check engine MITSUBISHI SHOGUN 2017 (in English) Owner's Guide
[x] Cancel search | Manufacturer: MITSUBISHI, Model Year: 2017, Model line: SHOGUN, Model: MITSUBISHI SHOGUN 2017Pages: 394, PDF Size: 19 MB
Page 180 of 394
Active stability control func-tion
E00613900097
The Active Stability Control function is de-
signed to help maintain the vehicle’s control
in slippery conditions, or during rapid steer- ing manoeuvres. It works by controlling theengine output and brake on each wheel.
NOTEl The Active Stability Control function does
not operate when the transfer shift lever is inthe “4LLc” position.
When the Active Stability Control function
is operating with the transfer shift lever in the “2H”, “4H” or “4HLc” position, moving
the shift lever to the “4LLc” position makes
the Active Stability Control function deacti- vate automatically.
l On vehicles with rear differential lock, the
Active Stability Control function does not operate when the rear differential lock is ac-
tivated.Active stability control function
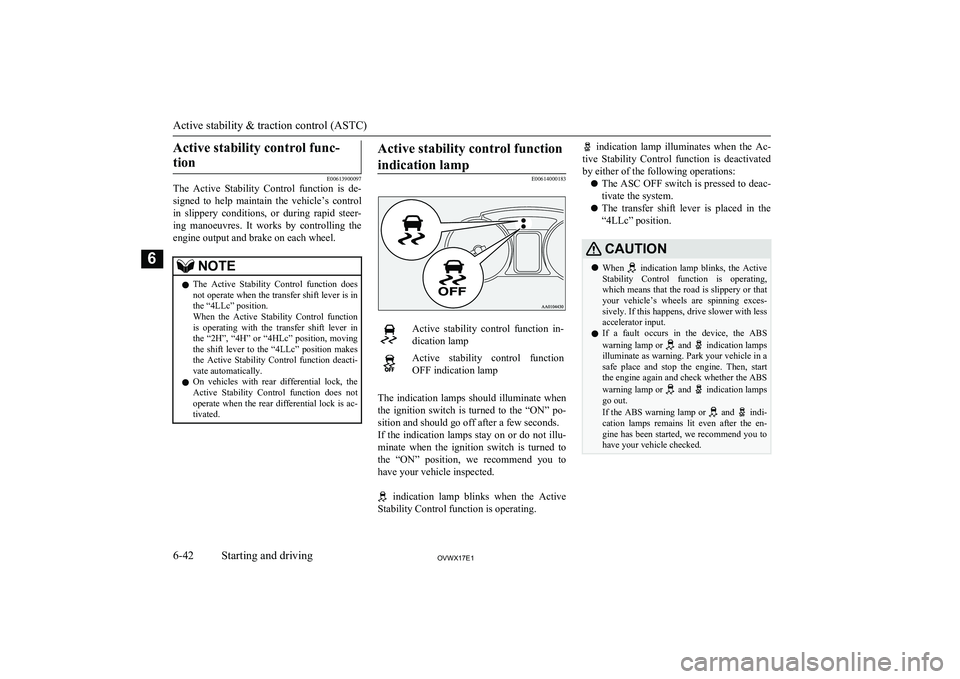
indication lamp
E00614000183
Active stability control function in- dication lampActive stability control function
OFF indication lamp
The indication lamps should illuminate when
the ignition switch is turned to the “ON” po- sition and should go off after a few seconds.
If the indication lamps stay on or do not illu-
minate when the ignition switch is turned to the “ON” position, we recommend you to
have your vehicle inspected.
indication lamp blinks when the Active
Stability Control function is operating.
indication lamp illuminates when the Ac-
tive Stability Control function is deactivated by either of the following operations:
l The ASC OFF switch is pressed to deac-
tivate the system.
l The transfer shift lever is placed in the
“4LLc” position.CAUTIONl When indication lamp blinks, the Active
Stability Control function is operating,
which means that the road is slippery or that your vehicle’s wheels are spinning exces- sively. If this happens, drive slower with lessaccelerator input.
l If a fault occurs in the device, the ABS
warning lamp or
and indication lamps
illuminate as warning. Park your vehicle in a
safe place and stop the engine. Then, start the engine again and check whether the ABS
warning lamp or
and indication lamps
go out.
If the ABS warning lamp or
and indi-
cation lamps remains lit even after the en- gine has been started, we recommend you tohave your vehicle checked.
Active stability & traction control (ASTC)
6-42OVWX17E1Starting and driving6
Page 187 of 394
NOTElThe tyre pressure monitoring system
(TPMS) is not a substitute for regularlychecking tyre inflation pressures.
Be sure to check the tyre inflation pressures as described in “Tyres” on page 10-11.
l The tyre inflation pressure sensor (B) is in-
stalled in the illustrated location.
Replace rubber air value (C) with a new one when the tyre is replaced.
For details, please contact your
MITSUBISHI MOTORS Authorized Serv-
ice Point.
l The spare tyre also has tyre inflation pres-
sure sensor, so it can be used for tyre rota- tion.
Tyre pressure monitoring sys-
tem warning lamp
E00637200052
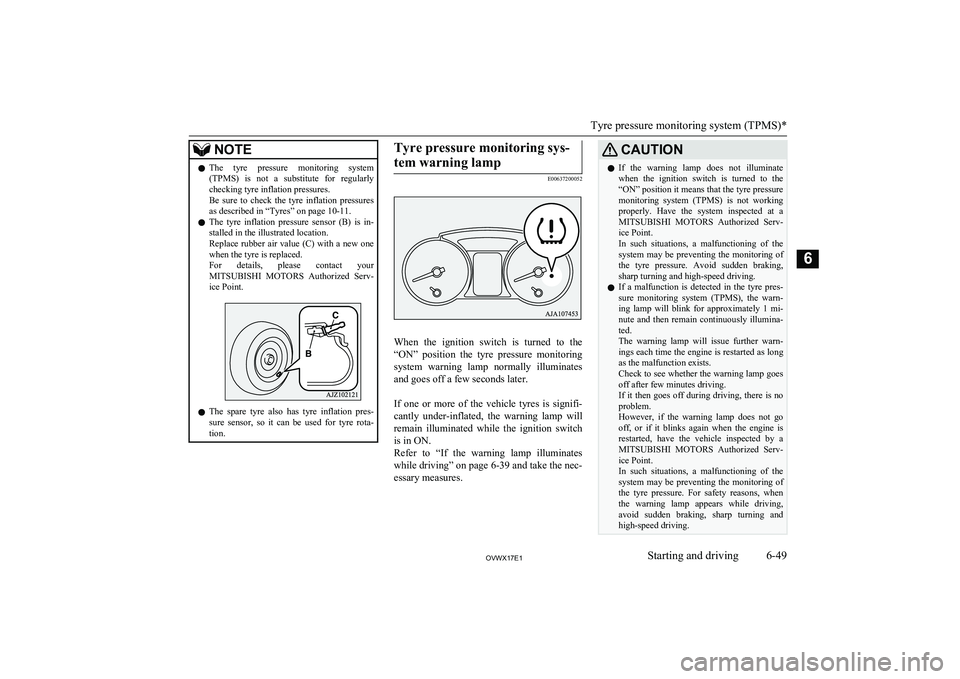
When the ignition switch is turned to the
“ON” position the tyre pressure monitoring system warning lamp normally illuminates
and goes off a few seconds later.
If one or more of the vehicle tyres is signifi- cantly under-inflated, the warning lamp will
remain illuminated while the ignition switch is in ON.
Refer to “If the warning lamp illuminates while driving” on page 6-39 and take the nec-essary measures.
CAUTIONl If the warning lamp does not illuminate
when the ignition switch is turned to the
“ON” position it means that the tyre pressure monitoring system (TPMS) is not working
properly. Have the system inspected at a MITSUBISHI MOTORS Authorized Serv-
ice Point.
In such situations, a malfunctioning of the system may be preventing the monitoring of the tyre pressure. Avoid sudden braking,
sharp turning and high-speed driving.
l If a malfunction is detected in the tyre pres-
sure monitoring system (TPMS), the warn-
ing lamp will blink for approximately 1 mi-
nute and then remain continuously illumina- ted.
The warning lamp will issue further warn-
ings each time the engine is restarted as long
as the malfunction exists.
Check to see whether the warning lamp goes
off after few minutes driving.
If it then goes off during driving, there is no problem.
However, if the warning lamp does not go off, or if it blinks again when the engine is
restarted, have the vehicle inspected by a
MITSUBISHI MOTORS Authorized Serv-
ice Point.
In such situations, a malfunctioning of the system may be preventing the monitoring of
the tyre pressure. For safety reasons, when the warning lamp appears while driving,
avoid sudden braking, sharp turning and high-speed driving.
Tyre pressure monitoring system (TPMS)*
6-49OVWX17E1Starting and driving6
Page 198 of 394
Roof carrier precautionCAUTIONlMake sure that the weight of the luggage
does not exceed the allowable roof load.
If the allowable roof load is exceeded, this may cause damage to the vehicle.
The roof load is the total allowable load on
the roof (the weight of the roof carrier plus
the weight of luggage placed on the roof car- rier).
For specific figures, please refer to “Maxi-
mum roof load” on page 11-06 .
l When luggage is loaded onto the vehicle,
please make sure to drive slowly and avoid
excessive manoeuvres such as sudden brak- ing or quick turning.
In addition, place the luggage on the carrier
so that its weight is distributed evenly with the heaviest items on the bottom. Do not load items that are wider than the roof carri-
er.
The additional weight on the roof could raise
the vehicle’s centre of gravity and affect ve- hicle handling characteristics.
As a result, driving errors or emergency ma-
noeuvres could lead to a loss of control and
result in an accident.
l Before driving and after travelling a short
distance, always check the load to make sure it is securely fastened to the roof carrier.
Check periodically during your travel that
the load remains secure.NOTEl To prevent wind noise or reduction in fuel
economy, remove the roof carrier when not
in use.
l Before using an automatic car wash, remove
the roof carrier.
l Be sure that adequate clearance is main-
tained for raising the sunroof (if so equip-
ped) when installing a roof carrier.Trailer towing
E00610001850
In order to tow a trailer with your vehicle,
when having a trailer towing device mounted that meets all relevant regulations in your
area, consult a MITSUBISHI MOTORS Au-
thorized Service Point.
The regulations concerning the towing of a
trailer may differ from country to country. You are advised to obey the regulations in
each area.
CAUTIONl Danger of Accident!
A towing bar should be fitted according to MITSUBISHI MOTORS guidelines.
When you are going to tow a trailer, move
the transfer shift lever to “4H” position.
Selecting the “2H” drive may increase the differential oil temperature, resulting in pos-sible damage to the driving system.
Further, the drive train will be subjected to
excessive loading possibly leading to oil leakage, component seizure, or other serious faults.
Maximum towable weight with
brake and maximum trailer- nose weight
Never exceed the maximum towable weight
with brake and the maximum trailer-nose weight as listed in the specifications. (Referto “Vehicle weight” on page 11-06 .)
If you tow a trailer at an altitude of more than
1,000 m above sea-level, reduce your weight
by 10 % of the gross combination weight for
every increase of 1,000 m above sea-level, as the engine output is lowered owing to de-
crease in atmospheric pressure.
Trailer towing
6-60OVWX17E1Starting and driving6
Page 208 of 394
NOTElIf a problem is detected in the air condition-
ing compressor, the air conditioning opera- tion indication lamp (A) blinks. Stop the ve- hicle in a safe place, turn off the engine, then
restart the engine. If the air conditioning op- eration indication lamp does not blink, thereis no problem. If it does blink, we recom-
mend you to have it checked.
l Sometimes, for example after using a high-
pressure car wash, the condenser can get
wet, and the operation indication lamp (A) blinks temporarily. In this case there is noth-ing wrong. Stop the vehicle in a safe place,
stop the engine, then restart the engine. Once the water evaporates, the blinking will stop.OFF switch
E00702700012
Push the switch to turn off the air condition-
ing system.
MODE switch
E00703300015
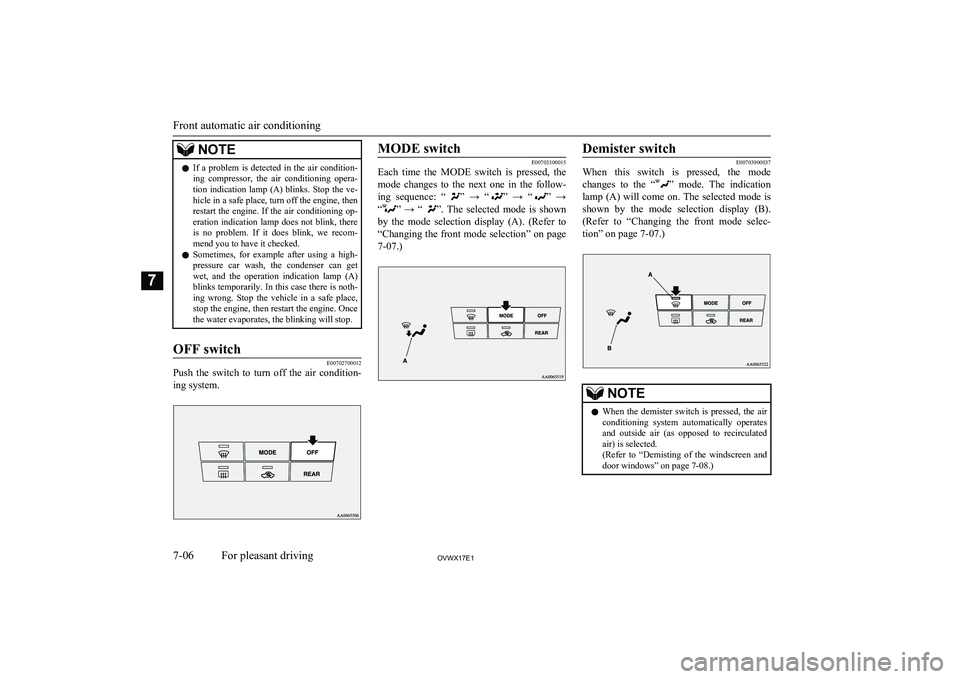
Each time the MODE switch is pressed, the
mode changes to the next one in the follow-
ing sequence: “
” → “” → “” →
“
” → “”. The selected mode is shown
by the mode selection display (A). (Refer to
“Changing the front mode selection” on page 7-07.)
Demister switch
E00703900037
When this switch is pressed, the mode
changes to the “
” mode. The indication
lamp (A) will come on. The selected mode is shown by the mode selection display (B).
(Refer to “Changing the front mode selec- tion” on page 7-07.)
NOTEl When the demister switch is pressed, the air
conditioning system automatically operates and outside air (as opposed to recirculated air) is selected.
(Refer to “Demisting of the windscreen and
door windows” on page 7-08.)
Front automatic air conditioning
7-06OVWX17E1For pleasant driving7
Page 256 of 394
4.The voice guide will say “Confirmation
prompts are
Answer “Yes” to change the setting or answer “No” to keep the current setting.
5. The voice guide will say “Confirmation
prompts are
E00760500131
It is possible to use a password as a security function by setting a password of your choice
for the Bluetooth ®
2.0 interface.
When the security function is turned on, it is
necessary to make a voice input of a 4-digit password in order to use all functions of the
Bluetooth ®
2.0 interface, except for recep-
tion.
Setting the password
Use the following procedure to turn on the security function by setting a password. 1. Press the SPEECH button.
2. Say “Setup”.
3. Say “Password.”
4. The voice guide will say “Password is
disabled. Would you like to enable it?”
Answer “Yes.”
Answer “No” to cancel the setting of the
password and return to the main menu.
5. The voice guide will say “Please say a 4-
digit password. Remember this pass-
word. It will be required to use this sys- tem”.
Say a 4-digit number which you want to
set as a password.
6. For confirmation purposes, the voice
guide will say “Password <4-digit pass-
word>. Is this correct?” Answer “Yes.”
Answer “No” to return to the password input in Step 5.
7. When the registration of the password is
completed, the voice guide will say
“Password is enabled” and the system will return to the main menu.NOTEl Password will be required to access the sys-
tem after the next ignition cycle.
l It is required for a little time after engine
stop that the entered password is actually re-corded in the system.
If the ignition switch is made to “ACC” or
“ON” or the engine is started immediately
after engine stop, there is a case when the entered password is not recorded in the sys-tem. At this time, please try to enter the
password again.Entering the password
If a password has been set and the security
function is enabled, the voice guide will say “Hands-free system is locked. State the pass-word to continue” when the SPEECH button
is pressed to enter voice recognition mode.
Say the 4-digit password number to enter the
password.
If the entered password is wrong, the voice
guide will say “<4- digit password>, Incor-
rect password. Please try again”. Enter the
correct password.
NOTEl You can re-enter the password as many
times as you want.
l If you have forgotten your password, say
“Cancel” to quit the voice input mode andthen check with a MITSUBISHI MOTORS
Authorized Service Point.
Disabling the password
Use the following procedure to turn off the
security function by disabling the password.
NOTEl System must be unlocked to disable the
password.
1. Press the SPEECH button.
2. Say “Setup”.
Bluetooth ®
2.0 interface*
7-54OVWX17E1For pleasant driving7
Page 278 of 394
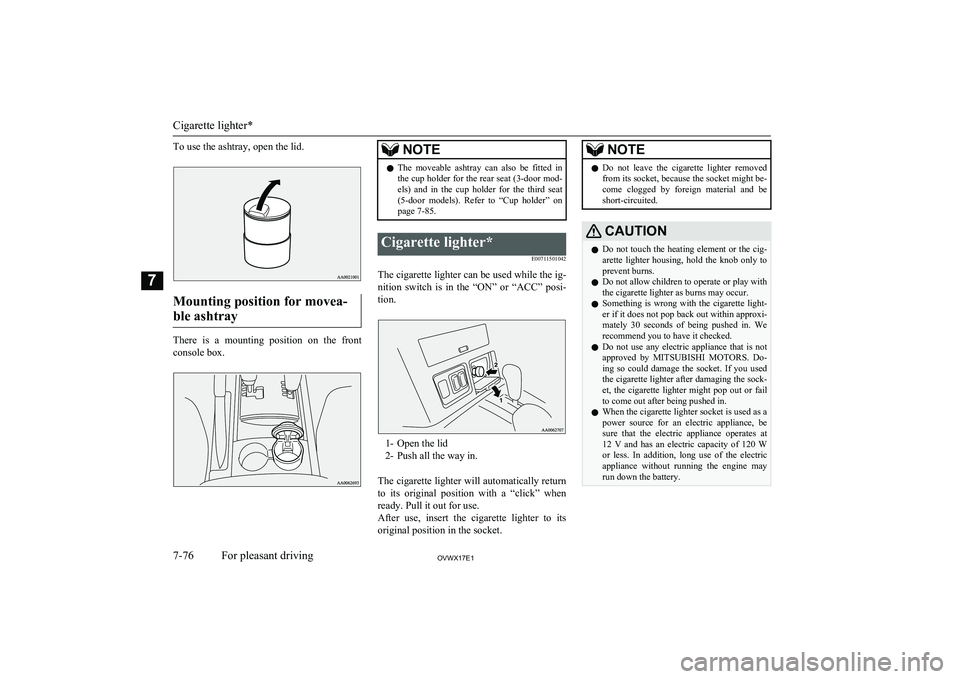
To use the ashtray, open the lid.
Mounting position for movea-ble ashtray
There is a mounting position on the front
console box.
NOTEl The moveable ashtray can also be fitted in
the cup holder for the rear seat (3-door mod-
els) and in the cup holder for the third seat (5-door models). Refer to “Cup holder” on
page 7-85.Cigarette lighter*
E00711501042
The cigarette lighter can be used while the ig-nition switch is in the “ON” or “ACC” posi-
tion.
1- Open the lid
2- Push all the way in.
The cigarette lighter will automatically return to its original position with a “click” when ready. Pull it out for use.
After use, insert the cigarette lighter to its
original position in the socket.
NOTEl Do not leave the cigarette lighter removed
from its socket, because the socket might be- come clogged by foreign material and be
short-circuited.CAUTIONl Do not touch the heating element or the cig-
arette lighter housing, hold the knob only to prevent burns.
l Do not allow children to operate or play with
the cigarette lighter as burns may occur.
l Something is wrong with the cigarette light-
er if it does not pop back out within approxi-
mately 30 seconds of being pushed in. We recommend you to have it checked.
l Do not use any electric appliance that is not
approved by MITSUBISHI MOTORS . Do-
ing so could damage the socket. If you used
the cigarette lighter after damaging the sock- et, the cigarette lighter might pop out or fail
to come out after being pushed in.
l When the cigarette lighter socket is used as a
power source for an electric appliance, be sure that the electric appliance operates at
12 V and has an electric capacity of 120 W or less. In addition, long use of the electricappliance without running the engine may
run down the battery.
Cigarette lighter*
7-76OVWX17E1For pleasant driving7
Page 294 of 394
If the vehicle breaks downE00800101179
If the vehicle breaks down on the road, move it to the shoulder and use the hazard warning
flashers and/or the warning triangle etc. Refer
to “Hazard warning flasher switch” on page 5-42.
If the engine stops/fails
Vehicle operation and control are affected if
the engine stops. Before moving the vehicle to a safe area, be aware of the following:
l The brake booster becomes inoperative
and the pedal effort will increase. Press
down the brake pedal harder than usual.
l Since the power steering pump is no lon-
ger operative, the steering wheel feelsheavy when turning it.
Emergency starting
E00800504318
If the engine cannot be started because thebattery is weak or dead, the battery from an-other vehicle can be used with jumper cables to start the engine.
WARNINGl To start the engine using jumper cables
connected from another vehicle, perform
the correct procedures according to the instruction below. Incorrect procedures could result in a fire or explosion or dam-
age to the vehicles.CAUTIONl Do not attempt to start the engine by pulling
or pushing the vehicle.
It could damage your vehicle.
l Always wear protective eye goggles when
working near the battery.
l Keep the battery out of the reach of children.
1.
Get the vehicles close enough so the
jumper cables can reach, but be sure the vehicles aren’t touching each other.
CAUTIONl Check the other vehicle. It must have a 12-
volt battery.
If the other system isn’t 12-volt, shorting can
damage both vehicles.
2. Set the parking brake firmly on each ve-
hicle. Put an A/T in “P” (PARK) or an
M/T in “N” (Neutral). Turn off the igni-
tion switch.WARNINGl Turn off the ignition on both vehicles be-
forehand. Make sure that the cables or your clothes cannot be caught by the fan
or drive belt. Personal injury could result.
3. Turn off all lamps, heater and other elec-
trical loads.
4. Make sure battery electrolyte is at the
proper level.
Refer to “Battery” on page 10-09.
WARNINGl If electrolyte fluid is not visible, or ap-
pears to be frozen, Do Not Attempt Jump Starting!
A battery might rupture or explode if the
temperature is below the freezing point or if it is not filled to the proper level.
5. Connect one end of one jumper cable to
the positive (+) terminal of the dis-charged battery (A or B), and the other
end to the positive (+) terminal of the booster battery (C).
If the vehicle breaks down
8-02OVWX17E1For emergencies8
Page 296 of 394
CAUTIONlTake care not to get the jumper cable caught
in the cooling fan or other rotating part in
the engine compartment.
l Use the proper cables suitable for the battery
size to prevent overheating of the cables.
l Check the jumper cables for damage and
corrosion before use.
7. Start the engine in the vehicle which has
the booster battery, let the engine idle a few
minutes, then start the engine in the vehicle
with the discharged battery.
CAUTIONl Keep the engine of the vehicle giving assis-
tance running.
8. After the engine is started, disconnect the
cables in the reverse order and keep the en-
gine running for several minutes.
WARNINGl If the battery has to be charged while fit-
ted in the vehicle, disconnect the vehicle side negative (-) terminal connected to the
battery.
l Keep sparks, cigarettes and flames away
from the battery because the battery may
produce an explosion.WARNINGl Use adequate ventilation when charging
or using the battery in an enclosed space.
l Remove all the caps before charging the
battery.
l Electrolyte is corrosive diluted sulphuric
acid.
If electrolyte (battery acid) comes into contact with your hands, eyes, clothes and
the painted surface of your vehicle, it should be thoroughly flushed with water.If electrolyte gets in your eyes, flush them
with water immediately and thoroughly, and get prompt medical attention.NOTEl If the vehicle is put in motion without fully
charging the battery, it might cause the loss
of smooth engine operation and the anti-lock brake warning lamp to illuminate.
Refer to “Anti-lock brake system (ABS)” on
page 6-37.Engine overheating
E00800603875
If the water temperature gauge indication re-
mains in the overheating zone for a long
time, the engine may be overheating. If this occurs, take the following corrective meas-
ures: 1. Stop the vehicle in a safe place.
2. Check whether steam is coming from the
engine compartment.
[If steam does not come from the engine
compartment]
With the engine still running, raise the bonnet to ventilate the engine compart-
ment.
[If steam is coming from the engine
compartment]
Stop the engine, and when the steam
stops, raise the bonnet to ventilate the
engine compartment. Restart the engine.WARNINGl Do not open the bonnet while steam is
coming from the engine compartment. It
could cause steam or hot water to spurt out, causing burns. Hot water could spurt
out even when there is no steam coming out, and some parts will be very hot. Be
very careful when opening the bonnet.
l Be careful of hot steam, which could be
blowing off the reserve tank cap.
l Do not attempt to remove the radiator
cap while the engine is hot.
Engine overheating
8-04OVWX17E1For emergencies8
Page 297 of 394
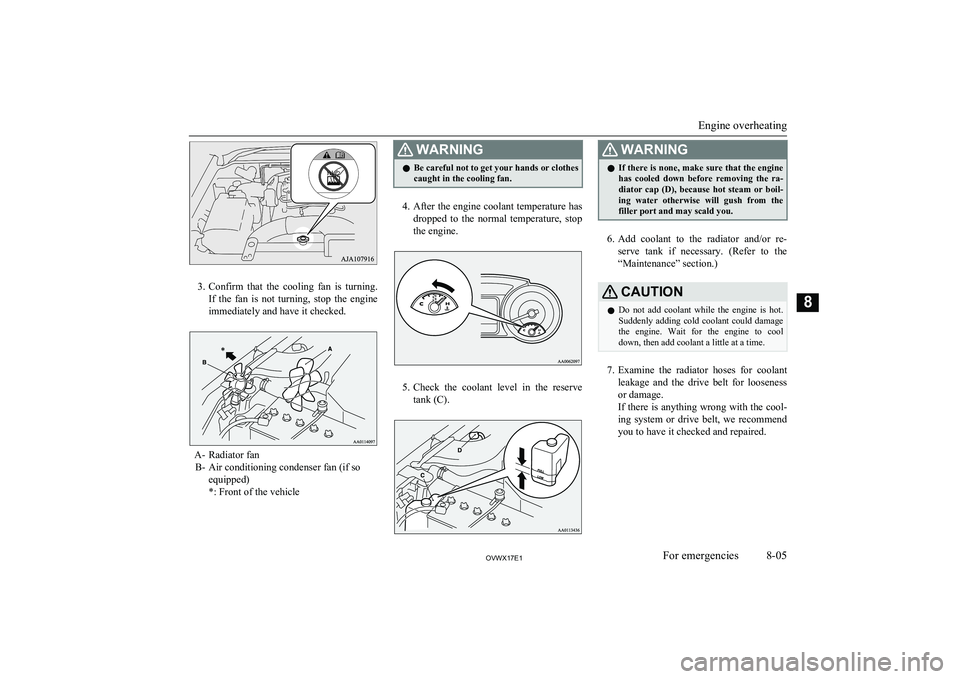
3.Confirm that the cooling fan is turning.
If the fan is not turning, stop the engine
immediately and have it checked.
A- Radiator fan B- Air conditioning condenser fan (if so equipped)
*: Front of the vehicle
WARNINGl Be careful not to get your hands or clothes
caught in the cooling fan.
4. After the engine coolant temperature has
dropped to the normal temperature, stop the engine.
5. Check the coolant level in the reserve
tank (C).
WARNINGl If there is none, make sure that the engine
has cooled down before removing the ra-
diator cap (D), because hot steam or boil- ing water otherwise will gush from the filler port and may scald you.
6. Add coolant to the radiator and/or re-
serve tank if necessary. (Refer to the
“Maintenance” section.)
CAUTIONl Do not add coolant while the engine is hot.
Suddenly adding cold coolant could damage
the engine. Wait for the engine to cool
down, then add coolant a little at a time.
7. Examine the radiator hoses for coolant
leakage and the drive belt for looseness
or damage.
If there is anything wrong with the cool-
ing system or drive belt, we recommend
you to have it checked and repaired.
Engine overheating
8-05OVWX17E1For emergencies8
Page 298 of 394
Bleeding the fuel system(diesel-powered vehicles
only) E00800700149
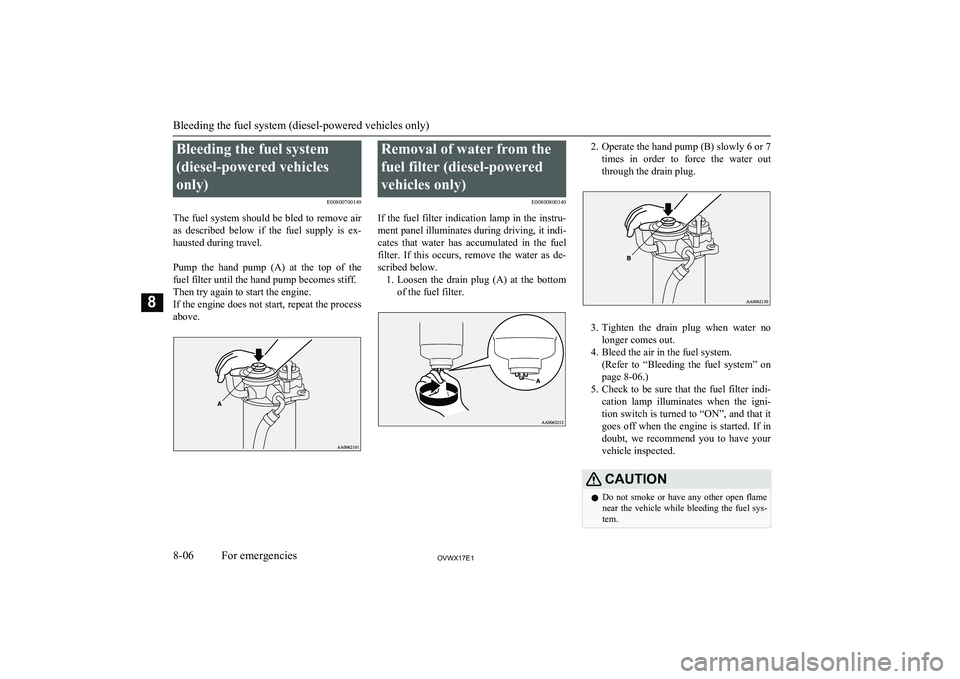
The fuel system should be bled to remove air
as described below if the fuel supply is ex- hausted during travel.
Pump the hand pump (A) at the top of the fuel filter until the hand pump becomes stiff.
Then try again to start the engine.
If the engine does not start, repeat the process
above.Removal of water from the
fuel filter (diesel-powered
vehicles only) E00800800140
If the fuel filter indication lamp in the instru- ment panel illuminates during driving, it indi-
cates that water has accumulated in the fuel filter. If this occurs, remove the water as de-
scribed below. 1. Loosen the drain plug (A) at the bottom
of the fuel filter.2. Operate the hand pump (B) slowly 6 or 7
times in order to force the water out
through the drain plug.
3. Tighten the drain plug when water no
longer comes out.
4. Bleed the air in the fuel system. (Refer to “Bleeding the fuel system” onpage 8-06.)
5. Check to be sure that the fuel filter indi-
cation lamp illuminates when the igni-
tion switch is turned to “ON”, and that it goes off when the engine is started. If in
doubt, we recommend you to have your vehicle inspected.
CAUTIONl Do not smoke or have any other open flame
near the vehicle while bleeding the fuel sys- tem.
Bleeding the fuel system (diesel-powered vehicles only)
8-06OVWX17E1For emergencies8