key MITSUBISHI SHOGUN 2017 (in English) Owner's Guide
[x] Cancel search | Manufacturer: MITSUBISHI, Model Year: 2017, Model line: SHOGUN, Model: MITSUBISHI SHOGUN 2017Pages: 394, PDF Size: 19 MB
Page 70 of 394
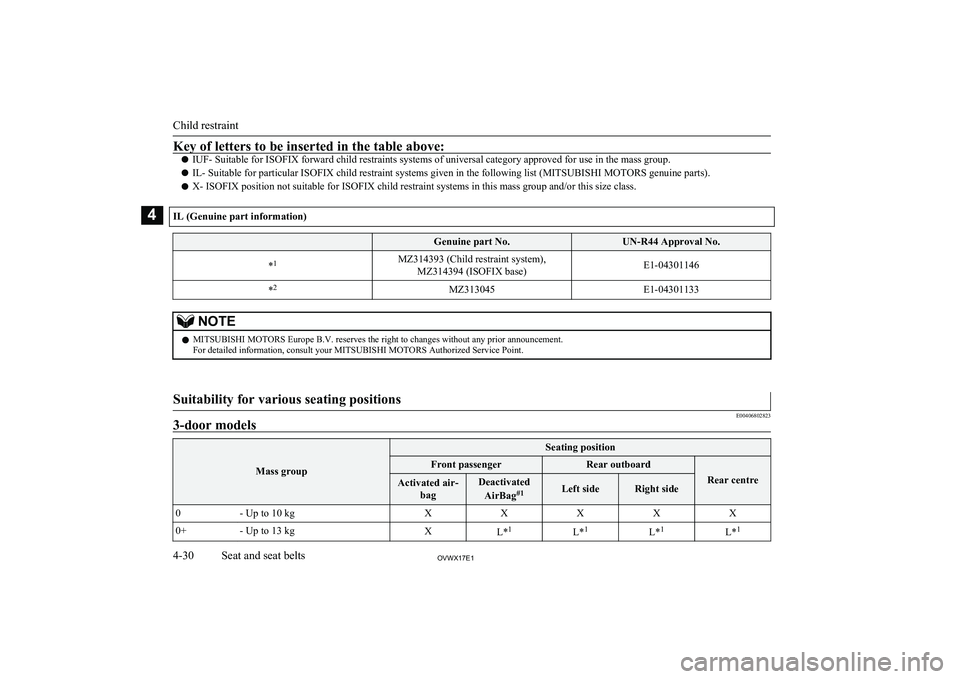
Key of letters to be inserted in the table above:
lIUF- Suitable for ISOFIX forward child restraints systems of universal category approved for use in the mass group.
l IL- Suitable for particular ISOFIX child restraint systems given in the following list (MITSUBISHI MOTORS genuine parts).
l X- ISOFIX position not suitable for ISOFIX child restraint systems in this mass group and/or this size class.IL (Genuine part information) Genuine part No.UN-R44 Approval No.*1MZ314393 (Child restraint system),
MZ314394 (ISOFIX base)E1-04301146*2MZ313045E1-04301133NOTEl
MITSUBISHI MOTORS Europe B.V. reserves the right to changes without any prior announcement.
For detailed information, consult your MITSUBISHI MOTORS Authorized Service Point.
Suitability for various seating positions
E00406802823
3-door models
Mass group
Seating positionFront passengerRear outboard
Rear centre
Activated air-
bagDeactivated
AirBag #1Left sideRight side0- Up to 10 kgXXXXX0+- Up to 13 kgXL*1L*1L*1L*1
Child restraint
4-30OVWX17E1Seat and seat belts4
Page 71 of 394
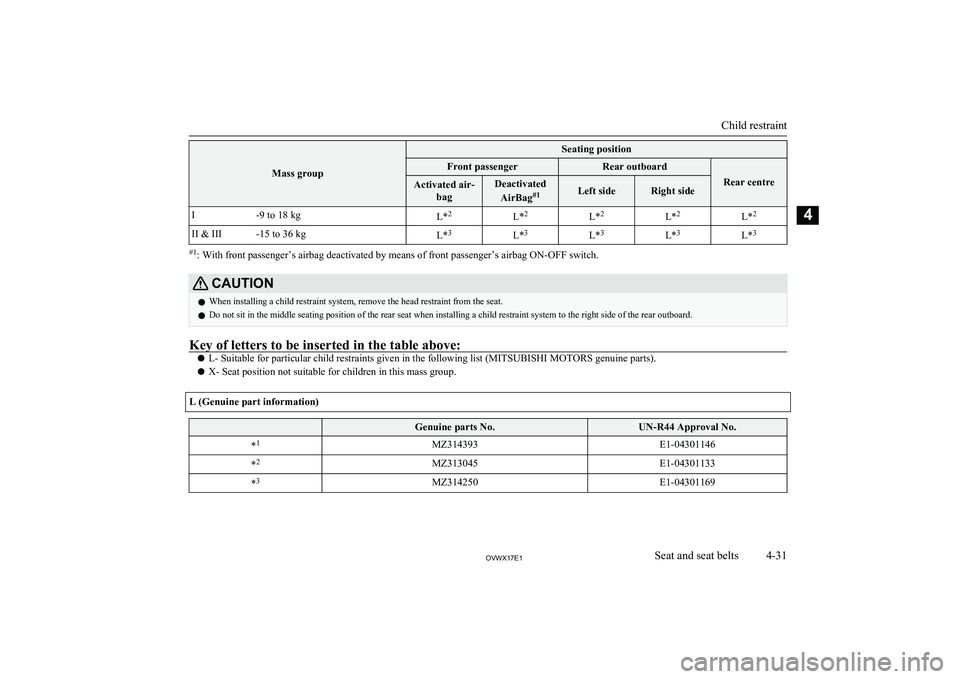
Mass group
Seating positionFront passengerRear outboard
Rear centre
Activated air-bagDeactivated
AirBag #1Left sideRight sideI-9 to 18 kgL*2L*2L*2L*2L*2II & III-15 to 36 kgL*3L*3L*3L*3L*3
#1
: With front passenger’s airbag deactivated by means of front passenger’s airbag ON-OFF switch.
CAUTIONl When installing a child restraint system, remove the head restraint from the seat.
l Do not sit in the middle seating position of the rear seat when installing a child restraint system to the right side of the rear outboard.Key of letters to be inserted in the table above:
l
L- Suitable for particular child restraints given in the following list (MITSUBISHI MOTORS genuine parts).
l X- Seat position not suitable for children in this mass group.
L (Genuine part information) Genuine parts No.UN-R44 Approval No.*1MZ314393E1-04301146*2MZ313045E1-04301133*3MZ314250E1-04301169
Child restraint
4-31OVWX17E1Seat and seat belts4
Page 73 of 394
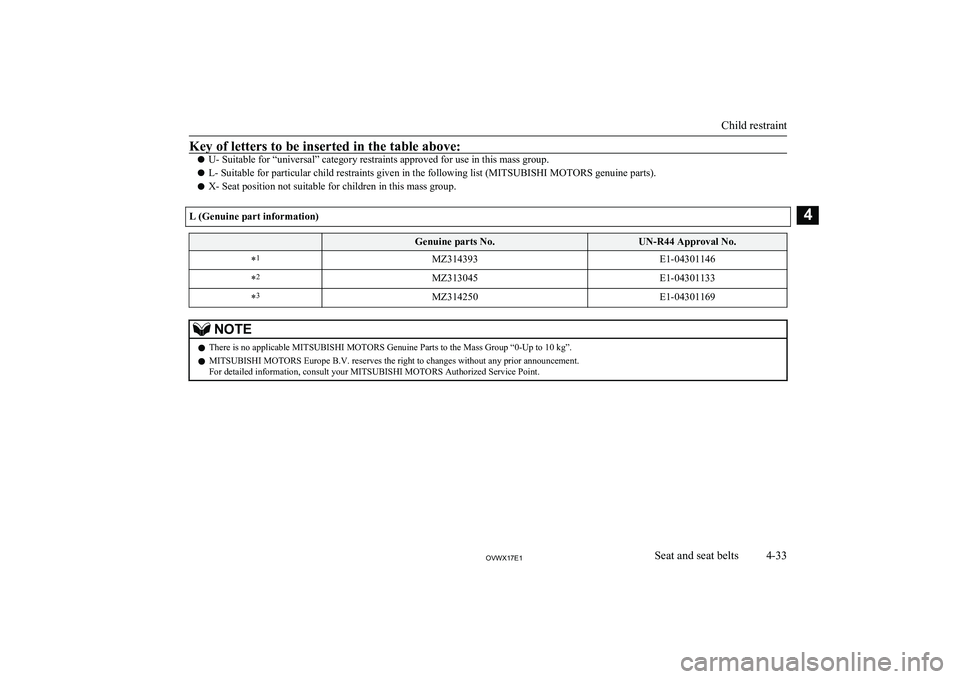
Key of letters to be inserted in the table above:
lU- Suitable for “universal” category restraints approved for use in this mass group.
l L- Suitable for particular child restraints given in the following list (MITSUBISHI MOTORS genuine parts).
l X- Seat position not suitable for children in this mass group.L (Genuine part information) Genuine parts No.UN-R44 Approval No.*1MZ314393E1-04301146*2MZ313045E1-04301133*3MZ314250E1-04301169NOTEl
There is no applicable MITSUBISHI MOTORS Genuine Parts to the Mass Group “0-Up to 10 kg”.
l MITSUBISHI MOTORS Europe B.V. reserves the right to changes without any prior announcement.
For detailed information, consult your MITSUBISHI MOTORS Authorized Service Point.
Child restraint
4-33OVWX17E1Seat and seat belts4
Page 80 of 394
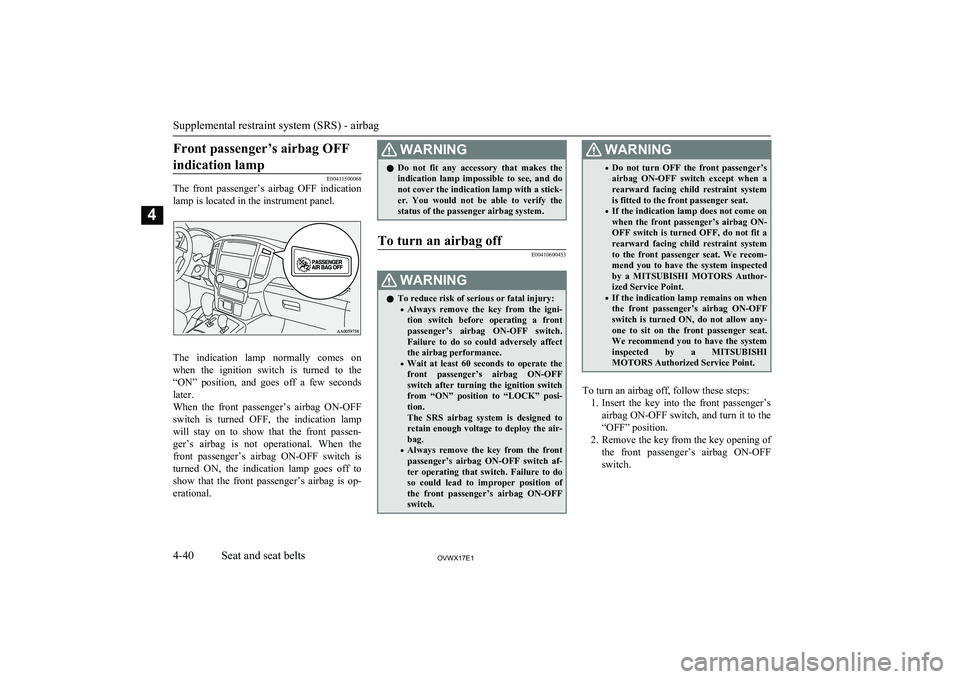
Front passenger’s airbag OFFindication lamp
E00411500068
The front passenger’s airbag OFF indication
lamp is located in the instrument panel.
The indication lamp normally comes on when the ignition switch is turned to the
“ON” position, and goes off a few seconds later.
When the front passenger’s airbag ON-OFF switch is turned OFF, the indication lamp
will stay on to show that the front passen-
ger’s airbag is not operational. When the
front passenger’s airbag ON-OFF switch is turned ON, the indication lamp goes off to
show that the front passenger’s airbag is op-
erational.
WARNINGl Do not fit any accessory that makes the
indication lamp impossible to see, and do
not cover the indication lamp with a stick- er. You would not be able to verify thestatus of the passenger airbag system.To turn an airbag off
E00410600453WARNINGl To reduce risk of serious or fatal injury:
• Always remove the key from the igni-
tion switch before operating a front
passenger’s airbag ON-OFF switch. Failure to do so could adversely affect
the airbag performance.
• Wait at least 60 seconds to operate the
front passenger’s airbag ON-OFF switch after turning the ignition switch
from “ON” position to “LOCK” posi- tion.
The SRS airbag system is designed to retain enough voltage to deploy the air-
bag.
• Always remove the key from the front
passenger’s airbag ON-OFF switch af-ter operating that switch. Failure to do
so could lead to improper position of the front passenger’s airbag ON-OFF switch.WARNING• Do not turn OFF the front passenger’s
airbag ON-OFF switch except when a rearward facing child restraint system
is fitted to the front passenger seat.
• If the indication lamp does not come on
when the front passenger’s airbag ON-
OFF switch is turned OFF, do not fit a rearward facing child restraint system
to the front passenger seat. We recom- mend you to have the system inspected
by a MITSUBISHI MOTORS Author-
ized Service Point.
• If the indication lamp remains on when
the front passenger’s airbag ON-OFF switch is turned ON, do not allow any-
one to sit on the front passenger seat. We recommend you to have the systeminspected by a MITSUBISHI
MOTORS Authorized Service Point.
To turn an airbag off, follow these steps:
1. Insert the key into the front passenger’s
airbag ON-OFF switch, and turn it to the “OFF” position.
2. Remove the key from the key opening of
the front passenger’s airbag ON-OFF switch.
Supplemental restraint system (SRS) - airbag
4-40OVWX17E1Seat and seat belts4
Page 81 of 394
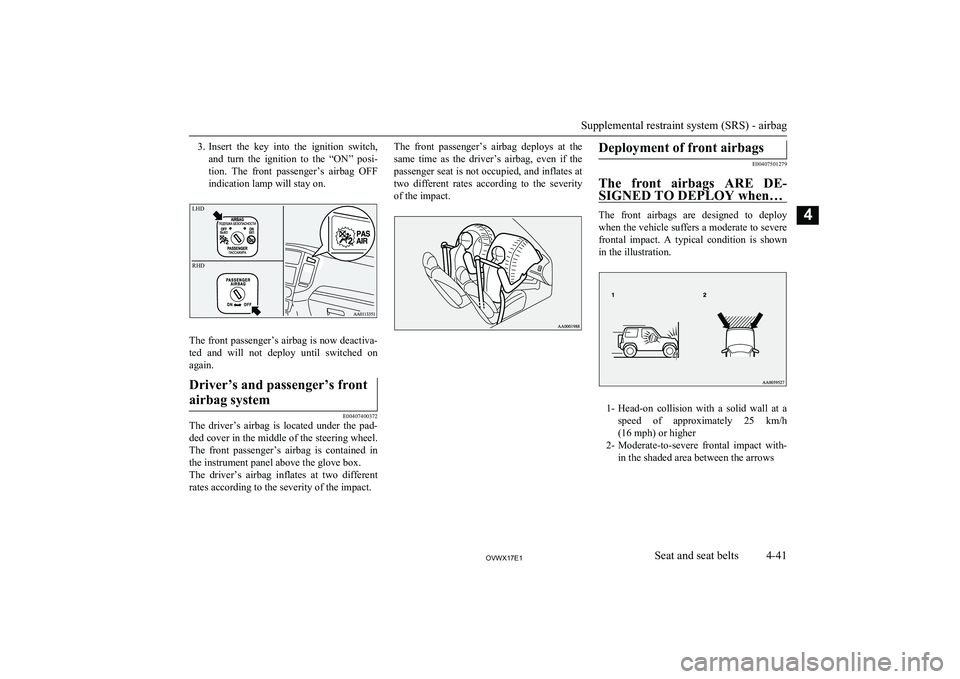
3.Insert the key into the ignition switch,
and turn the ignition to the “ON” posi-
tion. The front passenger’s airbag OFF
indication lamp will stay on.
The front passenger’s airbag is now deactiva- ted and will not deploy until switched on
again.
Driver’s and passenger’s front
airbag system
E00407400372
The driver’s airbag is located under the pad- ded cover in the middle of the steering wheel. The front passenger’s airbag is contained in
the instrument panel above the glove box.
The driver’s airbag inflates at two different rates according to the severity of the impact.
The front passenger’s airbag deploys at the
same time as the driver’s airbag, even if the
passenger seat is not occupied, and inflates at two different rates according to the severity of the impact.Deployment of front airbags
E00407501279
The front airbags ARE DE- SIGNED TO DEPLOY when…
The front airbags are designed to deploy when the vehicle suffers a moderate to severefrontal impact. A typical condition is shown
in the illustration.
1- Head-on collision with a solid wall at a
speed of approximately 25 km/h
(16 mph) or higher
2- Moderate-to-severe frontal impact with-
in the shaded area between the arrows
Supplemental restraint system (SRS) - airbag
4-41OVWX17E1Seat and seat belts4LHD
RHD
Page 100 of 394
NOTElThe engine electronic control module ac-
commodating the onboard diagnostic system has various fault data (especially about the
exhaust emission) stored.
This data will be erased if a battery cable is
disconnected which will make a rapid diag- nosis difficult. Do not disconnect a batterycable when the check engine warning lamp
is ON.Charge warning display
E00502700472
This lamp illuminates when
the ignition switch is turnedto the “ON” position, and goes off after the engine has
started.
CAUTIONl If it illuminates while the engine is running,
there is a problem in the charging system. In
this case, immediately park your vehicle in a safe place and we recommend you to have it checked.Oil pressure warning lamp
E00502800529
This lamp illuminates when
the ignition switch is turnedto the “ON” position, and goes off after the engine has
started. If it illuminates
while the engine is running,
the oil pressure is too low. Turn the engine off and have it inspected.
CAUTIONl This warning lamp does not indicate the
amount of oil level in the engine. This must
be determined by checking the oil level on the dipstick, while the engine is switched off.
l If this lamp illuminates when the engine oil
level is not low, have it inspected.
l If you continue driving with low engine oil
level or with this warning lamp illuminated,
engine seizure may occur.Door ajar warning lamp
E00503300635
This lamp illuminates when
a door or the backdoor is ei-
ther open or incompletely closed.
If the vehicle speed reaches approximately
8 km/h (5 mph) with a door or the backdoor open or incompletely closed, the warning
lamp flashes 8 times and a buzzer simultane- ously sounds 8 times as a warning.CAUTIONl Before moving your vehicle, check that the
warning lamp is OFF.NOTEl On vehicles with keyless entry system, the
lamp remains illuminated for a certain peri-
od and then goes out automatically.
l Buzzer settings can be changed at a your
MITSUBISHI MOTORS Authorized Serv-
ice Point to:
• No buzzer operation (buzzer disabled)
• Continuous buzzer operationCentre information display
E00517801423CAUTIONlThe driver should not operate the display
while the vehicle is in motion.
When the ignition switch is turned to the
“ACC” position, the screen switches on auto- matically.
Centre information display
5-12OVWX17E1Instruments and controls5
Page 123 of 394
AUTO
With the ignition switch in
the “ON” position, head-
lamps, position, tail, licence
plate, and instrument panel
lamps turn on and off auto-
matically in accordance with
outside light level. {Day-
time running lamps (if so
equipped) will be turned on
while the tail lamps are off.}
All lamps turn off automati-
cally when the ignition
switch is turned to the
“OFF” position.Position, tail, licence plate
and instrument panel lamps
onHeadlamps and other lamps
onNOTEl The sensitivity of the automatic on/off con-
trol can be adjusted.
For further information, we recommend you
to consult a MITSUBISHI MOTORS Au-
thorized Service Point.NOTEl When the headlamps are turned off by the
automatic on/off control with the ignition
switch in the “ON” position, the front fog lamps (if so equipped) and rear fog lamp al-
so go off. When the headlamps are subse- quently turned back on by the automatic
on/off control, the front fog lamps also come on but the rear fog lamp stays off. If you wish to turn the rear fog lamp back on, oper-
ate the switch again.
l Do not cover the sensor (A) for the automat-
ic on/off control by affixing a sticker or label
to the windscreen.
l If the lamps do not turn on or off with the
switch in the “AUTO” position, manually
operate the switch and we recommend you
to have your vehicle checked.
Daytime running lamps*
E00530601109
The daytime running lamps come on when
the engine is running and the lamp switch is in the “OFF” or “AUTO” position and the
tail lamps are off.NOTEl If the lamp switch is in the “” or “”
position, or if the tail lamps are on when the lamp switch is in the “AUTO” position, the
daytime running lamps come on as position lamps.Lamps (headlamps, fog lamp,
etc.) auto-cutout function
E00532700178
l If the ignition key is turned to the
“LOCK” or “ACC” position or removed from the ignition switch, and without
opening the driver’s door for 3 minutes with the lamp switch in the “
” posi-
tion, the lamps will turn off automatical-
ly.
l If the ignition key is turned to the
“LOCK” or “ACC” position or removed from the ignition switch and the driver’s
door is opened within 3 minutes with the
lamp switch in the “
” position, a buz-
zer will sound to warn the driver that the
lamps have not been turned off, and these lamps will automatically turn off.
Combination headlamps and dipper switch
5-35OVWX17E1Instruments and controls5
Page 124 of 394
NOTElThe lamp auto-cutout will not function when
the lamp switch is in the “” position
l When the ignition key has been turned to ei-
ther the “LOCK” or “ACC” position or re- moved from the ignition switch with the
lamp switch in the “
” position, and the
lamp switch is returned to the “OFF” within
approximately 3 minutes, the auto-cutout function will not be activated.
When you want to keep the
lamps on
l Turn the lamp switch in the “OFF” posi-
tion while the ignition switch is in the
“LOCK” or “ACC” position.
l Turn on the lamps with the switch in the
“
” or “” position again, then the
lamps will remain on.
l Remove the ignition key.
NOTElFor further information, we recommend you
to consult a MITSUBISHI MOTORS Au-
thorized Service Point.Lamp monitor buzzer
E00506100256
If the driver’s door is opened when the key is
in the “LOCK” or “ACC” position or re-
moved from the ignition switch while the
lamps are on, a buzzer will sound to remind the driver to turn off the lamps.
When the lamp auto-cutout function acts, the
buzzer will stop automatically.
Dipper (High/Low beam
change)
E00506201586
When the lamp switch is in the “” posi-
tion, the beam changes from high to low (or
low to high) each time the lever is pulled fully (1). While the high-beam is on, the
high-beam indication lamp in the instrument
cluster will also illuminate.
NOTEl On vehicles equipped with the automatic
high-beam system, if you press the ON side
of the automatic high-beam system switch when high-beam is on, automatic high-beam
system will be activated.Automatic high-beam system*
E00538200074
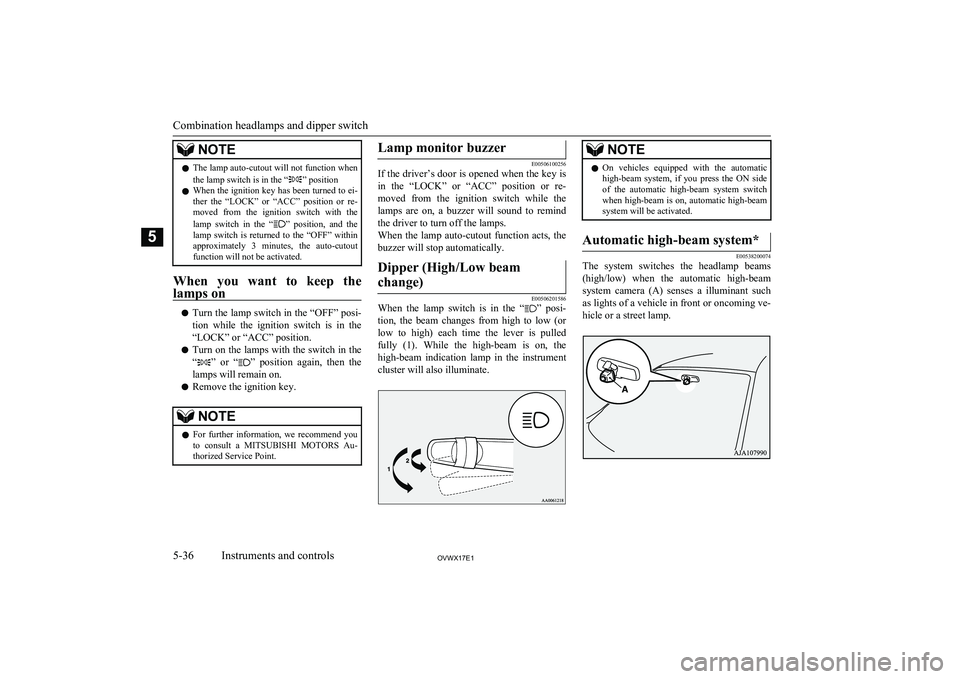
The system switches the headlamp beams
(high/low) when the automatic high-beam system camera (A) senses a illuminant such as lights of a vehicle in front or oncoming ve-
hicle or a street lamp.
Combination headlamps and dipper switch
5-36OVWX17E1Instruments and controls5
Page 130 of 394
Automatic headlamp levellingwarning lamp
E00525901045
The automatic headlamp levelling warning
lamp should illuminate when the ignition switch is turned “ON”, and should go off in a
few seconds.
CAUTIONl If the warning lamp stays on or does not illu-
minate when the ignition switch is turned
“ON”, it indicates that the automatic head- lamp levelling device is not functioning.
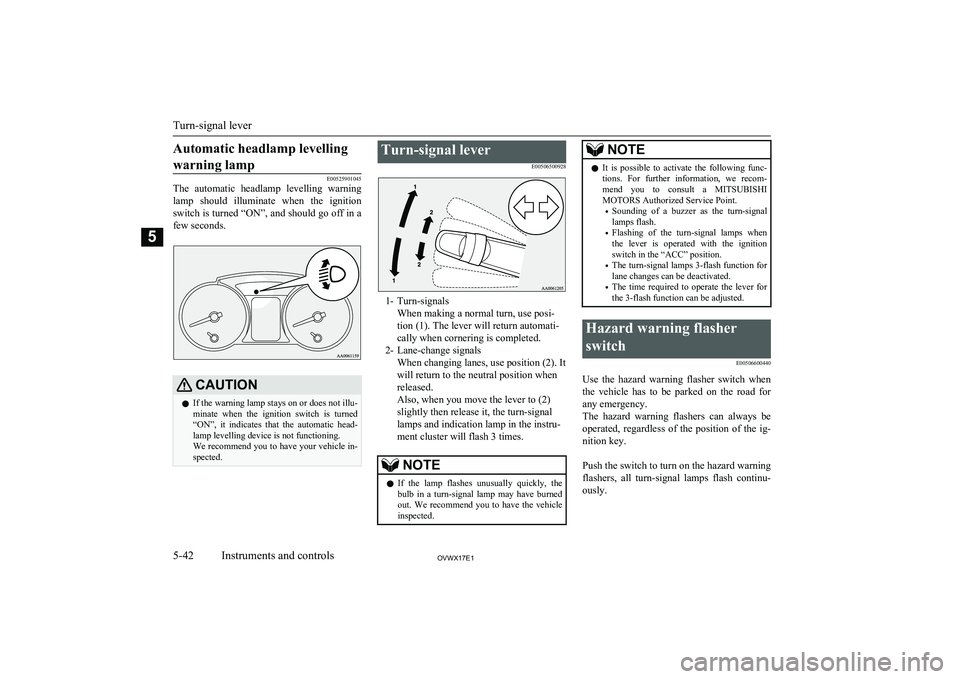
We recommend you to have your vehicle in- spected.Turn-signal lever
E00506500928
1- Turn-signalsWhen making a normal turn, use posi-
tion (1). The lever will return automati-
cally when cornering is completed.
2- Lane-change signals When changing lanes, use position (2). It
will return to the neutral position when released.
Also, when you move the lever to (2)
slightly then release it, the turn-signal
lamps and indication lamp in the instru-
ment cluster will flash 3 times.
NOTEl If the lamp flashes unusually quickly, the
bulb in a turn-signal lamp may have burned out. We recommend you to have the vehicle
inspected.NOTEl It is possible to activate the following func-
tions. For further information, we recom- mend you to consult a MITSUBISHI
MOTORS Authorized Service Point.
• Sounding of a buzzer as the turn-signal
lamps flash.
• Flashing of the turn-signal lamps when
the lever is operated with the ignition switch in the “ACC” position.
• The turn-signal lamps 3-flash function for
lane changes can be deactivated.
• The time required to operate the lever for
the 3-flash function can be adjusted.Hazard warning flasher
switch E00506600440
Use the hazard warning flasher switch when
the vehicle has to be parked on the road for
any emergency.
The hazard warning flashers can always be operated, regardless of the position of the ig-
nition key.
Push the switch to turn on the hazard warning flashers, all turn-signal lamps flash continu-
ously.
Turn-signal lever
5-42OVWX17E1Instruments and controls5
Page 141 of 394
Your driving ability can be seriously im-
paired even with blood alcohol levels far be- low the legal minimum. If you have beendrinking, don’t drive. Ride with a designated
non-drinking driver, call a cab or a friend, or
use public transportation. Drinking coffee or taking a cold shower will not make you so-ber.
Similarly, prescription and nonprescription
drugs affect your alertness, perception and re- action time. Consult with your doctor or
pharmacist before driving while under the in- fluence of any of these medications.WARNINGl NEVER DRINK AND DRIVE.
Your perceptions are less accurate, your reflexes are slower and your judgment is
impaired.Safe driving techniques
E00600300488
Driving safety and protection against injury
cannot be fully ensured. However, we recom- mend that you pay extra attention to the fol-
lowing:
Seat belts
Before starting the vehicle, make sure that
you and your passengers have fastened your seat belts.
Floor mats
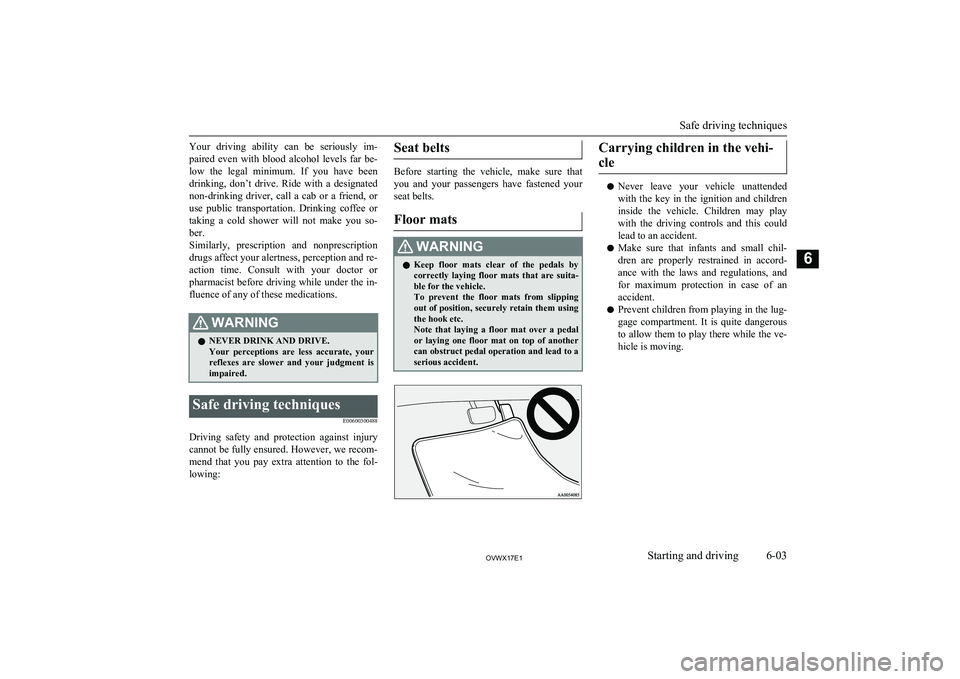
WARNINGl Keep floor mats clear of the pedals by
correctly laying floor mats that are suita-
ble for the vehicle.
To prevent the floor mats from slipping out of position, securely retain them usingthe hook etc.
Note that laying a floor mat over a pedal
or laying one floor mat on top of another can obstruct pedal operation and lead to a
serious accident.Carrying children in the vehi-
cle
l Never leave your vehicle unattended
with the key in the ignition and children
inside the vehicle. Children may play with the driving controls and this could
lead to an accident.
l Make sure that infants and small chil-
dren are properly restrained in accord-
ance with the laws and regulations, and for maximum protection in case of an
accident.
l Prevent children from playing in the lug-
gage compartment. It is quite dangerousto allow them to play there while the ve-
hicle is moving.
Safe driving techniques
6-03OVWX17E1Starting and driving6