stop start MITSUBISHI TRITON 2011 Owner's Manual
[x] Cancel search | Manufacturer: MITSUBISHI, Model Year: 2011, Model line: TRITON, Model: MITSUBISHI TRITON 2011Pages: 369, PDF Size: 26.15 MB
Page 169 of 369
WARNING
l Do not leave any objects near the brake
pedal or let a floor mat slide under it; do-
ing so could prevent the full pedal stroke
that would be necessary in an emergency.
Make sure that the pedal can be operated
freely at all times. Make sure the floor
mat is securely held in place.
Brake pads and linings l Avoid hard braking situations.
New
brakes need to be
broken-in by moder-
ate use for the first 200 km (124 miles).
l The disc brakes are provided with a warning
device which emits a shrieking metallic
sound while braking if the brake pads have
reached their wear limit.
If you hear this sound, have the brake pads re-
placed immediately. WARNING
l Driving with worn brake
pads
will make
it harder to stop, and can cause an acci-
dent. Brake assist system*
E00627000392
The brake assist system is a device assisting drivers
who cannot depress the brake
pedal firmly when it
is necessary to do so (such as in emergency stop sit-
uations) and provides greater braking force.
If the brake pedal is depressed suddenly, the brakes
will be applied with more force than usual. CAUTION
l
The brake assist system
is
not a device de-
signed to exercise braking force greater
than its capacity. Make sure to always
keep a sufficient distance between vehi-
cles in front of you without relying too
much on the brake assist system.
NOTE l Once
the brake assist system
is operational,
it maintains great braking force even if the
brake pedal is lightly released.
To stop its operation, completely remove
your foot from the brake pedal.
l When the brake assist system is in use while
driving, you may feel the brake pedal at-
tempt to resist, the pedal moves in small mo-
tions in conjunction with the operation noise,
or the vehicle body and the steering wheel vi-
brate. This occurs when the brake assist sys-
tem is operating normally and does not indi-
cate faulty operation. Continue to firmly de-
press the brake pedal.
l When the active stability & traction control
(ASTC) indication lamp is illuminated, the
brake assist system may not function. Anti-lock brake system (ABS)*
E00607100775
Environmental conditions can have
an
effect on
braking. During sudden braking when there is
snow, ice, oil, water etc. on the road surface, a skid
may occur. In this situation, steering control and
braking effectiveness is reduced and the stopping
distance is increased. The vehicle may also go into
an uncontrolled spin.
The ABS helps prevent the wheels from locking dur-
ing braking, thus maintaining directional stability,
ensuring controllability and providing optimum
braking force.
Driving hints
l With ABS fitted, steering during sudden brak-
ing (when the ABS functions) differs slightly
from when the brakes are not being applied.
Steer the vehicle carefully in these conditions.
l Always maintain the same distance from the
vehicle in front of you as you would for a ve-
hicle not equipped with ABS.
Compared with vehicles not fitted with ABS,
your vehicle may require a longer stopping
distance in the following cases:
• Driving on gravel or snow-covered roads.
• Driving with tyre chains installed.
• Driving on roads where the road surfaceis pitted or has other differences in sur-
face height.
• Driving on bumpy roads or other poor driv- ing surfaces. Starting and driving
4-44
4
OCRE12E1
Presented by http://mmc-manuals.ru/ \251
Page 171 of 369
If the warning lamp illuminates while
driving
E00607300663
If only the ABS warning lamp illuminates l Avoid hard braking and
high-speed
driving.
Stop the vehicle in a safe place.
Restart the engine and check to see whether
the lamp goes out after a few minutes driv-
ing; if it then remains off during driving,
there is no problem.
However, if the lamp does not go out, or if it
lights up again when the vehicle is driven,
we recommend you to have the vehicle
checked as soon as possible.
l The ABS warning lamp can illuminate if the
battery voltage is insufficient when the en-
gine is started. In this case, it does not indi-
cate an ABS fault.
Charge the battery by allowing the engine to
idle for a while.
If the battery has been charged but the ABS
warning lamp continues to illuminate or illu-
minates intermittently, have the vehicle in-
spected.
If the ABS warning lamp and brake warning
lamp illuminate at the same time l The ABS and brake force distribution func-
tion may not work, so hard braking could
make the vehicle unstable.
Avoid hard braking and high-speed driving.
Stop the vehicle in a safe place and contact a
MITSUBISHI MOTORS Authorized Service
Point. NOTE
l Immediately
after the vehicle starts
moving
after engine start up, a whining sound of a mo-
tor will be heard from the engine compart-
ment. If the brake pedal is depressed at that
moment, you can feel the brake pedal pulsat-
ing.
This pulsation is due to the self-diagnosis op-
eration of the ABS and does not indicate a
malfunction.
l After driving on snowy roads, remove any
snow and ice which may have become ad-
hered to the wheel areas.
When doing this, be careful not to damage
the wheel speed sensors (A) and cables loca-
ted at each wheel on vehicles equipped with
an ABS.
Front
Rear l
The ABS becomes operative after the vehicle
has accelerated to a
speed
in excess of approx-
imately 10 km/h (6 mph). It stops operating
when the vehicle decelerates to a speed be-
low approximately 7 km/h (4 mph). Starting and driving
4-46
4
OCRE12E1
Presented by http://mmc-manuals.ru/ \251
Page 172 of 369
Power steering system
E00607400260
The power steering system operates
while the en-
gine is running. It helps reduce the effort needed to
turn the steering wheel.
The power steering system has mechanical steering
capability in case the power assist is lost. If the pow-
er assist is lost for some reason, you will still be
able to steer your vehicle. If the power assist is
lost, you will notice it takes much more effort to
steer and that there is much more “free play” in the
steering wheel. If this happens, take your vehicle to
an authorized MITSUBISHI MOTORS dealer. WARNING
l Do not stop the
engine
while the vehicle is
moving. Stopping the engine would make
the steering wheel extremely hard to
turn, possibly resulting in an accident. CAUTION
l
Do not leave the steering
wheel turned all
the way in one direction. This can cause
damage to the power steering system. Active Stability & Traction
Control (ASTC)* E00616700344
The active stability & traction
control (ASTC)
takes overall control of the anti-lock brake system,
traction control function and Active Stability Con-
trol function to help maintain the vehicle’s control
and traction. Please read this section in conjunction
with the page on the anti-lock brake system, trac-
tion control function and Active Stability Control
function.
Anti-lock brake system (ABS) ® p. 4-44
Active Traction Control function ® p. 4-48
Active Stability Control function ® p. 4-48 CAUTION
l
Do not over-rely on
the
ASTC. This sys-
tem, like any other system, has limits and
cannot help you to maintain traction and
control of the vehicle in all circumstan-
ces. Reckless driving may lead to acci-
dents. Always drive carefully, taking into
account the traffic, road and environmen-
tal conditions.
l Be sure to use the same specified type and
size of tyre on all 4 wheels. Otherwise, the
ASTC may not work correctly.
NOTE l After
your vehicle is driven
a short distance
after starting the engine, a click is heard from
the engine compartment; however, this is on-
ly the sound of ASTC being checked. l
Some
vibration will be
felt
in the vehicle
body and a whining sound of a motor will be
heard from the engine compartment when
the ASTC functions. This is a normal result
of the ASTC operation, and does not indicate
a malfunction.
l The ASTC does not operate while the ABS
warning lamp is illuminated.
l On vehicles with the rear differential lock,
the ASTC and ABS functions are suspended
while the rear differential lock is activated.
ASTC indication lamp, ASTC OFF indica-
tion lamp and ABS warning lamp are illumi-
nated while these functions are suspended. It
does not indicate a problem. When the rear
differential lock is disengaged, these lamps
go out and function again.
Refer to “ABS warning lamp” on page 4-45,
“ASTC indication lamp, ASTC OFF indica-
tion lamp” on page 4-48.
Driving hints E00616800039
When extricating the vehicle from mud, sand or
fresh snow, you may find
that operation of the
ASTC prevents the engine speed from increasing
in response to depression of the accelerator pedal.
If this happens and the vehicle remains stuck as a
result, deactivate the ASC function by pressing the
“ASC OFF” switch. The vehicle will then be easier
to extricate. (Brake control of the ATC function is
still working to prevent wheel spins when the ASC
function is deactivated by pressing the “ASC OFF”
switch.) Starting and driving
4-47 4
OCRE12E1
Presented by http://mmc-manuals.ru/ \251
Page 173 of 369
Active Stability Control function
E00616900056
The Active Stability Control function
is designed
to improve the vehicle’s stability by restraining its
tendency to slip sideways (for example, when round-
ing a curve in slippery conditions, or when the driv-
er takes rapid steering action to avoid an obstacle).
It works by controlling the engine output and brake
on each wheel.
NOTE
l On vehicles with the rear differential lock,
the Active Stability Control function does
not operate when the rear differential lock is
activated. “ASC OFF” switch
The
Active Stability Control function
is automati-
cally activated when the ignition switch is turned to
the “ON” position. You can deactivate the system
by pressing the “ASC OFF” switch when the vehi-
cle speed is below about 40 km/h (25 mph). To re-
activate the Active Stability Control function, press
the “ASC OFF” switch again. It is strongly recom-
mended that the Active Stability Control function
normally be kept activated.
Type 1
Type 2 NOTE
l If
the vehicle speed increases
to about
120 km/h (74 mph) with the Active Stability
Control function deactivated, the Active Sta-
bility Control function automatically starts op-
erating. To subsequently stop the Active Sta-
bility Control function, stop the vehicle and
press the “ASC OFF” switch again. Active Traction Control function
E00617000025
On slippery surfaces, active
traction
control func-
tion prevents the drive wheels from excessive spin-
ning, thus helping the vehicle to start moving from
a stop. It also provides sufficient driving force and
steering performance as the vehicle turns at acceler-
ated speeds. CAUTION
l
When driving a vehicle
on
a snowy or icy
road, be sure to install snow tyres and
drive the vehicle at moderate speeds.
ASTC indication lamp, ASTC OFF in-
dication lamp E00617100071
The Active Stability Control function and active
traction control function
share the
same indication
lamp.
The indication lamps should illuminate when the ig-
nition switch is turned to the “ON” position and
should go off after a few seconds.
If the indication lamps stay on or do not illuminate
when the ignition switch is turned to the “ON” po-
sition, we recommend you to have your vehicle in-
spected as soon as possible. indication lamp blinks when the Active Stabili-
ty Control function or active
traction control func-
tion is operating. Starting and driving
4-48
4
OCRE12E1
Presented by http://mmc-manuals.ru/ \251
Page 174 of 369
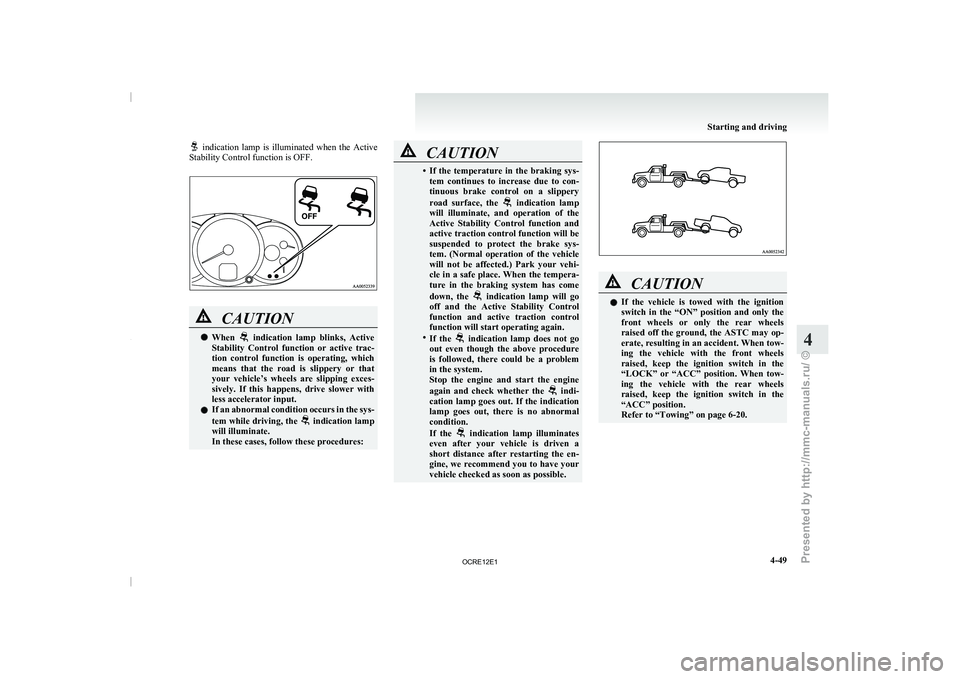
indication lamp is illuminated when the Active
Stability Control function is OFF. CAUTION
l
When indication lamp blinks, Active
Stability Control function or active
trac-
tion control function is operating, which
means that the road is slippery or that
your vehicle’s wheels are slipping exces-
sively. If this happens, drive slower with
less accelerator input.
l If an abnormal condition occurs in the sys-
tem while driving, the indication lamp
will illuminate.
In these cases, follow these procedures: CAUTION
• If the temperature in the braking sys-
tem continues to increase
due to con-
tinuous brake control on a slippery
road surface, the indication lamp
will illuminate, and operation of
the
Active Stability Control function and
active traction control function will be
suspended to protect the brake sys-
tem. (Normal operation of the vehicle
will not be affected.) Park your vehi-
cle in a safe place. When the tempera-
ture in the braking system has come
down, the indication lamp will go
off and the Active Stability
Control
function and active traction control
function will start operating again.
• If the indication lamp does not go
out even though the above
procedure
is followed, there could be a problem
in the system.
Stop the engine and start the engine
again and check whether the indi-
cation lamp goes out. If
the indication
lamp goes out, there is no abnormal
condition.
If the indication lamp illuminates
even after your vehicle is
driven a
short distance after restarting the en-
gine, we recommend you to have your
vehicle checked as soon as possible. CAUTION
l
If the vehicle is
towed
with the ignition
switch in the “ON” position and only the
front wheels or only the rear wheels
raised off the ground, the ASTC may op-
erate, resulting in an accident. When tow-
ing the vehicle with the front wheels
raised, keep the ignition switch in the
“LOCK” or “ACC” position. When tow-
ing the vehicle with the rear wheels
raised, keep the ignition switch in the
“ACC” position.
Refer to “Towing” on page 6-20. Starting and driving
4-49 4
OCRE12E1
Presented by http://mmc-manuals.ru/ \251
Page 207 of 369
To listen to a CD
E00709602290
1. Insert a disc with the
label facing up, and the
CD player will begin playing even if another
mode is being used. The CD indicator (18),
the track number (16), the playing time (17)
will appear on the display.
2. When the CD mode is selected by pressing the CD (12) button several times with the
disc in the player, the CD player will start
playback.
3. To stop the CD, turn off the power by press- ing the PWR switch (11) or change over to
the another mode by pressing the RADIO but-
ton or CD button, or eject the disc by press-
ing the eject button (1).
NOTE l To adjust the volume and tone, refer to “To
adjust the volume” on page 5-15 and “To ad-
just the tone” on page 5-15.
l An 8 cm compact disc cannot be played on
this CD player.
l For information concerning the handling of
compact discs, refer to “Handling of compact
discs” on page 5-48.
To fast-forward/fast-reverse the disc
Fast-forward
You can fast-forward the disc by pressing the button (9). While the button is kept pressed, the
disc will be fast-forwarded.
Fast-reverse
You can fast-reverse the
disc
by pressing the but-
ton (10). While the button
is kept pressed, the disc
will be fast-reversed. NOTE
l When
you have fast-forwarded/fast-reversed
the disc,
the playing-time may be shown
with deviation.
To listen to an MP3 CD
This CD player allows you to play MP3 (MPEG Au-
dio Layer-3) files recorded on CD-ROMs, CD-Rs
(recordable CDs), and CD-RWs (rewritable CDs)
in ISO9660 Level 1/Level 2, Joliet, and Romeo for-
mats. Each disc may have a maximum of 16 trees,
100 folders, and 255 files per disc. During MP3
playback, the unit can display ID3 tag information.
For information concerning ID3 tag, refer to “CD
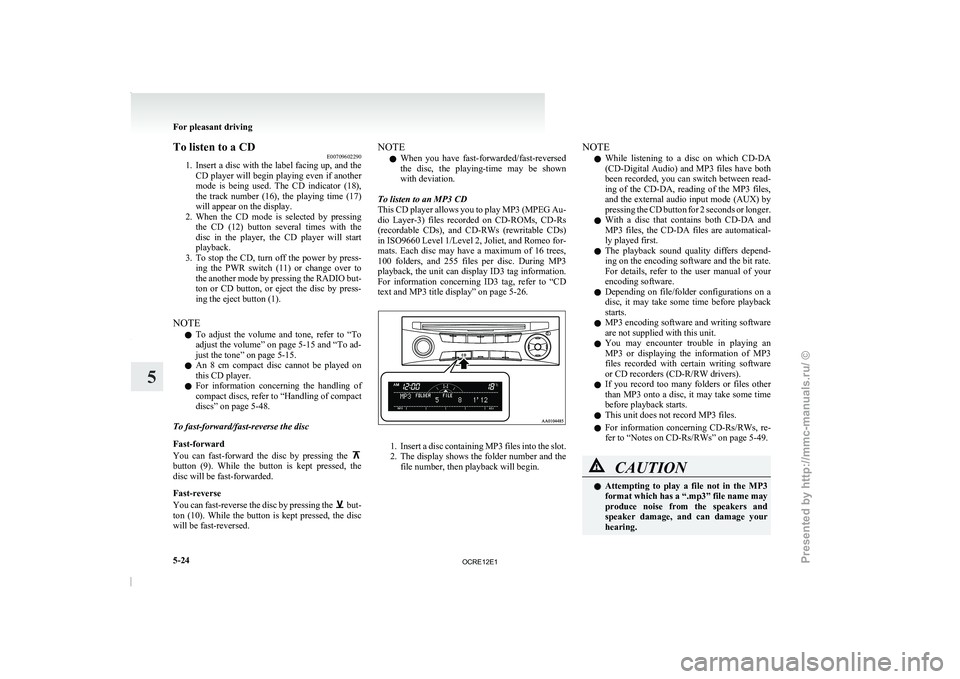
text and MP3 title display” on page 5-26. 1. Insert a disc containing MP3 files into the slot.
2. The display
shows
the folder number and the
file number, then playback will begin. NOTE
l While
listening to
a disc
on which CD-DA
(CD-Digital Audio) and MP3 files have both
been recorded, you can switch between read-
ing of the CD-DA, reading of the MP3 files,
and the external audio input mode (AUX) by
pressing the CD button for 2 seconds or longer.
l With a disc that contains both CD-DA and
MP3 files, the CD-DA files are automatical-
ly played first.
l The playback sound quality differs depend-
ing on the encoding software and the bit rate.
For details, refer to the user manual of your
encoding software.
l Depending on file/folder configurations on a
disc, it may take some time before playback
starts.
l MP3 encoding software and writing software
are not supplied with this unit.
l You may encounter trouble in playing an
MP3 or displaying the information of MP3
files recorded with certain writing software
or CD recorders (CD-R/RW drivers).
l If you record too many folders or files other
than MP3 onto a disc, it may take some time
before playback starts.
l This unit does not record MP3 files.
l For information concerning CD-Rs/RWs, re-
fer to “Notes on CD-Rs/RWs” on page 5-49. CAUTION
l
Attempting to play a
file
not in the MP3
format which has a “.mp3” file name may
produce noise from the speakers and
speaker damage, and can damage your
hearing. For pleasant driving
5-24
5
OCRE12E1
Presented by http://mmc-manuals.ru/ \251
Page 212 of 369
To play from an iPod
E00756300372
1. Press the PWR button (1)
to turn on the au-
dio system. The system turns on in the last
mode used.
2. Connect your iPod to the USB input terminal. Refer to “How to connect an iPod” on page
5-67.
3. Press the CD button (11) several times to switch to the iPod mode. The mode changes
every time the CD button is pressed.
CD mode → iPod mode → Bluetooth ®
mode*
NOTE l If your vehicle is equipped with Auxiliary Au-
dio connector (RCA), pressing and holding
the CD button for 2 seconds or more
switches the system to the AUX mode.
4. Once the device is selected, playback starts and “iPod” appears on the display.
NOTE l Depending on the condition of your iPod, it
may take a longer time before the playback
starts.
5. To stop the playback, change over to a differ- ent mode.
NOTE l Buttons on the iPod are disabled while the
iPod is connected to the audio system.
l To adjust the volume and tone, refer to “To
adjust the volume” and “To adjust the tone”. To fast-forward/reverse the track
E00756400113
Fast-forward
To fast-forward the current track,
press the but-
ton (8). While the button
is pressed, the track will
be fast-forwarded.
Fast-reverse
To fast-reverse the current track, press the but-
ton (9). While the button
is pressed, the track will
be fast-reversed.
To select a desired track E00756500097
Track up
Press the button (8) repeatedly until the desired
track number appears on the display.
Track down
Press the button (9) repeatedly until the desired
track number appears on the display.
NOTE
l Pressing
the button (9) once during the
song will cause the audio
system to restart
playback from the beginning of the song.
To find a track from the iPod menu E00756600186
You can select desired tracks from the “Playlists”,
“Artists”,“Albums”, “Songs” or “Genre” (vehicles
with Bluetooth ®
2.0 interface) menus on your iPod.
Press the following buttons to select desired tracks.
The
selected menu or category or track is shown in
the display. button (12)
: To start this mode or cancel the
selection. button (8)
or button (9)
: To show the menu or category
or track. button (13)
: To select the menu or category
or track.
NOTE l If
no operation is performed
for 10 seconds
or more or another button is operated after
the button or button has been pressed,
searching of the desired tracks is cancelled.
l If no operation is
performed
for 5 seconds or
more after the track is displayed, playback
starts.
To play the same track repeatedly E00756700099
Press the RPT button (6) during playback to show
“RPT” in the display.
To exit this mode, press the button again.
To play tracks in random order E00756900091
Press the RDM button (7) to show “SHUFFLE” in
the display.The iPod randomly selects
tracks from
the current category and plays the selected tracks.
To exit this mode, press the button again.
To play tracks in each album in random order E00757000099
Press and hold the RDM button (7) until you hear a
beep to show “A-SHUFFLE” in the display.
The iPod randomly selects tracks
in the album
from the current category and play the selected
tracks.
To exit this mode, press the button again. For pleasant driving
5-29 5
OCRE12E1
Presented by http://mmc-manuals.ru/ \251
Page 217 of 369
To play from a USB memory device
E00762500366
1. Press the PWR button (1)
to turn on the au-
dio system. The system turns on in the last
mode used.
2. Connect your USB memory device to the USB input terminal.
Refer to “How to connect a USB memory de-
vice” on page 5-67.
3. Press the CD button (11) several times to switch to the USB mode. The mode changes
as follows every time the CD button is pressed.
CD mode → USB mode → Bluetooth ®
mode*
NOTE l If your vehicle is equipped with Auxiliary Au-
dio connector (RCA), pressing and holding
the CD button for 2 seconds or more
switches the system to the AUX mode.
4. Once the device is selected, playback starts and “USB” appears on the display.
NOTE l Depending on the condition of your USB de-
vice, it may take a longer time before the play-
back starts.
5. To stop the playback, change over to a differ- ent mode.
NOTE l To adjust the volume and tone, refer to “To
adjust the volume” and “To adjust the tone”. Supported compressed music files
E00758300305
This audio can play MP3,
WMA, AAC and WAV
files recorded in a USB memory device. This audio
supports up to 65,535 files in 700 folders on 8 levels.
Folder selection order/file playback order (exam-
ple)
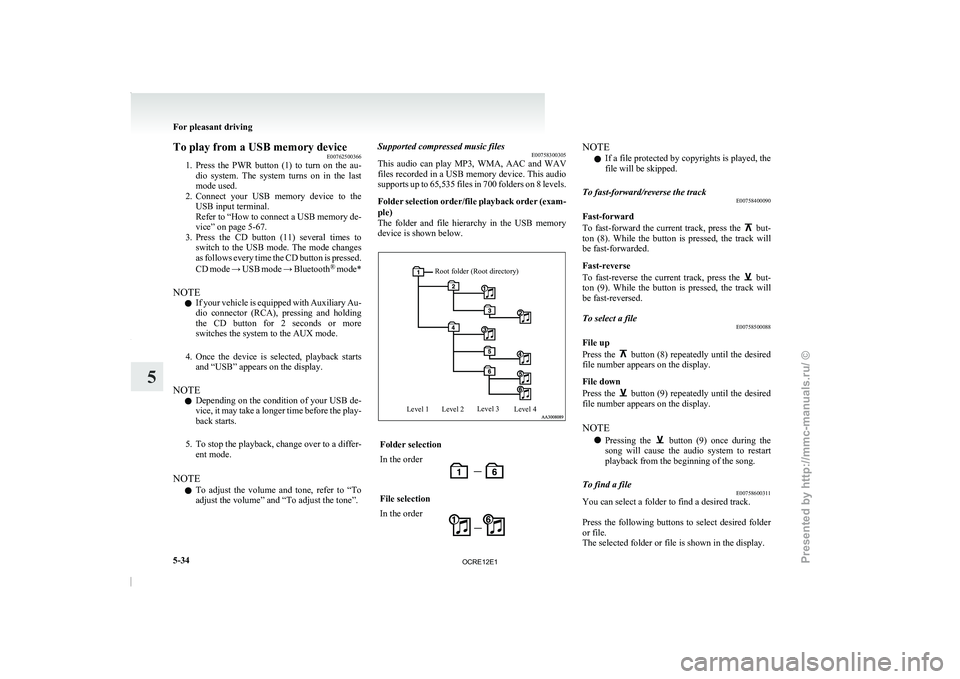
The folder and file hierarchy in the USB memory
device is shown below.
Root folder (Root directory)
Level 1 Level 2 Level 3
Level 4 Folder selection
In the order
File selection
In the order NOTE
l If a file protected by copyrights is played, the
file will be skipped.
To fast-forward/reverse the track E00758400090
Fast-forward
To fast-forward the current track,
press the but-
ton (8). While the button
is pressed, the track will
be fast-forwarded.
Fast-reverse
To fast-reverse the current track, press the but-
ton (9). While the button
is pressed, the track will
be fast-reversed.
To select a file E00758500088
File up
Press the button (8) repeatedly until the desired
file number appears on the display.
File down
Press the button (9) repeatedly until the desired
file number appears on the display.
NOTE
l Pressing
the button (9) once during the
song will cause the audio
system to restart
playback from the beginning of the song.
To find a file E00758600311
You can select a folder to find a desired track.
Press the following buttons to
select desired folder
or file.
The selected folder or file is shown in the display. For pleasant driving
5-34
5
OCRE12E1
Presented by http://mmc-manuals.ru/ \251
Page 221 of 369
To listen to tracks from a device con-
nected via Bluetooth
®
E00762700225
1. Press the PWR button (1)
to turn on the au-
dio system. The system turns on in the last
mode used.
2. Press the CD button (8) several times to
switch to the BT-A (Bluetooth ®
) mode. The
mode changes as follows every time the CD
button is pressed.
CD mode → USB (iPod) mode → Blue-
tooth ®
mode
NOTE l For vehicles equipped with Auxiliary Audio
connector (RCA), pressing and holding the
CD button for 2 seconds or more switches
the system to the AUX mode.
3. Connect your Bluetooth ®
device.
Refer to “Connecting the Bluetooth® 2.0 in-
terface and Bluetooth® device” on page
5-55.
4. Playback starts automatically.
NOTE l Depending on the connected device, the play-
back may not start automatically.
In this case, operate the connected device to
start the playback.
To stop the playback (if supported by the device) E00762800079
To stop the playback, press and hold the button
(9) until you hear a beep.
To restart the playback, press the button (10).To pause the playback (if supported by the device)
E00762900083
To pause the playback, press the button (9).
To restart the playback, press the button (10).
To fast-forward/reverse the track (if supported by
the device) E00765600010
Fast-forward
To fast-forward the current
track,
press the but-
ton (6). While the button
is pressed, the track will
be fast-forwarded.
Fast-reverse
To fast-reverse the current track, press the but-
ton (7). While the button
is pressed, the track will
be fast-reversed.
To select a track (if supported by the device) E00763000094
Track up
Press the button (6) repeatedly until the desired
track number appears on the display.
Track down
Press the button (7) repeatedly until the desired
track number appears on the display.
NOTE
l Pressing
the button (7) once during the
song will cause the audio
system to restart
playback from the beginning of the song.
To play the same track or all tracks repeatedly (if
supported by the device) E00763100079
Press the RPT button (4) several times to show
“1-RPT” (same track repeat mode)
or “A-RPT” (all
tracks repeat mode) in the display. The mode changes as follows every time the RPT
button is pressed.
1-RPT mode → A-RPT mode → mode off
To exit these mode,
press
the RPT button several
times until the 1-RPT indicator or the A-RPT indi-
cator goes off.
To play tracks in random order (if supported by
the device) E00763200070
Press the RDM button (5) to show “RDM” in the
display.
The system randomly selects and
plays tracks from
all tracks in the Bluetooth ®
device.
To exit this mode, press the button again.
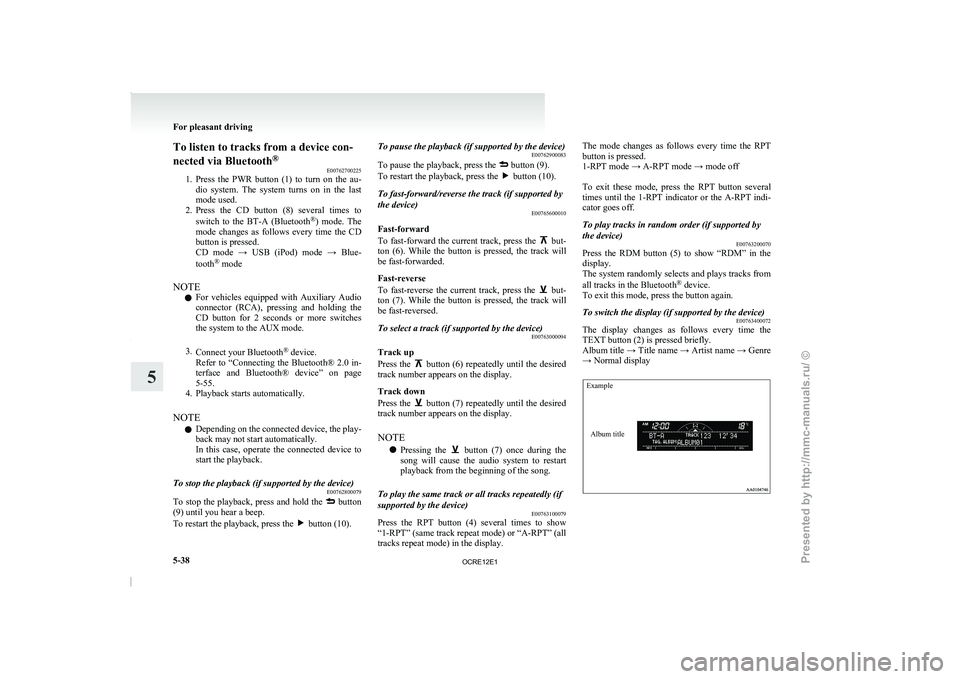
To switch the display (if supported by the device) E00763400072
The display changes as follows every time the
TEXT button (2) is pressed briefly.
Album title → Title name
→ Artist name → Genre
→ Normal display
Example
Album title For pleasant driving
5-38
5
OCRE12E1
Presented by http://mmc-manuals.ru/ \251
Page 231 of 369
Audio system anti-theft feature
E00710200348
To prevent theft of the
audio system, the control
knob can be removed. Always remove the control
knob when you leave the vehicle.
Removing the control knob
Slide the release button (A) to the right and remove
the control knob from the audio system.
The anti-theft function operates in two ways depend-
ing on the position of the ignition key. 1.
With the key in the “ON” or “ACC” posi-
tion
The “Please refit the control panel.” indicator
will appear on the
display. Any audio system
operation will be disabled while the “Please
refit the control panel.” indicator is displayed. 2.
With the key in the “LOCK” position
The lamp (B) will start
flashing to deter
thieves. NOTE
l When
sliding the release button,
place one
hand on the control knob to prevent it from
falling out.
Refitting the control knob
Put the control knob back into the original position
and then push it until it clicks. The “Please refit the
control panel.” indicator will disappear or the lamp
(B) will stop flashing.
NOTE l Do not leave the control knob in any place
where it may become hot (for example, the
dashboard) or in any place where it may be-
come wet.
l If you lose the control knob, contact a
MITSUBISHI MOTORS Authorized Service
Point. Handling of compact discs
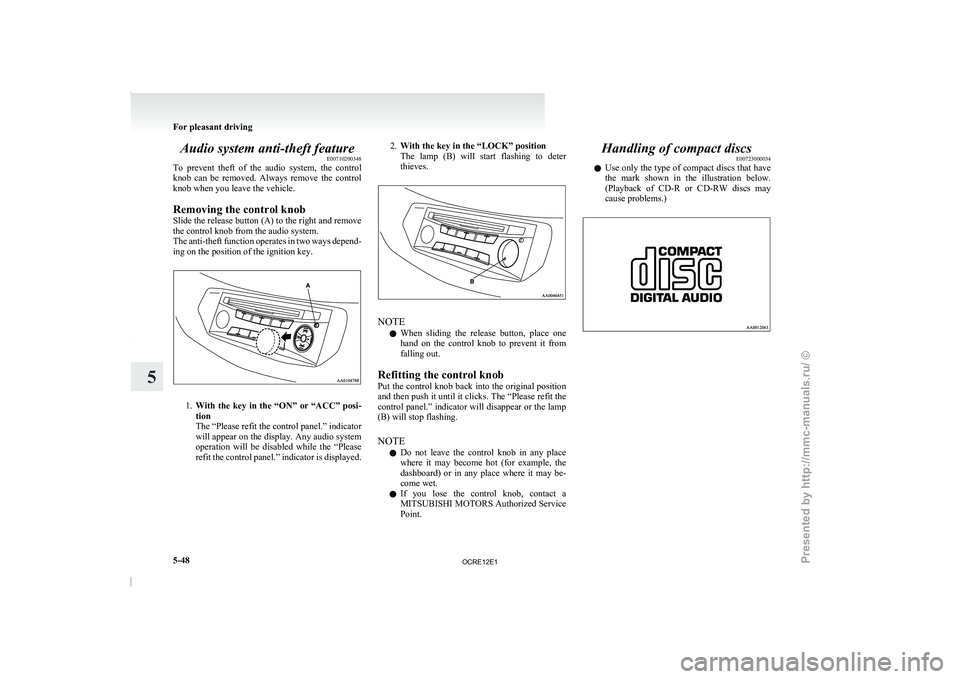
E00723000034
l Use only the type
of
compact discs that have
the mark shown in the illustration below.
(Playback of CD-R or CD-RW discs may
cause problems.) For pleasant driving
5-48
5
OCRE12E1
Presented by http://mmc-manuals.ru/ \251