NISSAN 350Z 2003 Z33 Owners Manual
Manufacturer: NISSAN, Model Year: 2003, Model line: 350Z, Model: NISSAN 350Z 2003 Z33Pages: 227, PDF Size: 2.39 MB
Page 121 of 227
ªWarning/indicator lights and audible remind-
ersº in the ª2. Instruments and controlsº section.
WARNING
IIf the low tire pressure warning light
in the meter panel comes on and/or
the PSI indicator on the trip computer
flashes while driving, avoid sudden
steering maneuvers or abrupt brak-
ing, reduce vehicle speed, pull off the
road to a safe location and stop the
vehicle as soon as possible. Serious
vehicle damage could occur and may
lead to an accident and could result
in serious personal injury. Check the
pressure for all four tires and adjust
the pressure to the COLD tire pres-
sure shown on the tire placard. If you
have a flat tire, replace it with a spare
tire as soon as possible. (See ªFlat
tireº in the ª6. In case of emergencyº
section for changing a flat tire.)
IWhen a spare tire is mounted or a
wheel is replaced, tire pressure will
not be indicated and the low tirepressure warning system will not
function. Contact your NISSAN
dealer as soon as possible for tire
replacement and/or system reset-
ting.
IDo not inject any tire liquid or aerosol
tire sealant into the tires, as this may
cause a malfunction of the tire pres-
sure sensors.
CAUTION
Do not place metalized film or any metal
parts (antenna, etc.) on the windows.
This may cause poor reception of the
signals from the tire pressure sensors,
and the low tire pressure warning sys-
tem will not function properly.
FCC Notice:
Changes or modifications not expressly
approved by the manufacturer compliance
could void the user's authority to operate
the equipment.This device complies with Part 15 of the
FCC Rules and RSS-210 of Industry
Canada.
Operation is subject to the following two
conditions: (1) This device may not cause
harmful interference, and (2) this device
must accept any interference received, in-
cluding interference that may cause undes-
ired operation of the device.
AVOIDING COLLISION AND
ROLLOVER
WARNING
Failure to operate this vehicle in a safe
and prudent manner may result in loss
of control or an accident.
Be alert and drive defensively at all times. Obey
all traffic regulations. Avoid excessive speed,
high speed cornering, or sudden steering ma-
neuvers, because these driving practices could
cause you to lose control of your vehicle.As
with any vehicle, a loss of control could
result in a collision with other vehicles or
objects, or cause the vehicle to rollover,
particularly if the loss of control causes the
vehicle to slide sideways.Be attentive at all
5-4
Starting and driving
Z
02.9.13/Z33-D/V5.0
X
Page 122 of 227
times, and avoid driving when tired. Never drive
when under the influence of alcohol or drugs
(including prescription or over-the-counter
drugs which may cause drowsiness). Always
wear your seat belt. See ªSeat Beltsº in the ª1.
Seats, restraints and supplemental air bag sys-
temsº section. Also instruct your passengers to
do so.DRINKING ALCOHOL/DRUGS AND
DRIVING
WARNING
Never drive under the influence of alco-
hol or drugs. Alcohol in the bloodstream
reduces coordination, delays reaction
time and impairs judgment. Driving after
drinking alcohol increases the likeli-
hood of being involved in an accident
injuring yourself and others. Addition-
ally, if you are injured in the accident,
alcohol can increase the severity of the
injury.
NISSAN is committed to safe driving. You must
not drive under the influence of alcohol. Every
year thousands of people are injured or killed in
alcohol related accidents. Although the locallaws vary on what is considered to be legally
intoxicated, the fact is that alcohol affects all
people differently and most people underesti-
mate the effects of alcohol.
Remember, drinking and driving don't mix!
And that's true for drugs too (over the counter,
prescription, and illegal drugs). Don't drive if
your ability to operate your vehicle is impaired by
alcohol, drugs, or some other physical condition.
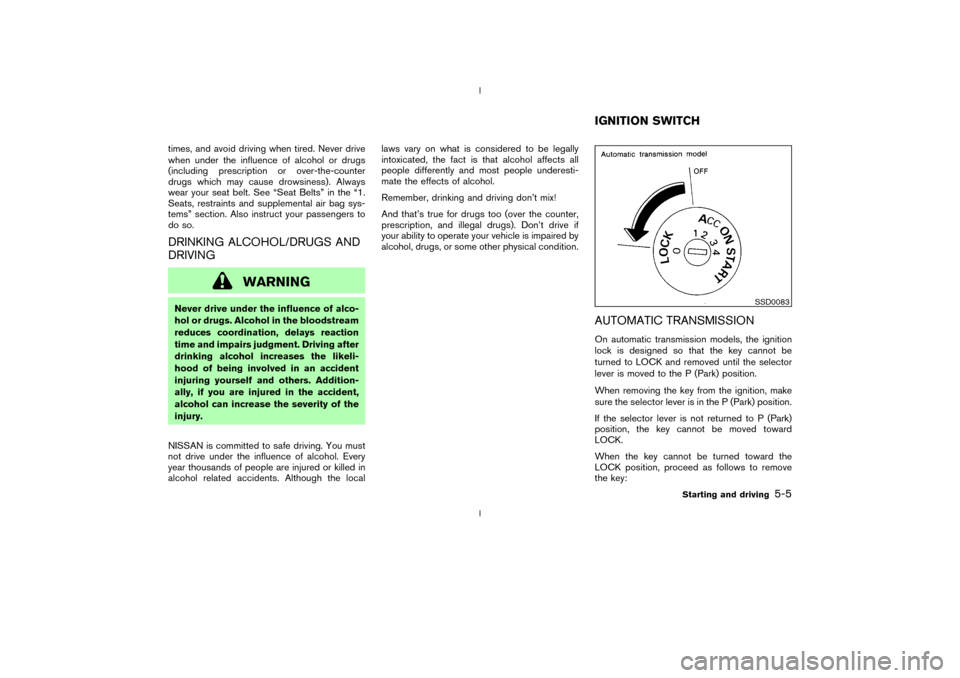
AUTOMATIC TRANSMISSIONOn automatic transmission models, the ignition
lock is designed so that the key cannot be
turned to LOCK and removed until the selector
lever is moved to the P (Park) position.
When removing the key from the ignition, make
sure the selector lever is in the P (Park) position.
If the selector lever is not returned to P (Park)
position, the key cannot be moved toward
LOCK.
When the key cannot be turned toward the
LOCK position, proceed as follows to remove
the key:
SSD0083
IGNITION SWITCH
Starting and driving
5-5
Z
02.9.13/Z33-D/V5.0
X
Page 123 of 227
1. Move the selector lever into the P (Park)
position.
2. Turn the ignition key slightly in the ON direc-
tion.
3. Turn the key toward the LOCK position.
4. Remove the key.
If the key is removed from the ignition switch, the
selector lever cannot be moved from P (Park)
position.The selector lever can be moved if
the ignition switch is in the ON position
and the foot brake pedal is depressed.
There is an OFF position in between LOCK and
ACC, although it does not show on the lock
cylinder. When the ignition is in OFF the steering
wheel is not locked.
In order for the steering wheel to be locked, it
must be turned about 1/6 of a turn counterclock-
wise from the straight up position.
To lock the steering wheel, turn the key to
the LOCK position. Remove the key. To
unlock the steering wheel, insert the key
and turn it gently while rotating the steer-
ing wheel slightly right and left.
WARNING
Never remove or turn the key to the
LOCK position while driving. The steer-
ing wheel will lock. This may cause the
driver to lose control of the vehicle and
could result in serious vehicle damage
and/or personal injury.
MANUAL TRANSMISSIONThe switch includes an anti-theft steering lock
device.
The ignition key can only be removed when the
switch is in the LOCK position.
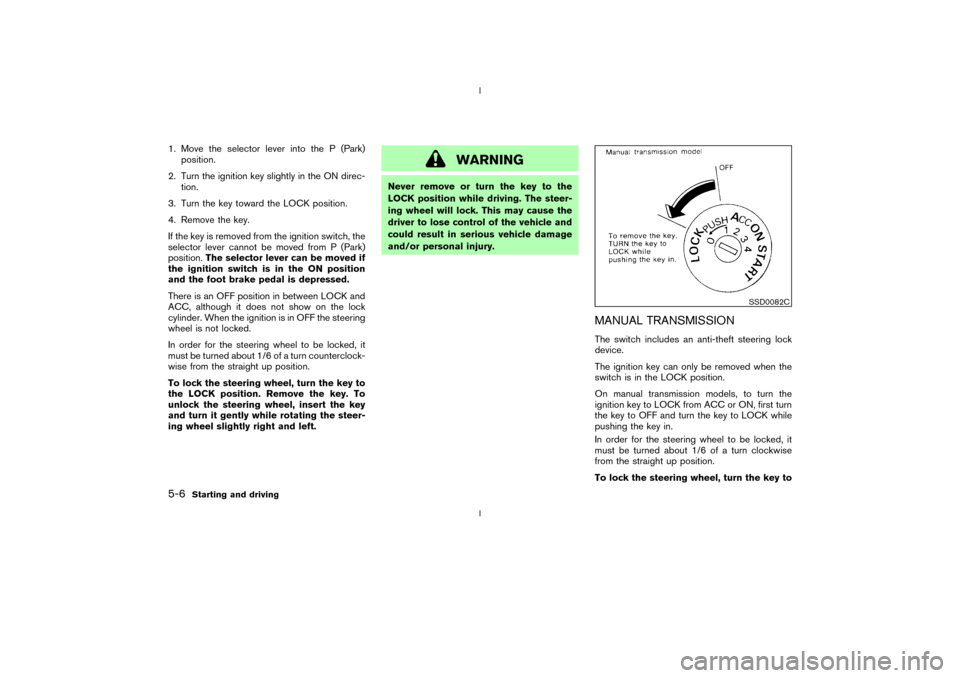
On manual transmission models, to turn the
ignition key to LOCK from ACC or ON, first turn
the key to OFF and turn the key to LOCK while
pushing the key in.
In order for the steering wheel to be locked, it
must be turned about 1/6 of a turn clockwise
from the straight up position.
To lock the steering wheel, turn the key to
SSD0082C
5-6
Starting and driving
Z
02.9.13/Z33-D/V5.0
X
Page 124 of 227
the LOCK position. Remove the key. To
unlock the steering wheel, insert the key
and turn it gently while rotating the steer-
ing wheel slightly right and left.
WARNING
Never remove or turn the key to the
LOCK position while driving. The steer-
ing wheel will lock. This may cause the
driver to lose control of the vehicle and
could result in serious vehicle damage
and/or personal injury.KEY POSITIONSThe switch includes an anti-theft steering lock
device.
LOCK (Normal parking position) (0)
The ignition key can only be removed when the
switch is in this position.
OFF (1)
The engine can be turned off without locking the
steering wheel.
The ignition lock is designed so that the key
cannot be turned to LOCK and removed until the
selector lever is moved to the P (Park) position.ACC (Accessories) (2)
This position activates electrical accessories
such as the radio when the engine is not running.
ON (Normal operating position) (3)
This position turns on the ignition system and the
electrical accessories.
START (4)
This position activates the starter motor, starting
the engine.
NISSAN VEHICLE IMMOBILIZER
SYSTEM (NVIS)The Nissan Vehicle Immobilizer System will not
allow the engine to start without the use of the
registered Nissan Vehicle Immobilizer System
key.
If the engine fails to start using the registered
Nissan Vehicle Immobilizer System key, it may be
due to interference caused by another Nissan
Vehicle Immobilizer System key, an automated
toll road device or automated payment device on
the key ring. Restart the engine using the follow-
ing procedures:
1. Leave the ignition switch in the ON position
for approximately 5 seconds.
2. Turn the ignition switch to the OFF or LOCKposition and wait approximately 10 seconds.
3. Repeat step 1 and 2 again.
4. Restart the engine while holding the device
(which may have caused the interference)
separate from the registered Nissan Vehicle
Immobilizer System key.
If this procedure allows the engine to start,
NISSAN recommends placing the registered
Nissan Vehicle Immobilizer System key on a
separate key ring to avoid interference from
other devices.
Starting and driving
5-7
Z
02.9.13/Z33-D/V5.0
X
Page 125 of 227
IMake sure the area around the vehicle is
clear.
IMaintenance items should be checked peri-
odically, for example, each time you check
engine oil.
ICheck that all windows and lights are clean.
IVisually inspect tires for their appearance and
condition. Also, check tires for proper infla-
tion.
ILock all doors.
IPosition seat and adjust head restraints.
IAdjust inside and outside mirrors.
IFasten seat belts and ask all passengers to
do likewise.
ICheck the operation of warning lights when
key is turned to the ON (3) position.1. Apply the parking brake.
2.Automatic transmission:
Move the selector lever to P (Park) or N
(Neutral). (P preferred.)
The starter is designed not to operate if the
selector lever is in one of the driving posi-
tions.
Manual transmission:
Move the shift lever to N (Neutral) position,
and depress the clutch pedal to the floor
while cranking the engine.
The starter is designed not to operate unless
the clutch pedal is fully depressed.
3. Crank the enginewith your foot off the
accelerator pedalby turning the ignition
key to START. Release the key when the
engine starts. If the engine starts, but fails to
run, repeat the above procedure.
IWhen the engine is very hard to start in
extremely cold weather or when restarting,
depress the accelerator pedal a little (ap-
proximately 1/5 to the floor) and hold it then
crank the engine. Release the key and the
accelerator pedal when the engine starts.
IWhen the engine is very hard to start be-
cause it is flooded, depress the acceleratorpedal all the way to the floor and hold it.
Crank the engine for 5 to 6 seconds. After
cranking the engine, release the accelerator
pedal. Crank the enginewith your foot off
the accelerator pedalby turning the igni-
tion key to START. Release the key when the
engine starts. If the engine starts, but fails to
run, repeat the above procedure.
CAUTION
Do not operate the starter for more than
15 seconds at a time. If the engine does
not start, turn the key off and wait 10
seconds before cranking again, other-
wise the starter could be damaged.
4.Warm-up
Allow the engine to idle for at least 30
seconds after starting. Drive at moderate
speed for a short distance first, especially in
cold weather.
BEFORE STARTING THE ENGINE STARTING THE ENGINE5-8
Starting and driving
Z
02.9.13/Z33-D/V5.0
X
Page 126 of 227
AUTOMATIC TRANSMISSION
5 speed automatic transmissionThe automatic transmission in your vehicle is
electronically controlled by a transmission con-
trol module to produce maximum power and
smooth operation.
Shown on the following pages are the recom-
mended operating procedures for this transmis-
sion. Follow these procedures for maximum ve-
hicle performance and driving enjoyment.Starting the vehicleAfter starting the engine, fully depress the foot
brake pedal and push the selector lever button
before shifting the selector lever to the R (Re-
verse), N (Neutral), D (Drive) or Manual shift
mode position. Be sure the vehicle is fully
stopped before attempting to shift the selector
lever.
This automatic transmission model is de-
signed so that the foot brake pedal must
be depressed before shifting from P (Park)
to any drive position while the ignition
switch is ON.
The selector lever cannot be moved out of
P (Park) position and into any of the other
gear positions if the ignition key is turned
to the LOCK, OFF or ACC position or if thekey is removed from the switch.
1. Keep the foot brake pedal depressed and
push the selector lever button to shift into a
driving gear.
2. Release the parking brake and foot brake,
then gradually start the vehicle in motion.
WARNING
IDo not depress the accelerator pedal
while shifting from P (Park) or N
(Neutral) to R (Reverse), D (Drive) or
manual shift mode. Always depress
the brake pedal until shifting is com-
pleted. Failure to do so could cause
you to lose control and have an acci-
dent.
ICold engine idle speed is high, so use
caution when shifting into a forward
or reverse gear before the engine has
warmed up.
IOn slippery roads, do not downshift.
This may cause a loss of control.
INever shift to P (Park) or R (Reverse)
while the vehicle is moving forward.Never shift to P (Park) or D (Drive)
while vehicle is moving rearward.
These could cause an accident.
CAUTION
When stopping the vehicle on an uphill
grade, do not hold the vehicle by de-
pressing the accelerator pedal. The foot
brakes should be used for this purpose.
DRIVING THE VEHICLE
Starting and driving
5-9
Z
02.9.13/Z33-D/V5.0
X
Page 127 of 227

To move the selector lever,
: Push the button while depressing the
brake pedal,: Push the button,: Just move the selector lever.
ShiftingAfter starting the engine, fully depress the brake
pedal and shift the selector lever from P (Park) to
R (Reverse), N (Neutral), D (Drive), or Manual
shift mode position.
Push the button to shift into P (Park) or R
(Reverse). All other positions can be selected
without pushing the button.
WARNING
Apply the parking brake if the selector
lever is in any position while the engine
is not running. Failure to do so could
cause the vehicle to move unexpectedly
or roll away and result in serious per-
sonal injury and/or property damage.
If the key is turned to OFF or ACC for any reason
while the vehicle is in R (Reverse), N (Neutral), or
any D (Drive) position, the key cannot be turned
to LOCK and be removed from the ignition
switch. Move the selector lever to P (Park)
position, then the key can be turned to LOCK.
P (Park):
Use this selector position when the vehicle is
parked or when starting the engine. Make sure
the vehicle is completely stopped.The brake
pedal must be depressed and the selector
lever button pushed in to move the selec-
tor lever from N (Neutral) or any drive
position to P (Park).Apply the parking brake.
When parking on a hill, apply the parking brake
first, then move the lever to the P (Park) position.
CAUTION
Use this position only when the vehicle
is completely stopped.
R (Reverse):
Use this position to back up. Always be sure the
vehicle is completely stopped before selecting R
(Reverse).The brake pedal must be de-
pressed and the selector lever button
pushed in to move the selector lever from
P (Park), N (Neutral) or any drive position
to R (Reverse).
N (Neutral):
Neither forward nor reverse gear is engaged.
The engine can be started in this position. You
may shift to N (Neutral) and restart a stalled
engine while the vehicle is moving.
D (Drive):
Use this position for all normal forward driving.Manual shift modeWhen the selector lever is shifted from D to the
manual shift gate with the vehicle stopped or
while driving, the transmission enters the manual
SSD0276
5-10
Starting and driving
Z
02.9.13/Z33-D/V5.0
X
Page 128 of 227

shift mode. Shift range can be selected manu-
ally.
In the manual shift mode, the shift range is
displayed on the position indicator in the meter.
Shift ranges up or down one by one as follows:M1®
¬
M2®
¬
M3®
¬
M4®
¬
M5
M5 (5th):
Use this position for all normal forward driving.M4 (4th):
For driving up or down long slopes where engine
braking would be advantageous.M3 (3rd) and
M2 (2nd):
Use for hill climbing or engine braking on down-
hill grades.
M1 (1st):
Use this position when climbing steep hills
slowly or driving slowly through deep snow,
sand or mud, or for maximum engine braking on
steep downhill grades.
IRemember not to drive at high speeds for
extended periods of time in lower than
M4
range. This reduces the fuel economy.
IWhen shifting up, move the selector lever to
the + (up) side. (Shifts to higher range.)IWhen shifting down, move the selector lever
to the þ (down) side. (Shifts to lower range.)
IMoving the selector lever to the same side
twice will shift the ranges in succession.
However, if this motion is rapidly done, the
second shifting may not be completed prop-
erly.
IIn the manual shift mode, the transmis-
sion automatically shifts down to 1st
gear before the vehicle comes to a stop.
When accelerating again, it is necessary
to shift up to the desired range.
IWhen canceling the manual shift mode, re-
turn the selector lever to the D position. The
transmission returns to the normal driving
mode.
IIn the manual shift mode, the transmis-
sion may not shift to the selected gear.
This helps maintain driving performance
and reduces the chance of vehicle dam-
age or loss of control.
Accelerator downshift
Ð In D position ÐFor passing or hill climbing, fully depress the
accelerator pedal to the floor. This shifts the
transmission down into the lower gear, depend-
ing on the vehicle speed.
Fail-safeWhen the fail-safe operation occurs, the next
time the key is turned to the ON position, the
warning light will blink for approximately 8
seconds after coming on for 2 seconds. While
the vehicle can be driven under these circum-
stances please note that the gears in the auto-
matic transmission will be locked in 4th gear.
If the vehicle is driven under extreme con-
ditions, such as excessive wheel spinning
and subsequent hard braking, the fail-safe
system may be activated. This will occur
even if all electrical circuits are functioning
properly. In this case, turn the ignition key
OFF and wait for 3 seconds. Then turn the
key back to the ON position. The vehicle
should return to its normal operating con-
dition. If it does not return to its normal
operating condition, have your NISSAN
dealer check the transmission and repair if
necessary.
Starting and driving
5-11
Z
02.9.13/Z33-D/V5.0
X
Page 129 of 227
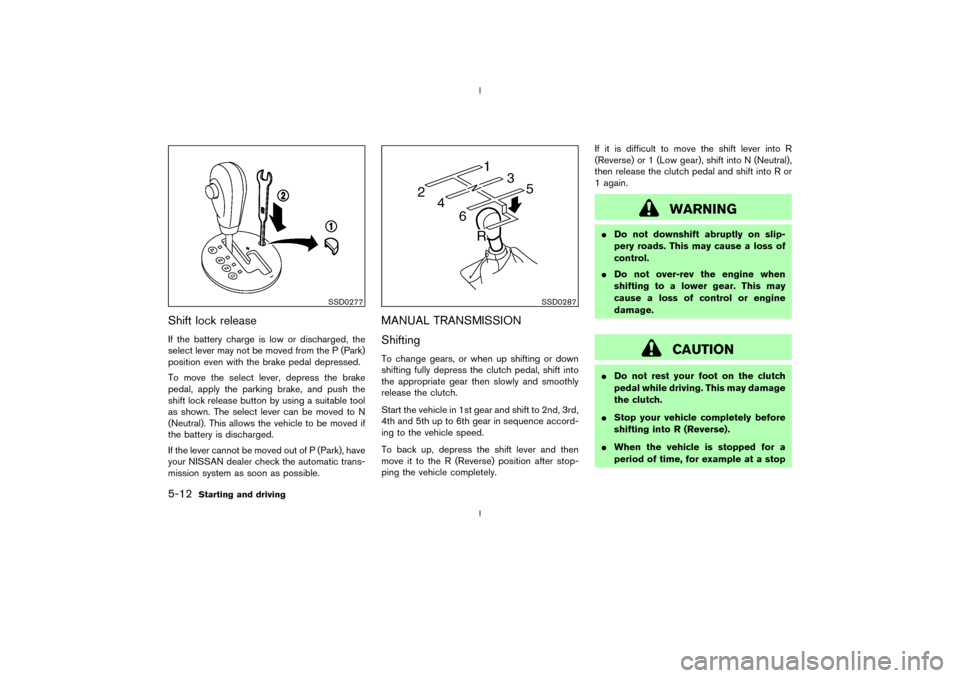
Shift lock releaseIf the battery charge is low or discharged, the
select lever may not be moved from the P (Park)
position even with the brake pedal depressed.
To move the select lever, depress the brake
pedal, apply the parking brake, and push the
shift lock release button by using a suitable tool
as shown. The select lever can be moved to N
(Neutral). This allows the vehicle to be moved if
the battery is discharged.
If the lever cannot be moved out of P (Park), have
your NISSAN dealer check the automatic trans-
mission system as soon as possible.
MANUAL TRANSMISSION
ShiftingTo change gears, or when up shifting or down
shifting fully depress the clutch pedal, shift into
the appropriate gear then slowly and smoothly
release the clutch.
Start the vehicle in 1st gear and shift to 2nd, 3rd,
4th and 5th up to 6th gear in sequence accord-
ing to the vehicle speed.
To back up, depress the shift lever and then
move it to the R (Reverse) position after stop-
ping the vehicle completely.If it is difficult to move the shift lever into R
(Reverse) or 1 (Low gear), shift into N (Neutral),
then release the clutch pedal and shift into R or
1 again.
WARNING
IDo not downshift abruptly on slip-
pery roads. This may cause a loss of
control.
IDo not over-rev the engine when
shifting to a lower gear. This may
cause a loss of control or engine
damage.
CAUTION
IDo not rest your foot on the clutch
pedal while driving. This may damage
the clutch.
IStop your vehicle completely before
shifting into R (Reverse).
IWhen the vehicle is stopped for a
period of time, for example at a stop
SSD0277
SSD0287
5-12
Starting and driving
Z
02.9.13/Z33-D/V5.0
X
Page 130 of 227

light, shift to N (Neutral) and release
the clutch pedal with the foot brake
applied.
Up-shift indicatorThe manual transmission up-shift indicator is
situated in the tachometer and shows the driver
the time to shift into a higher gear by illuminating.
The engine speed in revolutions per minute
(rpm) for upshifting can be set on the trip
computer display. (See ªTrip computerº in the
ª2. Instruments and controlsº section for the
display setting information.) The use of the up-
shift indicator will help you to upshift at a
constant engine speed (rpm) from any gear.
The up-shift indicator will start flashing when the
engine speed is within about 500 rpm of the set
figure while driving, and then illuminate after theengine speed reaches the set figure.
For example, you can use the up-shift indicator
when driving as follows:
IIf the maximum engine speed is desired, set
the figure at 6,600 rpm. (The indicator starts
flashing from about 6,100 rpm and comes on
steady at 6,600 rpm.)
IIf the maximum engine torque is desired, set
the figure at 4,800 rpm. (The indicator starts
flashing from about 4,300 rpm and comes on
steady at 4,800 rpm.)
IIf you want to break in your vehicle, use of the
up-shift indicator with a rather low figure will
help you to avoid the high engine speed.
To make the up-shift indicator not come on, set
the figure at above 7,200 rpm.
NOTE:
There may be a lag between the timing of
the up-shift indicator illumination and the
tachometer indication.
SSD0278
Starting and driving
5-13
Z
02.9.13/Z33-D/V5.0
X