clock NISSAN 370Z 2020 Owner´s Manual
[x] Cancel search | Manufacturer: NISSAN, Model Year: 2020, Model line: 370Z, Model: NISSAN 370Z 2020Pages: 455, PDF Size: 2.22 MB
Page 20 of 455
0-12Illustrated table of contents
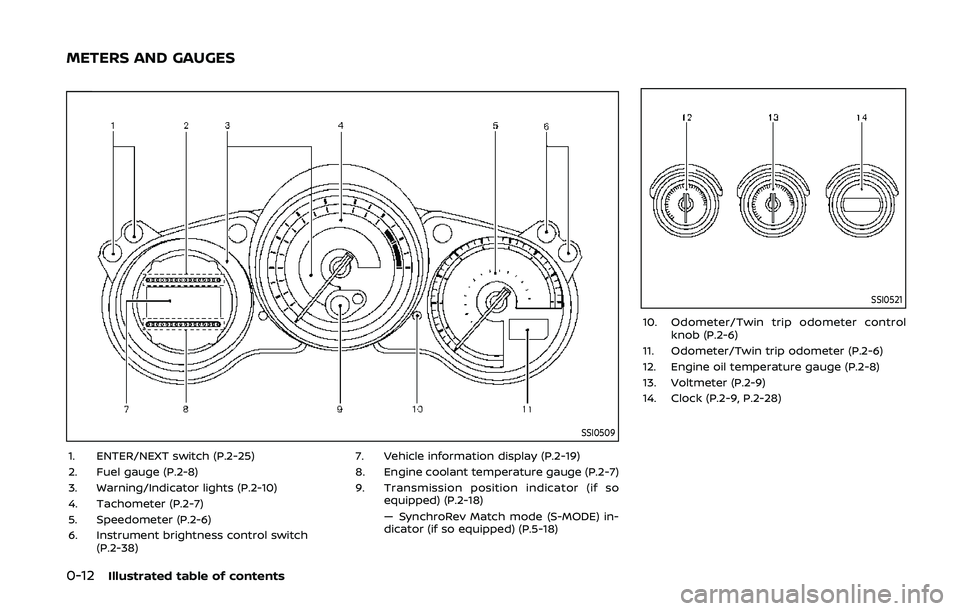
SSI0509
1. ENTER/NEXT switch (P.2-25)
2. Fuel gauge (P.2-8)
3. Warning/Indicator lights (P.2-10)
4. Tachometer (P.2-7)
5. Speedometer (P.2-6)
6. Instrument brightness control switch(P.2-38) 7. Vehicle information display (P.2-19)
8. Engine coolant temperature gauge (P.2-7)
9. Transmission position indicator (if so equipped) (P.2-18)
— SynchroRev Match mode (S-MODE) in-
dicator (if so equipped) (P.5-18)
SSI0521
10. Odometer/Twin trip odometer controlknob (P.2-6)
11. Odometer/Twin trip odometer (P.2-6)
12. Engine oil temperature gauge (P.2-8)
13. Voltmeter (P.2-9)
14. Clock (P.2-9, P.2-28)
METERS AND GAUGES
Page 73 of 455
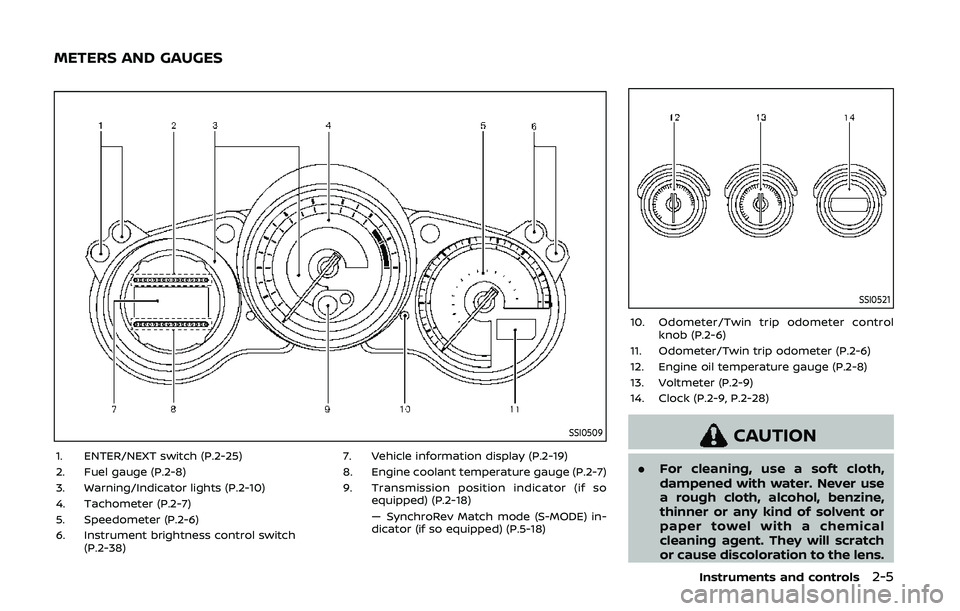
SSI0509
1. ENTER/NEXT switch (P.2-25)
2. Fuel gauge (P.2-8)
3. Warning/Indicator lights (P.2-10)
4. Tachometer (P.2-7)
5. Speedometer (P.2-6)
6. Instrument brightness control switch(P.2-38) 7. Vehicle information display (P.2-19)
8. Engine coolant temperature gauge (P.2-7)
9. Transmission position indicator (if so
equipped) (P.2-18)
— SynchroRev Match mode (S-MODE) in-
dicator (if so equipped) (P.5-18)
SSI0521
10. Odometer/Twin trip odometer controlknob (P.2-6)
11. Odometer/Twin trip odometer (P.2-6)
12. Engine oil temperature gauge (P.2-8)
13. Voltmeter (P.2-9)
14. Clock (P.2-9, P.2-28)
CAUTION
. For cleaning, use a soft cloth,
dampened with water. Never use
a rough cloth, alcohol, benzine,
thinner or any kind of solvent or
paper towel with a chemical
cleaning agent. They will scratch
or cause discoloration to the lens.
Instruments and controls2-5
METERS AND GAUGES
Page 76 of 455
2-8Instruments and controls
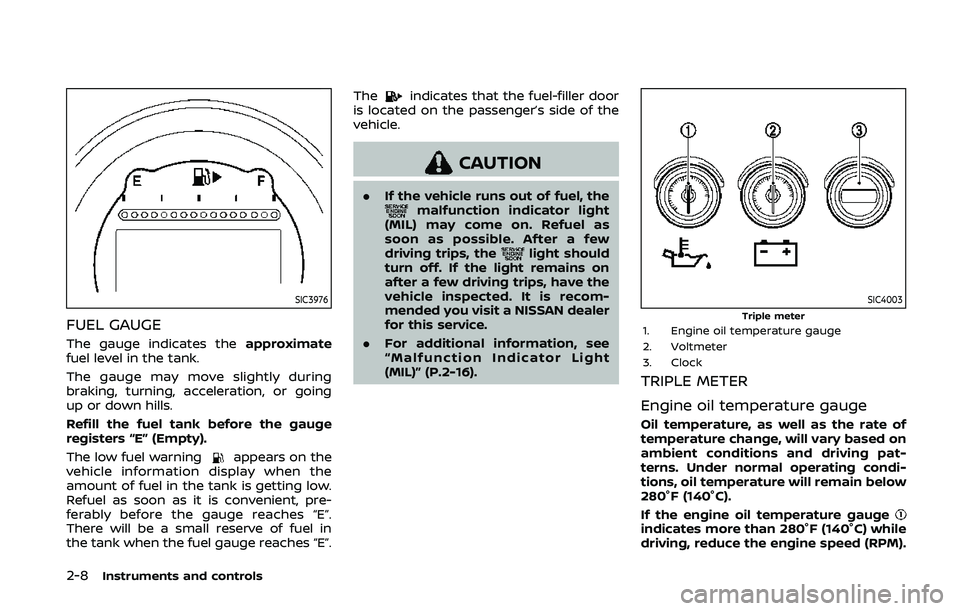
SIC3976
FUEL GAUGE
The gauge indicates theapproximate
fuel level in the tank.
The gauge may move slightly during
braking, turning, acceleration, or going
up or down hills.
Refill the fuel tank before the gauge
registers “E” (Empty).
The low fuel warning
appears on the
vehicle information display when the
amount of fuel in the tank is getting low.
Refuel as soon as it is convenient, pre-
ferably before the gauge reaches “E”.
There will be a small reserve of fuel in
the tank when the fuel gauge reaches “E”. The
indicates that the fuel-filler door
is located on the passenger’s side of the
vehicle.
CAUTION
. If the vehicle runs out of fuel, themalfunction indicator light
(MIL) may come on. Refuel as
soon as possible. After a few
driving trips, the
light should
turn off. If the light remains on
after a few driving trips, have the
vehicle inspected. It is recom-
mended you visit a NISSAN dealer
for this service.
. For additional information, see
“Malfunction Indicator Light
(MIL)” (P.2-16).
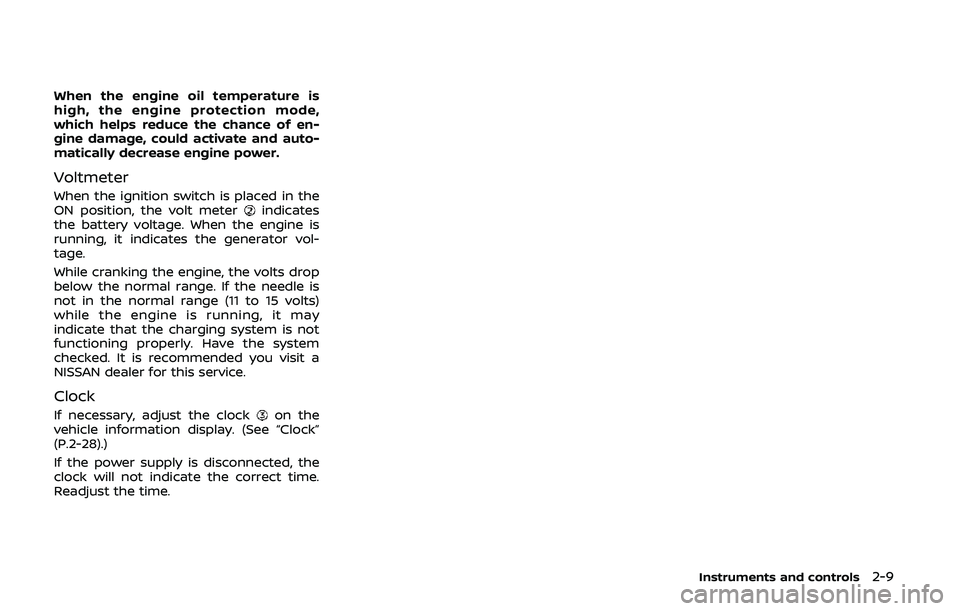
SIC4003Triple meter1. Engine oil temperature gauge
2. Voltmeter
3. Clock
TRIPLE METER
Engine oil temperature gauge
Oil temperature, as well as the rate of
temperature change, will vary based on
ambient conditions and driving pat-
terns. Under normal operating condi-
tions, oil temperature will remain below
280°F (140°C).
If the engine oil temperature gauge
indicates more than 280°F (140°C) while
driving, reduce the engine speed (RPM).
Page 77 of 455
When the engine oil temperature is
high, the engine protection mode,
which helps reduce the chance of en-
gine damage, could activate and auto-
matically decrease engine power.
Voltmeter
When the ignition switch is placed in the
ON position, the volt meterindicates
the battery voltage. When the engine is
running, it indicates the generator vol-
tage.
While cranking the engine, the volts drop
below the normal range. If the needle is
not in the normal range (11 to 15 volts)
while the engine is running, it may
indicate that the charging system is not
functioning properly. Have the system
checked. It is recommended you visit a
NISSAN dealer for this service.
Clock
If necessary, adjust the clockon the
vehicle information display. (See “Clock”
(P.2-28).)
If the power supply is disconnected, the
clock will not indicate the correct time.
Readjust the time.
Instruments and controls2-9
Page 93 of 455
WAC0051X
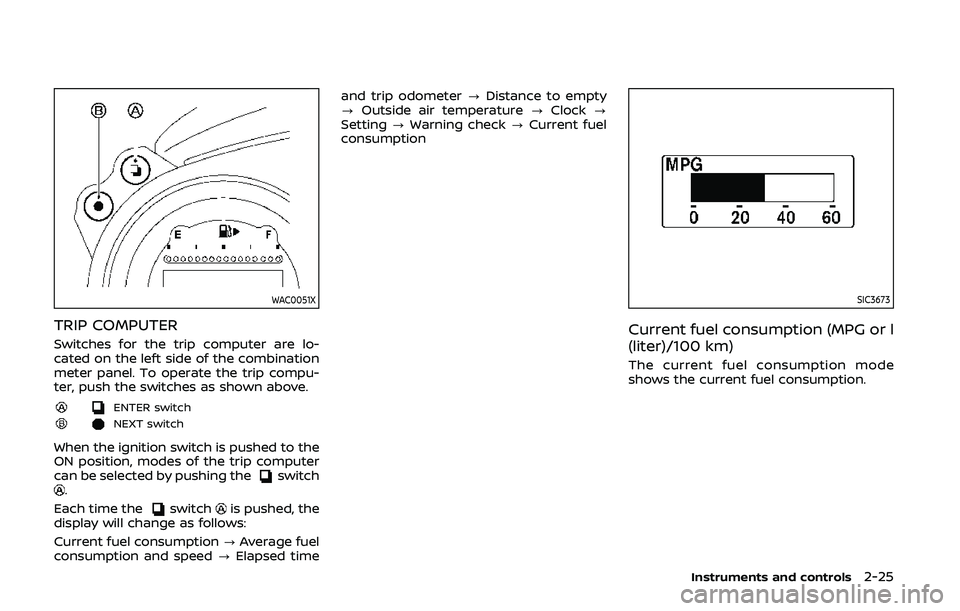
TRIP COMPUTER
Switches for the trip computer are lo-
cated on the left side of the combination
meter panel. To operate the trip compu-
ter, push the switches as shown above.
ENTER switch
NEXT switch
When the ignition switch is pushed to the
ON position, modes of the trip computer
can be selected by pushing the
switch.
Each time the
switchis pushed, the
display will change as follows:
Current fuel consumption ?Average fuel
consumption and speed ?Elapsed time and trip odometer
?Distance to empty
? Outside air temperature ?Clock ?
Setting ?Warning check ?Current fuel
consumption
SIC3673
Current fuel consumption (MPG or l
(liter)/100 km)
The current fuel consumption mode
shows the current fuel consumption.
Instruments and controls2-25
Page 96 of 455
2-28Instruments and controls
billboards.
JVI1447X
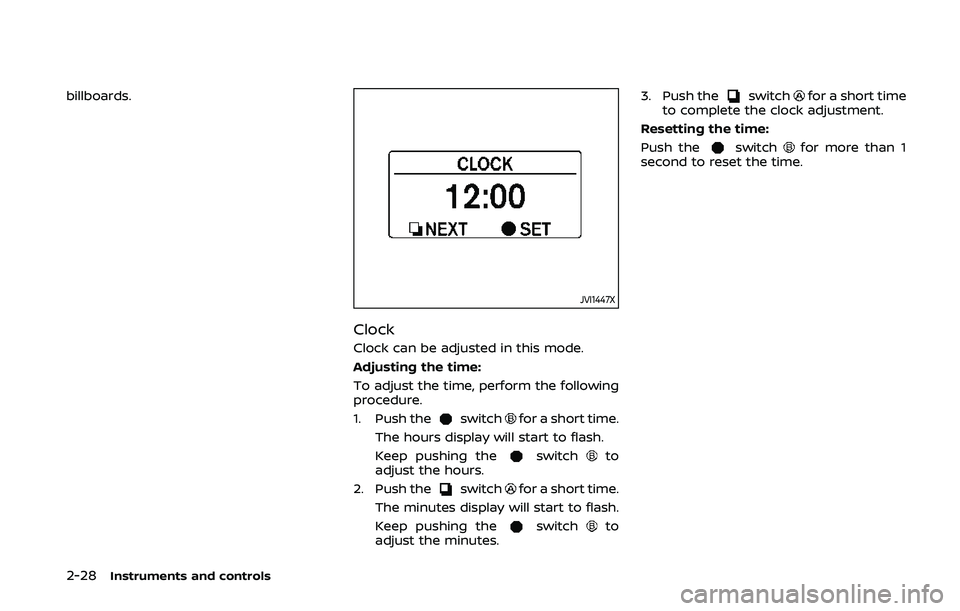
Clock
Clock can be adjusted in this mode.
Adjusting the time:
To adjust the time, perform the following
procedure.
1. Push the
switchfor a short time.
The hours display will start to flash.
Keep pushing the
switchto
adjust the hours.
2. Push the
switchfor a short time.
The minutes display will start to flash.
Keep pushing the
switchto
adjust the minutes. 3. Push the
switchfor a short time
to complete the clock adjustment.
Resetting the time:
Push the
switchfor more than 1
second to reset the time.
Page 147 of 455
SPA2682
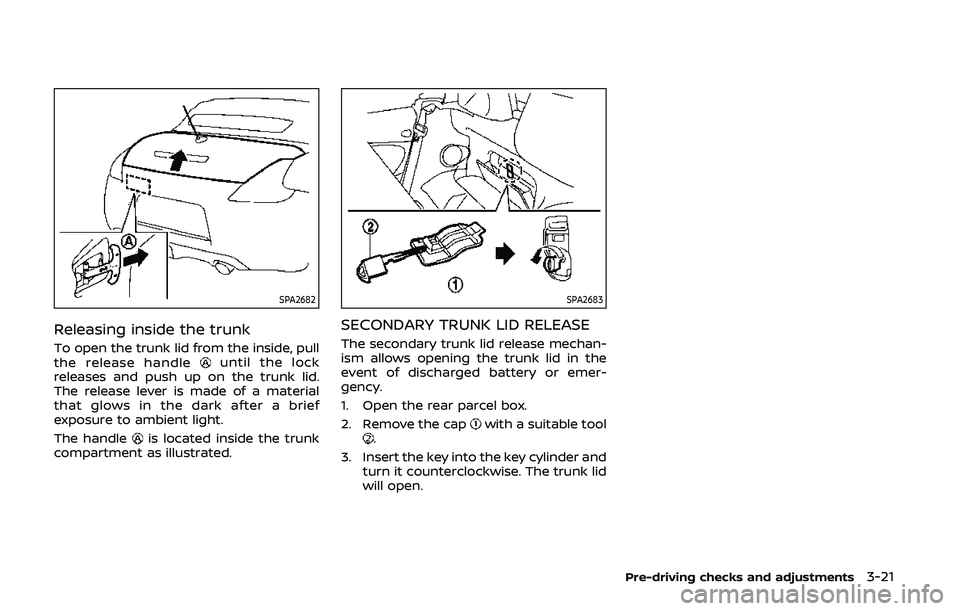
Releasing inside the trunk
To open the trunk lid from the inside, pull
the release handleuntil the lock
releases and push up on the trunk lid.
The release lever is made of a material
that glows in the dark after a brief
exposure to ambient light.
The handle
is located inside the trunk
compartment as illustrated.
SPA2683
SECONDARY TRUNK LID RELEASE
The secondary trunk lid release mechan-
ism allows opening the trunk lid in the
event of discharged battery or emer-
gency.
1. Open the rear parcel box.
2. Remove the cap
with a suitable tool.
3. Insert the key into the key cylinder and turn it counterclockwise. The trunk lid
will open.
Pre-driving checks and adjustments3-21
Page 158 of 455
3-32Pre-driving checks and adjustments
SPA2688
e. Close the front and rear parts of thesoft top at the same time as
illustrated.
SPA2689
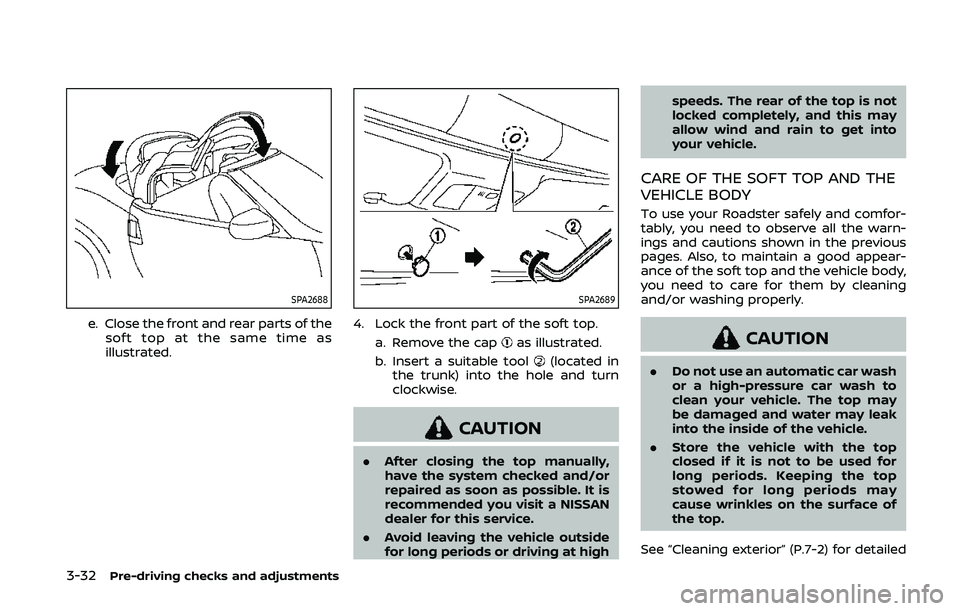
4. Lock the front part of the soft top.
a. Remove the cap
as illustrated.
b. Insert a suitable tool
(located in
the trunk) into the hole and turn
clockwise.
CAUTION
. After closing the top manually,
have the system checked and/or
repaired as soon as possible. It is
recommended you visit a NISSAN
dealer for this service.
. Avoid leaving the vehicle outside
for long periods or driving at high speeds. The rear of the top is not
locked completely, and this may
allow wind and rain to get into
your vehicle.
CARE OF THE SOFT TOP AND THE
VEHICLE BODY
To use your Roadster safely and comfor-
tably, you need to observe all the warn-
ings and cautions shown in the previous
pages. Also, to maintain a good appear-
ance of the soft top and the vehicle body,
you need to care for them by cleaning
and/or washing properly.
CAUTION
.
Do not use an automatic car wash
or a high-pressure car wash to
clean your vehicle. The top may
be damaged and water may leak
into the inside of the vehicle.
. Store the vehicle with the top
closed if it is not to be used for
long periods. Keeping the top
stowed for long periods may
cause wrinkles on the surface of
the top.
See “Cleaning exterior” (P.7-2) for detailed
Page 162 of 455
3-36Pre-driving checks and adjustments
SPA2837
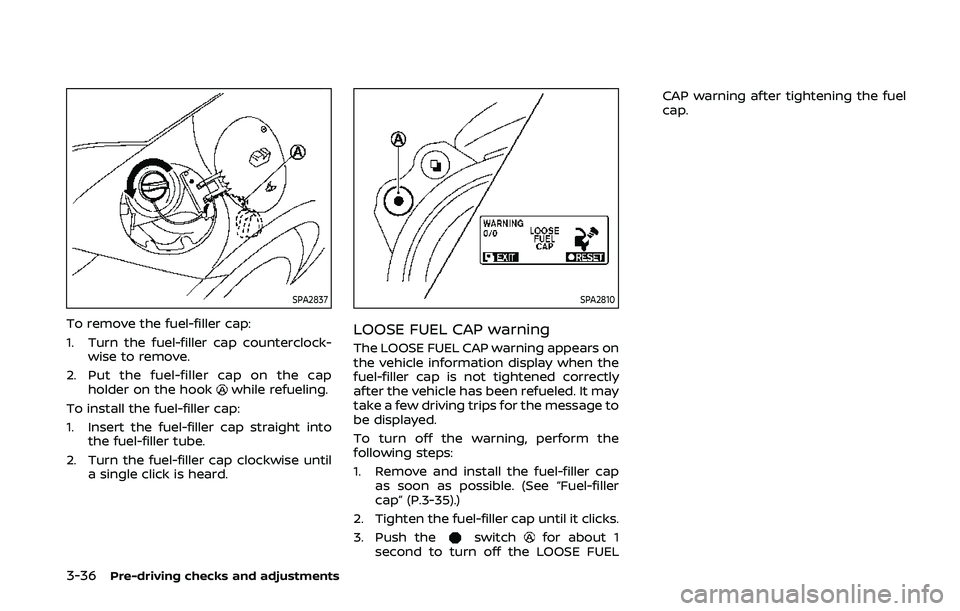
To remove the fuel-filler cap:
1. Turn the fuel-filler cap counterclock-wise to remove.
2. Put the fuel-filler cap on the cap holder on the hook
while refueling.
To install the fuel-filler cap:
1. Insert the fuel-filler cap straight into the fuel-filler tube.
2. Turn the fuel-filler cap clockwise until a single click is heard.
SPA2810
LOOSE FUEL CAP warning
The LOOSE FUEL CAP warning appears on
the vehicle information display when the
fuel-filler cap is not tightened correctly
after the vehicle has been refueled. It may
take a few driving trips for the message to
be displayed.
To turn off the warning, perform the
following steps:
1. Remove and install the fuel-filler capas soon as possible. (See “Fuel-filler
cap” (P.3-35).)
2. Tighten the fuel-filler cap until it clicks.
3. Push the
switchfor about 1
second to turn off the LOOSE FUEL CAP warning after tightening the fuel
cap.
Page 182 of 455
4-14Center display, heater, air conditioner, audio, phone and voice recognition systems
SAA2487
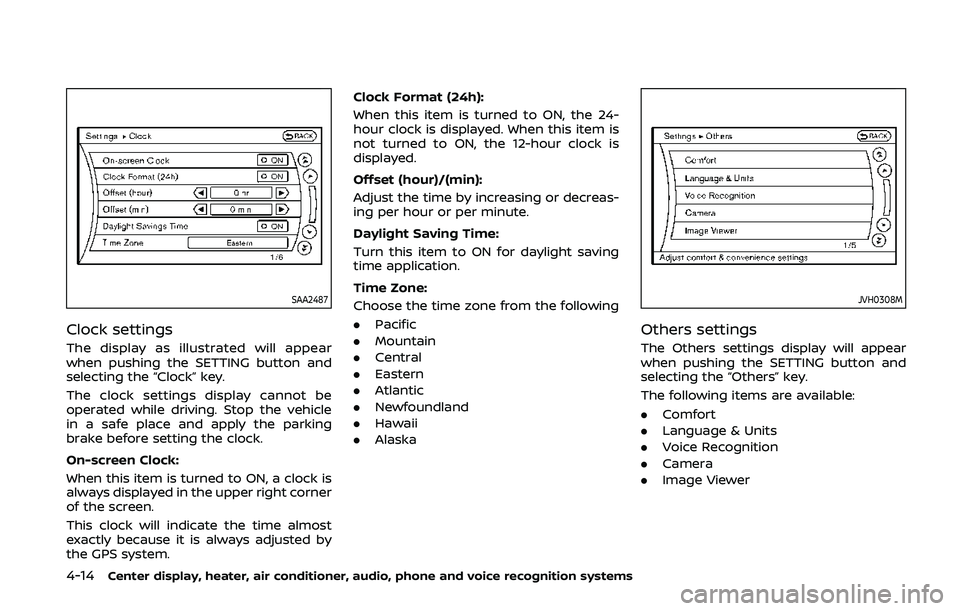
Clock settings
The display as illustrated will appear
when pushing the SETTING button and
selecting the “Clock” key.
The clock settings display cannot be
operated while driving. Stop the vehicle
in a safe place and apply the parking
brake before setting the clock.
On-screen Clock:
When this item is turned to ON, a clock is
always displayed in the upper right corner
of the screen.
This clock will indicate the time almost
exactly because it is always adjusted by
the GPS system.Clock Format (24h):
When this item is turned to ON, the 24-
hour clock is displayed. When this item is
not turned to ON, the 12-hour clock is
displayed.
Offset (hour)/(min):
Adjust the time by increasing or decreas-
ing per hour or per minute.
Daylight Saving Time:
Turn this item to ON for daylight saving
time application.
Time Zone:
Choose the time zone from the following
. Pacific
. Mountain
. Central
. Eastern
. Atlantic
. Newfoundland
. Hawaii
. Alaska
JVH0308M
Others settings
The Others settings display will appear
when pushing the SETTING button and
selecting the “Others” key.
The following items are available:
.Comfort
. Language & Units
. Voice Recognition
. Camera
. Image Viewer