ABS NISSAN ALTIMA 1996 U13 / 1.G Owners Manual
[x] Cancel search | Manufacturer: NISSAN, Model Year: 1996, Model line: ALTIMA, Model: NISSAN ALTIMA 1996 U13 / 1.GPages: 183, PDF Size: 1.38 MB
Page 65 of 183
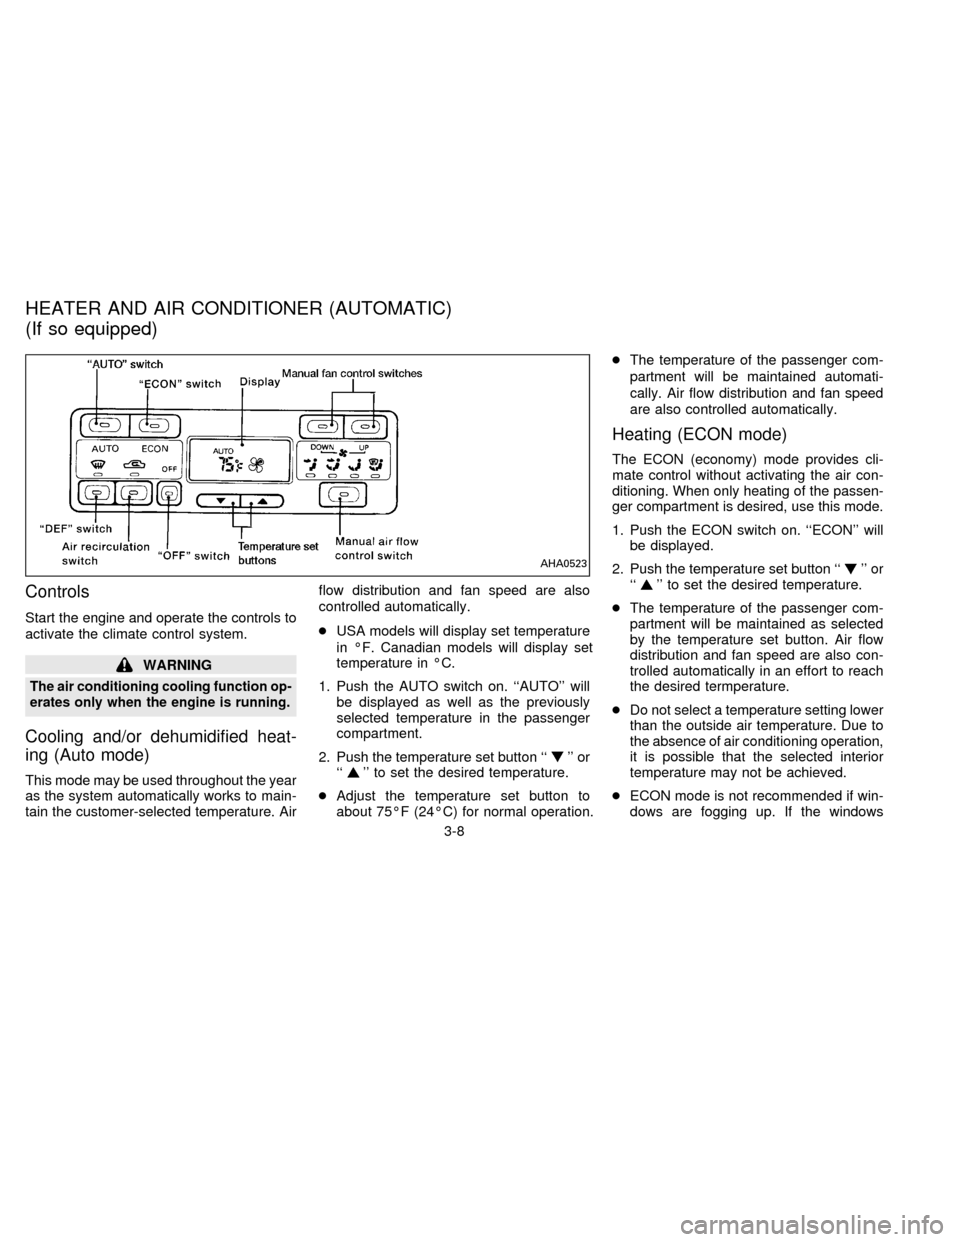
Controls
Start the engine and operate the controls to
activate the climate control system.
WARNING
The air conditioning cooling function op-
erates only when the engine is running.
Cooling and/or dehumidified heat-
ing (Auto mode)
This mode may be used throughout the year
as the system automatically works to main-
tain the customer-selected temperature. Airflow distribution and fan speed are also
controlled automatically.
cUSA models will display set temperature
in ÉF. Canadian models will display set
temperature in ÉC.
1. Push the AUTO switch on. ``AUTO'' will
be displayed as well as the previously
selected temperature in the passenger
compartment.
2. Push the temperature set button ``
'' or
``'' to set the desired temperature.
cAdjust the temperature set button to
about 75ÉF (24ÉC) for normal operation.cThe temperature of the passenger com-
partment will be maintained automati-
cally. Air flow distribution and fan speed
are also controlled automatically.
Heating (ECON mode)
The ECON (economy) mode provides cli-
mate control without activating the air con-
ditioning. When only heating of the passen-
ger compartment is desired, use this mode.
1. Push the ECON switch on. ``ECON'' will
be displayed.
2. Push the temperature set button ``
'' or
``'' to set the desired temperature.
cThe temperature of the passenger com-
partment will be maintained as selected
by the temperature set button. Air flow
distribution and fan speed are also con-
trolled automatically in an effort to reach
the desired termperature.
cDo not select a temperature setting lower
than the outside air temperature. Due to
the absence of air conditioning operation,
it is possible that the selected interior
temperature may not be achieved.
cECON mode is not recommended if win-
dows are fogging up. If the windows
AHA0523
HEATER AND AIR CONDITIONER (AUTOMATIC)
(If so equipped)
3-8
ZX
Page 80 of 183

4 Starting and driving
Precautions when starting and driving ................. 4-2
Ignition switch ....................................................... 4-4
Before starting the engine .................................... 4-5
Driving with automatic transmission..................... 4-6
Driving with manual transmission ........................ 4-8
Starting the engine ............................................... 4-9
Parking brake operation ..................................... 4-10
Cruise control ..................................................... 4-11
Break-in schedule............................................... 4-12
Increasing fuel economy .................................... 4-13
Parking/parking on hills ...................................... 4-14
Precautions when driving ................................... 4-15
Anti-lock brake system (ABS) (If so equipped).. 4-15
Cold weather driving cautions ............................ 4-17
ZX
Page 81 of 183
WARNING
Do not leave children, unreliable
adults, or pets alone in your vehicle.
They could accidentally injure them-
selves or others through inadvertent
operation of the vehicle. Also, on hot,
sunny days, temperatures in a closed
vehicle could quickly become high
enough to cause severe or possibly
fatal injuries to people or animals.
EXHAUST GAS
(Carbon Monoxide)
WARNING
Do not breathe exhaust gases; they
contain colorless and odorless carbon
monoxide. Carbon monoxide is dan-
gerous. It can cause unconsciousness
or death.
cIf you suspect that exhaust fumes
are entering the vehicle, drive with
all windows fully open, and have the
vehicle inspected immediately.
cDo not run the engine in closed
spaces such as a garage for any
longer than is absolutely necessary.cDo not park the vehicle with the
engine running for any extended
length of time.
cKeep the trunk lid closed while driv-
ing, otherwise exhaust gases could
be drawn into the passenger com-
partment. If you must drive in this
manner for some reason, take the
following steps:
1. Open all the windows.
2. Set the air recirculation switch to
``OFF'' and the fan control at 4
(high) to circulate the air.
cIf electrical wiring or other cable
connections must pass to a trailer
through the seal on the trunk lid or
the body, follow the manufacturer's
recommendation to prevent carbon
monoxide entry into the vehicle.
cThe exhaust system and body
should be inspected by a qualified
mechanic whenever:
a. The vehicle is raised for service.
b. You suspect that exhaust fumes
are entering into the passenger
compartment.c. You notice a change in the sound
of the exhaust system.
d. You have had an accident involv-
ing damage to the exhaust sys-
tem, underbody, or rear of the
vehicle.
THREE WAY CATALYST
The three way catalyst is an emission con-
trol device installed in the exhaust system.
Exhaust gases in the three way catalyst are
burned at high temperatures to help reduce
pollutants.
WARNING
cThe exhaust gas and the exhaust
system are very hot. While the en-
gine is running, keep people or flam-
mable materials away from the ex-
haust pipe.
cDo not stop or park the vehicle over
flammable materials such as dry
grass, waste paper or rags, as they
may burn easily.
PRECAUTIONS WHEN
STARTING AND DRIVING
4-2
ZX
Page 94 of 183

cDriving with vacuum assisted brake:
The brake booster aids braking by using
engine vacuum. If the engine stops, you
can stop the vehicle by depressing the
brake pedal. However, greater foot pres-
sure on the brake pedal will be required
to stop the vehicle and the stopping
distance will be longer.
cDriving with power assisted steering:
The power assisted steering is designed
to use a hydraulic pump, driven by the
engine, to assist steering.
If the engine stops or drive belt breaks,
you will still have control of the vehicle.
However, much greater steering effort is
needed, especially in sharp turns or at
low speeds.
cWet brakes:
When the vehicle is washed or driven
through water, the brakes may get wet.
As a result, your braking distance will be
longer and the vehicle may pull to one
side during braking.
To dry brakes, drive the vehicle at a safe
speed while lightly pressing the brake
pedal to heat-up the brakes. Do this untilthe brakes return to normal. Avoid driving
the vehicle at high speeds until the
brakes function correctly.
cAvoid resting your foot on the brake
pedal while driving. This will overheat the
brakes, wear out the brake linings and
pads faster and reduce gas mileage.
cTo help save the brakes and to prevent
the brakes from overheating, reduce
speed and downshift to a lower gear
before going down a slope or long grade.
Overheated brakes may reduce braking
performance and could result in loss of
vehicle control.
cWhile driving on a slippery surface, be
careful when braking, accelerating or
downshifting. Abrupt braking actions or
acceleration could cause the wheels to
skid.The anti-lock brake system installed in
some models controls the brakes at each
wheel so the wheels will not lock when
braking abruptly or when braking on slip-
pery surfaces. The system detects the rota-
tion speed at each wheel and varies the
brake fluid pressure to prevent each wheel
from locking and sliding. By preventing
wheel lockup, the system helps the driver
maintain steering control and helps to mini-
mize swerving and spinning on slippery
surfaces.
Using the System
Depress the brake pedal and hold it down.
It is not necessary to pump the brake
pedal.
Doing so may result in increased stopping
distances.
Normal operation
The anti-lock brake system will not operate
at speeds below 3 to 6 MPH (5 to 10 km/h)
to completely stop the vehicle. (The speeds
will vary according to road conditions.)
When the anti-lock system senses that one
or more wheels are close to locking up, the
actuator (under the hood) rapidly applies
PRECAUTIONS WHEN
DRIVINGANTI-LOCK BRAKE SYSTEM
(ABS) (If so equipped)
4-15
ZX
Page 95 of 183
and releases hydraulic pressure (like pump-
ing the brakes very quickly). While the ac-
tuator is working, you may feel a pulsation in
the brake pedal and hear a noise or vibra-
tion from the actuator under the hood. This
is normal and indicates that the anti-lock
system is working properly. However, the
pulsation may indicate that road conditions
are hazardous and extra care is required
while driving.
Self-test feature
The anti-lock brake system is sophisticated,
with electronic sensors, electric pumps, and
hydraulic solenoids controlled by a com-
puter. The computer has a built-in diagnos-
tic feature that tests the system each time
you start the engine and move the vehicle at
a low speed in forward or reverse. When the
self-test occurs, you may hear a ``clunk''
noise and/or feel a pulsation in the brake
pedal. This is normal and is not an indica-
tion of any malfunction. If the computer
senses any malfunction, it switches the anti-
lock brake system OFF and turns on the
ABS brake warning light in the dashboard.
The brake system will then behave nor-
mally, but without anti-lock assistance.
If the light comes on during the self-test orwhile you are driving, you should take your
car to your NISSAN dealer for repair at your
earliest convenience.
WARNING
The anti-lock brake system is a sophis-
ticated device, but it cannot prevent
accidents resulting from careless or
dangerous driving techniques. It can
help maintain vehicle control during
braking on slippery surfaces, but re-
member that the stopping distance on
slippery surfaces will be longer than on
normal surfaces, even with the anti-
lock system. Stopping distances may
also be longer on rough, gravel or
snow covered roads, or if you are using
tire chains. Always maintain a safe dis-
tance from the vehicle in front of you.
Ultimately, the responsibility for safety
of self and others rests in the hands of
the driver.
Tire type and condition of tires may
also affect braking effectiveness.
cWhen replacing tires, install the
specified size of tire on all 4 wheels.cWhen installing a spare tire, make
sure it is the proper size and type as
specified on the tire placard. For tire
placard location information, refer to
ªTire placardº in the Owner's Manual
index.
Refer to ``Wheels and Tires'' in the
``Do-it-yourself operations'' section of
this manual.
4-16
ZX
Page 172 of 183
hitch, trailer tongue load and any other
optional equipment. In addition, front or rear
gross axle weight must not exceed the
gross axle weight rating (GAWR) shown on
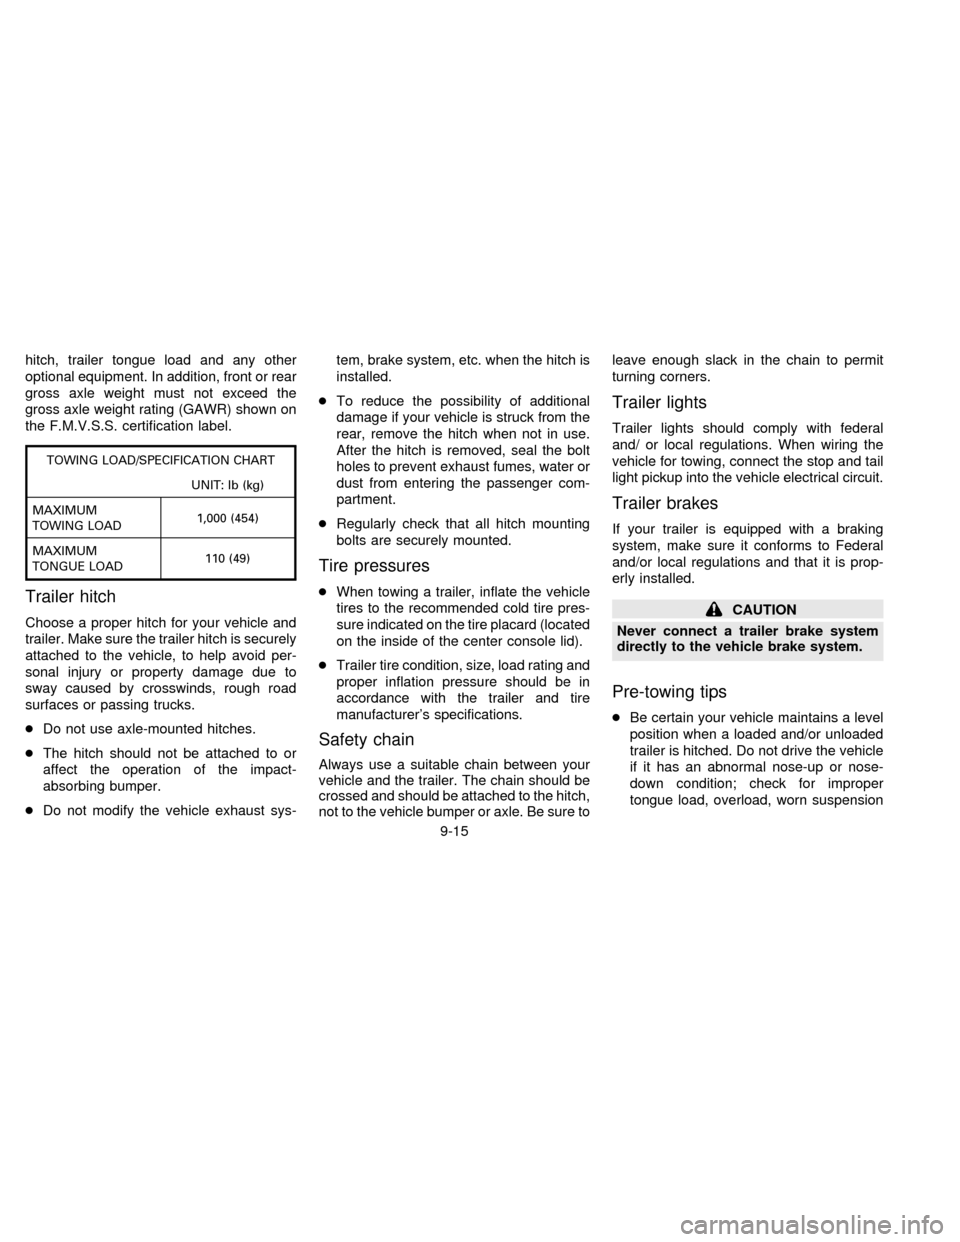
the F.M.V.S.S. certification label.
TOWING LOAD/SPECIFICATION CHART
UNIT: lb (kg)
MAXIMUM
TOWING LOAD1,000 (454)
MAXIMUM
TONGUE LOAD110 (49)
Trailer hitch
Choose a proper hitch for your vehicle and
trailer. Make sure the trailer hitch is securely
attached to the vehicle, to help avoid per-
sonal injury or property damage due to
sway caused by crosswinds, rough road
surfaces or passing trucks.
cDo not use axle-mounted hitches.
cThe hitch should not be attached to or
affect the operation of the impact-
absorbing bumper.
cDo not modify the vehicle exhaust sys-tem, brake system, etc. when the hitch is
installed.
cTo reduce the possibility of additional
damage if your vehicle is struck from the
rear, remove the hitch when not in use.
After the hitch is removed, seal the bolt
holes to prevent exhaust fumes, water or
dust from entering the passenger com-
partment.
cRegularly check that all hitch mounting
bolts are securely mounted.
Tire pressures
cWhen towing a trailer, inflate the vehicle
tires to the recommended cold tire pres-
sure indicated on the tire placard (located
on the inside of the center console lid).
cTrailer tire condition, size, load rating and
proper inflation pressure should be in
accordance with the trailer and tire
manufacturer's specifications.
Safety chain
Always use a suitable chain between your
vehicle and the trailer. The chain should be
crossed and should be attached to the hitch,
not to the vehicle bumper or axle. Be sure toleave enough slack in the chain to permit
turning corners.
Trailer lights
Trailer lights should comply with federal
and/ or local regulations. When wiring the
vehicle for towing, connect the stop and tail
light pickup into the vehicle electrical circuit.
Trailer brakes
If your trailer is equipped with a braking
system, make sure it conforms to Federal
and/or local regulations and that it is prop-
erly installed.
CAUTION
Never connect a trailer brake system
directly to the vehicle brake system.
Pre-towing tips
cBe certain your vehicle maintains a level
position when a loaded and/or unloaded
trailer is hitched. Do not drive the vehicle
if it has an abnormal nose-up or nose-
down condition; check for improper
tongue load, overload, worn suspension
9-15
ZX
Page 178 of 183
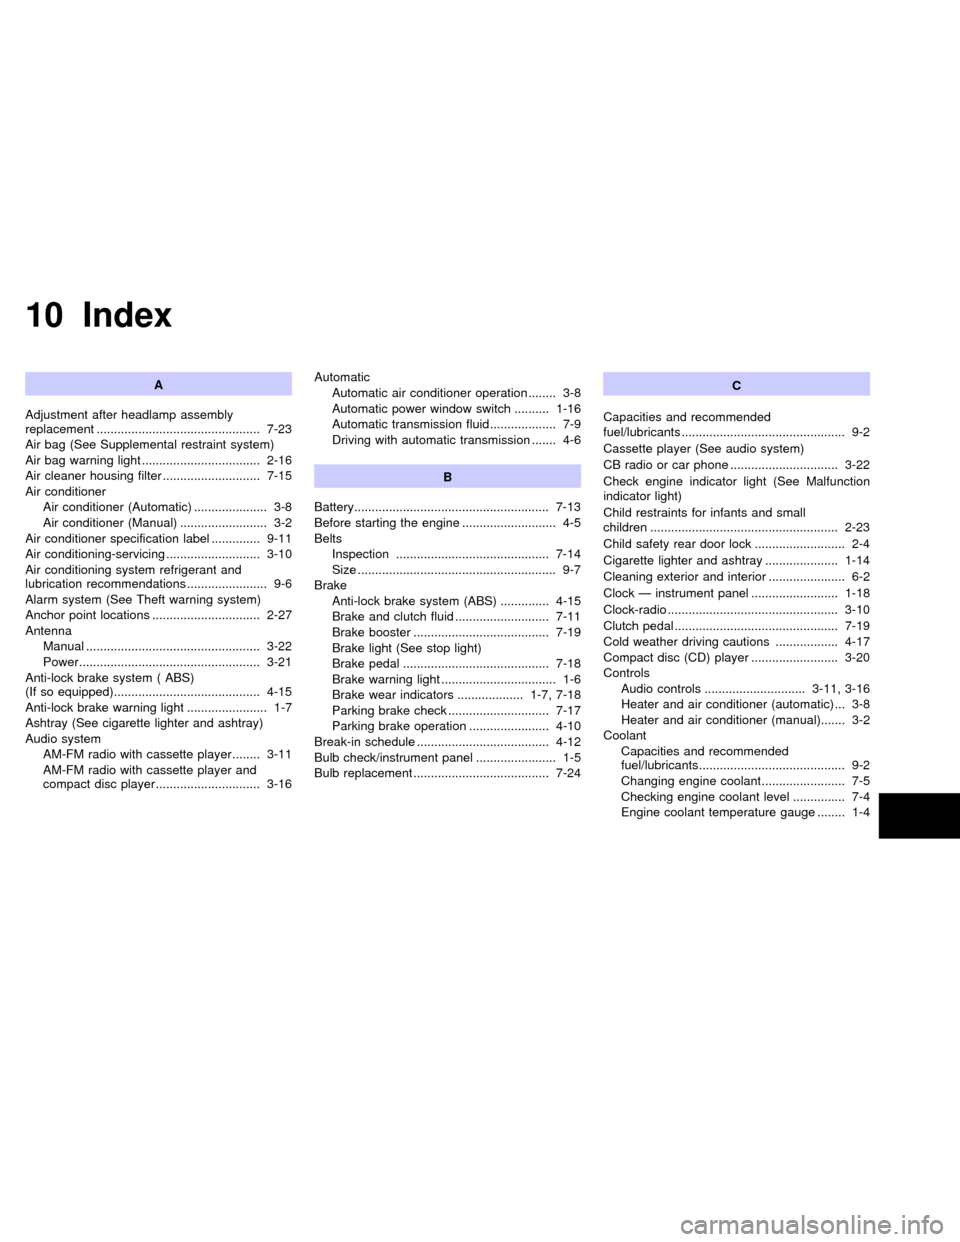
10 Index
A
Adjustment after headlamp assembly
replacement ............................................... 7-23
Air bag (See Supplemental restraint system)
Air bag warning light .................................. 2-16
Air cleaner housing filter ............................ 7-15
Air conditioner
Air conditioner (Automatic) ..................... 3-8
Air conditioner (Manual) ......................... 3-2
Air conditioner specification label .............. 9-11
Air conditioning-servicing ........................... 3-10
Air conditioning system refrigerant and
lubrication recommendations ....................... 9-6
Alarm system (See Theft warning system)
Anchor point locations ............................... 2-27
Antenna
Manual .................................................. 3-22
Power.................................................... 3-21
Anti-lock brake system ( ABS)
(If so equipped).......................................... 4-15
Anti-lock brake warning light ....................... 1-7
Ashtray (See cigarette lighter and ashtray)
Audio system
AM-FM radio with cassette player ........ 3-11
AM-FM radio with cassette player and
compact disc player.............................. 3-16Automatic
Automatic air conditioner operation ........ 3-8
Automatic power window switch .......... 1-16
Automatic transmission fluid ................... 7-9
Driving with automatic transmission ....... 4-6
B
Battery........................................................ 7-13
Before starting the engine ........................... 4-5
Belts
Inspection ............................................ 7-14
Size ......................................................... 9-7
Brake
Anti-lock brake system (ABS) .............. 4-15
Brake and clutch fluid ........................... 7-11
Brake booster ....................................... 7-19
Brake light (See stop light)
Brake pedal .......................................... 7-18
Brake warning light ................................. 1-6
Brake wear indicators ................... 1-7, 7-18
Parking brake check ............................. 7-17
Parking brake operation ....................... 4-10
Break-in schedule ...................................... 4-12
Bulb check/instrument panel ....................... 1-5
Bulb replacement ....................................... 7-24C
Capacities and recommended
fuel/lubricants ............................................... 9-2
Cassette player (See audio system)
CB radio or car phone ............................... 3-22
Check engine indicator light (See Malfunction
indicator light)
Child restraints for infants and small
children ...................................................... 2-23
Child safety rear door lock .......................... 2-4
Cigarette lighter and ashtray ..................... 1-14
Cleaning exterior and interior ...................... 6-2
Clock Ð instrument panel ......................... 1-18
Clock-radio ................................................. 3-10
Clutch pedal ............................................... 7-19
Cold weather driving cautions .................. 4-17
Compact disc (CD) player ......................... 3-20
Controls
Audio controls ............................. 3-11, 3-16
Heater and air conditioner (automatic) ... 3-8
Heater and air conditioner (manual)....... 3-2
Coolant
Capacities and recommended
fuel/lubricants.......................................... 9-2
Changing engine coolant........................ 7-5
Checking engine coolant level ............... 7-4
Engine coolant temperature gauge ........ 1-4
ZX