Heat NISSAN ALTIMA 1996 U13 / 1.G Owners Manual
[x] Cancel search | Manufacturer: NISSAN, Model Year: 1996, Model line: ALTIMA, Model: NISSAN ALTIMA 1996 U13 / 1.GPages: 183, PDF Size: 1.38 MB
Page 4 of 183
ContentsInstruments and controls
Pre-driving checks and adjustments
Heater, air conditioner and audio system
Starting and driving
In case of emergency
Appearance and interior care
Do-it-yourself operations
Maintenance schedule
Technical and consumer information
Index
1
2
3
4
5
6
7
8
9
10
Page 9 of 183
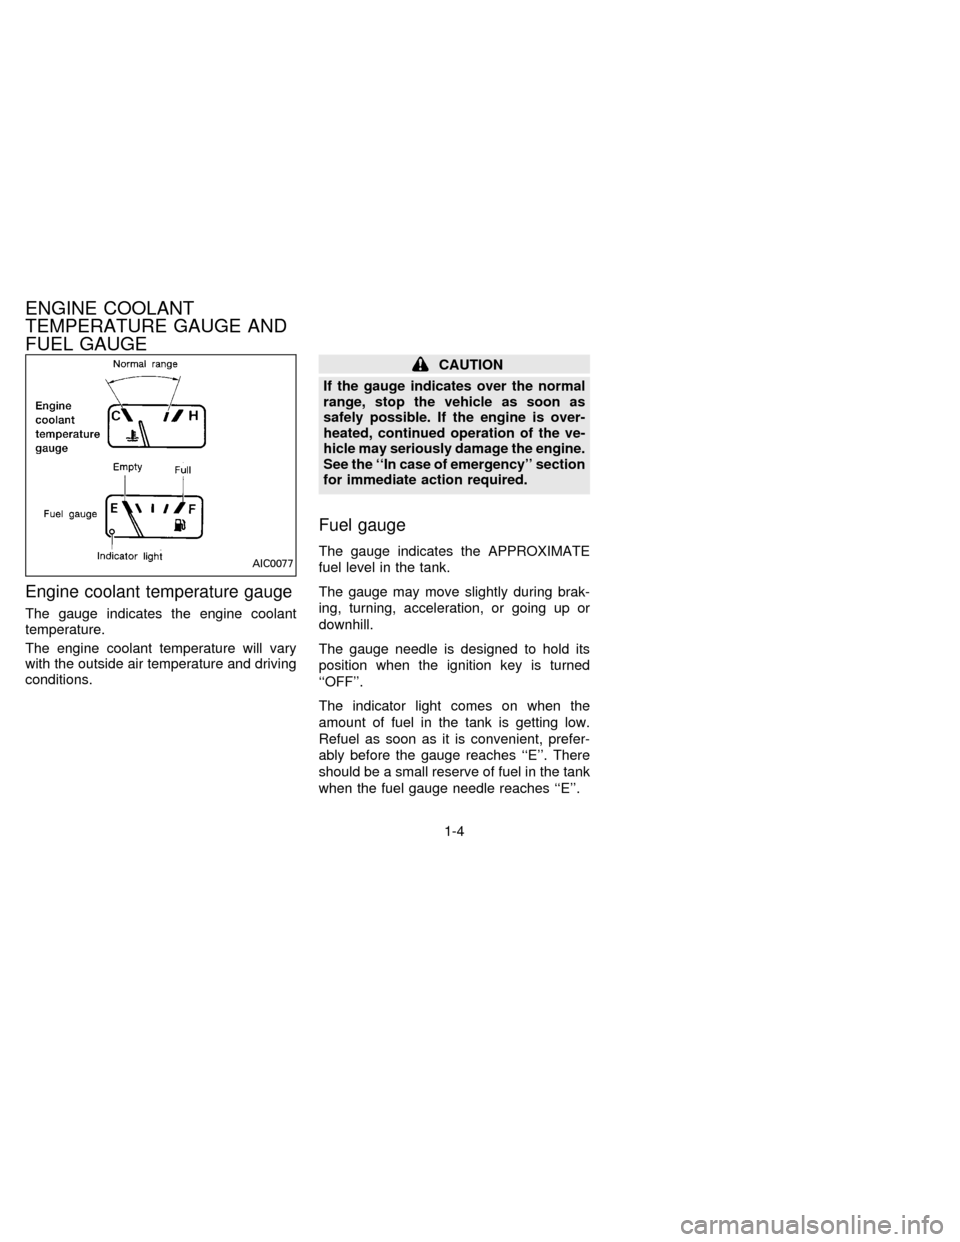
Engine coolant temperature gauge
The gauge indicates the engine coolant
temperature.
The engine coolant temperature will vary
with the outside air temperature and driving
conditions.
CAUTION
If the gauge indicates over the normal
range, stop the vehicle as soon as
safely possible. If the engine is over-
heated, continued operation of the ve-
hicle may seriously damage the engine.
See the ``In case of emergency'' section
for immediate action required.
Fuel gauge
The gauge indicates the APPROXIMATE
fuel level in the tank.
The gauge may move slightly during brak-
ing, turning, acceleration, or going up or
downhill.
The gauge needle is designed to hold its
position when the ignition key is turned
``OFF''.
The indicator light comes on when the
amount of fuel in the tank is getting low.
Refuel as soon as it is convenient, prefer-
ably before the gauge reaches ``E''. There
should be a small reserve of fuel in the tank
when the fuel gauge needle reaches ``E''.AIC0077
ENGINE COOLANT
TEMPERATURE GAUGE AND
FUEL GAUGE
1-4
ZX
Page 19 of 183
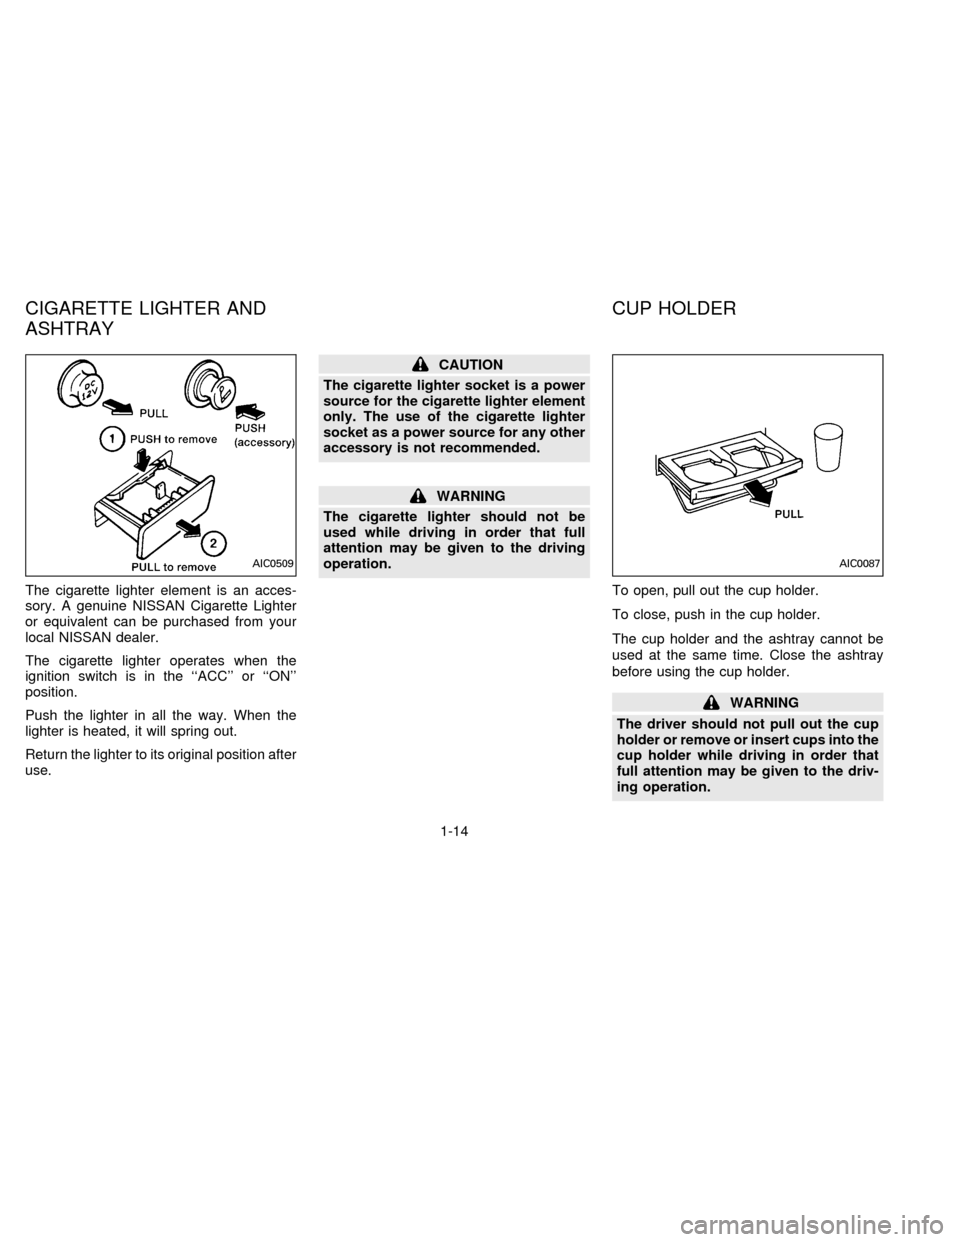
The cigarette lighter element is an acces-
sory. A genuine NISSAN Cigarette Lighter
or equivalent can be purchased from your
local NISSAN dealer.
The cigarette lighter operates when the
ignition switch is in the ``ACC'' or ``ON''
position.
Push the lighter in all the way. When the
lighter is heated, it will spring out.
Return the lighter to its original position after
use.
CAUTION
The cigarette lighter socket is a power
source for the cigarette lighter element
only. The use of the cigarette lighter
socket as a power source for any other
accessory is not recommended.
WARNING
The cigarette lighter should not be
used while driving in order that full
attention may be given to the driving
operation.
To open, pull out the cup holder.
To close, push in the cup holder.
The cup holder and the ashtray cannot be
used at the same time. Close the ashtray
before using the cup holder.
WARNING
The driver should not pull out the cup
holder or remove or insert cups into the
cup holder while driving in order that
full attention may be given to the driv-
ing operation.
AIC0509AIC0087
CIGARETTE LIGHTER AND
ASHTRAYCUP HOLDER
1-14
ZX
Page 58 of 183

3 Heater, air conditioner and audio system
Ventilators............................................................. 3-2
Heater and air conditioner (manual) .................... 3-2
Air flow charts....................................................... 3-6
Heater and air conditioner (automatic)
(If so equipped) .................................................... 3-8
Radio .................................................................. 3-10
Clock-radio ......................................................... 3-10
AM-FM radio with cassette player ..................... 3-11
AM-FM radio with cassette player and
compact disc player ........................................... 3-16
Antenna .............................................................. 3-21
CB radio or car phone........................................ 3-22
ZX
Page 59 of 183

Open or close (side vents only), and adjust
the air flow direction of ventilators.
CONTROLS
Fan control dial
This dial turns the fan on and off, and
controls fan speed. 1 is low, 4 is high.
Air flow control buttons
These buttons allow you to select the air
flow outlets.
Ð Air flows from center and side
ventilators.
HA1073
AHA0030
VENTILATORS HEATER AND AIR CONDITIONER (MANUAL)
3-2
ZX
Page 60 of 183
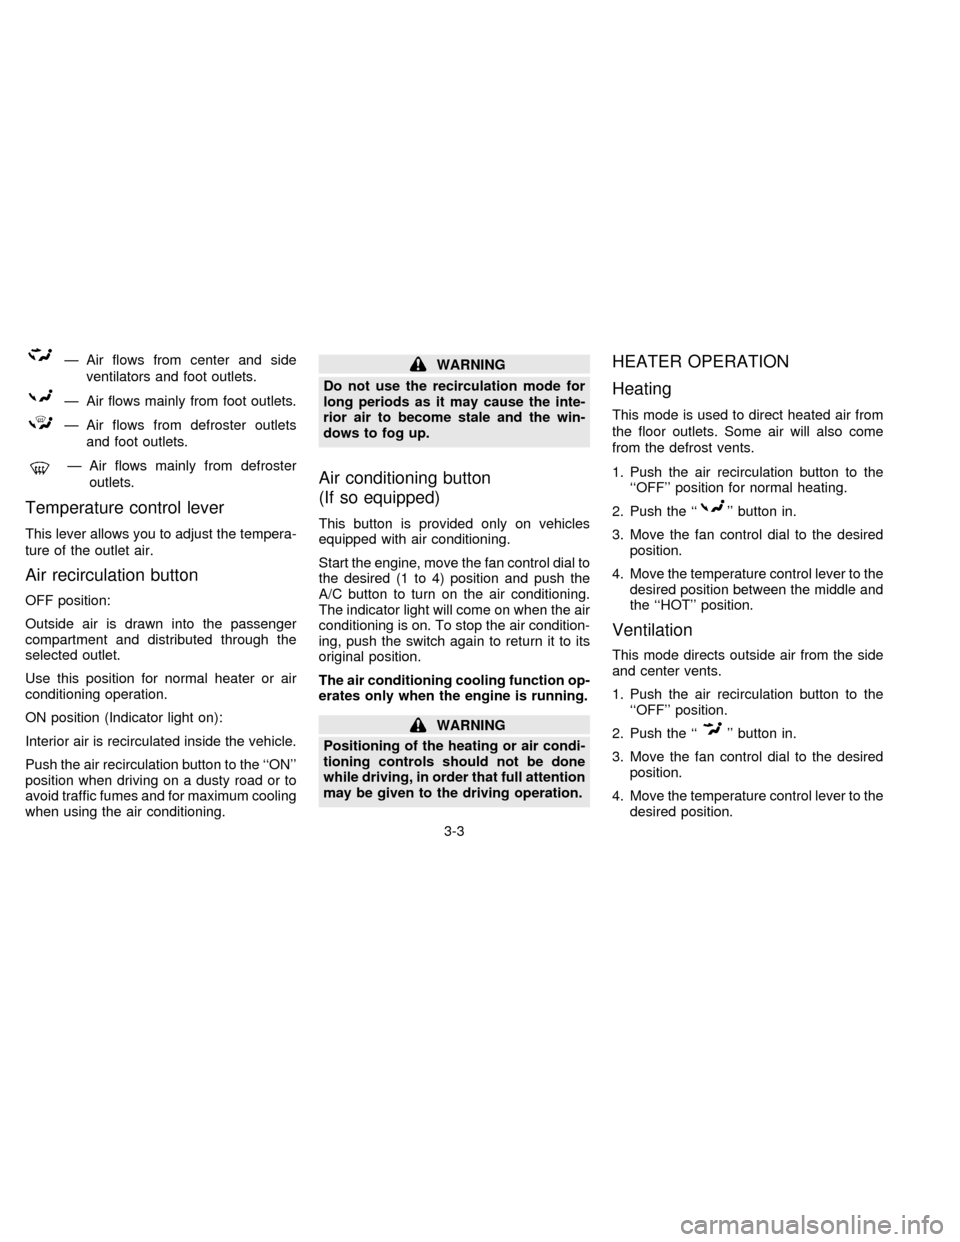
Ð Air flows from center and side
ventilators and foot outlets.
Ð Air flows mainly from foot outlets.
Ð Air flows from defroster outlets
and foot outlets.
Ð Air flows mainly from defroster
outlets.
Temperature control lever
This lever allows you to adjust the tempera-
ture of the outlet air.
Air recirculation button
OFF position:
Outside air is drawn into the passenger
compartment and distributed through the
selected outlet.
Use this position for normal heater or air
conditioning operation.
ON position (Indicator light on):
Interior air is recirculated inside the vehicle.
Push the air recirculation button to the ``ON''
position when driving on a dusty road or to
avoid traffic fumes and for maximum cooling
when using the air conditioning.
WARNING
Do not use the recirculation mode for
long periods as it may cause the inte-
rior air to become stale and the win-
dows to fog up.
Air conditioning button
(If so equipped)
This button is provided only on vehicles
equipped with air conditioning.
Start the engine, move the fan control dial to
the desired (1 to 4) position and push the
A/C button to turn on the air conditioning.
The indicator light will come on when the air
conditioning is on. To stop the air condition-
ing, push the switch again to return it to its
original position.
The air conditioning cooling function op-
erates only when the engine is running.
WARNING
Positioning of the heating or air condi-
tioning controls should not be done
while driving, in order that full attention
may be given to the driving operation.
HEATER OPERATION
Heating
This mode is used to direct heated air from
the floor outlets. Some air will also come
from the defrost vents.
1. Push the air recirculation button to the
``OFF'' position for normal heating.
2. Push the ``
'' button in.
3. Move the fan control dial to the desired
position.
4. Move the temperature control lever to the
desired position between the middle and
the ``HOT'' position.
Ventilation
This mode directs outside air from the side
and center vents.
1. Push the air recirculation button to the
``OFF'' position.
2. Push the ``
'' button in.
3. Move the fan control dial to the desired
position.
4. Move the temperature control lever to the
desired position.
3-3
ZX
Page 61 of 183
Defrosting or defogging
This mode is used to defrost/defog the
windows.
1. Push the air recirculation button to the
``OFF'' position.
2. Push the ``
'' button in.
3. Move the fan control dial to the desired
position.
4. Move the temperature control lever to the
desired position between the middle and
the ``HOT'' position.
cTo quickly remove ice or fog from the
windows, turn on the fan control dial to
``4'' and the temperature control lever to
the full ``HOT'' position.
cWhen the ``
'' switch is pushed, the
air conditioning will automatically be
turned on to defog the windshield, and
the air recirculation mode will automati-
cally be turned off.
Outside air is drawn into the passenger
compartment to improve the defogging
performance.
Bi-level heating
This mode directs cooler air from the side
and center vents and warmer air from the
floor outlets.
1. Push the air recirculation button to the
``OFF'' position.
2. Push the ``
'' button in.
3. Move the fan control dial to the desired
position.
4. Move the temperature control lever to the
desired position.
Heating and defogging
This mode heats the interior and defogs the
windshield.
1. Push the air recirculation button to the
``OFF'' position.
2. Push the ``
'' button in.
3. Move the fan control dial to the desired
position.
4. Move the temperature control lever to the
desired position between the middle and
the ``HOT'' position.
Operating tips
cClear snow and ice from the wiper
blades and air inlet in front of the
windshield. This will improve heater
operation.
cWhen the ``
'' or ``'' switch is
selected, the air recirculation mode will
automatically be turned off.
Outside air is drawn into the passenger
compartment to improve the defogging
performance.
AIR CONDITIONER OPERATION
Start the engine, move the fan control dial to
the desired (1 to 4) position and push in the
A/C button to activate the air conditioning.
When the air conditioning is on, cooling and
dehumidifying functions will be added to the
heater operation.
WARNING
The air conditioning cooling function
operates only when the engine is run-
ning.
3-4
ZX
Page 62 of 183

Cooling
This mode is used to cool and dehumidify.
1. Push the air recirculation button to the
``OFF'' position.
2. Push the ``
'' button in.
3. Move the fan control dial to the desired
position.
4. Push on the air conditioning button. The
indicator light will come on.
5. Move the temperature control lever to the
desired position.
cFor quick cooling when the outside tem-
perature is high, push the air recirculation
button to the ``ON'' position. Be sure to
return the air recirculation button to the
``OFF'' position for normal cooling.
Operating tips
cKeep the windows and sun roof closed
while the air conditioning is in operation.
cAfter parking in the sun, drive for two or
three minutes with the windows open to
vent hot air from the passenger compart-
ment. Then, close the windows. This will
allow the air conditioning to cool the
interior more quickly.cThe air conditioning system should be
operated for about ten minutes at
least once a month. This helps pre-
vent damage to the system due to lack
of lubrication.
cIf the coolant temperature gauge ex-
ceeds the HOT position, turn the air
conditioning off. See ``If your vehicle
overheats'' in the ``In case of emergency''
section for additional information.
Dehumidified heating
This mode is used to heat and dehumidify.
1. Push the air recirculation button to the
``OFF'' position.
2. Push the ``
'' button in.
3. Move the fan control dial to the desired
position.
4. Push on the air conditioning button. The
indicator light will come on.
5. Move the temperature control lever to the
desired position.
Dehumidified defogging
This mode is used to defog the windows
and dehumidify.1. Push the air recirculation button to the
``OFF'' position.
2. Push the ``
'' button in.
3. Move the fan control dial to the desired
position.
4. Push the air conditioning button. The
indicator light will come on.
5. Move the temperature control lever to the
desired position.
When the ``
'' button is pushed, the
air conditioning will automatically be
turned on to defog the windshield, and
the air recirculation mode will automati-
cally be turned off.
Outside air is drawn into the passenger
compartment to improve the defogging per-
formance.
AIR FLOW CHARTS
The charts on the following pages show the
switch and lever positions forMAXIMUM
and QUICKheating, cooling, or defrosting.
3-5
ZX
Page 65 of 183
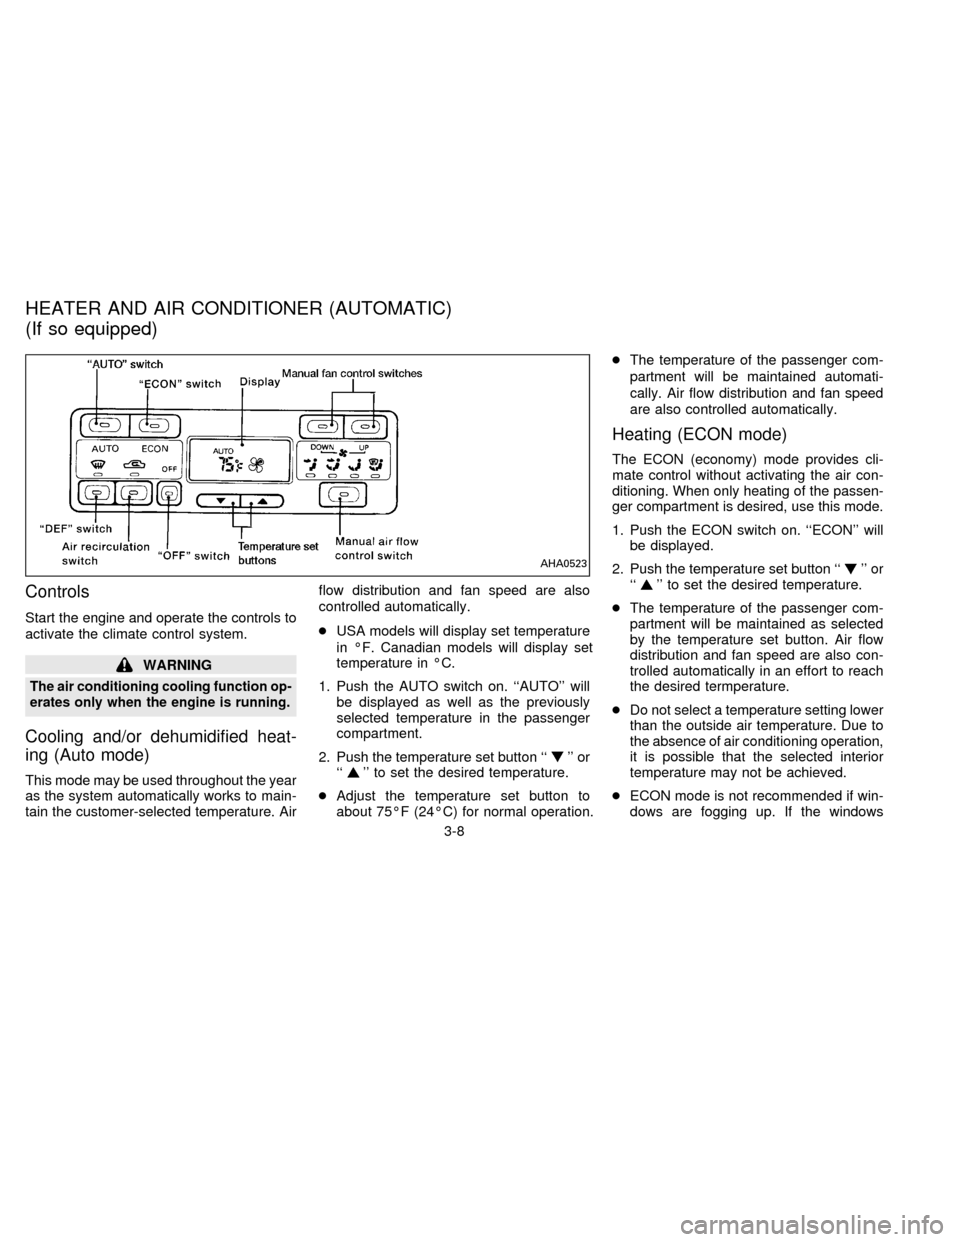
Controls
Start the engine and operate the controls to
activate the climate control system.
WARNING
The air conditioning cooling function op-
erates only when the engine is running.
Cooling and/or dehumidified heat-
ing (Auto mode)
This mode may be used throughout the year
as the system automatically works to main-
tain the customer-selected temperature. Airflow distribution and fan speed are also
controlled automatically.
cUSA models will display set temperature
in ÉF. Canadian models will display set
temperature in ÉC.
1. Push the AUTO switch on. ``AUTO'' will
be displayed as well as the previously
selected temperature in the passenger
compartment.
2. Push the temperature set button ``
'' or
``'' to set the desired temperature.
cAdjust the temperature set button to
about 75ÉF (24ÉC) for normal operation.cThe temperature of the passenger com-
partment will be maintained automati-
cally. Air flow distribution and fan speed
are also controlled automatically.
Heating (ECON mode)
The ECON (economy) mode provides cli-
mate control without activating the air con-
ditioning. When only heating of the passen-
ger compartment is desired, use this mode.
1. Push the ECON switch on. ``ECON'' will
be displayed.
2. Push the temperature set button ``
'' or
``'' to set the desired temperature.
cThe temperature of the passenger com-
partment will be maintained as selected
by the temperature set button. Air flow
distribution and fan speed are also con-
trolled automatically in an effort to reach
the desired termperature.
cDo not select a temperature setting lower
than the outside air temperature. Due to
the absence of air conditioning operation,
it is possible that the selected interior
temperature may not be achieved.
cECON mode is not recommended if win-
dows are fogging up. If the windows
AHA0523
HEATER AND AIR CONDITIONER (AUTOMATIC)
(If so equipped)
3-8
ZX
Page 71 of 183

indicating tape side will illuminate in the
display window.
Do not force the cassette tape into the
tape door.
Pressing strongly could cause player
damage.
The cassette tape will automatically change
directions to play the other side when the
first side is completed. At this time, the
arrow in the display window will change
direction.
cTo maintain good quality sound, NIS-
SAN recommends that you use cas-
sette tapes of 60 minutes or shorter in
length.
cCassette tapes should be removed
from the player when not in use. Store
cassettes in their protective cases
and away from direct sunlight, heat,
moisture and magnetic sources.
cDirect sunlight can cause the cassette
to become deformed. The use of de-
formed cassettes may cause the cas-
sette to jam in the player.
cDo not use cassettes that have labels
which are peeling and loose. If used,the label could jam in the player.
cIf a cassette has loose tape, insert a
pencil through one of the cassette
hubs and rewind the tape firmly
around the hubs. Loose tape may
cause tape jamming and wavering
sound quality.
cOver a period of time, the playback
head, capstan and pinch roller may
collect a tape coating residue as the
tape passes over the head. This resi-
due accumulation can cause weak or
wavering sound, and should be re-
moved periodically with a head clean-
ing tape. If the residue is not removed
periodically, the player may need to
be disassembled for cleaning.
Fast forwarding or rewinding the
tape
Push either the FF (fast forward) or REW
(rewind) button for the desired direction.
The
orsymbol will illuminate in
the display.
To stop the FF or REW function, press the
``PLAY/STOP'' button.
Automatic Program Search (APS)
fast forwarding or APS rewinding
the tape
Push either the APS FF or APS REW button
while the cassette tape is playing. The tape
will run quickly, and stop and play at the
next program. The indicator light flashes on
and off while searching the program. The
orsymbol will illuminate in
the display.
This system searches for the blank intervals
between selections. If there is a blank inter-
val within one program or there is no interval
between programs, the system may not
stop in the desired or expected location.
Changing the direction of tape play
Push the PROG (program) select button.
The
orsymbol will illuminate in
the display to indicate side of program play.
Playing and stopping the cassette
tape
Push the PLAY/STOP button while the cas-
sette tape is playing to stop the tape. Push
the button again to play the tape.
3-14
ZX