fog light NISSAN ALTIMA 1998 L30 / 2.G Owners Manual
[x] Cancel search | Manufacturer: NISSAN, Model Year: 1998, Model line: ALTIMA, Model: NISSAN ALTIMA 1998 L30 / 2.GPages: 217, PDF Size: 1.77 MB
Page 44 of 217

2 Instruments and controls
Meters and gauges ................................................2-2
Speedometer and odometer ..................................2-3
Tachometer ............................................................2-3
Engine coolant temperature gauge and fuel
gauge .....................................................................2-4
Warning/indicator lights and chimes ......................2-5
Theft warning (if so equipped) ...............................2-9
Windshield wiper and washer switch ...................2-11
Rear window defogger switch ..............................2-11
Headlight and turn signal switch ..........................2-12
Daytime running light system (Canada only) .......2-13
Instrument brightness control ...............................2-13
Front fog light switch (if so equipped)..................2-14Hazard warning flasher switch .............................2-14
Cigarette lighter (accessory) and ash tray ...........2-15
Cup holder ............................................................2-16
Power windows ....................................................2-17
Automatic power window switch ..........................2-17
Passenger power windows ..................................2-18
Sunroof (if so equipped).......................................2-18
If the sunroof does not close ...............................2-19
Storage compartment for garage door
transmitter (if so equipped) ..................................2-20
Interior light...........................................................2-21
Map light (if so equipped) ....................................2-22
Trunk light.............................................................2-22
ZX
Page 54 of 217
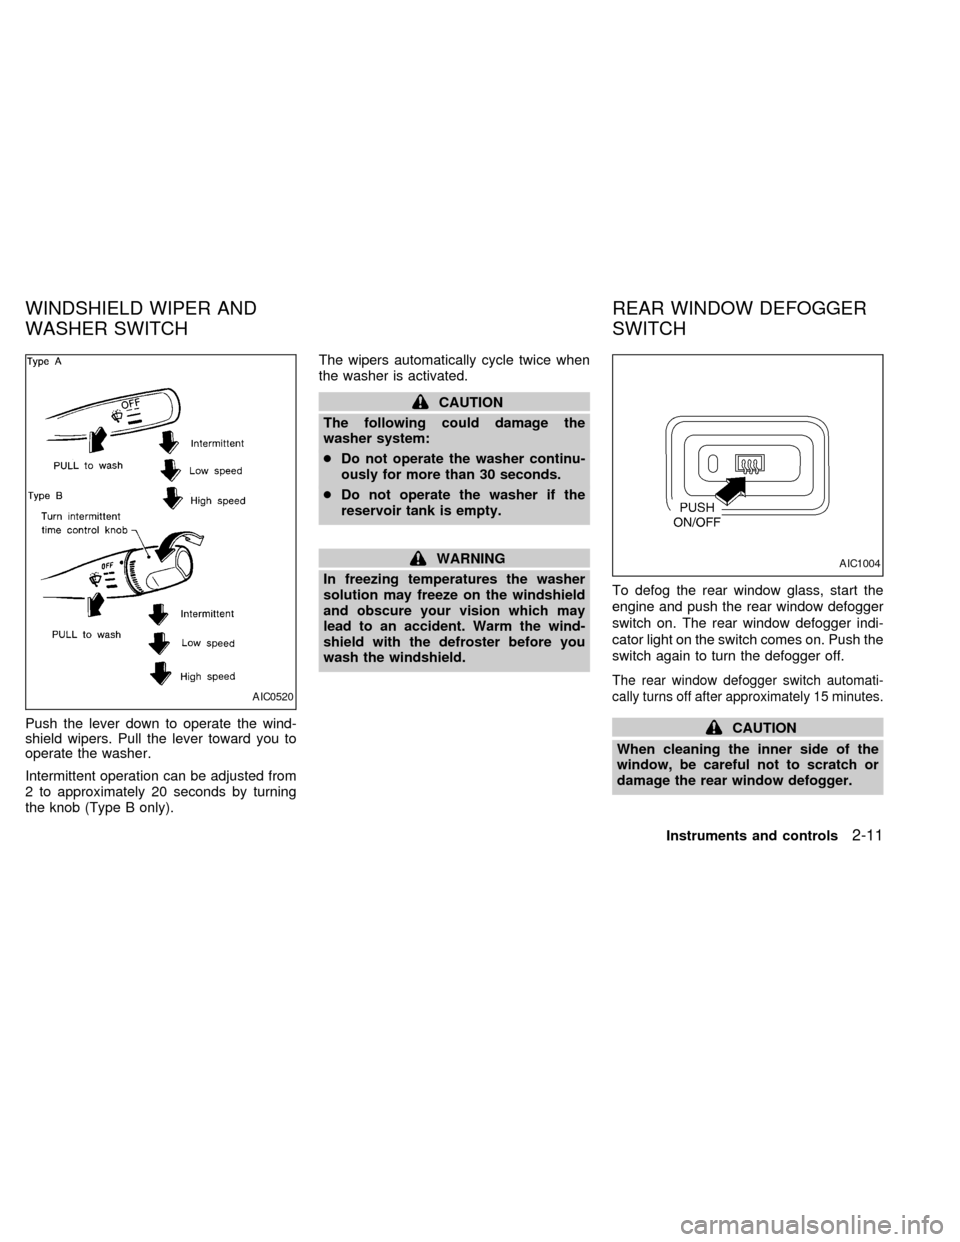
Push the lever down to operate the wind-
shield wipers. Pull the lever toward you to
operate the washer.
Intermittent operation can be adjusted from
2 to approximately 20 seconds by turning
the knob (Type B only).The wipers automatically cycle twice when
the washer is activated.
CAUTION
The following could damage the
washer system:
cDo not operate the washer continu-
ously for more than 30 seconds.
cDo not operate the washer if the
reservoir tank is empty.
WARNING
In freezing temperatures the washer
solution may freeze on the windshield
and obscure your vision which may
lead to an accident. Warm the wind-
shield with the defroster before you
wash the windshield.To defog the rear window glass, start the
engine and push the rear window defogger
switch on. The rear window defogger indi-
cator light on the switch comes on. Push the
switch again to turn the defogger off.
The rear window defogger switch automati-
cally turns off after approximately 15 minutes.
CAUTION
When cleaning the inner side of the
window, be careful not to scratch or
damage the rear window defogger.
AIC0520
AIC1004
WINDSHIELD WIPER AND
WASHER SWITCHREAR WINDOW DEFOGGER
SWITCH
Instruments and controls2-11
ZX
Page 55 of 217

NOTE: On some vehicles, the top few rows
of wires on the rear window are not part of
the rear window defogging system. These
wires, if so equipped, make up the diversity
antenna for the audio system.
Lighting
Turn the switch to theposition: The
front turn signal/parking, rear combination,
side marker, license plate and instrument
panel lights come on.
Turn the switch to the
position:The headlights come on and all the other
lights remain on.
To select the high beam function, push the
lever forward. The high beam lights come
on and the indicator light illuminates. Pull it
back to select the low beam.
AIC0505
HEADLIGHT AND TURN
SIGNAL SWITCH
2-12Instruments and controls
ZX
Page 57 of 217
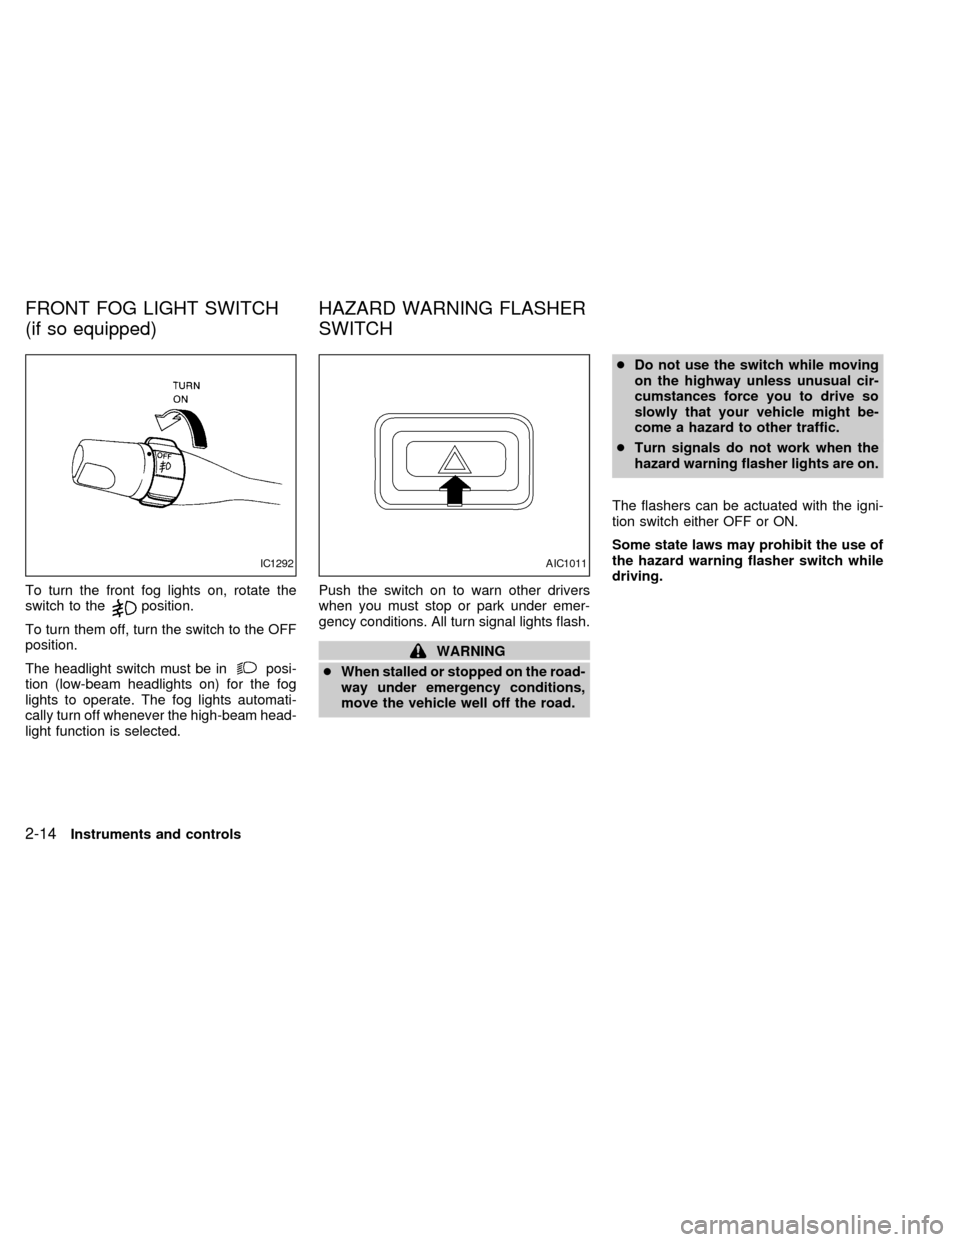
To turn the front fog lights on, rotate the
switch to theposition.
To turn them off, turn the switch to the OFF
position.
The headlight switch must be in
posi-
tion (low-beam headlights on) for the fog
lights to operate. The fog lights automati-
cally turn off whenever the high-beam head-
light function is selected.Push the switch on to warn other drivers
when you must stop or park under emer-
gency conditions. All turn signal lights flash.
WARNING
cWhen stalled or stopped on the road-
way under emergency conditions,
move the vehicle well off the road.cDo not use the switch while moving
on the highway unless unusual cir-
cumstances force you to drive so
slowly that your vehicle might be-
come a hazard to other traffic.
cTurn signals do not work when the
hazard warning flasher lights are on.
The flashers can be actuated with the igni-
tion switch either OFF or ON.
Some state laws may prohibit the use of
the hazard warning flasher switch while
driving.
IC1292AIC1011
FRONT FOG LIGHT SWITCH
(if so equipped)HAZARD WARNING FLASHER
SWITCH
2-14Instruments and controls
ZX
Page 83 of 217

Ð Air flows mainly from defroster
outlets.
Temperature control lever
This lever allows you to adjust the tempera-
ture of the outlet air.
Air recirculation button
Off position:
Outside air is drawn into the passenger
compartment and distributed through the
selected outlet.
Use the off position for normal heater or air
conditioner operation.
On position (Indicator light on):
Interior air is recirculated inside the vehicle.
Push the air recirculation button to the ON
position when driving on a dusty road, to
avoid traffic fumes, and for maximum cool-
ing when using the air conditioner.
Air conditioner button
(if so equipped)
This button is provided only on vehicles
equipped with an air conditioner.
Start the engine, move the fan control dial tothe desired (1 to 4) position and push the
A/C button to turn on the air conditioner.
The indicator light comes on when the air
conditioner is on. To stop the air condi-
tioner, push the switch again.
The air conditioner cooling function op-
erates only when the engine is running.
HEATER OPERATION
Heating
This mode is used to direct heated air to the
foot outlets. Some air also flows from the
defroster outlets.
1. Push the
(air recirculation) button
to the off position for normal heating.
2. Push the
button in.
3. Move the fan control dial to the desired
position.
4. Move the temperature control lever to the
desired position between the middle and
the HOT position.
Ventilation
This mode directs outside air to the side and
center ventilators.1. Push the
(air recirculation) button
to the off position.
2. Push the
button in.
3. Move the fan control dial to the desired
position.
4. Move the temperature control lever to the
desired position.
Defrosting or defogging
This mode is used to defrost/defog the
windows.
1. Push the
button in.
2. Move the fan control dial to the desired
position.
3. Move the temperature control lever to the
desired position between the middle and
the HOT position.
cTo quickly remove ice or fog from the
windows, turn on the fan control dial to 4
and the temperature control lever to the
full HOT position.
cWhen the
switch is pushed, the air
conditioner automatically turns on to de-
humidify the air, which helps defog the
windshield. The air recirculation mode
4-4Heater, air conditioner and audio systems
ZX
Page 84 of 217

automatically turns off.
Outside air is drawn into the passenger
compartment to improve the defogging
performance.
Bi-level heating/cooling
This mode directs air from the side, center
and foot outlets.
1. Push the
(air recirculation) button
to the off position.
2. Push the
button in.
3. Move the fan control dial to the desired
position.
4. Move the temperature control lever to the
desired position.
Heating and defogging
This mode heats the interior and defogs the
windshield.
1. Push the
button in.
2. Move the fan control dial to the desired
position.
3. Move the temperature control lever to the
desired position between the middle and
the HOT position.
Operating tips
cClear snow and ice from the wiper
blades and air inlet in front of the
windshield. This improves heater op-
eration.
cWhen the
orswitch is se-
lected, the air recirculation mode auto-
matically turns off.
Outside air is drawn into the passenger
compartment to improve the defogging
performance.
AIR CONDITIONER OPERATION
(if so equipped)
Start the engine, move the fan control dial to
the desired (1 to 4) position and push in the
A/C button to activate the air conditioner.
When the air conditioner is on, cooling and
dehumidifying functions are added to the
heater operation.
The air conditioner cooling function op-
erates only when the engine is running.
Cooling
This mode is used to cool and dehumidify
the air.
1. Push the
(air recirculation) button
to the off position.
2. Push the
button in.
3. Move the fan control dial to the desired
position.
4. Push on the air conditioner button. The
indicator light comes on.
5. Move the temperature control lever to the
desired position.
cFor quick cooling when the outside tem-
perature is high, push the air recirculation
button to the on position. Be sure to
return the air recirculation button to the
off position for normal cooling.
Dehumidified heating
This mode is used to heat and dehumidify.
1. Push the
(air recirculation) button
to the off position.
2. Push the
button in.
3. Move the fan control dial to the desired
position.
Heater, air conditioner and audio systems
4-5
ZX
Page 85 of 217

4. Push on the air conditioner button. The
indicator light comes on.
5. Move the temperature control lever to the
desired position.
Dehumidified defogging
This mode defogs the windows and dehu-
midifies the air.
1. Push the
button in.
When the
button is pushed, the air
conditioner automatically turns on to de-
humidify the air, which helps to defog the
windshield. The air recirculation mode
automatically turns off.
2. Move the fan control dial to the desired
position.
3. Move the temperature control lever to the
desired position.
Outside air is drawn into the passenger
compartment to improve the defogging per-
formance.
Operating tips
cKeep the windows and sun roof closed
while the air conditioner is in operation.
cAfter parking in the sun, drive for two orthree minutes with the windows open to
vent hot air from the passenger compart-
ment. Then, close the windows. This
allows the air conditioner to cool the
interior more quickly.
cThe air conditioner system should be
operated for about ten minutes at
least once a month. This helps pre-
vent damage to the system due to lack
of lubrication.
cIf the engine coolant temperature gauge
exceeds the H (hot) position, turn the air
conditioner off. See ``If your vehicle over-
heats'' in the ``In case of emergency''
section of this owner's manual for addi-
tional information.
AIR FLOW CHARTS
The charts on the following pages show the
switch and lever positions forMAXIMUM
and QUICKheating, cooling, or defrosting.
4-6Heater, air conditioner and audio systems
ZX
Page 169 of 217

BULB REPLACEMENT
Item Wattage (W) Bulb No.
Headlight (Semi-sealed beam)
High/Low 65/55 HB5
Front turn signal/parking light 27/8 1157NA
Front fog light 37.5 898
Rear combination light:
Turn signal 27 3156k
Stop/Tail 27/8 3157k
Back-up 18 921
License plate light 5 168
High-mounted stop light 18 T16
Interior light 8 68
Map light 10 578
Trunk light 3.4 158
Glove box light (if so equipped) 1.1 658
8-24Do-it-yourself
ZX
Page 211 of 217

Coolant
Capacities and recommended fuel/
lubricants .............................................. 10-2
Changing engine coolant........................ 8-5
Checking engine coolant level ............... 8-4
Engine coolant temperature gauge ........ 2-4
Corrosion protection .................................... 7-5
Cruise control............................................. 5-12
Cup holder ................................................. 2-16
D
Daytime running light system
(Canada only) ............................................ 2-13
Defogger switch
Rear window defogger switch .............. 2-11
Dimensions and weights............................ 10-9
Door ajar warning light ................................ 2-6
Door locks .................................................... 3-2
Drive belts .................................................. 8-14
Driving
Cold weather driving............................. 5-18
Driving with automatic
transmission .................................... 5-4, 5-6
Driving with manual transmission ... 5-4, 5-9
Precautions when starting and driving ... 5-2
E
Economy - fuel........................................... 5-14
Emission control information label........... 10-12Emission control system warranty ........... 10-19
Engine
Before starting the engine ...................... 5-5
Capacities and recommended fuel/
lubricants .............................................. 10-2
Changing engine coolant........................ 8-5
Changing engine oil................................ 8-8
Changing engine oil filter........................ 8-9
Checking engine coolant level ............... 8-4
Checking engine oil level ....................... 8-7
Engine compartment check locations .... 8-3
Engine coolant temperature gauge ........ 2-4
Engine cooling system ........................... 8-4
Engine oil ................................................ 8-7
Engine oil and oil filter
recommendation ................................... 10-5
Engine oil pressure warning light ........... 2-5
Engine oil viscosity ............................... 10-5
Engine serial number ......................... 10-11
Engine specifications ............................ 10-8
Starting the engine ............................... 5-10
Exhaust gas (Carbon monoxide) ................. 5-2
F
Flashers (See hazard warning flasher
switch) ........................................................ 2-14
Flat tire ......................................................... 6-2
Floor mat positioning aid ............................. 7-5
Fluid
Automatic transmission fluid (ATF) ........ 8-9
Brake fluid............................................. 8-11Capacities and recommended fuel/
lubricants .............................................. 10-2
Clutch fluid ............................................ 8-11
Engine oil ................................................ 8-7
Power steering fluid .............................. 8-11
Window washer fluid ............................ 8-12
F.M.V.S.S. certification label ................... 10-11
Front fog light switch ................................. 2-14
Front seats ................................................... 1-2
Fuel
Capacities and recommended fuel/
lubricants .............................................. 10-2
Fuel economy ....................................... 5-14
Fuel filler cap ........................................ 3-11
Fuel filler lid lock opener lever ............. 3-11
Fuel gauge.............................................. 2-4
Fuel octane rating................................. 10-3
Fuel recommendation ........................... 10-3
Fuses ......................................................... 8-20
G
Gauge
Engine coolant temperature gauge ........ 2-4
Fuel gauge.............................................. 2-4
Odometer ................................................ 2-3
Speedometer .......................................... 2-3
Tachometer............................................. 2-3
Trip odometer ......................................... 2-3
General maintenance .................................. 9-2
Glove box..................................................... 3-9
Glove box lock ............................................. 3-9
11-2
ZX
Page 212 of 217

H
Hazard warning flasher switch .................. 2-14
Head restraints ............................................ 1-5
Headlight aiming adjustment ..................... 8-22
Headlight and turn signal switch ............... 2-12
Headlights .................................................. 8-21
Heater
Heater and air conditioner controls ........ 4-3
Heater and air conditioner (manual)....... 4-3
Heater operation ..................................... 4-4
Heater operation .......................................... 4-4
Hood release ............................................... 3-8
I
Ignition switch .............................................. 5-4
Important vehicle information label.......... 10-11
Increasing fuel economy............................ 5-14
Indicator lights and chimes (See warning/
indicator lights and chimes) ......................... 2-5
Inside mirror ............................................... 3-13
Instrument brightness control .................... 2-13
Interior light ................................................ 2-21
J
Jack
Screw type .............................................. 6-2
Jump starting ...................................... 6-7, 8-13K
Key ............................................................... 3-2
Keyless entry system (See multi-remote
control system) ............................................ 3-4
L
Labels
Air conditioner specification label ....... 10-12
Emission control information label...... 10-12
Engine serial number ......................... 10-11
F.M.V.S.S. certification label .............. 10-11
Vehicle identification number (VIN)
plate .................................................... 10-10
Warning labels (for SRS) ..................... 1-12
License plate
Installing the license plate .................. 10-13
Light
Air bag warning light ............ 1-10, 1-12, 2-6
Bulb check/instrument panel .................. 2-5
Bulb replacement.................................. 8-24
Charge warning light .............................. 2-5
Front fog light switch ............................ 2-14
Headlight aiming adjustment ................ 8-22
Headlight and turn signal switch .......... 2-12
Headlights ............................................. 8-21
Interior light ........................................... 2-21
Light bulbs ............................................ 8-21
Low washer fluid warning light ............... 2-6
Spotlights (See map light) .................... 2-22Trunk light ............................................. 2-22
Warning/indicator lights and chimes ...... 2-5
Lock
Child safety rear door lock ..................... 3-4
Door locks............................................... 3-2
Fuel filler lid lock opener lever ............. 3-11
Glove box lock ........................................ 3-9
Power door lock...................................... 3-3
Trunk lid lock opener lever ..................... 3-9
M
Maintenance
General maintenance ............................. 9-2
Inside the vehicle.................................... 9-3
Maintenance precautions ....................... 8-2
Outside the vehicle ................................. 9-2
Periodic maintenance schedules ............ 9-5
Seat belt maintenance.......................... 1-22
Malfunction indicator light ............................ 2-8
Manual antenna ......................................... 4-26
Manual front seat adjustment ...................... 1-3
Map light .................................................... 2-22
Meters and gauges ...................................... 2-2
Mirror
Inside mirror.......................................... 3-13
Outside mirror control ........................... 3-13
Vanity mirror ......................................... 3-14
Multi-remote control system ........................ 3-4
11-3
ZX