clutch NISSAN ALTIMA 2001 L30 / 2.G Owners Manual
[x] Cancel search | Manufacturer: NISSAN, Model Year: 2001, Model line: ALTIMA, Model: NISSAN ALTIMA 2001 L30 / 2.GPages: 258, PDF Size: 2.09 MB
Page 53 of 258
fluid as necessary. See ``Brake and clutch
fluid'' in the ``Do-it-yourself'' section of this
owner's manual.
2. If the brake fluid level is correct, have the
brake system checked by an authorized
NISSAN dealer.
WARNING
c
Your brake system may not be work-
ing properly if the warning light is on.
Driving could be dangerous. If you
judge it to be safe, drive carefully to
the nearest service station for repairs.
Otherwise, have your vehicle towed
because driving it could be danger-
ous.
cPressing the brake pedal with the
engine stopped and/or a low brake
fluid level may increase your stop-
ping distance and braking will re-
quire greater pedal effort as well as
pedal travel.
cIf the brake fluid level is below the
MINIMUM or MIN mark on the brake
fluid reservoir, do not drive until the
brake system has been checked at a
NISSAN dealer.
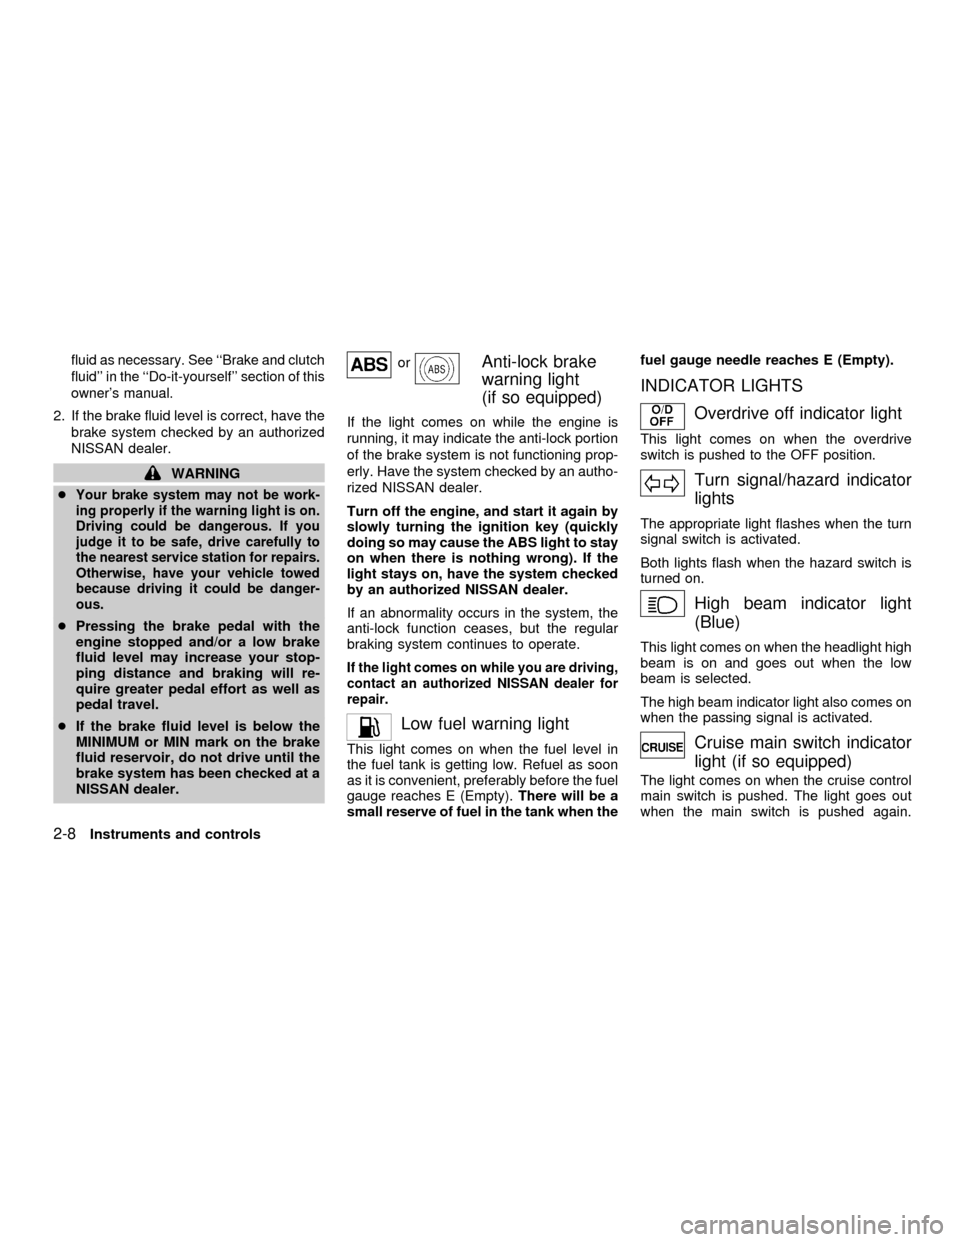
orAnti-lock brake
warning light
(if so equipped)
If the light comes on while the engine is
running, it may indicate the anti-lock portion
of the brake system is not functioning prop-
erly. Have the system checked by an autho-
rized NISSAN dealer.
Turn off the engine, and start it again by
slowly turning the ignition key (quickly
doing so may cause the ABS light to stay
on when there is nothing wrong). If the
light stays on, have the system checked
by an authorized NISSAN dealer.
If an abnormality occurs in the system, the
anti-lock function ceases, but the regular
braking system continues to operate.
If the light comes on while you are driving,
contact an authorized NISSAN dealer for
repair.
Low fuel warning light
This light comes on when the fuel level in
the fuel tank is getting low. Refuel as soon
as it is convenient, preferably before the fuel
gauge reaches E (Empty).There will be a
small reserve of fuel in the tank when thefuel gauge needle reaches E (Empty).
INDICATOR LIGHTS
Overdrive off indicator light
This light comes on when the overdrive
switch is pushed to the OFF position.
Turn signal/hazard indicator
lights
The appropriate light flashes when the turn
signal switch is activated.
Both lights flash when the hazard switch is
turned on.
High beam indicator light
(Blue)
This light comes on when the headlight high
beam is on and goes out when the low
beam is selected.
The high beam indicator light also comes on
when the passing signal is activated.
Cruise main switch indicator
light (if so equipped)
The light comes on when the cruise control
main switch is pushed. The light goes out
when the main switch is pushed again.
2-8Instruments and controls
ZX
Page 140 of 258
1. Apply the parking brake.
2.Automatic transmission:
Move the shift selector lever to P (Park)
or N (Neutral). (P is recommended.)
The shift selector lever cannot be
moved out of P (Park) and into any of
the other gear positions if the ignition
key is turned to OFF or if the key is
removed.
The starter is designed not to operate
if the shift selector lever is in any of
the driving positions.
Manual transmission:
Move the shift lever to N (Neutral), and
depress the clutch pedal to the floor while
cranking the engine.
The starter is designed not to operate
unless the clutch pedal is fully de-
pressed.
3. Crank the enginewith your foot off the
accelerator pedalby turning the ignition
key to START. Release the key when the
engine starts. If the engine starts, but
fails to run, repeat the above procedure.
Ð If the engine is very hard to start in
extremely cold or hot weather, de-
press and hold the accelerator pedalto help start the engine.
Ð In the summer, when restarting the
engine within 30 minutes after it has
been stopped, keep the accelerator
pedal fully depressed while starting.
CAUTION
Do not operate the starter for more than
15 seconds at a time. If the engine does
not
start, turn the key off and wait 10
seconds before cranking again, other-
wise the starter could be damaged.
4.Warm-up
Allow the engine to idle for at least 30
seconds after starting. Drive at moderate
speed for a short distance first, especially
in cold weather.
AUTOMATIC TRANSMISSION
WARNING
cDo not depress the accelerator pedal
while shifting from P (Park) or N
(Neutral) to R (Reverse), D (Drive), 2
or 1. Always depress the brake pedal
until shifting is completed. Failure to
do so could cause you to lose con-
trol and have an accident.
cCold engine idle speed is high, so
use caution when shifting into a for-
ward or reverse gear before the en-
gine has warmed up.
cNever shift to P (Park) or R (Reverse)
while the vehicle is moving. This
could cause an accident.
CAUTION
c
When stopping the vehicle on an
uphill grade, do not hold the vehicle
by depressing the accelerator pedal.
The foot brake should be used for
this purpose.
cDo not downshift abruptly on slip-
pery roads. This may cause a loss of
control.
STARTING THE ENGINE DRIVING THE VEHICLE
Starting and driving5-7
ZX
Page 144 of 258
OFF: For driving up and down long slopes
where engine braking is necessary,
push the OVERDRIVE switch once.
The O/D OFF indicator light on the
instrument panel comes on at this
time.
When cruising at a low speed or
climbing a gentle slope, you may feel
uncomfortable shift shocks as the
transmission shifts between 3rd gear
and overdrive repeatedly. In this
case, depress the OVERDRIVE
switch to turn the OVERDRIVE off.
The O/D off indicator light on the
instrument panel comes on at this
time.
When driving conditions change, depress
the overdrive switch on the selector/lever to
turn the OVERDRIVE on.
Remember not to drive at high speeds for
extended periods of time with the OVER-
DRIVE off. This reduces fuel economy.MANUAL TRANSMISSION
WARNING
cDo not downshift abruptly on slip-
pery roads. This may cause a loss of
control.
cDo not over-rev the engine when
shifting to a lower gear. This may
cause a loss of control or engine
damage.
CAUTION
cDo not rest your foot on the clutch
pedal while driving. This may cause
clutch damage.
cStop your vehicle completely before
shifting into R (Reverse).
cWhen the vehicle is stopped with the
engine running (for example at a
stop light), shift to N (Neutral) and
release the clutch pedal with the foot
brake applied.
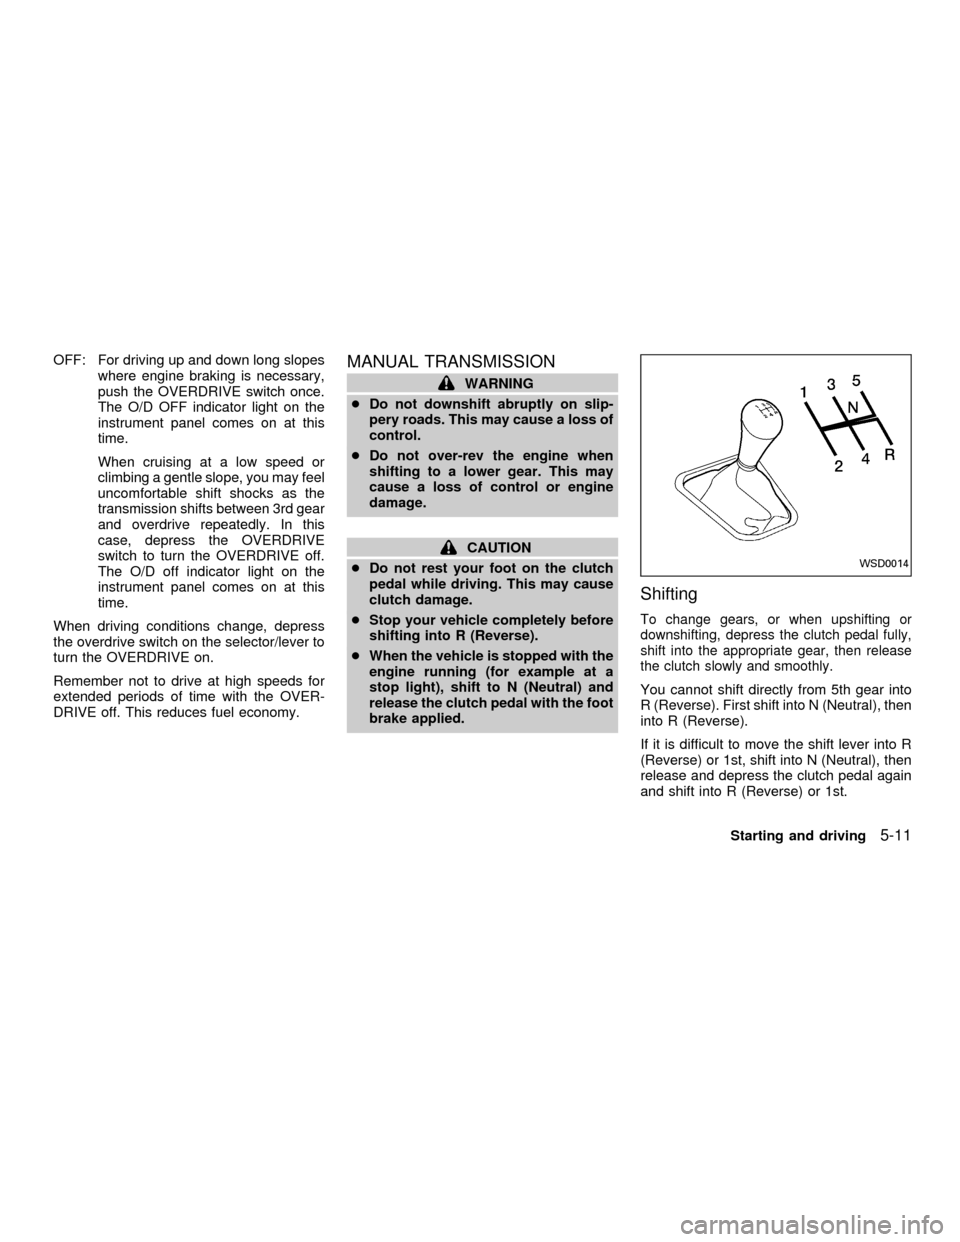
Shifting
To change gears, or when upshifting or
downshifting, depress the clutch pedal fully,
shift into the appropriate gear, then release
the clutch slowly and smoothly.
You cannot shift directly from 5th gear into
R (Reverse). First shift into N (Neutral), then
into R (Reverse).
If it is difficult to move the shift lever into R
(Reverse) or 1st, shift into N (Neutral), then
release and depress the clutch pedal again
and shift into R (Reverse) or 1st.
WSD0014
Starting and driving5-11
ZX
Page 146 of 258
4. Before driving, be sure the brake warning
light goes out.
WARNING
cBe sure the parking brake is fully
released before driving. Failure to do
so can cause brake failure and lead
to an accident.
cDo not release the parking brake
from outside the vehicle.
cDo not use the gear shift in place of
the parking brake. When parking, be
sure the parking brake is fully en-
gaged.
c
Do not leave children unattended in a
vehicle. They could release the park-
ing brake and cause an accident.PRECAUTIONS ON CRUISE
CONTROL
cIf the cruise control system malfunctions,
it cancels automatically. The SET indica-
tor light in the instrument panel then
blinks to warn the driver.
cIf the SET indicator light blinks, turn the
cruise control main switch off and have
the system checked by an authorized
NISSAN dealer.
cThe SET indicator light may blink when
the cruise control main switch is turned
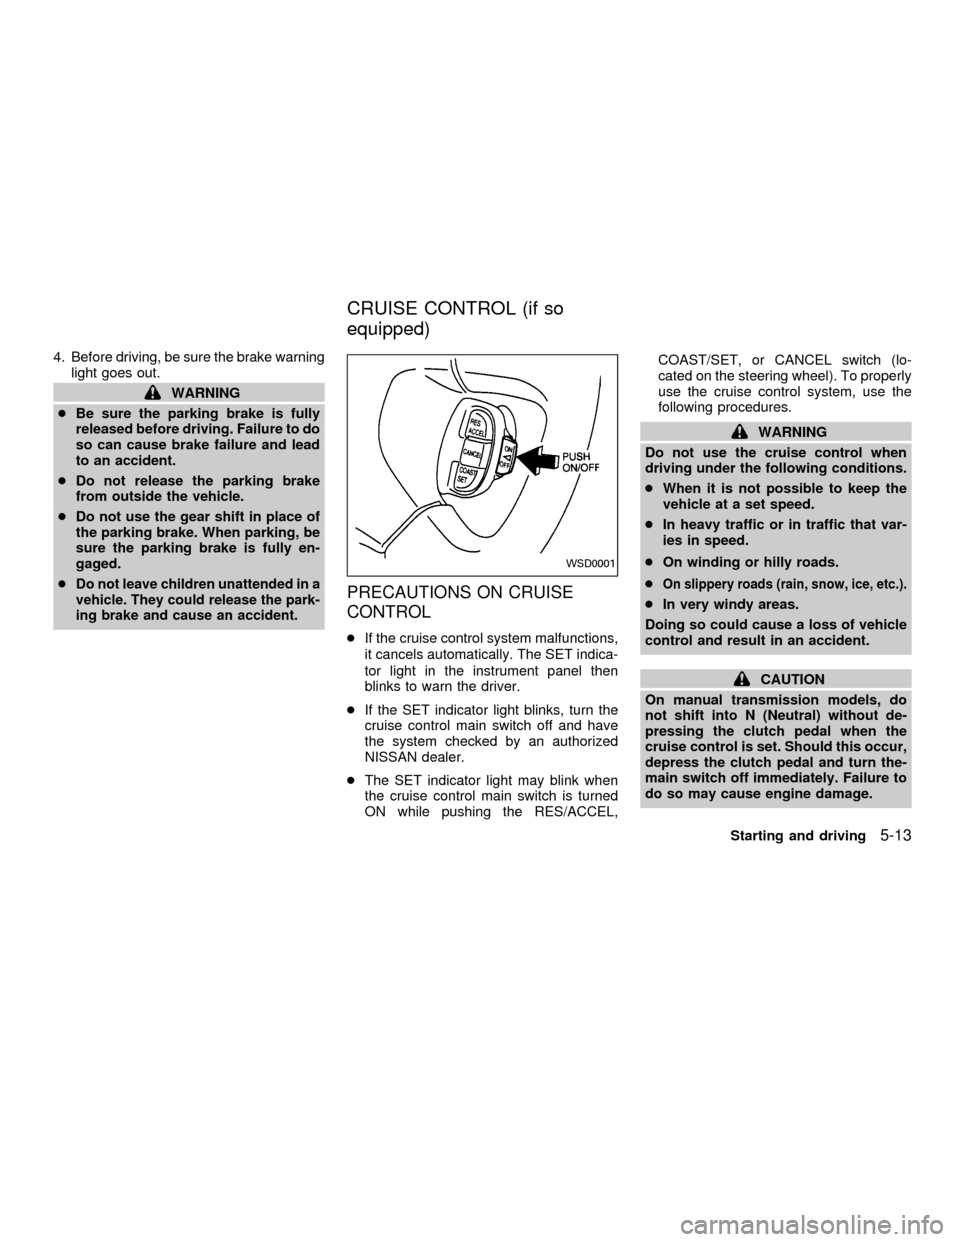
ON while pushing the RES/ACCEL,COAST/SET, or CANCEL switch (lo-
cated on the steering wheel). To properly
use the cruise control system, use the
following procedures.
WARNING
Do not use the cruise control when
driving under the following conditions.
cWhen it is not possible to keep the
vehicle at a set speed.
cIn heavy traffic or in traffic that var-
ies in speed.
cOn winding or hilly roads.
c
On slippery roads (rain, snow, ice, etc.).
cIn very windy areas.
Doing so could cause a loss of vehicle
control and result in an accident.
CAUTION
On manual transmission models, do
not shift into N (Neutral) without de-
pressing the clutch pedal when the
cruise control is set. Should this occur,
depress the clutch pedal and turn the-
main switch off immediately. Failure to
do so may cause engine damage.
WSD0001
CRUISE CONTROL (if so
equipped)
Starting and driving5-13
ZX
Page 147 of 258

CRUISE CONTROL OPERA-
TIONS
The cruise control allows driving at a speed
between 30 to 90 MPH (48 to 144 km/h)
without keeping your foot on the accelerator
pedal.
To turn on the cruise control,push the
main switch. The CRUISE indicator light in
the instrument panel comes on.
To set cruising speed,accelerate the ve-
hicle to the desired speed, push the
COAST/SET switch and release it. The SET
light in the instrument cluster comes on.
Take your foot off the accelerator pedal.
Your vehicle maintains the set speed.
cTo pass another vehicle,depress the
accelerator pedal. When you release the
pedal, the vehicle returns to the previ-
ously set speed.
c
The vehicle may not maintain the set speed
when going up or down steep hills. If this
happens, drive without the cruise control.
To cancel the preset speed,use one of
the following three methods:
a) Push the CANCEL button; the SET light
in the instrument cluster goes out.b) Tap the brake pedal; the SET light goes
out.
c) Turn the main switch off. Both the
CRUISE indicator on the main switch and
SET light in the instrument cluster go out.
The cruise control is automatically can-
celled and the SET light in the instrument
panel goes out if:
cyou depress the brake or clutch pedal
while pushing the RES/ACCEL or
COAST/SET switch.
cthe vehicle slows down more than 8 MPH
(13 km/h) below the set speed.
cyou depress the clutch pedal (manual
transmission), or move the shift selector
lever to N (Neutral) (automatic transmis-
sion).
To reset at a faster cruising speed,use
one of the following three methods.
a) Depress the accelerator pedal. When the
vehicle attains the desired speed, push
and release the COAST/SET switch.
b) Push and hold the RES/ACCEL switch.
When the vehicle attains the speed you
desire, release the switch.c)
Push and release the RES/ACCEL switch.
Each time you do this, the set speed
increases by about 1 MPH (1.6 km/h).
To reset at a slower cruising speed,use
one of the following three methods:
a) Lightly tap the brake pedal. When the
vehicle attains the desired speed, push
the COAST/SET switch and release it.
b) Push and hold the COAST/SET switch.
Release the switch when the vehicle
slows to the desired speed.
c) Push and release the COAST/SET
switch. Each time you do this, the set
speed decreases by about 1 MPH (1.6
km/h).
To resume the preset speed,push and re-
lease the RES/ACCEL switch. The vehicle
returns to the last set cruising speed when the
vehicle speed is over 30 MPH (48 km/h).
5-14Starting and driving
ZX
Page 177 of 258

8 Do-it-yourself
Maintenance precautions .......................................8-2
Engine compartment check locations ....................8-4
Engine cooling system ...........................................8-5
Checking engine coolant level ..........................8-5
Changing engine coolant ..................................8-6
Engine oil ...............................................................8-8
Checking engine oil level ..................................8-8
Changing engine oil ..........................................8-9
Changing engine oil filter.................................8-10
Automatic transmission fluid ................................8-11
Temperature conditions for checking ..............8-11
Power steering fluid..............................................8-12
Brake and clutch fluid...........................................8-12
Brake fluid........................................................8-12
Clutch fluid .......................................................8-13
Window washer fluid ............................................8-13
Battery ..................................................................8-14
Jump starting ...................................................8-15
Drive belts ............................................................8-15
Spark plugs ..........................................................8-16
Replacing spark plugs .....................................8-16
Air cleaner ............................................................8-17Windshield wiper blades ......................................8-18
Cleaning ..........................................................8-18
Replacing .........................................................8-18
Parking brake and brake pedal ............................8-19
Checking parking brake...................................8-19
Checking brake pedal .....................................8-19
Brake booster ..................................................8-20
Clutch pedal .........................................................8-21
Checking clutch pedal .....................................8-21
Fuses ....................................................................8-21
Engine compartment .......................................8-21
Passenger compartment .................................8-22
Multi-remote controller battery replacement ........8-23
Lights ....................................................................8-24
Headlights ........................................................8-24
Front turn signal lamp .....................................8-28
Front parking and cornering lamp ...................8-28
Front sidemarker lamp ....................................8-29
Fog lights .........................................................8-30
Exterior and interior lights ...............................8-31
Wheels and tires ..................................................8-35
Tire pressure ...................................................8-35
ZX
Page 189 of 258
CAUTION
DO NOT OVERFILL. USE ONLY NISSAN
Matic `D' (Continental U.S. and Alaska)
or Canada NISSAN Automatic Trans-
mission Fluid. DexronŸ III/MerconŸ or
equivalent may also be used. Outside
the continental United States and
Alaska contact an authorized NISSAN
dealership for more information re-
garding suitable fluids, including rec-
ommended brand(s) of DexronŸ
III/MerconŸ Automatic Transmission
Fluid.
NOTE:
If the vehicle has been driven for a long
time at high speeds, or in city traffic in
hot weather, or if it is being used to pull
a trailer, the accurate fluid level cannot
be read. You should wait until the fluid
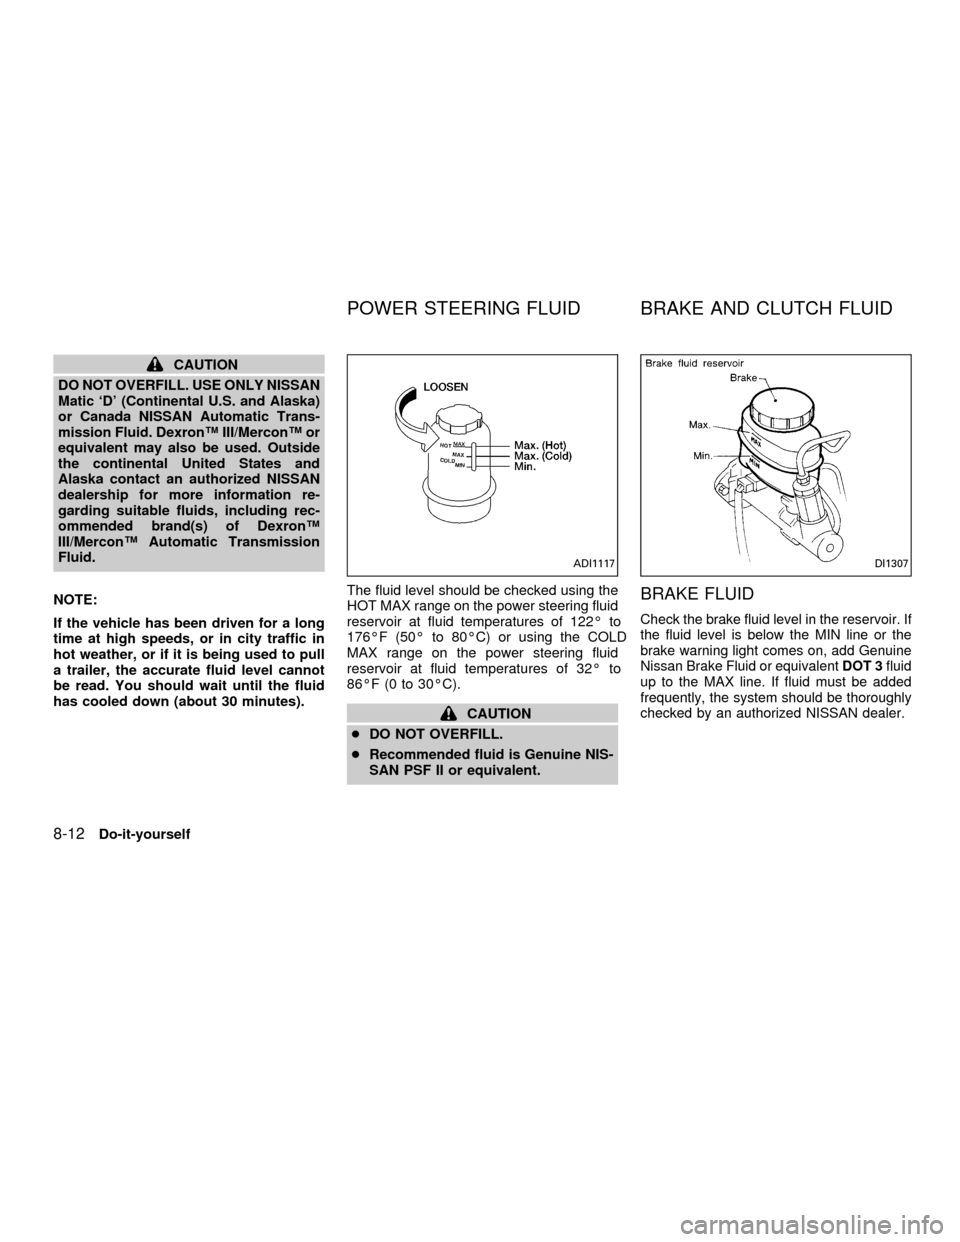
has cooled down (about 30 minutes).The fluid level should be checked using the
HOT MAX range on the power steering fluid
reservoir at fluid temperatures of 122É to
176ÉF (50É to 80ÉC) or using the COLD
MAX range on the power steering fluid
reservoir at fluid temperatures of 32É to
86ÉF (0 to 30ÉC).
CAUTION
cDO NOT OVERFILL.
cRecommended fluid is Genuine NIS-
SAN PSF II or equivalent.
BRAKE FLUID
Check the brake fluid level in the reservoir. If
the fluid level is below the MIN line or the
brake warning light comes on, add Genuine
Nissan Brake Fluid or equivalentDOT 3fluid
up to the MAX line. If fluid must be added
frequently, the system should be thoroughly
checked by an authorized NISSAN dealer.
ADI1117DI1307
POWER STEERING FLUID BRAKE AND CLUTCH FLUID
8-12Do-it-yourself
ZX
Page 190 of 258
CLUTCH FLUID
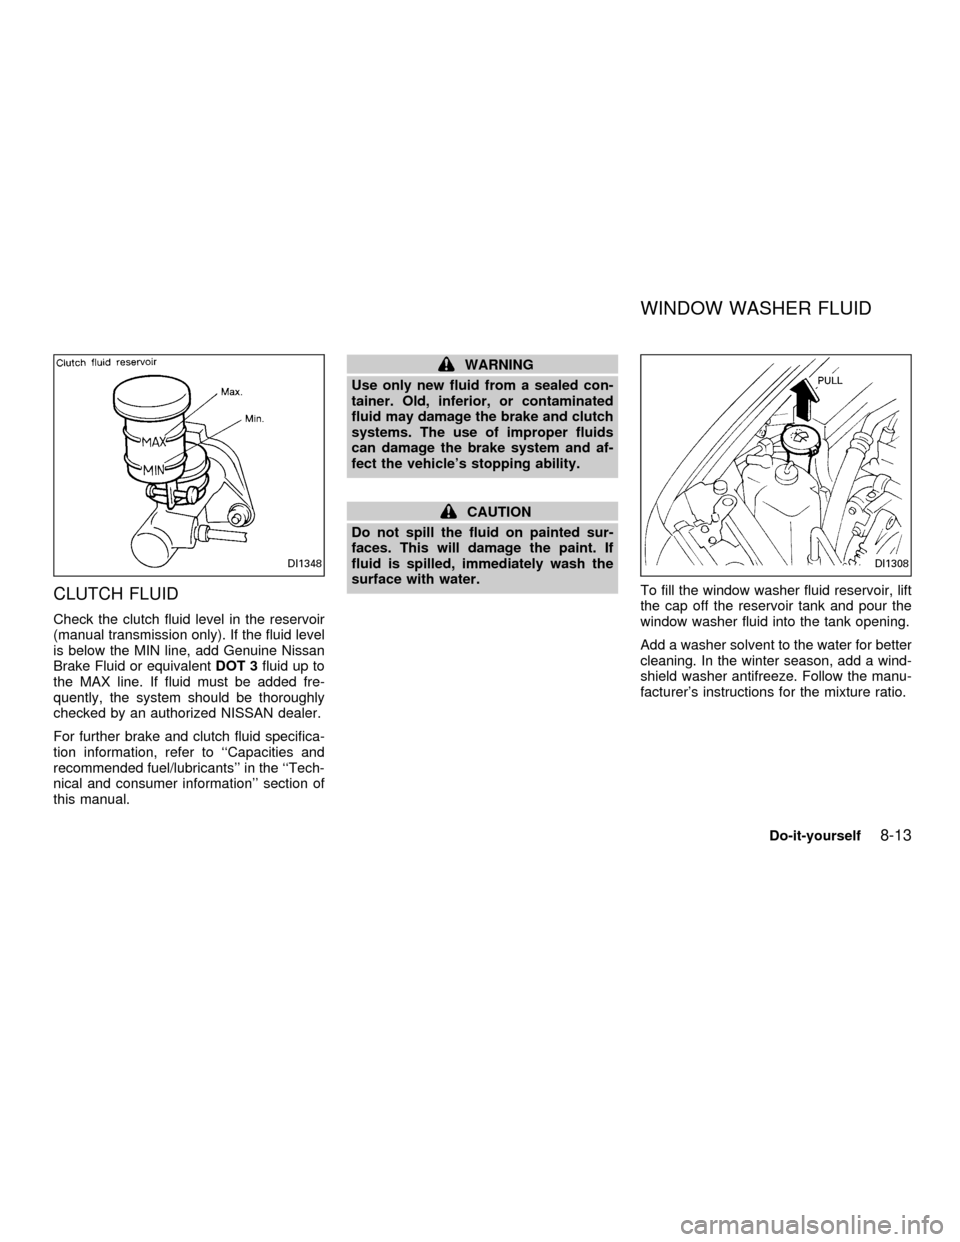
Check the clutch fluid level in the reservoir
(manual transmission only). If the fluid level
is below the MIN line, add Genuine Nissan
Brake Fluid or equivalentDOT 3fluid up to
the MAX line. If fluid must be added fre-
quently, the system should be thoroughly
checked by an authorized NISSAN dealer.
For further brake and clutch fluid specifica-
tion information, refer to ``Capacities and
recommended fuel/lubricants'' in the ``Tech-
nical and consumer information'' section of
this manual.
WARNING
Use only new fluid from a sealed con-
tainer. Old, inferior, or contaminated
fluid may damage the brake and clutch
systems. The use of improper fluids
can damage the brake system and af-
fect the vehicle's stopping ability.
CAUTION
Do not spill the fluid on painted sur-
faces. This will damage the paint. If
fluid is spilled, immediately wash the
surface with water.
To fill the window washer fluid reservoir, lift
the cap off the reservoir tank and pour the
window washer fluid into the tank opening.
Add a washer solvent to the water for better
cleaning. In the winter season, add a wind-
shield washer antifreeze. Follow the manu-
facturer's instructions for the mixture ratio.
DI1348DI1308
WINDOW WASHER FLUID
Do-it-yourself8-13
ZX
Page 198 of 258
CHECKING CLUTCH PEDAL
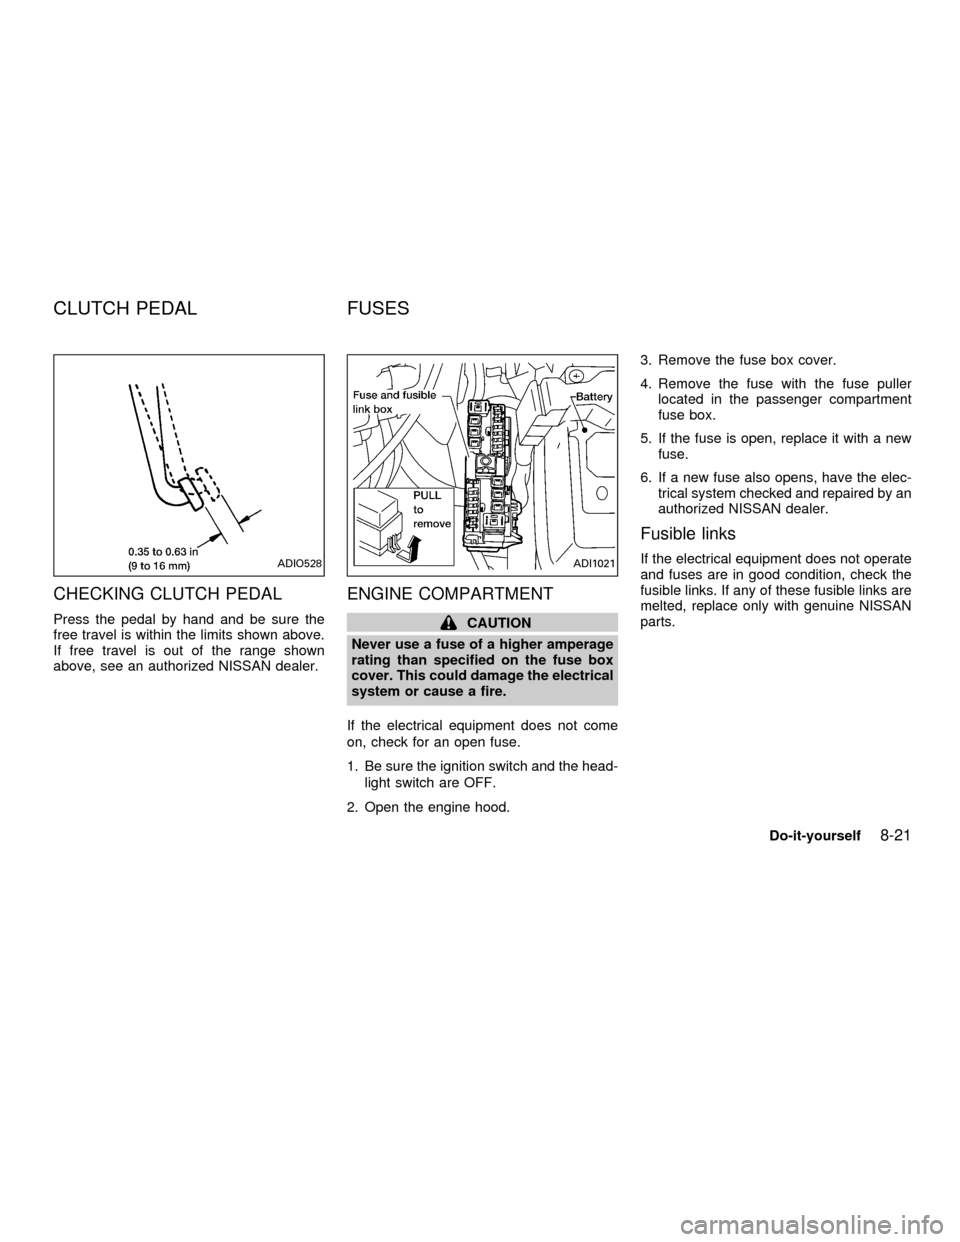
Press the pedal by hand and be sure the
free travel is within the limits shown above.
If free travel is out of the range shown
above, see an authorized NISSAN dealer.
ENGINE COMPARTMENT
CAUTION
Never use a fuse of a higher amperage
rating than specified on the fuse box
cover. This could damage the electrical
system or cause a fire.
If the electrical equipment does not come
on, check for an open fuse.
1. Be sure the ignition switch and the head-
light switch are OFF.
2. Open the engine hood.3. Remove the fuse box cover.
4. Remove the fuse with the fuse puller
located in the passenger compartment
fuse box.
5. If the fuse is open, replace it with a new
fuse.
6. If a new fuse also opens, have the elec-
trical system checked and repaired by an
authorized NISSAN dealer.
Fusible links
If the electrical equipment does not operate
and fuses are in good condition, check the
fusible links. If any of these fusible links are
melted, replace only with genuine NISSAN
parts.ADIO528ADI1021
CLUTCH PEDAL FUSES
Do-it-yourself8-21
ZX
Page 220 of 258

cluding the spare, and adjust to the speci-
fied pressure if necessary. Check carefully
for damage, cuts or excessive wear.
Wheel nuts* ÐWhen checking the tires,
make sure no wheel nuts are missing, and
check for any loose wheel nuts. Tighten if
necessary.
Tire rotation* ÐTires should be rotated
every 7,500 miles (12,000 km).
Wheel alignment and balance ÐIf the
vehicle should pull to either side while driv-
ing on a straight and level road, or if you
detect uneven or abnormal tire wear, there
may be a need for a wheel alignment.
If the steering wheel or seat vibrates at
normal highway speeds, wheel balancing
may be needed.
Windshield wiper blades* ÐCheck for
cracks or wear if they do not wipe properly.
Doors and engine hood ÐCheck that all
doors and the hood operate properly. Also
ensure all latches lock securely. Lubricate
hinges, latches, rollers and links if neces-
sary. Make sure the secondary latch keeps
the hood from opening when the primary
latch is released.When driving in areas using road salt or
other corrosive materials, check lubrication
frequently.
Lights* ÐMake sure the headlights, stop
lights, tail lights, turn signal lights, and other
lights are all operating properly and installed
securely. Also check headlight aim.
INTERIOR MAINTENANCE
The maintenance items listed here should
be checked on a regular basis, such as
when performing periodic maintenance,
cleaning the vehicle, etc.
Additional information on the following
items with an ``*'' is found in the ``Do-it-
yourself'' section of this manual.
Warning lights and chimes ÐMake sure
all warning lights and buzzers/chimes are
operating properly.
Windshield wiper and washer* ÐCheck
that the wipers and washer operate properly
and that the wipers do not streak.
Windshield defroster ÐCheck that the air
comes out of the defroster outlets properly
and in sufficient quantity when operating the
heater or air conditioner.Steering wheel ÐCheck for changes in
the steering conditions, such as excessive
freeplay, hard steering or strange noises.
Seats ÐCheck seat position controls such
as seat adjusters, seatback recliner, etc. to
ensure they operate smoothly and all
latches lock securely in every position.
Check that the head restraints move up and
down smoothly and the locks (if so
equipped) hold securely in all latched posi-
tions.
Seat belts ÐCheck that all parts of the seat
belt system (for example, buckles, anchors,
adjusters and retractors) operate properly
and smoothly, and are installed securely.
Check the belt webbing for cuts, fraying,
wear or damage.
Accelerator pedal ÐCheck the pedal for
smooth operation and make sure the pedal
does not catch or require uneven effort.
Keep the floor mat away from the pedal.
Clutch pedal* ÐMake sure the pedal
operates smoothly and check that it has the
proper free travel.
Brakes ÐCheck that the brakes do not pull
the vehicle to one side when applied.
Maintenance
9-3
ZX