engine NISSAN ALTIMA 2002 L31 / 3.G Owner's Manual
[x] Cancel search | Manufacturer: NISSAN, Model Year: 2002, Model line: ALTIMA, Model: NISSAN ALTIMA 2002 L31 / 3.GPages: 249, PDF Size: 2.02 MB
Page 84 of 249
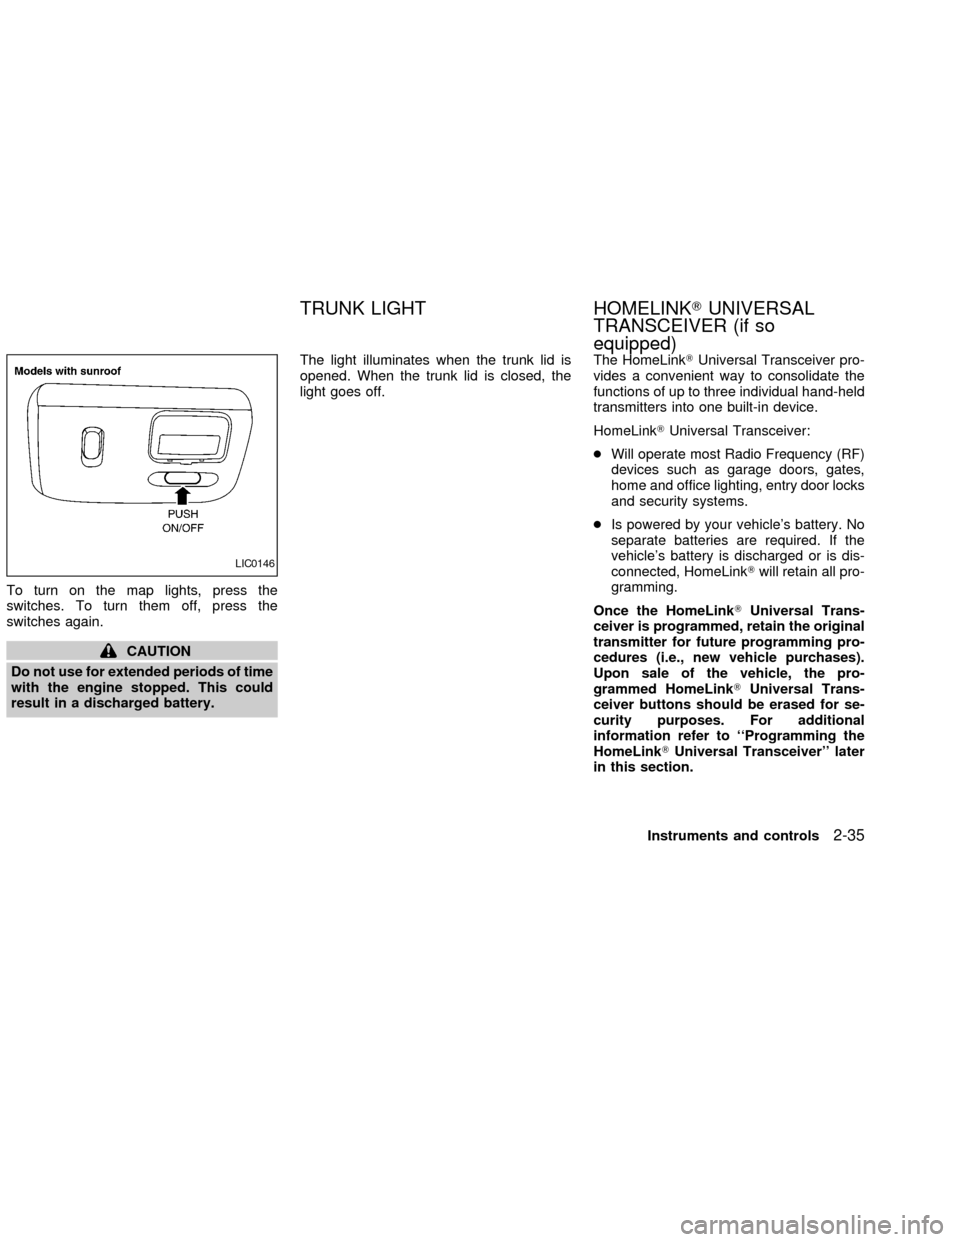
To turn on the map lights, press the
switches. To turn them off, press the
switches again.
CAUTION
Do not use for extended periods of time
with the engine stopped. This could
result in a discharged battery.The light illuminates when the trunk lid is
opened. When the trunk lid is closed, the
light goes off.The HomeLinkTUniversal Transceiver pro-
vides a convenient way to consolidate the
functions of up to three individual hand-held
transmitters into one built-in device.
HomeLinkTUniversal Transceiver:
cWill operate most Radio Frequency (RF)
devices such as garage doors, gates,
home and office lighting, entry door locks
and security systems.
cIs powered by your vehicle's battery. No
separate batteries are required. If the
vehicle's battery is discharged or is dis-
connected, HomeLinkTwill retain all pro-
gramming.
Once the HomeLinkTUniversal Trans-
ceiver is programmed, retain the original
transmitter for future programming pro-
cedures (i.e., new vehicle purchases).
Upon sale of the vehicle, the pro-
grammed HomeLinkTUniversal Trans-
ceiver buttons should be erased for se-
curity purposes. For additional
information refer to ``Programming the
HomeLinkTUniversal Transceiver'' later
in this section.
LIC0146
TRUNK LIGHT HOMELINKTUNIVERSAL
TRANSCEIVER (if so
equipped)
Instruments and controls2-35
ZX
Page 85 of 249
WARNING
cDo not use the HomeLinkTUniversal
Transceiver with any garage door
opener that lacks safety stop and
reverse features as required by fed-
eral safety standards. (These stan-
dards became effective for opener
models manufactured after April 1,
1982). A garage door opener which
cannot detect an object in the path of
a closing garage door and then au-
tomatically stop and reverse, does
not meet current federal safety stan-
dards. Using a garage door opener
without these features increases the
risk of serious injury or death.
cDuring programming, your garage
door or gate may open or close.
Make sure that people and objects
are clear of the garage door or gate
that you are programming.
cYour vehicle's engine should be
turned off while programming the
HomeLinkTUniversal Transceiver.
PROGRAMMING HomeLinkT
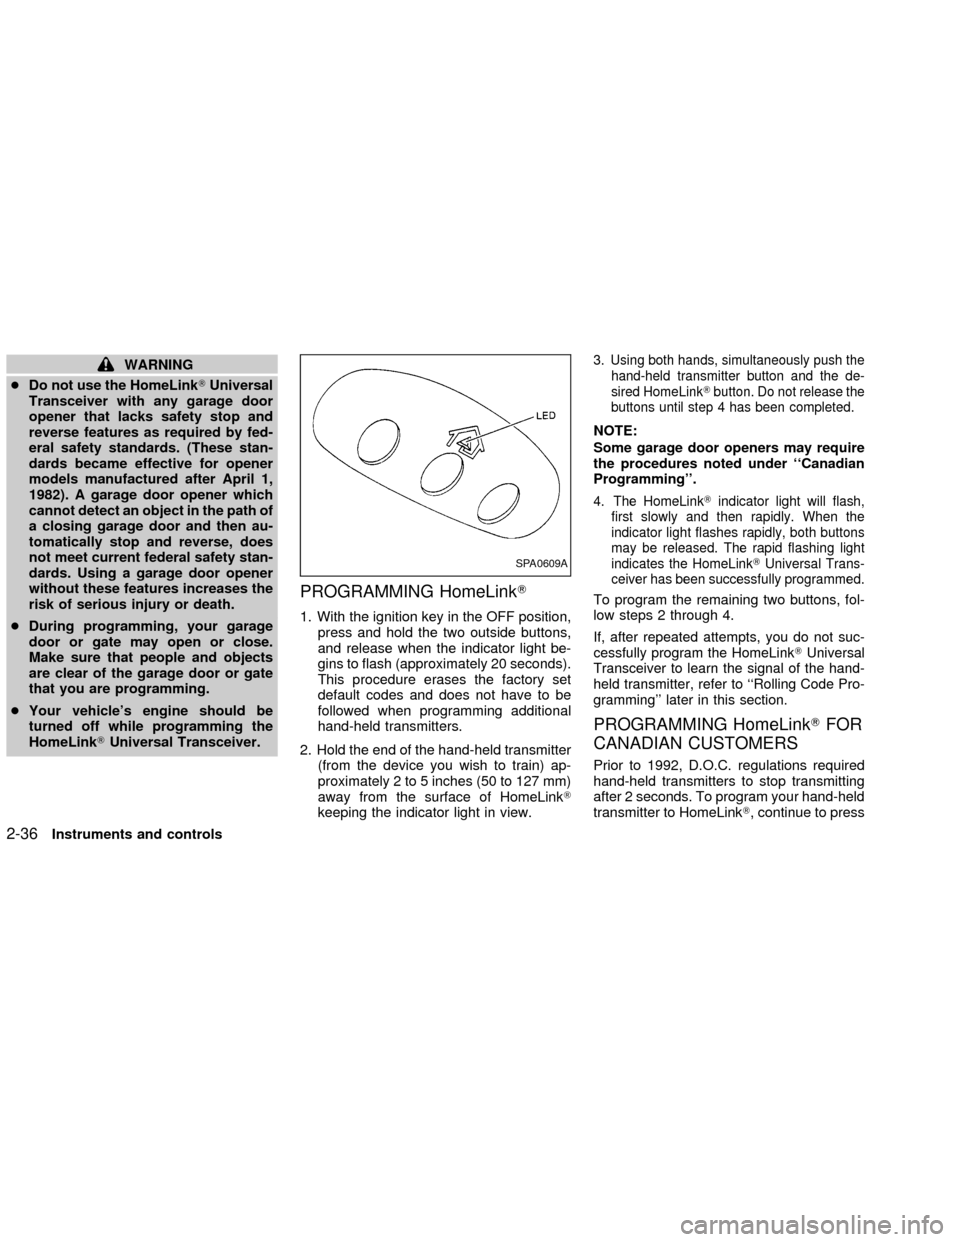
1. With the ignition key in the OFF position,
press and hold the two outside buttons,
and release when the indicator light be-
gins to flash (approximately 20 seconds).
This procedure erases the factory set
default codes and does not have to be
followed when programming additional
hand-held transmitters.
2. Hold the end of the hand-held transmitter
(from the device you wish to train) ap-
proximately 2 to 5 inches (50 to 127 mm)
away from the surface of HomeLinkT
keeping the indicator light in view.
3. Using both hands, simultaneously push the
hand-held transmitter button and the de-
sired HomeLinkTbutton. Do not release the
buttons until step 4 has been completed.
NOTE:
Some garage door openers may require
the procedures noted under ``Canadian
Programming''.
4. The HomeLinkTindicator light will flash,
first slowly and then rapidly. When the
indicator light flashes rapidly, both buttons
may be released. The rapid flashing light
indicates the HomeLinkTUniversal Trans-
ceiver has been successfully programmed.
To program the remaining two buttons, fol-
low steps 2 through 4.
If, after repeated attempts, you do not suc-
cessfully program the HomeLinkTUniversal
Transceiver to learn the signal of the hand-
held transmitter, refer to ``Rolling Code Pro-
gramming'' later in this section.
PROGRAMMING HomeLinkTFOR
CANADIAN CUSTOMERS
Prior to 1992, D.O.C. regulations required
hand-held transmitters to stop transmitting
after 2 seconds. To program your hand-held
transmitter to HomeLinkT, continue to press
SPA0609A
2-36Instruments and controls
ZX
Page 97 of 249
port rod to its original position, lower the
hood to approximately 12 inches above
the latch and release it. This allows
proper engagement of the hood latch.
WARNING
cMake sure the hood is completely
closed and latched before driving.
Failure to do so could cause the
hood to fly open and result in an
accident.
cIf you see steam or smoke coming
from the engine compartment, to
avoid injury do not open the hood.
OPENER OPERATION
WARNING
cDo not drive with the trunk lid open.
This could allow dangerous exhaust
gases to be drawn into the vehicle.
See ``Exhaust gas'' in the ``Starting
and driving'' section of this manual.cClosely supervise children when they
are around cars to prevent them from
playing and becoming locked in the
trunk where they could be seriously
injured. Keep the car locked, with the
trunk closed, when not in use, and
prevent children's access to car
keys.
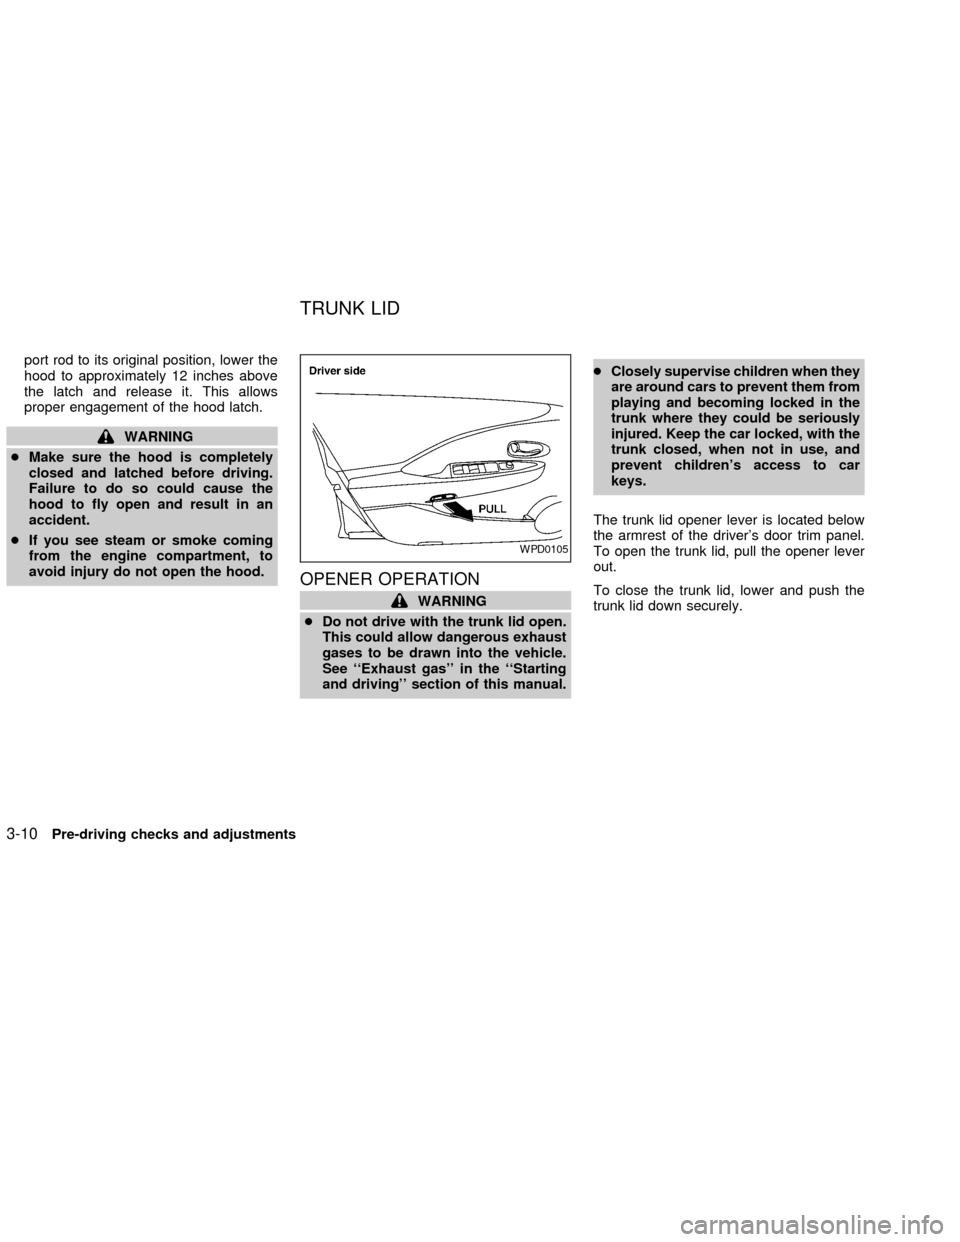
The trunk lid opener lever is located below
the armrest of the driver's door trim panel.
To open the trunk lid, pull the opener lever
out.
To close the trunk lid, lower and push the
trunk lid down securely.
WPD0105
TRUNK LID
3-10Pre-driving checks and adjustments
ZX
Page 99 of 249
To open the trunk from the inside, rotate the
illuminated lever until the lock releases and
push up on the trunk lid. The release lever is
made of a material that glows in the dark
after a brief exposure to ambient light.
The handle is located inside the trunk com-
partment on the trunk lock at the center of
the trunk lid.
OPENER OPERATION
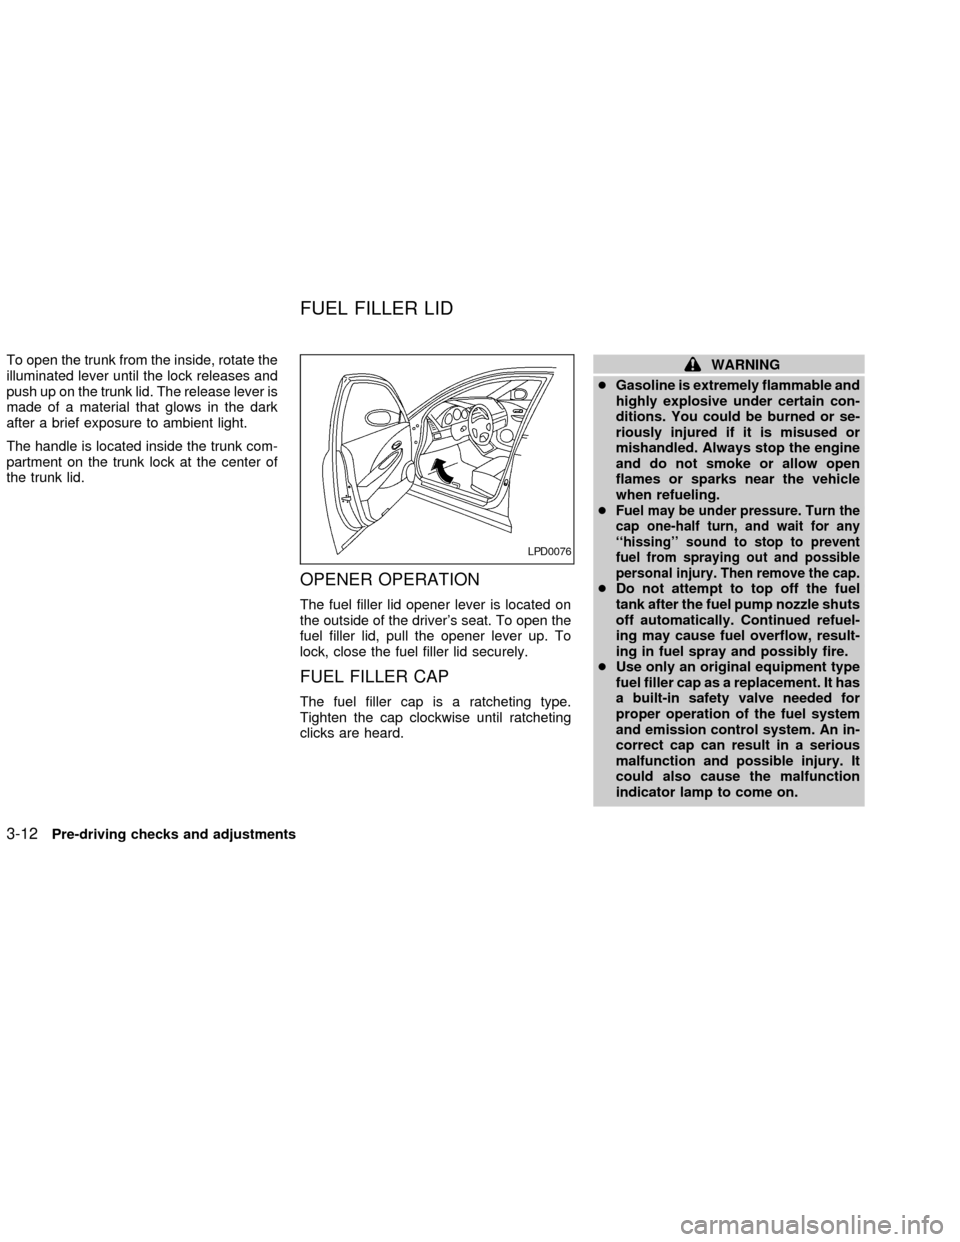
The fuel filler lid opener lever is located on
the outside of the driver's seat. To open the
fuel filler lid, pull the opener lever up. To
lock, close the fuel filler lid securely.
FUEL FILLER CAP
The fuel filler cap is a ratcheting type.
Tighten the cap clockwise until ratcheting
clicks are heard.
WARNING
cGasoline is extremely flammable and
highly explosive under certain con-
ditions. You could be burned or se-
riously injured if it is misused or
mishandled. Always stop the engine
and do not smoke or allow open
flames or sparks near the vehicle
when refueling.
c
Fuel may be under pressure. Turn the
cap one-half turn, and wait for any
``hissing'' sound to stop to prevent
fuel from spraying out and possible
personal injury. Then remove the cap.
cDo not attempt to top off the fuel
tank after the fuel pump nozzle shuts
off automatically. Continued refuel-
ing may cause fuel overflow, result-
ing in fuel spray and possibly fire.
cUse only an original equipment type
fuel filler cap as a replacement. It has
a built-in safety valve needed for
proper operation of the fuel system
and emission control system. An in-
correct cap can result in a serious
malfunction and possible injury. It
could also cause the malfunction
indicator lamp to come on.
LPD0076
FUEL FILLER LID
3-12Pre-driving checks and adjustments
ZX
Page 106 of 249
WARNING
cThe air conditioner cooling function
operates only when the engine is
running.
c
Do not leave children, impaired adults,
or pets alone in your vehicle. On hot
sunny days, temperatures in a closed
vehicle could quickly become high
enough to cause severe or possibly
fatal injuries to people or animals.
cDo not use the recirculation mode
for long periods as it may cause the
interior air to become stale and the
windows to fog up.
cPositioning of the heating or air con-
ditioning controls should not be
done while driving, so full attention
may be given to vehicle operation.
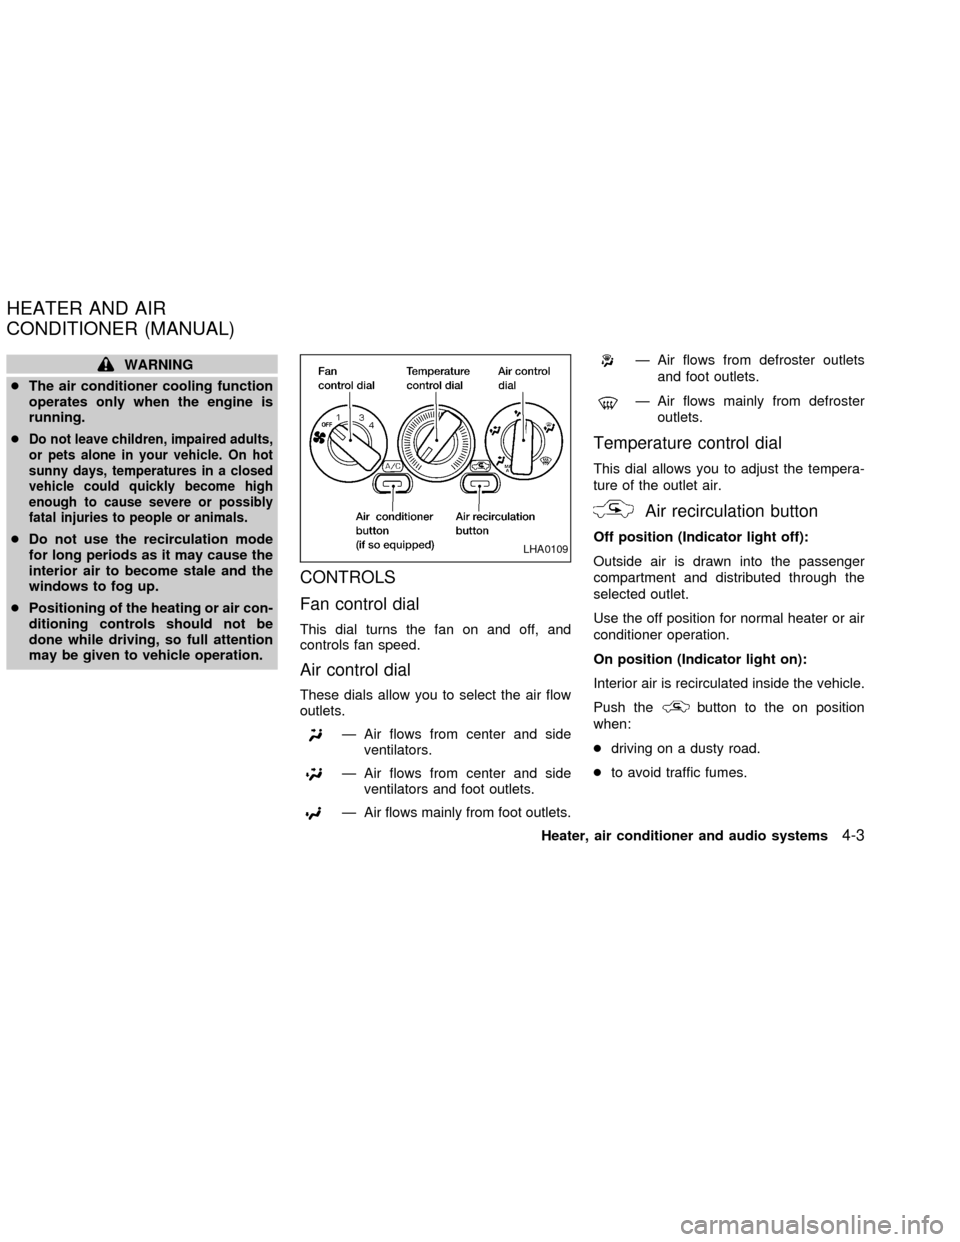
CONTROLS
Fan control dial
This dial turns the fan on and off, and
controls fan speed.
Air control dial
These dials allow you to select the air flow
outlets.
Ð Air flows from center and side
ventilators.
Ð Air flows from center and side
ventilators and foot outlets.
Ð Air flows mainly from foot outlets.
Ð Air flows from defroster outlets
and foot outlets.
Ð Air flows mainly from defroster
outlets.
Temperature control dial
This dial allows you to adjust the tempera-
ture of the outlet air.
Air recirculation button
Off position (Indicator light off):
Outside air is drawn into the passenger
compartment and distributed through the
selected outlet.
Use the off position for normal heater or air
conditioner operation.
On position (Indicator light on):
Interior air is recirculated inside the vehicle.
Push the
button to the on position
when:
cdriving on a dusty road.
cto avoid traffic fumes.
LHA0109
HEATER AND AIR
CONDITIONER (MANUAL)
Heater, air conditioner and audio systems4-3
ZX
Page 107 of 249

cfor maximum cooling when using the air
conditioner
Air conditioner button
(if so equipped)
This button is provided only on vehicles
equipped with an air conditioner.
Start the engine, turn the fan control dial to
the desired (1 to 4) position and push the
A/C button to turn on the air conditioner.
The indicator light comes on when the air
conditioner is operating. To stop the air
conditioner, push the switch again.
The air conditioner cooling function op-
erates only when the engine is running.
HEATER OPERATION
Heating
This mode is used to direct heated air to the
foot outlets. Some air also flows from the
defroster outlets.
1. Push the
button to the off position
for normal heating.
2.
Turn the air control dial to theposition.
3. Move the fan control dial to the desired
position.4. Move the temperature control dial to the
desired position between the middle and
the HOT position.
Ventilation
This mode directs outside air to the side and
center ventilators.
1. Turn the air control dial to the
po-
sition.
2. Push the
button in.
3. Move the fan control dial to the desired
position.
4. Move the temperature control dial to the
desired position.
Defrosting or defogging
This mode is used to defrost/defog the
windows.
1.
Turn the air control dial to theposition.
2. Move the fan control dial to the desired
position.
3. Move the temperature control dial to the
desired position between the middle and
the HOT position.
cTo quickly remove ice or fog from thewindows, turn on the fan control dial to 4
and the temperature control dial to the
full HOT position.
cWhen the
position is selected, the
air conditioner automatically turns on
(however, the indicator light will not illu-
minate). This dehumidifies the air which
helps defog the windshield. The air recir-
culation mode automatically turns off,
allowing outside air to be drawn into the
passenger compartment which helps de-
fog the windshield.
Bi-level heating/cooling
This mode directs air from the side, center
and foot outlets.
1. Push the
button to the off position.
2.
Turn the air control dial to theposition.
3. Move the fan control dial to the desired
position.
4. Move the temperature control dial to the
desired position.
Heating and defogging
This mode heats the interior and defogs the
windshield.
1.
Turn the air control dial to theposition.
4-4Heater, air conditioner and audio systems
ZX
Page 108 of 249

2. Move the fan control dial to the desired
position.
3. Move the temperature control dial to the
desired position between the middle and
the HOT position.
Operating tips
cClear snow and ice from the wiper
blades and air inlet in front of the
windshield. This improves heater op-
eration.
cWhen the
orpositions are
selected, the air recirculation mode auto-
matically turns off.
Outside air is drawn into the passenger
compartment to improve the defogging
performance.
AIR CONDITIONER OPERATION
(if so equipped)
Start the engine, move the fan control dial to
the desired (1 to 4) position and push in the
A/C button to activate the air conditioner.
When the air conditioner is on, cooling and
dehumidifying functions are added to the
heater operation.
The air conditioner cooling function op-
erates only when the engine is running.
Cooling
This mode is used to cool and dehumidify
the air.
1. Push the
button to the off position.
2. Turn the air control dial to the
po-
sition.
3. Move the fan control dial to the desired
position.
4. Push on the air conditioner button. The
indicator light comes on.
5. Move the temperature control dial to the
desired position.
cFor quick cooling when the outside tem-
perature is high, push the
button to
the on position (Indicator light on). Be
sure to return the
button to the off
position for normal cooling.
Dehumidified heating
This mode is used to heat and dehumidify.
1. Push the
button to the off position.
2. Turn the air control dial to the
po-
sition.
3. Move the fan control dial to the desired
position.4. Push on the air conditioner button. The
indicator light comes on.
5. Move the temperature control dial to the
desired position.
Dehumidified defogging
This mode defogs the windows and dehu-
midifies the air.
1. Turn the air control dial to the
posi-
tion.
When the
position is selected, the
air conditioner automatically turns on
(however, the indicator light will not illu-
minate). This dehumidifies the air which
helps defog the windshield. The air recir-
culation mode automatically turns off,
allowing outside air to be drawn into the
passenger compartment which helps de-
fog the windshield.
2. Move the fan control dial to the desired
position.
3. Move the temperature control dial to the
desired position.
Outside air is drawn into the passenger
compartment to improve the defogging per-
formance.
Heater, air conditioner and audio systems
4-5
ZX
Page 109 of 249

Operating tips
cKeep the windows and sun roof closed
while the air conditioner is in operation.
cAfter parking in the sun, drive for two or
three minutes with the windows open to
vent hot air from the passenger compart-
ment. Then, close the windows. This
allows the air conditioner to cool the
interior more quickly.
cThe air conditioner system should be
operated for approximately ten min-
utes at least once a month. This helps
prevent damage to the system due to
lack of lubrication.
cIf the engine coolant temperature gauge
exceeds the H (hot) position, turn the air
conditioner off. See ``If your vehicle over-
heats'' in the ``In case of emergency''
section of this Owner's Manual for addi-
tional information.
AIR FLOW CHARTS
The charts on the following pages show the
switch and lever positions forMAXIMUM
and QUICKheating, cooling, or defrosting.
LHA0110
4-6Heater, air conditioner and audio systems
ZX
Page 112 of 249
WARNING
cThe air conditioner cooling function
operates only when the engine is
running.cDo not leave children, impaired
adults, or pets alone in your vehicle.
On hot, sunny days, temperatures in
a closed vehicle could quickly be-
come high enough to cause severe orpossibly fatal injuries to people or
animals.
cDo not use the recirculation mode
for long periods as it may cause the
interior air to become stale and the
windows to fog up.
cPositioning of the heating or air con-
ditioning controls should not be
done while driving, so full attention
may be given to vehicle operation.
Start the engine and operate the controls to
activate the air conditioner.
AUTOMATIC OPERATION
Cooling and/or dehumidified heat-
ing (AUTO)
This mode may be normally used all year
round as the system automatically works to
keep a constant temperature. Air flow distri-
bution and fan speed are also controlled
automatically.
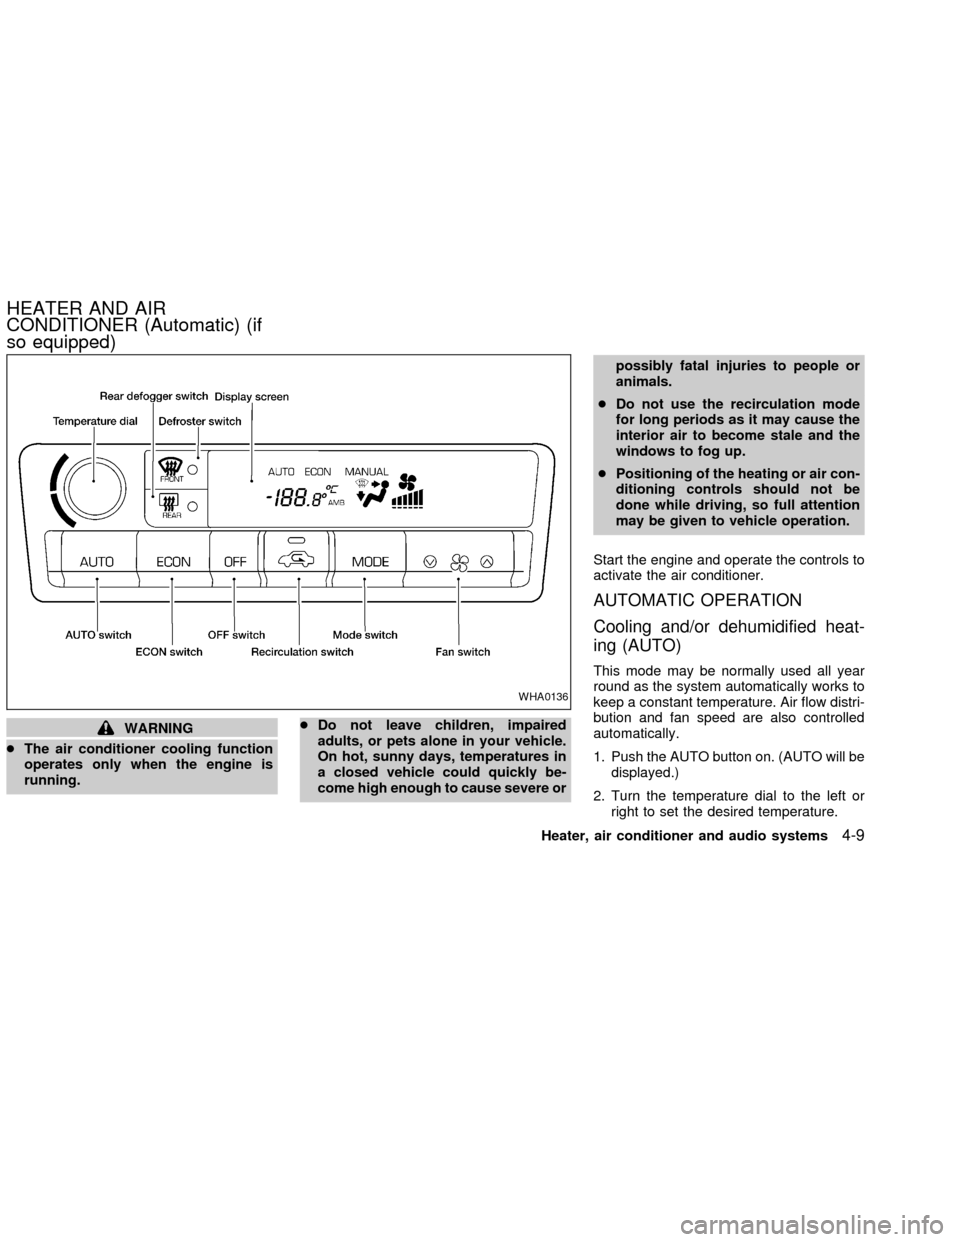
1. Push the AUTO button on. (AUTO will be
displayed.)
2. Turn the temperature dial to the left or
right to set the desired temperature.
WHA0136
HEATER AND AIR
CONDITIONER (Automatic) (if
so equipped)
Heater, air conditioner and audio systems4-9
ZX
Page 114 of 249
OPERATING TIPS
cWhen the engine coolant temperature
and outside air temperature are low, the
air flow from the foot outlets may not
operate for a maximum of 150 seconds.
However, this is not a malfunction. After
the coolant temperature warms up, air
flow from the foot outlets will operate
normally.
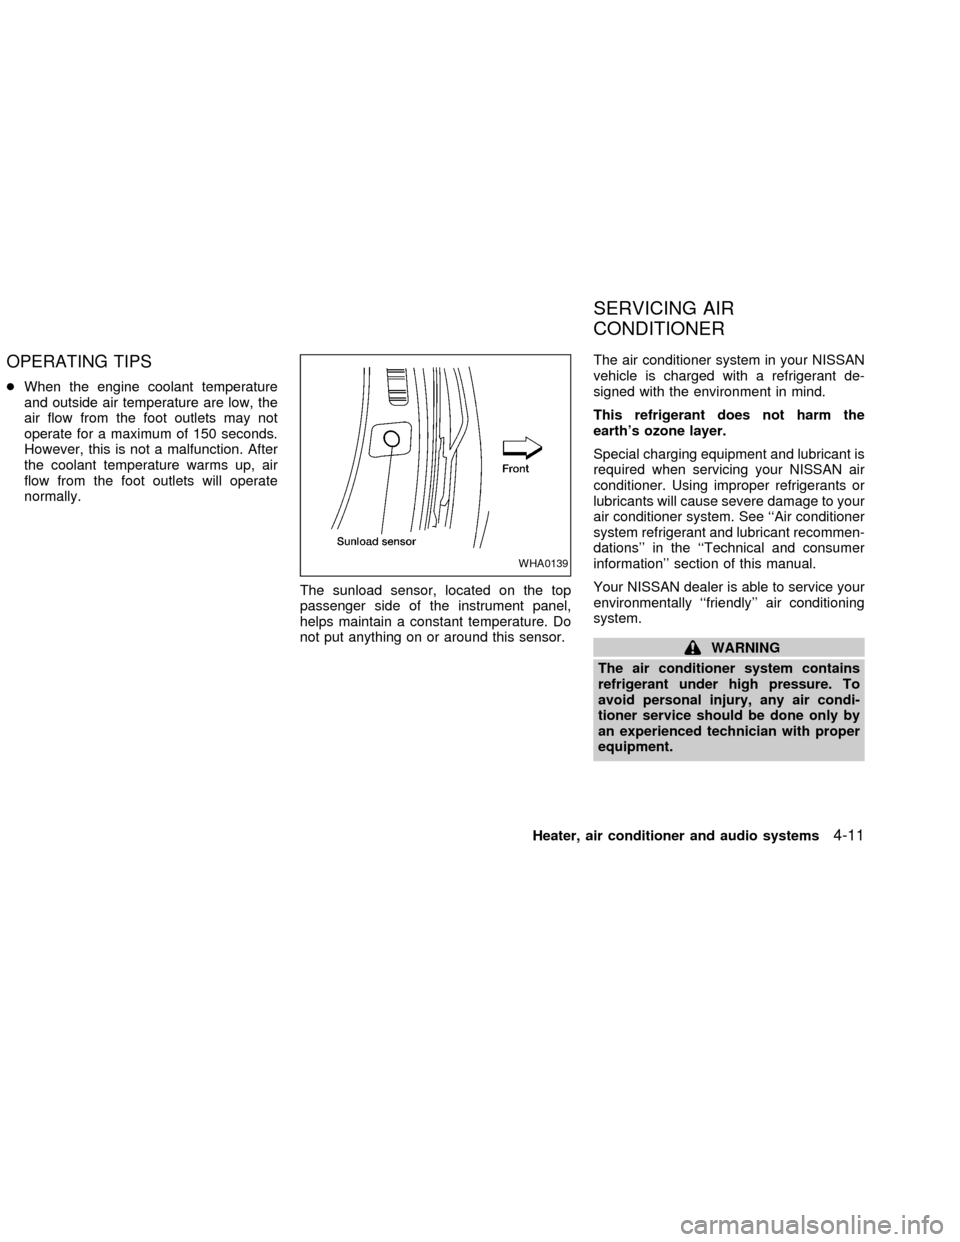
The sunload sensor, located on the top
passenger side of the instrument panel,
helps maintain a constant temperature. Do
not put anything on or around this sensor.The air conditioner system in your NISSAN
vehicle is charged with a refrigerant de-
signed with the environment in mind.
This refrigerant does not harm the
earth's ozone layer.
Special charging equipment and lubricant is
required when servicing your NISSAN air
conditioner. Using improper refrigerants or
lubricants will cause severe damage to your
air conditioner system. See ``Air conditioner
system refrigerant and lubricant recommen-
dations'' in the ``Technical and consumer
information'' section of this manual.
Your NISSAN dealer is able to service your
environmentally ``friendly'' air conditioning
system.
WARNING
The air conditioner system contains
refrigerant under high pressure. To
avoid personal injury, any air condi-
tioner service should be done only by
an experienced technician with proper
equipment.
WHA0139
SERVICING AIR
CONDITIONER
Heater, air conditioner and audio systems4-11
ZX