warning light NISSAN ALTIMA 2002 L31 / 3.G Owner's Manual
[x] Cancel search | Manufacturer: NISSAN, Model Year: 2002, Model line: ALTIMA, Model: NISSAN ALTIMA 2002 L31 / 3.GPages: 249, PDF Size: 2.02 MB
Page 76 of 249
CAUTION
cDo not use for anything other than
sunglasses.
cDo not leave sunglasses in the sun-
glasses case while parking in direct
sunlight. The heat may damage the
sunglasses.
CUP HOLDERS
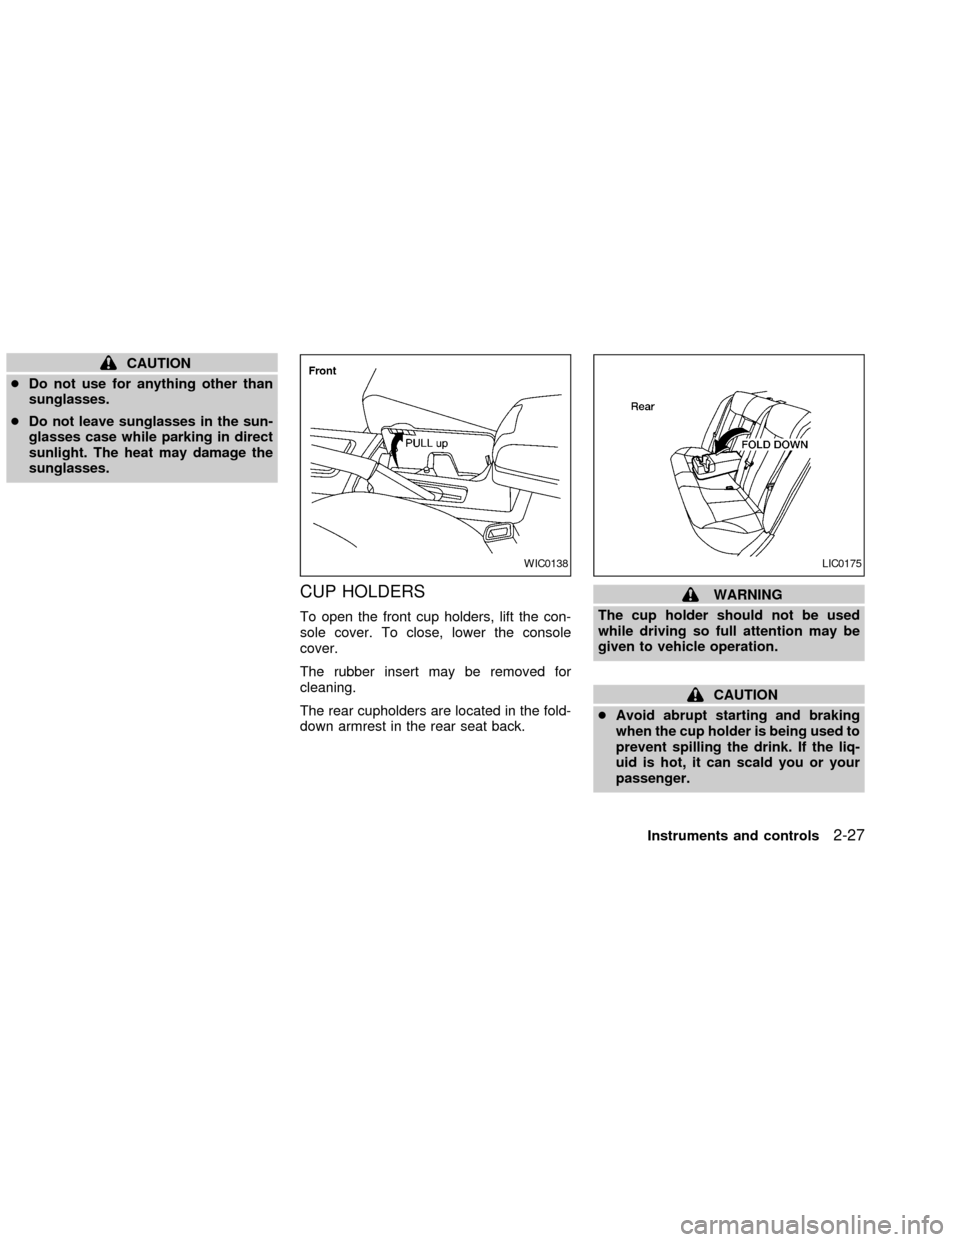
To open the front cup holders, lift the con-
sole cover. To close, lower the console
cover.
The rubber insert may be removed for
cleaning.
The rear cupholders are located in the fold-
down armrest in the rear seat back.
WARNING
The cup holder should not be used
while driving so full attention may be
given to vehicle operation.
CAUTION
cAvoid abrupt starting and braking
when the cup holder is being used to
prevent spilling the drink. If the liq-
uid is hot, it can scald you or your
passenger.
WIC0138LIC0175
Instruments and controls2-27
ZX
Page 77 of 249
cUse only soft cups in the cup holder.
Hard objects can injure you in an
accident.
GLOVE BOX
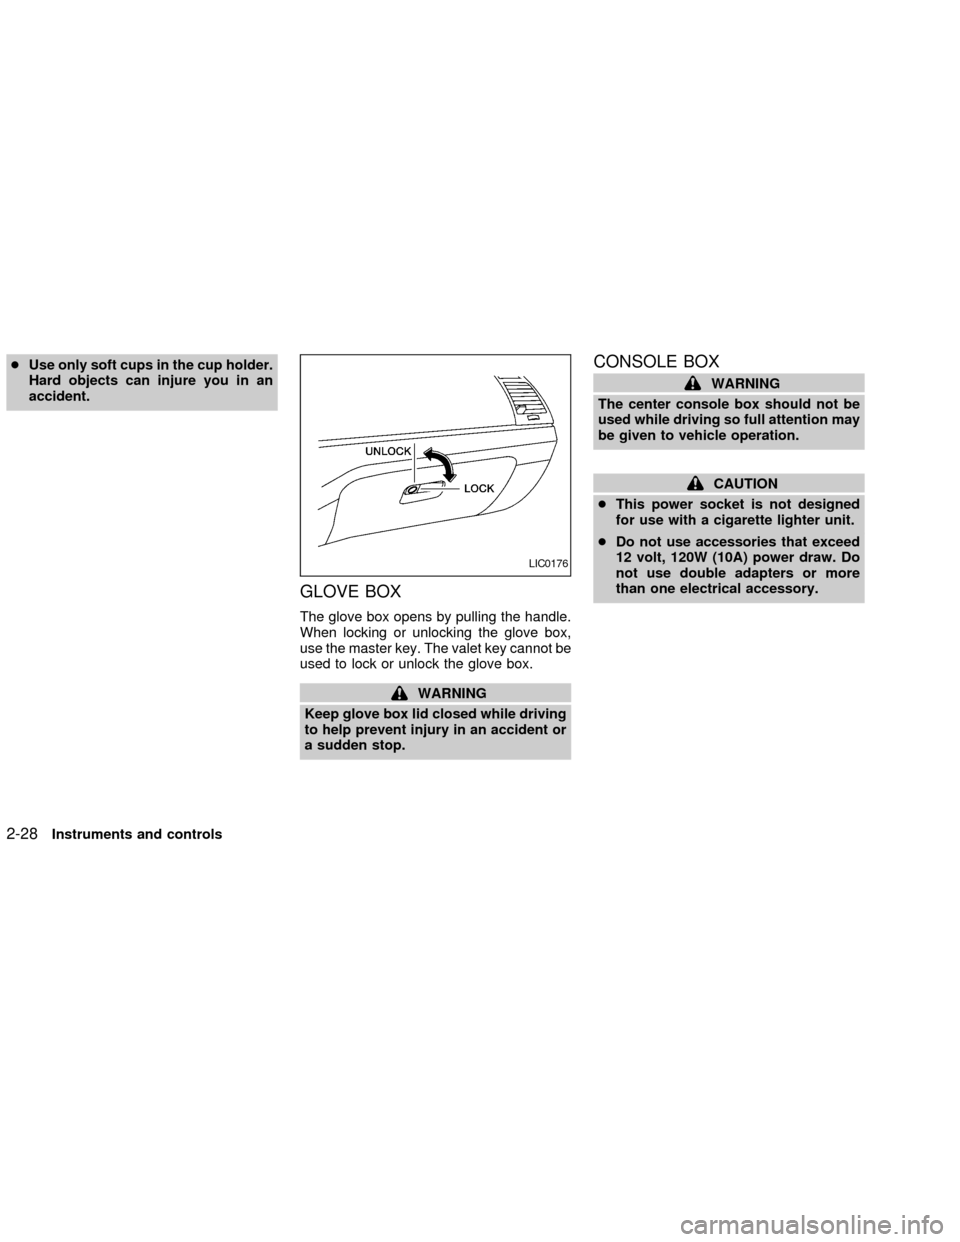
The glove box opens by pulling the handle.
When locking or unlocking the glove box,
use the master key. The valet key cannot be
used to lock or unlock the glove box.
WARNING
Keep glove box lid closed while driving
to help prevent injury in an accident or
a sudden stop.
CONSOLE BOX
WARNING
The center console box should not be
used while driving so full attention may
be given to vehicle operation.
CAUTION
cThis power socket is not designed
for use with a cigarette lighter unit.
cDo not use accessories that exceed
12 volt, 120W (10A) power draw. Do
not use double adapters or more
than one electrical accessory.
LIC0176
2-28Instruments and controls
ZX
Page 85 of 249
WARNING
cDo not use the HomeLinkTUniversal
Transceiver with any garage door
opener that lacks safety stop and
reverse features as required by fed-
eral safety standards. (These stan-
dards became effective for opener
models manufactured after April 1,
1982). A garage door opener which
cannot detect an object in the path of
a closing garage door and then au-
tomatically stop and reverse, does
not meet current federal safety stan-
dards. Using a garage door opener
without these features increases the
risk of serious injury or death.
cDuring programming, your garage
door or gate may open or close.
Make sure that people and objects
are clear of the garage door or gate
that you are programming.
cYour vehicle's engine should be
turned off while programming the
HomeLinkTUniversal Transceiver.
PROGRAMMING HomeLinkT
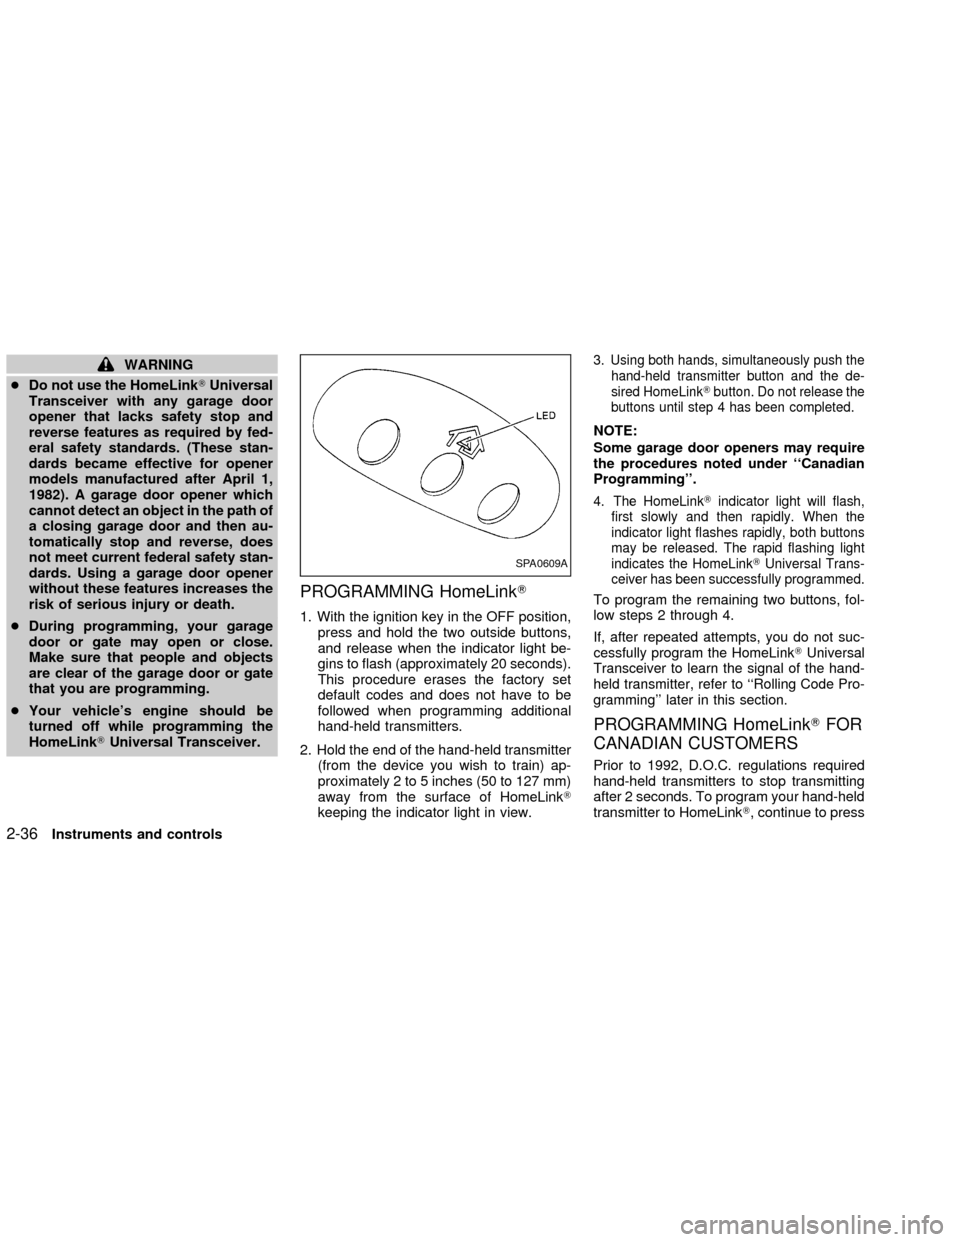
1. With the ignition key in the OFF position,
press and hold the two outside buttons,
and release when the indicator light be-
gins to flash (approximately 20 seconds).
This procedure erases the factory set
default codes and does not have to be
followed when programming additional
hand-held transmitters.
2. Hold the end of the hand-held transmitter
(from the device you wish to train) ap-
proximately 2 to 5 inches (50 to 127 mm)
away from the surface of HomeLinkT
keeping the indicator light in view.
3. Using both hands, simultaneously push the
hand-held transmitter button and the de-
sired HomeLinkTbutton. Do not release the
buttons until step 4 has been completed.
NOTE:
Some garage door openers may require
the procedures noted under ``Canadian
Programming''.
4. The HomeLinkTindicator light will flash,
first slowly and then rapidly. When the
indicator light flashes rapidly, both buttons
may be released. The rapid flashing light
indicates the HomeLinkTUniversal Trans-
ceiver has been successfully programmed.
To program the remaining two buttons, fol-
low steps 2 through 4.
If, after repeated attempts, you do not suc-
cessfully program the HomeLinkTUniversal
Transceiver to learn the signal of the hand-
held transmitter, refer to ``Rolling Code Pro-
gramming'' later in this section.
PROGRAMMING HomeLinkTFOR
CANADIAN CUSTOMERS
Prior to 1992, D.O.C. regulations required
hand-held transmitters to stop transmitting
after 2 seconds. To program your hand-held
transmitter to HomeLinkT, continue to press
SPA0609A
2-36Instruments and controls
ZX
Page 93 of 249

Unlocking doors
1. Push the UNLOCK button on the keyfob
once.
cOnly the driver's door unlocks
cThe hazard indicator flashes once if all
doors are completely closed with the
ignition key in any position except the ON
position.
cThe interior light turns on and the light
timer activates for 30 seconds when the
switch is in the centerjposition with the
ignition key in any position except the ON
position.2. Push the UNLOCK button on the keyfob
again within 5 seconds.
cAll doors unlock
cThe hazard indicator flashes once if all
doors are completely closed.
If the following operation is not carried
out within 1 minute after pressing the
ªUNLOCKº button, all doors will be
locked automatically.
cWhen any door is not opened.
cWhen the ignition key is not set in the
ON position.
The interior light can be turned off without
waiting for 30 seconds by turning the igni-
tion switch to the ON position or by locking
the doors with the keyfob.
Releasing the trunk lid
1. Push the trunk button on the keyfob for
longer than 0.5 second. The trunk re-
lease button on the keyfob will not oper-
ate when the ignition switch is in the ON
position.
2. The trunk lid opens.The trunk lid will not open with the trunk
lid release cancel switch turned to OFF.
See ªTrunk lidº later in this section for
cancel switch. It can be opened only with
the key.
Using the panic alarm
If you are near your vehicle and feel threat-
ened, you may activate the alarm to call
attention as follows:
1. Push and hold the PANIC button on the
keyfob forlonger than 0.5 seconds.
2. The theft warning alarm and headlights
will stay on for 25 seconds.
3. The panic alarm stops when:
cit has run for 25 seconds, or
cany button is pressed on the keyfob.
LPD0071
3-6Pre-driving checks and adjustments
ZX
Page 99 of 249
To open the trunk from the inside, rotate the
illuminated lever until the lock releases and
push up on the trunk lid. The release lever is
made of a material that glows in the dark
after a brief exposure to ambient light.
The handle is located inside the trunk com-
partment on the trunk lock at the center of
the trunk lid.
OPENER OPERATION
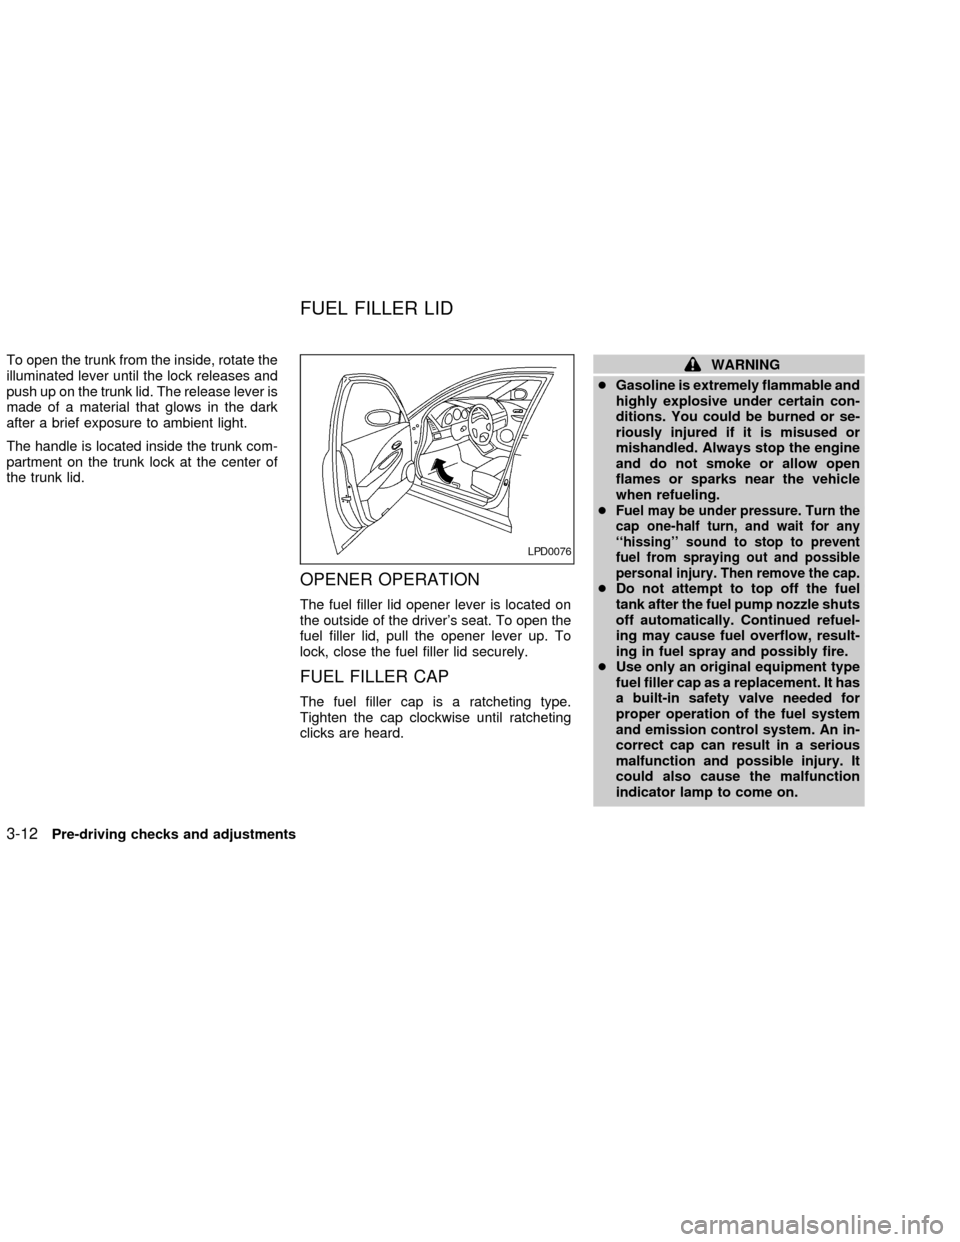
The fuel filler lid opener lever is located on
the outside of the driver's seat. To open the
fuel filler lid, pull the opener lever up. To
lock, close the fuel filler lid securely.
FUEL FILLER CAP
The fuel filler cap is a ratcheting type.
Tighten the cap clockwise until ratcheting
clicks are heard.
WARNING
cGasoline is extremely flammable and
highly explosive under certain con-
ditions. You could be burned or se-
riously injured if it is misused or
mishandled. Always stop the engine
and do not smoke or allow open
flames or sparks near the vehicle
when refueling.
c
Fuel may be under pressure. Turn the
cap one-half turn, and wait for any
``hissing'' sound to stop to prevent
fuel from spraying out and possible
personal injury. Then remove the cap.
cDo not attempt to top off the fuel
tank after the fuel pump nozzle shuts
off automatically. Continued refuel-
ing may cause fuel overflow, result-
ing in fuel spray and possibly fire.
cUse only an original equipment type
fuel filler cap as a replacement. It has
a built-in safety valve needed for
proper operation of the fuel system
and emission control system. An in-
correct cap can result in a serious
malfunction and possible injury. It
could also cause the malfunction
indicator lamp to come on.
LPD0076
FUEL FILLER LID
3-12Pre-driving checks and adjustments
ZX
Page 102 of 249
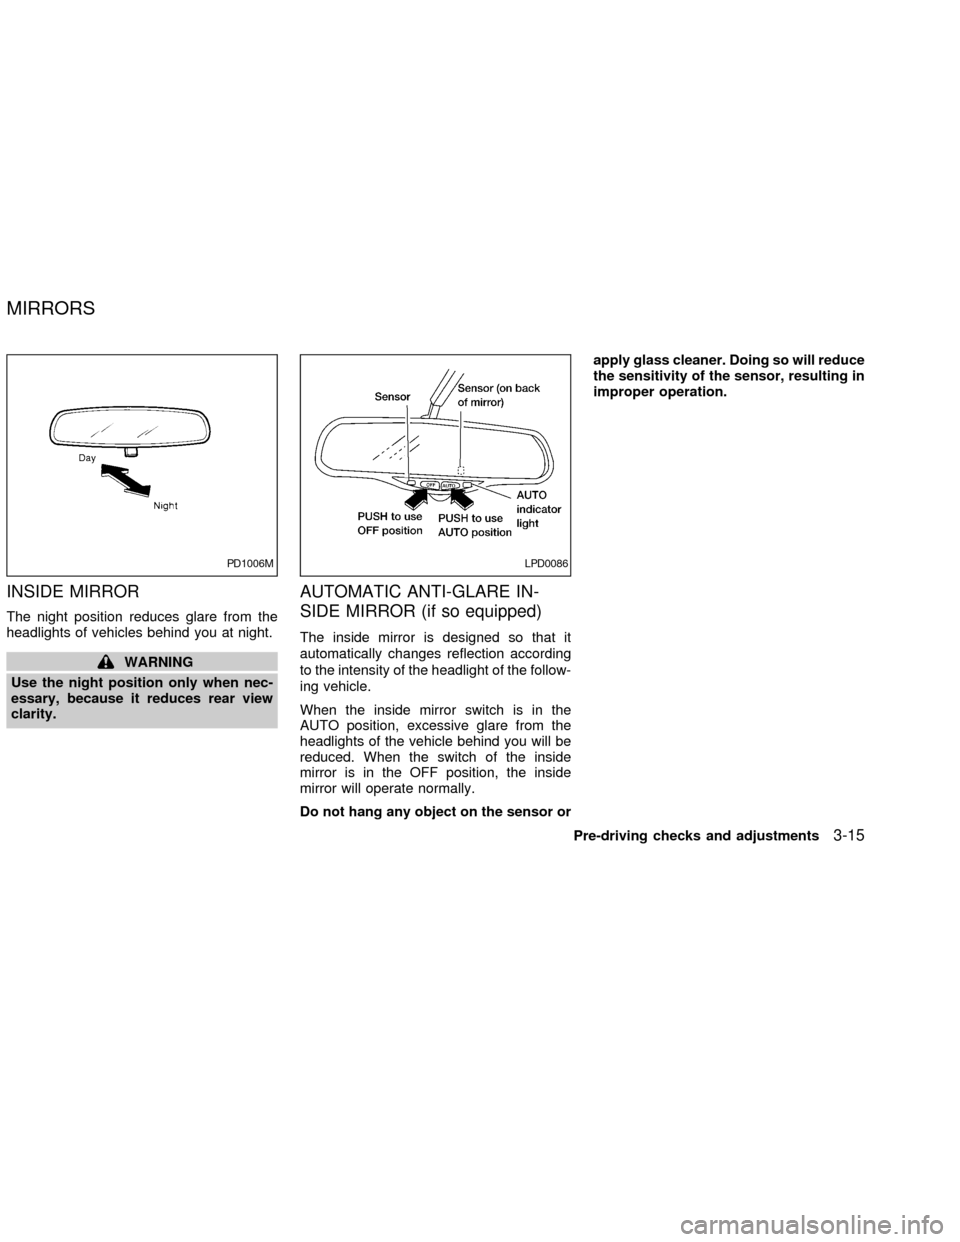
INSIDE MIRROR
The night position reduces glare from the
headlights of vehicles behind you at night.
WARNING
Use the night position only when nec-
essary, because it reduces rear view
clarity.
AUTOMATIC ANTI-GLARE IN-
SIDE MIRROR (if so equipped)
The inside mirror is designed so that it
automatically changes reflection according
to the intensity of the headlight of the follow-
ing vehicle.
When the inside mirror switch is in the
AUTO position, excessive glare from the
headlights of the vehicle behind you will be
reduced. When the switch of the inside
mirror is in the OFF position, the inside
mirror will operate normally.
Do not hang any object on the sensor orapply glass cleaner. Doing so will reduce
the sensitivity of the sensor, resulting in
improper operation.
PD1006MLPD0086
MIRRORS
Pre-driving checks and adjustments3-15
ZX
Page 106 of 249
WARNING
cThe air conditioner cooling function
operates only when the engine is
running.
c
Do not leave children, impaired adults,
or pets alone in your vehicle. On hot
sunny days, temperatures in a closed
vehicle could quickly become high
enough to cause severe or possibly
fatal injuries to people or animals.
cDo not use the recirculation mode
for long periods as it may cause the
interior air to become stale and the
windows to fog up.
cPositioning of the heating or air con-
ditioning controls should not be
done while driving, so full attention
may be given to vehicle operation.
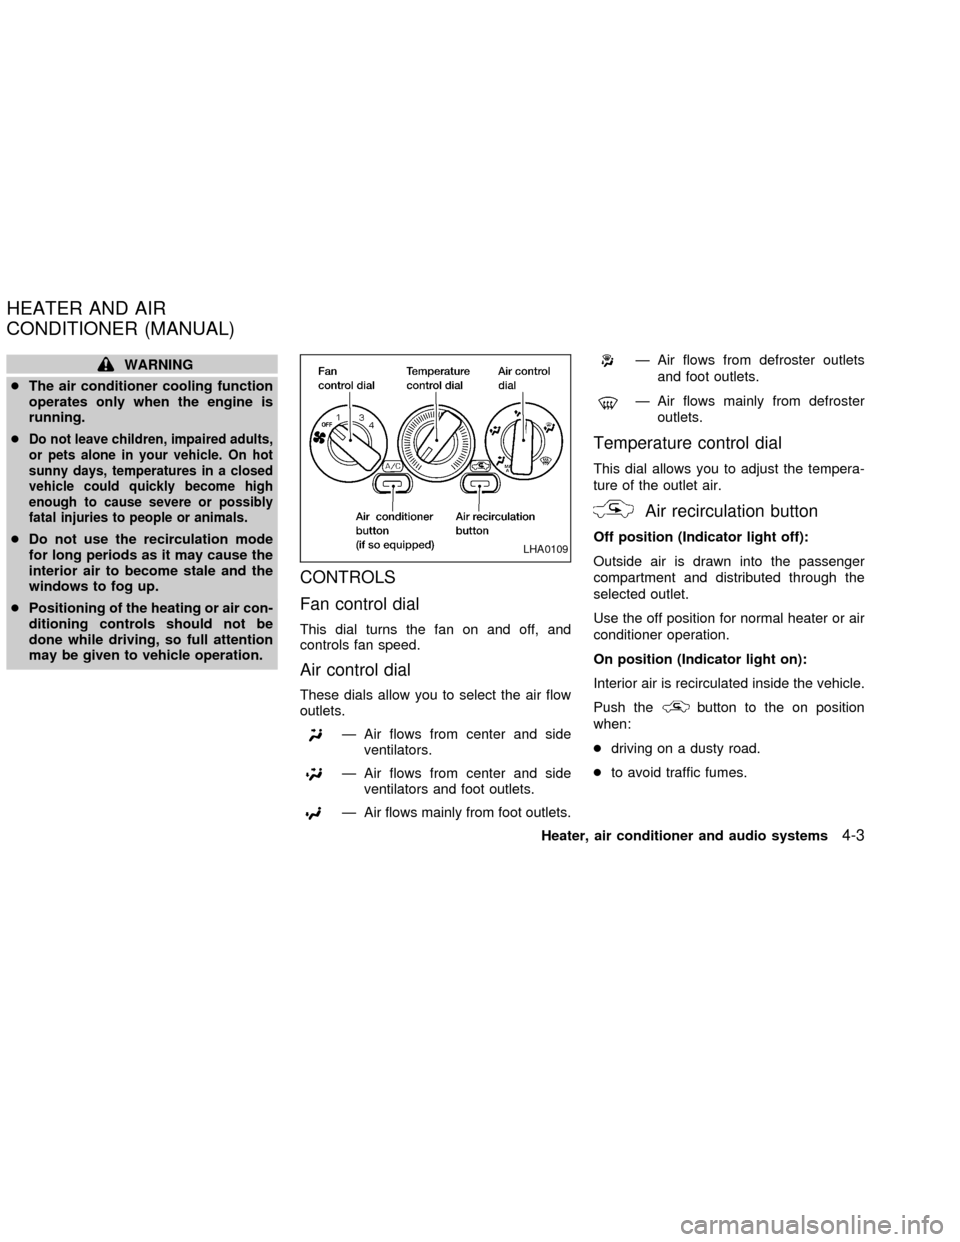
CONTROLS
Fan control dial
This dial turns the fan on and off, and
controls fan speed.
Air control dial
These dials allow you to select the air flow
outlets.
Ð Air flows from center and side
ventilators.
Ð Air flows from center and side
ventilators and foot outlets.
Ð Air flows mainly from foot outlets.
Ð Air flows from defroster outlets
and foot outlets.
Ð Air flows mainly from defroster
outlets.
Temperature control dial
This dial allows you to adjust the tempera-
ture of the outlet air.
Air recirculation button
Off position (Indicator light off):
Outside air is drawn into the passenger
compartment and distributed through the
selected outlet.
Use the off position for normal heater or air
conditioner operation.
On position (Indicator light on):
Interior air is recirculated inside the vehicle.
Push the
button to the on position
when:
cdriving on a dusty road.
cto avoid traffic fumes.
LHA0109
HEATER AND AIR
CONDITIONER (MANUAL)
Heater, air conditioner and audio systems4-3
ZX
Page 132 of 249
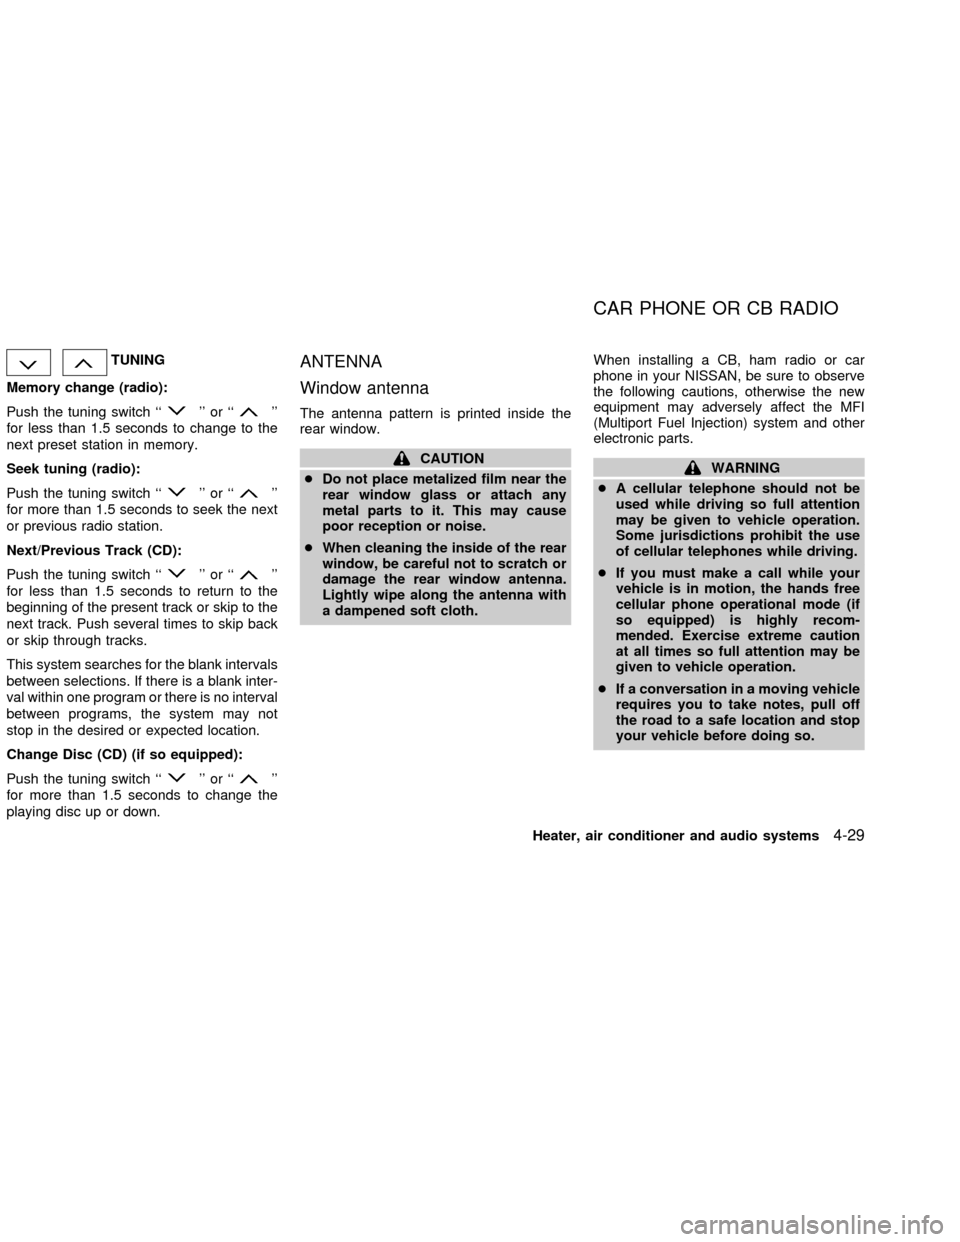
TUNING
Memory change (radio):
Push the tuning switch ``
'' or ``''
for less than 1.5 seconds to change to the
next preset station in memory.
Seek tuning (radio):
Push the tuning switch ``
'' or ``''
for more than 1.5 seconds to seek the next
or previous radio station.
Next/Previous Track (CD):
Push the tuning switch ``
'' or ``''
for less than 1.5 seconds to return to the
beginning of the present track or skip to the
next track. Push several times to skip back
or skip through tracks.
This system searches for the blank intervals
between selections. If there is a blank inter-
val within one program or there is no interval
between programs, the system may not
stop in the desired or expected location.
Change Disc (CD) (if so equipped):
Push the tuning switch ``
'' or ``''
for more than 1.5 seconds to change the
playing disc up or down.
ANTENNA
Window antenna
The antenna pattern is printed inside the
rear window.
CAUTION
cDo not place metalized film near the
rear window glass or attach any
metal parts to it. This may cause
poor reception or noise.
cWhen cleaning the inside of the rear
window, be careful not to scratch or
damage the rear window antenna.
Lightly wipe along the antenna with
a dampened soft cloth.When installing a CB, ham radio or car
phone in your NISSAN, be sure to observe
the following cautions, otherwise the new
equipment may adversely affect the MFI
(Multiport Fuel Injection) system and other
electronic parts.WARNING
cA cellular telephone should not be
used while driving so full attention
may be given to vehicle operation.
Some jurisdictions prohibit the use
of cellular telephones while driving.
cIf you must make a call while your
vehicle is in motion, the hands free
cellular phone operational mode (if
so equipped) is highly recom-
mended. Exercise extreme caution
at all times so full attention may be
given to vehicle operation.
cIf a conversation in a moving vehicle
requires you to take notes, pull off
the road to a safe location and stop
your vehicle before doing so.
CAR PHONE OR CB RADIO
Heater, air conditioner and audio systems4-29
ZX
Page 137 of 249
DRINKING ALCOHOL/DRUGS
AND DRIVING
WARNING
Never drive under the influence of alco-
hol or drugs. Alcohol in the bloodstream
reduces coordination, delays reaction
time and impairs judgement. Driving after
drinking alcohol increases the likelihood
of being involved in an accident injuring
yourself and others. Additionally, if you
are injured in an accident, alcohol can
increase the severity of the injury.
NISSAN is committed to safe driving. How-
ever, you must choose not to drive under
the influence of alcohol. Every year thou-
sands of people are injured or killed in
alcohol related accidents. Although the local
laws vary on what is considered to be
legally intoxicated, the fact is that alcohol
affects all people differently and most
people underestimate the effects of alcohol.
Remember, drinking and driving don't mix!
And that's true for drugs, too (over the
counter, prescription, and illegal drugs).
Don't drive if your ability to operate your
vehicle is impaired by alcohol, drugs, or
some other physical condition.AUTOMATIC TRANSMISSION
On automatic transmission models, the ig-
nition lock is designed so the key cannot be
turned to LOCK and removed until the shift
selector lever is moved to the P (Park)
position.
When removing the key from the ignition,
make sure the shift selector lever is in the P
(Park) position.
If the key cannot be turned to the LOCK
position, proceed as follows to remove the
key.1) Move the shift selector lever into the P
(Park) position.
2) Turn the ignition key slightly toward the
ON position.
3) Turn the key to the LOCK position.
4) Remove the key.
The shift lever is designed so it cannot be
moved out of P (Park) and into any of the
other gear positions, if the ignition key is
turned to OFF or if the key is removed from
the switch.
The shift selector lever can be moved if
the ignition switch is in the ACC posi-
tion. This allows the vehicle to be moved
if the battery is discharged. The shift
selector lever can also be moved if the
ignition switch is in the ON position and
the foot brake pedal is depressed.
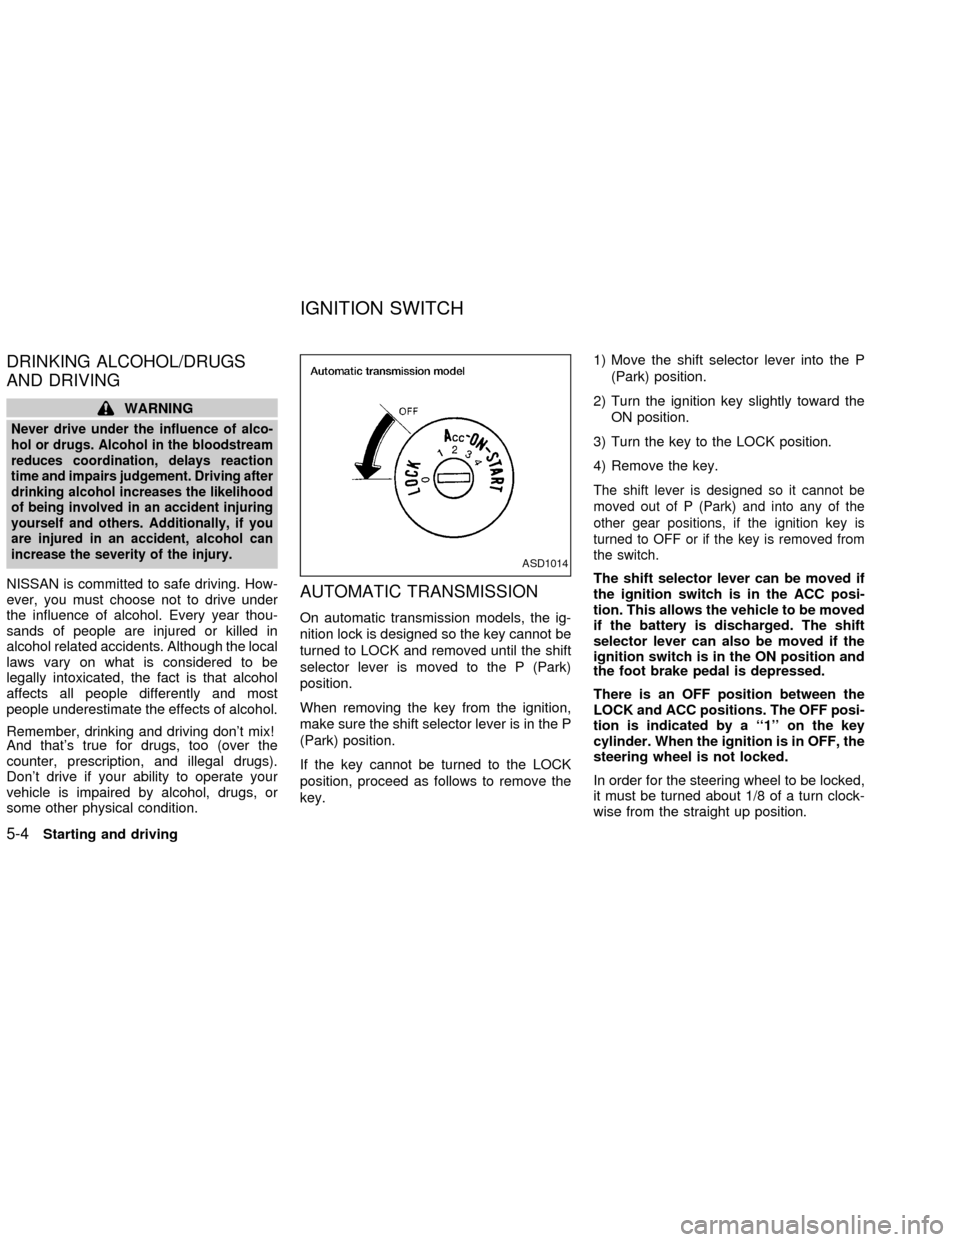
There is an OFF position between the
LOCK and ACC positions. The OFF posi-
tion is indicated by a ``1'' on the key
cylinder. When the ignition is in OFF, the
steering wheel is not locked.
In order for the steering wheel to be locked,
it must be turned about 1/8 of a turn clock-
wise from the straight up position.
ASD1014
IGNITION SWITCH
5-4Starting and driving
ZX
Page 138 of 249
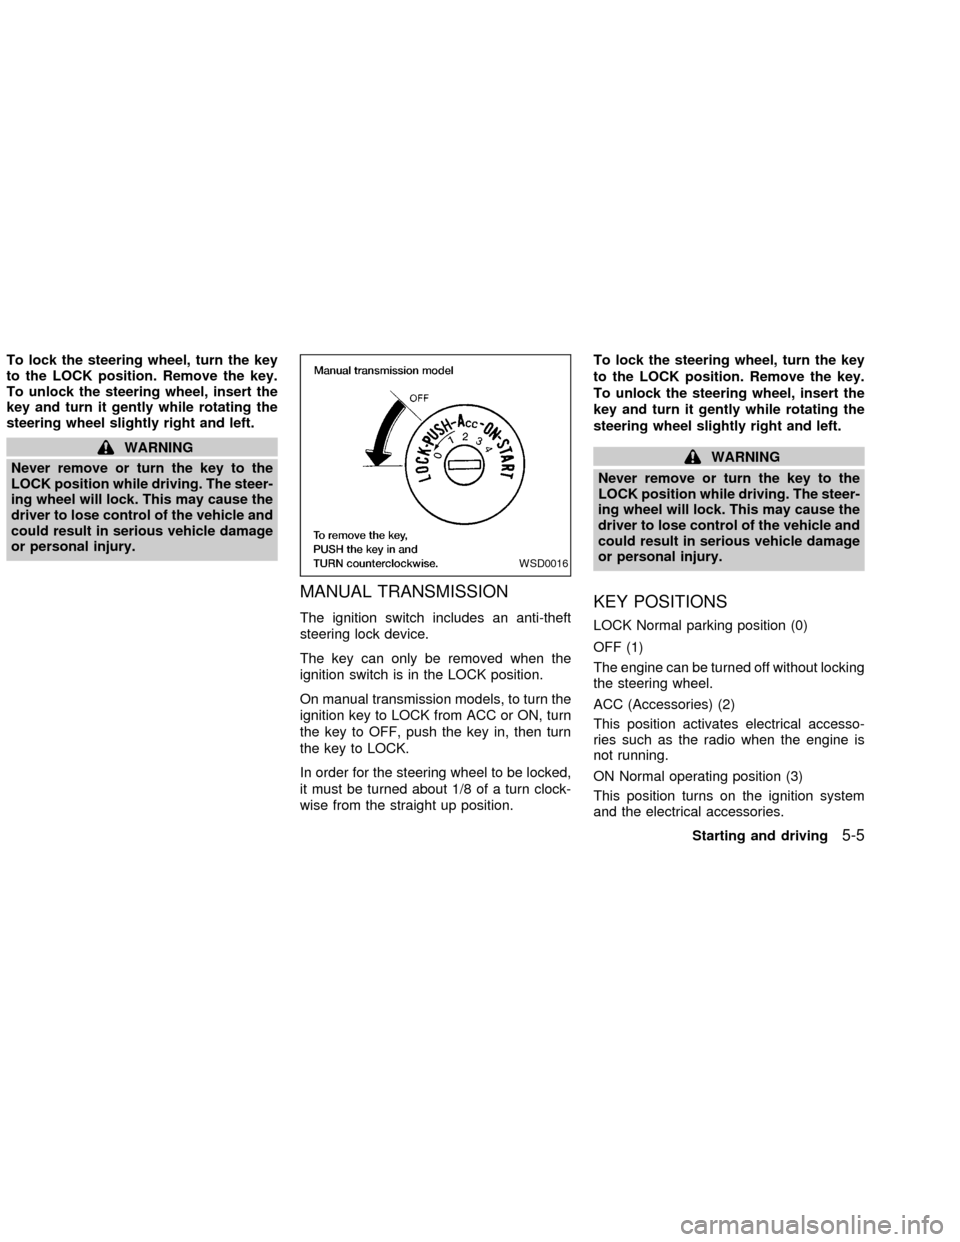
To lock the steering wheel, turn the key
to the LOCK position. Remove the key.
To unlock the steering wheel, insert the
key and turn it gently while rotating the
steering wheel slightly right and left.
WARNING
Never remove or turn the key to the
LOCK position while driving. The steer-
ing wheel will lock. This may cause the
driver to lose control of the vehicle and
could result in serious vehicle damage
or personal injury.
MANUAL TRANSMISSION
The ignition switch includes an anti-theft
steering lock device.
The key can only be removed when the
ignition switch is in the LOCK position.
On manual transmission models, to turn the
ignition key to LOCK from ACC or ON, turn
the key to OFF, push the key in, then turn
the key to LOCK.
In order for the steering wheel to be locked,
it must be turned about 1/8 of a turn clock-
wise from the straight up position.To lock the steering wheel, turn the key
to the LOCK position. Remove the key.
To unlock the steering wheel, insert the
key and turn it gently while rotating the
steering wheel slightly right and left.
WARNING
Never remove or turn the key to the
LOCK position while driving. The steer-
ing wheel will lock. This may cause the
driver to lose control of the vehicle and
could result in serious vehicle damage
or personal injury.
KEY POSITIONS
LOCK Normal parking position (0)
OFF (1)
The engine can be turned off without locking
the steering wheel.
ACC (Accessories) (2)
This position activates electrical accesso-
ries such as the radio when the engine is
not running.
ON Normal operating position (3)
This position turns on the ignition system
and the electrical accessories.
WSD0016
Starting and driving5-5
ZX