start stop button NISSAN ALTIMA 2005 L31 / 3.G Owners Manual
[x] Cancel search | Manufacturer: NISSAN, Model Year: 2005, Model line: ALTIMA, Model: NISSAN ALTIMA 2005 L31 / 3.GPages: 304, PDF Size: 4.91 MB
Page 85 of 304
Keyfob operation:
cPush the
button on the keyfob.
All doors lock. The hazard lights flash
twice and the horn beeps once to indicate
all doors are locked.
c When the
button is pushed with
all doors locked, the hazard lights flash
twice and the horn beeps once as a re-
minder that the doors are already locked.
For vehicles with navigation system, see
9 Vehicle electronic systems 9in the 9Display
screen, heater, air conditioner and audio
systems 9section later in this manual. For
vehicles without navigation system, see 9Si-
lencing the horn beep feature 9in the 9Pre-
driving checks and adjustments 9section
later in this manual.
4. Confirm that the security indicator light comes on. The security light stays on for
about 30 seconds. The vehicle security sys-
tem is now pre-armed. After about 30 sec-
onds the vehicle security system automati-
cally shifts into the armed phase. The
security light begins to flash once every 3
seconds. If, during the 30-second pre-arm
time period, the door is unlocked by the key
or the keyfob, or the ignition key is turned to
ACC or ON, the system will not arm. c
If the key is turned slowly when locking
the door, the system may not arm. Fur-
thermore, if the key is turned beyond
the vertical position toward the unlock
position to remove the key, the system
may be disarmed when the key is re-
moved. If the indicator light fails to
glow for 30 seconds, unlock the door
once and lock it again.
c Even when the driver and/or passen-
gers are in the vehicle, the system will
arm with all doors and trunk lid closed
and locked with the ignition key in the
OFF position.
Vehicle security system activation
The vehicle security system will give the following
alarm:
c The headlights blink and the horn sounds
intermittently.
c The alarm automatically turns off after ap-
proximately 50 seconds. However, the alarm
reactivates if the vehicle is tampered with
again. The alarm can be shut off by unlocking
a door or trunk lid with the key, or by pressing
the
button on the keyfob. The alarm is activated by:
c opening the door or trunk lid without using
the key or keyfob (even if the door is un-
locked by releasing the door inside lock
switch) .
How to stop an activated alarm
The alarm stops only by unlocking a door or the
trunk lid with the key, or by pressing the
button on the keyfob.
NISSAN VEHICLE IMMOBILIZER
SYSTEM (NVIS)
The NISSAN Vehicle Immobilizer System (NVIS)
will not allow the engine to start without the use of
a registered NVIS key.
If the engine fails to start using a registered NVIS
key (for example, when interference is caused by
another NVIS key, an automated toll road device
or automatic payment device on the key ring) ,
restart the engine using the following proce-
dures:
1. Leave the ignition switch in the ON position for approximately 5 seconds.
2. Turn the ignition switch to the OFF or LOCK position, and wait approximately 10 sec-
onds.
3. Repeat steps 1 and 2.
Instruments and controls2-17
ZREVIEW COPYÐ2005 Altima (l30)
Owners ManualÐUSA_English (nna)
06/28/04Ðtbrooks
X
Page 119 of 304
Push thebutton on the keyfob again within
5 seconds.
c All doors unlock.
c The hazard indicator flashes once if all doors
are completely closed.
The interior lights can be turned off without wait-
ing 30 seconds by inserting the key into the
ignition and turning to the ON or START position,
locking the doors with the keyfob or pushing the
interior light switch to the OFF position.
Auto relock
When thebutton on the keyfob is pushed,
all doors will lock automatically within 1 minute
unless one of the following operations is per-
formed:
c Any door is opened.
c A key is inserted into the ignition switch and
the key is turned from OFF to ON.
Releasing the trunk lid
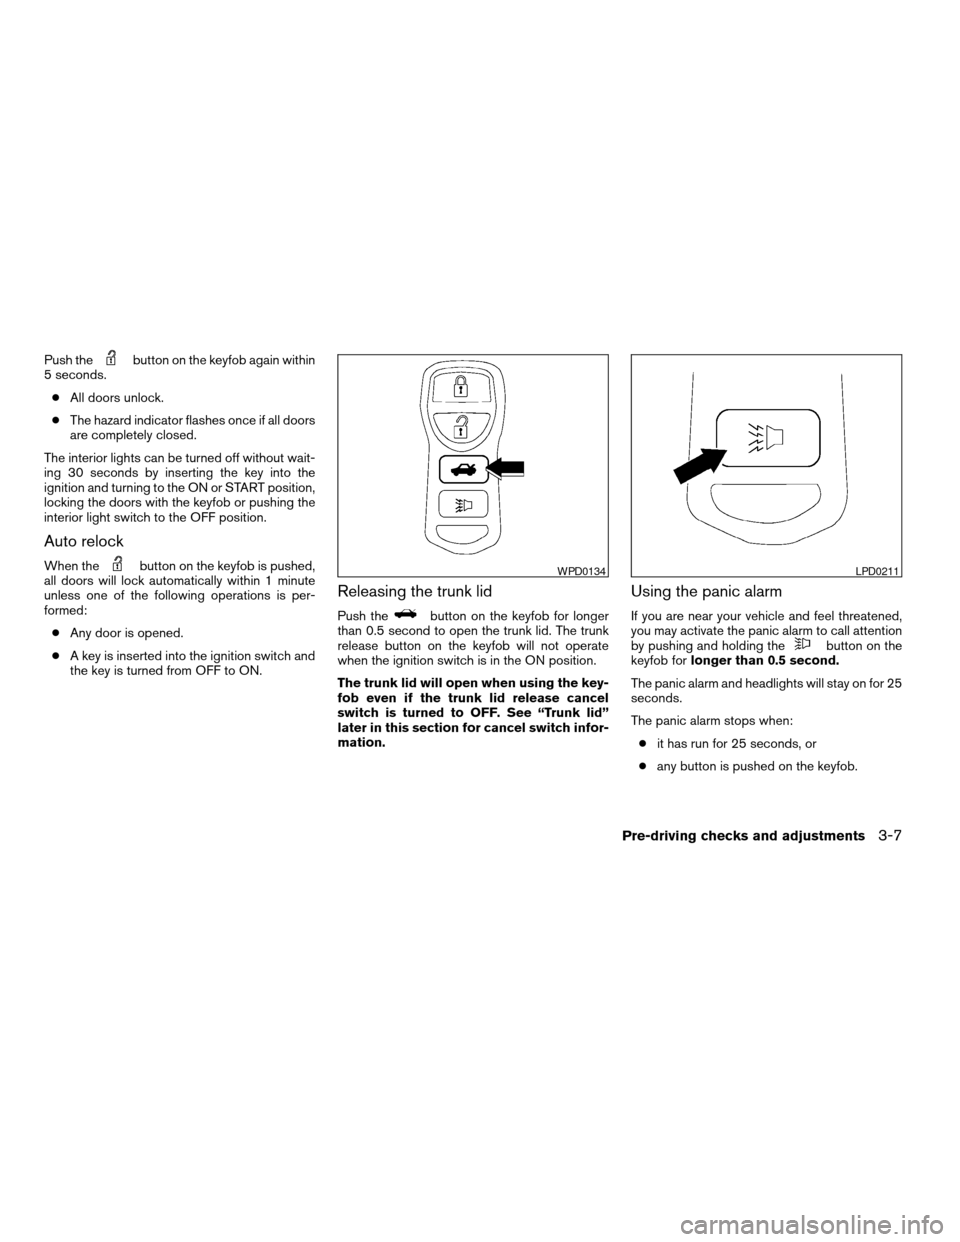
Push thebutton on the keyfob for longer
than 0.5 second to open the trunk lid. The trunk
release button on the keyfob will not operate
when the ignition switch is in the ON position.
The trunk lid will open when using the key-
fob even if the trunk lid release cancel
switch is turned to OFF. See “Trunk lid”
later in this section for cancel switch infor-
mation.
Using the panic alarm
If you are near your vehicle and feel threatened,
you may activate the panic alarm to call attention
by pushing and holding the
button on the
keyfob for longer than 0.5 second.
The panic alarm and headlights will stay on for 25
seconds.
The panic alarm stops when: c it has run for 25 seconds, or
c any button is pushed on the keyfob.
WPD0134LPD0211
Pre-driving checks and adjustments3-7
ZREVIEW COPYÐ2005 Altima (l30)
Owners ManualÐUSA_English (nna)
06/28/04Ðtbrooks
X
Page 130 of 304
WARNING
cPositioning of the heating or air condi-
tioning controls and display controls
should not be done while driving in or-
der that full attention may be given to
the driving operation.
c Do not disassemble or modify this sys-
tem. If you do, it may result in accidents,
fire, or electrical shock.
c Do not use this system if you notice any
abnormality, such as a frozen screen or
lack of sound. Continued use of the
system may result in accident, fire or
electric shock.
c In case you notice any foreign object in
the system hardware, spill liquid on it,
or notice smoke or smell coming from
it, stop using the system immediately
and contact your nearest NISSAN
dealer. Ignoring such conditions may
lead to accidents, fire or electrical
shock.
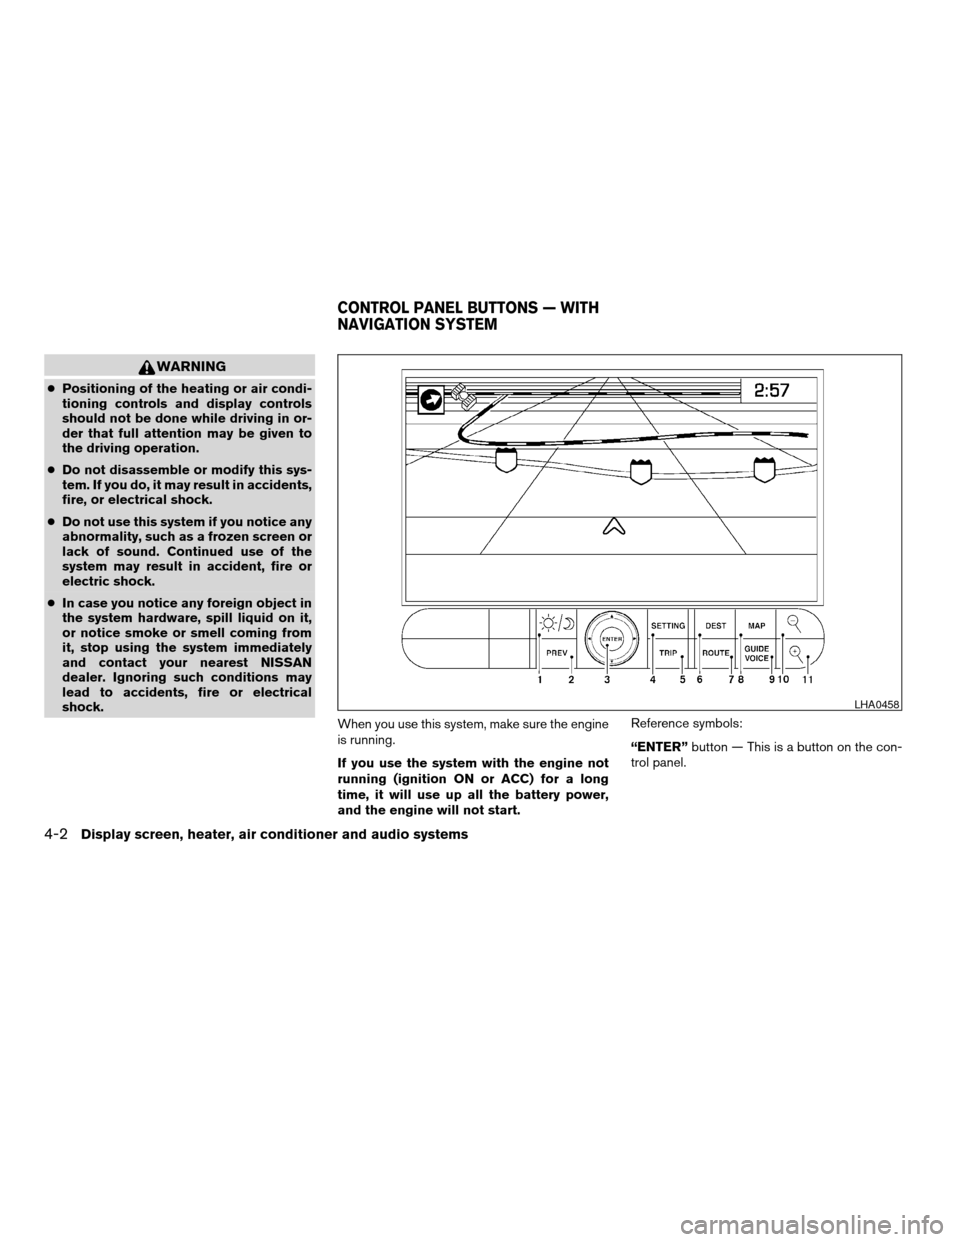
When you use this system, make sure the engine
is running.
If you use the system with the engine not
running (ignition ON or ACC) for a long
time, it will use up all the battery power,
and the engine will not start. Reference symbols:
“ENTER”
button — This is a button on the con-
trol panel.
LHA0458
CONTROL PANEL BUTTONS — WITH
NAVIGATION SYSTEM
4-2Display screen, heater, air conditioner and audio systems
ZREVIEW COPYÐ2005 Altima (l30)
Owners ManualÐUSA_English (nna)
06/28/04Ðtbrooks
X
Page 156 of 304
or CD) that was playing immediately before the
system was turned off resumes playing.
When no CD is loaded, the radio comes on.
Pushing the PWR/VOL control knob again turns
the system off.
Turn the PWR/VOL control knob to the right to
increase volume or to the left to decrease volume.
Adjusting tone quality and speaker balance
Press the AUDIO button to enter the audio adjust
mode:
Bass!Mid !Treb !Fade !Bal
Press the TUNE/FF-REV (
or)or
SEEK/TRACK (or) to adjust to the
desired levels. The display will return to the regu-
lar radio display after 10 seconds, or you may
press the AUDIO button again to return to the
regular radio display.
Clock operation
Pressing the MENU or CLOCK button displays
the clock with the radio on or off. Press the MENU
or CLOCK button again to turn off the clock
display.
Clock set
1. Press and hold the MENU or CLOCK button until it beeps (longer than 2 seconds) . 2. The hours will start flashing. Press
TUNE/FF-REV (
or)or
SEEK/TRACK (or) to adjust
the hours.
3. Press the MENU or CLOCK button to switch to the minute adjustment.
4. Press TUNE/FF-REV (
or)or
SEEK/TRACK (or) to adjust
the minutes.
5. Press the MENU or CLOCK button again to exit the clock set mode.
The display will return to the regular clock display
after 10 seconds, or you may press the MENU or
CLOCK button again to return to the regular
clock display.
FM-AM radio operation
FM-AM band select
Push the AM or the FM button to change from AM
to FM reception.
The FM stereo indicator, ST, illuminates during
FM stereo reception. When the stereo broadcast
signal is weak, the radio automatically changes
from stereo to monaural reception.
TUNE/FF—REV
WARNING
The radio should not be tuned while driv-
ing so full attention may be given to ve-
hicle operation.
Use the
andbuttons for manual
tuning. To move quickly through the channels,
hold the tuning buttons down.
SEEK tuning
Push SEEK/TRACK (
or) . SEEK
tuning begins from low to high frequencies or
high to low frequencies, depending on which
button is pressed, and stops at the next broad-
casting station. If using the up button, once the
highest broadcasting station is reached, the ra-
dio continues in the SEEK mode at the lowest
broadcasting station. If using the down button,
once the lowest broadcasting station is reached,
the radio continues in the SEEK mode at the
highest broadcasting station.
SCAN tuning
Push the SCAN button. SCAN illuminates in the
display window. SCAN tuning begins from low to
high frequencies. SCAN tuning stops for 5 sec-
onds at each broadcasting station that has suffi-
cient signal strength. When scanning, SCAN
4-28Display screen, heater, air conditioner and audio systems
ZREVIEW COPYÐ2005 Altima (l30)
Owners ManualÐUSA_English (nna)
06/28/04Ðtbrooks
X
Page 157 of 304
blinks in the display. Pushing the SCAN button
again during this 5 second period stops SCAN
tuning and the radio remains tuned to that station.
Station memory operation
Each preset mode (A, B or C) has 6 presets,
capable of storing any combination of AM, FM,
SAT (if so equipped ) and FM RDS stations.
Press the PRESET ABC button to change be-
tween the presets:
A! B! C
The radio displays icon A, B or C to indicate
which set of presets is active.
To store a radio station in a preset: 1. Select the desired preset by pressing PRE- SET ABC.
2. Select the desired AM, FM or SAT (if so equipped) station band.
3. Tune to the desired station.
4. Press the desired station select button (>1.5 seconds) .
5. A beep will sound indicating memorization is complete.
6. Other station select buttons can be set in the same manner. If the battery cable is disconnected, or if the radio
fuse opens, the radio memory is canceled. In that
case, reset the desired stations.
Preset Scan
Pressing the Preset Scan button (<1.5 seconds)
scans the permanent preset memory that is se-
lected (A, B or C) fro
m1-6for5seconds.
All Preset Scan
Pressing the Preset Scan button (>1.5 seconds)
scans all the permanent preset memory banks (A,
BorC)from1-6for5 seconds.
Canceling Preset Scan mode
Pressing the Preset Scan (P.SCAN) button again
will cancel the Preset Scan mode.
Speed Sensitive Control Volume (SSV) (if
so equipped)
Your vehicle has Speed Sensitive Control Vol-
ume (SSV) for audio. The audio volume changes
as the driving speed changes.
Press and hold the MENU button (>2 seconds)
until the radio beeps to start the editing mode.
Press the MENU button until the display shows
“SSV”. This display will last 2 seconds and then
change to “OFF”. Press TUNE/FF-REV (
or) to change between:
Off !Low !Mid !High
Compact disc (CD) player operation
Turn the ignition key to the ACC or ON position.
CAUTION
c Do not force a compact disc into the CD
insert slot. This could damage the CD
and/or CD changer/player.
c Trying to load a CD with the CD door
closed could damage the CD and/or CD
changer.
CD button
When the CD button is pressed with a compact
disc loaded and the radio playing, the radio turns
off and the last used compact disc starts to play.
FF (Fast Forward) , REW
(Rewind) buttons
When the TUNE/FF-REV (
or) but-
ton is pressed while the compact disc is playing,
the compact disc plays at an increased speed
while fast forwarding or rewinding. When the
button is released, the compact disc returns to
normal play speed.
SEEK/TRACK buttons
When
is pressed while the compact disc
is playing, the selection following the present one
Display screen, heater, air conditioner and audio systems4-29
ZREVIEW COPYÐ2005 Altima (l30)
Owners ManualÐUSA_English (nna)
06/28/04Ðtbrooks
X
Page 160 of 304
When no CD is loaded, the radio comes on.
Pushing the PWR/VOL control knob again turns
the system off.
Turn the PWR/VOL control knob to the right to
increase volume or to the left to decrease volume.
Adjusting tone quality and speaker balance
Press the AUDIO button to enter the audio adjust
mode:
Bass!Treb !Fade !Bal
Press the TUNE/FF-REV (
or)or
SEEK/TRACK (or) to adjust to the
desired levels. The display will return to the regu-
lar radio display after 10 seconds, or you may
press the AUDIO button again to return to the
regular radio display.
Clock operation
Pressing the CLOCK button displays the clock
with the radio on or off. Press the CLOCK button
again to turn off the clock display.
Clock set
1. Press and hold the CLOCK button until it beeps (>1.5 seconds) .
2. The hours will start flashing. Press TUNE/FF-REV (
or)or
SEEK/TRACK (or) to adjust
the hours. 3. Press the CLOCK button to switch to the
minute adjustment.
4. Press TUNE/FF-REV (
or)or
SEEK/TRACK (or) to adjust
the minutes.
5. Press the CLOCK button again to exit the clock set mode.
The display will return to the regular clock display
after 7 seconds, or you may press the CLOCK
button again to return to the regular clock display.
FM/AM/SAT radio operation
FM/AM/SAT band select:
Pushing the FM, AM or SAT radio select button
will change the band to either FM, AM or SAT
(satellite-if so equipped) radio stations.
When the FM, AM or SAT radio select button is
pushed while the ignition switch is in the ACC or
ON, the radio will come on at the station last
played.
The last station played will also come on when
the Power/Volume control knob is depressed to
ON.
No satellite radio reception is available and “NO
SAT” is displayed when the SAT button is
pressed unless optional satellite receiver and antenna are installed and an XM
Tor SIRIUS™
satellite radio service subscription is active.
If a compact disc is playing when the FM, AM or
SAT radio select button is pushed, the compact
disc will automatically be turned off and the last
radio station played will come on.
The FM stereo indicator ST will glow during FM
stereo reception. When the stereo broadcast
signal is weak, the radio will automatically change
from stereo to monaural reception.
TUNE/FF—REV
WARNING
The radio should not be tuned while driv-
ing so full attention may be given to ve-
hicle operation.
Use the
andbuttons for manual
tuning. To move quickly through the channels,
hold the tuning buttons down.
SEEK tuning
Push SEEK/TRACK (
or) . SEEK
tuning begins from low to high frequencies or
high to low frequencies, depending on which
button is pressed, and stops at the next broad-
casting station. If using the up button, once the
highest broadcasting station is reached, the ra-
dio continues in the SEEK mode at the lowest
4-32Display screen, heater, air conditioner and audio systems
ZREVIEW COPYÐ2005 Altima (l30)
Owners ManualÐUSA_English (nna)
06/28/04Ðtbrooks
X
Page 162 of 304
SEEK tuning:3.
After selecting a program type, push the
SEEK/TRACK button (or) for
less than 1.5 seconds within 10 seconds.
Tuning to the PTY station will start. If you do
not push the SEEK button within the 10 sec-
ond period, the PTY mode will be canceled.
SCAN tuning:
4.
Push the SCAN button for more than 1.5
seconds to scan the PTY name stations and
stop at each broadcasting station for 5 sec-
onds. Pushing the button again during this 5
second period will stop SCAN tuning and the
radio will remain tuned to that station. If the
SCAN button is not pushed within 5 seconds,
SCAN tuning moves to the next station.
Speed Sensitive Control Volume (SSV) (if
so equipped)
Your vehicle has Speed Sensitive Control Vol-
ume (SSV) for audio. The audio volume changes
as the driving speed changes.
Press and hold the AUDIO button until the radio
beeps to start the editing mode. Press the AU-
DIO button until the display shows “SSV OFF”.
Press TUNE/FF-REV (
or)to
change between:
Off !Low !Mid !High
Compact disc (CD) player operation
Turn the ignition key to the ACC or ON position.
CAUTION
c Do not force a compact disc into the CD
insert slot. This could damage the CD
and/or CD changer/player.
c Trying to load a CD with the CD door
closed could damage the CD and/or CD
changer.
CD6 button
When the CD6 button is pressed with a compact
disc loaded and the radio playing, the radio turns
off and the last used compact disc starts to play.
CD loading
Press the LOAD button to start CD loading
mode.
The following sequence will occur: 1. If other discs are already loaded, the disc number indicator on the lowest available
disc select button will start blinking. The
display shows “Select Disc” .
2. The display changes to “Insert Disc”for a
maximum of 15 seconds. 3. During the 15 second interval, insert the
disc. The display changes to “Loading
Disc” .
4. The CD will play after the disc is set to a play position.
5. The indicator changes from blinking disc
number indicator tosolid disc number
indicator and the display changes to show
the Disc number icon, Disc number, Track
number and Elapsed time.
All disc loading 1. Press and hold the LOAD button until the radio beeps (>1.5 seconds) .
2. The numbered disc indicator on the lowest
available disc select button will start blink-
ing. The display shows “All Loading”.
3. The display changes to “Insert Disc”for a
maximum of 15 seconds.
4. During the 15 second interval, insert the disc. The display changes to “Loading
Disc”.
5. The indicator changes from blinking num-
bered disc tosolid numbered disc.
6. The disc number icon is turned on.
4-34Display screen, heater, air conditioner and audio systems
ZREVIEW COPYÐ2005 Altima (l30)
Owners ManualÐUSA_English (nna)
06/28/04Ðtbrooks
X
Page 168 of 304
Searching or scanning by program type may yield
a limited number of selections.
When CAT/RPT button is pressed for more than
1.5 seconds during FM or SAT (if so equipped)
mode, the PTY name of the current tuned station
is displayed. During this time if the PTY data code
is zero or the data is unreadable, the display will
show NONE.
To change the PTY:1. Press the CAT/RPT button.
2. Press the TUNE/FF-REV (
or)
up/down button to chose a specific program
type.
ROCK, CLASSIC ROCK, SOFT ROCK,
TOP 40, COUNTRY, JAZZ, CLASSICAL,
OLDIES, NEWS, SPORTS, TALK, ANY
SEEK tuning: 3. After selecting a program type, push the SEEK/TRACK button (
or) for
less than 1.5 seconds within 10 seconds.
Tuning to the PTY station will start. If you do
not push the SEEK button within the 10
second period, the PTY mode will be can-
celed. SCAN tuning:
4. Push the SCAN button for more than 1.5 seconds to scan the PTY name stations and
stop at each broadcasting station for 5 sec-
onds. Pushing the button again during this 5
second period will stop SCAN tuning and
the radio will remain tuned to that station. If
the SCAN button is not pushed within 5
seconds, SCAN tuning moves to the next
station.
Compact disc (CD) changer operation
CAUTION
cDo not force a compact disc into the CD
insert slot. This could damage the CD
and/or CD changer/player.
c Trying to load a CD with the CD door
closed could damage the CD and/or CD
changer.
Turn the ignition key to the ACC or ON position
and insert the compact disc into the slot with the
label side facing up. The compact disc will be
guided automatically into the slot and start play-
ing. To insert the disc, first push the LOAD button.
If the radio is already operating, it will automati-
cally turn off and the compact disc will play. If the system has been turned off while the com-
pact disc was playing, pushing the
POWER/VOLUME control knob will start the
compact disc.
LOAD button:
To insert a CD in the CD changer, push the LOAD
button for less than 1.5 seconds. Select the
loading slot by pushing the CD insert select
button (1 - 6) , then insert the CD.
To insert 6 CDs to the CD changer, push the
LOAD button for more than 1.5 seconds.
The slot numbers (1 - 6) will illuminate on the
display when CDs are loaded into the changer.
CD button:
When the CD button is pushed with the system
off and the compact disc loaded, the system will
turn on and the compact disc will start to play.
When the CD button is pushed with the compact
disc loaded with the radio playing, the radio will
automatically be turned off and the compact disc
will start to play.
REW (Rewind) , FF (Fast
Forward):
When the
(rewind) or(fast forward)
button is pushed while a compact disc is playing,
the compact disc will play while rewinding or fast
4-40Display screen, heater, air conditioner and audio systems
ZREVIEW COPYÐ2005 Altima (l30)
Owners ManualÐUSA_English (nna)
06/28/04Ðtbrooks
X
Page 169 of 304
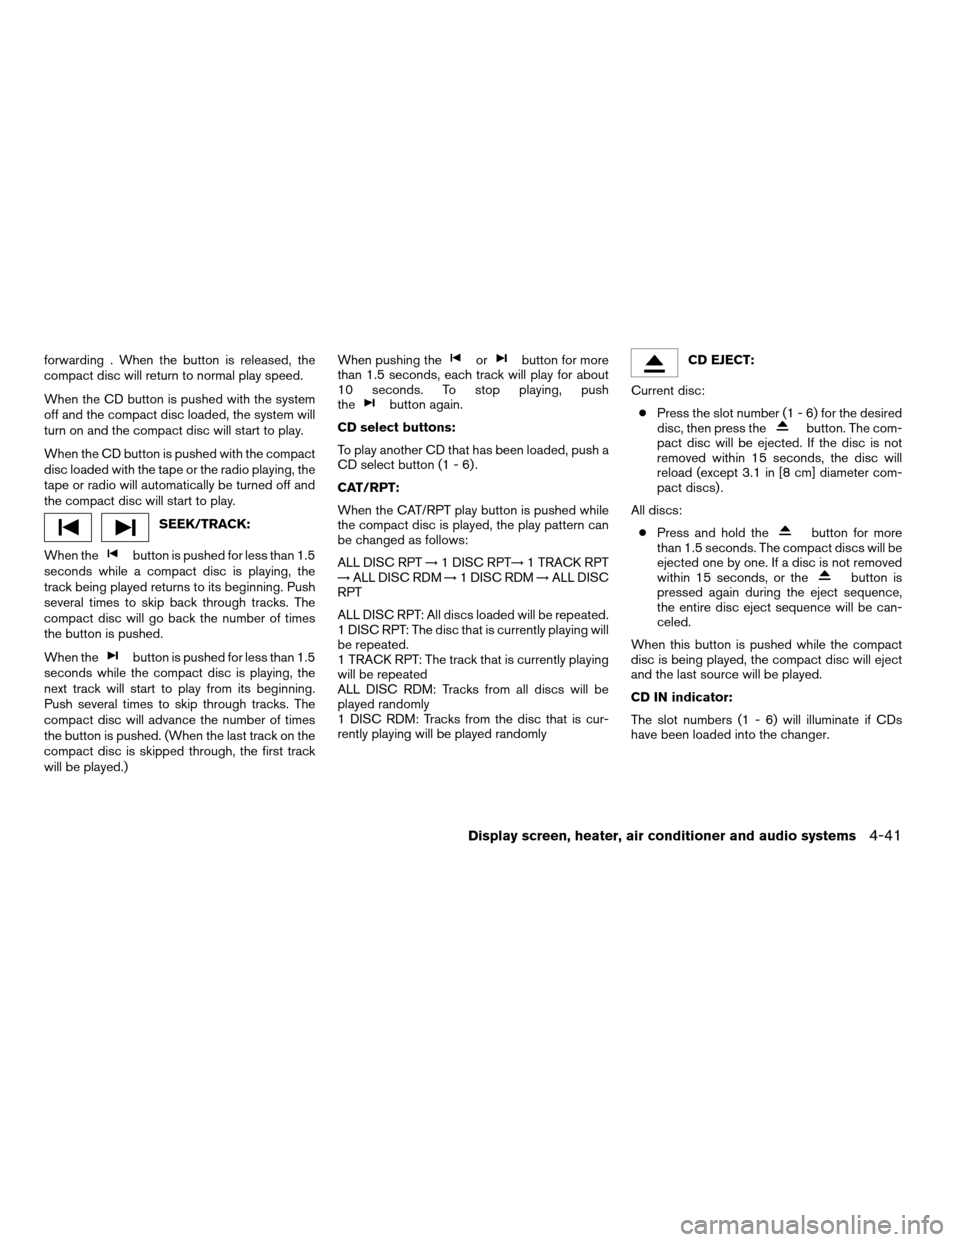
forwarding . When the button is released, the
compact disc will return to normal play speed.
When the CD button is pushed with the system
off and the compact disc loaded, the system will
turn on and the compact disc will start to play.
When the CD button is pushed with the compact
disc loaded with the tape or the radio playing, the
tape or radio will automatically be turned off and
the compact disc will start to play.
SEEK/TRACK:
When the
button is pushed for less than 1.5
seconds while a compact disc is playing, the
track being played returns to its beginning. Push
several times to skip back through tracks. The
compact disc will go back the number of times
the button is pushed.
When the
button is pushed for less than 1.5
seconds while the compact disc is playing, the
next track will start to play from its beginning.
Push several times to skip through tracks. The
compact disc will advance the number of times
the button is pushed. (When the last track on the
compact disc is skipped through, the first track
will be played.) When pushing the
orbutton for more
than 1.5 seconds, each track will play for about
10 seconds. To stop playing, push
the
button again.
CD select buttons:
To play another CD that has been loaded, push a
CD select button (1 - 6) .
CAT/RPT:
When the CAT/RPT play button is pushed while
the compact disc is played, the play pattern can
be changed as follows:
ALL DISC RPT !1 DISC RPT !1 TRACK RPT
! ALL DISC RDM !1 DISC RDM !ALL DISC
RPT
ALL DISC RPT: All discs loaded will be repeated.
1 DISC RPT: The disc that is currently playing will
be repeated.
1 TRACK RPT: The track that is currently playing
will be repeated
ALL DISC RDM: Tracks from all discs will be
played randomly
1 DISC RDM: Tracks from the disc that is cur-
rently playing will be played randomly
CD EJECT:
Current disc: c Press the slot number (1 - 6) for the desired
disc, then press the
button. The com-
pact disc will be ejected. If the disc is not
removed within 15 seconds, the disc will
reload (except 3.1 in [8 cm] diameter com-
pact discs) .
All discs: c Press and hold the
button for more
than 1.5 seconds. The compact discs will be
ejected one by one. If a disc is not removed
within 15 seconds, or the
button is
pressed again during the eject sequence,
the entire disc eject sequence will be can-
celed.
When this button is pushed while the compact
disc is being played, the compact disc will eject
and the last source will be played.
CD IN indicator:
The slot numbers (1 - 6) will illuminate if CDs
have been loaded into the changer.
Display screen, heater, air conditioner and audio systems4-41
ZREVIEW COPYÐ2005 Altima (l30)
Owners ManualÐUSA_English (nna)
06/28/04Ðtbrooks
X
Page 291 of 304
10 Index
A
Active head restraint .............. .1-8
Air bag
(See supplemental restraint
system) .................... .1-33
Air bag system Front (See supplemental front impact
air bag system) .............. .1-40
Air bag warning light ...........1-48, 2-13
Air cleaner housing filter ............8-21
Air conditioner Air conditioner operation ..........4-15
Air conditioner service ...........4-22
Air conditioner specification label .....9-11
Air conditioner system refrigerant and
lubrication recommendations ........9-6
Heater and air conditioner
controls ............... .4-12, 4-20
Servicing air conditioner ..........4-22
Air flow charts ................. .4-16
Alarm system
(See vehicle security system) .........2-16
Anchor point locations .............1-25
Antenna .................... .4-43
Anti-lock brake system (ABS) .........5-20
Anti-lock brake warning light ..........2-11
Armrests .................... .1-7
Audible reminders ............... .2-15
Audio system ................. .4-23AM-FM-SAT radio with compact disc
(CD) changer
............... .4-37
Compact Disc (CD) changer .......4-40
FM-AM radio with compact disc (CD)
changer .................. .4-31
FM-AM radio with compact disc (CD)
player ................... .4-27
Radio ................... .4-23
Autolight switch ................ .2-22
Automatic Automatic power window switch .....2-37
Automatic transmission fluid (ATF) . . . .8-13
Automatic transmission position
indicator light ............... .2-14
Driving with automatic transmission .....5-7
Transmission selector lever lock
release ................... .5-10
Automatic anti-glare inside mirror .......3-15
B
Battery ..................... .8-17
Charge warning light ............2-12
Battery replacement
(See remote keyless entry system) ......8-29
Before starting the engine ............5-6
Belts (See drive belts) .............8-19
Brake Anti-lock brake system (ABS) .......5-20
Brake booster ............... .8-26
Brake fluid ................. .8-15Brake light (See stop light)
.........8-31
Brake pedal ................ .8-25
Brake system ............... .5-19
Brake warning light ............ .2-12
Brake wear indicators ........2-15, 8-26
Parking brake check ............8-25
Parking brake operation ..........5-14
Self-adjusting brakes ............8-26
Break-in schedule ............... .5-16
Brightness control Instrument panel ............. .2-24
Brightness/Contrast button ..........4-10
Control panel buttons ...........4-10
Bulb check/instrument panel ..........2-11
Bulb replacement ............... .8-31
C
Capacities and recommended
fuel/lubricants .................. .9-2
Car phone or CB radio .............4-43
Cargo (See vehicle loading information) . . .9-12
CD care and cleaning .............4-42
CD changer (See audio system) ........4-40
Check engine indicator light
(See malfunction indicator lamp) .......2-14
Child restraint with top tether strap ......1-25
Child restraints .......1-11, 1-12, 1-17, 1-24
Precautions on child restraints . . .1-17, 1-29
Top tether strap anchor point locations . .1-25
Child safety rear door lock ............3-5
ZREVIEW COPYÐ2005 Altima(l30)
Owners ManualÐUSA_English (nna)
07/09/04Ðtbrooks
X