NISSAN ALTIMA 2016 L33 / 5.G Quick Reference Guide
Manufacturer: NISSAN, Model Year: 2016, Model line: ALTIMA, Model: NISSAN ALTIMA 2016 L33 / 5.GPages: 32, PDF Size: 1.96 MB
Page 21 of 32
19
INTELLIGENT CRUISE CONTROL (ICC) (if so equipped)
VEHICLE-TO-VEHICLE DISTANCE CONTROL MODE
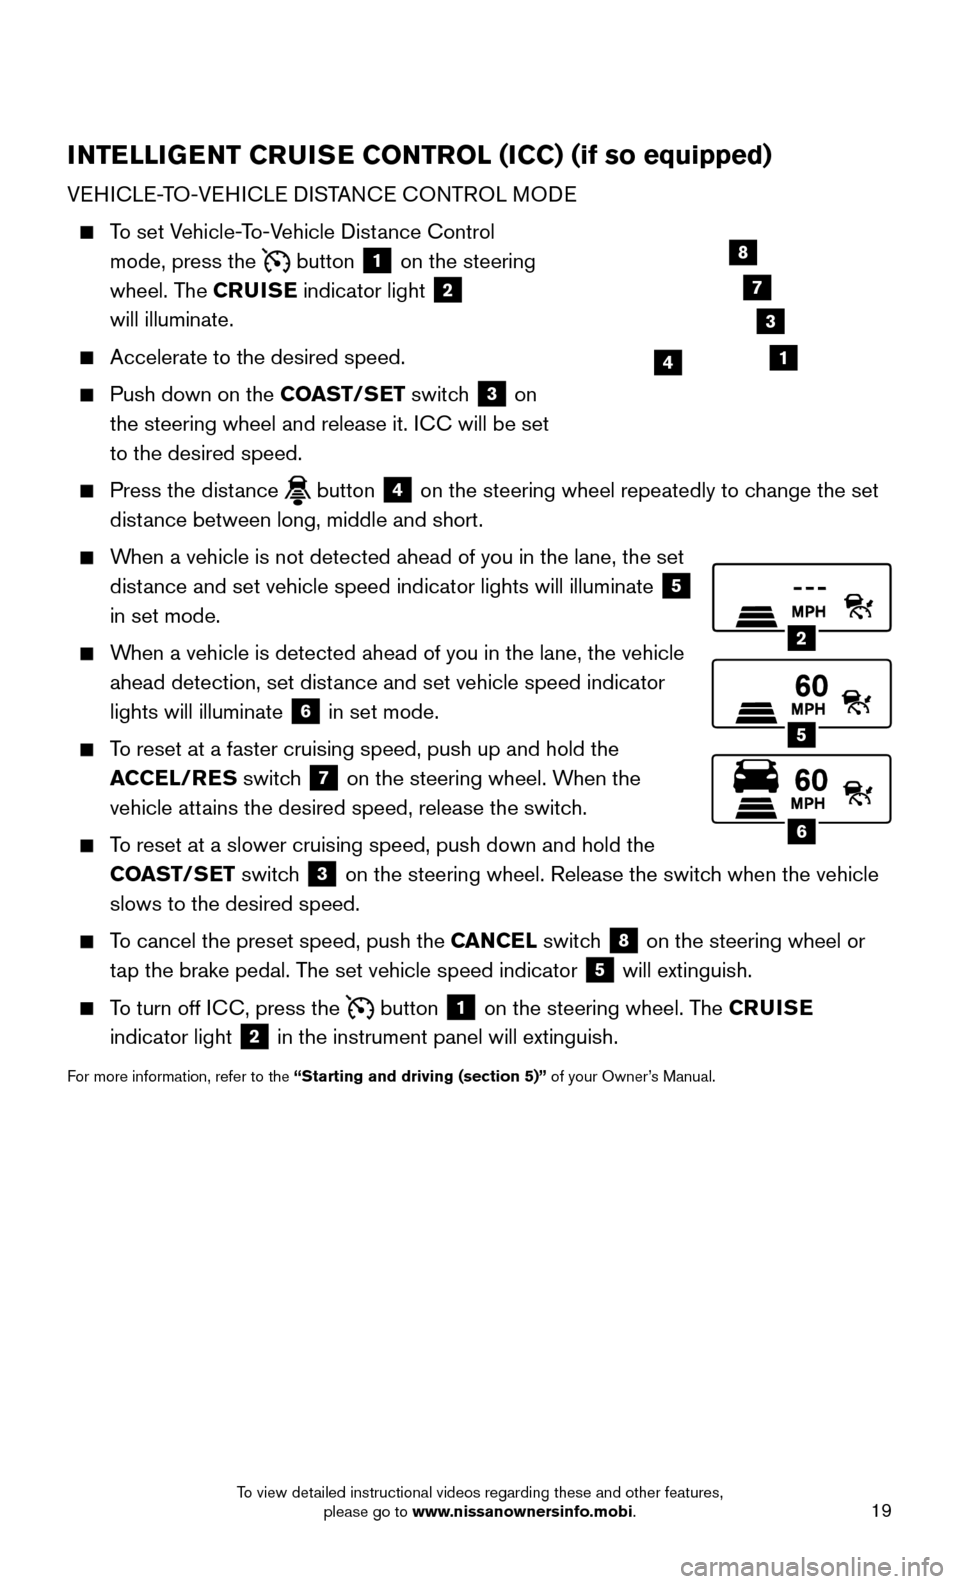
To set Vehicle-To-Vehicle Distance Control
mode, press the
button 1 on the steering
wheel. The CRUISE indicator light 2
will illuminate.
Accelerate to the desired speed.
Push down on the CO AST/SET switch 3 on
the steering wheel and release it. ICC will be set
to the desired speed.
Press the distance button 4 on the steering wheel repeatedly to change the set
distance between long, middle and short.
When a vehicle is not detected ahead of you in the lane, the set
dist ance and set vehicle speed indicator lights will illuminate
5
in set mode.
When a vehicle is detected ahead of you in the lane, the vehicle
ahead detection, set dist ance and set vehicle speed indicator
lights will illuminate
6 in set mode.
To reset at a faster cruising speed, push up and hold the
A CCEL/RES switch
7 on the steering wheel. When the
vehicle attains the desired speed, release the switch.
To reset at a slower cruising speed, push down and hold the
CO AST/SET switch
3 on the steering wheel. Release the switch when the vehicle
slows to the desired speed.
To cancel the preset speed, push the CANCEL switch 8 on the steering wheel or
tap the brake pedal. The set vehicle speed indicator
5 will extinguish.
To turn off ICC, press the button 1 on the steering wheel. The CRUISE
indicator light 2 in the instrument panel will extinguish.
For more information, refer to the “Starting and driving (section 5)” of your Owner’s Manual.
2
5
6
14
8
7
3
To view detailed instructional videos regarding these and other features, please go to www.nissanownersinfo.mobi.
Page 22 of 32
20
VEHICLE INFORMATION DISPLAY
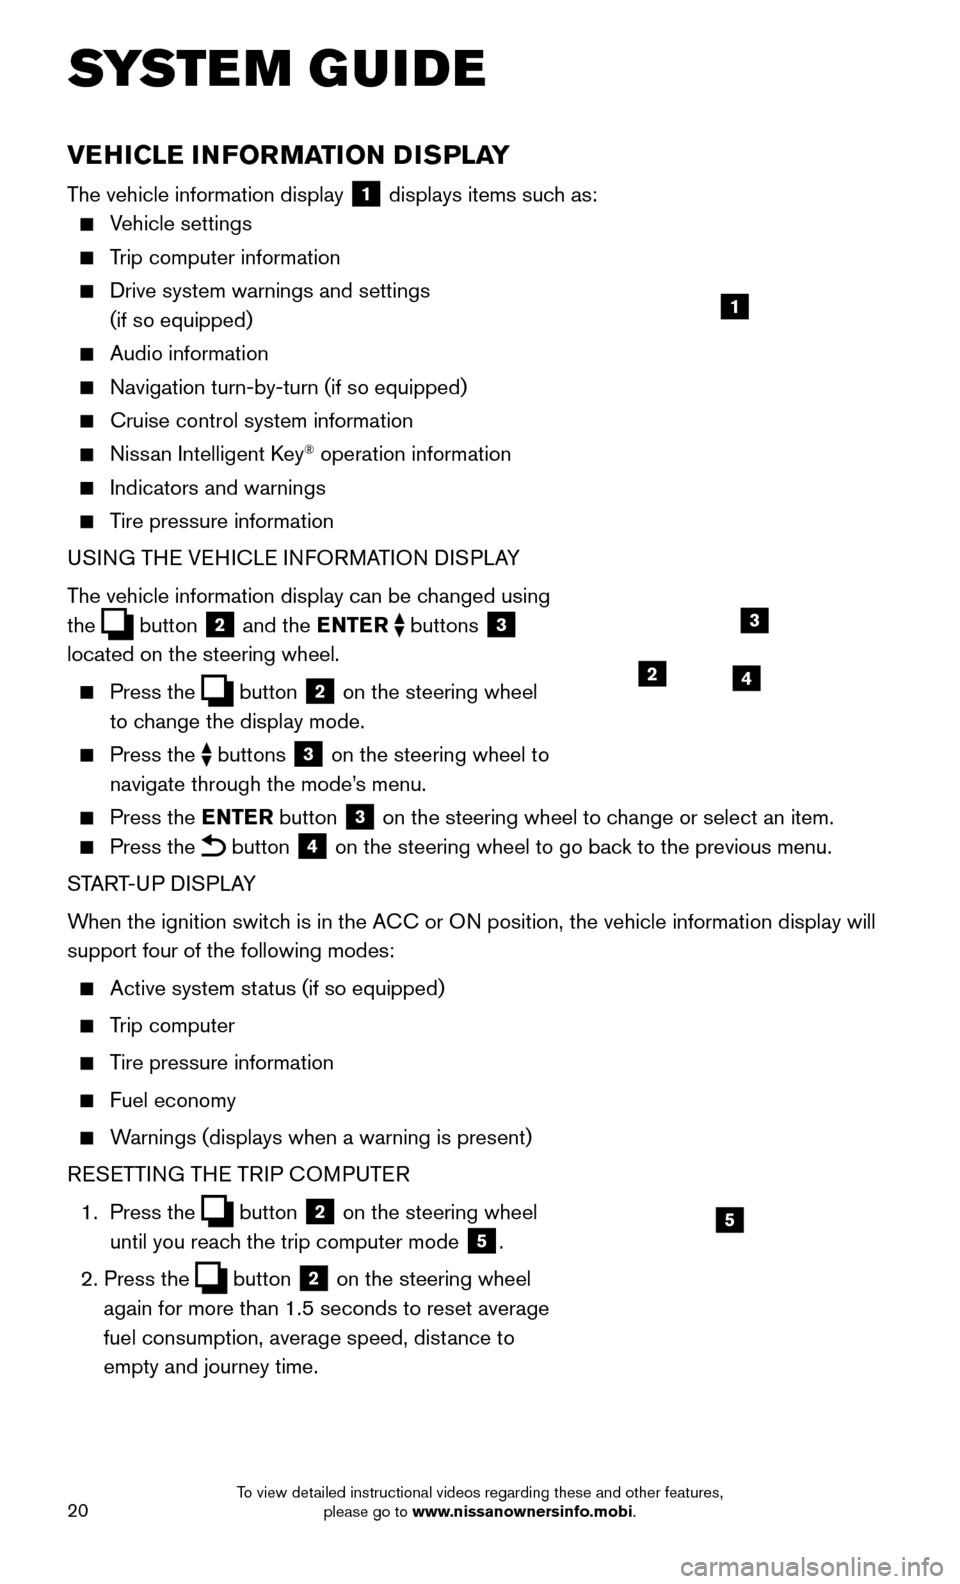
The vehicle information display 1 displays items such as:
Vehicle settings
Trip computer information
Drive system warnings and settings
(if so equipped)
Audio information
Navigation turn-by-turn (if so equipped)
Cruise control system information
Nissan Intelligent Key® operation information
Indicators and warnings
Tire pressure information
USI NG THE VEHICLE INFORMATION DISPLAY
The vehicle information display can be changed using
the
button 2 and the ENTER buttons 3
located on the steering wheel.
Press the button 2 on the steering wheel
to change the display mode.
Press the buttons 3 on the steering wheel to
navigate through the mode’s menu.
Press the E NTER button 3 on the steering wheel to change or select an item.
Press the button 4 on the steering wheel to go back to the previous menu.
START-UP DISPLAY
When the ignition switch is in the ACC or ON position, the vehicle information display will
support four of the following modes:
Active system status (if so equipped)
Trip computer
Tire pressure information
Fuel economy
Warnings (displays when a warning is present)
R
ESETTING THE TRIP COMPUTER
1.
Press
the
button 2 on the steering wheel
until you reach the trip computer mode
5.
2. Press the button 2 on the steering wheel
again for more than 1.5 seconds to reset average
fuel consumption, average speed, distance to
empty and journey time.
1
3
42
5
SYSTEM GUIDE
To view detailed instructional videos regarding these and other features, please go to www.nissanownersinfo.mobi.
Page 23 of 32

21
SETTINGS
The setting mode allows you to change the information displayed in the vehicle
information display:
Driver Assistance (if so equipped) Alarms
Vehicle Settings Language
Main Menu Selection Unit
Body Color Welcome Effects
Maintenance Factory Reset
For more information, refer to the “Instruments and controls (section 2)” of your Owner’s Manual.
NISSANCONNECTSM MOBILE APPS1 (if so equipped)
Press the MENU button on the control panel, touch the “Info” key on the Launch Bar
and then touch the NissanConnectSM Mobile Apps key.
1. Start by creating a Niss
an Owner Portal account at owners.NissanUSA.com.
2.
Next, download the NissanConnect Mobile Apps companion app from Google Play or
the Apple App Store.
3.
Launch the app and sign-in with the email user name and password you created \
when
registering on the Niss
an Owner Portal website.
FOR S
YSTEM WITH NAVIGATION
• iPhone®,2: Please connect via USB when using an iPhone® with NissanConnect
Mobile Apps.
• Android®,3: Please connect via Bluetooth®,4 when using an Android® device with
NissanConnect Mobile Apps.
FOR S
YSTEM WITH NAVIGATION
• iPhone®: Please connect via Bluetooth®,4 when using an iPhone® with
NissanConnect Mobile Apps.
• Android®: Please connect via Bluetooth®,4 when using an Android® device with
NissanConnect Mobile Apps.
For more information on how to pair your cellular phone and set up NissanConnect
Mobile Apps, visit: www.NissanUSA.com/connect/support.
1 Only use features when safe to do so. App availability is dependent upon vehicle model, trim lev\
el, pac kaging,
and/or options. See www.NissanUSA.com/Connect for complete app availability details. Compatible smartphone
required. Cellular network and GPS signals not available in all areas and/or at all times. NISSAN is not responsible for
associated costs, if any, for continued operation due to cellular network or other third party t\
ermination/changes. Cellular
or other third party provider may terminate/restrict respective service \
without notice. Subscription Agreement required.
See www.NissanUSA.com/connect for details. Text rates and/or data usage may apply.
2 iPhone is registered trademark of Apple, Inc. All rights reserved. iPhon\
e not included.3 Android® is a registered trademark of Google, Inc.4 Availability of specific features is dependent upon the cellular phone’\
s Bluetooth® support. Please refer to your cellular
phone’s Owner’s Manual for details. Bluetooth® word mark and logos are owned by Bluetooth SIG, Inc., and any use of
such marks by NISSAN is under license. See www.NissanUSA.com/bluetooth for details.
For more information, refer to the “Monitor, climate, audio, phone and voice recognition systems (section 4) ” of
your Owner’s Manual or the “Information (section 5)” of your Navigation System Owner’s Manual.
To view detailed instructional videos regarding these and other features, please go to www.nissanownersinfo.mobi.
Page 24 of 32
22
BLUETOOTH® HANDS-FREE PHONE SYSTEM1
A cellular telephone should not be used
while driving so full attention may be given to
vehicle operation
2.
SYSTEM OPERATING TIPS
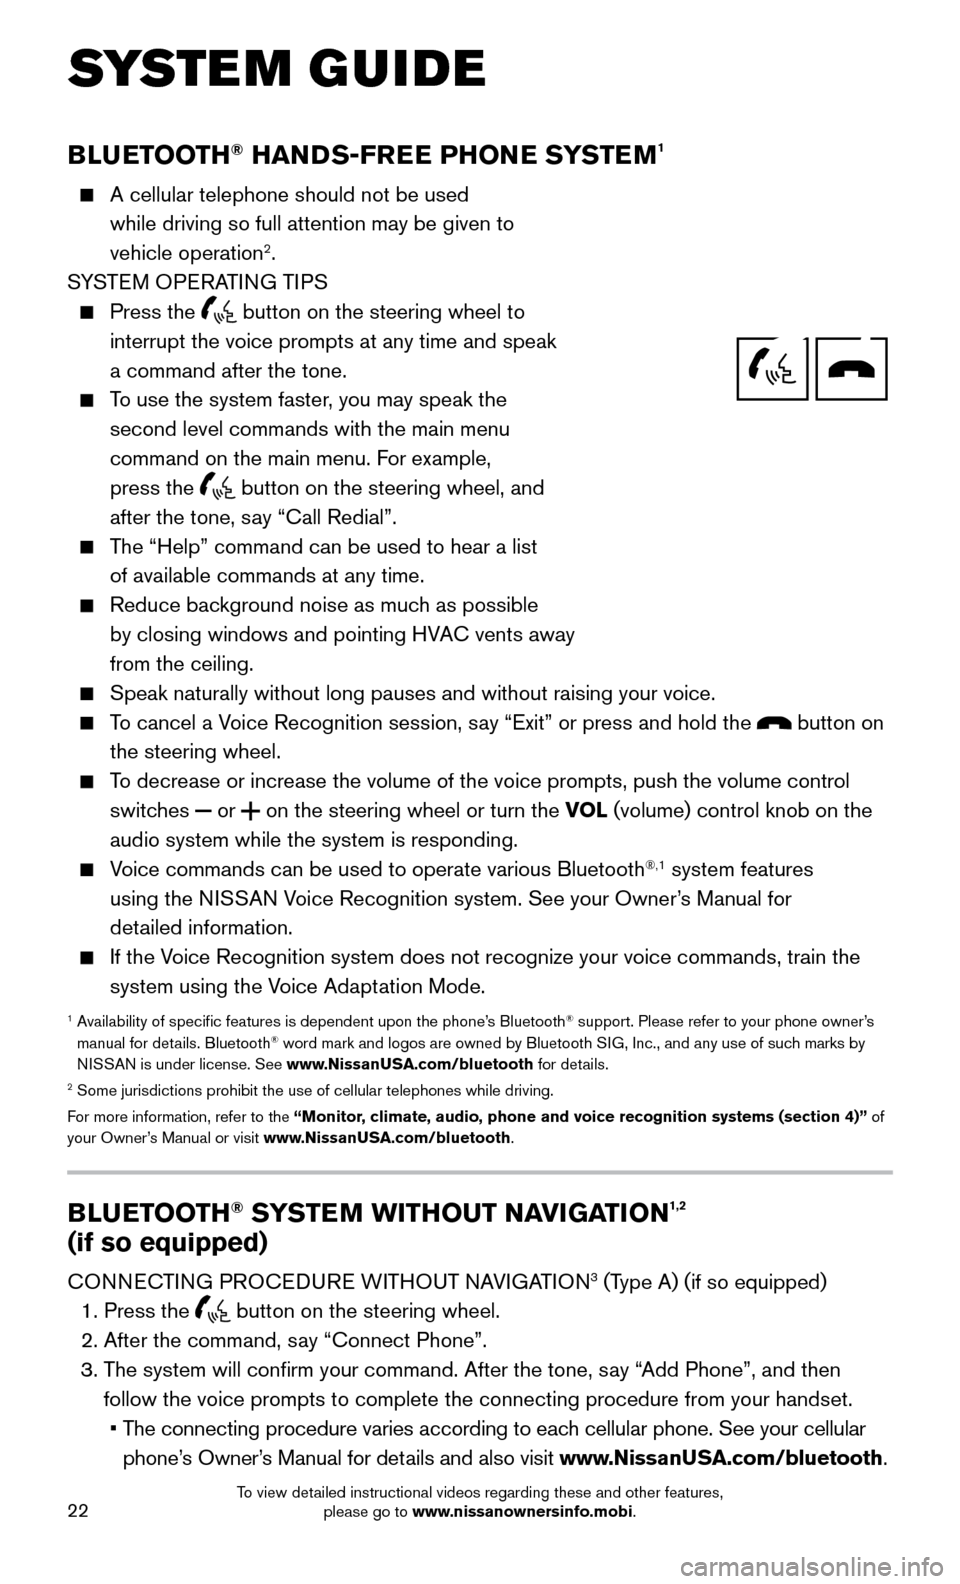
Press the button on the steering wheel to
interrupt the voice prompts at any time and speak
a command after the tone.
To use the system faster, you may speak the
second level commands with the main menu
command on the main menu. F
or example,
press the
button on the steering wheel, and
after the tone, say “Call Redial”.
The “Help” command can be used to hear a list
of available commands at any time.
Reduce background noise as muc h as possible
by closing windows and pointing HVAC vents away
from the ceiling.
Speak naturally without long pauses and without raising your voice.
To cancel a Voice Recognition session, say “Exit” or press and hold the button on
the steering wheel.
To decrease or increase the volume of the voice prompts, push the volume \
control
switc hes or on the steering wheel or turn the VOL (volume) control knob on the
audio system while the system is responding.
Voice commands can be used to operate various Bluetooth®,1 system features
using the NISSAN Voice Recognition system. See your Owner’s Manual for
detailed information.
If the Voice Recognition system does not recognize your voice commands, train th\
e
system using the V oice Adaptation Mode.
1 Availability of specific features is dependent upon the phone’s Bluetooth® support. Please refer to your phone owner’s
manual for details. Bluetooth® word mark and logos are owned by Bluetooth SIG, Inc., and any use of such marks by
NISSAN is under license. See www.NissanUSA.com/bluetooth for details.
2 Some jurisdictions prohibit the use of cellular telephones while drivin\
g.
For more information, refer to the “Monitor, climate, audio, phone and voice recognition systems (section 4)” of
your Owner’s Manual or visit www.NissanUSA.com/bluetooth.
Microphone
Bluetooth®
Controls
SYSTEM GUIDE
BLUETOOTH® SYSTEM WITHOUT NAVIGATION1,2
(if so equipped)
CONNECTING PROCEDURE WITHOUT NAVIGATION3 (Type A) (if so equipped)
1. Press the button on the steering wheel.
2. After the command, say “Connect Phone”.
3. The system will confirm your command. After the tone, s
ay “Add Phone”, and then
follow the voice prompts to complete the connecting procedure from your \
handset.
• The connecting procedure varies according to eac
h cellular phone. See your cellular
phone’s Owner’s Manual for details and also visit www.NissanUSA.com/bluetooth.
To view detailed instructional videos regarding these and other features, please go to www.nissanownersinfo.mobi.
Page 25 of 32

23
CONNECTING PROCEDURE WITHOUT NAVIGATION* (Type B) (if so equipped)
The vehicle must be stationary when connecting the cellular phone.
1. Press the S
ETTING button on the control panel.
2.
Use
the TUNE/SCROLL knob to select
“Bluetooth” and then press the ENTER button
on the control panel.
3.
Use
the TUNE/SCROLL knob to select
“Add Phone” and then press the ENTER button
on the control panel.
4.
Follow the instructions on the screen to complete
the connecting procedure from your handset.
• The connecting procedure varies according to
eac
h cellular phone. See your cellular phone’s
Owner’s Manual for details and also visit
www.NissanUSA.com/bluetooth.
PHONEBOOK SETUP
Depending on your cellular phone, the system may automatically download \
your
cellular phone’s entire phonebook to the vehicle’ s Bluetooth®,2 system.
If the phonebook does not download automatically, follow this procedure to manually
download entries:
1.
Using
the SETTING button and TUNE/SCROLL knob on the control panel,
change the “Phonebook Download” setting to OFF.
2. Press the button on the steering wheel.
3. After the tone, say “Phonebook”.
4.
After the next tone, say “T
ransfer Entry”. The system acknowledges the command
and asks you to initiate the transfer from the cellular phone handset. T\
he new
contact phone number will be transferred from the cellular phone to the vehi\
cle.
MAKING A CALL FROM THE PHONEBOOK
1. Press the button on the steering wheel.
2.
After the tone, say “Call
in your phonebook.
3. The system will confirm the name. If correct, s
ay “Yes”. Otherwise, say “No”.
• Please note that some cellular phones require the name to be spoken in a\
ST NAME, FIRST NAME> format.
MAKING A CALL BY PHONE NUMBER
1. Press the button on the steering wheel.
2. After the tone, say “Call
3. The system will confirm the command. After the tone, s
ay “Phone Number”.
4.
The system will prompt you to speak the phone number
. Say the 7-10 digit
phone number.
5.
The system will confirm the phone number
. If correct, say “Dial”. Otherwise,
say “Correction”.
To view detailed instructional videos regarding these and other features, please go to www.nissanownersinfo.mobi.
Page 26 of 32
24
BLUETOOTH® SYSTEM WITH NAVIGATION1,2 (if so equipped)
Send predefined or custom text messages3
through your vehicle’s Bluetooth®,2 system.
Receive texts through your vehicle’s Bluetooth®,2
system that can be read to you.
Bluetooth®,2 Streaming Audio allows you to
use a compatible Bluetooth®,2 cellular phone to
play audio files from your device through your
vehicle’s audio system. Once your compatible
cellular phone is connected to the vehicle’s audio system, the audio files will play
through the vehicle’s speakers.
CONNECTING PROCEDURE
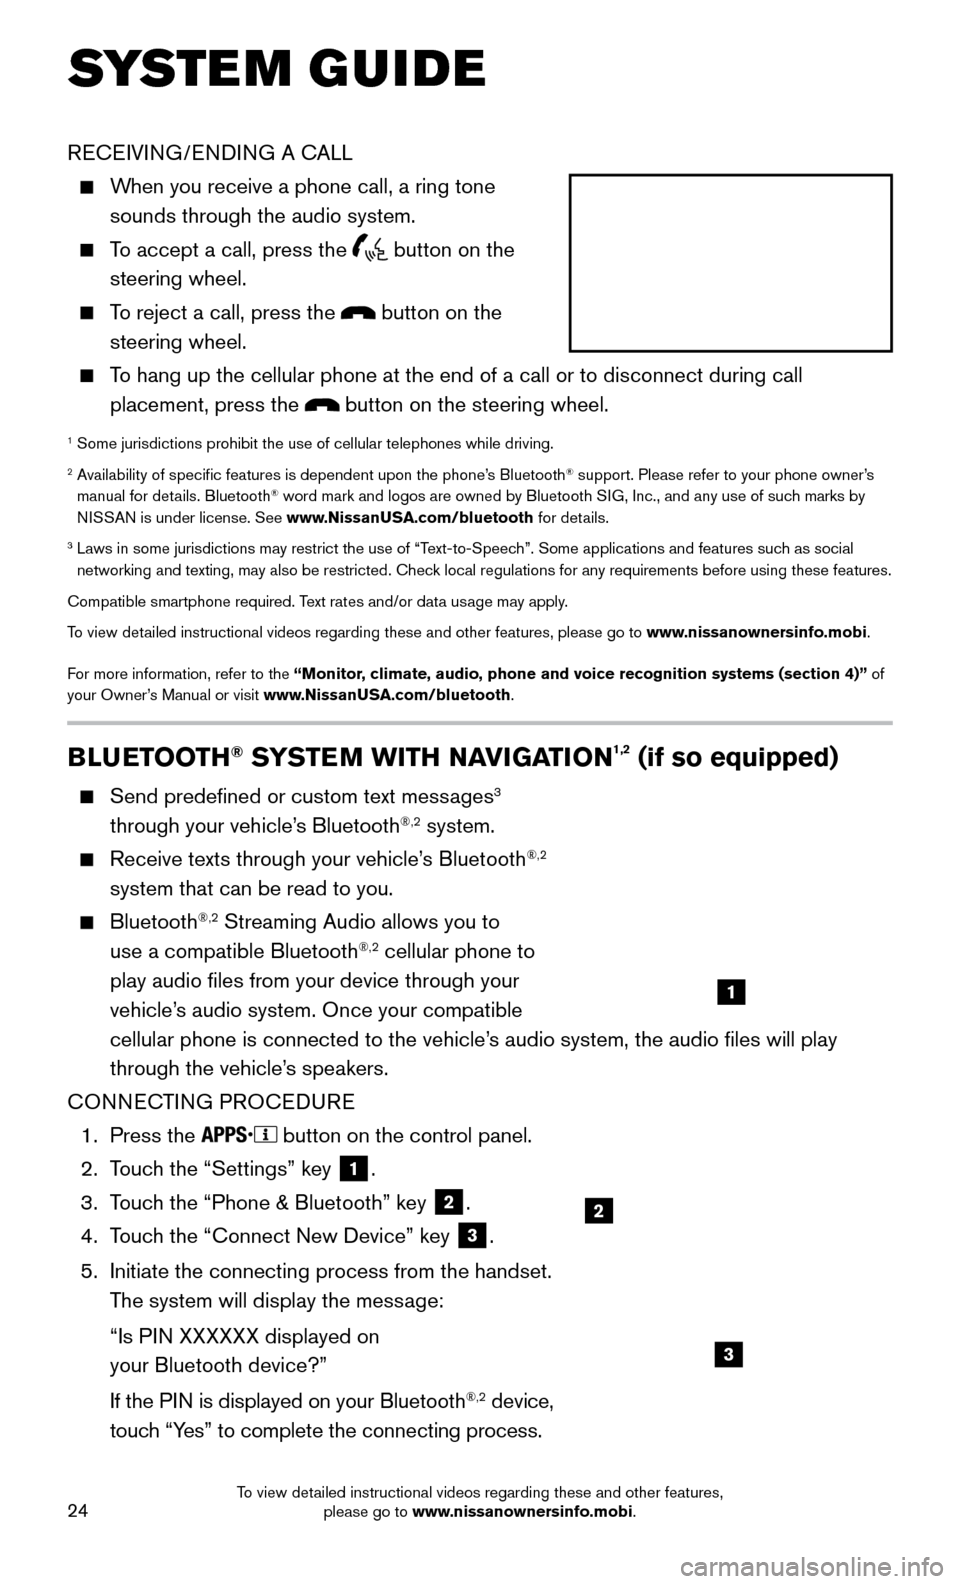
1. Press the button on the control panel.
2.
Touc
h the “Settings” key
1.
3.
Touc
h the “Phone & Bluetooth” key
2.
4.
Touc
h the “Connect New Device” key
3.
5.
Initiate the connecting process from the handset.
The system will display the mess
age:
“Is PI
N XXXXXX displayed on
your Bluetooth device?”
If the PI
N is displayed on your Bluetooth
®,2 device,
touch “Yes” to complete the connecting process.
RECEIVING/ENDING A CALL
When you receive a phone call, a ring tone
sounds through the audio system.
To accept a call, press the button on the
steering wheel.
To reject a call, press the button on the
steering wheel.
To hang up the cellular phone at the end of a call or to disconnect durin\
g call
placement, press the
button on the steering wheel.
1 Some jurisdictions prohibit the use of cellular telephones while drivin\
g.2 Availability of specific features is dependent upon the phone’s Bluetooth® support. Please refer to your phone owner’s
manual for details. Bluetooth® word mark and logos are owned by Bluetooth SIG, Inc., and any use of such marks by
NISSAN is under license. See www.NissanUSA.com/bluetooth for details.
3 Laws in some jurisdictions may restrict the use of “Text-to-Speec h”. Some applications and features such as social
networking and texting, may also be restricted. Check local regulations for any requirements before using these features.
Compatible smartphone required. Text rates and/or data usage may apply.
To view detailed instructional videos regarding these and other features, please go\
to www.nissanownersinfo.mobi.
For more information, refer to the “Monitor, climate, audio, phone and voice recognition systems (section 4)” of
your Owner’s Manual or visit www.NissanUSA.com/bluetooth.
2
1
SYSTEM GUIDE
3
To view detailed instructional videos regarding these and other features, please go to www.nissanownersinfo.mobi.
Page 27 of 32
25
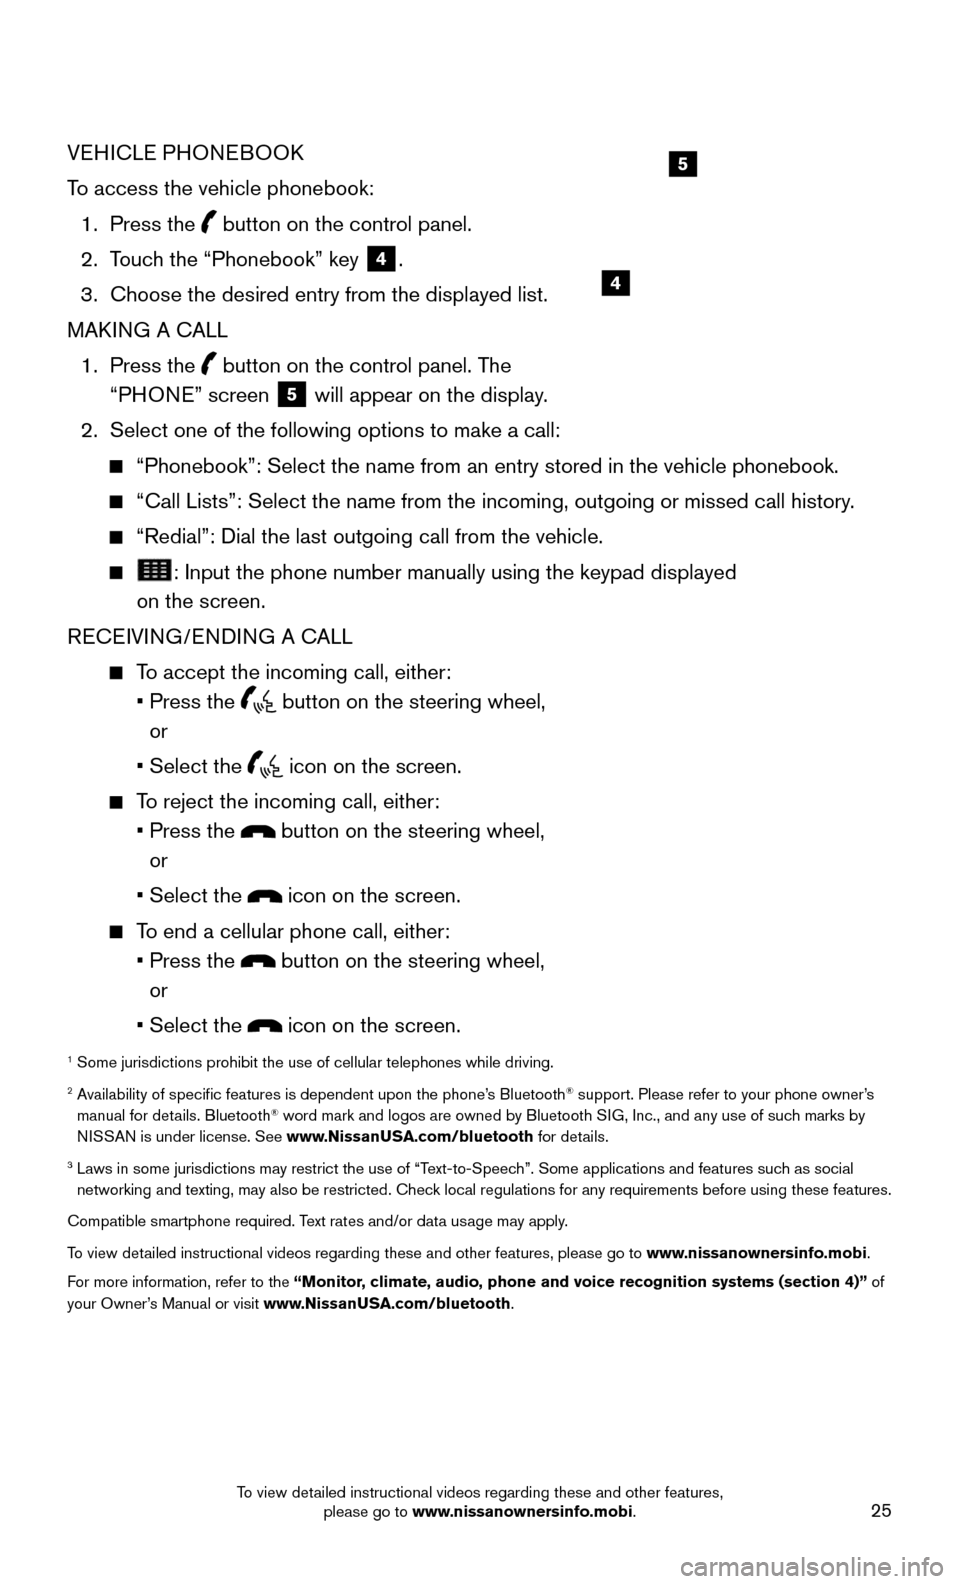
VEHICLE PHONEBOOK
To access the vehicle phonebook:
1. Press the button on the control panel.
2. Touc
h the “Phonebook” key
4.
3.
Choose the desired entry from the displayed list.
MAKI
NG A CALL
1.
Press
the
button on the control panel. The
“PHONE” screen
5 will appear on the display.
2. Select one of the following options to make a call:
“Phonebook”: Select the name from an entry stored in the vehicle p\
honebook.
“Call Lists”: Select the name from the incoming, outgoing or misse\
d call history.
“Redial”: Dial the last outgoing call from the vehicle.
: Input the phone number manually using the keypad displayed
on the screen.
RECEIVING/ENDING A CALL
To accept the incoming call, either:
• Press the button on the steering wheel,
or
• Select the icon on the screen.
To reject the incoming call, either:
• Press the button on the steering wheel,
or
• Select the icon on the screen.
To end a cellular phone call, either:
• Press the button on the steering wheel,
or
• Select the icon on the screen.
1 Some jurisdictions prohibit the use of cellular telephones while drivin\
g.2 Availability of specific features is dependent upon the phone’s Bluetooth® support. Please refer to your phone owner’s
manual for details. Bluetooth® word mark and logos are owned by Bluetooth SIG, Inc., and any use of such marks by
NISSAN is under license. See www.NissanUSA.com/bluetooth for details.
3 Laws in some jurisdictions may restrict the use of “Text-to-Speec h”. Some applications and features such as social
networking and texting, may also be restricted. Check local regulations for any requirements before using these features.
Compatible smartphone required. Text rates and/or data usage may apply.
To view detailed instructional videos regarding these and other features, please go\
to www.nissanownersinfo.mobi.
For more information, refer to the “Monitor, climate, audio, phone and voice recognition systems (section 4)” of
your Owner’s Manual or visit www.NissanUSA.com/bluetooth.
4
5
To view detailed instructional videos regarding these and other features, please go to www.nissanownersinfo.mobi.
Page 28 of 32
26
NAVIGATION SYSTEM (if so equipped)
Your Navigation System can calculate a route from the current location to\
a preferred
destination. The real-time map display and turn-by-turn voice guidance will lead you
along the route.
The Navigation System will continually update your vehicle’s position. If you have
deviated from the original route, it will recalculate the route from you\
r current location.
To help promote safe driving, some functions cannot be operated or have limited
operation when the vehicle speed is above 5 mph (8 km/h). T he on-screen text and
keys for these restricted functions will be “grayed-out” or muted \
and cannot be
selected while driving. These functions will become available again when the vehicle
speed is reduced to 5 mph (8 km/h). Voice commands may be available for some of
the restricted functions. For more information, refer to the “Monitor, climate, audio,
phone and voice recognition systems (section 4)” of your Owner’s Manual.
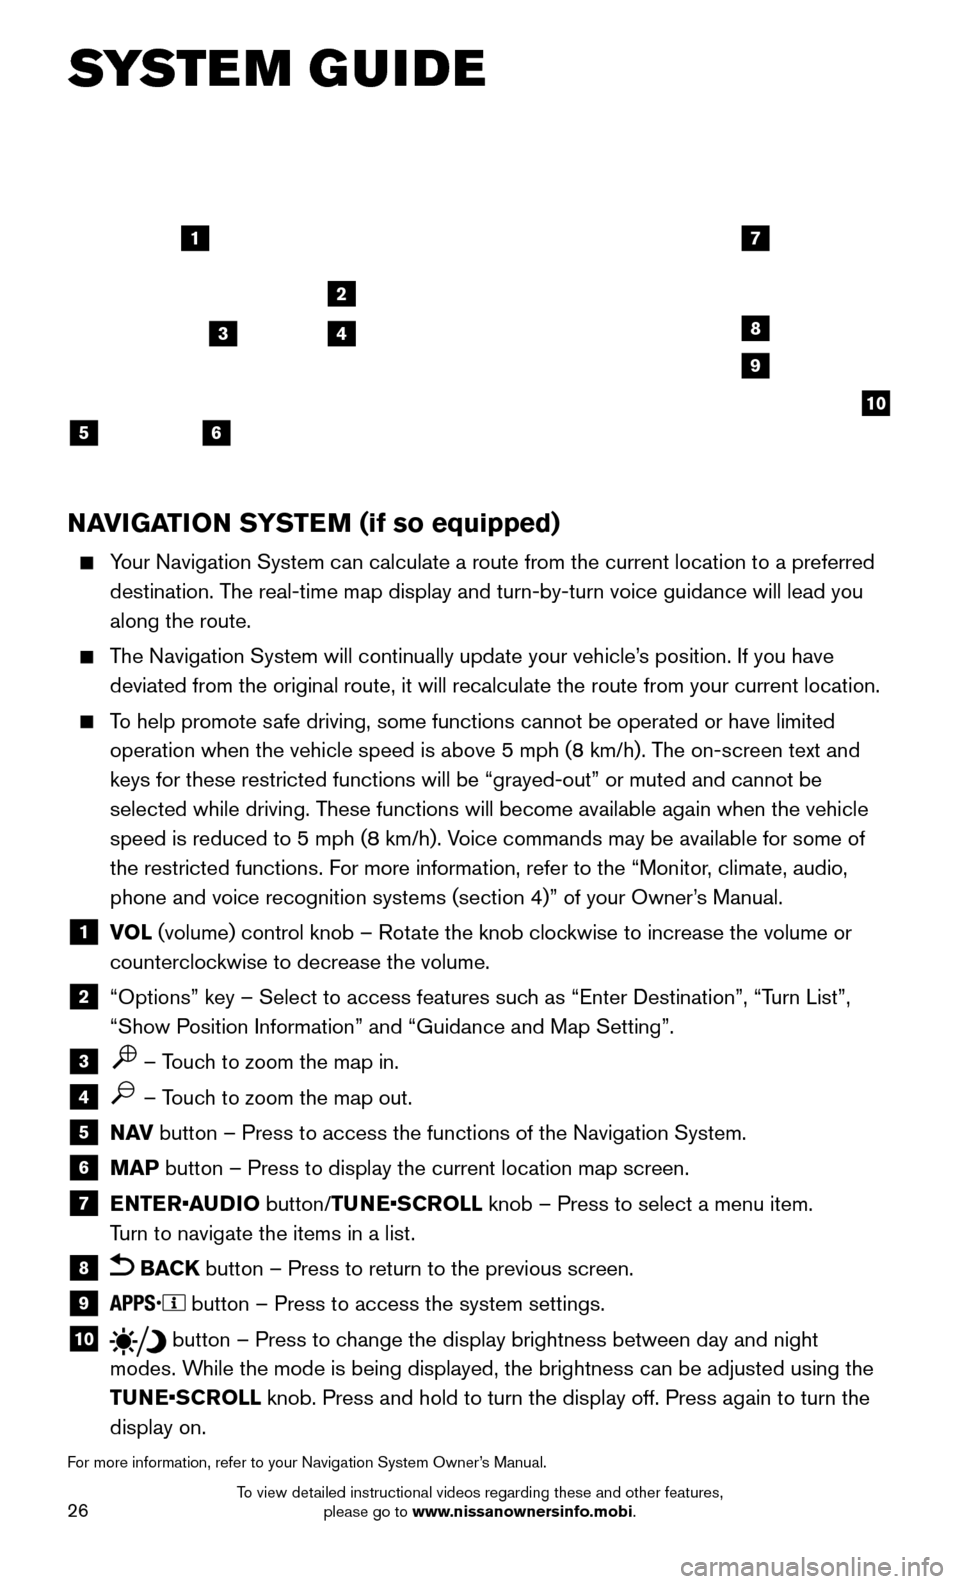
1 VOL (volume) control knob – Rotate the knob clockwise to increase the volume or
counterclockwise to decrease the volume.
2 “Options” key – Select to access features such as “Enter Destination”, “T urn List”,
“Show Position Information” and “Guidance and Map Setting”.
3 – Touch to zoom the map in.
4 – Touch to zoom the map out.
5 N AV button – Press to access the functions of the Navigation System.
6 MAP button – Press to display the current location map screen.
7 ENTER•AUDIO button/TUNE•SCROLL knob – Press to select a menu item.
T
urn to navigate the items in a list.
8 BACK button – Press to return to the previous screen.
9 button – Press to access the system settings.
10 button – Press to change the display brightness between day and night
modes. While the mode is being displayed, the brightness can be adjusted using t\
he
TUNE•SCROLL knob. Press and hold to turn the display off. Press again to turn the
display on.
For more information, refer to your Navigation System Owner’s Manual.
17
2
8
9
10
5
34
6
SYSTEM GUIDE
To view detailed instructional videos regarding these and other features, please go to www.nissanownersinfo.mobi.
Page 29 of 32

27
HOMELINK® UNIVERSAL TRANSCEIVER (if so equipped)
The HomeLink® Universal Transceiver can learn and consolidate the functions of up to
three different hand-held transmitters, operating items such as garage doors, property
gates, outdoor and indoor lights or alarm systems.
To program the HomeLink® Universal Transceiver:
• Position the handheld transceiver 1-3 in (26-
76 mm) away from the HomeLink
surface, keeping the HomeLink indicator light in view.
• Press and hold the desired HomeLink button and the handheld transmitter \
button
simult
aneously until the HomeLink indicator light flashes slowly and then ra\
pidly.
• Both buttons may be released when the indicator light flashes rapidly
.
To verify the programing is complete, press and hold the HomeLink button \
and
observe the indicator light:
• A solid, continuous light indicates the programing is complete and the H\
omeLink
button will activate your device.
• A blinking light that turns to a solid, continuous light after 2 seconds\
indicates
additional steps are required to complete the programing.
An additional person may make the remaining steps easier. T o complete the
programing process:
• At the receiver of the device that you are programing to the HomeLink sy\
stem,
press and release the “learn” or “smart” button (the name m\
ay vary by manufacturer
,
but it is usually located near where the hanging antenna wire is attached to the unit).
You have approximately 30 seconds to initiate the following step.
• Press and hold the programed HomeLink button for 2 seconds and release.
You may have to repeat the previous two steps up to three times to comple\
te the
programing process. HomeLink should now activate your device.
For more information, refer to the “Instruments and controls (section 2)” of your Owner’s Manual, the HomeLink
website at www.homelink.com or call 1-800-355-3515.
HOMELINK
To view detailed instructional videos regarding these and other features, please go to www.nissanownersinfo.mobi.
Page 30 of 32

MEMO