fuse NISSAN ALTIMA 2018 Owner´s Manual
[x] Cancel search | Manufacturer: NISSAN, Model Year: 2018, Model line: ALTIMA, Model: NISSAN ALTIMA 2018Pages: 467, PDF Size: 5.42 MB
Page 26 of 467
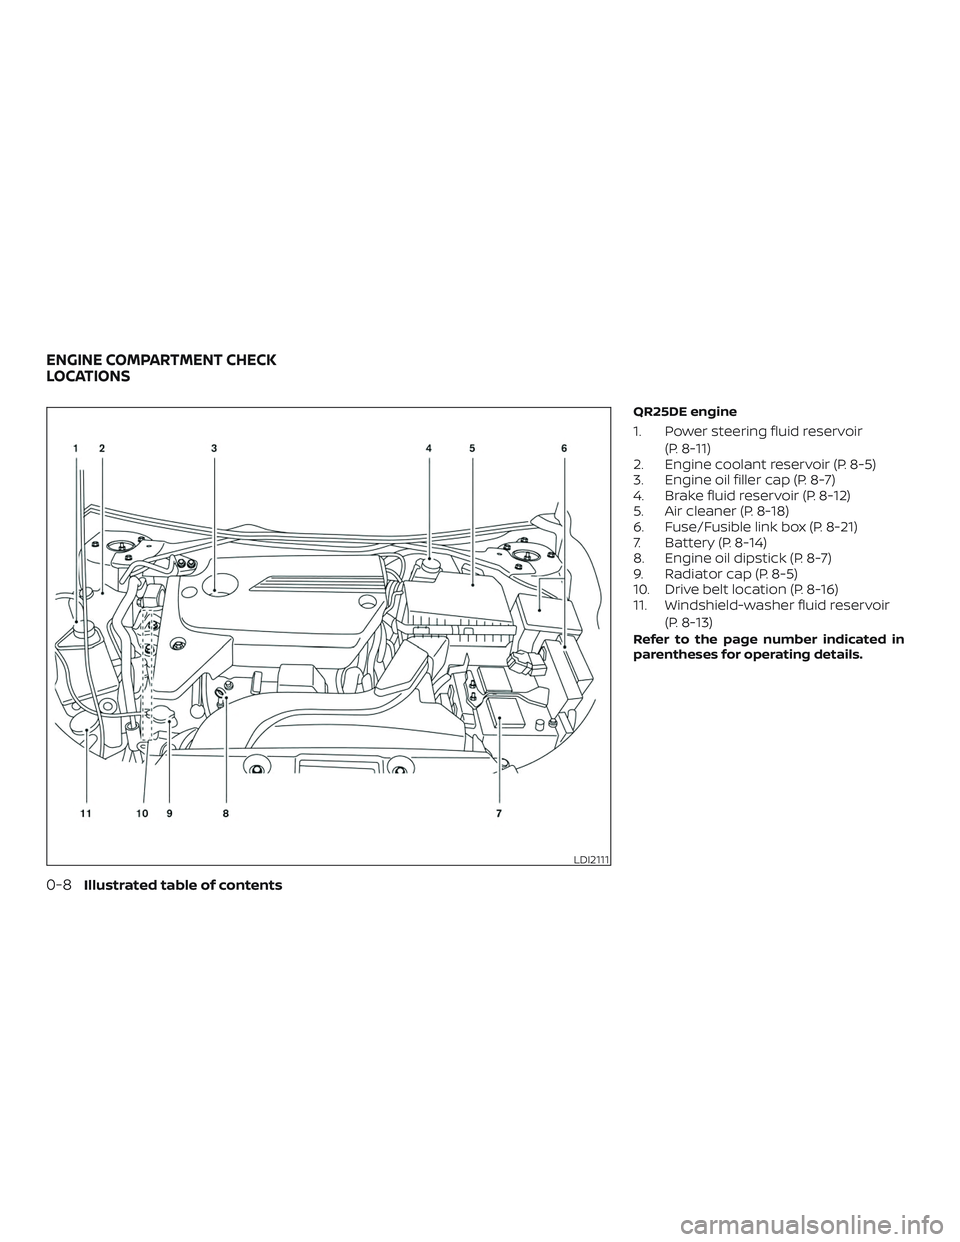
QR25DE engine
1. Power steering fluid reservoir(P. 8-11)
2. Engine coolant reservoir (P. 8-5)
3. Engine oil filler cap (P. 8-7)
4. Brake fluid reservoir (P. 8-12)
5. Air cleaner (P. 8-18)
6. Fuse/Fusible link box (P. 8-21)
7. Battery (P. 8-14)
8. Engine oil dipstick (P. 8-7)
9. Radiator cap (P. 8-5)
10. Drive belt location (P. 8-16)
11. Windshield-washer fluid reservoir
(P. 8-13)
Refer to the page number indicated in
parentheses for operating details.
LDI2111
ENGINE COMPARTMENT CHECK
LOCATIONS
0-8Illustrated table of contents
Page 27 of 467
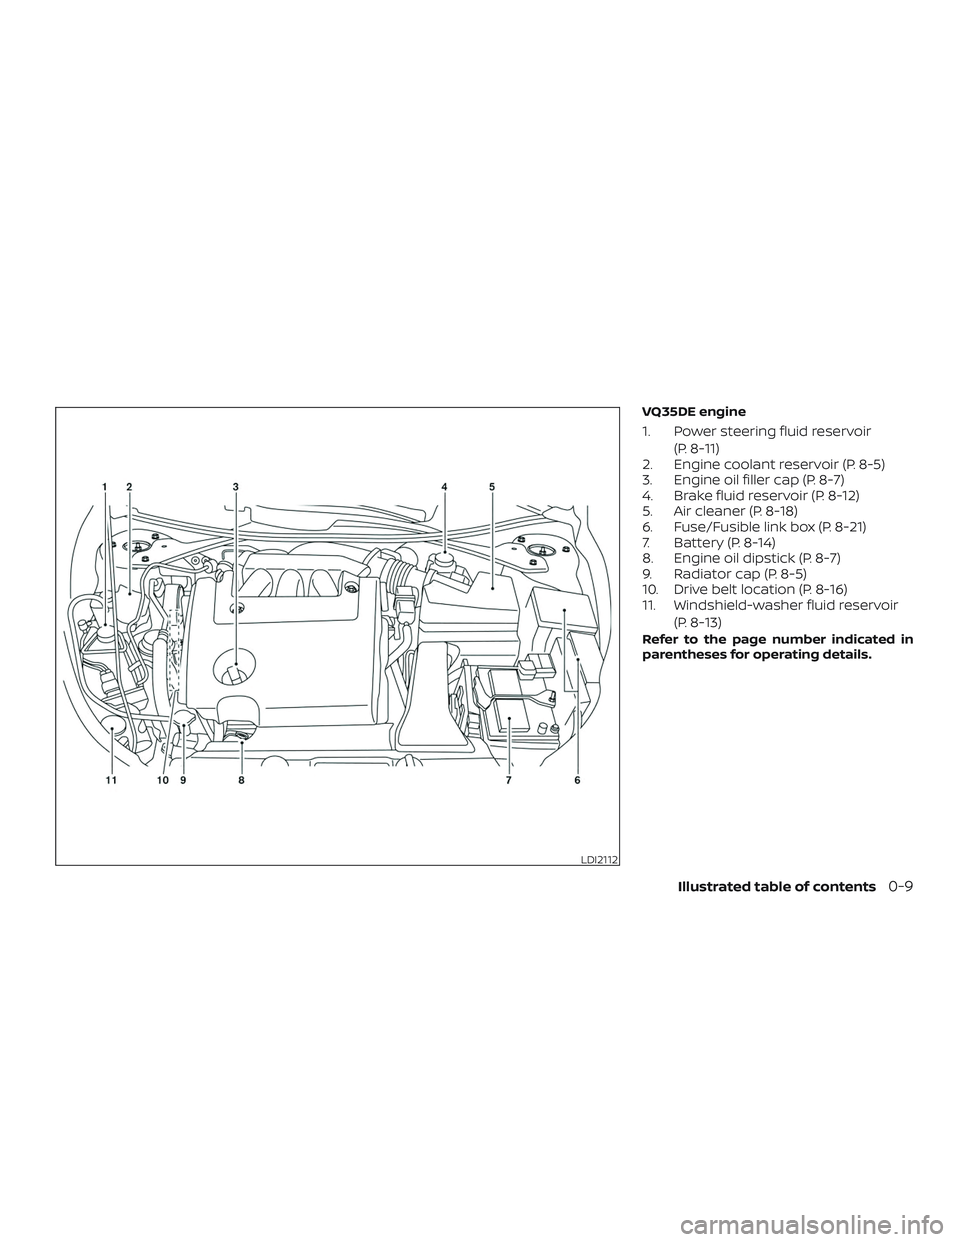
VQ35DE engine
1. Power steering fluid reservoir(P. 8-11)
2. Engine coolant reservoir (P. 8-5)
3. Engine oil filler cap (P. 8-7)
4. Brake fluid reservoir (P. 8-12)
5. Air cleaner (P. 8-18)
6. Fuse/Fusible link box (P. 8-21)
7. Battery (P. 8-14)
8. Engine oil dipstick (P. 8-7)
9. Radiator cap (P. 8-5)
10. Drive belt location (P. 8-16)
11. Windshield-washer fluid reservoir
(P. 8-13)
Refer to the page number indicated in
parentheses for operating details.
LDI2112
Illustrated table of contents0-9
Page 119 of 467
VEHICLE INFORMATION DISPLAY
WARNINGS AND INDICATORS
1. No Key Detected
2. Key ID Incorrect
3. Key Battery Low
4. I-Key System Error: See Owner’sManual
5. Key Registration Complete
6. Shif t to Park
7. Push ignition to OFF
8. Push brake and start switch to drive
9. Engine start operation for Intelligent Key system (if I-Key battery level is low)
10. Release Parking Brake
11. Low Fuel
12. Loose Fuel Cap
13. Low Oil Pressure: See Owner’s Manual
14. Low Washer Fluid
15. Tire Pressure Low - Add Air
16. TPMS Error: See Owner’s Manual
17. Door Open 18. Trunk Open
19. Timer Alert – Have a break?
20. Low Outside Temperature
21. Power will turn off to save the battery
22. Power turned off to save the battery
23. Reminder: Turn OFF headlights
24. Headlight System Error: See Owner’s
Manual (if so equipped)
25. Parking Sensor Error: See Owner’s Manual (if so equipped)
26. Blind Spot Warning (BSW) and Rear Cross Traffic Alert (RCTA) indicator (if so
equipped)
27. Malfunction: See Owner’s Manual (if so equipped)
28. Side Radar Obstruction (if so equipped)
29. Unavailable: Front Radar Obstruction (if so equipped)
30. Cruise control indicator (if so equipped)
31. Intelligent Cruise Control (ICC) indicator (if so equipped)
32. Shipping Mode On Push Storage Fuse
33. Transmission Shif t Position indicator 34. CVT Error: See Owner’s Manual
No Key Detected
This warning appears when the Intelligent
Key is lef t outside the vehicle with the igni-
tion switch in the ON position. Make sure
the Intelligent Key is inside the vehicle.
For additional information, refer to “NISSAN
Intelligent Key®” in the “Pre-driving checks
and adjustments” section of this manual.
Key ID Incorrect
This warning appears when the ignition
switch is placed from the OFF position and
the Intelligent Key is not recognized by the
system. You cannot start the engine with
an unregistered key.
For additional information, refer to “NISSAN
Intelligent Key®” in the “Pre-driving checks
and adjustments” section of this manual.
Key Battery Low
This indicator illuminates when the Intelli-
gent Key battery is running out of power.
If this indicator illuminates, replace the bat-
tery with a new one. For additional infor-
mation, refer to “Battery replacement” in
the “Do-it-yourself ” section of this manual.
Instruments and controls2-27
Page 123 of 467
Shipping Mode On Push Storage Fuse
This warning may appear if the extended
storage switch is not pushed in. When this
warning appears, push in the extended
storage switch to turn off the warning. For
additional information, refer to “Extended
storage switch” in this section.
Transmission Shif t Position indicator
This indicator shows the transmission shif t
position.
CVT Error: See Owner’s Manual
This warning illuminates when there is a
problem with the CVT system. If this warn-
ing comes on, have the system checked. It
is recommended that you visit a NISSAN
dealer for this service.Your vehicle may have two types of security
systems:
∙ Vehicle security system
∙ NISSAN Vehicle Immobilizer System
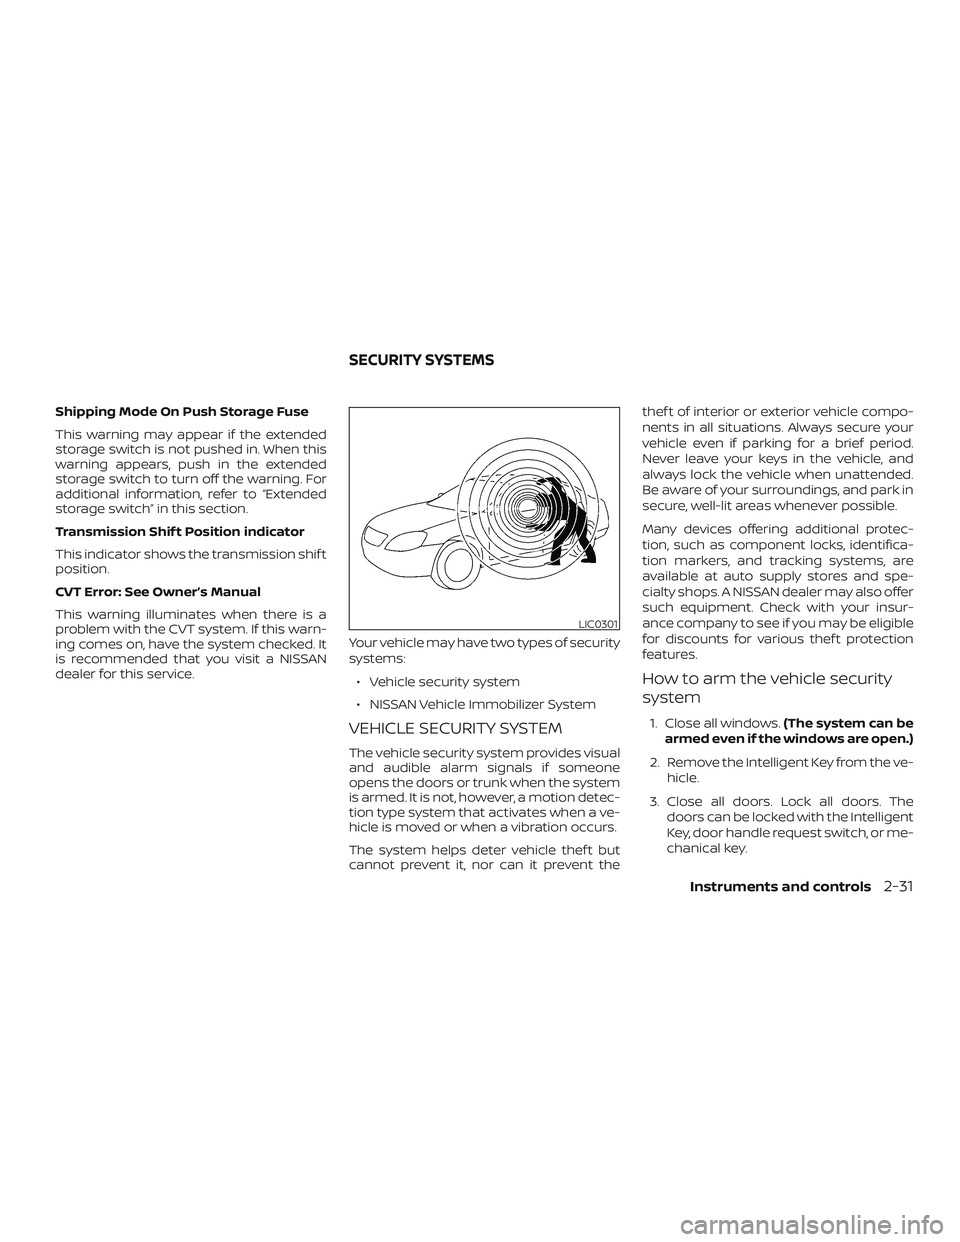
VEHICLE SECURITY SYSTEM
The vehicle security system provides visual
and audible alarm signals if someone
opens the doors or trunk when the system
is armed. It is not, however, a motion detec-
tion type system that activates when a ve-
hicle is moved or when a vibration occurs.
The system helps deter vehicle thef t but
cannot prevent it, nor can it prevent the thef t of interior or exterior vehicle compo-
nents in all situations. Always secure your
vehicle even if parking for a brief period.
Never leave your keys in the vehicle, and
always lock the vehicle when unattended.
Be aware of your surroundings, and park in
secure, well-lit areas whenever possible.
Many devices offering additional protec-
tion, such as component locks, identifica-
tion markers, and tracking systems, are
available at auto supply stores and spe-
cialty shops. A NISSAN dealer may also offer
such equipment. Check with your insur-
ance company to see if you may be eligible
for discounts for various thef t protection
features.
How to arm the vehicle security
system
1. Close all windows.
(The system can be
armed even if the windows are open.)
2. Remove the Intelligent Key from the ve- hicle.
3. Close all doors. Lock all doors. The doors can be locked with the Intelligent
Key, door handle request switch, or me-
chanical key.
LIC0301
SECURITY SYSTEMS
Instruments and controls2-31
Page 136 of 467
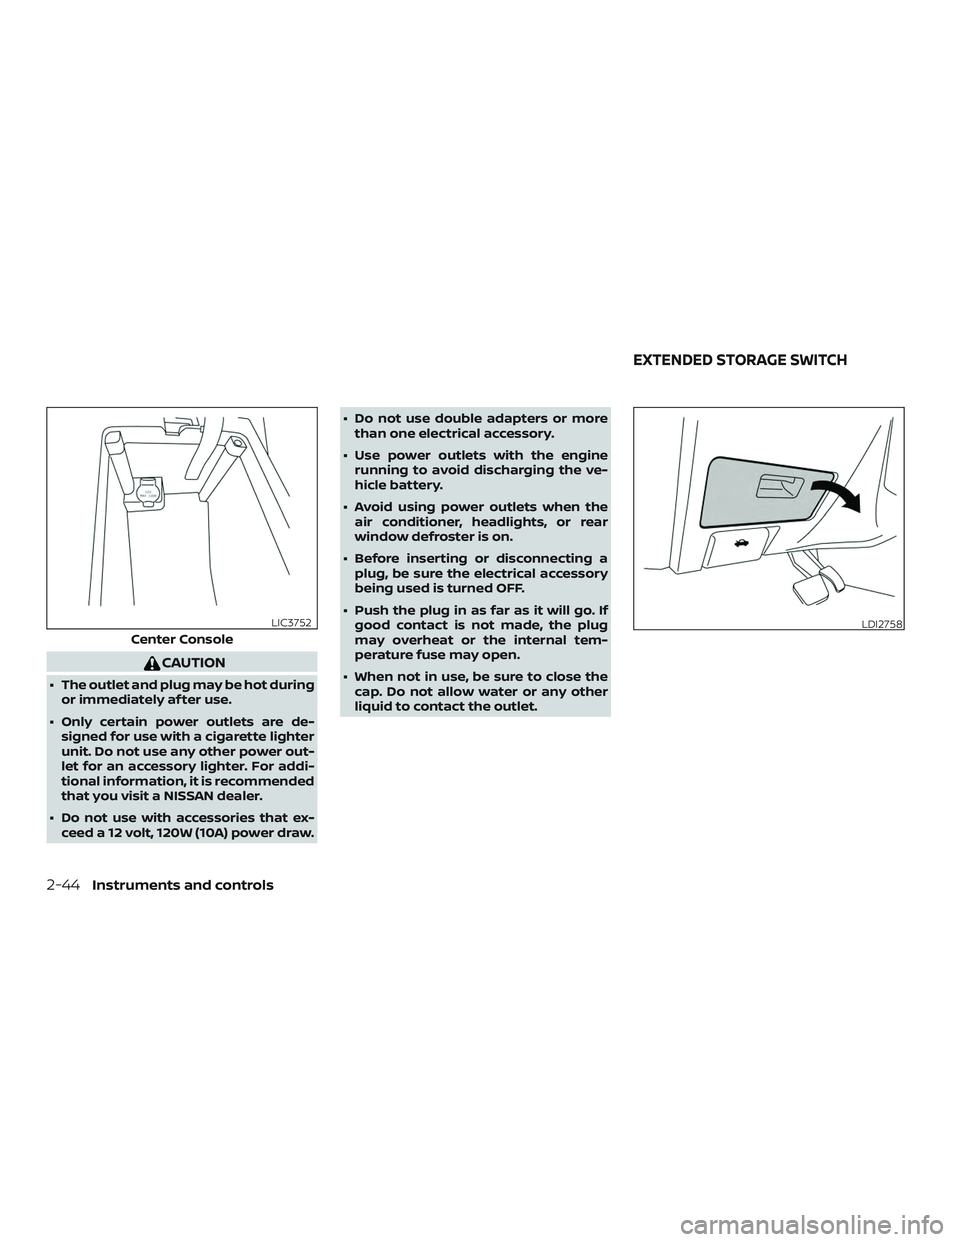
CAUTION
∙ The outlet and plug may be hot duringor immediately af ter use.
∙ Only certain power outlets are de- signed for use with a cigarette lighter
unit. Do not use any other power out-
let for an accessory lighter. For addi-
tional information, it is recommended
that you visit a NISSAN dealer.
∙ Do not use with accessories that ex- ceed a 12 volt, 120W (10A) power draw. ∙ Do not use double adapters or more
than one electrical accessory.
∙ Use power outlets with the engine running to avoid discharging the ve-
hicle battery.
∙ Avoid using power outlets when the air conditioner, headlights, or rear
window defroster is on.
∙ Before inserting or disconnecting a plug, be sure the electrical accessory
being used is turned OFF.
∙ Push the plug in as far as it will go. If good contact is not made, the plug
may overheat or the internal tem-
perature fuse may open.
∙ When not in use, be sure to close the cap. Do not allow water or any other
liquid to contact the outlet.
Center Console
LIC3752LDI2758
EXTENDED STORAGE SWITCH
2-44Instruments and controls
Page 137 of 467
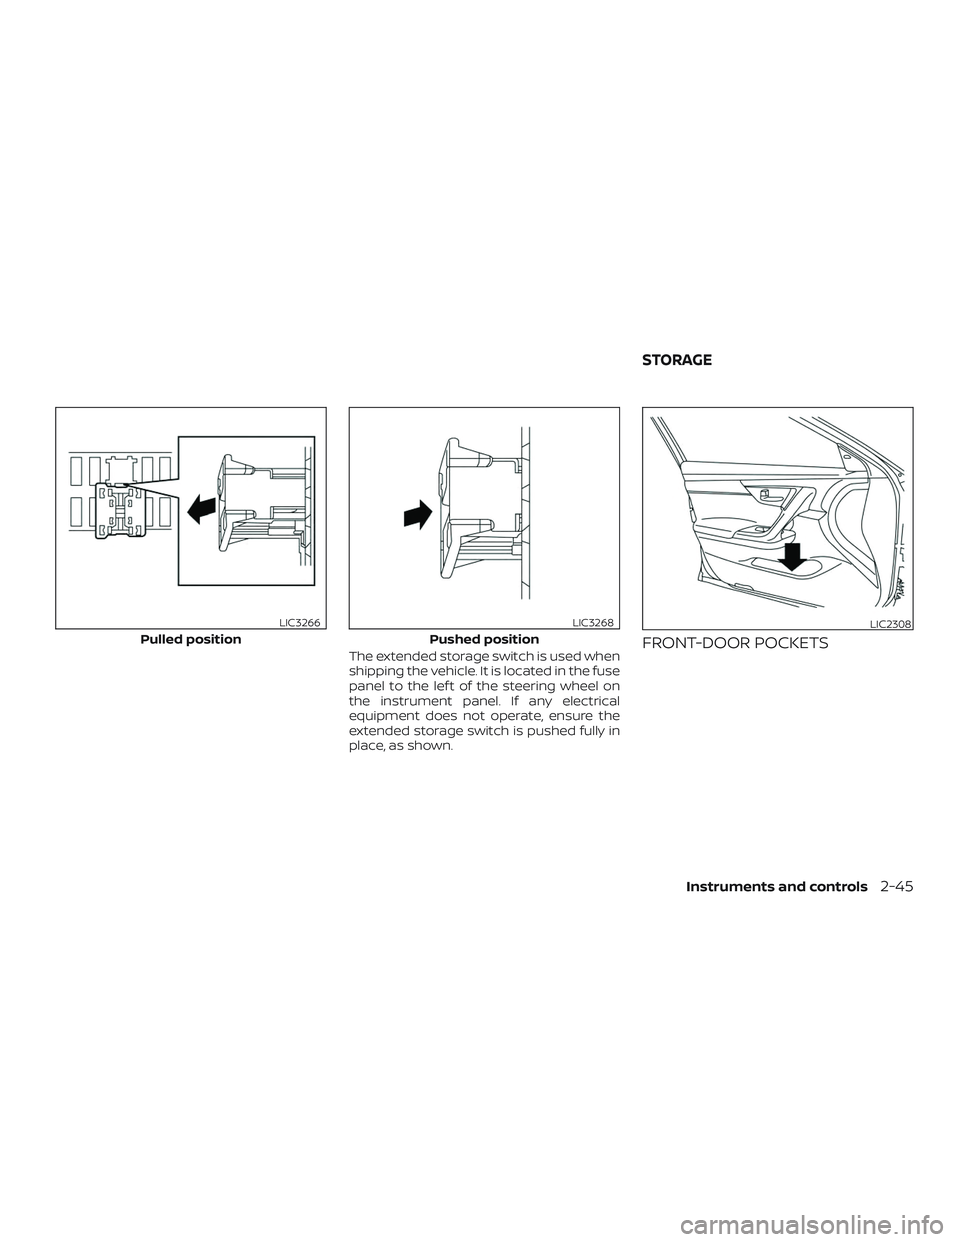
The extended storage switch is used when
shipping the vehicle. It is located in the fuse
panel to the lef t of the steering wheel on
the instrument panel. If any electrical
equipment does not operate, ensure the
extended storage switch is pushed fully in
place, as shown.FRONT-DOOR POCKETSPulled position
LIC3266
Pushed position
LIC3268LIC2308
STORAGE
Instruments and controls2-45
Page 221 of 467
iPod MENU button
This button can only be used for iPod® op-
erations. For additional information, refer to
“iPod® player operation (models without
navigation system)” in this section.
DISP (display) button
The DISP (display) button turns the display
screen on or off.
FM/AM radio operation
FM·AM button
Press the FM·AM button to change the
band as follows:
AM→FM1 →FM2 →AM
If another audio source is playing when the
FM·AM button is pressed, the audio source
playing will automatically be turned off and
the last radio station played will begin play-
ing.
TUNE/FOLDER knob tuning
Turn the TUNE/FOLDER knob to the lef t or
right for manual tuning.
SEEK/TRACK tuning
Press the
SEEK button orTRACK button to tune from low to high or
high to low frequencies and to stop at the
next broadcasting station.
SCAN tuning
Press the SCAN button to stop at each
broadcasting station for 5 seconds. SCAN
will appear on the screen while the radio is
scan tuning.
Pressing the button again during this
5 second period will stop SCAN tuning and
the radio will remain tuned to that station. If
the SCAN button is not pressed within
5 seconds, SCAN tuning moves to the next
station.
1 to 6 Station memory operations
Six stations can be set for the AM band.
Twelve stations can be set for the FM band
(6 for FM1, 6 for FM2). 1. Choose the radio band AM, FM1 or FM2 using the FM·AM select button.
2. Tune to the desired station using the
SEEK button or theTRACK button. Press and hold any of
the desired station memory buttons (1 – 6) until the preset number is updated
on the display and the sound is briefly
muted.
3. The channel indicator will then come on and the sound will resume. Pro-
gramming is now complete.
4. Other buttons can be set in the same manner.
If the battery cable is disconnected, or if the
fuse opens, the radio memory will be can-
celed. In that case, reset the desired sta-
tions.
Compact disc (CD) player
operation
If the radio is already operating, it automati-
cally turns off and the compact disc begins
to play.
MEDIA button
With a CD loaded, press the MEDIA button
until the CD mode is displayed on the
screen.
CD/MP3 display mode
While listening to an MP3/WMA CD, certain
text may be displayed on the screen if the
CD has been encoded with text informa-
tion. Depending on how the MP3/WMA CD
Monitor, climate, audio, phone and voice recognition systems4-35
Page 227 of 467
3. The channel indicator will then comeon and the sound will resume. Pro-
gramming is now complete.
4. Other buttons can be set in the same manner.
If the battery cable is disconnected, or if the
fuse opens, the radio memory will be can-
celed. In that case, reset the desired sta-
tions.
Compact disc (CD) player
operation
If the radio is already operating, it automati-
cally turns off and the compact disc begins
to play.
MEDIA button
With a CD loaded, press the MEDIA button
until the CD mode is displayed on the
screen.
CD/MP3 display mode
While listening to an MP3/WMA CD, certain
text may be displayed on the screen if the
CD has been encoded with text informa-
tion. Depending on how the MP3/WMA CD
is encoded, information such as Artist,
Song and Folder will be displayed. The track number and the total number of
tracks in the current folder or on the cur-
rent disc are displayed on the screen as
well.
SEEK/CAT (Reverse or
Fast Forward) button
Press and hold the SEEK/CAT button
orfor 1.5 seconds while the compact
disc is playing to reverse or fast forward the
track being played. The compact disc plays
at an increased speed while reversing or
fast forwarding. When the button is re-
leased, the compact disc returns to normal
play speed.
SEEK/CAT button
Press the
SEEK/CAT button while a
CD or MP3/WMA CD is playing to return to
the beginning of the current track. Press
the
SEEK/CAT button several times to
skip backward several tracks.
Press the
SEEK/CAT button while a
CD or MP3/WMA CD is playing to advance
one track. Press the
SEEK/CAT button
several times to skip forward several
tracks. If the last track on a CD is skipped,
the first track on the disc is played. If the last track in a folder of an MP3/WMA CD is
skipped, the first track of the next folder is
played.
TUNE/SCROLL knob (MP3/WMA CD only)
If a MP3/WMA CD with multiple folders is
playing, turn the TUNE/SCROLL knob to
change folders. Turn the knob to the lef t to
skip back a folder. Turn the knob to the right
to skip ahead a folder.
RPT (repeat) button
When the RPT button is pressed while a
compact disc is playing, the play pattern
can be changed as follows:
CD:
1 Track Repeat
←→OFF
CD with MP3 or WMA:
1 Folder Repeat →1 Track Repeat →OFF
1 Track Repeat: the current track will be
repeated.
1 Folder Repeat: the current folder will be
repeated.
OFF: No repeat play pattern is applied. The
indicator on the display will turn off.
Monitor, climate, audio, phone and voice recognition systems4-41
Page 373 of 467
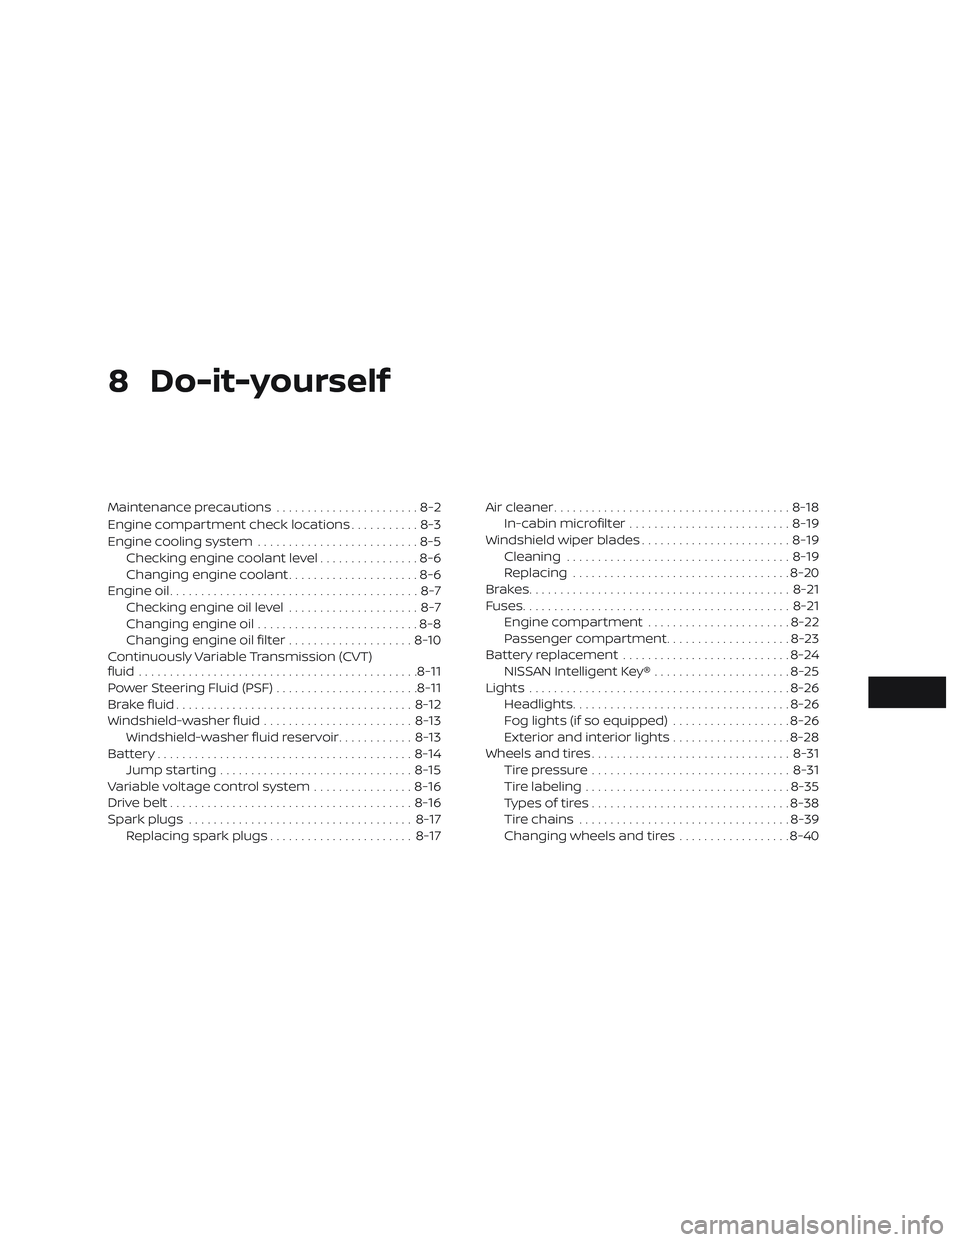
8 Do-it-yourself
Maintenance precautions.......................8-2
Engine compartment check locations ...........8-3
Engine cooling system ..........................8-5
Checking engine coolant level ................8-6
Changing engine coolant .....................8-6
Engine oil ........................................8-7
Checking engine oil level .....................8-7
Changing engine oil ..........................8-8
Changing engine oil filter ....................8-10
Continuously Variable Transmission (CVT)
fluid ............................................. 8-11
Power Steering Fluid (PSF) .......................8-11
Brake fluid ...................................... 8-12
Windshield-washer fluid ........................8-13
Windshield-washer fluid reservoir ............8-13
Battery......................................... 8-14
Jump starting ............................... 8-15
Variable voltage control system ................8-16
Drive belt ....................................... 8-16
Spark plugs .................................... 8-17
Replacing spark plugs ....................... 8-17Air cleaner
...................................... 8-18
In-cabin microfilter .......................... 8-19
Windshield wiper blades ........................8-19
Cleaning .................................... 8-19
Replacing ................................... 8-20
Brakes.......................................... 8-21
Fuses ........................................... 8-21
Engine compartment .......................8-22
Passenger compartment ....................8-23
Battery replacement ........................... 8-24
NISSAN Intelligent Key® ......................8-25
Lights .......................................... 8-26
Headlights ................................... 8-26
Fog lights (if so equipped) ...................8-26
Exterior and interior lights ...................8-28
Wheels and tires ................................ 8-31
Tire pressure ................................ 8-31
Tir
e labeling ................................. 8-35
Types of tires ................................ 8-38
Tire chains .................................. 8-39
Changing wheels and tires ..................8-40
Page 375 of 467
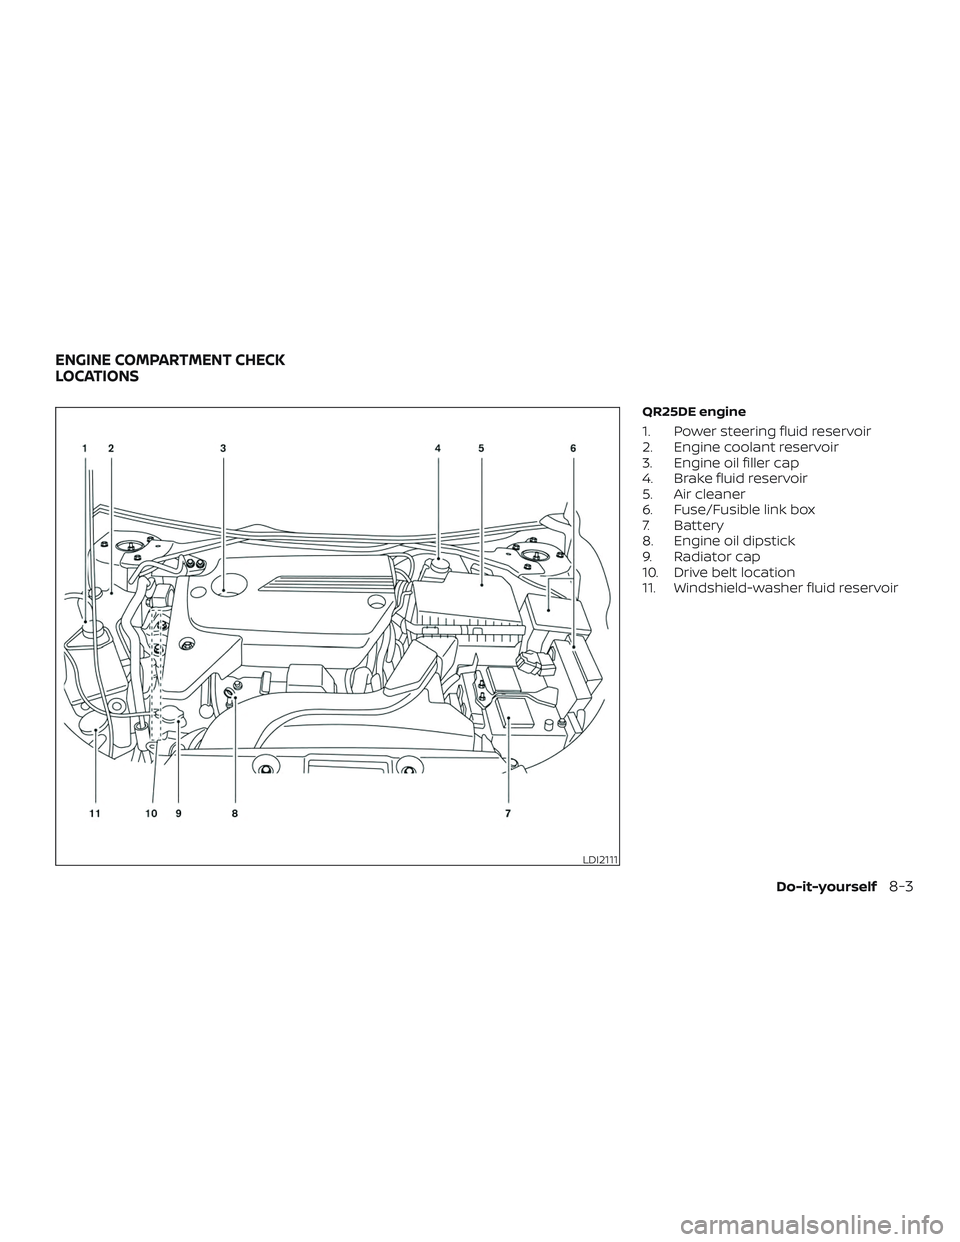
QR25DE engine
1. Power steering fluid reservoir
2. Engine coolant reservoir
3. Engine oil filler cap
4. Brake fluid reservoir
5. Air cleaner
6. Fuse/Fusible link box
7. Battery
8. Engine oil dipstick
9. Radiator cap
10. Drive belt location
11. Windshield-washer fluid reservoir
LDI2111
ENGINE COMPARTMENT CHECK
LOCATIONS
Do-it-yourself8-3