sport mode NISSAN ALTIMA 2023 Owners Manual
[x] Cancel search | Manufacturer: NISSAN, Model Year: 2023, Model line: ALTIMA, Model: NISSAN ALTIMA 2023Pages: 644, PDF Size: 4.12 MB
Page 41 of 644
WARNING
Do not allow children to play with the
seat belts. Most seating positions are
equipped with Automatic Locking Re-
tractor (ALR) mode seat belts. If the seat
belt becomes wrapped around a child’s
neck with the ALR mode activated, the
child can be seriously injured or killed if
the seat belt retracts and becomes
tight. This can occur even if the vehicle
is parked. Unbuckle the seat belt to re-
lease the child. If the seat belt cannot
be unbuckled or is already unbuckled,
release the child by cutting the seat
belt with a suitable tool (such as a knife
or scissors) to release the seat belt.
Children need adults to help protect
them. They need to be properly
restrained.
In addition to the general information in
this manual, child safety information is
available from many other sources, includ-
ing doctors, teachers, government traffic
safety offices, and community organiza-
tions. Every child is different, so be sure to
learn the best way to transport your child.
There are three basic types of child re-
straint systems: • Rear-facing child restraints
• Forward-facing child restraints
• Booster seats
The proper restraint depends on the child's
size. Generally, infants up to about 1 year
and less than 20 lbs. (9 kg) should be placed
in rear-facing child restraints. Forward-
facing child restraints are available for chil-
dren who outgrow rear-facing child re-
straints and are at least 1 year old. Booster
seats are used to help position a vehicle
lap/shoulder belt on a child who can no
longer use a forward-facing child restraint.
WARNING
Infants and children need special pro-
tection. The vehicle's seat belts may
not fit them properly. The shoulder belt
may come too close to the face or neck.
The lap belt may not fit over their small
hip bones. In an accident, an improp-
erly fitting seat belt could cause serious
or fatal injury. Always use appropriate
child restraints.
All U.S. states and Canadian provinces or
territories require the use of approved child
restraints for infants and small children. For
additional information, see “Child re-
straints” (P. 1-23). A child restraint may be secured in the ve-
hicle by using either the LATCH (Lower An-
chors and Tethers for CHildren) system or
with the vehicle seat belt. For additional
information, see “Child restraints” (P. 1-23).
NISSAN recommends that all pre-teens
and children be restrained in the rear
seat. Studies show that children are
safer when properly restrained in the
rear seat than in the front seat.
This is especially important because
your vehicle has a supplemental re-
straint system (air bag system) for the
front passenger. For additional informa-
tion, see “Supplemental Restraint Sys-
tem (SRS)” (P. 1-47).
INFANTS
Infants up to at least 1 year old should be
placed in a rear-facing child restraint.
NISSAN recommends that infants be
placed in child restraints that comply with
Federal Motor Vehicle Safety Standards or
Canadian Motor Vehicle Safety Standards.
You should choose a child restraint that fits
your vehicle and always follow the manu-
facturer's instructions for installation and
use.
CHILD SAFETY
Safety-Seats, seat belts and supplemental restraint system1-21
Page 119 of 644
Rear Door Alert is activated
When the system is enabled, this message
appears when the Rear Door Alert system
is active and can remind the driver to check
the back seat.
• Using the steering wheel switch, a drivercan select “Dismiss Message” to clear the
display for a period of time. If no selection
is made, this message automatically
turns off af ter a period of time.
• Using the steering wheel switch, a driver can select “Disable Alert” to disable the
horn alert for the remainder of the cur-
rent trip.
WARNING
Selecting “Dismiss Message” during a
stop within a trip temporarily dis-
misses the message for that stop with-
out turning the system off. Alerts can
be provided for other stops during the
trip. Selecting “Disable Alert” turns off
the Rear Door Alert system for the re-
mainder of a trip and no audible alert
will be provided.
NOTE:
This system is disabled until a driver en-
ables it using the vehicle information
display. For additional information, see
“How to use the vehicle information dis-
play ” (P. 2-19).
For additional information, see “Rear Door
Alert” (P. 2-67).
Check Rear Seat For All Articles
When the system is enabled, this message
appears when the vehicle comes to a com-
plete stop, the vehicle is transitioned from
the D (Drive) position to P (Park) position,
and the driver exits the vehicle. This mes-
sage alerts the driver, af ter a period of time,
to check for items in the rear seat af ter the
audible alert has been provided.
NOTE:
This system is disabled until a driver en-
ables it using the vehicle information
display. For additional information, see
“How to use the vehicle information dis-
play ” (P. 2-19).
For additional information, see “Rear Door
Alert” (P. 2-67).
Door/Trunk Open
This warning appears when a door or the
trunk has been opened.
Drive sport mode indicator
A small “S” appears to the right of the Trans-
mission Shif t Position indicator in the ve-
hicle information display when the drive
sport mode is engaged.
Activate the drive sport mode by pushing
the switch on the shif t lever while the shif t
lever is in the D (Drive) position.
For additional information, see “Driving the
vehicle” (P. 5-18).
Engine Oil Service due in – –
– miles
This distance to oil change will display if the
distance to oil change is approximately
1,000 miles (1,600 km) or less. Several re-
minders will display until the remaining dis-
tance is 0.
Instruments and controls2-29
Page 136 of 644
WARNING
Selecting “Dismiss Message” during a
stop within a trip temporarily dis-
misses the message for that stop with-
out turning the system off. Alerts can
be provided for other stops during the
trip. Selecting “Disable Alert” turns off
the Rear Door Alert system for the re-
mainder of a trip and no audible alert
will be provided.
NOTE:
This system is disabled until a driver en-
ables it using the vehicle information
display. For additional information, see
“How to use the vehicle information dis-
play ” (P. 2-35).
For additional information, see “Rear Door
Alert” (P. 2-67).
Check Rear Seat For All Articles
When the system is enabled, this message
appears when the vehicle comes to a com-
plete stop, the vehicle is transitioned from
the D (Drive) position to P (Park) position,
and the driver exits the vehicle. This mes-
sage alerts the driver, af ter a period of time,
to check for items in the rear seat af ter the
audible alert has been provided.
NOTE:
This system is disabled until a driver en-
ables it using the vehicle information
display. For additional information, see
“How to use the vehicle information dis-
play ” (P. 2-35).
For additional information, see “Rear Door
Alert” (P. 2-67).
Door/Trunk Open
This warning appears when a door or the
trunk has been opened.
Drive sport mode indicator
A small “S” appears to the right of the Trans-
mission Shif t Position indicator in the ve-
hicle information display when the drive
sport mode is engaged.
Activate the drive sport mode by pushing
the switch on the shif t lever while the shif t
lever is in the D (Drive) position.
For additional information, see “Driving the
vehicle” (P. 5-18 ).
Engine Oil Service due in – –
– miles
This distance to oil change will display if the
distance to oil change is approximately
1,000 miles (1,600 km) or less. Several re-
minders will display until the remaining dis-
tance is 0.
Engine Oil Service due now
This message will be displayed when re-
maining distance is 0, indicating service is
now due/overdue. Af ter service is com-
pleted, the Oil Control System should be
reset from the Maintenance settings
menu.
Headlight System Error: See Owner’s
Manual
This warning appears when there is an er-
ror with the system. For additional informa-
tion, see “Headlight and turn signal switch”
(P. 2-57).
Loose Fuel Cap
This warning appears when the fuel-filler
cap is not tightened correctly af ter the ve-
hicle has been refueled. For additional in-
formation, see “Fuel-filler cap” (P. 3-25).
2-46Instruments and controls
Page 317 of 644
L(Low)
Use this position for engine braking on
steep downhill gradients/climbing steep
slopes and whenever approaching sharp
bends. Do not use the L (Low) position in
any other circumstances.
Manual shif t mode (if so
equipped)
When the shif t lever is in the D (Drive) posi-
tion and the drive sport mode switch is
pushed, the transmission is ready for the
manual shif t mode. Shif t ranges can be
selected manually by pulling the right-side
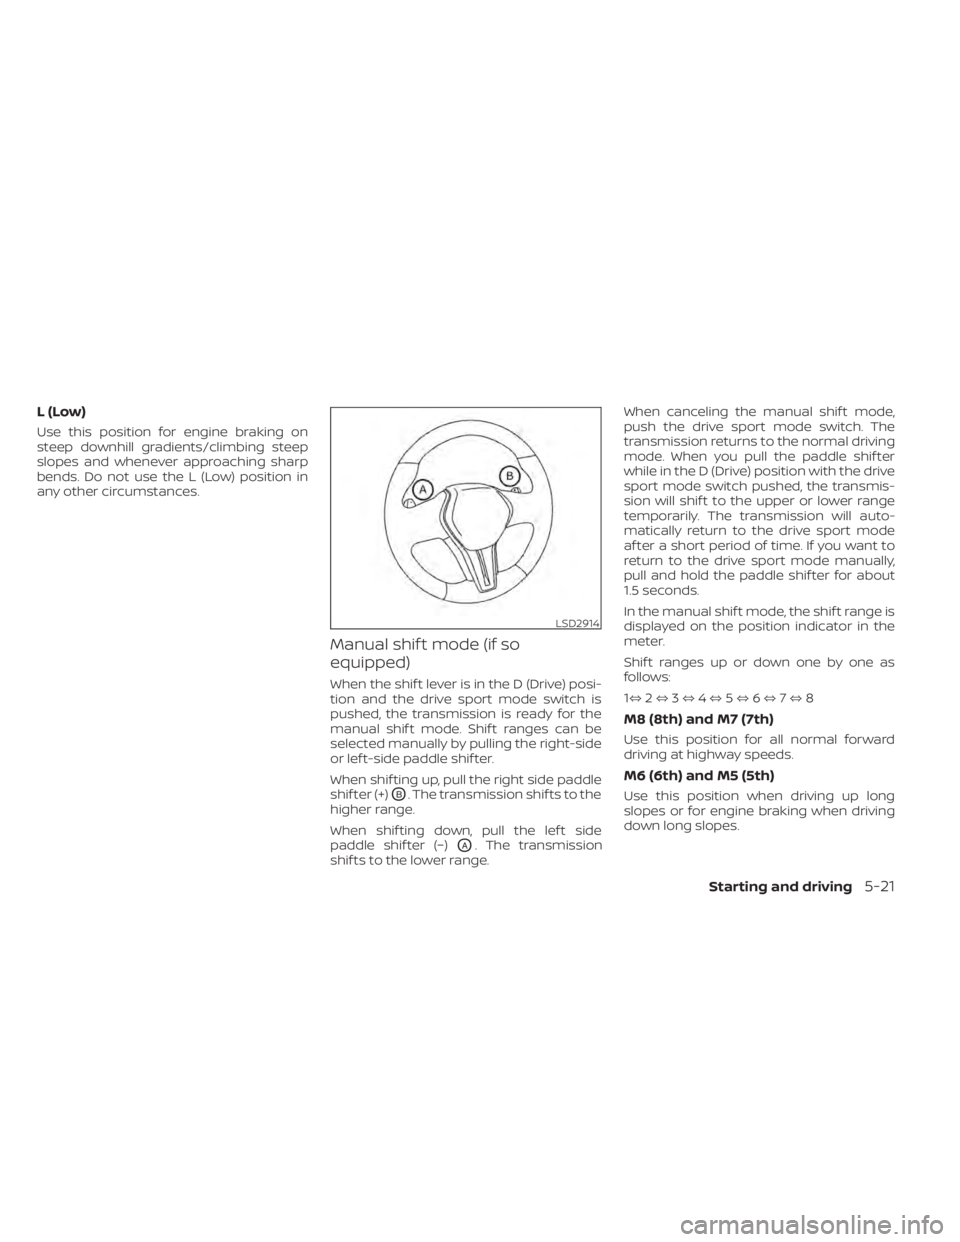
or lef t-side paddle shif ter.
When shif ting up, pull the right side paddle
shif ter (+)
OB. The transmission shif ts to the
higher range.
When shif ting down, pull the lef t side
paddle shif ter (−)
OA. The transmission
shif ts to the lower range. When canceling the manual shif t mode,
push the drive sport mode switch. The
transmission returns to the normal driving
mode. When you pull the paddle shif ter
while in the D (Drive) position with the drive
sport mode switch pushed, the transmis-
sion will shif t to the upper or lower range
temporarily. The transmission will auto-
matically return to the drive sport mode
af ter a short period of time. If you want to
return to the drive sport mode manually,
pull and hold the paddle shif ter for about
1.5 seconds.
In the manual shif t mode, the shif t range is
displayed on the position indicator in the
meter.
Shif t ranges up or down one by one as
follows:
1⇔
2⇔ 3⇔ 4⇔ 5⇔ 6⇔ 7⇔ 8
M8 (8th) and M7 (7th)
Use this position for all normal forward
driving at highway speeds.
M6 (6th) and M5 (5th)
Use this position when driving up long
slopes or for engine braking when driving
down long slopes.
LSD2914
Starting and driving5-21
Page 318 of 644
M4 (4th), M3 (3rd) and M2 (2nd)
Use for hill climbing or engine braking on
downhill grades.
M1 (1st)
Use this position when climbing steep hills
slowly or driving slowly through deep snow,
sand or mud, or for maximum engine brak-
ing on steep downhill grades.
• Remember not to drive at high speeds forextended periods of time in lower than
the 8th range. This reduces fuel economy.
When shif ting up
Use the + (up) side paddle shif ter. (Shif ts to
higher range.)
When shif ting down
Use the − (down) side paddle shif ter. (Shif ts
to lower range.)
When canceling the manual shif t mode
To cancel manual shif t mode, push the
drive sport mode switch on the shif t lever
or press and hold either paddle shif ter.
• In the manual shif t mode, the trans-
mission may not shif t to the selected
gear. This helps maintain driving per-
formance and reduces the chance of
vehicle damage or loss of control. •
In the manual shif t mode, the trans-
mission may shif t up automatically to a
higher range than selected if the en-
gine speed is too high. When the ve-
hicle speed decreases, the transmis-
sion automatically shif ts down and
shif ts to 1st gear before the vehicle
comes to a stop.
• Continuously Variable Transmission (CVT) operation is limited to automatic
drive mode when CVT fluid temperature
is extremely low even if manual shif t
mode is selected. This is not a malfunc-
tion. When CVT fluid warms up, manual
mode can be selected.
• When the CVT fluid temperature is high, the shif t range may upshif t in lower rpm
than usual. This is not a malfunction.
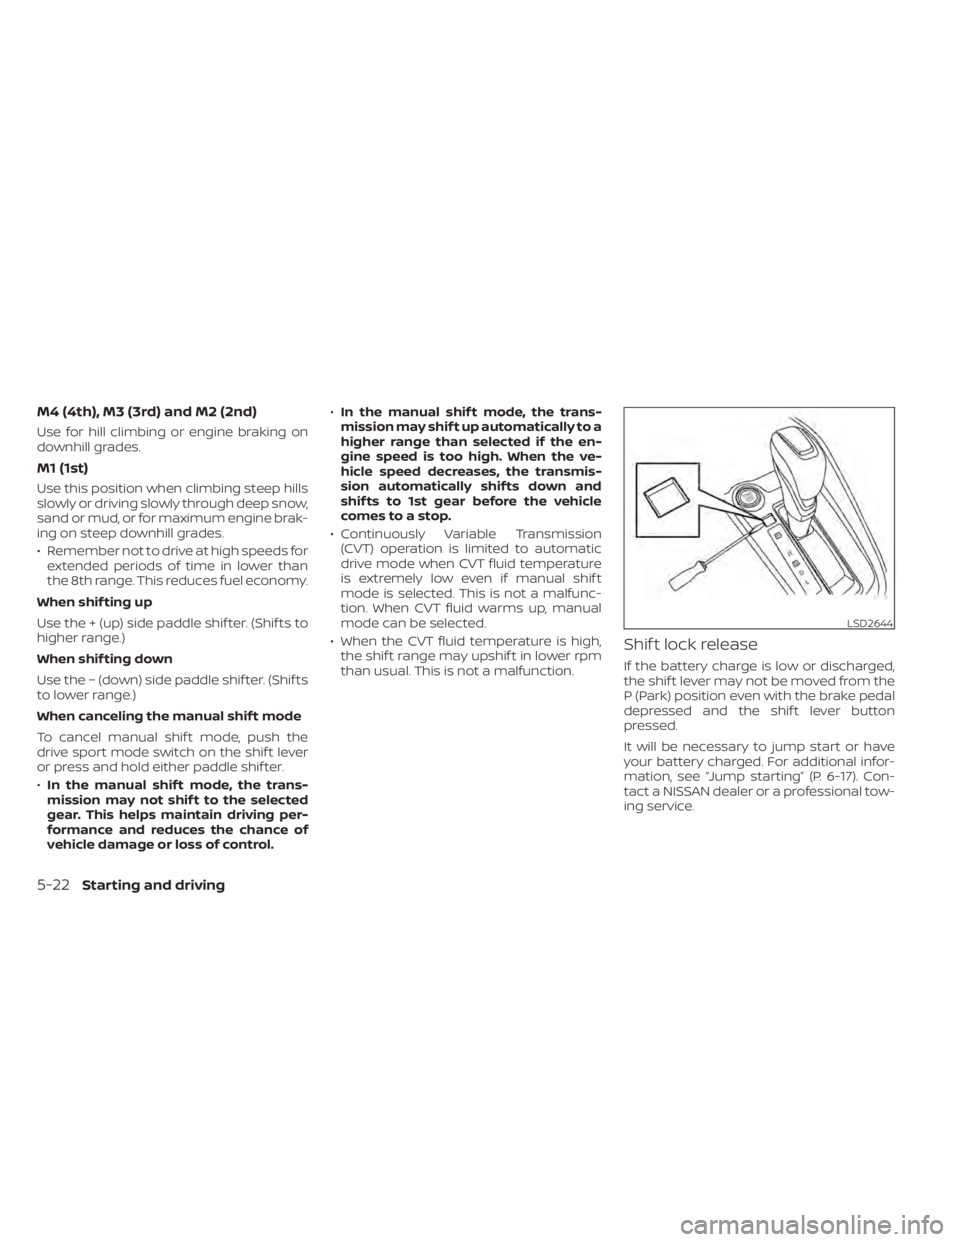
Shif t lock release
If the battery charge is low or discharged,
the shif t lever may not be moved from the
P (Park) position even with the brake pedal
depressed and the shif t lever button
pressed.
It will be necessary to jump start or have
your battery charged. For additional infor-
mation, see “Jump starting” (P. 6-17). Con-
tact a NISSAN dealer or a professional tow-
ing service.
LSD2644
5-22Starting and driving
Page 319 of 644
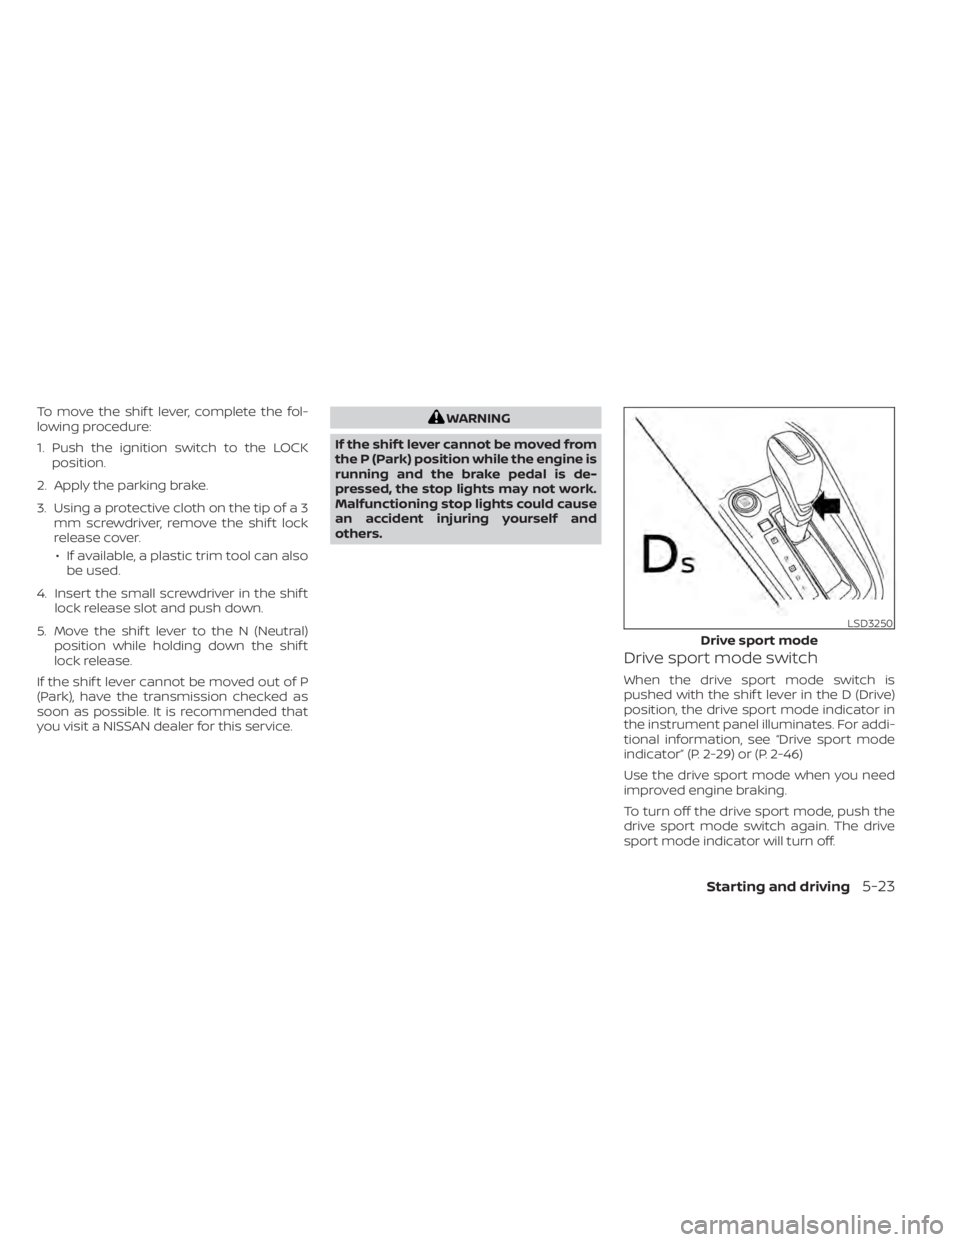
To move the shif t lever, complete the fol-
lowing procedure:
1. Push the ignition switch to the LOCKposition.
2. Apply the parking brake.
3. Using a protective cloth on the tip of a 3 mm screwdriver, remove the shif t lock
release cover.
• If available, a plastic trim tool can also be used.
4. Insert the small screwdriver in the shif t lock release slot and push down.
5. Move the shif t lever to the N (Neutral) position while holding down the shif t
lock release.
If the shif t lever cannot be moved out of P
(Park), have the transmission checked as
soon as possible. It is recommended that
you visit a NISSAN dealer for this service.WARNING
If the shif t lever cannot be moved from
the P (Park) position while the engine is
running and the brake pedal is de-
pressed, the stop lights may not work.
Malfunctioning stop lights could cause
an accident injuring yourself and
others.
Drive sport mode switch
When the drive sport mode switch is
pushed with the shif t lever in the D (Drive)
position, the drive sport mode indicator in
the instrument panel illuminates. For addi-
tional information, see “Drive sport mode
indicator” (P. 2-29) or (P. 2-46)
Use the drive sport mode when you need
improved engine braking.
To turn off the drive sport mode, push the
drive sport mode switch again. The drive
sport mode indicator will turn off.
LSD3250
Drive sport mode
Starting and driving5-23
Page 320 of 644
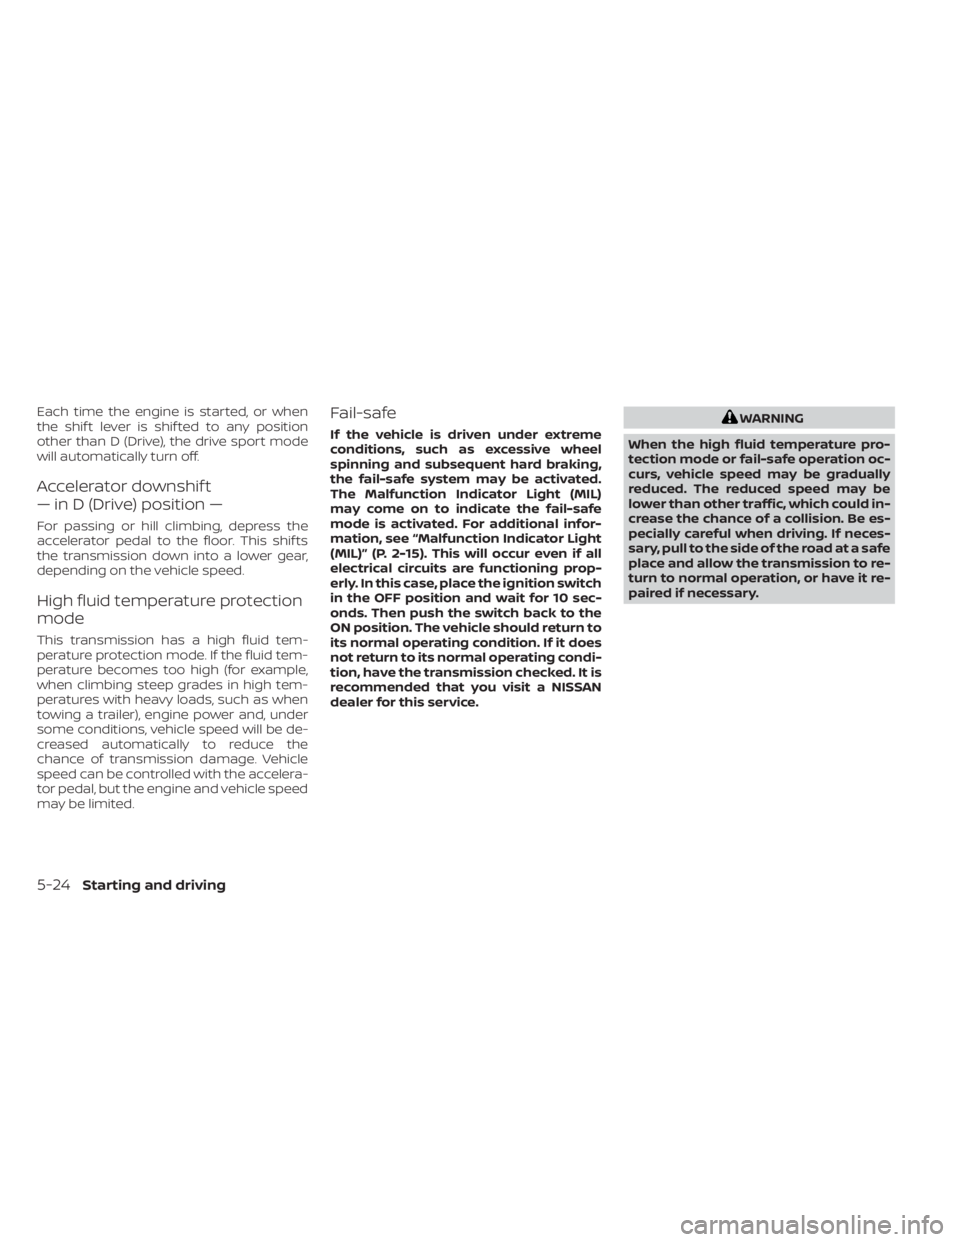
Each time the engine is started, or when
the shif t lever is shif ted to any position
other than D (Drive), the drive sport mode
will automatically turn off.
Accelerator downshif t
— in D (Drive) position —
For passing or hill climbing, depress the
accelerator pedal to the floor. This shif ts
the transmission down into a lower gear,
depending on the vehicle speed.
High fluid temperature protection
mode
This transmission has a high fluid tem-
perature protection mode. If the fluid tem-
perature becomes too high (for example,
when climbing steep grades in high tem-
peratures with heavy loads, such as when
towing a trailer), engine power and, under
some conditions, vehicle speed will be de-
creased automatically to reduce the
chance of transmission damage. Vehicle
speed can be controlled with the accelera-
tor pedal, but the engine and vehicle speed
may be limited.
Fail-safe
If the vehicle is driven under extreme
conditions, such as excessive wheel
spinning and subsequent hard braking,
the fail-safe system may be activated.
The Malfunction Indicator Light (MIL)
may come on to indicate the fail-safe
mode is activated. For additional infor-
mation, see “Malfunction Indicator Light
(MIL)” (P. 2-15). This will occur even if all
electrical circuits are functioning prop-
erly. In this case, place the ignition switch
in the OFF position and wait for 10 sec-
onds. Then push the switch back to the
ON position. The vehicle should return to
its normal operating condition. If it does
not return to its normal operating condi-
tion, have the transmission checked. It is
recommended that you visit a NISSAN
dealer for this service.
WARNING
When the high fluid temperature pro-
tection mode or fail-safe operation oc-
curs, vehicle speed may be gradually
reduced. The reduced speed may be
lower than other traffic, which could in-
crease the chance of a collision. Be es-
pecially careful when driving. If neces-
sary, pull to the side of the road at a safe
place and allow the transmission to re-
turn to normal operation, or have it re-
paired if necessary.
5-24Starting and driving