INSTRUMENT NISSAN ARMADA 2005 1.G Manual PDF
[x] Cancel search | Manufacturer: NISSAN, Model Year: 2005, Model line: ARMADA, Model: NISSAN ARMADA 2005 1.GPages: 352, PDF Size: 6.46 MB
Page 158 of 352
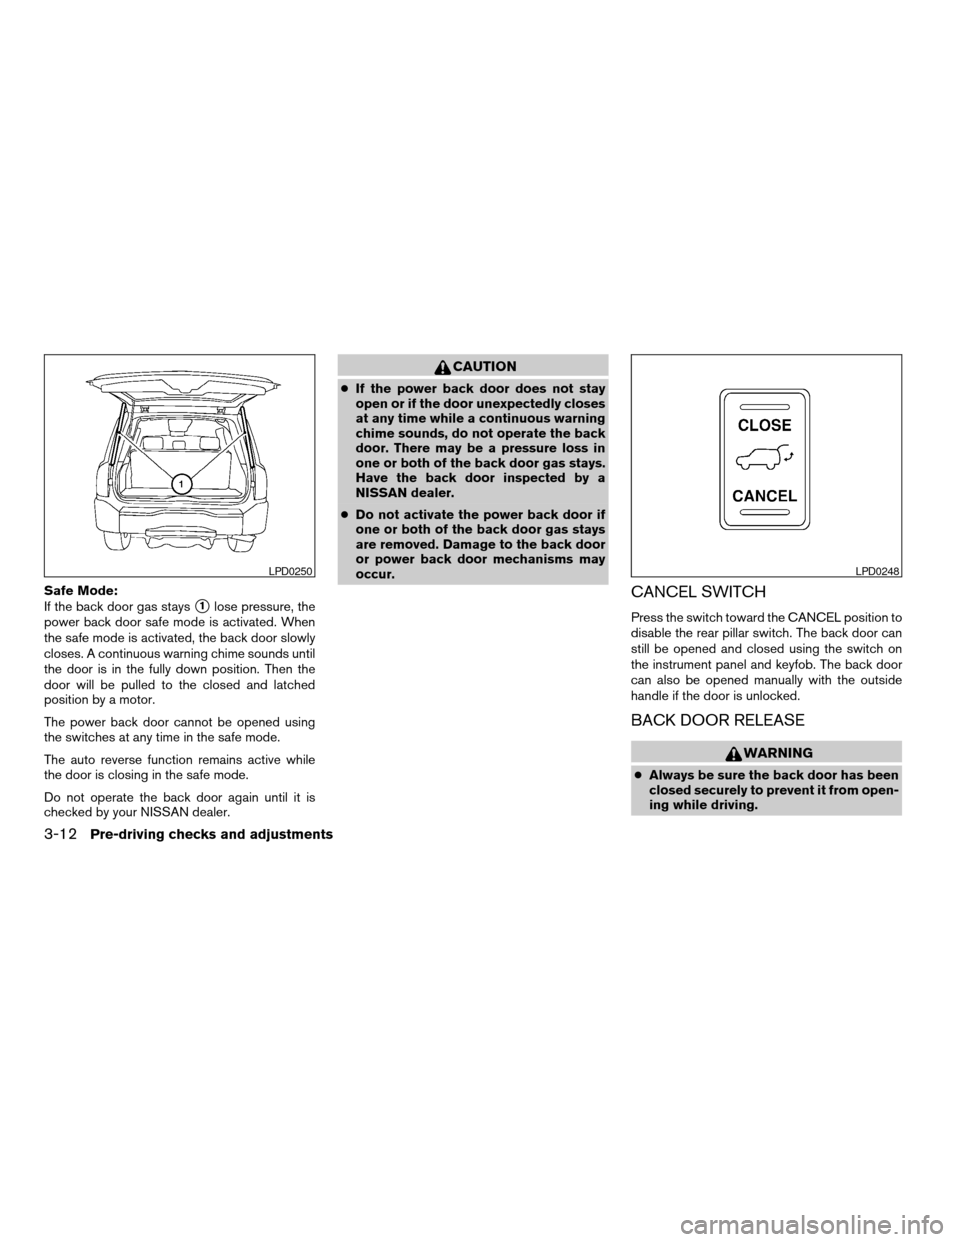
Safe Mode:
If the back door gas stays
s1lose pressure, the
power back door safe mode is activated. When
the safe mode is activated, the back door slowly
closes. A continuous warning chime sounds until
the door is in the fully down position. Then the
door will be pulled to the closed and latched
position by a motor.
The power back door cannot be opened using
the switches at any time in the safe mode.
The auto reverse function remains active while
the door is closing in the safe mode.
Do not operate the back door again until it is
checked by your NISSAN dealer.
CAUTION
cIf the power back door does not stay
open or if the door unexpectedly closes
at any time while a continuous warning
chime sounds, do not operate the back
door. There may be a pressure loss in
one or both of the back door gas stays.
Have the back door inspected by a
NISSAN dealer.
cDo not activate the power back door if
one or both of the back door gas stays
are removed. Damage to the back door
or power back door mechanisms may
occur.
CANCEL SWITCH
Press the switch toward the CANCEL position to
disable the rear pillar switch. The back door can
still be opened and closed using the switch on
the instrument panel and keyfob. The back door
can also be opened manually with the outside
handle if the door is unlocked.
BACK DOOR RELEASE
WARNING
cAlways be sure the back door has been
closed securely to prevent it from open-
ing while driving.
LPD0250LPD0248
3-12Pre-driving checks and adjustments
ZREVIEW COPYÐ2005 Armada(wzw)
Owners ManualÐUSA_English(nna)
11/18/04Ðtbrooks
X
Page 161 of 352
WARNING
cGasoline is extremely flammable and
highly explosive under certain condi-
tions. You could be burned or seriously
injured if it is misused or mishandled.
Always stop the engine and do not
smoke or allow open flames or sparks
near the vehicle when refueling.
cFuel may be under pressure. Turn the
cap a third of a turn, and wait for any
“hissing” sound to stop to prevent fuel
from spraying out and possibly causing
personal injury. Then remove the cap.
cDo not attempt to top off the fuel tank
after the fuel pump nozzle shuts off
automatically. Continued refueling may
cause fuel overflow, resulting in fuel
spray and possibly a fire.
cUse only an original equipment type
fuel filler cap as a replacement. It has a
built-in safety valve needed for proper
operation of the fuel system and emis-
sion control system. An incorrect cap
can result in a serious malfunction and
possible injury. It could also cause the
malfunction indicator lamp to come on.
cNever pour fuel into the throttle body to
attempt to start your vehicle.cDo not fill a portable fuel container in
the vehicle or trailer. Static electricity
can cause an explosion of flammable
liquid, vapor or gas in any vehicle or
trailer. To reduce the risk of serious
injury or death when filling portable fuel
containers:
– Always place the container on the
ground when filling.
– Do not use electronic devices when
filling.
– Keep the pump nozzle in contact
with the container while you are fill-
ing it.
– Use only approved portable fuel con-
tainers for flammable liquid.
CAUTION
cIf fuel is spilled on the vehicle body,
flush it away with water to avoid paint
damage.cTighten until the fuel filler cap clicks.
Failure to tighten the fuel filler cap
properly may cause the
mal-
function indicator lamp (MIL) to illumi-
nate. If the
lamp illuminates be-
cause the fuel filler cap is loose or
missing, tighten or install the cap and
continue to drive the vehicle.
The
lamp should turn off after a
few driving trips. If the
lamp
does not turn off after a few driving
trips, have the vehicle inspected by a
NISSAN dealer.
cFor additional information, see the
“Malfunction indicator lamp (MIL)” in
the “Instruments and Controls” section
earlier in this manual.
Pre-driving checks and adjustments3-15
ZREVIEW COPYÐ2005 Armada(wzw)
Owners ManualÐUSA_English(nna)
11/18/04Ðtbrooks
X
Page 165 of 352
WARNING
cObjects viewed in the outside mirror on
the passenger side are closer than they
appear. Be careful when moving to the
right. Using only this mirror could cause
an accident. Use the inside mirror or
glance over your shoulder to properly
judge distances to other objects.
cDo not adjust the mirrors while driving.
You could lose control of your vehicle
and cause an accident.
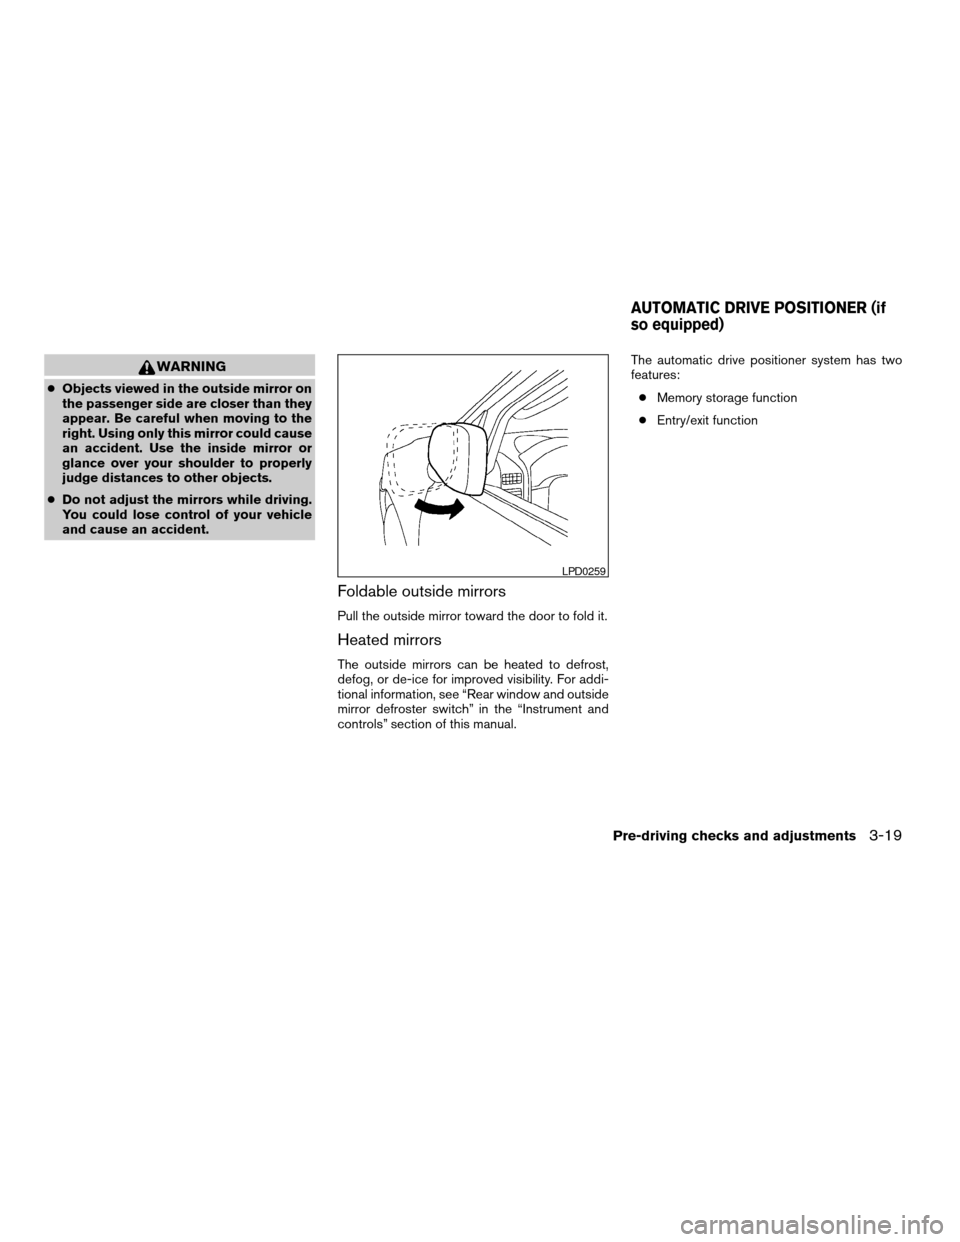
Foldable outside mirrors
Pull the outside mirror toward the door to fold it.
Heated mirrors
The outside mirrors can be heated to defrost,
defog, or de-ice for improved visibility. For addi-
tional information, see “Rear window and outside
mirror defroster switch” in the “Instrument and
controls” section of this manual.The automatic drive positioner system has two
features:
cMemory storage function
cEntry/exit function
LPD0259
AUTOMATIC DRIVE POSITIONER (if
so equipped)
Pre-driving checks and adjustments3-19
ZREVIEW COPYÐ2005 Armada(wzw)
Owners ManualÐUSA_English(nna)
11/18/04Ðtbrooks
X
Page 180 of 352
The GPS time (manual time) corresponding to
the selected zone will be displayed. Pacific zone
has been set as the initial (default) setting.
Beep setting
With this option ON, a beep will sound if any
audio button is pushed.
BUTTON
To change the display brightness, push
thebutton. Pushing the button again will
change the display to DAY or NIGHT display.
Then, adjust the brightness moving the joystick
right or left.
If no operation is done within 10 seconds, or if the
“PREV”button is pushed, the display will return
to the previous display.When the selector lever is shifted into the R
(Reverse) position, the monitor display shows
view to the rear of the vehicle.
WARNING
cThe system is designed as an aid to the
driver in detecting large stationary ob-
jects to help avoid damaging the ve-
hicle. The system will not detect small
objects below the bumper, and may not
detect objects close to the bumper or
on the ground.
cThe rear view camera is a convenience
but it is not a substitute for proper back-
ing. Always turn and check that it is safe
to do so before backing up . Always
back up slowly.
cObjects viewed in the rear view monitor
differ from actual distance because a
wide-angle lens is used. Objects in the
rear view monitor will appear visually
opposite than when viewed in the rear
view and outside mirrors.
cMake sure that the back door is se-
curely closed when backing up.
cDo not put anything on the rear view
camera. The rear view camera is in-
stalled beside the license plate light.cWhen washing the vehicle with high-
pressure water, be sure not to spray it
around the camera. Otherwise, water
may enter the camera unit causing wa-
ter condensation on the lens, a mal-
function, fire or an electric shock.
cDo not strike the camera. It is a preci-
sion instrument. Otherwise, it may mal-
function or cause damage resulting in a
fire or an electric shock.
CAUTION
There is a plastic cover over the camera.
Do not scratch the cover when cleaning
dirt or snow from the cover.
HOW TO READ THE DISPLAYED
LINES
Lines which indicate the vehicle clearance and
distances to objects with reference to the
bumper line
sAare displayed on the monitor.
REARVIEW MONITOR (if so
equipped)
4-12Display screen, heater, air conditioner and audio systems
ZREVIEW COPYÐ2005 Armada(wzw)
Owners ManualÐUSA_English(nna)
11/18/04Ðtbrooks
X
Page 184 of 352

— Air flows from center and side
ventilators and the front and rear
floor outlets.
— Air flows mainly from the front and
rear floor outlets.
— Air flows from defroster outlets
and the front and rear floor
outlets.
— Air flows mainly from defroster
outlets.
The air flow control dial also has intermediate
positions which allow the air flow to be distrib-
uted between 2 of the icon positions on the air
flow control dial.
Temperature control dial
The temperature control dial allows you to adjust
the temperature of the outlet air. To lower the
temperature, turn the dial to the left. To increase
the temperature, turn the dial to the right.
Air recirculation button
ON position:
Push thebutton to recirculate air inside
the vehicle.
Push the
button to the on position when:
cdriving on a dusty road.cto prevent traffic fumes from entering pas-
senger compartment.
cfor maximum cooling when using the air con-
ditioner.
OFF position:
Push the
button again to turn air recircula-
tion off. Outside air is drawn into the passenger
compartment and distributed through the se-
lected outlet.
Use the off position for normal heater or air con-
ditioner operation.
Air conditioner button
Start the engine, turn the fan control dial to the
desired position and push thebutton to
turn on the air conditioner. A/C will appear on the
display when the air conditioner is operating. To
turn off the air conditioner, push the
button
again, the display will show A/C OFF.
The air conditioner cooling function oper-
ates only when the engine is running.
Rear window defroster switch
For more information about the rear window de-
froster switch, see “Rear window defroster
switch” in the “Instruments and controls” section
of this manual.
HEATER OPERATION
Heating
This mode is used to direct heated air to the foot
outlets. Some air also flows from the defrost
outlets.
1. Push the
button to the OFF position
for normal heating. The indicator light on
the
button will go off. (will ap-
pear on the display, if so equipped.)
2. Turn the air flow control dial to the
position.
3. Turn the fan control dial to the desired posi-
tion.
4. Turn the temperature control dial to the de-
sired position between the middle and the
hot position.
Ventilation
This mode directs outside air to the side and
center ventilators.
1. Push the
button to the OFF position.
The indicator light on thebutton will
go off. (will appear on the display, if so
equipped.)
2. Turn the air flow control dial to the
position.
4-16Display screen, heater, air conditioner and audio systems
ZREVIEW COPYÐ2005 Armada(wzw)
Owners ManualÐUSA_English(nna)
11/18/04Ðtbrooks
X
Page 194 of 352

1. Rear fan speed control dial.
2. Rear temperature control dial.
REAR CONTROL BUTTON
You can adjust the climate control system for rear
seat passengers using the buttons on the main
control panel. Front passengers can control the
rear functions by placing the controls on any
setting other than the “R”.
OPERATING TIPS
cWhen the engine coolant temperature and
outside air temperature are low, the air flow
from the foot outlets may not operate for a
maximum of 150 seconds. However, this is
not a malfunction. After the coolant tempera-
ture warms up, air flow from the foot outlets
will operate normally.
The sunload sensor
s1, located on the top center
of the instrument panel, helps the system main-
tain a constant temperature. Do not put anything
on or around this sensor.
WHA0509LIC0836
4-26Display screen, heater, air conditioner and audio systems
ZREVIEW COPYÐ2005 Armada(wzw)
Owners ManualÐUSA_English(nna)
11/18/04Ðtbrooks
X
Page 222 of 352
If the warning light illuminates in low ambient
temperature as described above, check the tire
pressure for all four tires. Adjust the tire pressure
to the recommended COLD tire pressure shown
on the Tire and Loading Information label to turn
the low tire pressure warning light OFF.
Frequently check the tire pressure information
display on the display screen (if so equipped) and
adjust pressure of each tire properly. (The order
of the tire pressure figures displayed on the
screen does not correspond with the actual order
of the tire position.) See “Tire pressure informa-
tion” in the “Display screen, heater, air condi-
tioner and audio systems” section for tire pres-
sure monitor. If you select the tire pressure
information in the display (if so equipped) , the
FLAT TIRE warning message will be displayed.
Low tire pressure warning
If the vehicle is being driven with low tire pressure
(lower than 28 psi, 193 kPa) , the low tire pres-
sure warning light comes on and the chime
sounds for about 10 seconds.
For additional information regarding the above
warning, see “Warning/indicator lights and au-
dible reminders” in the “Instruments and con-
trols” section.
WARNING
cIf the low tire pressure warning light
flashes while driving, avoid sudden
steering maneuvers or abrupt braking,
reduce vehicle speed, pull off the road
to a safe location and stop the vehicle
as soon as possible. Serious vehicle
damage could occur and may lead to an
accident and could result in serious
personal injury. Check the tire pressure
for all four tires. Adjust the tire pressure
to the recommended COLD tire pres-
sure shown on the Tire and Loading
Information label to turn the low tire
pressure warning light OFF. If you have
a flat tire, replace it with a spare tire as
soon as possible. (See “Flat tire” in the
“In case of emergency” section for
changing a flat tire.)
cWhen a spare tire is mounted or a wheel
is replaced, tire pressure will not be
indicated and the low tire pressure
warning system will not function. Con-
tact your NISSAN dealer as soon as
possible for tire replacement and/or
system resetting.cDo not inject any tire liquid or aerosol
tire sealant into the tires, as this may
cause a malfunction of the tire pressure
sensors.
CAUTION
Do not place metalized film or any metal
parts (antenna, etc.) on the windows. This
may cause poor reception of the signals
from the tire pressure sensors, and the
low tire pressure warning system will not
function properly.
FCC Notice:
Changes or modifications not expressly ap-
proved by the manufacturer compliance
could void the user’s authority to operate
the equipment.
This device complies with Part 15 of the
FCC Rules and RSS-210 of Industry
Canada.
Operation is subject to the following two
conditions: (1) This device may not cause
harmful interface, and (2) this device must
accept any interference received, including
interference that may cause undesired op-
eration of the device.
5-4Starting and driving
ZREVIEW COPYÐ2005 Armada(wzw)
Owners ManualÐUSA_English(nna)
11/18/04Ðtbrooks
X
Page 226 of 352

This position activates electrical accessories
such as the radio when the engine is not running.
ON: Normal operating position (3)
This position turns on the ignition system and the
electrical accessories.
START: (4)
This position starts the engine. As soon as the
engine has started, release the key. It automati-
cally returns to the ON position.
NISSAN VEHICLE IMMOBILIZER
SYSTEM (NVIS)
The NISSAN Vehicle Immobilizer System (NVIS)
will not allow the engine to start without the use of
the registered NVIS key.
If the engine fails to start using the registered
NVIS key, it may be due to interference caused by
another NVIS key, an automated toll road device
or automated payment device on the key ring.
Restart the engine using the following proce-
dures:
1. Leave the ignition switch in the ON position
for approximately 5 seconds.
2. Turn the ignition switch to the OFF or LOCK
position and wait approximately 10 seconds.3. Repeat step 1 and 2 again.
4. Restart the engine while holding the device
(which may have caused the interference)
separate from the registered NVIS key.
If this procedure allows the engine to start,
NISSAN recommends placing the registered
NVIS key on a separate key ring to avoid interfer-
ence from other devices.cMake sure the area around the vehicle is
clear.
cCheck fluid levels such as engine oil, cool-
ant, brake fluid, and window washer fluid as
frequently as possible, or at least whenever
you refuel.
cCheck that all windows and lights are clean.
cVisually inspect tires for their appearance
and condition. Also check tires for proper
inflation.
cLock all doors.
cPosition seat and adjust head restraints.
cAdjust inside and outside mirrors.
cFasten seat belts and ask all passengers to
do likewise.
cCheck the operation of warning lights when
the key is turned to the ON (3) position. See
“Warning/indicator lights and audible re-
minders” in the “Instruments and controls”
section of this manual.
BEFORE STARTING THE ENGINE
5-8Starting and driving
ZREVIEW COPYÐ2005 Armada(wzw)
Owners ManualÐUSA_English(nna)
12/02/04Ðdebbie
X
Page 232 of 352
WARNING
cBe sure the parking brake is fully re-
leased before driving. Failure to do so
can cause brake failure and lead to an
accident.
cDo not release the parking brake from
outside the vehicle.
cDo not use the gear shift in place of the
parking brake. When parking, be sure
the parking brake is fully engaged.
cDo not leave children unattended in a
vehicle. They could release the parking
brake and cause an accident.
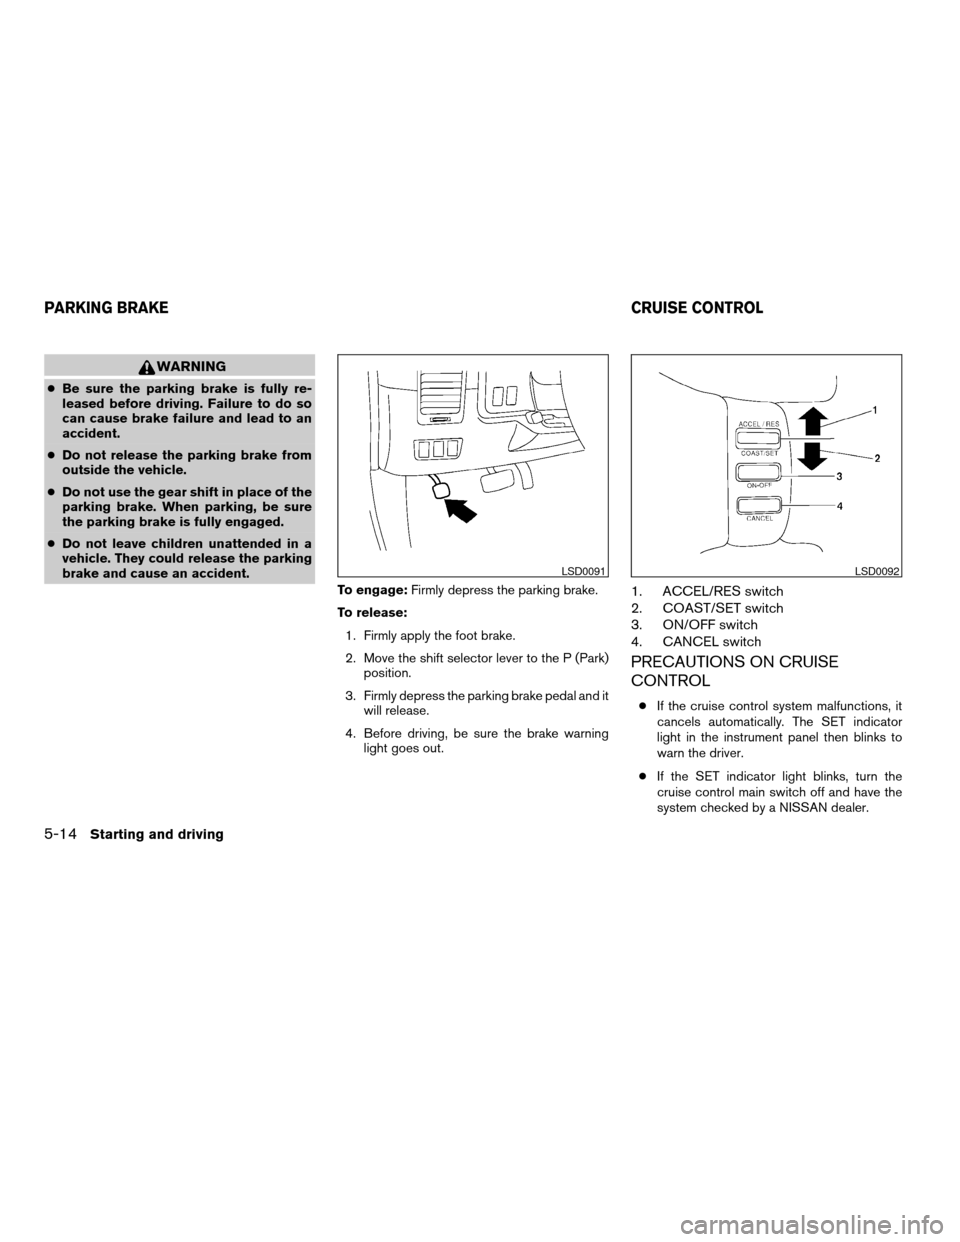
To engage:Firmly depress the parking brake.
To release:
1. Firmly apply the foot brake.
2. Move the shift selector lever to the P (Park)
position.
3. Firmly depress the parking brake pedal and it
will release.
4. Before driving, be sure the brake warning
light goes out.
1. ACCEL/RES switch
2. COAST/SET switch
3. ON/OFF switch
4. CANCEL switch
PRECAUTIONS ON CRUISE
CONTROL
cIf the cruise control system malfunctions, it
cancels automatically. The SET indicator
light in the instrument panel then blinks to
warn the driver.
cIf the SET indicator light blinks, turn the
cruise control main switch off and have the
system checked by a NISSAN dealer.
LSD0091LSD0092
PARKING BRAKE CRUISE CONTROL
5-14Starting and driving
ZREVIEW COPYÐ2005 Armada(wzw)
Owners ManualÐUSA_English(nna)
12/02/04Ðdebbie
X
Page 233 of 352
cThe SET indicator light may blink when the
cruise control main switch is turned ON
while pushing the ACCEL/RES,
COAST/SET, or CANCEL switch (located
on the steering wheel) . To properly set the
cruise control system, use the following pro-
cedures.
WARNING
Do not use the cruise control when driving
under the following conditions:
cWhen it is not possible to keep the
vehicle at a set speed.
cIn heavy traffic or in traffic that varies in
speed.
cOn winding or hilly roads.
cOn slippery roads (rain, snow, ice, etc.) .
cIn very windy areas.
Doing so could cause a loss of vehicle
control and result in an accident.
CRUISE CONTROL OPERATIONS
The cruise control allows driving at a speed be-
tween 25 - 89 MPH (40 - 144 km/h) without
keeping your foot on the accelerator pedal.To turn on the cruise control,push the main
switch. The CRUISE indicator light in the instru-
ment panel comes on.
To set cruising speed,accelerate the vehicle to
the desired speed, push the COAST/SET switch
and release it. The SET indicator light in the
instrument panel comes on. Take your foot off the
accelerator pedal. Your vehicle maintains the set
speed.
cTo pass another vehicle,depress the ac-
celerator pedal. When you release the
pedal, the vehicle returns to the previously
set speed.
cThe vehicle may not maintain the set speed
when going up or down steep hills. If this
happens, drive without the cruise control.
To cancel the preset speed,use one of the
following three methods.
cPush the CANCEL button; the SET indicator
light in the instrument panel goes out.
cTap the brake pedal; the SET indicator light
goes out.
cTurn the main switch off. Both the CRUISE
indicator light and SET indicator light in the
instrument panel go out.The cruise control is automatically canceled and
the SET light in the instrument panel goes out if:
cyou depress the brake pedal while pushing
the ACCEL/RES or SET/COAST switch.
The preset speed is deleted from memory.
cthe vehicle slows down more than 8 MPH
(13 km/h) below the set speed.
cyou move the shift selector lever to N (Neu-
tral) .
To reset at a faster cruising speed,use one
of the following three methods.
cDepress the accelerator pedal. When the
vehicle attains the desired speed, push and
release the COAST/SET switch.
cPush and hold the ACCEL/RES switch.
When the vehicle attains the speed you de-
sire, release the switch.
cPush and release the ACCEL/RES switch.
Each time you do this, the set speed in-
creases by about 1 MPH (1.6 km/h) .
To reset at a slower cruising speed,use one
of the following three methods.
cLightly tap the brake pedal. When the ve-
hicle attains the desired speed, push the
COAST/SET switch and release it.
Starting and driving5-15
ZREVIEW COPYÐ2005 Armada(wzw)
Owners ManualÐUSA_English(nna)
12/02/04Ðdebbie
X