ECO mode NISSAN ARMADA 2005 1.G Owners Manual
[x] Cancel search | Manufacturer: NISSAN, Model Year: 2005, Model line: ARMADA, Model: NISSAN ARMADA 2005 1.GPages: 352, PDF Size: 6.46 MB
Page 2 of 352
This manual includes information for all options
available on this model. Therefore, you may find
some information that does not apply to your
vehicle.
All information, specifications and illustrations in
this manual are those in effect at the time of
printing. NISSAN reserves the right to change
specifications or design without notice and with-
out obligation.
IMPORTANT INFORMATION ABOUT
THIS MANUAL
You will see various symbols in this manual. They
are used in the following ways:
WARNING
This is used to indicate the presence of a
hazard that could cause death or serious
personal injury. To avoid or reduce the
risk, the procedures must be followed
precisely.
CAUTION
This is used to indicate the presence of a
hazard that could cause minor or moder-
ate personal injury or damage to your ve-
hicle. To avoid or reduce the risk, the pro-
cedures must be followed carefully.If you see this symbol, it means“Do not do this”
or“Do not let this happen.”
If you see a symbol similar to these in an illustra-
tion, it means the arrow points to the front of the
vehicle.
Arrows in an illustration that are similar to these
indicate movement or action.
Arrows in an illustration that are similar to these
call attention to an item in the illustration.
CALIFORNIA PROPOSITION 65
WARNING
WARNING
Engine exhaust, some of its constituents,
and certain vehicle components contain
or emit chemicals known to the State of
California to cause cancer and birth de-
fects or other reproductive harm. In addi-
tion, certain fluids contained in vehicles
and certain products of component wear
contain or emit chemicals known to the
State of California to cause cancer and
birth defects or other reproductive harm.
© 2004 NISSAN NORTH AMERICA, INC.
GARDENA, CALIFORNIA
All rights reserved. No part of this Owner’s
Manual may be reproduced or stored in a retrieval
system, or transmitted in any form, or by any
means, electronic, mechanical, photocopying,
recording or otherwise, without the prior written
permission of Nissan North America, Inc., Gar-
dena, California.
APD1005
WHEN READING THE MANUAL
ZREVIEW COPYÐ2005 Armada(wzw)
Owners ManualÐUSA_English(nna)
11/18/04Ðtbrooks
X
Page 43 of 352
cIf you must install a front facing child
restraint in the front seat, see “Child
restraint installation on front passenger
seat” later in this section.
cWhen your child restraint is not in use,
keep it secured with a seat belt to pre-
vent it from being thrown around in
case of a sudden stop or accident.
CAUTION
Remember that a child restraint left in a
closed vehicle can become very hot. Check
the seating surface and buckles before
placing your child in the child restraint.
CHILD RESTRAINT INSTALLATION
ON 2ND ROW CAPTAIN’S CHAIRS
WARNING
cThe three-point seat belt in your vehicle
is equipped with an automatic locking
mode retractor which must be used
when installing a child restraint.
cFailure to use the retractor’s locking
mode will result in the child restraint
not being properly secured. The re-
straint could tip over or otherwise be
unsecured and cause injury to the child
in a sudden stop or collision.
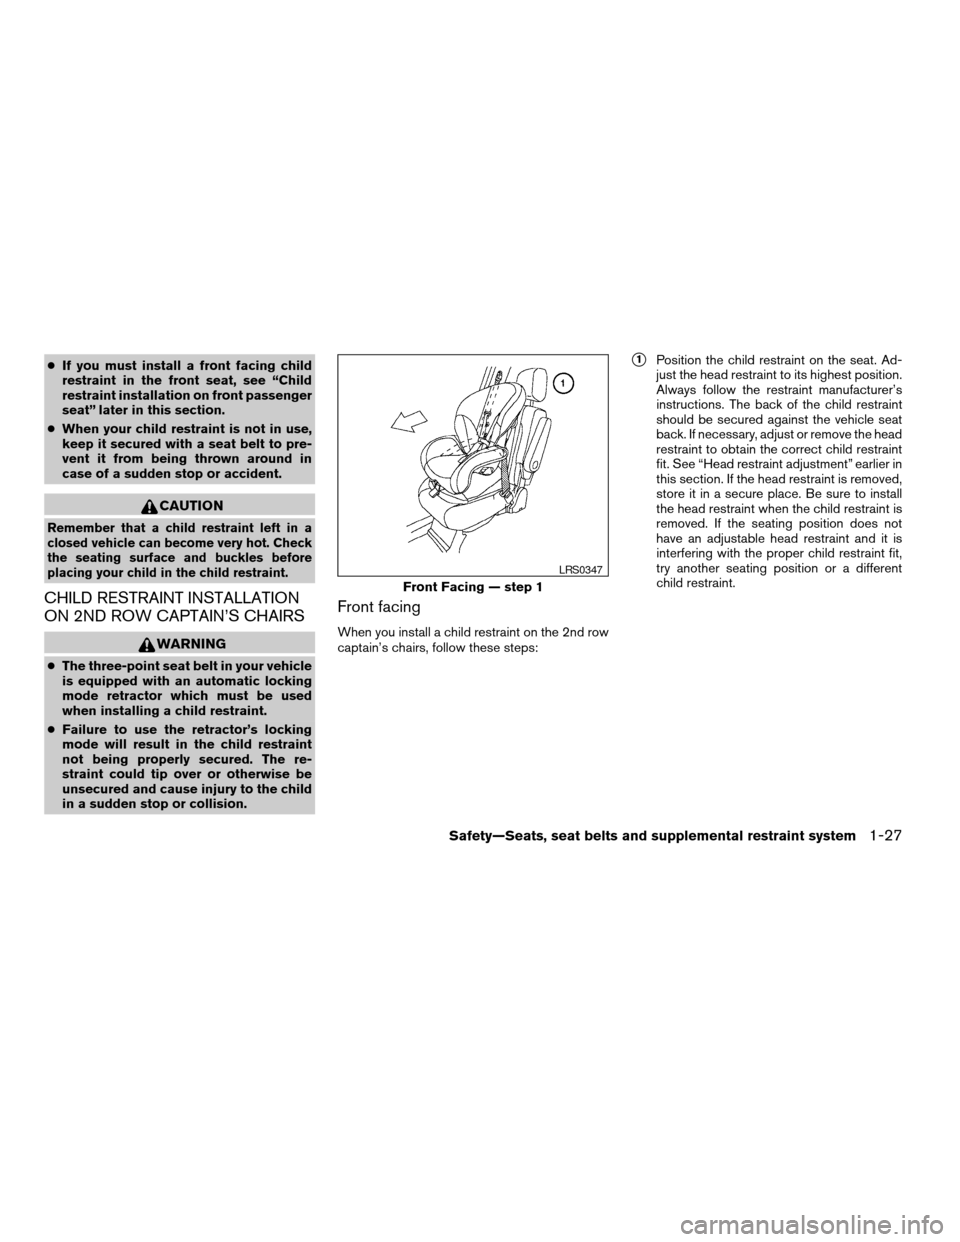
Front facing
When you install a child restraint on the 2nd row
captain’s chairs, follow these steps:
s1Position the child restraint on the seat. Ad-
just the head restraint to its highest position.
Always follow the restraint manufacturer’s
instructions. The back of the child restraint
should be secured against the vehicle seat
back. If necessary, adjust or remove the head
restraint to obtain the correct child restraint
fit. See “Head restraint adjustment” earlier in
this section. If the head restraint is removed,
store it in a secure place. Be sure to install
the head restraint when the child restraint is
removed. If the seating position does not
have an adjustable head restraint and it is
interfering with the proper child restraint fit,
try another seating position or a different
child restraint.
Front Facing — step 1
LRS0347
Safety—Seats, seat belts and supplemental restraint system1-27
ZREVIEW COPYÐ2005 Armada(wzw)
Owners ManualÐUSA_English(nna)
11/18/04Ðtbrooks
X
Page 66 of 352
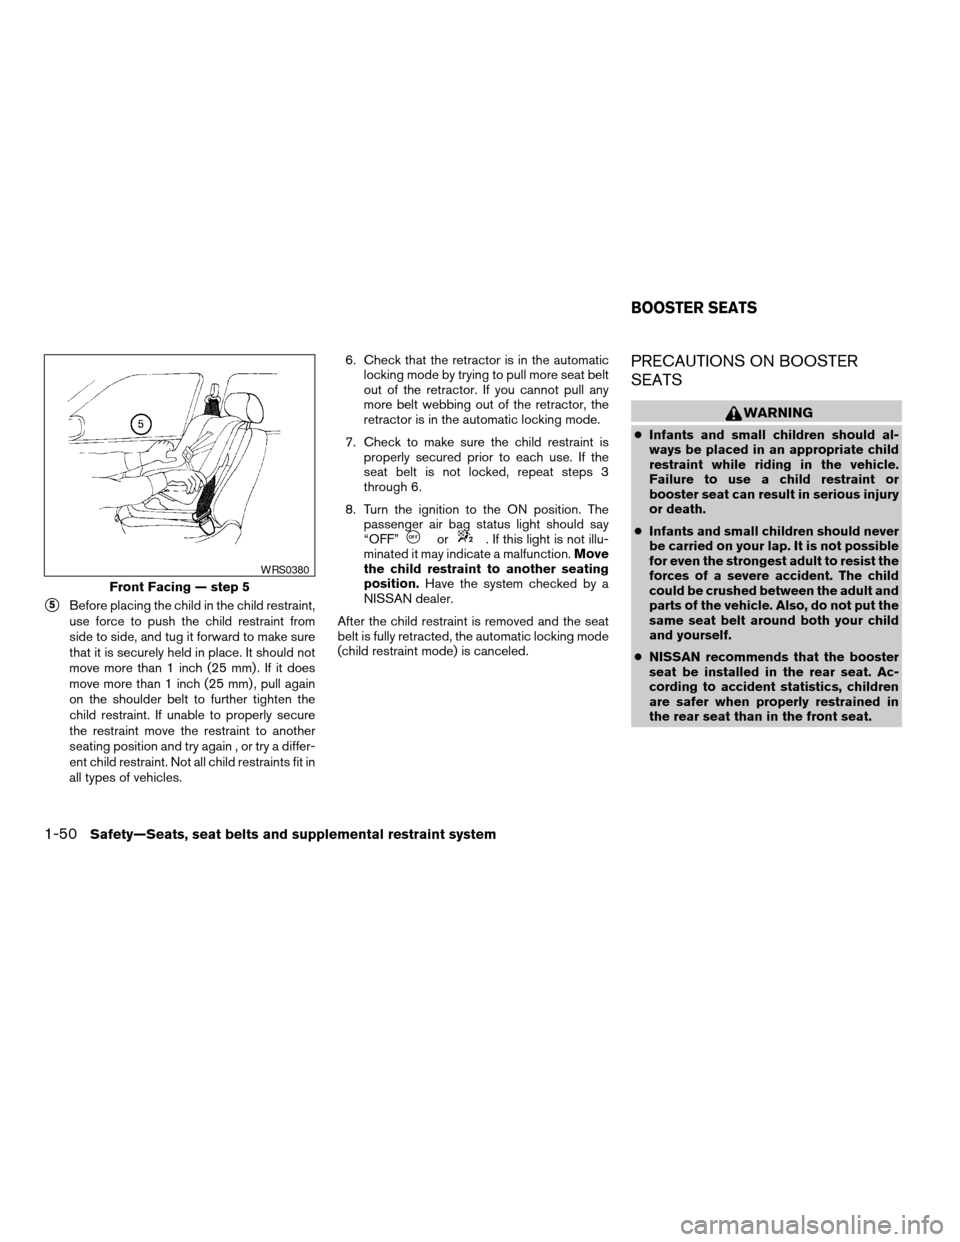
s5Before placing the child in the child restraint,
use force to push the child restraint from
side to side, and tug it forward to make sure
that it is securely held in place. It should not
move more than 1 inch (25 mm) . If it does
move more than 1 inch (25 mm) , pull again
on the shoulder belt to further tighten the
child restraint. If unable to properly secure
the restraint move the restraint to another
seating position and try again , or try a differ-
ent child restraint. Not all child restraints fit in
all types of vehicles.6. Check that the retractor is in the automatic
locking mode by trying to pull more seat belt
out of the retractor. If you cannot pull any
more belt webbing out of the retractor, the
retractor is in the automatic locking mode.
7. Check to make sure the child restraint is
properly secured prior to each use. If the
seat belt is not locked, repeat steps 3
through 6.
8. Turn the ignition to the ON position. The
passenger air bag status light should say
“OFF”
or. If this light is not illu-
minated it may indicate a malfunction.Move
the child restraint to another seating
position.Have the system checked by a
NISSAN dealer.
After the child restraint is removed and the seat
belt is fully retracted, the automatic locking mode
(child restraint mode) is canceled.
PRECAUTIONS ON BOOSTER
SEATS
WARNING
cInfants and small children should al-
ways be placed in an appropriate child
restraint while riding in the vehicle.
Failure to use a child restraint or
booster seat can result in serious injury
or death.
cInfants and small children should never
be carried on your lap. It is not possible
for even the strongest adult to resist the
forces of a severe accident. The child
could be crushed between the adult and
parts of the vehicle. Also, do not put the
same seat belt around both your child
and yourself.
cNISSAN recommends that the booster
seat be installed in the rear seat. Ac-
cording to accident statistics, children
are safer when properly restrained in
the rear seat than in the front seat.
Front Facing — step 5
WRS0380
BOOSTER SEATS
1-50Safety—Seats, seat belts and supplemental restraint system
ZREVIEW COPYÐ2005 Armada(wzw)
Owners ManualÐUSA_English(nna)
11/18/04Ðtbrooks
X
Page 82 of 352

The front passenger seat belt sensors are de-
signed to detect if the seat belt is buckled and the
amount of tension on the seat belt, such as when
it is in the automatic locking mode (child restraint
mode) . Based on the weight on the seat detected
by the weight sensor and the belt tension de-
tected on the seat belt, the advanced air bag
system determines whether the front passenger
air bag should be automatically turned OFF as
required by the regulations.
Front passenger seat adult occupants who are
properly seated and using the seat belt as out-
lined in this manual should not cause the passen-
ger air bag to be automatically turned OFF. For
small adults it may be turned OFF. Also, if the
occupant takes his/her weight off the seat cush-
ion (for example, by not sitting upright, by sitting
on an edge of the seat, or by otherwise being out
of position) , this could cause the sensor to turn
the air bag OFF. In addition, if the occupant
improperly uses the seat belt in the automatic
locking mode (child restraint mode) , this could
cause the air bag to be turned OFF. Always be
sure to be seated and wearing the seat belt
properly for the most effective protection by the
seat belt and supplemental air bag.
NISSAN recommends that pre-teens and chil-
dren be properly restrained in a rear seat.
NISSAN also recommends that appropriate child
restraints and booster seats be properly installedin a rear seat. If this is not possible, the weight
sensor and seat belt sensors are designed to
operate as described above to turn the front
passenger air bag OFF for specified child re-
straints as required by the regulations. Failing to
properly secure child restraints and to use the
automatic locking mode (child restraint mode)
may allow the restraint to tip or move in an acci-
dent or sudden stop. This can also result in the
passenger air bag inflating in a crash instead of
being OFF. See “Child restraints” earlier in this
section for proper use and installation.
If the front passenger seat is not occupied and
the seat belt is not buckled, the passenger air bag
is designed not to inflate in a crash. However,
heavy objects placed on the seat could result in
air bag inflation, because of the object’s weight
detected by the weight sensor. Other conditions
could also result in air bag inflation, such as if a
child is standing on the seat, or if two children are
on the seat, contrary to the instructions in this
manual. Always be sure that you and all vehicle
occupants are seated and restrained properly.
Using the passenger air bag status light, you can
monitor when the front passenger air bag is au-
tomatically turned OFF. The light will illuminate
(indicating the air bag is OFF and will not inflate)
when the front passenger seat is not occupied.If an adult occupant is in the seat and the pas-
senger air bag status light is illuminated (indicat-
ing that the air bag is OFF) , it could be that the
person is a small adult, or is not sitting on the seat
or not using the seat belt properly. If a child
restraint must be used in the front seat, but the
status light is not lit (indicating that the air bag
might inflate in a crash) , it could be that the child
restraint or seat belt is not being used properly. If
such situations happen, properly position and
restrain the occupant or child restraint. Other-
wise reposition the occupant or child restraint in
a rear seat.
If a malfunction occurs in the front passenger air
bag system, the supplemental air bag warning
light
, located in the meter and gauges area
in the center of the instrument panel, will blink.
Have the system checked by a NISSAN dealer.
1-66Safety—Seats, seat belts and supplemental restraint system
ZREVIEW COPYÐ2005 Armada(wzw)
Owners ManualÐUSA_English(nna)
11/18/04Ðtbrooks
X
Page 100 of 352

Zone variation change procedure
The difference between magnetic north and geo-
graphical north is known as variance. In some
areas, this difference can sometimes be great
enough to cause false compass readings. Follow
these instructions to set the variance for your
particular location if this happens:
1. With the display turned on, press and hold
the mode button for about 5 seconds. The
current zone number will appear in the dis-
play.
2. Find your current location on the zone map.
Refer to the illustration. Record the zone
number.
3. Press the mode button repeatedly to toggle
through the zone numbers until the desired
number shows in the display. The display
should return to the normal compass mode
within a few seconds of no button activity.
4. If the vehicle changes zones, repeat steps 1
through 3.
WIC0355
2-10Instruments and controls
ZREVIEW COPYÐ2005 Armada(wzw)
Owners ManualÐUSA_English(nna)
11/18/04Ðtbrooks
X
Page 101 of 352
Inaccurate compass direction
The compass display is equipped with automatic
correction function. If the correct direction is not
shown, follow this procedure.
1. With the display turned on, press and hold
the mode button for about 10 seconds. The
compass display will begin to flash.
2. Calibrate the compass by driving the vehicle
one and a half circles at a maximum speed of
6 MPH (10 km/h) .
3. After completing the circles, the display
should return to normal.
cIf the compass deviates from the correct
indication soon after repeated adjustment,
have the compass checked at an authorized
dealer.
cThe compass may not indicate the correct
compass point in tunnels or while driving up
or down a steep hill. (The compass returns
to the correct compass point when the ve-
hicle moves to an area where the geomag-
netism is stabilized.)
cIf a magnet is located in or near the overhead
console in the front of the vehicle or the
vehicle is driven where the terrestrial mag-
netism is disturbed, the compass display
may not indicate the correct direction.CAUTION
Do not install a ski rack, antenna, etc.,
which are attached to the vehicle by
means of a magnet. They affect the opera-
tion of the compass.
Instruments and controls2-11
ZREVIEW COPYÐ2005 Armada(wzw)
Owners ManualÐUSA_English(nna)
11/18/04Ðtbrooks
X
Page 103 of 352
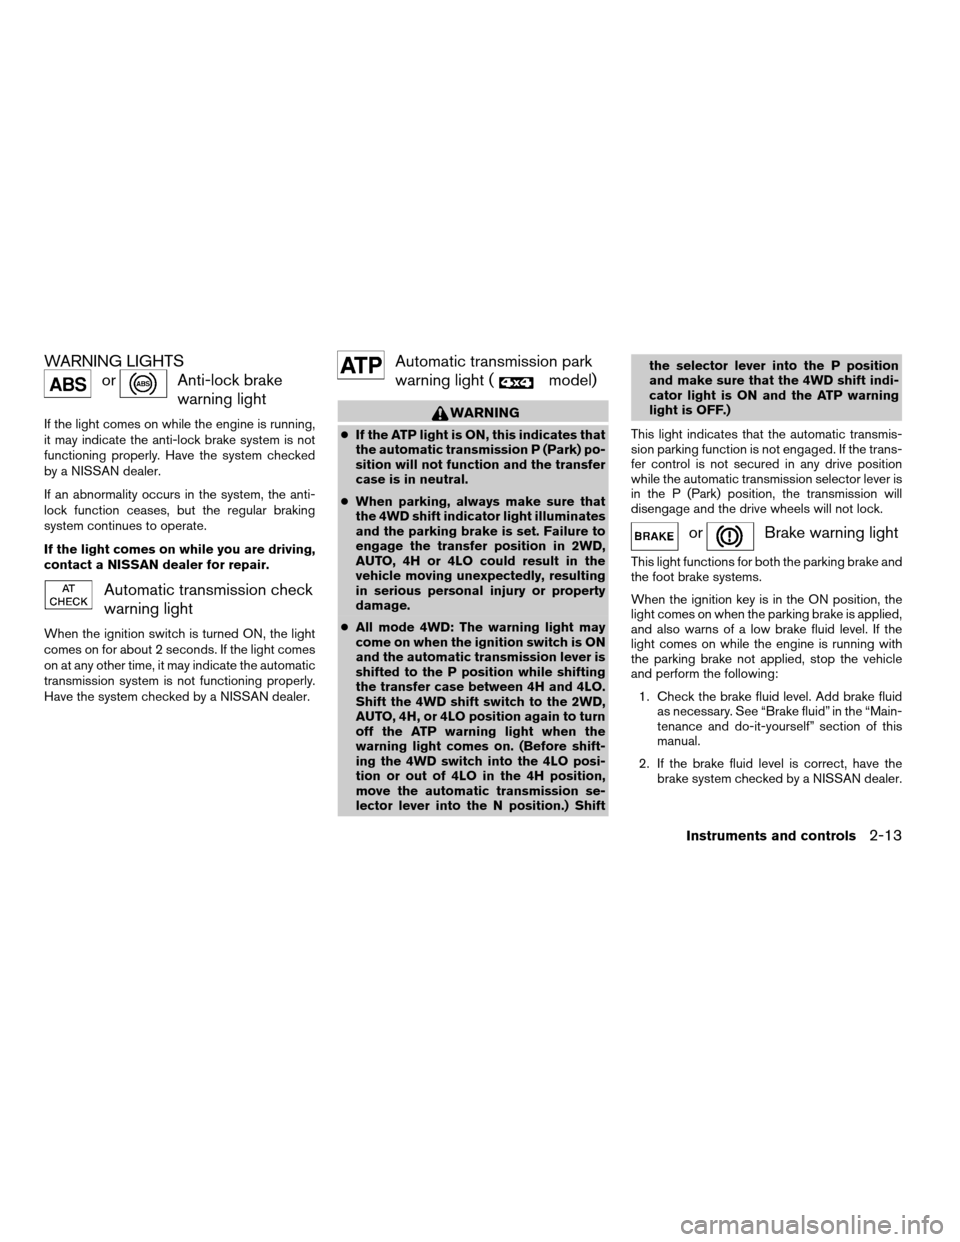
WARNING LIGHTS
orAnti-lock brake
warning light
If the light comes on while the engine is running,
it may indicate the anti-lock brake system is not
functioning properly. Have the system checked
by a NISSAN dealer.
If an abnormality occurs in the system, the anti-
lock function ceases, but the regular braking
system continues to operate.
If the light comes on while you are driving,
contact a NISSAN dealer for repair.
Automatic transmission check
warning light
When the ignition switch is turned ON, the light
comes on for about 2 seconds. If the light comes
on at any other time, it may indicate the automatic
transmission system is not functioning properly.
Have the system checked by a NISSAN dealer.
Automatic transmission park
warning light (
model)
WARNING
cIf the ATP light is ON, this indicates that
the automatic transmission P (Park) po-
sition will not function and the transfer
case is in neutral.
cWhen parking, always make sure that
the 4WD shift indicator light illuminates
and the parking brake is set. Failure to
engage the transfer position in 2WD,
AUTO, 4H or 4LO could result in the
vehicle moving unexpectedly, resulting
in serious personal injury or property
damage.
cAll mode 4WD: The warning light may
come on when the ignition switch is ON
and the automatic transmission lever is
shifted to the P position while shifting
the transfer case between 4H and 4LO.
Shift the 4WD shift switch to the 2WD,
AUTO, 4H, or 4LO position again to turn
off the ATP warning light when the
warning light comes on. (Before shift-
ing the 4WD switch into the 4LO posi-
tion or out of 4LO in the 4H position,
move the automatic transmission se-
lector lever into the N position.) Shiftthe selector lever into the P position
and make sure that the 4WD shift indi-
cator light is ON and the ATP warning
light is OFF.)
This light indicates that the automatic transmis-
sion parking function is not engaged. If the trans-
fer control is not secured in any drive position
while the automatic transmission selector lever is
in the P (Park) position, the transmission will
disengage and the drive wheels will not lock.
orBrake warning light
This light functions for both the parking brake and
the foot brake systems.
When the ignition key is in the ON position, the
light comes on when the parking brake is applied,
and also warns of a low brake fluid level. If the
light comes on while the engine is running with
the parking brake not applied, stop the vehicle
and perform the following:
1. Check the brake fluid level. Add brake fluid
as necessary. See “Brake fluid” in the “Main-
tenance and do-it-yourself” section of this
manual.
2. If the brake fluid level is correct, have the
brake system checked by a NISSAN dealer.
Instruments and controls2-13
ZREVIEW COPYÐ2005 Armada(wzw)
Owners ManualÐUSA_English(nna)
11/18/04Ðtbrooks
X
Page 105 of 352
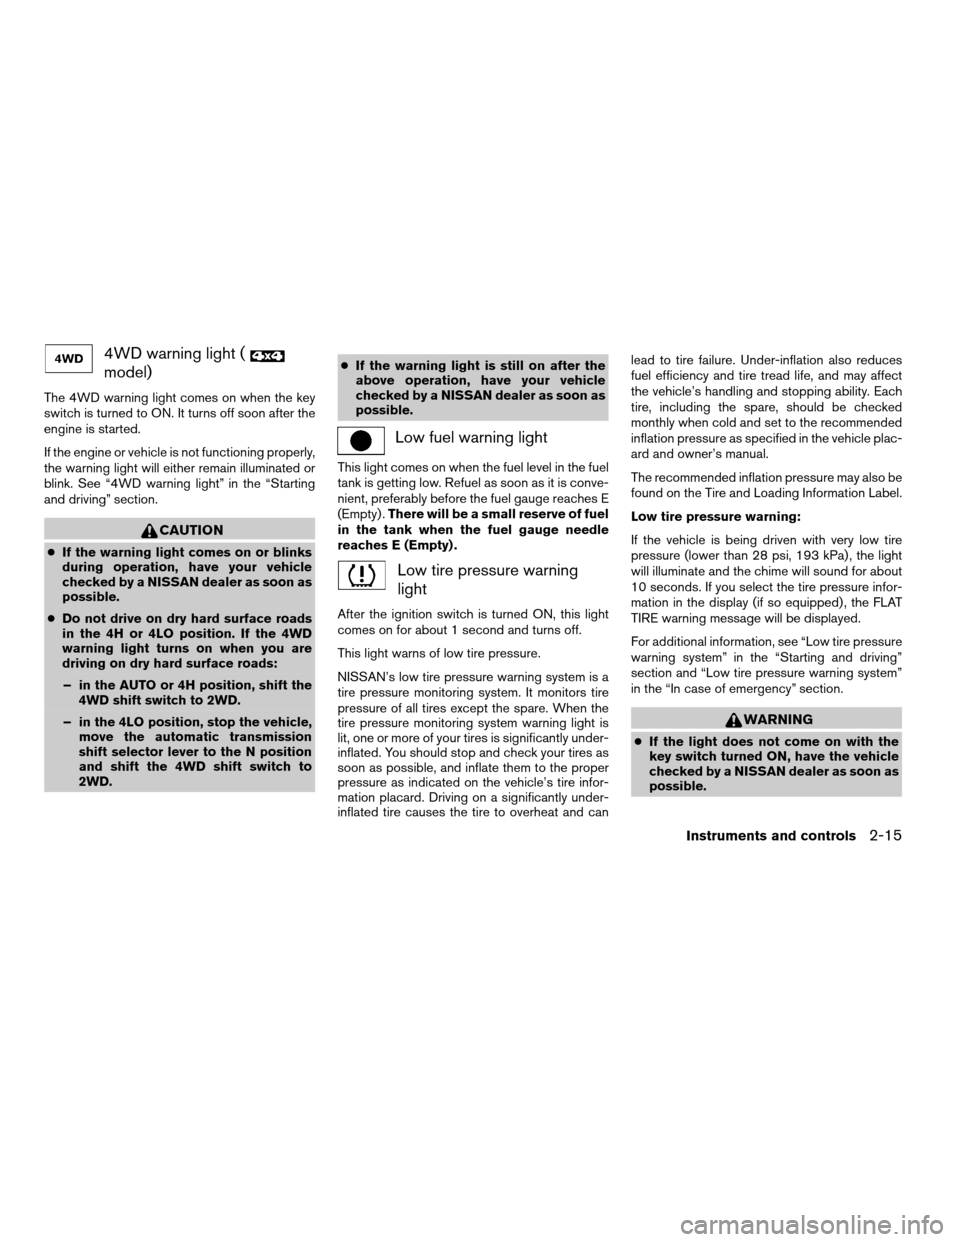
4WD warning light (
model)
The 4WD warning light comes on when the key
switch is turned to ON. It turns off soon after the
engine is started.
If the engine or vehicle is not functioning properly,
the warning light will either remain illuminated or
blink. See “4WD warning light” in the “Starting
and driving” section.
CAUTION
cIf the warning light comes on or blinks
during operation, have your vehicle
checked by a NISSAN dealer as soon as
possible.
cDo not drive on dry hard surface roads
in the 4H or 4LO position. If the 4WD
warning light turns on when you are
driving on dry hard surface roads:
– in the AUTO or 4H position, shift the
4WD shift switch to 2WD.
– in the 4LO position, stop the vehicle,
move the automatic transmission
shift selector lever to the N position
and shift the 4WD shift switch to
2WD.cIf the warning light is still on after the
above operation, have your vehicle
checked by a NISSAN dealer as soon as
possible.
Low fuel warning light
This light comes on when the fuel level in the fuel
tank is getting low. Refuel as soon as it is conve-
nient, preferably before the fuel gauge reaches E
(Empty) .There will be a small reserve of fuel
in the tank when the fuel gauge needle
reaches E (Empty) .
Low tire pressure warning
light
After the ignition switch is turned ON, this light
comes on for about 1 second and turns off.
This light warns of low tire pressure.
NISSAN’s low tire pressure warning system is a
tire pressure monitoring system. It monitors tire
pressure of all tires except the spare. When the
tire pressure monitoring system warning light is
lit, one or more of your tires is significantly under-
inflated. You should stop and check your tires as
soon as possible, and inflate them to the proper
pressure as indicated on the vehicle’s tire infor-
mation placard. Driving on a significantly under-
inflated tire causes the tire to overheat and canlead to tire failure. Under-inflation also reduces
fuel efficiency and tire tread life, and may affect
the vehicle’s handling and stopping ability. Each
tire, including the spare, should be checked
monthly when cold and set to the recommended
inflation pressure as specified in the vehicle plac-
ard and owner’s manual.
The recommended inflation pressure may also be
found on the Tire and Loading Information Label.
Low tire pressure warning:
If the vehicle is being driven with very low tire
pressure (lower than 28 psi, 193 kPa) , the light
will illuminate and the chime will sound for about
10 seconds. If you select the tire pressure infor-
mation in the display (if so equipped) , the FLAT
TIRE warning message will be displayed.
For additional information, see “Low tire pressure
warning system” in the “Starting and driving”
section and “Low tire pressure warning system”
in the “In case of emergency” section.
WARNING
cIf the light does not come on with the
key switch turned ON, have the vehicle
checked by a NISSAN dealer as soon as
possible.
Instruments and controls2-15
ZREVIEW COPYÐ2005 Armada(wzw)
Owners ManualÐUSA_English(nna)
11/18/04Ðtbrooks
X
Page 107 of 352
Unless checked and repaired, the supplemental
restraint system (air bag system) and/or the pre-
tensioner seat belts may not function properly.
For additional details see “Supplemental restraint
system” in the “Safety—Seats, seat belts and
supplemental restraint system” section of this
manual.
WARNING
If the supplemental air bag warning light
is on, it could mean that the supplemental
front air bag, supplemental side air bag,
curtain side-impact and rollover air bag
systems (if so equipped) and/or pre-
tensioner seat belt systems will not oper-
ate in an accident. To help avoid injury to
yourself or others, have your vehicle
checked by a NISSAN dealer as soon as
possible.
INDICATOR LIGHTS
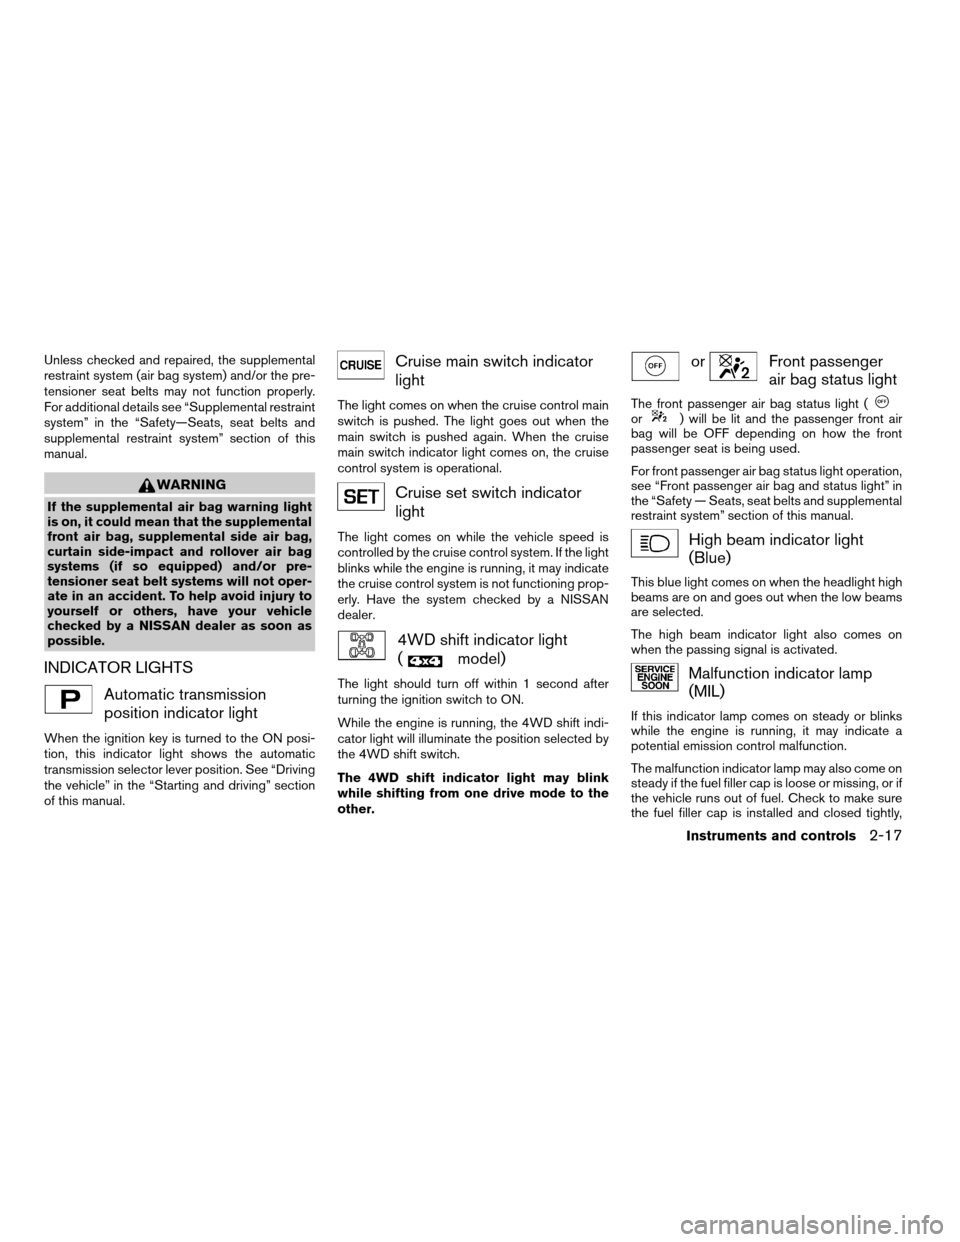
Automatic transmission
position indicator light
When the ignition key is turned to the ON posi-
tion, this indicator light shows the automatic
transmission selector lever position. See “Driving
the vehicle” in the “Starting and driving” section
of this manual.
Cruise main switch indicator
light
The light comes on when the cruise control main
switch is pushed. The light goes out when the
main switch is pushed again. When the cruise
main switch indicator light comes on, the cruise
control system is operational.
Cruise set switch indicator
light
The light comes on while the vehicle speed is
controlled by the cruise control system. If the light
blinks while the engine is running, it may indicate
the cruise control system is not functioning prop-
erly. Have the system checked by a NISSAN
dealer.
4WD shift indicator light
(
model)
The light should turn off within 1 second after
turning the ignition switch to ON.
While the engine is running, the 4WD shift indi-
cator light will illuminate the position selected by
the 4WD shift switch.
The 4WD shift indicator light may blink
while shifting from one drive mode to the
other.
orFront passenger
air bag status light
The front passenger air bag status light (or) will be lit and the passenger front air
bag will be OFF depending on how the front
passenger seat is being used.
For front passenger air bag status light operation,
see “Front passenger air bag and status light” in
the “Safety — Seats, seat belts and supplemental
restraint system” section of this manual.
High beam indicator light
(Blue)
This blue light comes on when the headlight high
beams are on and goes out when the low beams
are selected.
The high beam indicator light also comes on
when the passing signal is activated.
Malfunction indicator lamp
(MIL)
If this indicator lamp comes on steady or blinks
while the engine is running, it may indicate a
potential emission control malfunction.
The malfunction indicator lamp may also come on
steady if the fuel filler cap is loose or missing, or if
the vehicle runs out of fuel. Check to make sure
the fuel filler cap is installed and closed tightly,
Instruments and controls2-17
ZREVIEW COPYÐ2005 Armada(wzw)
Owners ManualÐUSA_English(nna)
11/18/04Ðtbrooks
X
Page 108 of 352
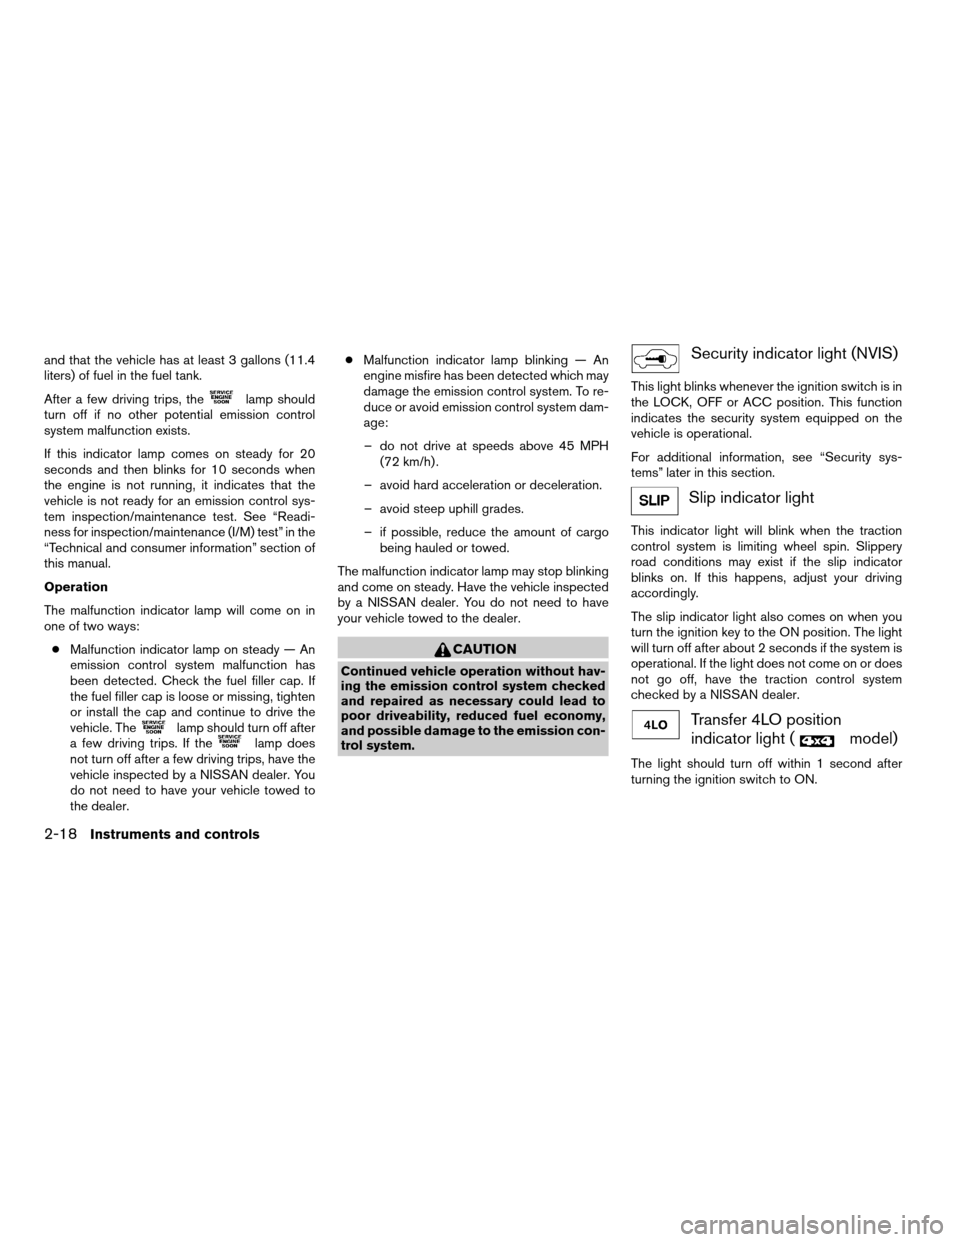
and that the vehicle has at least 3 gallons (11.4
liters) of fuel in the fuel tank.
After a few driving trips, the
lamp should
turn off if no other potential emission control
system malfunction exists.
If this indicator lamp comes on steady for 20
seconds and then blinks for 10 seconds when
the engine is not running, it indicates that the
vehicle is not ready for an emission control sys-
tem inspection/maintenance test. See “Readi-
ness for inspection/maintenance (I/M) test” in the
“Technical and consumer information” section of
this manual.
Operation
The malfunction indicator lamp will come on in
one of two ways:
cMalfunction indicator lamp on steady — An
emission control system malfunction has
been detected. Check the fuel filler cap. If
the fuel filler cap is loose or missing, tighten
or install the cap and continue to drive the
vehicle. The
lamp should turn off after
a few driving trips. If thelamp does
not turn off after a few driving trips, have the
vehicle inspected by a NISSAN dealer. You
do not need to have your vehicle towed to
the dealer.cMalfunction indicator lamp blinking — An
engine misfire has been detected which may
damage the emission control system. To re-
duce or avoid emission control system dam-
age:
– do not drive at speeds above 45 MPH
(72 km/h) .
– avoid hard acceleration or deceleration.
– avoid steep uphill grades.
– if possible, reduce the amount of cargo
being hauled or towed.
The malfunction indicator lamp may stop blinking
and come on steady. Have the vehicle inspected
by a NISSAN dealer. You do not need to have
your vehicle towed to the dealer.
CAUTION
Continued vehicle operation without hav-
ing the emission control system checked
and repaired as necessary could lead to
poor driveability, reduced fuel economy,
and possible damage to the emission con-
trol system.
Security indicator light (NVIS)
This light blinks whenever the ignition switch is in
the LOCK, OFF or ACC position. This function
indicates the security system equipped on the
vehicle is operational.
For additional information, see “Security sys-
tems” later in this section.
Slip indicator light
This indicator light will blink when the traction
control system is limiting wheel spin. Slippery
road conditions may exist if the slip indicator
blinks on. If this happens, adjust your driving
accordingly.
The slip indicator light also comes on when you
turn the ignition key to the ON position. The light
will turn off after about 2 seconds if the system is
operational. If the light does not come on or does
not go off, have the traction control system
checked by a NISSAN dealer.
Transfer 4LO position
indicator light (
model)
The light should turn off within 1 second after
turning the ignition switch to ON.
2-18Instruments and controls
ZREVIEW COPYÐ2005 Armada(wzw)
Owners ManualÐUSA_English(nna)
11/18/04Ðtbrooks
X