mirror NISSAN ARMADA 2007 1.G Quick Reference Guide
[x] Cancel search | Manufacturer: NISSAN, Model Year: 2007, Model line: ARMADA, Model: NISSAN ARMADA 2007 1.GPages: 14, PDF Size: 1.28 MB
Page 5 of 14

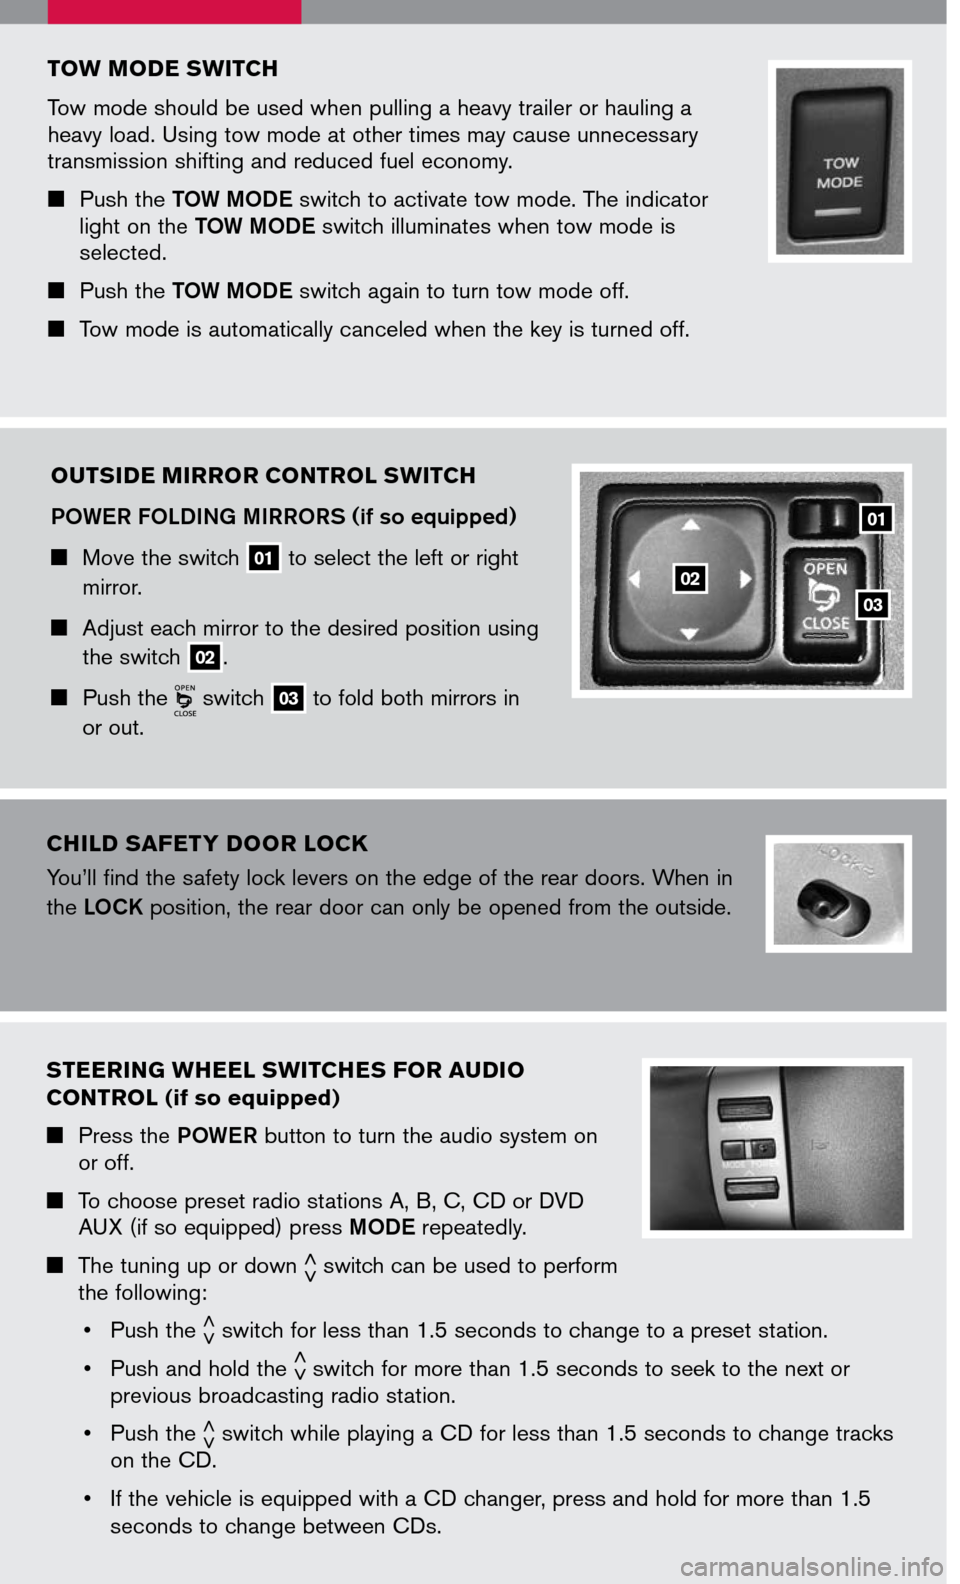
TOW MODE SWITCH
Tow mode should be used when pulling a heavy trailer or hauling a heavy load. Using tow mode at other times may cause unnecessary transmission shifting and reduced fuel economy.
Push the TOW MODE switch to activate tow mode. The indicator light on the TOW MODE switch illuminates when tow mode is selected.
Push the TOW MODE switch again to turn tow mode off.
Tow mode is automatically canceled when the key is turned off.
OUTSIDE MIRROR CONTROL SWITCH
POWER FOLDING MIRRORS (if so equipped)
Move the switch 01 to select the left or right
mirror.
Adjust each mirror to the desired position using
the switch 02.
Push the switch 03 to fold both mirrors in
or out.
03
01
02
STEERING WHEEL SWITCHES FOR AUDIO
CONTROL (if so equipped)
Press the POWER button to turn the audio system on or off.
To choose preset radio stations A, B, C, CD or DVD AUX (if so equipped) press MODE repeatedly.
The tuning up or down < >switch can be used to perform the following:
• Push the
< >switch for less than 1.5 seconds to change to a preset station.
• Push and hold the
< >switch for more than 1.5 seconds to seek to the next or previous broadcasting radio station.
• Push the
< >switch while playing a CD for less than 1.5 seconds to change tracks on the CD.
• If the vehicle is equipped with a CD changer, press and hold for more than 1.5
seconds to change between CDs.
CHILD SAFET Y DOOR LOCK
You’ll find the safety lock levers on the edge of the rear doors. When in
the LOCK position, the rear door can only be opened from the outside.
Page 8 of 14

01
03
0508
04
02
06
0709
02
01
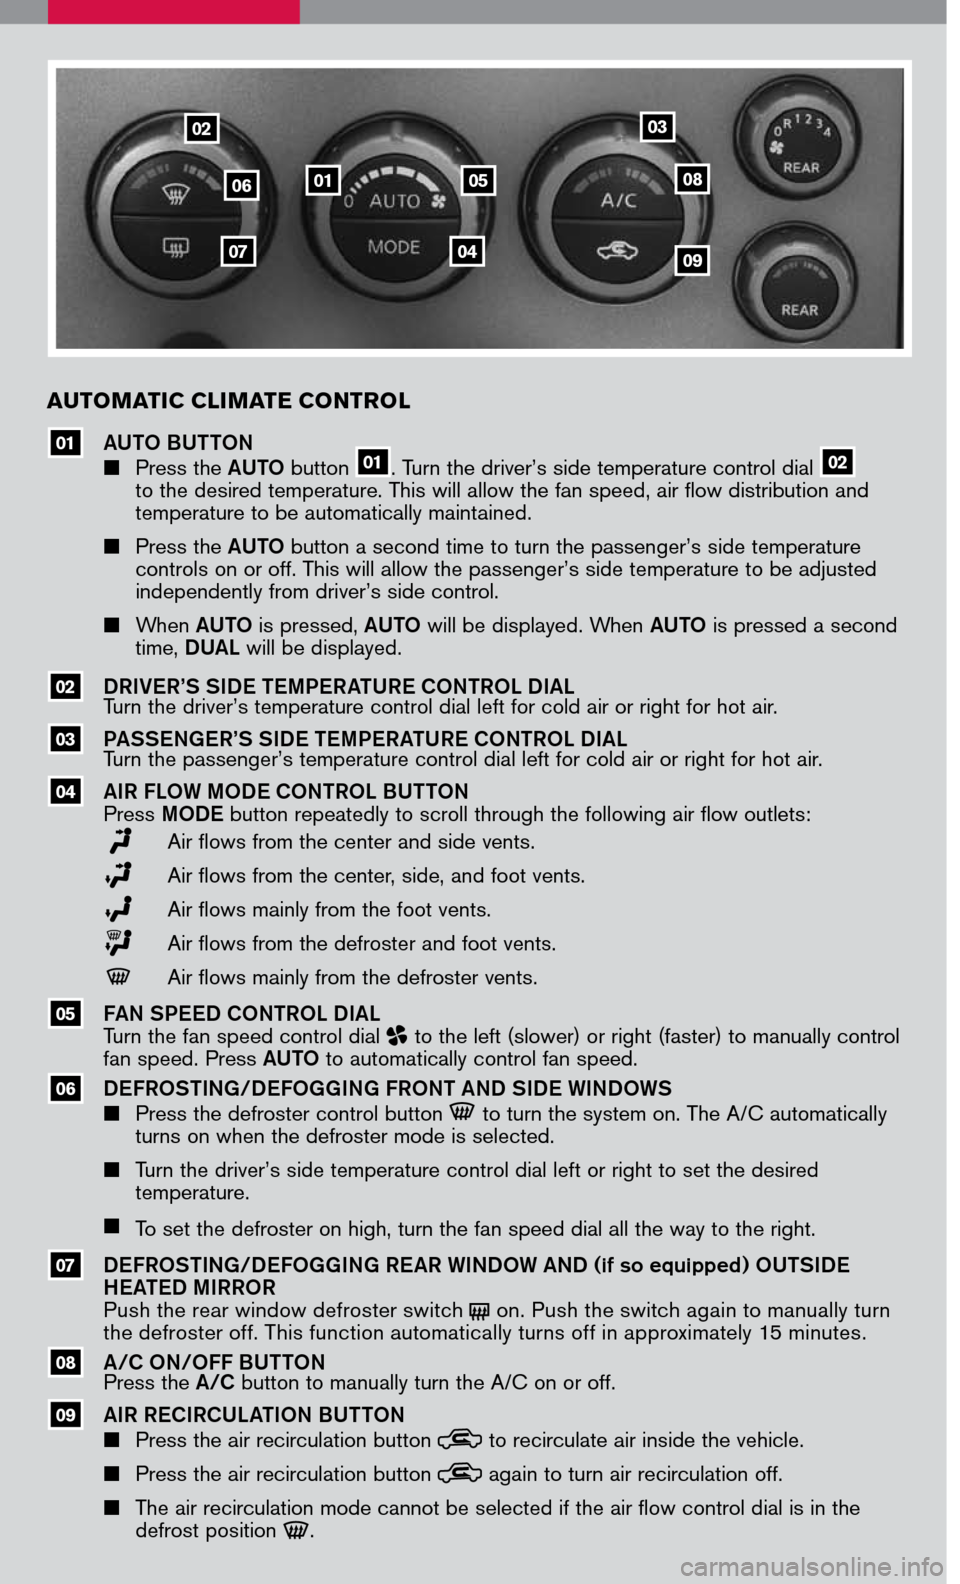
AUTOMATIC C LIMATE CONTROL
AUTO BUTTON Press the AUTO button 01. Turn the driver’s side temperature control dial 02
to the desired temperature. This will allow the fan speed, air flow distribution and temperature to be automatically maintained.
Press the AUTO button a second time to turn the passenger’s side temperature controls on or off. This will allow the passenger’s side temperature to be adjusted independently from driver’s side control.
When AUTO is pressed, AUTO will be displayed. When AUTO is pressed a second time, DUAL will be displayed.
DRIVER’S SIDE TEMPERATURE CONTROL DIALTurn the driver’s temperature control dial left for cold air or right for hot air.
PASSENGER’S SIDE TEMPERATURE CONTROL DIALTurn the passenger’s temperature control dial left for cold air or right for hot air.
AIR FLOW MODE CONTROL BUTTONPress MODE button repeatedly to scroll through the following air flow outlets:
Air flows from the center and side vents.
Air flows from the center, side, and foot vents.
Air flows mainly from the foot vents.
Air flows from the defroster and foot vents.
Air flows mainly from the defroster vents.
FAN SPEED CONTROL DIALTurn the fan speed control dial to the left (slower) or right (faster) to manually control fan speed. Press AUTO to automatically control fan speed.
DEFROSTING/DEFOGGING FRONT AND SIDE WINDOWS Press the defroster control button to turn the system on. The A/C automatically turns on when the defroster mode is selected.
Turn the driver’s side temperature control dial left or right to set the desired temperature.
To set the defroster on high, turn the fan speed dial all the way to the right.
DEFROSTING/DEFOGGING REAR WINDOW AND (if so equipped) OUTSIDE HEATED MIRROR Push the rear window defroster switch on. Push the switch again to manually turn the defroster off. This function automatically turns off in approximately 15 minutes.
A/C ON/OFF BUTTONPress the A/C button to manually turn the A/C on or off.
AIR RECIRCULATION BUTTON Press the air recirculation button to recirculate air inside the vehicle.
Press the air recirculation button again to turn air recirculation off.
The air recirculation mode cannot be selected if the air flow control dial is in the defrost position .
03
08
07
05
04
06
09
Page 11 of 14

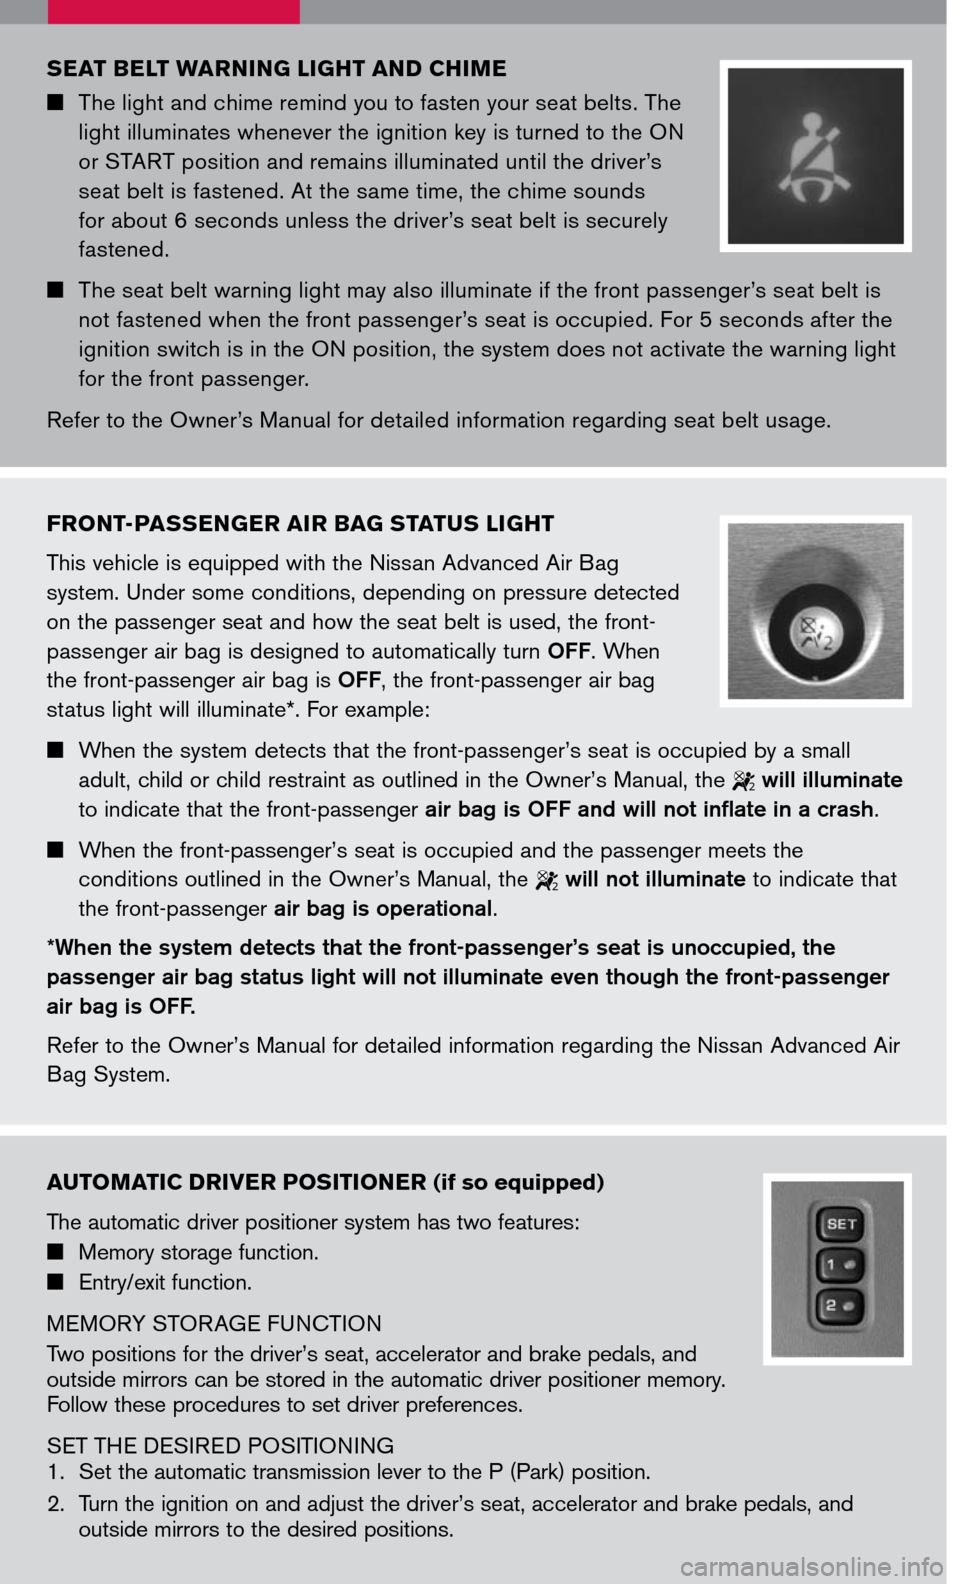
AUTOMATIC DRIVER POSITIONER (if so equipped)
The automatic driver positioner system has two features:
Memory storage function.
Entry/exit function.
MEMORY STORAGE FUNCTION
Two positions for the driver’s seat, accelerator and brake pedals, and outside mirrors can be stored in the automatic driver positioner memory. Follow these procedures to set driver preferences.
SET THE DESIRED POSITIONING
1. Set the automatic transmission lever to the P (Park) position.
2. Turn the ignition on and adjust the driver’s seat, accelerator and brake pedals, and
outside mirrors to the desired positions.
SEAT BELT WARNING LIGHT AND CHIME
The light and chime remind you to fasten your seat belts. The
light illuminates whenever the ignition key is turned to the ON
or START position and remains illuminated until the driver’s
seat belt is fastened. At the same time, the chime sounds
for about 6 seconds unless the driver’s seat belt is securely
fastened.
The seat belt warning light may also illuminate if the front passenger’s seat belt is
not fastened when the front passenger’s seat is occupied. For 5 seconds after the
ignition switch is in the ON position, the system does not activate the warning light
for the front passenger.
Refer to the Owner’s Manual for detailed information regarding seat belt usage.
FRONT-PASSENGER AIR BAG STATUS LIGHT
This vehicle is equipped with the Nissan Advanced Air Bag
system. Under some conditions, depending on pressure detected
on the passenger seat and how the seat belt is used, the front-
passenger air bag is designed to automatically turn OFF. When
the front-passenger air bag is OFF, the front-passenger air bag
status light will illuminate*. For example:
When the system detects that the front-passenger’s seat is occupied by a small
adult, child or child restraint as outlined in the Owner’s Manual, the 2 will illuminate
to indicate that the front-passenger air bag is OFF and will not inflate in a crash.
When the front-passenger’s seat is occupied and the passenger meets the
conditions outlined in the Owner’s Manual, the 2 will not illuminate to indicate that
the front-passenger air bag is operational.
*When the system detects that the front-passenger’s seat is unoccupied, the
passenger air bag status light will not illuminate even though the front-passenger
air bag is OFF.
Refer to the Owner’s Manual for detailed information regarding the Nissan Advanced Air
Bag System.
Page 12 of 14

DRIVER FRONT SEAT ADJUSTMENTS
With manual seats (passenger’s side, if so equipped):
Pull up on the lever under the front of the seat and slide backward or forward; release.
Lift the lever 01 on the side of the seat to adjust your seatback backward or forward; release when you have found a comfortable angle and the seat belt fits properly.
With power seats (if so equipped):
Move the control 02 forward or backward to adjust the seat cushion forward or backward.
Pull up on the control 02 to raise the seat cushion; press down to lower the cushion.
Push the switch 03 forward to move the seatback forward; push it back to move the seatback backward.
LUMBAR SUPPORT (if so equipped) Your driver’s seat has a lumbar support; adjust it by
moving the lever 04 up or down.
04
0203
01
3. Press the SET (memory) button and within 5 seconds press the position button (1 or 2) for at least 1 second until the indicator light illuminates. The position is now stored in memory.
LINK TO KEYFOB Within 5 seconds of setting the memory position (indicator light is on and ignition is on), press the button on the remote. A keyfob can be linked to each memory button. If memory positioning is re-set to a new location, the keyfob automatically re-links.
RECALLING A MEMORY SETTING FROM THE MEMORY PAD Set the automatic transmission lever to the P (Park) position, then: Within 45 seconds of opening the driver’s door, push the memory switch (1 or 2) fully for at least 1 second, or Turn the ignition switch to the ON position and push the memory switch (1 or 2) fully for at least 1 second.
FROM THE KEYFOB
If properly linked, operation of the button will automatically return the driver’s seat, accelerator and brake pedals, and outside mirrors to the memorized position.
ENTRY/EXIT FUNCTION
The driver’s seat automatically moves to allow the driver to get into and out of the driver’s seat more easily. The driver’s seat slides backward when:
The driver’s door is opened with the key turned to LOCK. The key is turned from ACC to LOCK with the driver’s door open and the automatic transmission lever is in the P (Park) position.
The driver’s seat returns to the previous position when:
The key is inserted into the ignition switch. The driver’s door is closed with the key turned to LOCK. The key is turned from ACC to ON while the automatic transmission lever is in the P (Park) position.