tire type NISSAN ARMADA 2018 Owner´s Manual
[x] Cancel search | Manufacturer: NISSAN, Model Year: 2018, Model line: ARMADA, Model: NISSAN ARMADA 2018Pages: 532, PDF Size: 2.3 MB
Page 52 of 532
seat. Studies show that children are
safer when properly restrained in the
rear seat than in the front seat.
This is especially important because
your vehicle has a supplemental re-
straint system (Air bag system) for the
front passenger. See “Supplemental re-
straint system” (P.1-54).
INFANTS
Infants up to at least 1 year old should be
placed in a rear-facing child restraint.
NISSAN recommends that infants be
placed in child restraints that comply with
Federal Motor Vehicle Safety Standards
or Canadian Motor Vehicle Safety Stan-
dards. You should choose a child restraint
that fits your vehicle and always follow
the manufacturer’s instructions for instal-
lation and use.
SMALL CHILDREN
Children that are over 1 year old and
weigh at least 20 lbs (9 kg) should remain
in a rear-facing child restraint as long as
possible up to the height or weight limit
of the child restraint. Children who out-
grow the height or weight limit of the
rear-facing child restraint and are at least
1 year old should be secured in a forward-
facing child restraint with a harness. Refer
to the manufacturer’s instructions for
minimum and maximum weight andheight recommendations. NISSAN recom-
mends that small children be placed in
child restraints that comply with Federal
Motor Vehicle Safety Standards or Cana-
dian Motor Vehicle Safety Standards. You
should choose a child restraint that fits
your vehicle and always follow the man-
ufacturer’s instructions for installation
and use.
LARGER CHILDREN
Children should remain in a forward-
facing child restraint with a harness until
they reach the maximum height or
weight limit allowed by the child restraint
manufacturer.
Once a child outgrows the height or
weight limit of the harness-equipped
forward-facing child restraint, NISSAN
recommends that the child be placed in
a commercially available booster seat to
obtain proper seat belt fit. For a seat belt
to fit properly, the booster seat should
raise the child so that the shoulder belt is
properly positioned across the chest and
the top, middle portion of the shoulder.
The shoulder belt should not cross the
neck or face and should not fall off the
shoulder. The lap belt should lie snugly
across the lower hips or upper thighs, not
the abdomen.
A booster seat can only be used in
seating positions that have a three-pointtype seat belt. The booster seat should fit
the vehicle seat and have a label certify-
ing that it complies with Federal Motor
Vehicle Safety Standards or Canadian
Motor Vehicle Safety Standards.
A booster seat should be used until the
child can pass the seat belt fit test below:
.
Are the child’s back and hips against
the vehicle seatback?
. Is the child able to sit without slouch-
ing?
. Do the child’s knees bend easily over
the front edge of the seat with feet flat
on the floor?
. Can the child safely wear the seat belt
(lap belt low and snug across the hips
and shoulder belt across mid-chest
and shoulder)?
. Is the child able to use the properly
adjusted head restraint/headrest?
. Will the child be able to stay in position
for the entire ride?
Safety — seats, seat belts and supplemental restraint system1-31
Page 264 of 532
person is significantly more likely to be
injured or killed than a person properly
wearing a seat belt.
ON-PAVEMENT AND OFF-ROAD
DRIVING PRECAUTIONS
Utility vehicles have a significantly high-
er rollover rate than other types of
vehicles.
They have higher ground clearance than
passenger cars to make them capable of
performing in a variety of on-pavement
and off-road applications. This gives them
a higher center of gravity than ordinary
cars. An advantage of higher ground
clearance is a better view of the road,
allowing you to anticipate problems.
However, they are not designed for cor-
nering at the same speeds as conven-
tional passenger cars any more than low-
slung sports cars are designed to perform
satisfactorily under off-road conditions. If
at all possible, avoid sharp turns or abrupt
maneuvers, particularly at high speeds. As
with other vehicles of this type, failure to
operate this vehicle correctly may result
in loss of control or vehicle rollover. Seat
belts help reduce the risk of injury in
collisions and rollovers. In a rollover crash,
an unbelted or improperly belted person
is significantly more likely to be injured or
killed than a person properly wearing a
seat belt.Be sure to read “Driving safety precau-
tions” (P.5-10).
OFF-ROAD RECOVERY
While driving, the right side or left side
wheels may unintentionally leave the
road surface. If this occurs, maintain
control of the vehicle by following the
procedure below. Please note that this
procedure is only a general guide. The
vehicle must be driven as appropriate
based on the conditions of the vehicle,
road and traffic.
1. Remain calm and do not overreact.
2. Do not apply the brakes.
3. Maintain a firm grip on the steering
wheel with both hands and try to hold
a straight course.
4. When appropriate, slowly release the accelerator pedal to gradually slow
the vehicle.
5. If there is nothing in the way, steer the vehicle to follow the road while the
vehicle speed is reduced. Do not
attempt to drive the vehicle back onto
the road surface until vehicle speed is
reduced.
6. When it is safe to do so, gradually turn the steering wheel until both tires
return to the road surface. When all
tires are on the road surface, steer the vehicle to stay in the appropriate
driving lane.
.If you decide that it is not safe to
return the vehicle to the road sur-
face based on vehicle, road or
traffic conditions, gradually slow
the vehicle to a stop in a safe place
off the road.
RAPID AIR PRESSURE LOSS
Rapid air pressure loss or a “blow-out” can
occur if the tire is punctured or is
damaged due to hitting a curb or pothole.
Rapid air pressure loss can also be caused
by driving on under-inflated tires.
Rapid air pressure loss can affect the
handling and stability of the vehicle,
especially at highway speeds.
Help prevent rapid air pressure loss by
maintaining the correct air pressure and
visually inspect the tires for wear and
damage. See “Wheels and tires” (P.8-30).
If a tire rapidly loses air pressure or
“blows-out” while driving maintain control
of the vehicle by following the procedure
below. Please note that this procedure is
only a general guide. The vehicle must be
driven as appropriate based on the con-
ditions of the vehicle, road and traffic.
Starting and driving5-9
Page 267 of 532
5-12Starting and driving
similar equipment even if the
other two wheels are raised off
the ground. Make sure you inform
test facility personnel that your
vehicle is equipped with 4WD
before it is placed on a dynam-
ometer. Using the wrong test
equipment may result in drive-
train damage or unexpected ve-
hicle movement which could
result in serious vehicle damage
or personal injury (4WD models).
. When a wheel is off the ground
due to an unlevel surface, do not
spin the wheel excessively.
. Accelerating quickly, sharp steer-
ing maneuvers or sudden braking
may cause loss of control.
. If at all possible, avoid sharp
turning maneuvers, particularly
at high speeds. Your vehicle has
a higher center of gravity than a
conventional passenger car. The
vehicle is not designed for cor-
nering at the same speeds as
conventional passenger cars.
Failure to operate this vehicle
correctly could result in loss of
control and/or a rollover acci-
dent. .
Always use tires of the same type,
size, brand, construction (bias,
bias-belted or radial), and tread
pattern on all four wheels. Install
tire chains on the rear wheels
when driving on slippery roads
and drive carefully.
. Be sure to check the brakes im-
mediately after driving in mud or
water. See “Brake system” (P.5-
137) for wet brakes.
. Avoid parking your vehicle on
steep hills. If you get out of the
vehicle and it rolls forward, back-
ward or sideways, you could be
injured.
. Whenever you drive off-road
through sand, mud or water as
deep as the wheel hub, more
frequent maintenance may be
required. See the maintenance
schedule shown in the "9. Main-
tenance and schedules" section.
. Spinning the rear wheels on slip-
pery surfaces may cause the 4WD
warning light to flash. The 4WD
system may also automatically
switch from the 4WD mode to
the 2WD mode. This could reduce
traction. Be especially careful
when towing a trailer (4WD mod- els).
Page 382 of 532
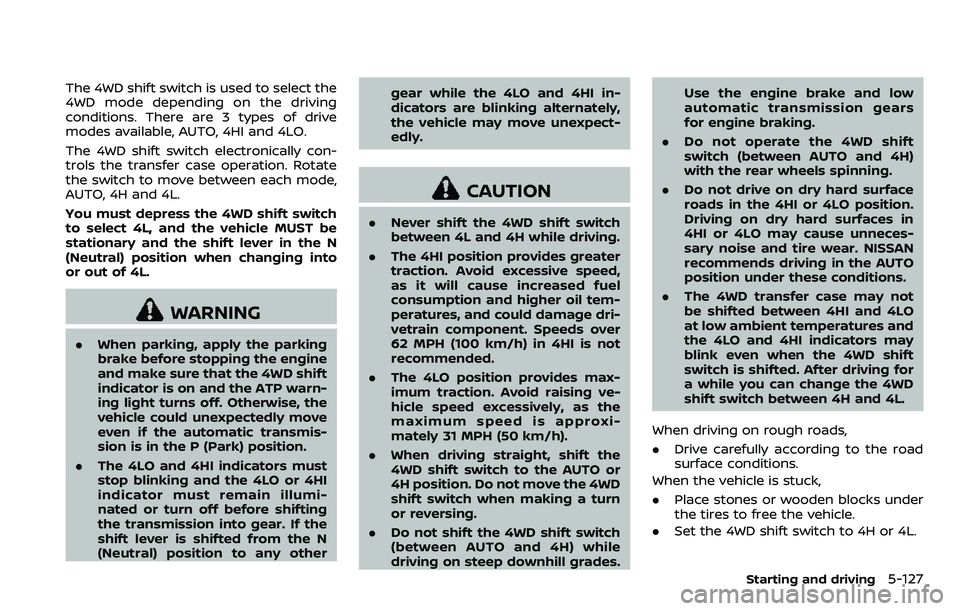
The 4WD shift switch is used to select the
4WD mode depending on the driving
conditions. There are 3 types of drive
modes available, AUTO, 4HI and 4LO.
The 4WD shift switch electronically con-
trols the transfer case operation. Rotate
the switch to move between each mode,
AUTO, 4H and 4L.
You must depress the 4WD shift switch
to select 4L, and the vehicle MUST be
stationary and the shift lever in the N
(Neutral) position when changing into
or out of 4L.
WARNING
.When parking, apply the parking
brake before stopping the engine
and make sure that the 4WD shift
indicator is on and the ATP warn-
ing light turns off. Otherwise, the
vehicle could unexpectedly move
even if the automatic transmis-
sion is in the P (Park) position.
. The 4LO and 4HI indicators must
stop blinking and the 4LO or 4HI
indicator must remain illumi-
nated or turn off before shifting
the transmission into gear. If the
shift lever is shifted from the N
(Neutral) position to any other gear while the 4LO and 4HI in-
dicators are blinking alternately,
the vehicle may move unexpect-
edly.
CAUTION
.
Never shift the 4WD shift switch
between 4L and 4H while driving.
. The 4HI position provides greater
traction. Avoid excessive speed,
as it will cause increased fuel
consumption and higher oil tem-
peratures, and could damage dri-
vetrain component. Speeds over
62 MPH (100 km/h) in 4HI is not
recommended.
. The 4LO position provides max-
imum traction. Avoid raising ve-
hicle speed excessively, as the
maximum speed is approxi-
mately 31 MPH (50 km/h).
. When driving straight, shift the
4WD shift switch to the AUTO or
4H position. Do not move the 4WD
shift switch when making a turn
or reversing.
. Do not shift the 4WD shift switch
(between AUTO and 4H) while
driving on steep downhill grades. Use the engine brake and low
automatic transmission gears
for engine braking.
. Do not operate the 4WD shift
switch (between AUTO and 4H)
with the rear wheels spinning.
. Do not drive on dry hard surface
roads in the 4HI or 4LO position.
Driving on dry hard surfaces in
4HI or 4LO may cause unneces-
sary noise and tire wear. NISSAN
recommends driving in the AUTO
position under these conditions.
. The 4WD transfer case may not
be shifted between 4HI and 4LO
at low ambient temperatures and
the 4LO and 4HI indicators may
blink even when the 4WD shift
switch is shifted. After driving for
a while you can change the 4WD
shift switch between 4H and 4L.
When driving on rough roads,
. Drive carefully according to the road
surface conditions.
When the vehicle is stuck,
. Place stones or wooden blocks under
the tires to free the vehicle.
. Set the 4WD shift switch to 4H or 4L.
Starting and driving5-127
Page 394 of 532
faces even with ABS. Stopping
distances may also be longer on
rough, gravel or snow covered
roads, or if you are using tire
chains. Always maintain a safe
distance from the vehicle in front
of you. Ultimately, the driver is
responsible for safety.
. Tire type and condition may also
affect braking effectiveness.
— When replacing tires, install
the specified size of tires on
all four wheels.
— When installing a spare tire, make sure that it is the proper
size and type as specified on
the Tire and Loading Informa-
tion label. See “Tire and load-
ing information label” (P.10-
13).
— For detailed information, see “Wheels and tires” (P.8-30).
The Anti-lock Braking System (ABS) con-
trols the brakes so the wheels do not lock
during hard braking or when braking on
slippery surfaces. The system detects the
rotation speed at each wheel and varies
the brake fluid pressure to prevent each
wheel from locking and sliding. By pre-
venting each wheel from locking, the system helps the driver maintain steering
control and helps to minimize swerving
and spinning on slippery surfaces.
Using the system
Depress the brake pedal and hold it down.
Depress the brake pedal with firm steady
pressure, but do not pump the brakes.
The ABS will operate to prevent the
wheels from locking up. Steer the vehicle
to avoid obstacles.
WARNING
Do not pump the brake pedal. Doing
so may result in increased stopping
distances.
Self-test feature
The ABS includes electronic sensors, elec-
tric pumps, hydraulic solenoids and a
computer. The computer has a built-in
diagnostic feature that tests the system
each time you start the engine and move
the vehicle at a low speed in forward or
reverse. When the self-test occurs, you
may hear a “clunk” noise and/or feel a
pulsation in the brake pedal. This is
normal and does not indicate a malfunc-
tion. If the computer senses a malfunc-
tion, it switches the ABS off and
illuminates the ABS warning light on the
instrument panel. The brake system then
operates normally, but without anti-lock
assistance.
If the ABS warning light illuminates during
the self-test or while driving, have the
vehicle checked. It is recommended you
visit a NISSAN dealer for this service.
Normal operation
The ABS operates at speeds above 3 to 6
MPH (5 to 10 km/h). The speed varies
according to road conditions.
When the ABS senses that one or more
wheels are close to locking up, the
actuator rapidly applies and releases
hydraulic pressure. This action is similar
to pumping the brakes very quickly. You
may feel a pulsation in the brake pedal
and hear a noise from under the hood or
feel a vibration from the actuator when it
is operating. This is normal and indicates
that the ABS is operating properly. How-
ever, the pulsation may indicate that road
conditions are hazardous and extra care
is required while driving.
Starting and driving5-139
Page 396 of 532
are extremely deteriorated, the
VDC system may not operate
properly. This could adversely
affect vehicle handling perfor-
mance, and the VDC warning light
may illuminate.
. If brake related parts such as
brake pads, rotors and calipers
are not NISSAN recommended or
are extremely deteriorated, the
VDC system may not operate
properly and the VDC warning
light
may illuminate.
. If engine control related parts are
not NISSAN recommended or are
extremely deteriorated, the VDC
warning light
may illuminate.
. When driving on extremely in-
clined surfaces such as higher
banked corners, the VDC system
may not operate properly and the
VDC warning light
may illumi-
nate. Do not drive on these types
of roads.
. When driving on an unstable sur-
face such as a turntable, ferry,
elevator or ramp, the VDC warn-
ing light
may illuminate. This
is not a malfunction. Restart the
engine after driving onto a stable
surface. .
If wheels or tires other than the
NISSAN recommended ones are
used, the VDC system may not
operate properly and the VDC
warning light
may illuminate.
. The VDC system is not a substi-
tute for winter tires or tire chains
on a snow covered road.
SIC4455
VEHICLE DYNAMIC CONTROL (VDC)
OFF SWITCH
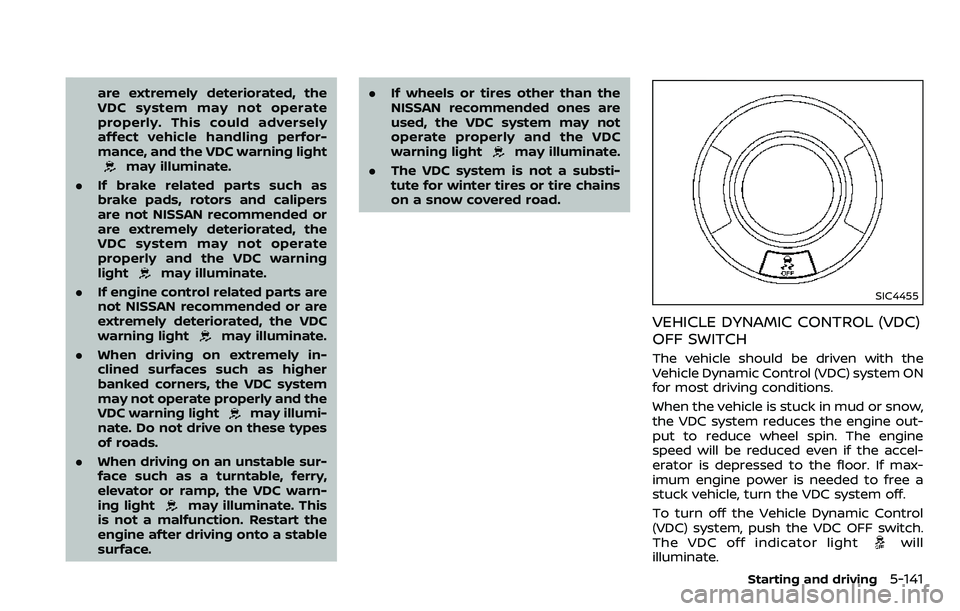
The vehicle should be driven with the
Vehicle Dynamic Control (VDC) system ON
for most driving conditions.
When the vehicle is stuck in mud or snow,
the VDC system reduces the engine out-
put to reduce wheel spin. The engine
speed will be reduced even if the accel-
erator is depressed to the floor. If max-
imum engine power is needed to free a
stuck vehicle, turn the VDC system off.
To turn off the Vehicle Dynamic Control
(VDC) system, push the VDC OFF switch.
The VDC off indicator light
will
illuminate.
Starting and driving5-141
Page 397 of 532
5-142Starting and driving
Push the VDC OFF switch again or restart
the engine to turn ON the system.FREEING A FROZEN DOOR LOCK
To prevent a door lock from freezing,
apply deicer through the key hole. If the
lock becomes frozen, heat the key before
inserting it into the key hole or use the
Intelligent Key system.
ANTIFREEZE
In the winter when it is anticipated that
the outside temperature will drop below
32°F (0°C), check antifreeze to assure
proper winter protection. For additional
information, see “Engine cooling system”
(P.8-4).
BATTERY
If the battery is not fully charged during
extremely cold weather conditions, the
battery fluid may freeze and damage the
battery. To maintain maximum efficiency,
the battery should be checked regularly.
For additional information, see “Battery”
(P.8-11).
DRAINING OF COOLANT WATER
If the vehicle is to be left outside without
antifreeze, drain the cooling system, in-
cluding the engine block. Refill before
operating the vehicle. For details, see
“Engine cooling system” (P.8-4).
TIRE EQUIPMENT
SUMMER tires have a tread designed to
provide superior performance on dry
pavement. However, the performance of
these tires will be substantially reduced in
snowy and icy conditions. If you operate
your vehicle on snowy or icy roads,
NISSAN recommends the use of MUD &
SNOW or ALL SEASON tires on all four
wheels. It is recommended you consult a
NISSAN dealer for the tire type, size, speed
rating and availability information.
For additional traction on icy roads,
studded tires may be used. However,
some U.S. states and Canadian provinces
prohibit their use. Check local, state and
provincial laws before installing studded
tires.
Skid and traction capabilities of
studded snow tires, on wet or dry
surfaces, may be poorer than that of
non-studded snow tires.
Tire chains may be used. For details, see
“Tire chains” (P.8-37).
COLD WEATHER DRIVING
Page 432 of 532

8 Do-it-yourself
Maintenance precautions ...................................................... 8-2
Engine compartment check locations ........................ 8-3VK56VD engine ....................................................................... 8-3
Engine cooling system ............................................................. 8-4 Checking engine coolant level .................................... 8-5
Changing engine coolant ................................................ 8-5
Engine oil ........................................................................\
..................... 8-6 Checking engine oil level ................................................. 8-6
Changing engine oil and filter ..................................... 8-6
Automatic Transmission Fluid (ATF) ............................. 8-8
Power steering fluid ................................................................... 8-8
Brake fluid ........................................................................\
.................. 8-9
Window washer fluid .............................................................. 8-10
Battery ........................................................................\
........................ 8-11 Jump starting ........................................................................\
. 8-13
Variable voltage control system ................................... 8-13
Drive belts ........................................................................\
................ 8-13
Spark plugs ........................................................................\
............. 8-14 Replacing spark plugs ..................................................... 8-14
Air cleaner ........................................................................\
............... 8-15 Windshield wiper blades ..................................................... 8-16
Cleaning ........................................................................\
........... 8-16
Replacing ........................................................................\
........ 8-16
Rear window wiper blades ............................................... 8-17
Brakes ........................................................................\
........................ 8-17 Self-adjusting brakes ..................................................... 8-17
Brake pad wear warning ............................................ 8-17
Brake booster ...................................................................... 8-17
Fuses ........................................................................\
........................... 8-18 Engine compartment .................................................... 8-18
Passenger compartment ........................................... 8-20
Intelligent Key battery replacement .......................... 8-21
Lights ........................................................................\
.......................... 8-24
Headlights ........................................................................\
...... 8-24
Exterior and interior lights ........................................ 8-26
Wheels and tires ........................................................................\
8-30
Tire pressure ........................................................................\
8-30
Tire labeling ........................................................................\
.. 8-34
Types of tires ....................................................................... 8-36
Tire chains ........................................................................\
...... 8-37
Changing wheels and tires ...................................... 8-37
Page 466 of 532
JVM0694X
Example
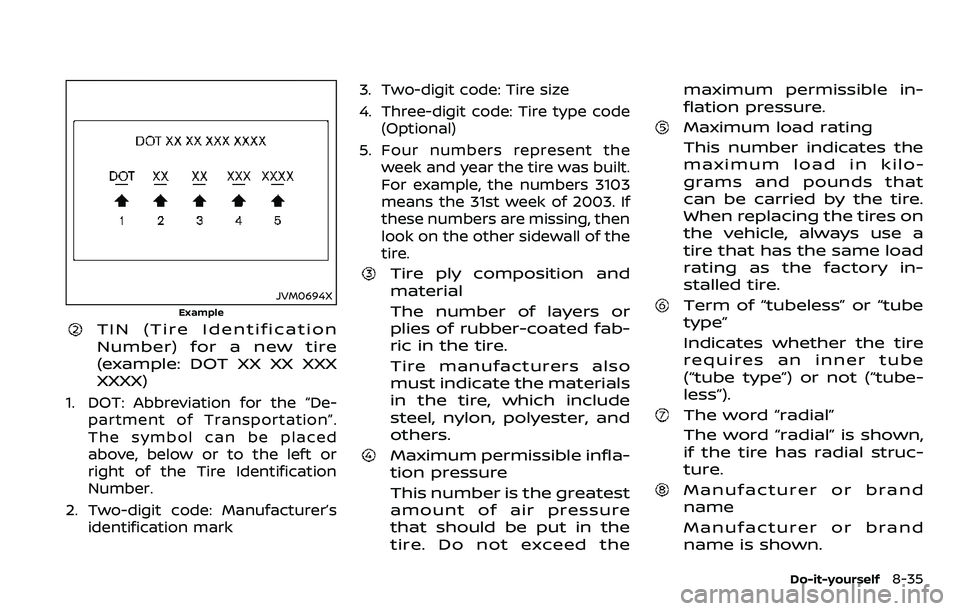
TIN (Tire Identification
Number) for a new tire
(example: DOT XX XX XXX
XXXX)
1. DOT: Abbreviation for the “De-partment of Transportation”.
The symbol can be placed
above, below or to the left or
right of the Tire Identification
Number.
2. Two-digit code: Manufacturer’s identification mark 3. Two-digit code: Tire size
4. Three-digit code: Tire type code
(Optional)
5. Four numbers represent the week and year the tire was built.
For example, the numbers 3103
means the 31st week of 2003. If
these numbers are missing, then
look on the other sidewall of the
tire.
Tire ply composition and
material
The number of layers or
plies of rubber-coated fab-
ric in the tire.
Tire manufacturers also
must indicate the materials
in the tire, which include
steel, nylon, polyester, and
others.
Maximum permissible infla-
tion pressure
This number is the greatest
amount of air pressure
that should be put in the
tire. Do not exceed the maximum permissible in-
flation pressure.
Maximum load rating
This number indicates the
maximum load in kilo-
grams and pounds that
can be carried by the tire.
When replacing the tires on
the vehicle, always use a
tire that has the same load
rating as the factory in-
stalled tire.
Term of “tubeless” or “tube
type”
Indicates whether the tire
requires an inner tube
(“tube type”) or not (“tube-
less”).
The word “radial”
The word “radial” is shown,
if the tire has radial struc-
ture.
Manufacturer or brand
name
Manufacturer or brand
name is shown.
Do-it-yourself8-35
Page 467 of 532
8-36Do-it-yourself
Other tire-related terminology:
In addition to the many terms that
are defined throughout this sec-
tion, Intended Outboard Sidewall is
(1) the sidewall that contains a
whitewall, bears white lettering or
bears manufacturer, brand and/or
model name molding that is higher
or deeper than the same molding
on the other sidewall of the tire, or
(2) the outward facing sidewall of
an asymmetrical tire that has a
particular side that must always
face outward when mounted on a
vehicle.
TYPES OF TIRES
WARNING
.When changing or replacing tires,
be sure all four tires are of the
same type (Example: Summer, All
Season or Snow) and construc-
tion. A NISSAN dealer may be able
to help you with information
about tire type, size, speed rating
and availability. .
Replacement tires may have a
lower speed rating than the fac-
tory equipped tires, and may not
match the potential maximum
vehicle speed. Never exceed the
maximum speed rating of the
tire.
. Replacing tires with those not
originally specified by NISSAN
could affect the proper operation
of the TPMS.
. For additional information re-
garding tires, refer to “Important
Tire Safety Information” (US) or
“Tire Safety Information” (Cana-
da) in the Warranty Information
Booklet.
All season tires
NISSAN specifies all season tires on some
models to provide good performance all
year, including snowy and icy road con-
ditions. All Season tires are identified by
ALL SEASON and/or M&S (Mud and Snow)
on the tire sidewall. Snow tires have
better snow traction than All Season tires
and may be more appropriate in some
areas.
Summer tires
NISSAN specifies summer tires on some
models to provide superior performance
on dry roads. Summer tire performance is
substantially reduced in snow and ice.
Summer tires do not have the tire trac-
tion rating M&S on the tire sidewall.
If you plan to operate your vehicle in
snowy or icy conditions, NISSAN recom-
mends the use of SNOW tires or ALL
SEASON tires on all four wheels.
Snow tires
If snow tires are needed, it is necessary to
select tires equivalent in size and load
rating to the original equipment tires. If
you do not, it can adversely affect the
safety and handling of your vehicle.
Generally, snow tires will have lower
speed ratings than factory equipped tires
and may not match the potential max-
imum vehicle speed. Never exceed the
maximum speed rating of the tire.
If you install snow tires, they must be the
same size, brand, construction and tread
pattern on all four wheels.
For additional traction on icy roads,
studded tires may be used. However,
some U.S. states and Canadian provinces
prohibit their use. Check local, state and
provincial laws before installing studded