sensor NISSAN ARMADA 2019 Owner´s Manual
[x] Cancel search | Manufacturer: NISSAN, Model Year: 2019, Model line: ARMADA, Model: NISSAN ARMADA 2019Pages: 536, PDF Size: 2.56 MB
Page 87 of 536
tions that may be interfering with the
weight sensors:
.Small adult or child is not sitting
upright, leaning against the seatback,
and centered on the seat cushion with
his/her feet comfortably extended to
the floor.
. The child restraint is not properly
installed, as outlined. (See “Child re-
straints” (P.1-32).)
. An object weighing over 9.1 lbs (4 kg)
hanging on the seat or placed in the
seatback pocket.
. A child restraint or other object press-
ing against the rear of the seatback.
. A rear passenger pushing or pulling
on the back of the front passenger
seat.
. Forcing the front seat or seatback
against an object on the seat or floor
behind it.
. An object placed under the front
passenger seat.
. An object placed between the seat
cushion and center console.
If the vehicle is moving, please come to a
stop when it is safe to do so. Check and
correct any of the above conditions.
Restart the vehicle and wait 1 minute. NOTE:
A system check will be performed dur-
ing which the front passenger air bag
status light will remain lit for about 7
seconds initially.
If the light is still OFF after this, the small
adult, child or child restraint should be
repositioned in the rear seat and it is
recommended that the vehicle be
checked by a NISSAN dealer as soon as
possible.
Other supplemental front-impact
air bag precautions
WARNING
.
Do not place any objects on the
steering wheel pad or on the
instrument panel. Also, do not
place any objects between any
occupant and the steering wheel
or instrument panel. Such objects
may become dangerous projec-
tiles and cause injury if the front
air bags inflate.
. Do not place objects with sharp
edges on the seat. Also, do not
place heavy objects on the seat
that will leave permanent impres-
sions in the seat. Such objects
can damage the seat or occupant classification sensors (weight
sensors). This can affect the op-
eration of the air bag system and
result in serious personal injury.
. Do not use water or acidic clea-
ners (hot steam cleaners) on the
seat. This can damage the seat or
occupant classification sensors.
This can also affect the operation
of the air bag system and result in
serious personal injury.
. Immediately after inflation, sev-
eral front air bag system compo-
nents will be hot. Do not touch
them; you may severely burn
yourself.
. No unauthorized changes should
be made to any components or
wiring of the supplemental air
bag system. This is to prevent
accidental inflation of the supple-
mental air bag or damage to the
supplemental air bag system.
. Do not make unauthorized
changes to your vehicle’s electri-
cal system, suspension system or
front end structure. This could
affect proper operation of the
front air bag system.
. Tampering with the air bag sys-
tem may result in serious perso-
Safety — seats, seat belts and supplemental restraint system1-67
Page 93 of 536
REPAIR AND REPLACEMENT PRO-
CEDURE
The front air bags, side air bags, curtain
air bags and pretensioners are designed
to activate on a one-time-only basis. As a
reminder, unless it is damaged, the sup-
plemental air bag warning light will re-
main illuminated after inflation has
occurred. These systems should be re-
paired and/or replaced as soon as possi-
ble. It is recommended you visit a NISSAN
dealer for this service.
When maintenance work is required on
the vehicle, the front air bags, side air
bags, curtain air bags, pretensioners and
related parts should be pointed out to the
person conducting the maintenance. The
ignition switch should always be in the
LOCK position when working under the
hood or inside the vehicle.
WARNING
.Once a front air bag, side air bag
or curtain air bag has inflated, the
air bag module will not function
again and must be replaced. Ad-
ditionally, the activated preten-
sioner must also be replaced. The
air bag module and pretensioner
should be replaced. It is recom- mended you visit a NISSAN dealer
for this service. However, the air
bag module and pretensioner
system cannot be repaired.
. The front air bag, side air bag,
curtain air bag and the preten-
sioner should be inspected if
there is any damage to the front
end or side portion of the vehicle.
It is recommended you visit a
NISSAN dealer for this service.
. If you need to dispose of a sup-
plemental air bag or pretensioner
or scrap the vehicle, it is recom-
mended you visit a NISSAN deal-
er. Correct supplemental air bag
and pretensioner system dispo-
sal procedures are set forth in the
appropriate NISSAN Service Man-
ual. Incorrect disposal procedures
could cause personal injury.
. If there is an impact to your
vehicle from any direction, your
Occupant Classification Sensor
(OCS) should be checked to verify
it is still functioning correctly. It is
recommended that you visit a
NISSAN dealer for this service.
The OCS should be checked even
if no air bags deploy as a result of
the impact. Failure to verify prop-
er OCS function may result in an improper air bag deployment re-
sulting in injury or death.
Safety — seats, seat belts and supplemental restraint system1-73
Page 118 of 536
2-24Instruments and controls
8. Parking brake release warning
This warning appears when the vehicle
speed is above 4 MPH (7 km/h) and the
parking brake is applied.
9. Low fuel warning
This warning appears when the fuel level
in the tank is getting low. Refuel as soon
as it is convenient, preferably before the
fuel gauge reaches the 0 (Empty) position.
There is a small reserve of fuel remain-
ing in the tank when the fuel gauge
reaches the 0 (Empty) position.
10. Low washer fluid warning
This warning appears when the washer
tank fluid is at a low level. Add washer
fluid as necessary. (See “Window washer
fluid” (P.8-10).)
11. Door/liftgate open warning
(ignition switch is in the ON posi-
tion)
This warning appears if any of the doors
and/or the liftgate are open or not closed
securely. The vehicle icon indicates which
door or the liftgate is open on the display.
12. Loose fuel cap warning
This warning appears when the fuel-filler
cap is not tightened correctly after the
vehicle has been refueled. (See “Fuel-filler
cap” (P.3-27).)
13. Check tire pressure warning
This warning appears when the low tire
pressure warning light in the meter
illuminates and low tire pressure is de-
tected. The warning appears each time
the ignition switch is placed in the ON
position as long as the low tire pressure
warning light remains illuminated. If this
warning appears, stop the vehicle and
adjust the tire pressure to the recom-
mended COLD tire pressure shown on the
Tire and Loading Information label. (See
“Low tire pressure warning light” (P.2-15)
and “Tire Pressure Monitoring System
(TPMS)” (P.5-5).)
14. Extended storage fuse warning
(if so equipped)
This warning may appear if the extended
storage fuse switch is not pushed in
(switched on). When this warning ap-
pears, push in (switch on) the extended
storage fuse switch to turn off the warn-
ing. For more information, see “Extended
storage fuse switch” (P.8-21).
15. Intelligent Back-up Intervention
(I-BI) not available warning (if so
equipped)
This warning appears when the Intelli-
gent Back-up Intervention (I-BI) system is
temporarily not available.
For more details, see “Intelligent Back-up
Intervention (I-BI)” (P.5-57).
16. Intelligent Back-up Intervention
(I-BI) malfunction warning (if so
equipped)
This warning appears when the Intelli-
gent Back-up Intervention (I-BI) system is
not functioning properly.
For more details, see “Intelligent Back-up
Intervention (I-BI)” (P.5-57).
17. Headlight warning
This warning appears if the LED head-
lights are malfunctioning. It is recom-
mended you have the system checked
by a NISSAN dealer.
18. Front radar obstruction warning
This warning appears when the sensor
area of the front bumper is covered with
dirt or is obstructed, making it impossible
to detect a vehicle ahead.
The following systems will be automati-
cally canceled.
Page 123 of 536
warning feature. If the fuel level is low, the
warning is displayed on the screen.
When the fuel level drops even lower, the
dte display will change to “——”.
.If the amount of fuel added is small,
the display just before the ignition
switch is pushed to the OFF position
may continue to be displayed.
. When driving uphill or rounding
curves, the fuel in the tank shifts,
which may momentarily change the
display.
5. Outside air temperature (ICY — °F
or °C)
The outside air temperature is displayed
in °F or °C in the range of −22 to 131°F (−30
to 55°C).
The outside air temperature mode in-
cludes a low temperature warning fea-
ture. If the outside air temperature is
below 37°F (3°C), the warning is displayed
on the screen.
The outside temperature sensor is lo-
cated in front of the radiator. The sensor
may be affected by road or engine heat,
wind directions and other driving condi-
tions. The display may differ from the
actual outside temperature or the tem-
perature displayed on various signs or
billboards.
6. Setting
Setting is available while the engine is
running.
Setting cannot be made while driving. A
message “SETTING CAN ONLY BE OPER-
ATED WHEN STOPPED” is also displayed
on the vehicle information display.
The
switchandswitchare
used in the setting mode to select and
decide a menu.
SKIP:
Push the
switchto move to the
warning check mode.
Push the
switchto select other
menus.
ALERT:
There are 3 submenus under the alert
menu.
. BACK
Select this submenu to return to the
top page of the setting mode.
. TIMER
Select this submenu to specify when
the “TIMER” indicator activates.
. ICY
Select this submenu to display the low
outside temperature warning. MAINTENANCE:
There are 5 submenus under the main-
tenance menu.
. BACK
Select this submenu to return to the
top page of the setting mode.
. TIRE
Select this submenu to set or reset the
distance for replacing tires.
. FILTER
Select this submenu to set or reset the
distance for replacing the oil filter.
. OIL
Select this submenu to set or reset the
distance for changing the engine oil.
. OTHER
Select this submenu and set or reset
the distance for replacing items other
than the engine oil, oil filter and tires.
OPTIONS:
There are 4 submenus under the display
menu.
. BACK
Select this submenu to return to the
top page of the setting mode.
. LANGUAGE
Select this submenu to choose Eng-
lish, French or Spanish for display.
Instruments and controls2-29
Page 128 of 536
2-34Instruments and controls
WINDSHIELD WIPER AND WASHER
OPERATION
The windshield wiper and washer oper-
ates when the ignition switch is in the ON
position.
Push the lever down to operate the wiper
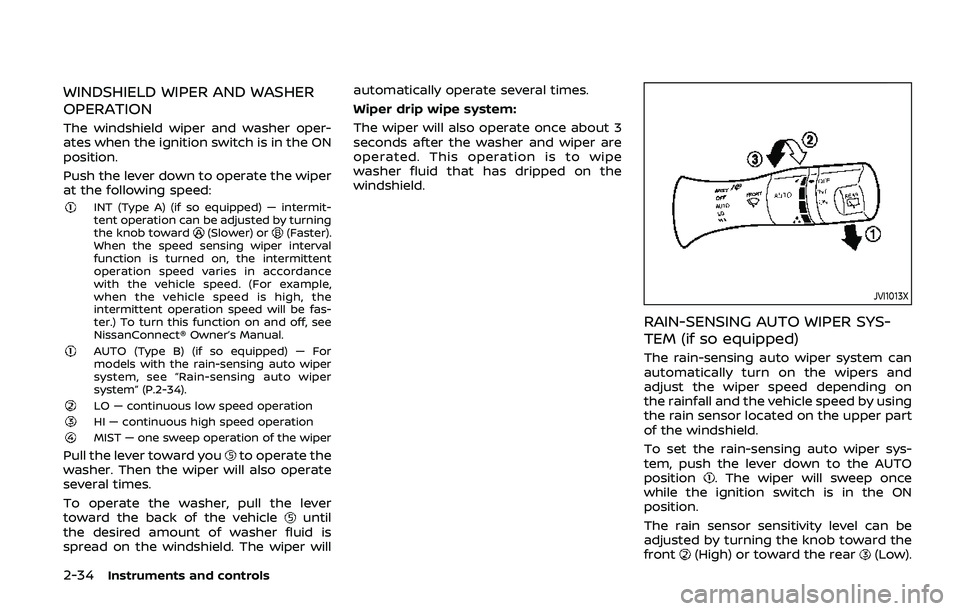
at the following speed:
INT (Type A) (if so equipped) — intermit-
tent operation can be adjusted by turning
the knob toward
(Slower) or(Faster).
When the speed sensing wiper interval
function is turned on, the intermittent
operation speed varies in accordance
with the vehicle speed. (For example,
when the vehicle speed is high, the
intermittent operation speed will be fas-
ter.) To turn this function on and off, see
NissanConnect® Owner’s Manual.
AUTO (Type B) (if so equipped) — For
models with the rain-sensing auto wiper
system, see “Rain-sensing auto wiper
system” (P.2-34).
LO — continuous low speed operationHI — continuous high speed operationMIST — one sweep operation of the wiper
Pull the lever toward youto operate the
washer. Then the wiper will also operate
several times.
To operate the washer, pull the lever
toward the back of the vehicle
until
the desired amount of washer fluid is
spread on the windshield. The wiper will automatically operate several times.
Wiper drip wipe system:
The wiper will also operate once about 3
seconds after the washer and wiper are
operated. This operation is to wipe
washer fluid that has dripped on the
windshield.
JVI1013X
RAIN-SENSING AUTO WIPER SYS-
TEM (if so equipped)
The rain-sensing auto wiper system can
automatically turn on the wipers and
adjust the wiper speed depending on
the rainfall and the vehicle speed by using
the rain sensor located on the upper part
of the windshield.
To set the rain-sensing auto wiper sys-
tem, push the lever down to the AUTO
position
. The wiper will sweep once
while the ignition switch is in the ON
position.
The rain sensor sensitivity level can be
adjusted by turning the knob toward the
front
(High) or toward the rear(Low).
Page 129 of 536
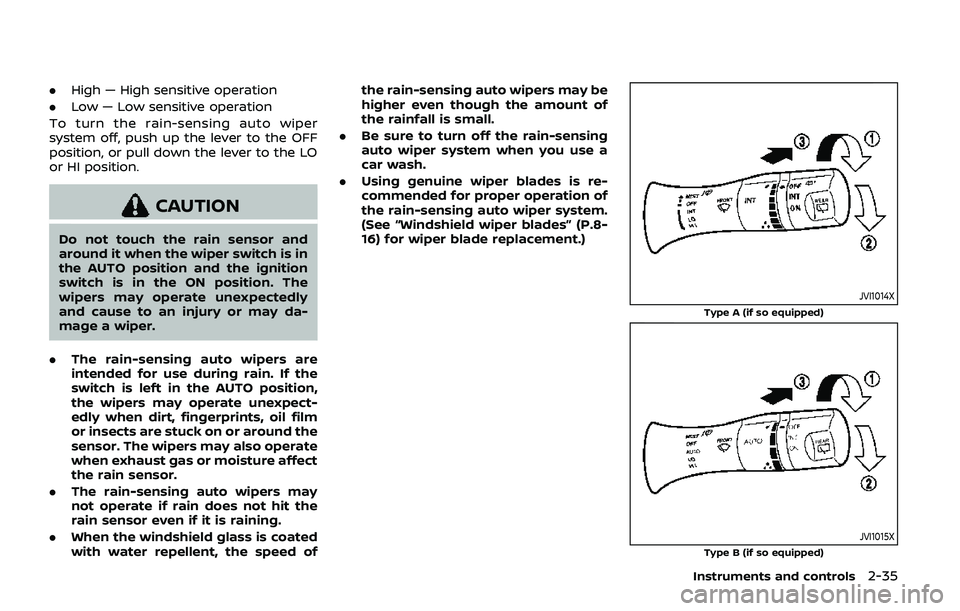
.High — High sensitive operation
. Low — Low sensitive operation
To turn the rain-sensing auto wiper
system off, push up the lever to the OFF
position, or pull down the lever to the LO
or HI position.
CAUTION
Do not touch the rain sensor and
around it when the wiper switch is in
the AUTO position and the ignition
switch is in the ON position. The
wipers may operate unexpectedly
and cause to an injury or may da-
mage a wiper.
. The rain-sensing auto wipers are
intended for use during rain. If the
switch is left in the AUTO position,
the wipers may operate unexpect-
edly when dirt, fingerprints, oil film
or insects are stuck on or around the
sensor. The wipers may also operate
when exhaust gas or moisture affect
the rain sensor.
. The rain-sensing auto wipers may
not operate if rain does not hit the
rain sensor even if it is raining.
. When the windshield glass is coated
with water repellent, the speed of the rain-sensing auto wipers may be
higher even though the amount of
the rainfall is small.
. Be sure to turn off the rain-sensing
auto wiper system when you use a
car wash.
. Using genuine wiper blades is re-
commended for proper operation of
the rain-sensing auto wiper system.
(See “Windshield wiper blades” (P.8-
16) for wiper blade replacement.)
JVI1014X
Type A (if so equipped)
JVI1015XType B (if so equipped)
Instruments and controls2-35
Page 132 of 536
2-38Instruments and controls
SIC3669
Intelligent Auto Headlight system
The Intelligent Auto Headlight system
allows the headlights to be set so they
turn on and off automatically.
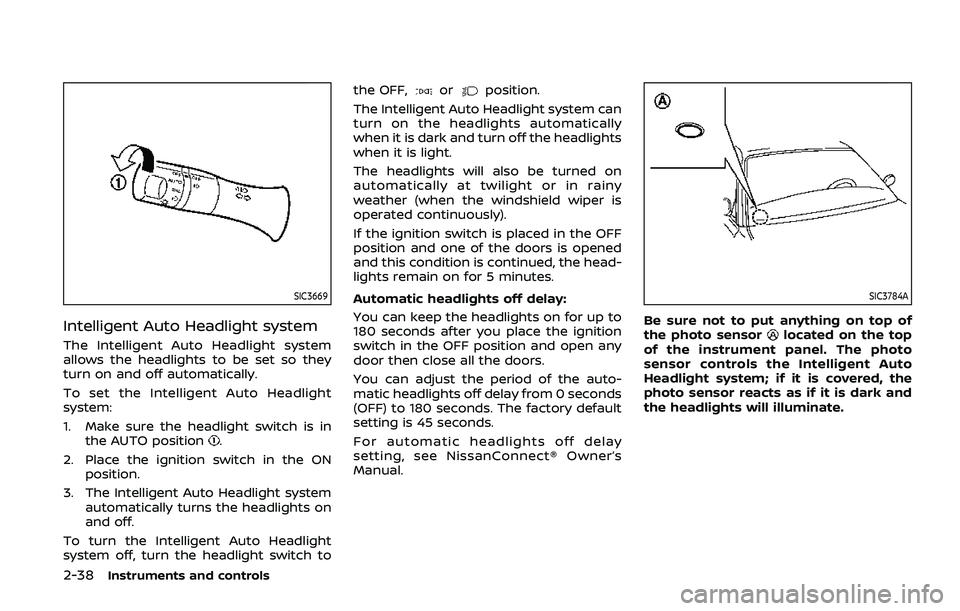
To set the Intelligent Auto Headlight
system:
1. Make sure the headlight switch is inthe AUTO position
.
2. Place the ignition switch in the ON position.
3. The Intelligent Auto Headlight system automatically turns the headlights on
and off.
To turn the Intelligent Auto Headlight
system off, turn the headlight switch to the OFF,
orposition.
The Intelligent Auto Headlight system can
turn on the headlights automatically
when it is dark and turn off the headlights
when it is light.
The headlights will also be turned on
automatically at twilight or in rainy
weather (when the windshield wiper is
operated continuously).
If the ignition switch is placed in the OFF
position and one of the doors is opened
and this condition is continued, the head-
lights remain on for 5 minutes.
Automatic headlights off delay:
You can keep the headlights on for up to
180 seconds after you place the ignition
switch in the OFF position and open any
door then close all the doors.
You can adjust the period of the auto-
matic headlights off delay from 0 seconds
(OFF) to 180 seconds. The factory default
setting is 45 seconds.
For automatic headlights off delay
setting, see NissanConnect® Owner’s
Manual.
SIC3784A
Be sure not to put anything on top of
the photo sensorlocated on the top
of the instrument panel. The photo
sensor controls the Intelligent Auto
Headlight system; if it is covered, the
photo sensor reacts as if it is dark and
the headlights will illuminate.
Page 141 of 536
traveling lane with detectable lane mar-
kers. (See “Lane Departure Warning
(LDW)/Intelligent Lane Intervention (I-LI)”
(P.5-23).)
The BSW system will turn on the side
indicator lights, located next to the out-
side mirrors, if the radar sensors detect a
vehicle in the detection zone. If the turn
signal is activated in the direction of the
detected vehicle, a chime sounds twice
and the side indicator light will flash. (See
“Blind Spot Warning (BSW)” (P.5-33).)
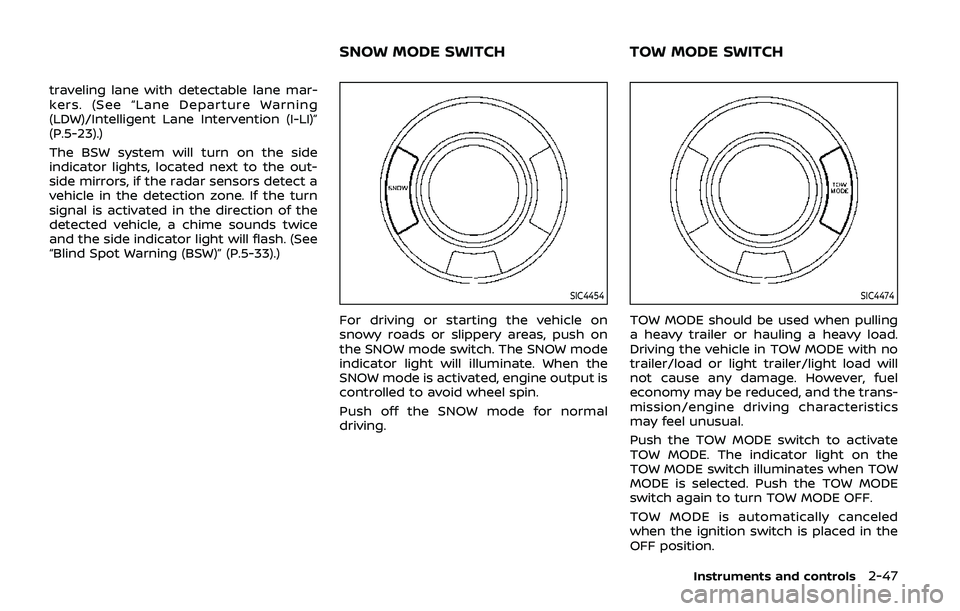
SIC4454
For driving or starting the vehicle on
snowy roads or slippery areas, push on
the SNOW mode switch. The SNOW mode
indicator light will illuminate. When the
SNOW mode is activated, engine output is
controlled to avoid wheel spin.
Push off the SNOW mode for normal
driving.
SIC4474
TOW MODE should be used when pulling
a heavy trailer or hauling a heavy load.
Driving the vehicle in TOW MODE with no
trailer/load or light trailer/light load will
not cause any damage. However, fuel
economy may be reduced, and the trans-
mission/engine driving characteristics
may feel unusual.
Push the TOW MODE switch to activate
TOW MODE. The indicator light on the
TOW MODE switch illuminates when TOW
MODE is selected. Push the TOW MODE
switch again to turn TOW MODE OFF.
TOW MODE is automatically canceled
when the ignition switch is placed in the
OFF position.
Instruments and controls2-47
SNOW MODE SWITCHTOW MODE SWITCH
Page 198 of 536
3-24Pre-driving checks and adjustments
Power open
When the liftgate is fully closed, the
liftgate will fully open automatically by:
.pushing the power liftgate switch
on the instrument panel
. pushing the liftgate opener switch
.pushing the power liftgate buttonon the Intelligent Key for more than 1
second
The hazard flashes 4 times and the out-
side chime sounds when the liftgate
starts opening.
NOTE:
The liftgate can be opened by the
power liftgate switch
, the liftgate
opener switchor the power liftgate
buttoneven if the liftgate is
locked. The liftgate will individually un-
lock and open.
Power close
When the liftgate is fully opened, the
liftgate will fully close automatically by:
. pushing the power liftgate switch
on the instrument panel
. pushing the power liftgate button
on the Intelligent Key for more than 1
second
. pushing the power liftgate switch
on the lower part of the liftgate
The hazard flashes 4 times and the out- side chime sounds when the liftgate
starts closing.
NOTE:
When the liftgate is closed, it remains
unlocked. Manually lock the liftgate.
Reverse function
The power liftgate will reverse immedi-
ately if one of the following actions is
performed during power open or power
close.
.
pushing the power liftgate switch
on the instrument panel
. pushing the power liftgate button
on the Intelligent Key.
. pushing the liftgate switch
on the
lower part of the liftgate
The outside chime sounds when the
liftgate starts to reverse.
Auto reverse function
The auto-reverse function enables the
liftgate to automatically reverse when
something is caught in the liftgate as it
is opening or closing. When the control
unit detects an obstacle, the liftgate will
reverse and return to the full open or full
close position.
If a second obstacle is detected, the
liftgate motion will stop and the drive
motor will disengage. The liftgate will
enter the manual mode. A pinch sensor is mounted on each side
of the liftgate. If an obstacle is detected
by the pinch sensor during power close,
the liftgate will reverse and return to the
full open position immediately.
NOTE:
If the pinch sensor is damaged or
removed, the power close function will
not operate.
WARNING
There is a small distance immedi-
ately before the closed position that
cannot be detected. Make sure that
all passengers keep their hands, etc.,
clear from the liftgate opening be-
fore closing the liftgate.
Manual mode
If power operation is not available, the
liftgate can be operated manually. Power
operation may not be available if multiple
obstacles have been detected in a single
power cycle or if the battery voltage is
low. When the power liftgate main switch
is in the OFF position, the liftgate can be
opened manually by pushing the liftgate
opener switch. If the power liftgate open-
er switch is pushed during power open or
close, the power operation will be can-
Page 206 of 536
3-32Pre-driving checks and adjustments
indicator light will turn off. Push the “I”
switchto turn the system on.
Do not allow any object to cover the
sensors
or apply glass cleaner on
them. Doing so will reduce the sensitiv-
ity of the sensor, resulting in improper
operation.
For the HomeLink® Universal Transceiver
operation, see “HomeLink® Universal
Transceiver (Type A)” (P.2-71).
Intelligent Rear View Mirror (if so
equipped)
WARNING
Failure to follow the warnings and
instructions for proper use of the
Intelligent Rear View Mirror could
result in serious injury or death.
. The Intelligent Rear View Mirror is
a convenience feature but it is not
a substitute for proper vehicle
operation. The system has areas
where objects cannot be viewed.
Check the blind spot of the In-
telligent Rear View Mirror before
vehicle operation. The driver is
always responsible for safe driv-
ing. .
Do not disassemble or modify the
Intelligent Rear View Mirror, the
camera unit or wirings. If you do,
it may result in accidents or fire.
In case you notice smoke or smell
coming from the Intelligent Rear
View Mirror, stop using the sys-
tem immediately. It is recom-
mended that you see a NISSAN
dealer for servicing.
. Do not operate the Intelligent
Rear View Mirror while driving.
Doing so can be a distraction
and it could lose control of your
vehicle and cause an accident or
serious injury.
. Do not gaze into the Intelligent
Rear View Mirror display during
driving. It may cause a distraction
and it could lose control of your
vehicle and cause an accident or
serious injury.
. Do not put a cigarette or flames
to the Intelligent Rear View Mir-
ror, the camera unit or wirings. It
may cause a fire.
. Be sure to adjust the Intelligent
Rear View Mirror before driving.
Switch the system to the conven-
tional rearview mirror mode and
be properly seated on the driver’s seat. Then adjust the mirror so as
to see the rear window properly.
Driving without adjusting the mir-
ror may cause difficulty in watch-
ing the display at Intelligent Rear
View Mirror mode (camera view
mode) due to the reflection from
the surface of the mirror.
. If the Intelligent Rear View Mirror
malfunctions, immediately switch
the system to the conventional
rearview mirror mode.
. When strong light (for example,
sunlight or high beams from fol-
lowing vehicles) enters the cam-
era, a light beam or a glaring light
may appear on the monitor
screen of the Intelligent Rear
View Mirror. In that case, switch
the system to the conventional
rearview mirror mode appropri-
ately.
. If dirt, rain or snow accumulates
on the exterior glass surface cov-
ering the camera, the Intelligent
Rear View Mirror may not display
objects clearly. Use of the rear
window wiper/washer may im-
prove visibility, but if not, switch
the Intelligent Rear View Mirror to
the conventional rearview mirror
mode until a time the glass cov-