steering NISSAN CUBE 2014 3.G User Guide
[x] Cancel search | Manufacturer: NISSAN, Model Year: 2014, Model line: CUBE, Model: NISSAN CUBE 2014 3.GPages: 332, PDF Size: 2.59 MB
Page 89 of 332
2-14Instruments and controls
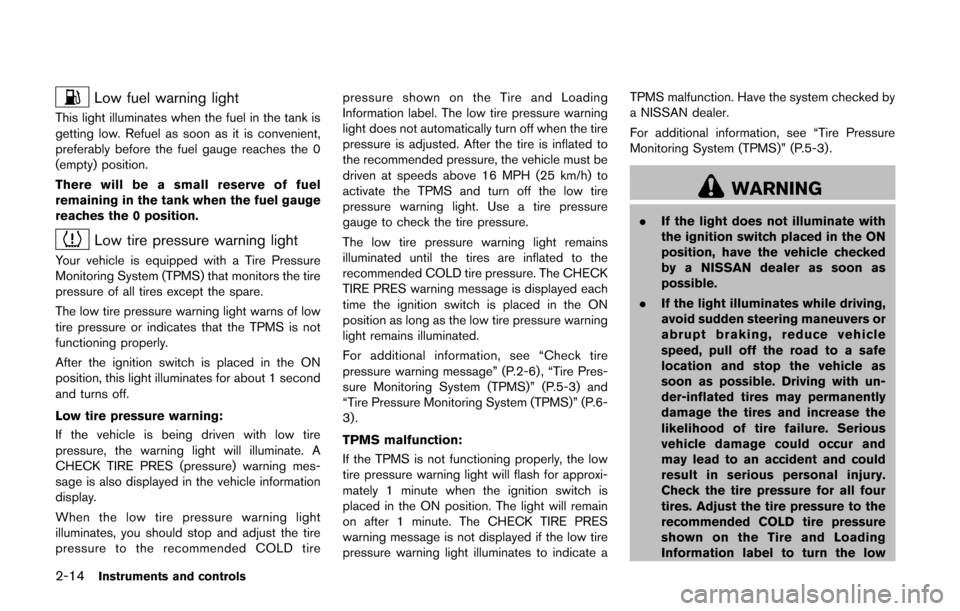
Low fuel warning light
This light illuminates when the fuel in the tank is
getting low. Refuel as soon as it is convenient,
preferably before the fuel gauge reaches the 0
(empty) position.
There will be a small reserve of fuel
remaining in the tank when the fuel gauge
reaches the 0 position.
Low tire pressure warning light
Your vehicle is equipped with a Tire Pressure
Monitoring System (TPMS) that monitors the tire
pressure of all tires except the spare.
The low tire pressure warning light warns of low
tire pressure or indicates that the TPMS is not
functioning properly.
After the ignition switch is placed in the ON
position, this light illuminates for about 1 second
and turns off.
Low tire pressure warning:
If the vehicle is being driven with low tire
pressure, the warning light will illuminate. A
CHECK TIRE PRES (pressure) warning mes-
sage is also displayed in the vehicle information
display.
When the low tire pressure warning light
illuminates, you should stop and adjust the tire
pressure to the recommended COLD tirepressure shown on the Tire and Loading
Information label. The low tire pressure warning
light does not automatically turn off when the tire
pressure is adjusted. After the tire is inflated to
the recommended pressure, the vehicle must be
driven at speeds above 16 MPH (25 km/h) to
activate the TPMS and turn off the low tire
pressure warning light. Use a tire pressure
gauge to check the tire pressure.
The low tire pressure warning light remains
illuminated until the tires are inflated to the
recommended COLD tire pressure. The CHECK
TIRE PRES warning message is displayed each
time the ignition switch is placed in the ON
position as long as the low tire pressure warning
light remains illuminated.
For additional information, see “Check tire
pressure warning message” (P.2-6) , “Tire Pres-
sure Monitoring System (TPMS)” (P.5-3) and
“Tire Pressure Monitoring System (TPMS)” (P.6-
3) .
TPMS malfunction:
If the TPMS is not functioning properly, the low
tire pressure warning light will flash for approxi-
mately 1 minute when the ignition switch is
placed in the ON position. The light will remain
on after 1 minute. The CHECK TIRE PRES
warning message is not displayed if the low tire
pressure warning light illuminates to indicate aTPMS malfunction. Have the system checked by
a NISSAN dealer.
For additional information, see “Tire Pressure
Monitoring System (TPMS)” (P.5-3) .
WARNING
.
If the light does not illuminate with
the ignition switch placed in the ON
position, have the vehicle checked
by a NISSAN dealer as soon as
possible.
. If the light illuminates while driving,
avoid sudden steering maneuvers or
abrupt braking, reduce vehicle
speed, pull off the road to a safe
location and stop the vehicle as
soon as possible. Driving with un-
der-inflated tires may permanently
damage the tires and increase the
likelihood of tire failure. Serious
vehicle damage could occur and
may lead to an accident and could
result in serious personal injury.
Check the tire pressure for all four
tires. Adjust the tire pressure to the
recommended COLD tire pressure
shown on the Tire and Loading
Information label to turn the low
Page 103 of 332
2-28Instruments and controls
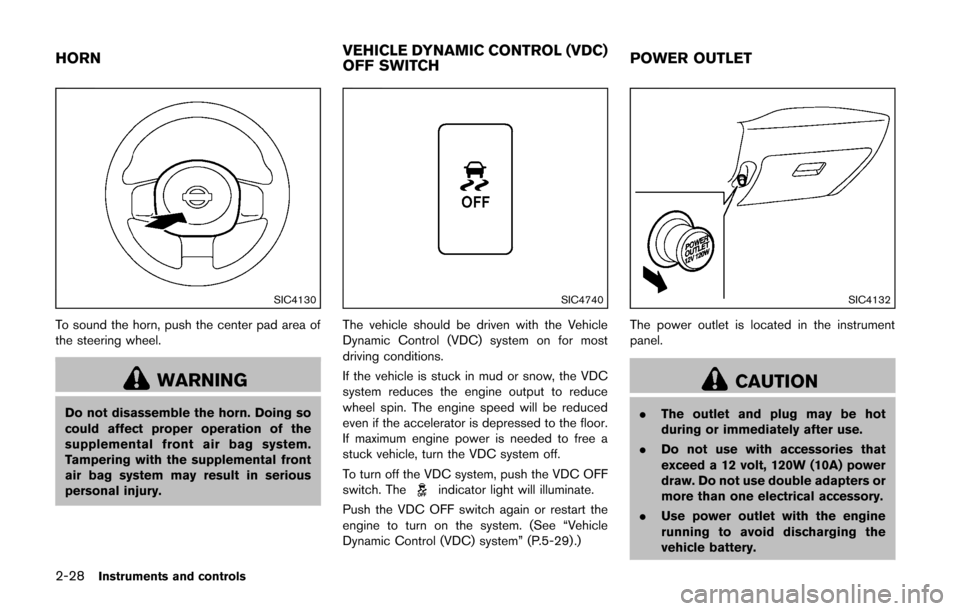
SIC4130
To sound the horn, push the center pad area of
the steering wheel.
WARNING
Do not disassemble the horn. Doing so
could affect proper operation of the
supplemental front air bag system.
Tampering with the supplemental front
air bag system may result in serious
personal injury.
SIC4740
The vehicle should be driven with the Vehicle
Dynamic Control (VDC) system on for most
driving conditions.
If the vehicle is stuck in mud or snow, the VDC
system reduces the engine output to reduce
wheel spin. The engine speed will be reduced
even if the accelerator is depressed to the floor.
If maximum engine power is needed to free a
stuck vehicle, turn the VDC system off.
To turn off the VDC system, push the VDC OFF
switch. The
indicator light will illuminate.
Push the VDC OFF switch again or restart the
engine to turn on the system. (See “Vehicle
Dynamic Control (VDC) system” (P.5-29) .)
SIC4132
The power outlet is located in the instrument
panel.
CAUTION
. The outlet and plug may be hot
during or immediately after use.
. Do not use with accessories that
exceed a 12 volt, 120W (10A) power
draw. Do not use double adapters or
more than one electrical accessory.
. Use power outlet with the engine
running to avoid discharging the
vehicle battery.
HORN VEHICLE DYNAMIC CONTROL (VDC)
OFF SWITCHPOWER OUTLET
Page 114 of 332
3 Pre-driving checks and adjustments
Keys ........................................................................\
...................... 3-2NISSAN Vehicle Immobilizer System keys ................... 3-2
Intelligent Keys (if so equipped) ..................................... 3-3
Doors ........................................................................\
.................... 3-4 Locking with key .................................................................. 3-5
Locking with inside lock knob .......................................... 3-5
Locking with power door lock switch ............................ 3-5
Automatic door locks ......................................................... 3-6
Child safety rear door lock ............................................... 3-6
Remote keyless entry system (if so equipped) ................. 3-7
How to use remote keyless entry system ..................... 3-8
Intelligent Key system (if so equipped) ............................ 3-10 Intelligent Key operating range ..................................... 3-12
Door locks/unlocks precaution .................................... 3-12
Intelligent Key operation ................................................. 3-13
Battery saver system ....................................................... 3-14 Warning lights and audible reminders ...................... 3-14
Troubleshooting guide .................................................. 3-15
How to use remote keyless entry function .............. 3-16
Hood ........................................................................\
................. 3-19
Back door ........................................................................\
........ 3-20
Fuel-filler door ........................................................................\
3-21
Opening the fuel-filler door ......................................... 3-21
Fuel-filler cap .................................................................. 3-21
Tilt steering column .............................................................. 3-23 Tilt operation ................................................................... 3-23
Sun visors ........................................................................\
........ 3-24
Mirrors ........................................................................\
............. 3-24 Inside mirror ..................................................................... 3-24
Outside mirrors ............................................................... 3-25
Vanity mirror ..................................................................... 3-26
Page 136 of 332
CAP warning message after tightening the
fuel cap.
WARNING
Do not adjust the steering wheel while
driving. You could lose control of your
vehicle and cause an accident.
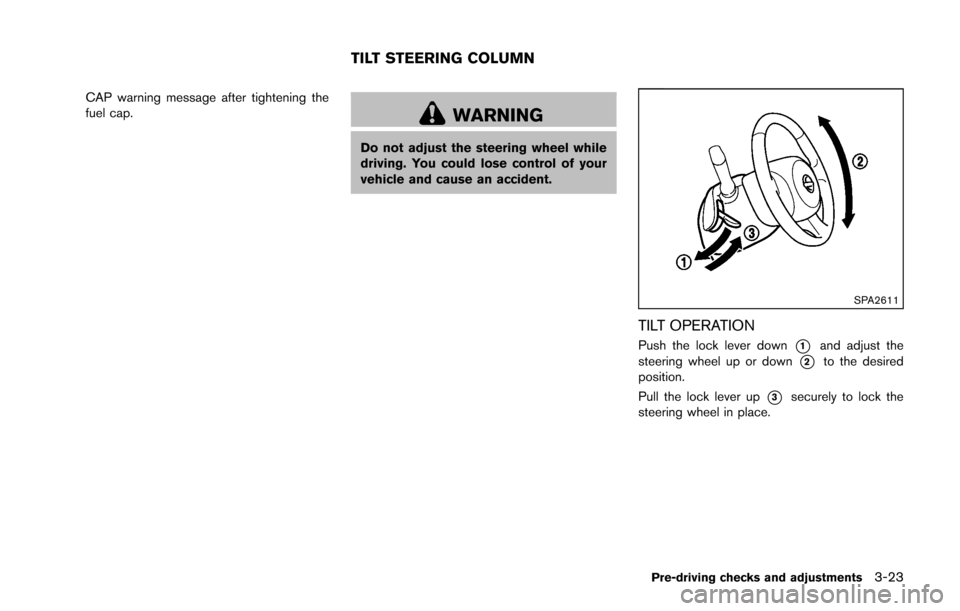
SPA2611
TILT OPERATION
Push the lock lever down*1and adjust the
steering wheel up or down
*2to the desired
position.
Pull the lock lever up
*3securely to lock the
steering wheel in place.
Pre-driving checks and adjustments3-23
TILT STEERING COLUMN
Page 142 of 332
4 Center display, heater, air conditioner, audioand phone systems
Safety note ........................................................................\
.......... 4-2
Control panel buttons — color screen with navigation
system (if so equipped) .......................................................... 4-3
How to use touch screen ................................................. 4-3
How to use the BACK button ......................................... 4-5
How to use brightness control and display
ON/OFF button ................................................................... 4-5
How to use the setup button ........................................... 4-6
RearView monitor (if so equipped) ...................................... 4-9 How to read the displayed lines .................................. 4-10
Difference between predicted and
actual distances ................................................................ 4-10
How to adjust the screen .............................................. 4-13
Operating tips ................................................................... 4-13
Ventilators ........................................................................\
......... 4-13 Center ventilators ............................................................. 4-13
Side ventilators ................................................................. 4-14
Heater and air conditioner ................................................... 4-14 Manual air conditioner ..................................................... 4-15
Automatic air conditioner ............................................... 4-18 Operating tips (for automatic air conditioner) ........ 4-20
In-cabin microfilter ......................................................... 4-20
Servicing air conditioner .............................................. 4-20
Audio system ........................................................................\
.. 4-21 Audio operation precautions ....................................... 4-21
FM-AM radio with Compact Disc (CD) player ....... 4-32
FM-AM-SAT radio with Compact Disc
(CD) player ...................................................................... 4-39
CD/USB memory care and cleaning ........................ 4-47
Steering wheel switch for audio control .................. 4-47
Antenna ........................................................................\
.... 4-48
Car phone or CB radio ........................................................ 4-49
Bluetooth
®Hands-Free Phone System ........................... 4-50
Regulatory information .................................................. 4-51
Using the system ........................................................... 4-52
Control buttons ............................................................... 4-54
Getting started ............................................................... 4-54
List of voice commands ............................................... 4-56
Speaker Adaptation (SA) mode ................................. 4-59
Troubleshooting guide .................................................. 4-62
Page 188 of 332
SAA0451
CD/USB MEMORY CARE AND
CLEANING
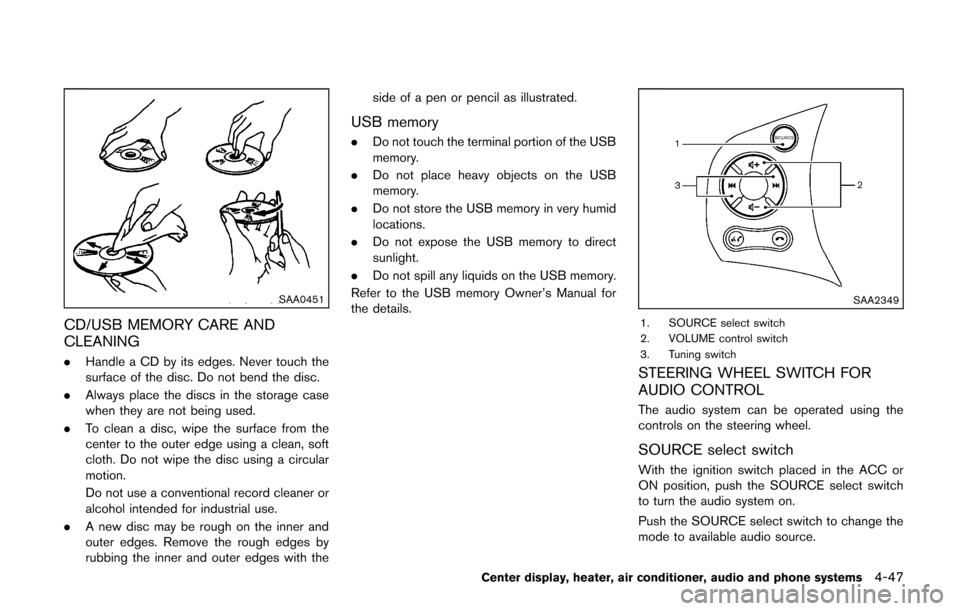
.Handle a CD by its edges. Never touch the
surface of the disc. Do not bend the disc.
. Always place the discs in the storage case
when they are not being used.
. To clean a disc, wipe the surface from the
center to the outer edge using a clean, soft
cloth. Do not wipe the disc using a circular
motion.
Do not use a conventional record cleaner or
alcohol intended for industrial use.
. A new disc may be rough on the inner and
outer edges. Remove the rough edges by
rubbing the inner and outer edges with the side of a pen or pencil as illustrated.
USB memory
.
Do not touch the terminal portion of the USB
memory.
. Do not place heavy objects on the USB
memory.
. Do not store the USB memory in very humid
locations.
. Do not expose the USB memory to direct
sunlight.
. Do not spill any liquids on the USB memory.
Refer to the USB memory Owner’s Manual for
the details.
SAA2349
1. SOURCE select switch
2. VOLUME control switch
3. Tuning switch
STEERING WHEEL SWITCH FOR
AUDIO CONTROL
The audio system can be operated using the
controls on the steering wheel.
SOURCE select switch
With the ignition switch placed in the ACC or
ON position, push the SOURCE select switch
to turn the audio system on.
Push the SOURCE select switch to change the
mode to available audio source.
Center display, heater, air conditioner, audio and phone systems4-47
Page 193 of 332
4-52Center display, heater, air conditioner, audio and phone systems
USING THE SYSTEM
The NISSAN Voice Recognition system allows
hands-free operation of the Bluetooth®Hands-
Free Phone System.
If the vehicle is in motion, some commands may
not be available so full attention may be given to
vehicle operation.
Initialization
When the ignition switch is pushed to the ON
position, NISSAN Voice Recognition is initia-
lized, which takes a few seconds. If the
button is pushed before the initialization com-
pletes, the system will not accept any command.
Operating tips
To get the best performance out of the NISSAN
Voice Recognition system, observe the follow-
ing:
. Keep the interior of the vehicle as quiet as
possible. Close the windows to eliminate
surrounding noises (traffic noises, vibration
sounds, etc.), which may prevent the system
from recognizing voice commands correctly.
. Wait until the tone sounds before speaking a
command. Otherwise, the command will not
be received properly.
. Start speaking a command within 5 seconds
after the tone sounds. .
Speak in a natural voice without pausing
between words.
Giving voice command
To operate NISSAN Voice Recognition, push
and release thebutton located on the
steering wheel. After the tone sounds, speak a
command.
The command given is picked up by the
microphone, and voice feedback is given when
the command is accepted.
. If you need to hear the available commands
for the current menu again, say “Help” and
the system will repeat them.
. If a command is not recognized, the system
announces, “Command not recognized.
Please say again.” Repeat the command in
a clear voice.
. If you want to go back to the previous
command, you can say “Go back” or
“Correction” anytime the system is waiting
for a response.
. You can cancel a command when the
system is waiting for a response by saying,
“Cancel” or “Quit.” The system announces
“Cancel” and ends the VR session. You can
also push and hold the
button for 5
seconds on the steering wheel at any time to
cancel the VR session. Whenever the VR session is cancelled, a double beep is
played to indicate you have exited the
system.
. If you want to adjust the volume of the voice
feedback, push the volume control switch (+
or−) on the steering wheel while being
provided with feedback. You can also use
the radio volume control knob.
. In most cases you can interrupt the voice
feedback to speak the next command by
pressing the
button on the steering
wheel.
. To use the system faster, you may speak the
second level commands with the main menu
command on the main menu. For example,
press the
button and after the tone say,
“Call Redial.” Note: The combined com-
mand of Call and (Speak Name) cannot be
used.
How to say numbers
NISSAN Voice Recognition requires a certain
way to speak numbers in voice commands.
Refer to the rules and examples below.
. Either “zero” or “oh” can be used for “0”.
Example: 1-800-662-6200
— “One eight oh oh six six two six two oh
oh”, or
Page 195 of 332
4-54Center display, heater, air conditioner, audio and phone systems
SAA2351
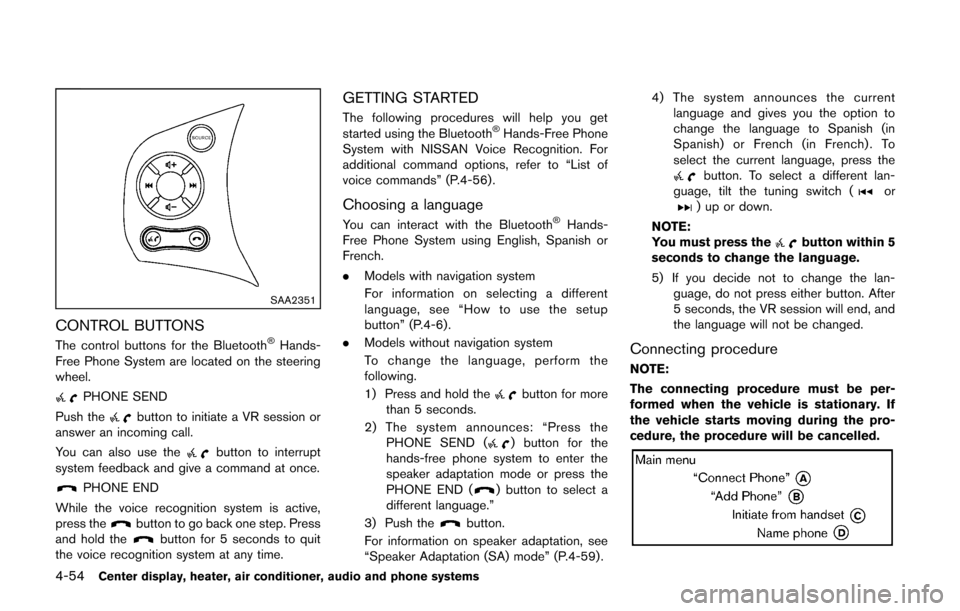
CONTROL BUTTONS
The control buttons for the Bluetooth®Hands-
Free Phone System are located on the steering
wheel.
PHONE SEND
Push the
button to initiate a VR session or
answer an incoming call.
You can also use the
button to interrupt
system feedback and give a command at once.
PHONE END
While the voice recognition system is active,
press the
button to go back one step. Press
and hold thebutton for 5 seconds to quit
the voice recognition system at any time.
GETTING STARTED
The following procedures will help you get
started using the Bluetooth®Hands-Free Phone
System with NISSAN Voice Recognition. For
additional command options, refer to “List of
voice commands” (P.4-56) .
Choosing a language
You can interact with the Bluetooth®Hands-
Free Phone System using English, Spanish or
French.
. Models with navigation system
For information on selecting a different
language, see “How to use the setup
button” (P.4-6).
. Models without navigation system
To change the language, perform the
following.
1) Press and hold the
button for more
than 5 seconds.
2) The system announces: “Press the PHONE SEND (
) button for the
hands-free phone system to enter the
speaker adaptation mode or press the
PHONE END (
) button to select a
different language.”
3) Push the
button.
For information on speaker adaptation, see
“Speaker Adaptation (SA) mode” (P.4-59) . 4) The system announces the current
language and gives you the option to
change the language to Spanish (in
Spanish) or French (in French) . To
select the current language, press the
button. To select a different lan-
guage, tilt the tuning switch (or) up or down.
NOTE:
You must press the
button within 5
seconds to change the language.
5) If you decide not to change the lan- guage, do not press either button. After
5 seconds, the VR session will end, and
the language will not be changed.
Connecting procedure
NOTE:
The connecting procedure must be per-
formed when the vehicle is stationary. If
the vehicle starts moving during the pro-
cedure, the procedure will be cancelled.
Page 196 of 332
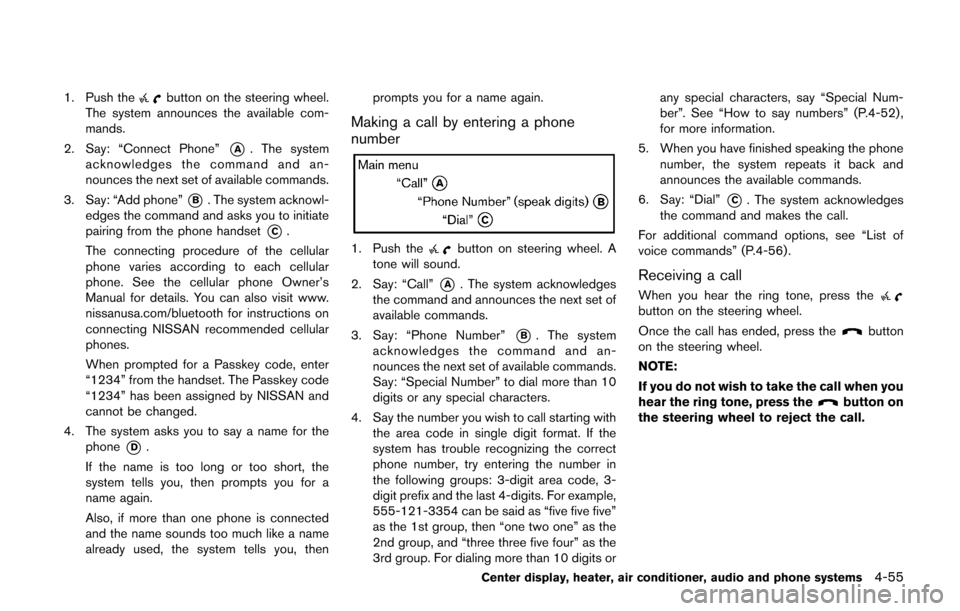
1. Push thebutton on the steering wheel.
The system announces the available com-
mands.
2. Say: “Connect Phone”
*A. The system
acknowledges the command and an-
nounces the next set of available commands.
3. Say: “Add phone”
*B. The system acknowl-
edges the command and asks you to initiate
pairing from the phone handset
*C.
The connecting procedure of the cellular
phone varies according to each cellular
phone. See the cellular phone Owner’s
Manual for details. You can also visit www.
nissanusa.com/bluetooth for instructions on
connecting NISSAN recommended cellular
phones.
When prompted for a Passkey code, enter
“1234” from the handset. The Passkey code
“1234” has been assigned by NISSAN and
cannot be changed.
4. The system asks you to say a name for the phone
*D.
If the name is too long or too short, the
system tells you, then prompts you for a
name again.
Also, if more than one phone is connected
and the name sounds too much like a name
already used, the system tells you, then prompts you for a name again.
Making a call by entering a phone
number
1. Push thebutton on steering wheel. A
tone will sound.
2. Say: “Call”
*A. The system acknowledges
the command and announces the next set of
available commands.
3. Say: “Phone Number”
*B. The system
acknowledges the command and an-
nounces the next set of available commands.
Say: “Special Number” to dial more than 10
digits or any special characters.
4. Say the number you wish to call starting with the area code in single digit format. If the
system has trouble recognizing the correct
phone number, try entering the number in
the following groups: 3-digit area code, 3-
digit prefix and the last 4-digits. For example,
555-121-3354 can be said as “five five five”
as the 1st group, then “one two one” as the
2nd group, and “three three five four” as the
3rd group. For dialing more than 10 digits or any special characters, say “Special Num-
ber”. See “How to say numbers” (P.4-52) ,
for more information.
5. When you have finished speaking the phone number, the system repeats it back and
announces the available commands.
6. Say: “Dial”
*C. The system acknowledges
the command and makes the call.
For additional command options, see “List of
voice commands” (P.4-56) .
Receiving a call
When you hear the ring tone, press thebutton on the steering wheel.
Once the call has ended, press the
button
on the steering wheel.
NOTE:
If you do not wish to take the call when you
hear the ring tone, press the
button on
the steering wheel to reject the call.
Center display, heater, air conditioner, audio and phone systems4-55
Page 197 of 332
4-56Center display, heater, air conditioner, audio and phone systems
LIST OF VOICE COMMANDS
When you push and release thebutton on
the steering wheel, you can choose from the
commands on the Main Menu. The following
pages describe these commands and the
commands in each sub-menu.
Remember to wait for the tone before
speaking.
You can say “Help” to hear the list of commands
currently available anytime the system is waiting
for a response.
A menu item can also be selected by scrolling
the display with the SEEK switch and entering
by pushing the
button.
If you want to end an action without completing
it, you can say “Cancel” or “Quit” at anytime the
system is waiting for a response. The system will
end the VR session. Whenever the VR session
is cancelled, a double beep is played to indicate
you have exited the system.
If you want to go back to the previous command,
you can say “Go back” or “Correction” anytime the system is waiting for a response.
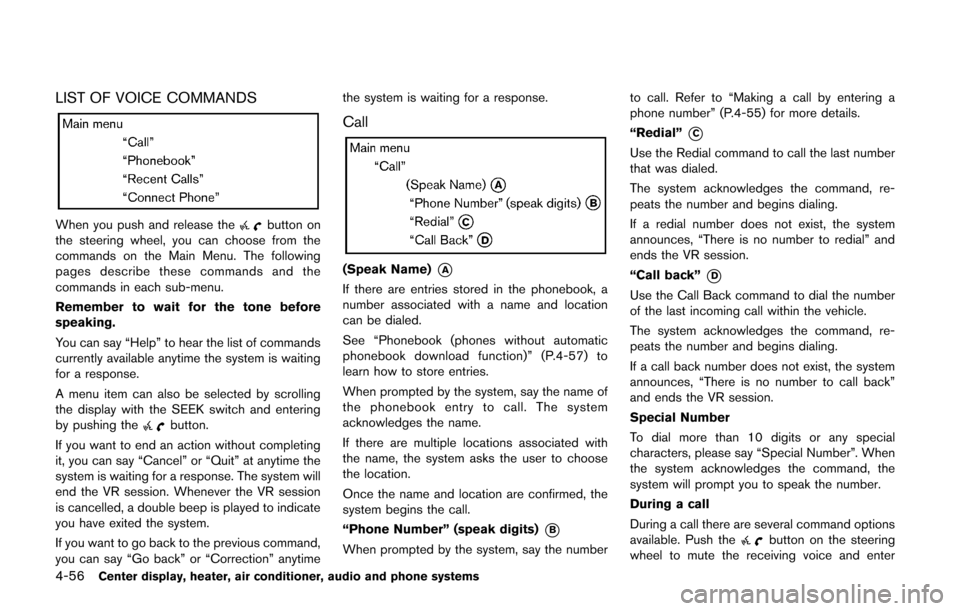
Call
(Speak Name)*A
If there are entries stored in the phonebook, a
number associated with a name and location
can be dialed.
See “Phonebook (phones without automatic
phonebook download function)” (P.4-57) to
learn how to store entries.
When prompted by the system, say the name of
the phonebook entry to call. The system
acknowledges the name.
If there are multiple locations associated with
the name, the system asks the user to choose
the location.
Once the name and location are confirmed, the
system begins the call.
“Phone Number” (speak digits)
*B
When prompted by the system, say the number
to call. Refer to “Making a call by entering a
phone number” (P.4-55) for more details.
“Redial”
*C
Use the Redial command to call the last number
that was dialed.
The system acknowledges the command, re-
peats the number and begins dialing.
If a redial number does not exist, the system
announces, “There is no number to redial” and
ends the VR session.
“Call back”
*D
Use the Call Back command to dial the number
of the last incoming call within the vehicle.
The system acknowledges the command, re-
peats the number and begins dialing.
If a call back number does not exist, the system
announces, “There is no number to call back”
and ends the VR session.
Special Number
To dial more than 10 digits or any special
characters, please say “Special Number”. When
the system acknowledges the command, the
system will prompt you to speak the number.
During a call
During a call there are several command options
available. Push the
button on the steering
wheel to mute the receiving voice and enter