tow NISSAN FRONTIER 1997 D22 / 1.G Owners Manual
[x] Cancel search | Manufacturer: NISSAN, Model Year: 1997, Model line: FRONTIER, Model: NISSAN FRONTIER 1997 D22 / 1.GPages: 204, PDF Size: 1.45 MB
Page 14 of 204
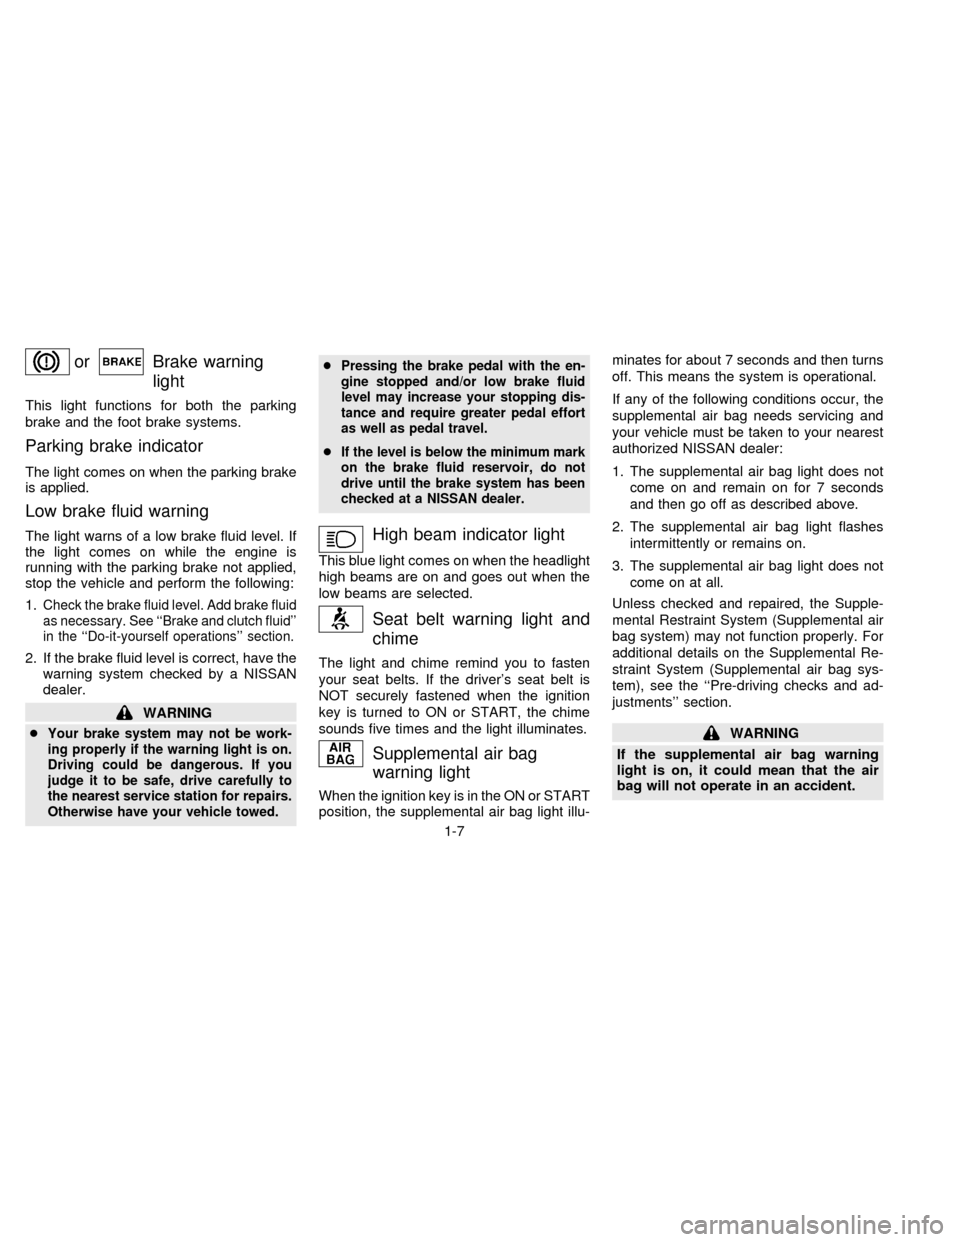
orBrake warning
light
This light functions for both the parking
brake and the foot brake systems.
Parking brake indicator
The light comes on when the parking brake
is applied.
Low brake fluid warning
The light warns of a low brake fluid level. If
the light comes on while the engine is
running with the parking brake not applied,
stop the vehicle and perform the following:
1.
Check the brake fluid level. Add brake fluid
as necessary. See ``Brake and clutch fluid''
in the ``Do-it-yourself operations'' section.
2. If the brake fluid level is correct, have the
warning system checked by a NISSAN
dealer.
WARNING
c
Your brake system may not be work-
ing properly if the warning light is on.
Driving could be dangerous. If you
judge it to be safe, drive carefully to
the nearest service station for repairs.
Otherwise have your vehicle towed.c
Pressing the brake pedal with the en-
gine stopped and/or low brake fluid
level may increase your stopping dis-
tance and require greater pedal effort
as well as pedal travel.
cIf the level is below the minimum mark
on the brake fluid reservoir, do not
drive until the brake system has been
checked at a NISSAN dealer.
High beam indicator light
This blue light comes on when the headlight
high beams are on and goes out when the
low beams are selected.
Seat belt warning light and
chime
The light and chime remind you to fasten
your seat belts. If the driver's seat belt is
NOT securely fastened when the ignition
key is turned to ON or START, the chime
sounds five times and the light illuminates.
Supplemental air bag
warning light
When the ignition key is in the ON or START
position, the supplemental air bag light illu-minates for about 7 seconds and then turns
off. This means the system is operational.
If any of the following conditions occur, the
supplemental air bag needs servicing and
your vehicle must be taken to your nearest
authorized NISSAN dealer:
1. The supplemental air bag light does not
come on and remain on for 7 seconds
and then go off as described above.
2. The supplemental air bag light flashes
intermittently or remains on.
3. The supplemental air bag light does not
come on at all.
Unless checked and repaired, the Supple-
mental Restraint System (Supplemental air
bag system) may not function properly. For
additional details on the Supplemental Re-
straint System (Supplemental air bag sys-
tem), see the ``Pre-driving checks and ad-
justments'' section.
WARNING
If the supplemental air bag warning
light is on, it could mean that the air
bag will not operate in an accident.
1-7
ZX
Page 16 of 204

orRear anti-lock brake
warning light
If the light comes on while the engine is
running, it may indicate a potential problem
with the rear anti-lock brake system. Have the
system checked by your NISSAN dealer.
If an abnormality occurs in the system, the
rear anti-lock function ceases but the ordi-
nary brakes continue to operate normally.
If the light comes on while you are driving,
contact your NISSAN dealer for repair.
The rear anti-lock brake system may only
be effective when driving in the 2-wheel
drive mode.
When driving in the 4-wheel drive mode, if the
front wheels lock, the rear wheels also lock. If
this happens, the rear anti-lock brake system
may stop functioning, but the ordinary brakes
operate normally. The warning light then
comes on. The above condition is not a mal-
function, and the rear anti-lock brake system
recovers once the engine is turned off and
restarted. The warning light then goes off. For
further description of the rear anti-lock brake
system, refer to ``Rear anti-lock brake system''
in the ``Starting and driving'' section.
Overdrive off indicator light
(if so equipped)
This light comes on when the overdrive
switch is pushed to the OFF position.
Key reminder chime
The chime sounds when the driver's door is
opened and the key is left in the ignition
switch. Take the ignition key when you
leave the vehicle.
Light reminder chime
A chime sounds if the driver's door is opened
with the headlight switch on unless the ignition
key is in the ON position. Turn the headlight
switch off when you leave the vehicle.
Brake pad wear warning
The disc brake pads have audible wear
warnings. When a brake pad requires re-
placement, it makes a high pitched scraping
sound when the vehicle is in motion whether
or not the brake pedal is depressed. Have
the brakes checked as soon as possible if
the warning sound is heard.
orMalfunction indi-
cator light (MIL)
If the malfunction indicator light comes onsteady or blinks while the engine is running,
it may indicate a potential emission control
problem.
The malfunction indicator light will come on
in one of two ways:
cMalfunction indicator light on steady - -
An emission control system malfunction
has been detected. Have the vehicle
inspected by an authorized NISSAN
dealer. You do not need to have your
vehicle towed to the dealer.
cMalfunction indicator light blinking - - An
engine misfire has been detected which
may damage the emission control sys-
tem. To reduce or avoid emission control
system damage:
cdo not drive at speeds above 45 MPH
(72 km/h).
c
avoid hard acceleration or deceleration.
cavoid steep uphill grades.
cif possible, reduce the amount of cargo
being hauled or towed.
The malfunction indicator light may stop
blinking and come on steady.
Have the vehicle inspected by an autho-
rized NISSAN dealer. You do not need to
have your vehicle towed to the dealer.
1-9
ZX
Page 18 of 204
ning lights will remain on until the ignition
switch is turned off.
WARNING
When the daytime running light system
is active, tail lights on your vehicle will
not be on. It is necessary at dusk to
turn on your headlights. Failure to do
so could cause an accident injuring
yourself and others.
Passing signal
Pulling the lever toward you turns on the
headlight high beam.
Turn signal
Move the lever up or down to signal the
turning direction. When the turn is com-
pleted, the turn signal cancels automati-
cally.
Lane change signal
To indicate a lane change, move the lever
up or down to the point where the indicator
light begins to flash, but the lever does not
latch.
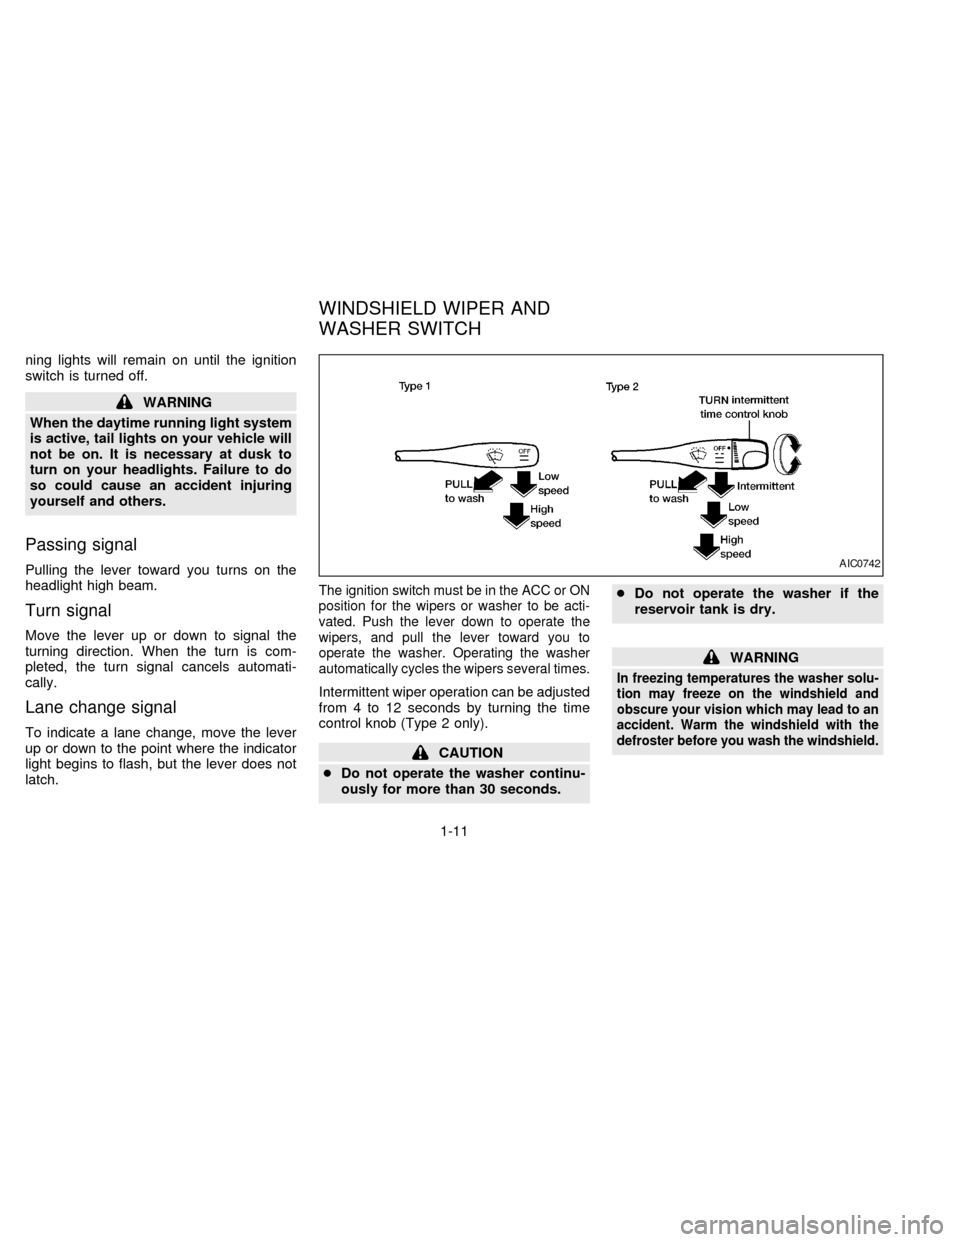
The ignition switch must be in the ACC or ON
position for the wipers or washer to be acti-
vated. Push the lever down to operate the
wipers, and pull the lever toward you to
operate the washer. Operating the washer
automatically cycles the wipers several times.
Intermittent wiper operation can be adjusted
from 4 to 12 seconds by turning the time
control knob (Type 2 only).
CAUTION
cDo not operate the washer continu-
ously for more than 30 seconds.cDo not operate the washer if the
reservoir tank is dry.
WARNING
In freezing temperatures the washer solu-
tion may freeze on the windshield and
obscure your vision which may lead to an
accident. Warm the windshield with the
defroster before you wash the windshield.
AIC0742
WINDSHIELD WIPER AND
WASHER SWITCH
1-11
ZX
Page 29 of 204

A key number plate is supplied with your key.
Record the key number found on the key
number plate and keep it in a safe place
(such as your wallet), NOT IN THE VEHICLE.
If you lose your keys, see your NISSAN
dealer for duplicates by using the key num-
ber. NISSAN does not record key numbers so
it is very important to keep track of your key
number plate.
A key number is only necessary when you
have lost all keys and do not have one to
duplicate from. If you still have a key, this
key can be duplicated by your NISSAN
dealer or locksmith.
Locking doors with key
To lock the door, turn the key towards the
back of the vehicle. To unlock, turn it to-
wards the front.
On power door lock equipped models, lock-
ing the driver's door simultaneously locks
the passenger's door.
Locking doors without key
To lock the doors from the outside without a
key, push the inside lock knob to the lock
position, then close the door.
When locking the door this way, be certain
not to leave the key inside the vehicle.
PD1296IC1309MIC0184
KEY DOOR LOCKS
2-2
ZX
Page 30 of 204
POWER DOOR LOCK
(if so equipped)
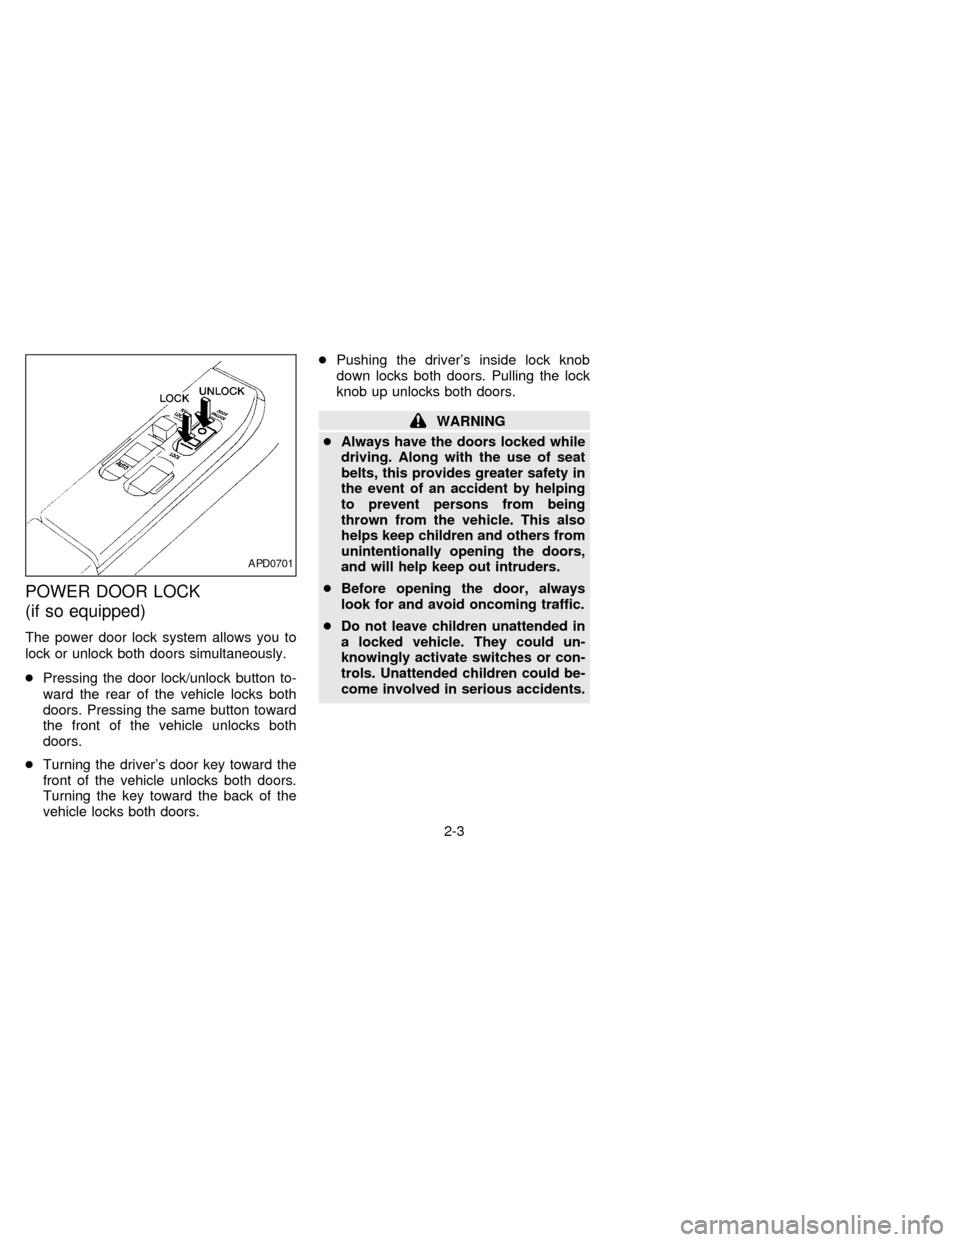
The power door lock system allows you to
lock or unlock both doors simultaneously.
cPressing the door lock/unlock button to-
ward the rear of the vehicle locks both
doors. Pressing the same button toward
the front of the vehicle unlocks both
doors.
cTurning the driver's door key toward the
front of the vehicle unlocks both doors.
Turning the key toward the back of the
vehicle locks both doors.cPushing the driver's inside lock knob
down locks both doors. Pulling the lock
knob up unlocks both doors.
WARNING
cAlways have the doors locked while
driving. Along with the use of seat
belts, this provides greater safety in
the event of an accident by helping
to prevent persons from being
thrown from the vehicle. This also
helps keep children and others from
unintentionally opening the doors,
and will help keep out intruders.
cBefore opening the door, always
look for and avoid oncoming traffic.
cDo not leave children unattended in
a locked vehicle. They could un-
knowingly activate switches or con-
trols. Unattended children could be-
come involved in serious accidents.
APD0701
2-3
ZX
Page 49 of 204

The retractor is designed to lock during
a sudden stop or on impact. A slow
pulling motion permits the belt to move,
and allows you some freedom of move-
ment in the seat.
3. Position the lap belt portionlow on the
hipsas shown.
4. Pull the shoulder belt portion toward the
retractor to take up extra slack.
The front passenger side seat belt has a
cinching mechanism for child seat installa-
tion. It is referred to as the automatic locking
mode.
When the cinching mechanism is activated
the seat belt cannot be extracted again until
the seat belt tongue is detached from the
buckle and the seat belt is fully retracted.
Refer to ``Child restraints for infants and
small children'' later in this section for more
information.
The automatic locking mode should be
used only for child seat installation. Dur-
ing normal seat belt use by a passenger,
the locking mode should not be acti-
vated. If it is activated it may cause
uncomfortable seat belt tension.
Unfastening the belt
To unfasten the belt, press the button on the
buckle. The seat belt automatically retracts.
Checking seat belt operation
Seat belt retractors are designed to lock belt
movement by two separate methods:
1) When the belt is pulled quickly from the
retractor.
2) When the vehicle slows down rapidly.
To increase your confidence in the belts,
check the operation as follows:
cGrasp the shoulder belt and pull quicklyforward. The retractor should lock and
restrict further belt movement.
If the retractor does not lock during this
check, or if you have any questions about
seat belt operation, see your NISSAN
dealer.
Replacing front seat belt (3-point
type only)
The front passenger seat belt is an energy
absorber type. Replace the belt when the
loop has been pulled out and ``REPLACE
BELT'' is visible. This indicator means the
seat belt has been loaded and must be
replaced.
PD1024M
2-22
ZX
Page 72 of 204
Adjusting tone quality and sound
balance
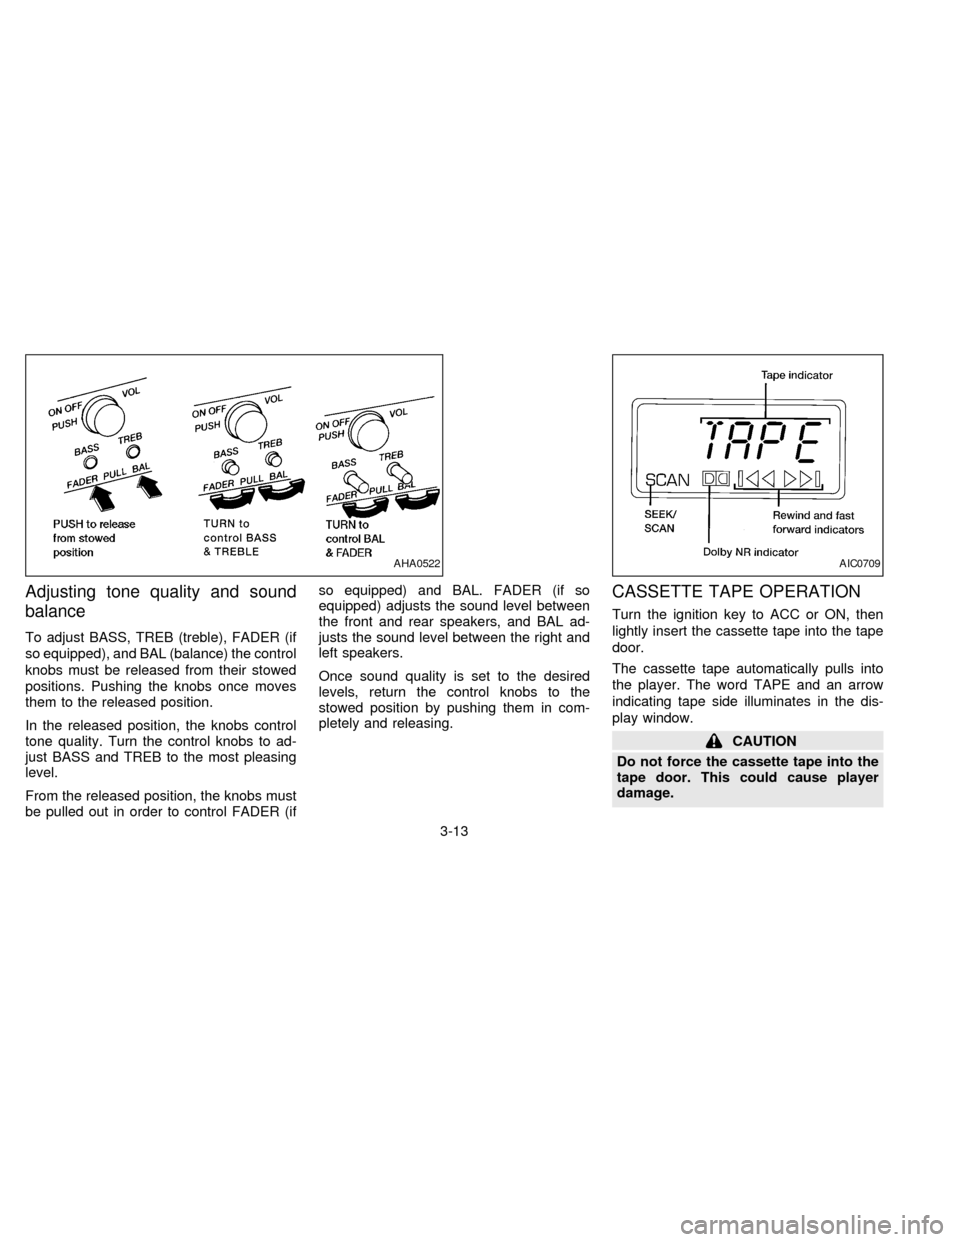
To adjust BASS, TREB (treble), FADER (if
so equipped), and BAL (balance) the control
knobs must be released from their stowed
positions. Pushing the knobs once moves
them to the released position.
In the released position, the knobs control
tone quality. Turn the control knobs to ad-
just BASS and TREB to the most pleasing
level.
From the released position, the knobs must
be pulled out in order to control FADER (ifso equipped) and BAL. FADER (if so
equipped) adjusts the sound level between
the front and rear speakers, and BAL ad-
justs the sound level between the right and
left speakers.
Once sound quality is set to the desired
levels, return the control knobs to the
stowed position by pushing them in com-
pletely and releasing.
CASSETTE TAPE OPERATION
Turn the ignition key to ACC or ON, then
lightly insert the cassette tape into the tape
door.
The cassette tape automatically pulls into
the player. The word TAPE and an arrow
indicating tape side illuminates in the dis-
play window.
CAUTION
Do not force the cassette tape into the
tape door. This could cause player
damage.
AHA0522AIC0709
3-13
ZX
Page 77 of 204

than 2 seconds. For example, in the
diagram ch2 is to be memorized. The
radio mutes when the select button is
pushed.
3. The indicator, ch2, then comes on and
the sound resumes. Memorizing is now
complete.
4. Other buttons can be set in the same
manner.
If the battery cable is disconnected, or if the
fuse blows, the radio memory is cancelled.
In that case, reset the desired stations.
Adjusting tone quality and sound
balance
To adjust BASS, TREB (treble), FADER,
and BAL (balance) the control knobs must
be released from their stowed positions.
Pushing the knobs once moves them to the
released position.
In the released position, the knobs control
tone quality. Turn the control knobs to ad-
just BASS and TREB to the most pleasing
level.
From the released position, the knobs must
be pulled out in order to control FADER andBAL. FADER adjusts the sound level be-
tween the front and rear speakers, and BAL
adjusts the sound level between the right
and left speakers.
Once sound quality is set to the desired
levels, return the control knobs to the
stowed position by pushing them in com-
pletely and releasing.
AHA0705
3-18
ZX
Page 84 of 204
driving if the engine misfires, or if
noticeable loss of performance or
other unusual operating conditions
are detected. Have the vehicle in-
spected promptly by an authorized
NISSAN dealer.
cAvoid driving with an extremely low
fuel level. Running out of fuel could
cause the engine to misfire, damag-
ing the three-way catalyst.
cDo not race the engine while warm-
ing it up.
cDo not push or tow your vehicle to
start the engine.
ON-PAVEMENT AND OFF-ROAD
DRIVING PRECAUTIONS
Utility vehicles have higher ground clear-
ance than passenger cars in order to make
them capable of performing in a wide variety
of off-road applications. Specific design
characteristics give them a higher center of
gravity than ordinary cars. Higher ground
clearance provides a better view of the
road, allowing you to anticipate problems.
Utility vehicles are not designed for corner-
ing at the same speeds as conventional2-wheel drive vehicles any more than low-
slung sports cars are designed to perform
satisfactorily under off-road conditions. If at
all possible, avoid sharp turns or abrupt
maneuvers. As with other vehicles of this
type, failure to operate this vehicle correctly
may result in loss of control or vehicle
rollover.
Avoiding Collision and Rollover
WARNING
Failure to operate this vehicle in a safe
and prudent manner may result in loss
of control or an accident.
Be alert and drive defensively at all times.
Obey all traffic regulations. Avoid excessive
speed, high speed cornering, or sudden
steering maneuvers, because these driving
practices could cause you to lose control of
your vehicle.As with any vehicle, a loss
of control could result in a collision with
other vehicles or objects, or cause the
vehicle to roll over, particularly if the
loss of control causes the vehicle to
slide sideways.Be attentive at all times,
and avoid driving when tired. Never drive
when under the influence of alcohol ordrugs (including prescription or over-the-
counter drugs which may cause drowsi-
ness). Always wear your seat belt as out-
lined in the ``Seat belts'' section of this
manual, and instruct your passengers to do
the same.
4-3
ZX
Page 86 of 204
AUTOMATIC TRANSMISSION
On automatic transmission models, the ig-
nition lock is designed so the key cannot be
turned to LOCK and removed until the shift
lever is moved to the P position.
When removing the key from the ignition,
make sure the shift lever is in the P position.
When the key cannot be turned to the LOCK
position, proceed as follows to remove the
key:
1) Move the shift lever into the P position.2) Turn the ignition key slightly in the ON
direction.
3) Turn the key toward the LOCK position.
4) Remove the key.
The shift lever is designed so it cannot be
moved out of P and into any of the other
gear positions if the ignition key is turned to
OFF or if the key is removed from the
switch.The shift lever can be moved if the
ignition switch is in the ACC position.
The shift lever can also be moved if the
ignition switch is in the ON position and
the foot brake pedal is depressed.
To lock the steering wheel, remove the
key. To unlock the steering wheel, insert
the key and turn it gently while rotating
the steering wheel slightly right and left.
WARNING
Never remove the key while driving. If
the key is removed, the steering wheel
will lock. This may cause the driver to
lose control of the vehicle and could
result in serious vehicle damage or
personal injury.
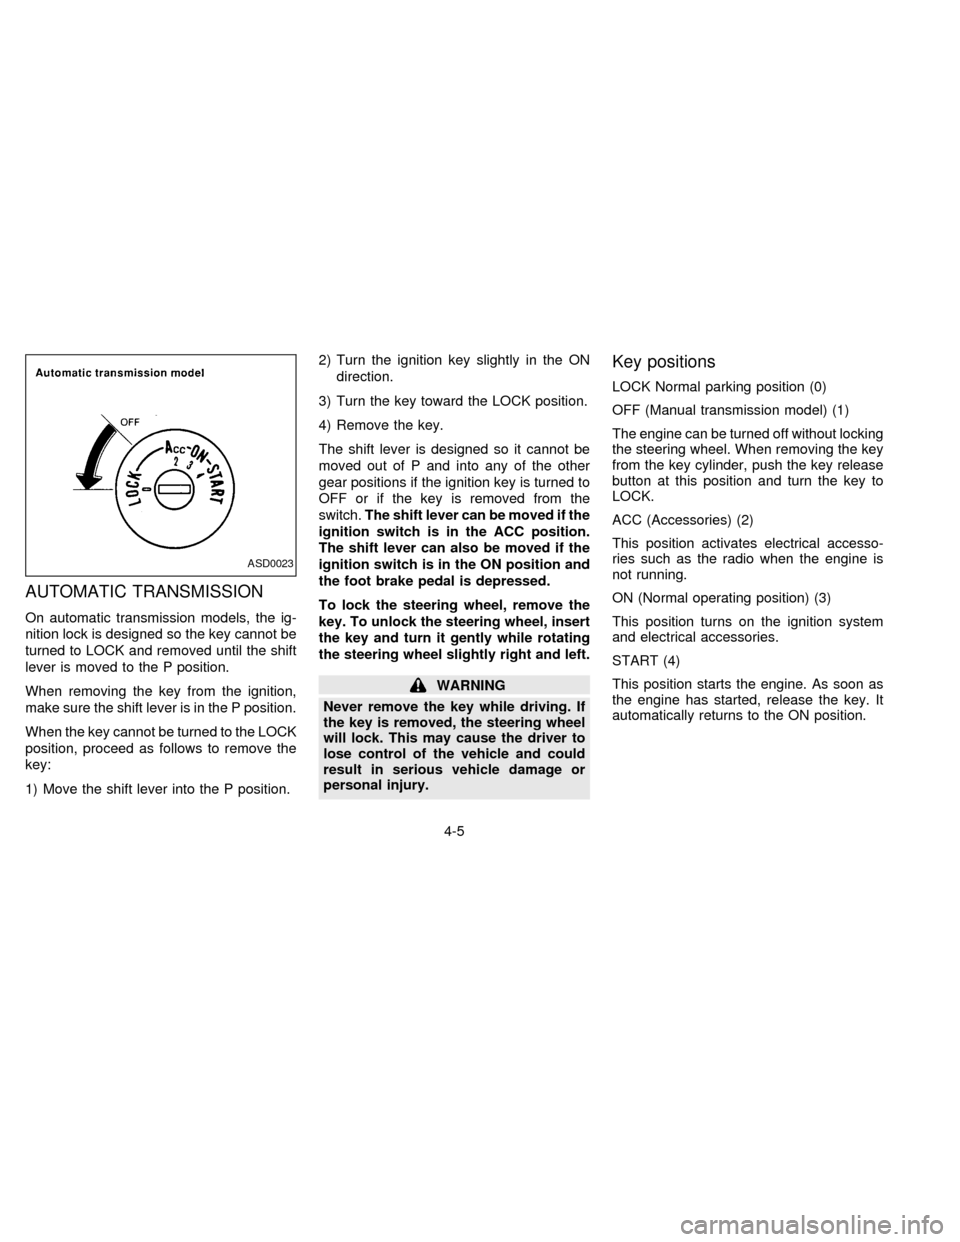
Key positions
LOCK Normal parking position (0)
OFF (Manual transmission model) (1)
The engine can be turned off without locking
the steering wheel. When removing the key
from the key cylinder, push the key release
button at this position and turn the key to
LOCK.
ACC (Accessories) (2)
This position activates electrical accesso-
ries such as the radio when the engine is
not running.
ON (Normal operating position) (3)
This position turns on the ignition system
and electrical accessories.
START (4)
This position starts the engine. As soon as
the engine has started, release the key. It
automatically returns to the ON position.
ASD0023
4-5
ZX