NISSAN FRONTIER 1999 D22 / 1.G Service Manual
Manufacturer: NISSAN, Model Year: 1999, Model line: FRONTIER, Model: NISSAN FRONTIER 1999 D22 / 1.GPages: 247, PDF Size: 1.89 MB
Page 41 of 247
After the child restraint is removed and the
seat belt is fully retracted the automatic
locking mode (child restraint mode) is can-
celed.
TOP STRAP CHILD RESTRAINT
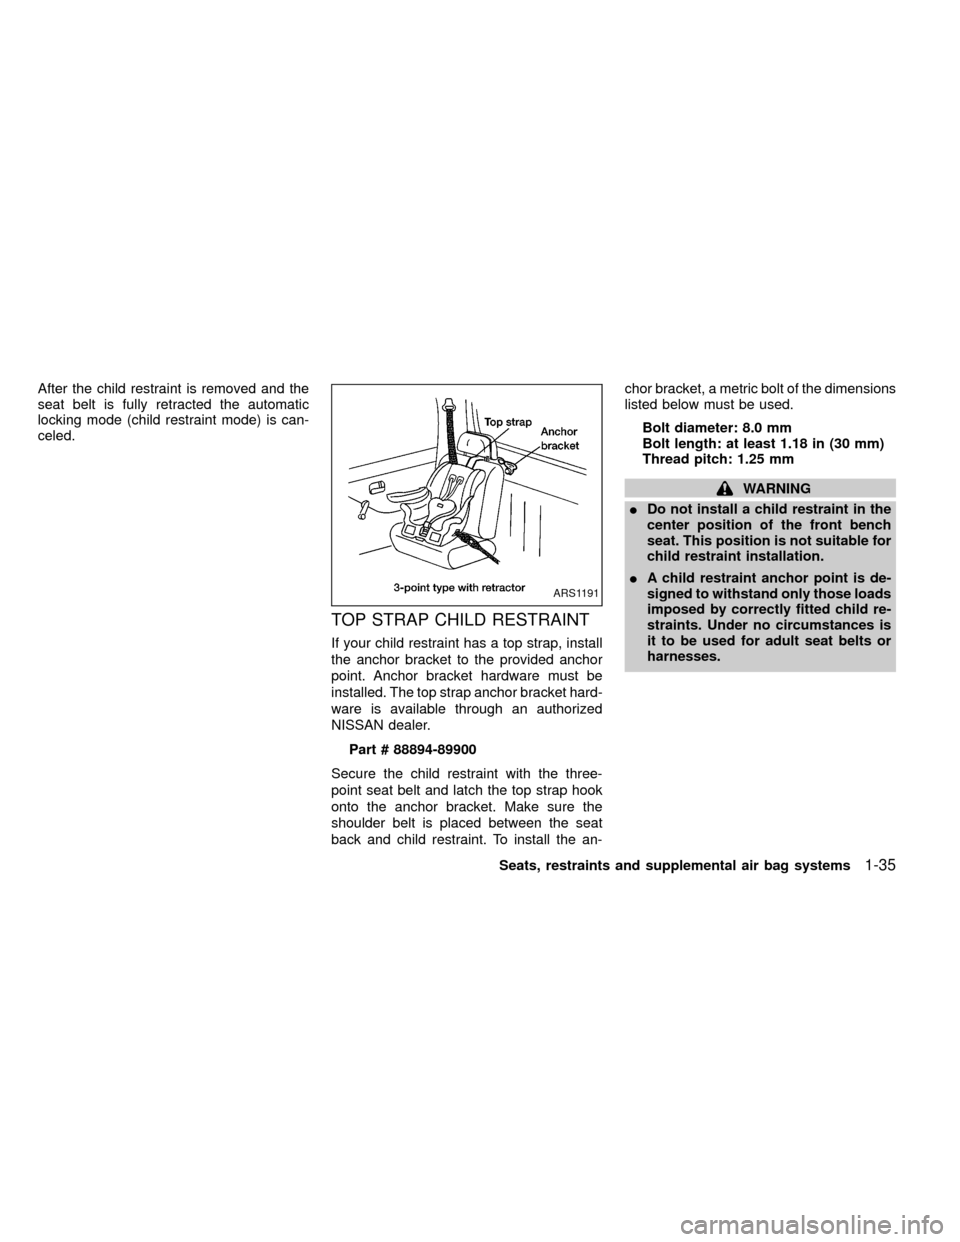
If your child restraint has a top strap, install
the anchor bracket to the provided anchor
point. Anchor bracket hardware must be
installed. The top strap anchor bracket hard-
ware is available through an authorized
NISSAN dealer.
Part # 88894-89900
Secure the child restraint with the three-
point seat belt and latch the top strap hook
onto the anchor bracket. Make sure the
shoulder belt is placed between the seat
back and child restraint. To install the an-chor bracket, a metric bolt of the dimensions
listed below must be used.
Bolt diameter: 8.0 mm
Bolt length: at least 1.18 in (30 mm)
Thread pitch: 1.25 mm
WARNING
IDo not install a child restraint in the
center position of the front bench
seat. This position is not suitable for
child restraint installation.
IA child restraint anchor point is de-
signed to withstand only those loads
imposed by correctly fitted child re-
straints. Under no circumstances is
it to be used for adult seat belts or
harnesses.
ARS1191
Seats, restraints and supplemental air bag systems1-35
ZX
Page 42 of 247
Anchor point location
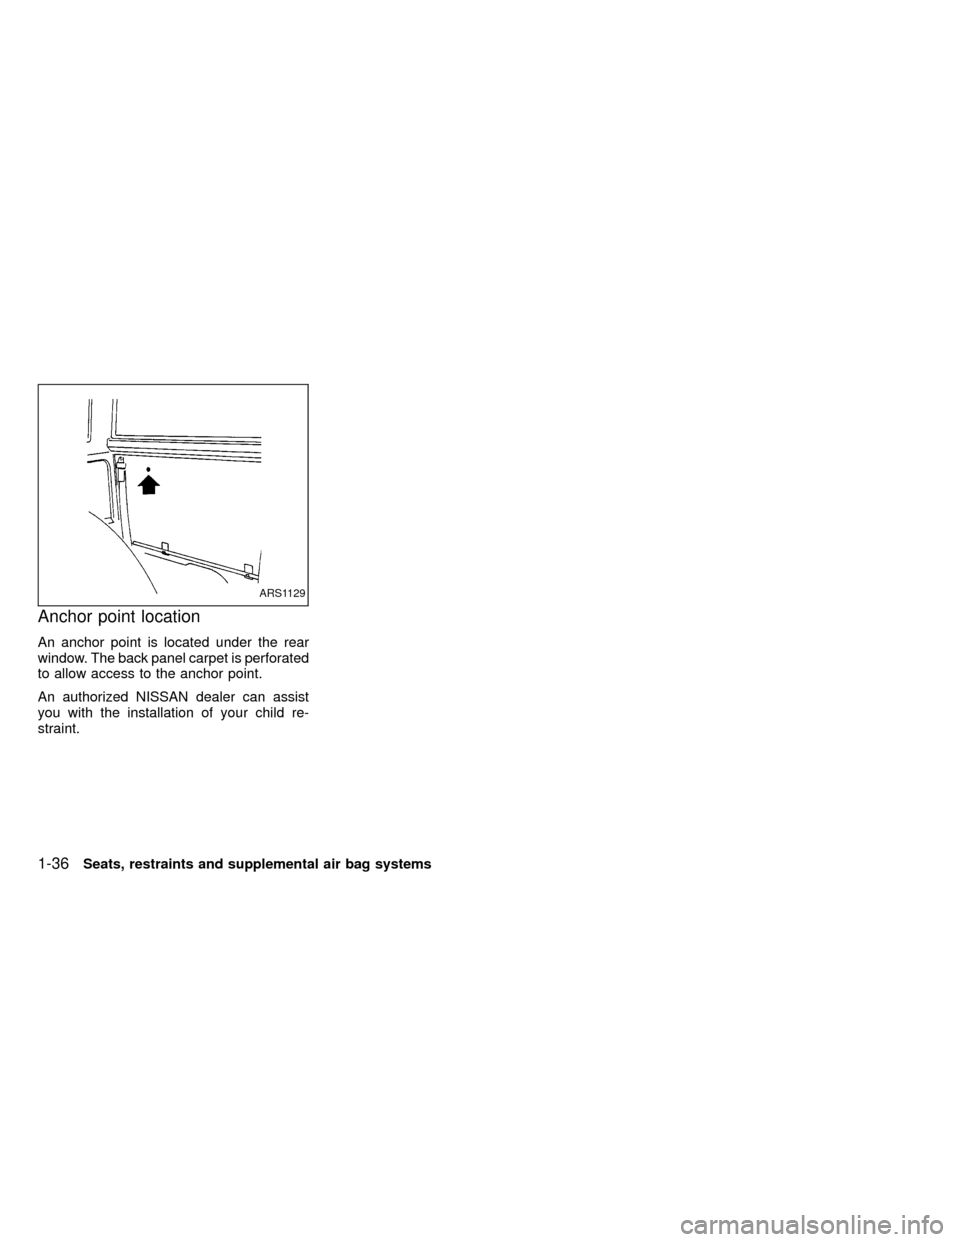
An anchor point is located under the rear
window. The back panel carpet is perforated
to allow access to the anchor point.
An authorized NISSAN dealer can assist
you with the installation of your child re-
straint.
ARS1129
1-36Seats, restraints and supplemental air bag systems
ZX
Page 43 of 247

2 Instruments and controls
Meters and gauges ................................................2-2
Speedometer and odometer ..................................2-3
Tachometer (if so equipped) ..................................2-5
Engine coolant temperature gauge ........................2-5
Fuel gauge .............................................................2-6
Warning/indicator lights and chimes ......................2-7
Theft warning (if so equipped) .............................2-13
Headlight and turn signal switch ..........................2-15
Daytime running light system (Canada only) .......2-15
Front fog light switch (if so equipped)..................2-16
Windshield wiper and washer switch ...................2-17
Instrument brightness control ...............................2-17Hazard warning flasher switch .............................2-18
Cigarette lighter (accessory) and ash tray ...........2-18
Power point (if so equipped) ................................2-19
Cup holder (if so equipped) .................................2-20
Dome light and cargo light ...................................2-21
Map lights (if so equipped)...................................2-21
Manual windows ...................................................2-22
Power windows (if so equipped) ..........................2-22
Automatic power window switch ..........................2-23
Rear sliding window (if so equipped) ...................2-23
Sunroof (if so equipped).......................................2-24
ZX
Page 44 of 247
AIC1082
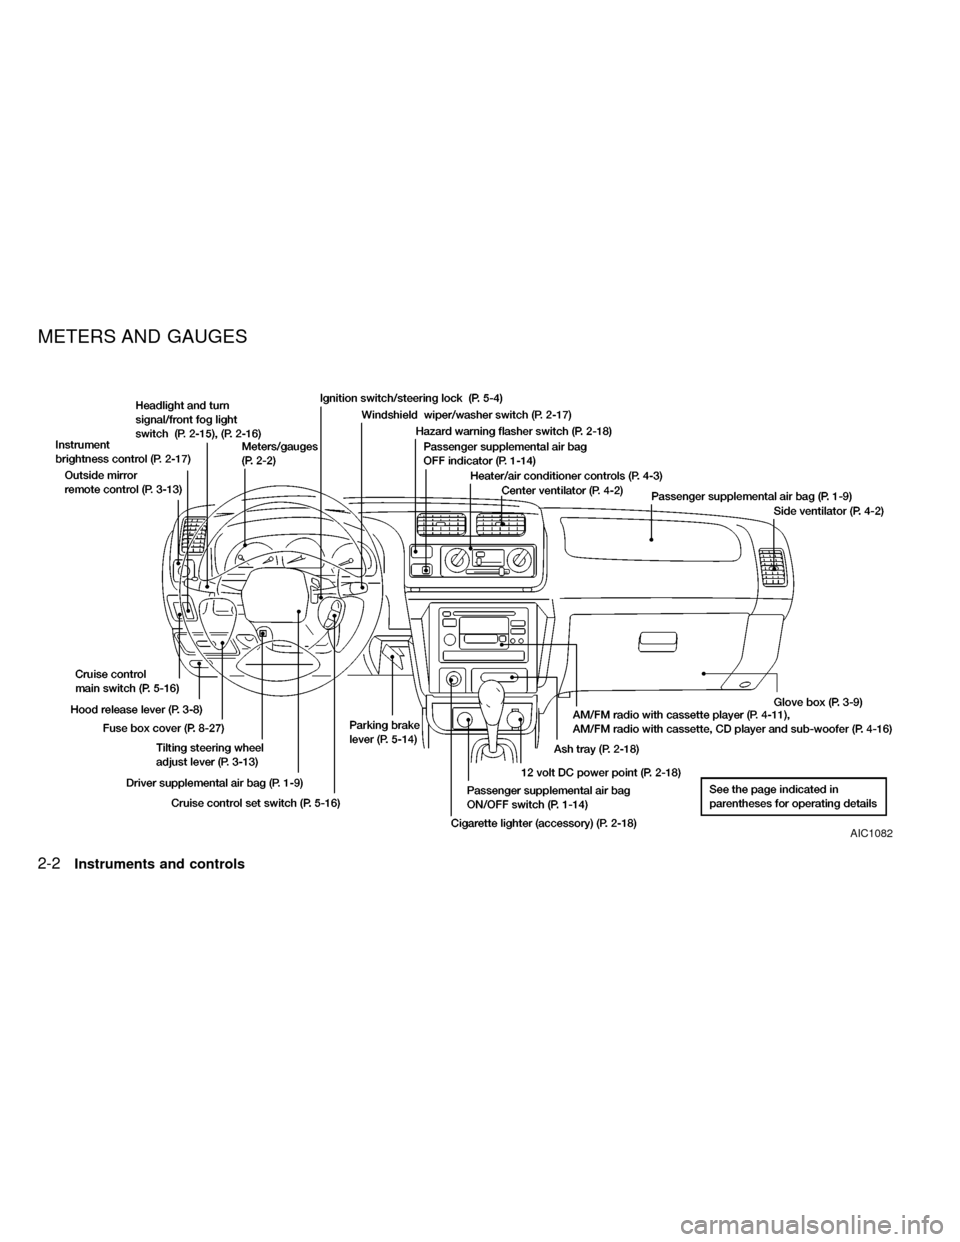
METERS AND GAUGES
2-2Instruments and controls
ZX
Page 45 of 247
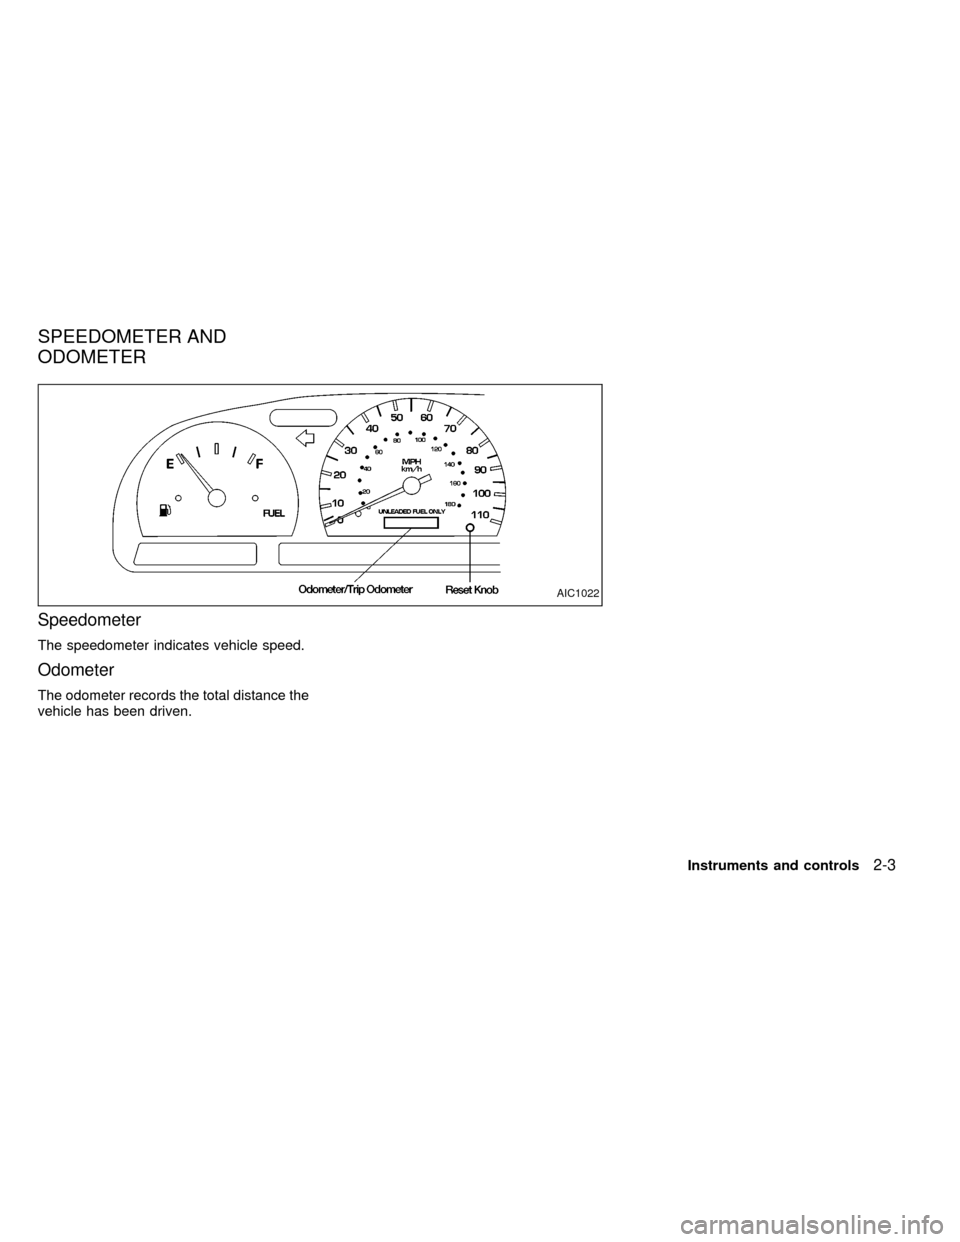
Speedometer
The speedometer indicates vehicle speed.
Odometer
The odometer records the total distance the
vehicle has been driven.
AIC1022
SPEEDOMETER AND
ODOMETER
Instruments and controls2-3
ZX
Page 46 of 247
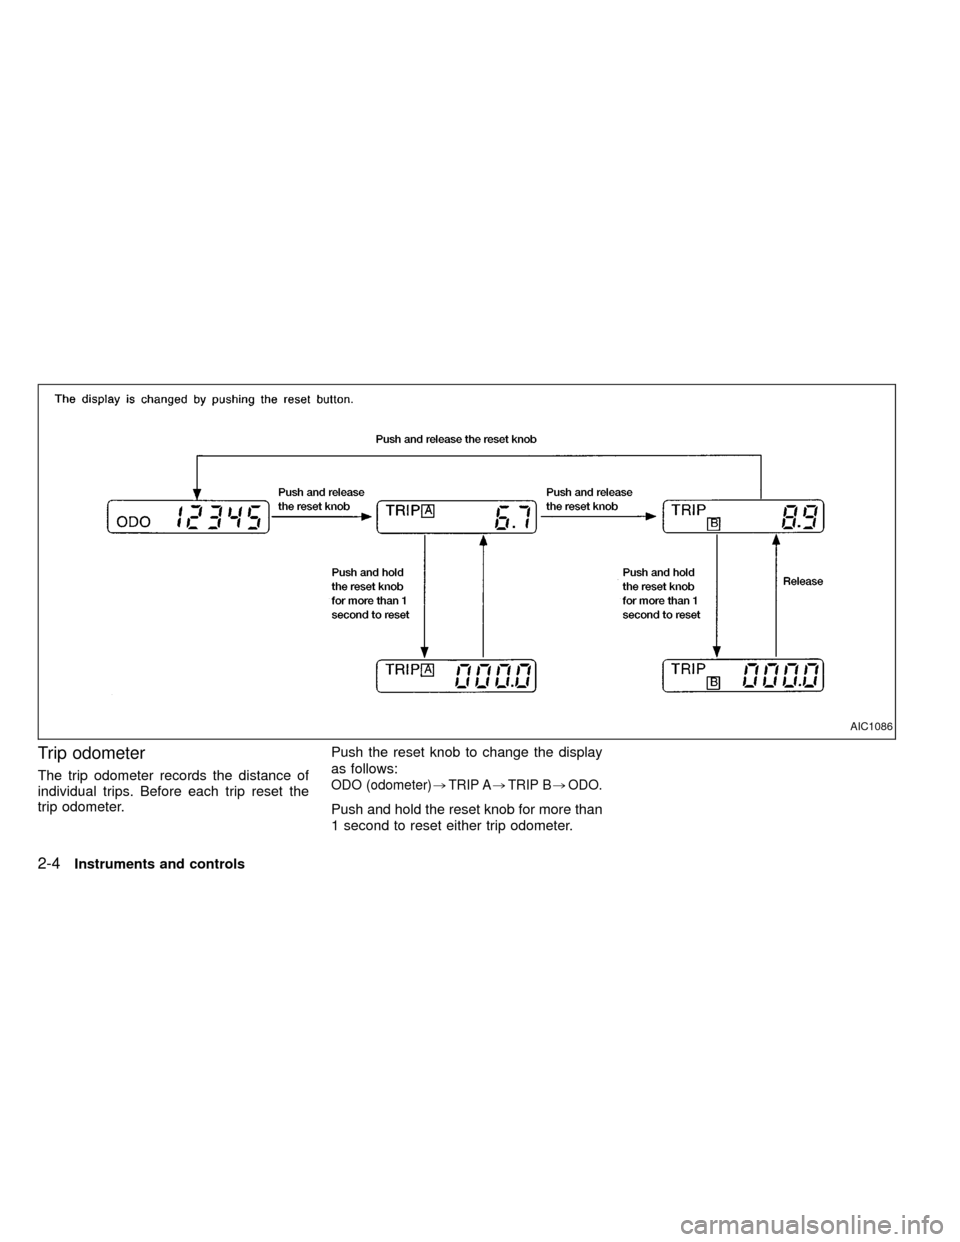
Trip odometer
The trip odometer records the distance of
individual trips. Before each trip reset the
trip odometer.Push the reset knob to change the display
as follows:ODO (odometer),TRIP A,TRIP B,ODO.
Push and hold the reset knob for more than
1 second to reset either trip odometer.
AIC1086
2-4Instruments and controls
ZX
Page 47 of 247
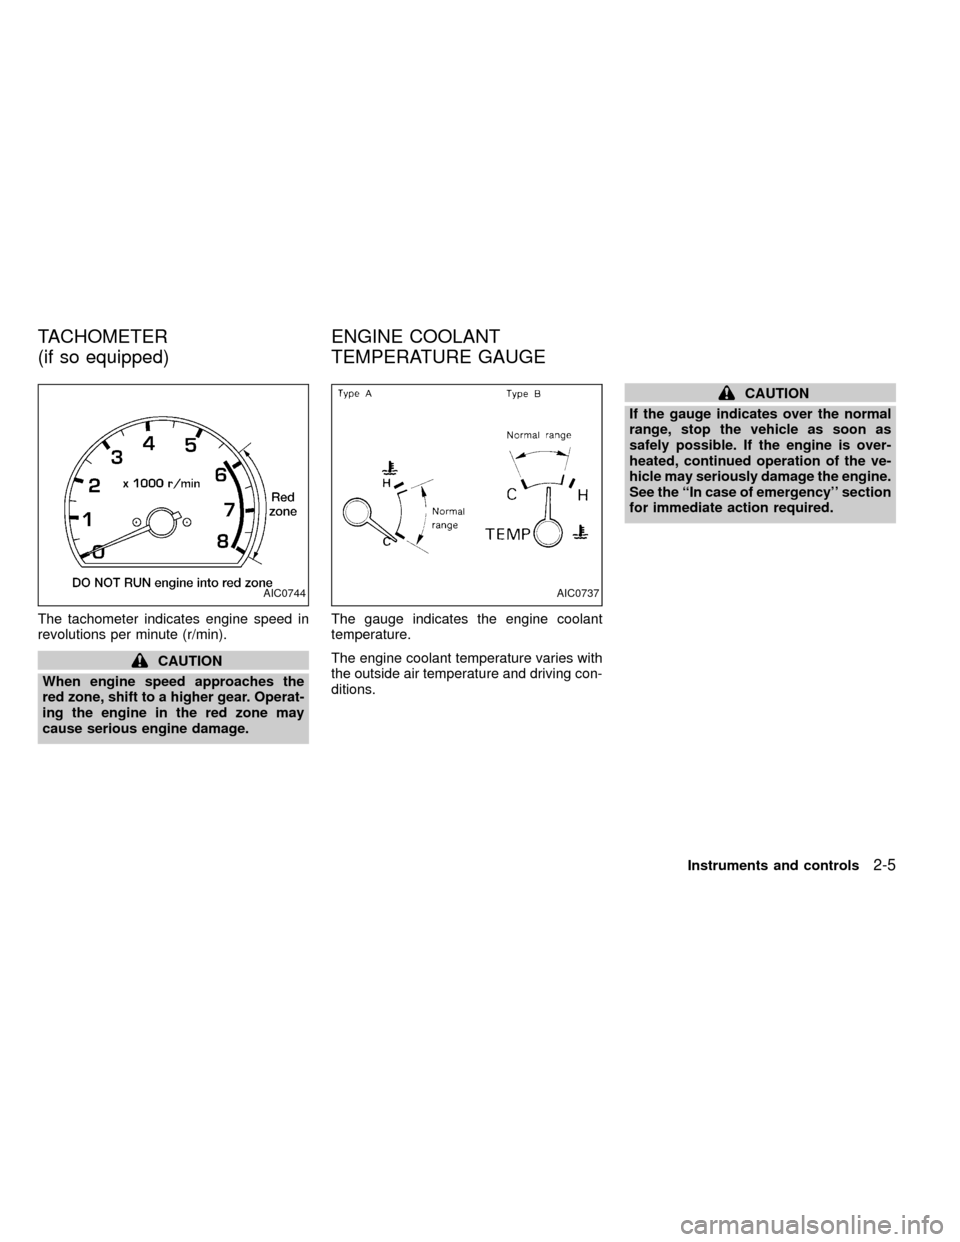
The tachometer indicates engine speed in
revolutions per minute (r/min).
CAUTION
When engine speed approaches the
red zone, shift to a higher gear. Operat-
ing the engine in the red zone may
cause serious engine damage.The gauge indicates the engine coolant
temperature.
The engine coolant temperature varies with
the outside air temperature and driving con-
ditions.
CAUTION
If the gauge indicates over the normal
range, stop the vehicle as soon as
safely possible. If the engine is over-
heated, continued operation of the ve-
hicle may seriously damage the engine.
See the ``In case of emergency'' section
for immediate action required.
AIC0744AIC0737
TACHOMETER
(if so equipped)ENGINE COOLANT
TEMPERATURE GAUGE
Instruments and controls2-5
ZX
Page 48 of 247
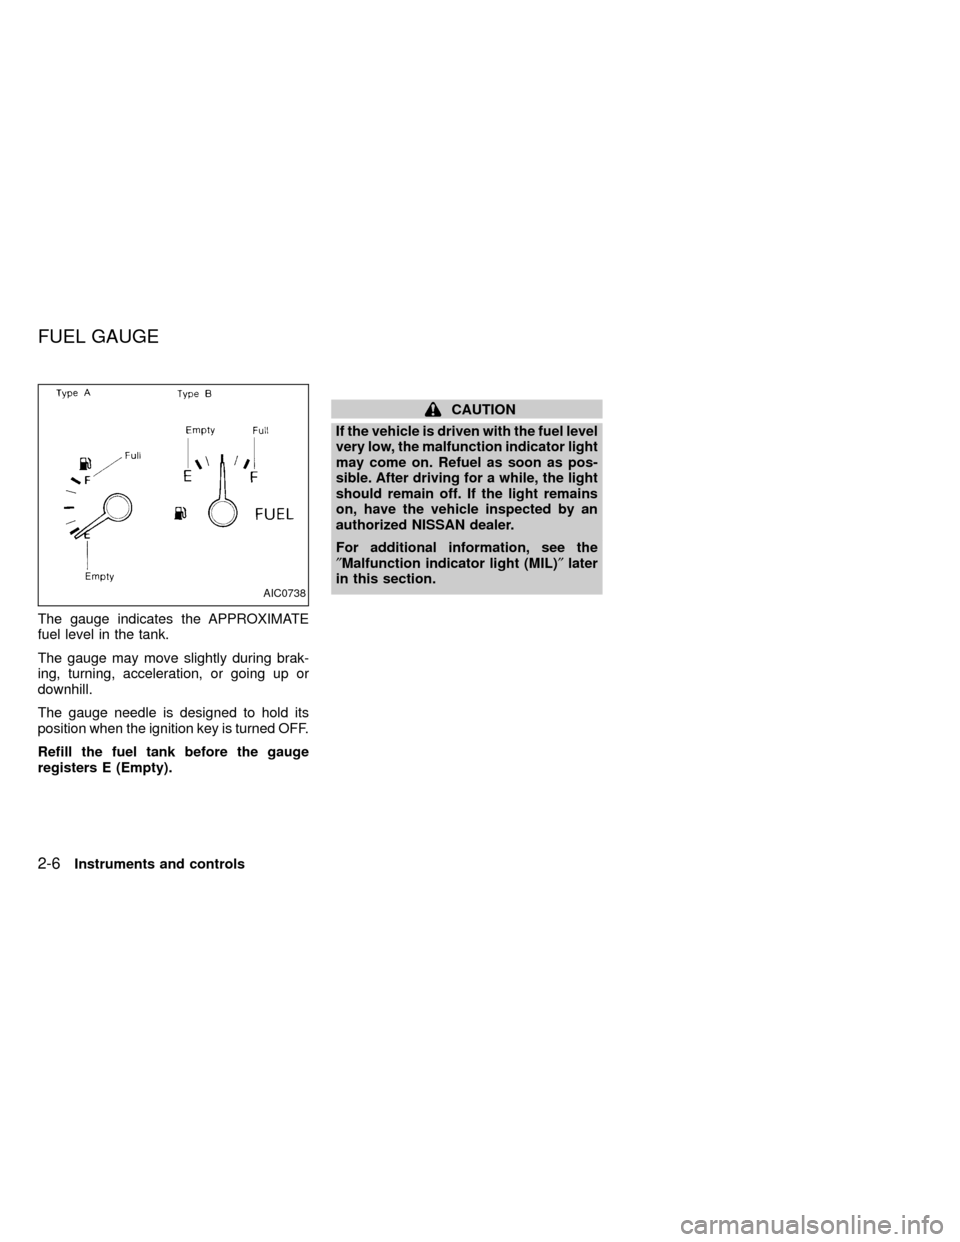
The gauge indicates the APPROXIMATE
fuel level in the tank.
The gauge may move slightly during brak-
ing, turning, acceleration, or going up or
downhill.
The gauge needle is designed to hold its
position when the ignition key is turned OFF.
Refill the fuel tank before the gauge
registers E (Empty).
CAUTION
If the vehicle is driven with the fuel level
very low, the malfunction indicator light
may come on. Refuel as soon as pos-
sible. After driving for a while, the light
should remain off. If the light remains
on, have the vehicle inspected by an
authorized NISSAN dealer.
For additional information, see the
²Malfunction indicator light (MIL)²later
in this section.
AIC0738
FUEL GAUGE
2-6Instruments and controls
ZX
Page 49 of 247
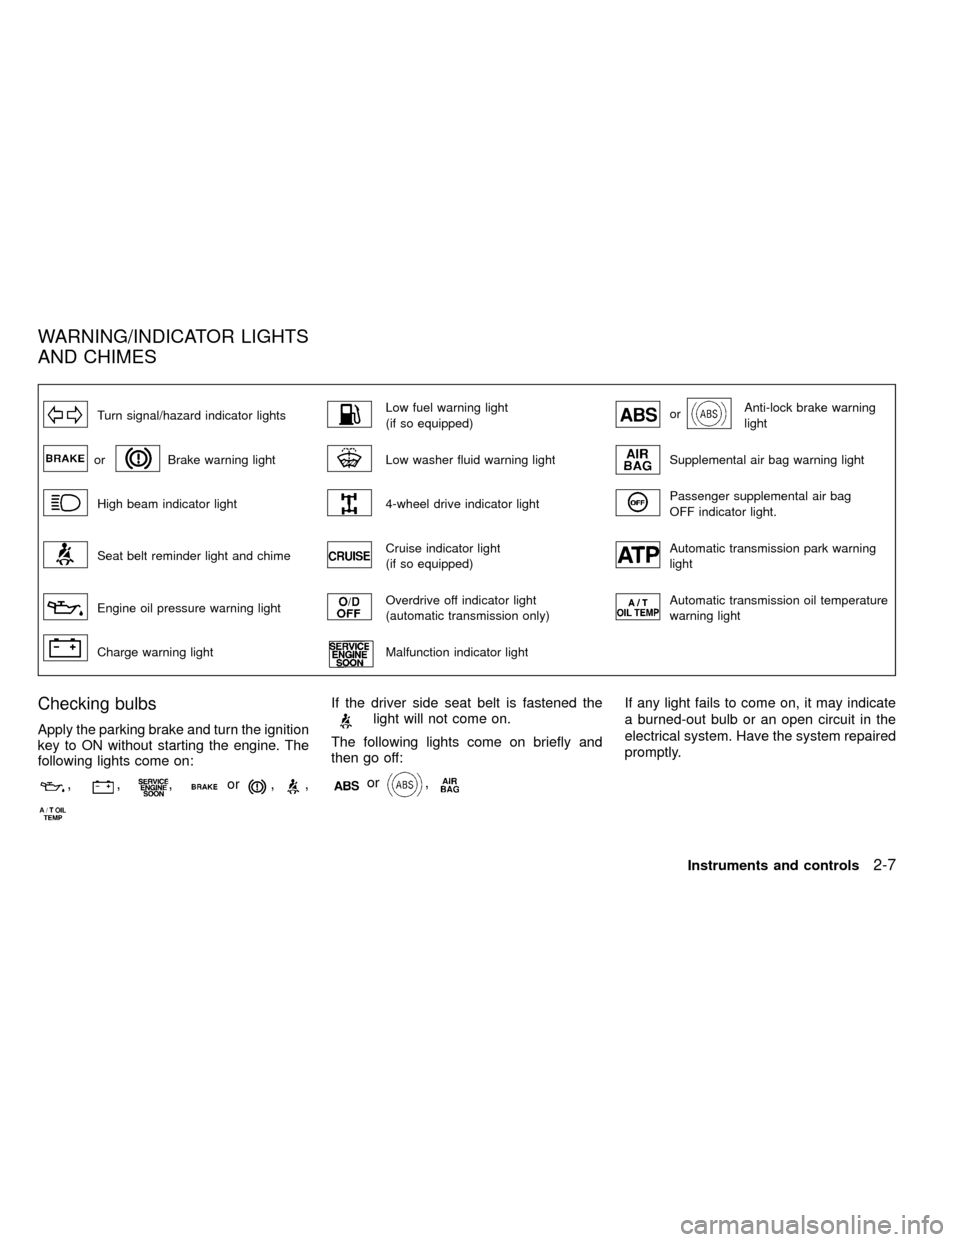
Turn signal/hazard indicator lightsLow fuel warning light
(if so equipped)orAnti-lock brake warning
light
orBrake warning lightLow washer fluid warning lightSupplemental air bag warning light
High beam indicator light4-wheel drive indicator lightPassenger supplemental air bag
OFF indicator light.
Seat belt reminder light and chimeCruise indicator light
(if so equipped)Automatic transmission park warning
light
Engine oil pressure warning lightOverdrive off indicator light
(automatic transmission only)Automatic transmission oil temperature
warning light
Charge warning lightMalfunction indicator light
Checking bulbs
Apply the parking brake and turn the ignition
key to ON without starting the engine. The
following lights come on:
,,,or,,
If the driver side seat belt is fastened thelight will not come on.
The following lights come on briefly and
then go off:
or,
If any light fails to come on, it may indicate
a burned-out bulb or an open circuit in the
electrical system. Have the system repaired
promptly.
WARNING/INDICATOR LIGHTS
AND CHIMES
Instruments and controls2-7
ZX
Page 50 of 247
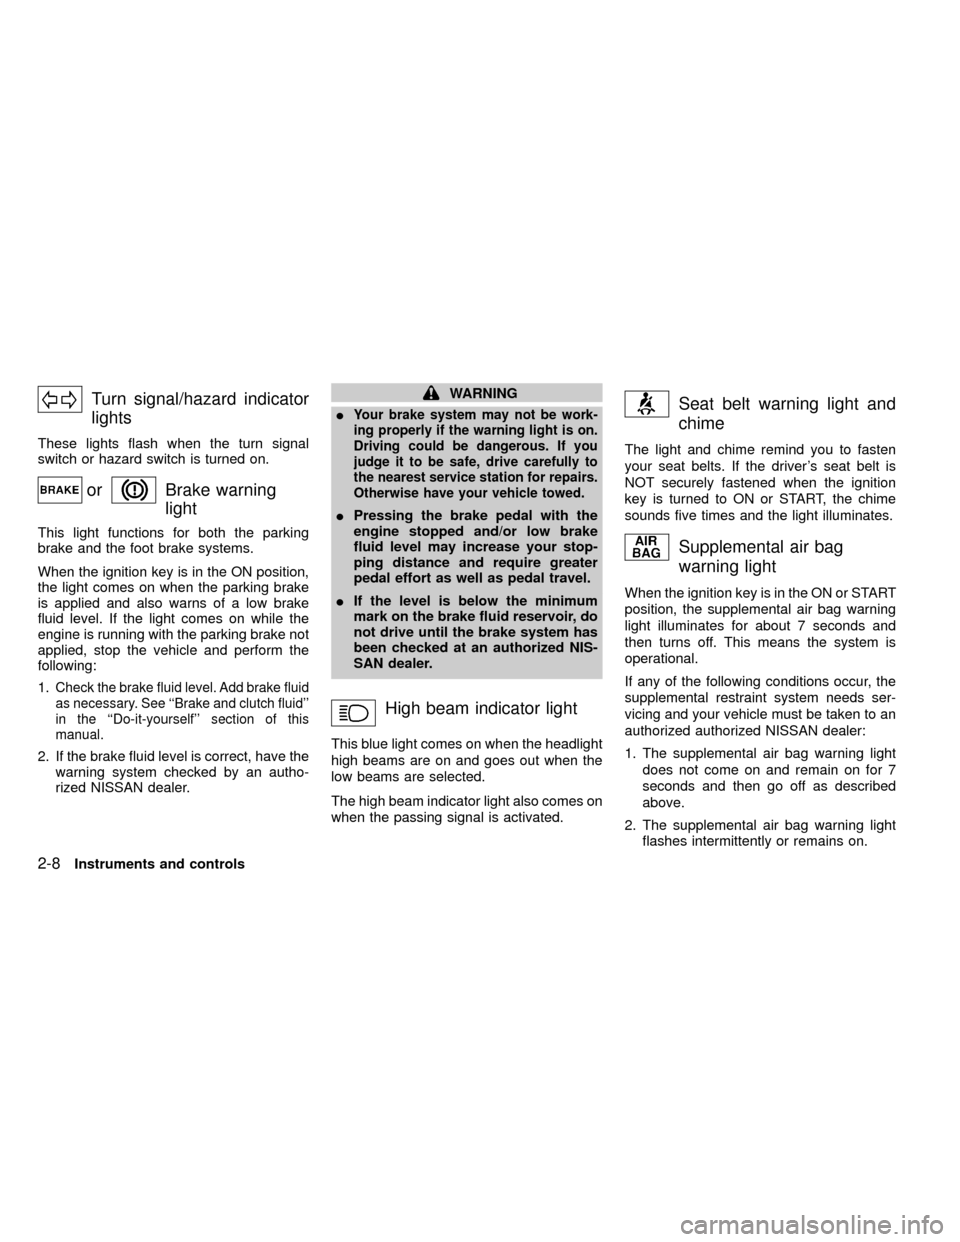
Turn signal/hazard indicator
lights
These lights flash when the turn signal
switch or hazard switch is turned on.
orBrake warning
light
This light functions for both the parking
brake and the foot brake systems.
When the ignition key is in the ON position,
the light comes on when the parking brake
is applied and also warns of a low brake
fluid level. If the light comes on while the
engine is running with the parking brake not
applied, stop the vehicle and perform the
following:
1.
Check the brake fluid level. Add brake fluid
as necessary. See ``Brake and clutch fluid''
in the ``Do-it-yourself'' section of this
manual.
2. If the brake fluid level is correct, have the
warning system checked by an autho-
rized NISSAN dealer.
WARNING
I
Your brake system may not be work-
ing properly if the warning light is on.
Driving could be dangerous. If you
judge it to be safe, drive carefully to
the nearest service station for repairs.
Otherwise have your vehicle towed.
IPressing the brake pedal with the
engine stopped and/or low brake
fluid level may increase your stop-
ping distance and require greater
pedal effort as well as pedal travel.
IIf the level is below the minimum
mark on the brake fluid reservoir, do
not drive until the brake system has
been checked at an authorized NIS-
SAN dealer.
High beam indicator light
This blue light comes on when the headlight
high beams are on and goes out when the
low beams are selected.
The high beam indicator light also comes on
when the passing signal is activated.
Seat belt warning light and
chime
The light and chime remind you to fasten
your seat belts. If the driver's seat belt is
NOT securely fastened when the ignition
key is turned to ON or START, the chime
sounds five times and the light illuminates.
Supplemental air bag
warning light
When the ignition key is in the ON or START
position, the supplemental air bag warning
light illuminates for about 7 seconds and
then turns off. This means the system is
operational.
If any of the following conditions occur, the
supplemental restraint system needs ser-
vicing and your vehicle must be taken to an
authorized authorized NISSAN dealer:
1. The supplemental air bag warning light
does not come on and remain on for 7
seconds and then go off as described
above.
2. The supplemental air bag warning light
flashes intermittently or remains on.
2-8Instruments and controls
ZX