oil level NISSAN FRONTIER 2000 D22 / 1.G Owners Manual
[x] Cancel search | Manufacturer: NISSAN, Model Year: 2000, Model line: FRONTIER, Model: NISSAN FRONTIER 2000 D22 / 1.GPages: 269, PDF Size: 2.19 MB
Page 64 of 269
3. The supplemental air bag warning light
does not come on at all.
Unless checked and repaired, the supplemen-
tal restraint system may not function properly.
For additional details on the Supplemental
restraint system (Supplemental air bag sys-
tem), see the ``Seats, restraints and supple-
mental air bag systems'' section of this
manual
WARNING
If the supplemental air bag warning
light is on, it could mean that the
supplemental air bag will not operate in
an accident.
Passenger supplemental air
bag OFF indicator light (ex-
cept Crew Cab models)
The passenger supplemental air bag is
equipped with an ON/OFF switch. The
switch is located in the center of the instru-
ment panel, near the ashtray. When the
switch is turned to the ON position, the
passenger supplemental air bag is enabled
and could inflate in a frontal collision. When
the switch is turned to the OFF position, thepassenger supplemental air bag is disabled
and will not inflate in a frontal collision. The
passenger supplemental air bag OFF indi-
cator light on the instrument panel illumi-
nates when the passenger supplemental air
bag ON/OFF switch is turned to the OFF
position. The driver's side supplemental air
bag always remains enabled and is not
affected by the passenger supplemental air
bag ON/OFF switch. The key for the pas-
senger supplemental air bag ON/OFF
switch should not be left in the switch.
Remove the key after turning the switch in
the desired position. Do not leave a key in
the switch. See ªPassenger supplemental
air bag ON/OFF switch and lightº in the
²Seats, restraints and supplemental air bag
systems²section for details.
Engine oil pressure warning
light
This light warns of low engine oil pressure. If
the light flickers or comes on during normal
driving, pull off the road in a safe area, stop
the engineimmediatelyand call an autho-
rized NISSAN dealer.
The oil pressure warning light is not
designed to indicate a low oil level. Use
the dipstick to check the oil level.See``Engine oil'' in the ``Do-it-yourself'' section
of this manual.
CAUTION
Running the engine with the oil pres-
sure warning light on could cause seri-
ous damage to the engine almost im-
mediately. Turn off the engine as soon
as it is safe to do so.
Charge warning light
If this light comes on while the engine is
running, it may indicate a problem with the
charging system. Turn the engine off and
check the generator belt. If the belt is loose,
broken, missing or if the light remains on, see
an authorized NISSAN dealer immediately.
CAUTION
Do not continue driving if the belt is
loose, broken or missing.
Low fuel warning light
This light comes on when the fuel in the tank
is low. Refuel as soon as it is convenient,
preferably before the fuel gauge reaches E
(Empty).
2-10Instruments and controls
ZX
Page 65 of 269
There will be a small reserve of fuel
remaining in the tank when the fuel
gauge needle reaches E (Empty).
Door open warning light (if
so equipped)
This light comes on when any of the doors
are not closed securely while the ignition
key is in the ON position.
Low washer fluid warning
light (Canada only)
This light comes on when the washer tank
fluid is at a low level. Add washer fluid as
necessary. See ``Window washer fluid'' in
the ``Do-it-yourself'' section of this manual.
4-wheel drive indicator light
This light comes on when the transfer shift
control lever is in the 4H or 4L position.
WARNING
IWhen parking always make sure the
transfer control lever is in the 2H, 4H
or 4L position and the parking brake
is applied.
IFailure to engage the transfer con-trol lever in 2H, 4H or 4L could result
in the vehicle moving unexpectedly,
which could cause serious personal
injury or property damage.
Automatic transmission park
warning light (
model)
This light indicates that the automatic trans-
mission parking function is not engaged. If
the transfer control lever is not secured in
any drive position while the automatic trans-
mission selector lever is in the P (Park)
position, the transmission will disengage
and the vehicle may move unexpectedly.
Shift the transfer control lever into the 2H,
4H, or 4L position when the warning light
comes on.
IWhen parking, always make sure that the
transfer control lever is in 2H, 4H, or 4L
and the parking brake is set.
IIf the ATP light is ON, this indicates that
the automatic transmission P (Park) po-
sition will not function and the transfer
lever is in the N (Neutral) position.
IFailure to engage the transfer control
lever in 2H, 4H, or 4L could result in thevehicle moving unexpectedly, resulting in
serious personal injury or property dam-
age.
WARNING
IIf the ATP light is ON, this indicates
that the automatic transmission P
(Park) position will not function and
the transfer control shift lever is in
the N (Neutral) position.
Automatic transmission oil
temperature warning light
(
model)
This light comes on when the automatic
transmission oil temperature is too high. If
the light comes on while driving, reduce the
vehicle speed as soon as safely possible
until the light turns off.
CAUTION
Continued vehicle operation when the
A/T oil temperature warning light is on
may damage the automatic transmis-
sion.
Instruments and controls
2-11
ZX
Page 138 of 269
START (4)
This position starts the engine. As soon as
the engine has started, release the key. It
automatically returns to the ON position.IMake sure the area around the vehicle is
clear.
ICheck fluid levels such as engine oil,
coolant, brake and clutch fluid, and win-
dow washer fluid as frequently as pos-
sible, at least whenever you refuel.
ICheck that all windows and lights are
clean.
IVisually inspect tires for their appearance
and condition. Also check tires for proper
inflation.
ILock all doors.
IPosition seat and adjust head restraints.
IAdjust inside and outside mirrors.
IFasten seat belts and ask all passengers
to do likewise.
ICheck the operation of warning lights
when key is turned to the ON (3) position.
See²Warning/Indicator lights and
chimes²in the²Instruments and con-
trols²section.WARNING
IDo not depress the accelerator pedal
while shifting from P (Park) or N
(Neutral) to R (Reverse), D (Drive), 2
or 1. Always depress the brake pedal
until shifting is completed. Failure to
do so could cause you to lose con-
trol and have an accident.
ICold engine idle speed is high, so
use caution when shifting into a for-
ward or reverse gear before the en-
gine has warmed up.
INever shift to P (Park) or R (Reverse)
while the vehicle is moving. This
could cause an accident.
CAUTION
IWhen stopping the vehicle on an
uphill grade, do not hold the vehicle
by depressing the accelerator pedal.
The foot brake should be used for
this purpose.
IOn slippery roads, do not downshift.
This may cause a loss of control.
BEFORE STARTING THE
ENGINEDRIVING WITH AUTOMATIC
TRANSMISSION (if so
equipped)
5-8Starting and driving
ZX
Page 183 of 269

8 Do-it-yourself
Maintenance precautions .......................................8-2
Engine compartment check locations ....................8-3
Engine cooling system ...........................................8-5
Checking engine coolant level ...............................8-5
Changing engine coolant .......................................8-6
Engine oil ...............................................................8-9
Checking engine oil level .......................................8-9
Changing engine oil .............................................8-10
Changing engine oil filter .....................................8-12
Automatic transmission fluid (ATF) ......................8-13
Temperature conditions for checking ATF ...........8-13
Power steering fluid..............................................8-14
Brake and clutch fluid ...........................................8-15
Window washer fluid ............................................8-15
Battery ..................................................................8-16
Jump starting ........................................................8-17
Drive belts ............................................................8-18Spark plug replacement .......................................8-19
Air cleaner housing filter ......................................8-21
Wiper blades ........................................................8-22
Parking brake check.............................................8-23
Brake pedal ..........................................................8-23
Brake booster .......................................................8-24
Clutch pedal .........................................................8-25
Fuses ....................................................................8-26
Multi-remote controller battery replacement ........8-27
Light bulbs ............................................................8-29
Headlights ............................................................8-29
Bulb replacement .................................................8-30
Front fog light bulb replacement (if so
equipped) .............................................................8-32
Wheels and tires...................................................8-33
Four-wheel drive models ......................................8-36
ZX
Page 184 of 269
When performing any inspection or mainte-
nance work on your vehicle, always take
care to prevent serious accidental injury to
yourself or damage to the vehicle. The
following are general precautions which
should be closely observed.
WARNING
IPark the vehicle on a level surface,
apply the parking brake securely and
block the wheels to prevent the ve-
hicle from moving. For manual trans-
mission models, move the shift lever
to N (Neutral). For automatic trans-
mission models, move the shift lever
to P (Park).
IBe sure the ignition key is in the OFF
or LOCK position when performing
any parts replacement or repairs.
INever leave the engine or automatic
transmission related component
harnesses disconnected while the
ignition switch is in the ON position.
INever connect or disconnect the bat-
tery or any transistorized compo-
nent while the ignition switch is in
the ON position.IIf you must work with the engine
running, keep your hands, clothing,
hair and tools away from moving
fans, belts, and any other moving
parts.
IIt is advisable to secure or remove
any loose clothing and remove any
jewelry, such as rings, watches, etc.,
before working on your vehicle.
IAlways wear eye protection when-
ever you work on your vehicle.
IIf you must run the engine in an
enclosed space such as a garage, be
sure there is proper ventilation for
exhaust gases to escape.
INever get under the vehicle while it
is supported only by a jack. If it is
necessary to work under the vehicle,
support it with safety stands.
IKeep smoking materials, flame and
sparks away from fuel tank and bat-
tery.
IOn gasoline engine models with the
multiport fuel injection (MFI) system,
the fuel filter or fuel lines should
beserviced by an authorized NISSANdealer because the fuellines are un-
der high pressure even when the
engine is off.
CAUTION
IDo not work under the hood while
the engine is hot. Turn the engine off
and wait until it cools down.
INever connect or disconnect either
the battery or any transistorized
component connector while the igni-
tion is on.
IAvoid contact with used engine oil.
Improperly disposed engine oil and/
or other vehicle fluids can damage
the environment. Always conform to
local regulations for disposal of ve-
hicle fluid.
This ``Do-it-yourself'' section gives instruc-
tions regarding only those items which are
relatively easy for an owner to perform.
You should be aware that incomplete or
improper servicing may result in operating
difficulties or excessive emissions, and
could affect your warranty coverage.If in
doubt about any servicing, have it done
by an authorized NISSAN dealer.
MAINTENANCE
PRECAUTIONS
8-2Do-it-yourself
ZX
Page 191 of 269

11. Check the drain valve on the radiator
and drain plugs on the engine block for
any sign of leakage.CHECKING ENGINE OIL LEVEL
1. Park the vehicle on a level surface and
apply the parking brake.
2. Start the engine and let it idle until it
reaches operating temperature.
3. Turn off the engine.Wait a few minutes
for the oil to drain back into the oil
pan.4. Remove the dipstick and wipe it clean.
Reinsert it all the way.
ADI1058ADI1059ADI1060
ENGINE OIL
Do-it-yourself8-9
ZX
Page 192 of 269
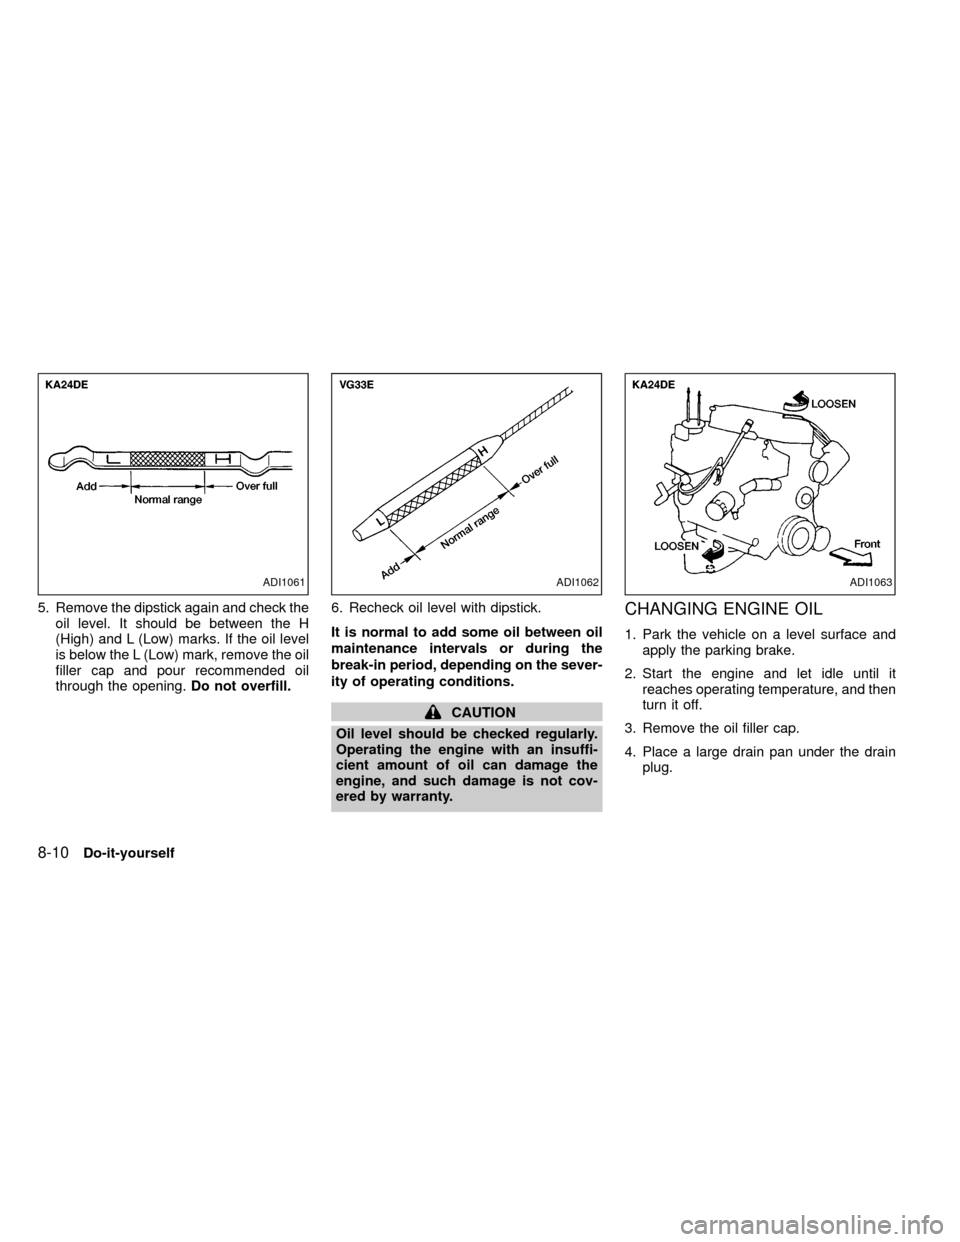
5. Remove the dipstick again and check the
oil level. It should be between the H
(High) and L (Low) marks. If the oil level
is below the L (Low) mark, remove the oil
filler cap and pour recommended oil
through the opening.Do not overfill.6. Recheck oil level with dipstick.
It is normal to add some oil between oil
maintenance intervals or during the
break-in period, depending on the sever-
ity of operating conditions.
CAUTION
Oil level should be checked regularly.
Operating the engine with an insuffi-
cient amount of oil can damage the
engine, and such damage is not cov-
ered by warranty.
CHANGING ENGINE OIL
1. Park the vehicle on a level surface and
apply the parking brake.
2. Start the engine and let idle until it
reaches operating temperature, and then
turn it off.
3. Remove the oil filler cap.
4. Place a large drain pan under the drain
plug.
ADI1061ADI1062ADI1063
8-10Do-it-yourself
ZX
Page 193 of 269
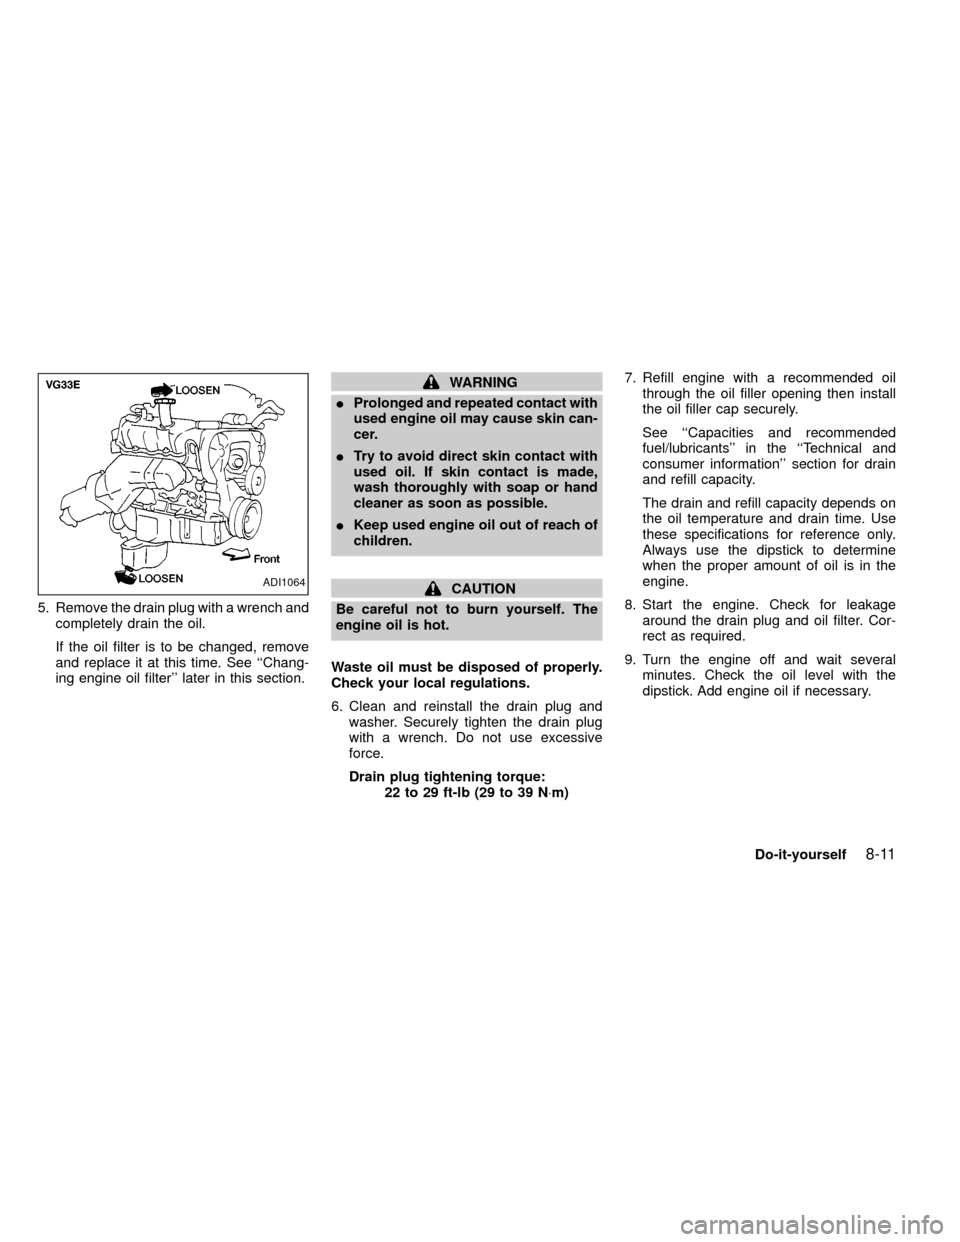
5. Remove the drain plug with a wrench and
completely drain the oil.
If the oil filter is to be changed, remove
and replace it at this time. See ``Chang-
ing engine oil filter'' later in this section.
WARNING
IProlonged and repeated contact with
used engine oil may cause skin can-
cer.
ITry to avoid direct skin contact with
used oil. If skin contact is made,
wash thoroughly with soap or hand
cleaner as soon as possible.
IKeep used engine oil out of reach of
children.
CAUTION
Be careful not to burn yourself. The
engine oil is hot.
Waste oil must be disposed of properly.
Check your local regulations.
6. Clean and reinstall the drain plug and
washer. Securely tighten the drain plug
with a wrench. Do not use excessive
force.
Drain plug tightening torque:
22 to 29 ft-lb (29 to 39 N×m)7. Refill engine with a recommended oil
through the oil filler opening then install
the oil filler cap securely.
See ``Capacities and recommended
fuel/lubricants'' in the ``Technical and
consumer information'' section for drain
and refill capacity.
The drain and refill capacity depends on
the oil temperature and drain time. Use
these specifications for reference only.
Always use the dipstick to determine
when the proper amount of oil is in the
engine.
8. Start the engine. Check for leakage
around the drain plug and oil filter. Cor-
rect as required.
9. Turn the engine off and wait several
minutes. Check the oil level with the
dipstick. Add engine oil if necessary.ADI1064
Do-it-yourself8-11
ZX
Page 194 of 269
CHANGING ENGINE OIL FILTER
1. Park the vehicle on a level surface and
apply the parking brake.
2. Turn the engine off.
3. Remove the splash shield.
IRemove the six push pins.
IRemove the six bolts and the splash
shield.
4. Place a large drain pan under the oil filter.
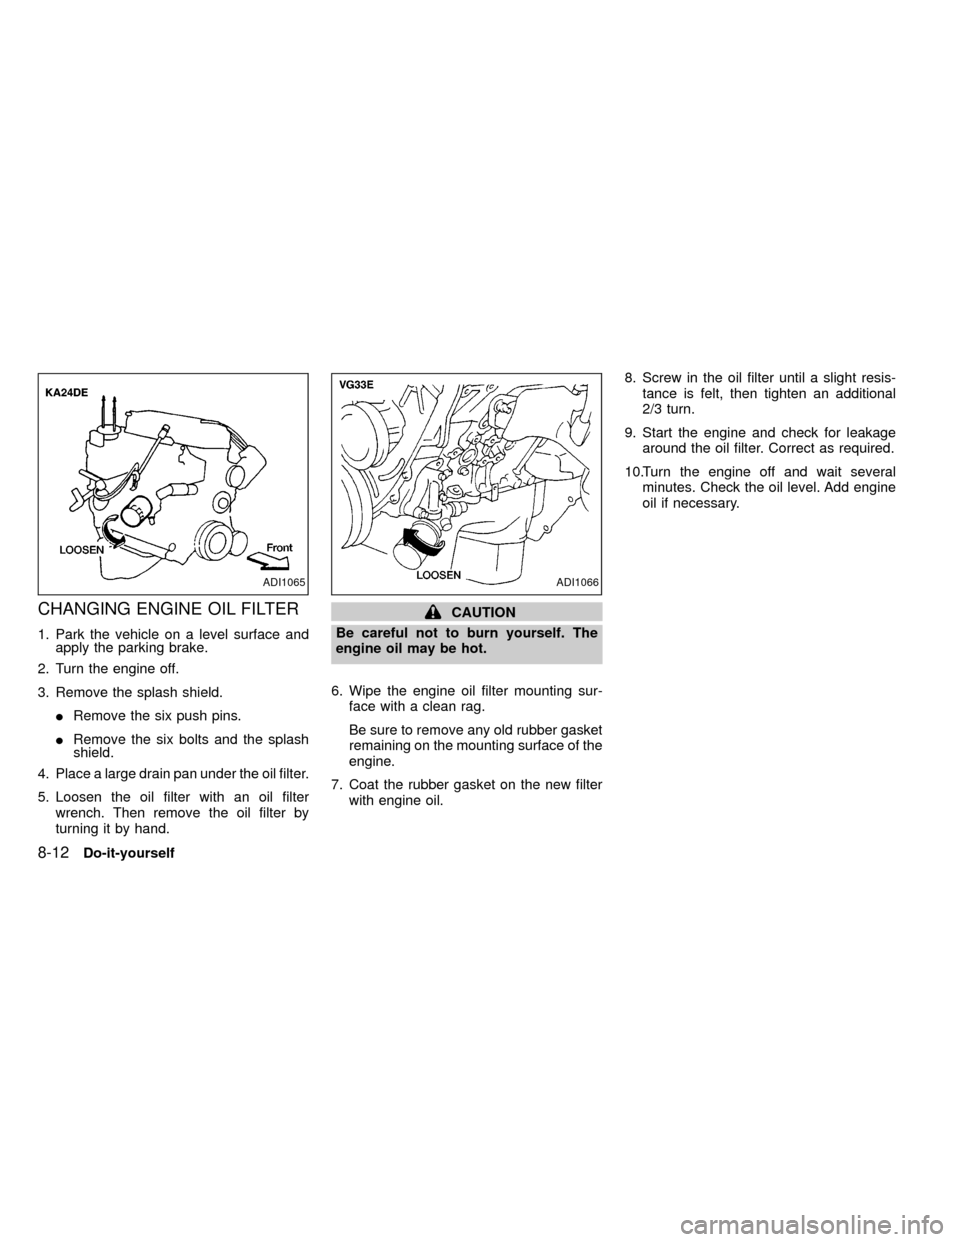
5. Loosen the oil filter with an oil filter
wrench. Then remove the oil filter by
turning it by hand.
CAUTION
Be careful not to burn yourself. The
engine oil may be hot.
6. Wipe the engine oil filter mounting sur-
face with a clean rag.
Be sure to remove any old rubber gasket
remaining on the mounting surface of the
engine.
7. Coat the rubber gasket on the new filter
with engine oil.8. Screw in the oil filter until a slight resis-
tance is felt, then tighten an additional
2/3 turn.
9. Start the engine and check for leakage
around the oil filter. Correct as required.
10.Turn the engine off and wait several
minutes. Check the oil level. Add engine
oil if necessary.
ADI1065ADI1066
8-12Do-it-yourself
ZX
Page 224 of 269

Parking brake*Check that the lever has
the proper travel and confirm that your
vehicle is held securely on a fairly steep hill
with only the parking brake applied.
Automatic transmission Park position
mechanismCheck that the lock release
button on the selector lever operates prop-
erly and smoothly. On a fairly steep hill
check that your vehicle is held securely with
the selector lever in the P position without
applying any brakes.
UNDER THE HOOD AND
VEHICLE
The maintenance items listed here should
be checked periodically (e.g., each time you
check the engine oil or refuel).
Additional information on the following
items with an ``*'' is found in the ``Do-it-
yourself operations'' section.
Windshield washer fluid*Check that there
is adequate fluid in the reservoir.
Engine coolant level*Check the coolant
level when the engine is cold.
Radiator and hosesCheck the front of the
radiator and clean off any dirt, insects,
leaves, etc., that may have accumulated.Make sure the hoses have no cracks, de-
formation, rot or loose connections.
Brake and clutch fluid levels*Make sure
that the brake and clutch fluid level is be-
tween the MIN and MAX lines on the reser-
voir.
Battery*Check the fluid level in each cell. It
should be between the MAX and MIN lines.
Engine drive belts*Make sure the drive
belts are not frayed, worn, cracked or oily.
Engine oil level*Check the level after
parking the vehicle on a level surface with
the engine off. Wait a few minutes for the oil
to drain back into the oil pan.
Power steering fluid level* and lines
Check the level when the fluid is cold, with
the engine off. Check the lines for proper
attachment, leaks, cracks, etc.
Automatic transmission fluid level*
Check the level after putting the selector
lever in P with the engine idling at operating
temperature.
Exhaust systemMake sure there are no
loose supports, cracks or holes. If the sound
of the exhaust seems unusual or there is a
smell of exhaust fumes, immediately havethe exhaust system inspected by an autho-
rized NISSAN dealer. See the carbon mon-
oxide warning in the ``Starting and driving''
section of this manual.
UnderbodyThe underbody is frequently
exposed to corrosive substances such as
those used on icy roads or to control dust. It
is very important to remove these sub-
stances from the underbody, otherwise rust
may form on the floor pan, frame, fuel lines
and exhaust system. At the end of winter,
the underbody should be thoroughly flushed
with plain water, in those areas where mud
and dirt may have accumulated. See the
``Appearance and care'' section of this
manual.
Fluid leaksCheck under the vehicle for
fuel, oil, water or other fluid leaks after the
vehicle has been parked for a while. Water
dripping from the air conditioner after use is
normal. If you should notice any leaks or if
gasoline fumes are evident, check for the
cause and have it corrected immediately.
9-4Maintenance
ZX