door lock NISSAN FRONTIER 2001 D22 / 1.G Owners Manual
[x] Cancel search | Manufacturer: NISSAN, Model Year: 2001, Model line: FRONTIER, Model: NISSAN FRONTIER 2001 D22 / 1.GPages: 290, PDF Size: 3.14 MB
Page 28 of 290
light illuminates for about 7 seconds and
then turns off. This means the system is
operational.
If any of the following system conditions
occur, the supplemental air bag and pre-
tensioner seat belt systems need servicing
and should be taken to an authorized
NISSAN dealer:
cThe supplemental air bag warning light
remains on after approximately 7 sec-
onds.
cThe supplemental air bag warning light
flashes intermittently.
cThe supplemental air bag warning light
does not come on at all.
Under these conditions, the Supplemental
Restraint System (supplemental air bag or
pre-tensioner seat belt systems) may not
function properly. It must be checked and
repaired.WARNING
If the supplemental air bag warning
light is on, it could mean that the
supplemental air bag or pre-tensioner
seat belt systems will not operate in an
accident.
Repair and replacement procedure
The supplemental air bag modules are de-
signed to inflate on a one-time-only basis.
As a reminder, unless it is damaged, the
supplemental air bag warning light remains
illuminated after inflation has occurred.
Repair and replacement of the supplemen-
tal air bag system should be done only by
an authorized NISSAN dealer.
To ensure long-term functioning, the
supplemental air bag system must be
inspected 10 years after the date of
manufacture noted on the certification
label located on the driver side door
jamb pillar.
When maintenance work is required on the
vehicle, the supplemental air bag system
and related parts should be pointed out to
the person conducting the maintenance.The ignition key must always be in the LOCK
position when working under the hood or
inside the vehicle.
WARNING
cOnce the supplemental air bag in-
flates, the supplemental air bag
module will not function again and
should be replaced by an authorized
NISSAN dealer. The supplemental air
bag module cannot be repaired.
cThe supplemental air bag system
should be inspected by an autho-
rized NISSAN dealer if there is any
damage to the front end portion of
the vehicle, or replaced if the supple-
mental air bag has inflated.
cIf you need to dispose of the supple-
mental air bag or scrap the vehicle,
contact an authorized NISSAN
dealer. Correct supplemental air bag
disposal procedures are set forth in
the appropriate NISSAN Service
Manual. Incorrect disposal proce-
dures could cause personal injury.
Seats, restraints and supplemental air bag systems
1-21
ZX
Page 63 of 290
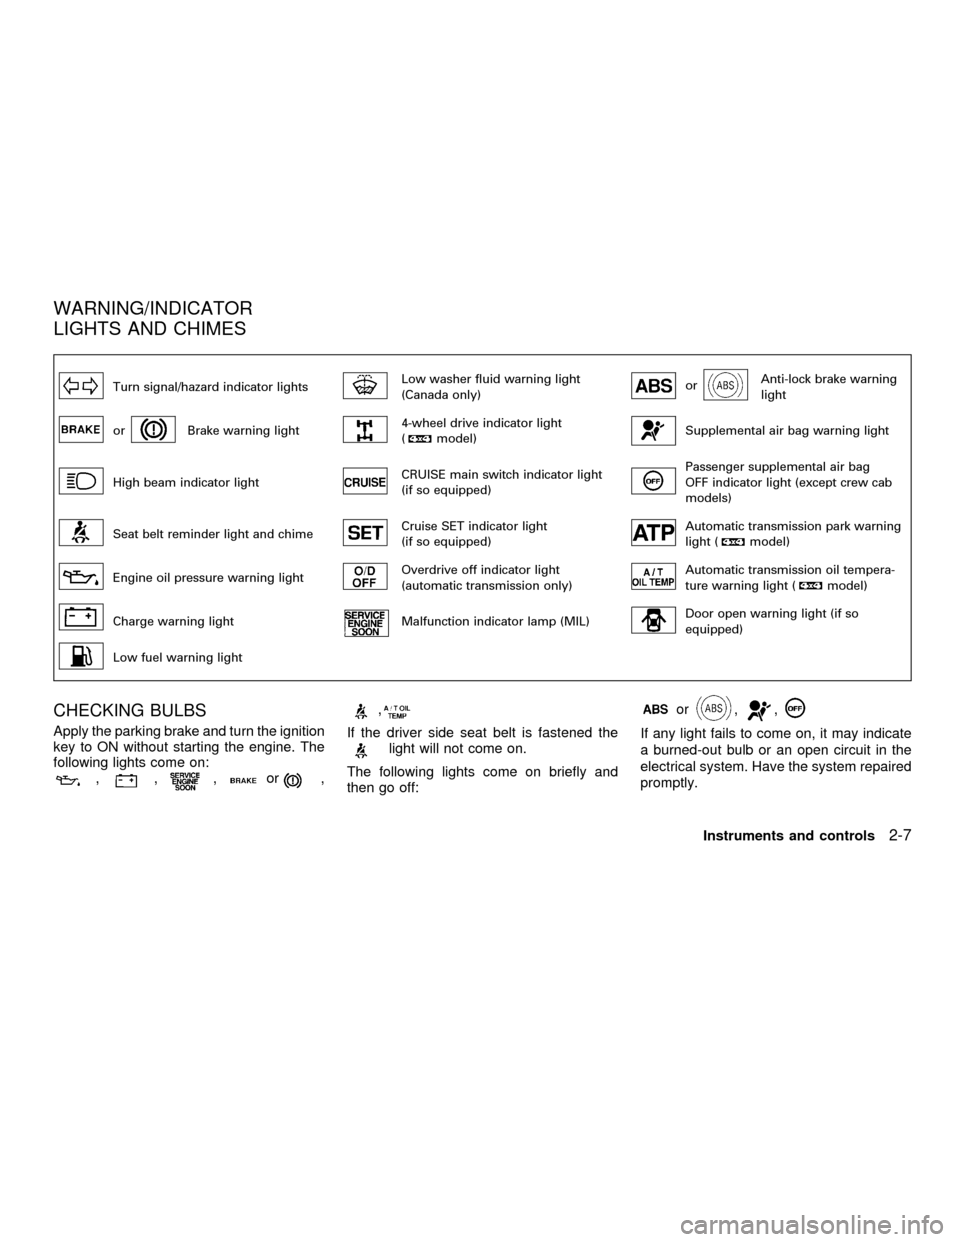
Turn signal/hazard indicator lightsLow washer fluid warning light
(Canada only)orAnti-lock brake warning
light
orBrake warning light4-wheel drive indicator light
(model)Supplemental air bag warning light
High beam indicator lightCRUISE main switch indicator light
(if so equipped)Passenger supplemental air bag
OFF indicator light (except crew cab
models)
Seat belt reminder light and chimeCruise SET indicator light
(if so equipped)Automatic transmission park warning
light (model)
Engine oil pressure warning lightOverdrive off indicator light
(automatic transmission only)Automatic transmission oil tempera-
ture warning light (model)
Charge warning lightMalfunction indicator lamp (MIL)Door open warning light (if so
equipped)
Low fuel warning light
CHECKING BULBS
Apply the parking brake and turn the ignition
key to ON without starting the engine. The
following lights come on:
,,,or,
,
If the driver side seat belt is fastened thelight will not come on.
The following lights come on briefly and
then go off:
or,,
If any light fails to come on, it may indicate
a burned-out bulb or an open circuit in the
electrical system. Have the system repaired
promptly.
WARNING/INDICATOR
LIGHTS AND CHIMES
Instruments and controls2-7
ZX
Page 69 of 290

Security indicator light
The security indicator light shows the status
of the vehicle security system.
The light operates whenever the ignition
switch is in the LOCK, OFF, or ACC posi-
tion.
The vehicle security system has four
phases. For each phase the operation of the
security indicator light is different.
How to activate the vehicle security
system
1. Close all windows.(The system can be
activated even if the windows are
open.)
2. Remove the key from the ignition switch.
3. Close the hood and all doors. The doors
can be locked using the key, power door
lock switch or multi-remote controller.
Multi-remote controller operation:
cPush the LOCK button on the multi-
remote controller. All doors lock. The
hazard lights flash twice and the horn
beeps once to indicate all doors are
locked.
cWhen the LOCK button is pushed with
all doors locked, the hazard lights flash
twice and the horn beeps once as a
reminder that the doors are already
locked. The horn may or may not beep
once. Refer to ``silencing the horn
beep feature'' later in this section.
4.
Confirm that the SECURITY indicator
light comes on. The SECURITY light
glows for about 30 seconds and then
LIC0071
LIC0053
Instruments and controls2-13
ZX
Page 70 of 290

begins to flash once every three seconds.
The system is now activated. If, during
this 30 second time period, a door is
unlocked by the key or the multi-remote
controller, or the ignition key is turned to
ACC or ON, the system will not activate.
cIf the key is turned slowly when lock-
ing the door, the system may not acti-
vate. Furthermore, if the key is turned
excessively to the unlock position, the
system may be deactivated when the
key is removed. If the indicator light
fails to glow for 30 seconds, unlock
the door once and lock it again.
cEven when the driver and/or passen-
gers are in the vehicle, the system will
activate with doors, and hood locked
and with the ignition key in the OFF
position. Turn the ignition key to ACC
or ON to turn the system off.
The vehicle security system is NOT acti-
vated if one of the following occurs:
cA door is unlocked or the ignition key is
turned to the ACC or ON position during
the 30 seconds in which the SECURITY
light stays on.
cThe SECURITY light blinks at a steady1/2 second on - 1/2 second off rate (a
door, or the hood is open and the key is
not in the ACC or ON position). When the
ignition key is turned to the ACC or ON
position, the SECURITY light turns off.
Vehicle security system operation
The vehicle security system emits the fol-
lowing alarm:
cThe headlights blink and the horn sounds
intermittently. In addition, the starter mo-
tor does not operate.
c
The alarm automatically turns off after 50
seconds. However, the alarm reactivates
if the vehicle is tampered with again. The
alarm can be shut off by unlocking a door
with the key or by pressing the UNLOCK
buttonon the multi-remote controller.
The alarm is activated by:
copening a door without using the key
(even if the door is unlocked by releasing
the inside lock knob).
copening the hood.
How to stop the alarm
The alarm stops only by unlocking a door
with the key or by pressing the UNLOCK
buttonon the multi-remote controller.
The alarm does not stop if the ignition
switch is turned to ACC or ON position.
2-14Instruments and controls
ZX
Page 79 of 290
GROCERY HOOKS (King Cab
only)
The grocery hooks allow for 2 standard size
plastic grocery bags to hang side-by-side.
Do not apply a total load of more than 55 lbs
(25 kg) to a single grocery hook.
WARNING
cProperly secure all cargo to help
prevent it from sliding or shifting. Do
not place cargo higher than the seat-
backs. In a sudden stop or collision,
unsecured cargo could cause per-
sonal injury.
cUse suitable ropes and hooks to se-
cure cargo.
POWER WINDOWS
(if so equipped)
WARNING
cMake sure that all passengers have
their hands, etc. inside the vehicle
before closing the windows. Use the
window lock switch to prevent unex-
pected use of the power windows.cDo not leave children unattended in-
side the vehicle. They could un-
knowingly activate switches or con-
trols and become trapped in a
window. Unattended children could
become involved in serious acci-
dents.
The power windows operate when the igni-
tion key is in the ON position, or for 45
seconds after the ignition key is turned to
the OFF position. If the driver's or passen-
ger's door is opened during this 45 second
period, power to the windows is cancelled.
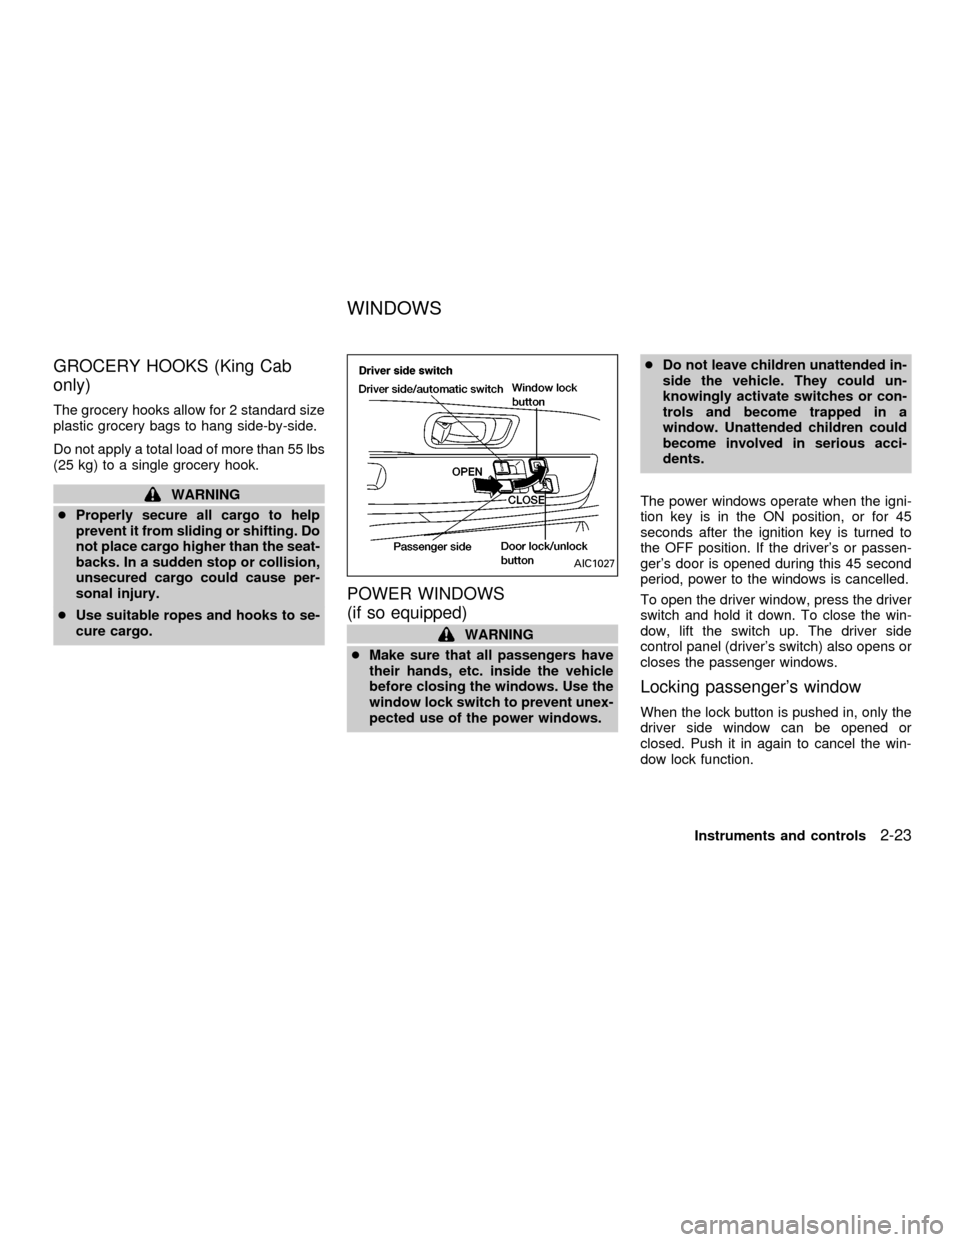
To open the driver window, press the driver
switch and hold it down. To close the win-
dow, lift the switch up. The driver side
control panel (driver's switch) also opens or
closes the passenger windows.
Locking passenger's window
When the lock button is pushed in, only the
driver side window can be opened or
closed. Push it in again to cancel the win-
dow lock function.
AIC1027
WINDOWS
Instruments and controls2-23
ZX
Page 81 of 290
MANUAL WINDOWS
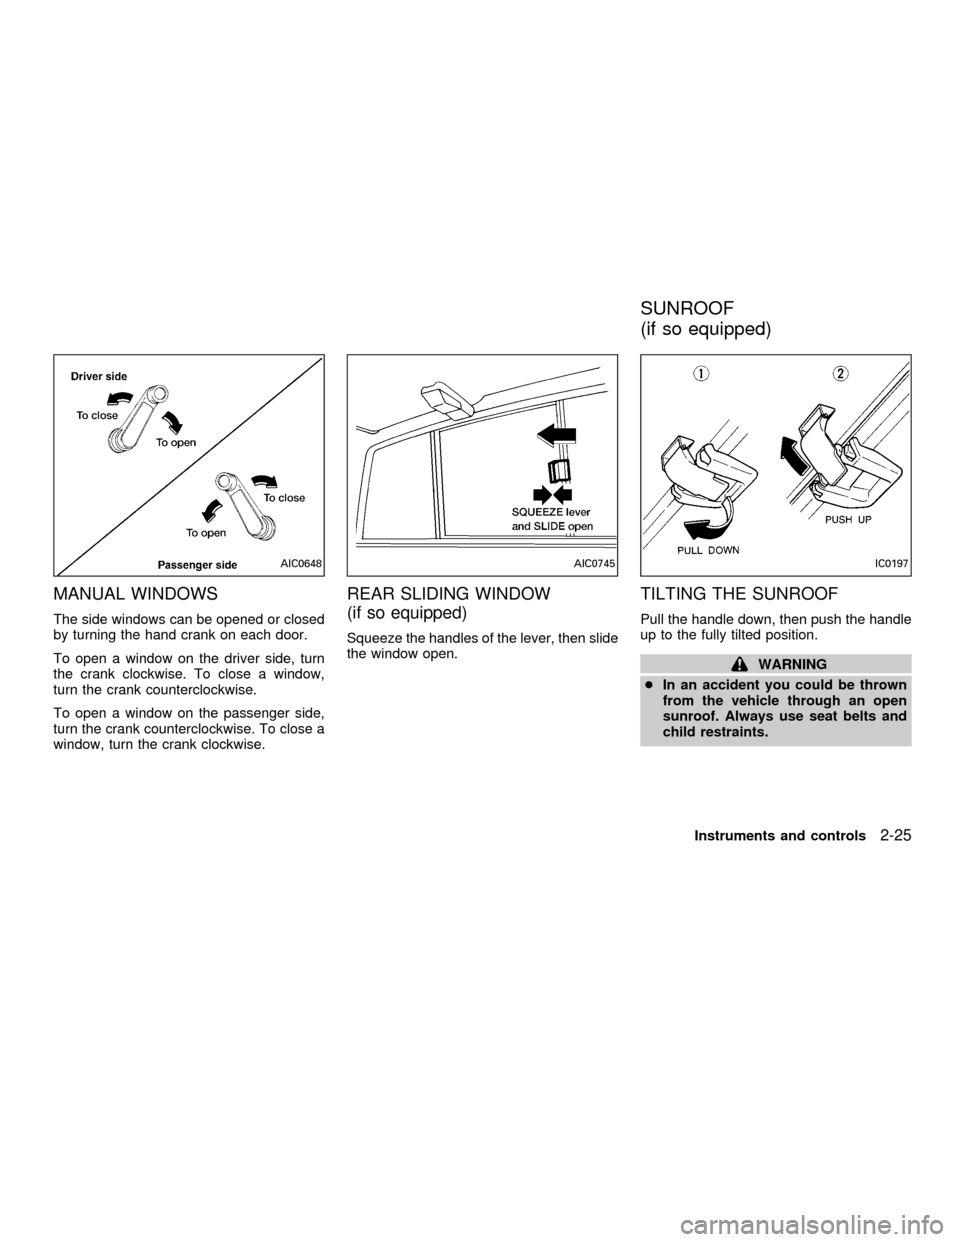
The side windows can be opened or closed
by turning the hand crank on each door.
To open a window on the driver side, turn
the crank clockwise. To close a window,
turn the crank counterclockwise.
To open a window on the passenger side,
turn the crank counterclockwise. To close a
window, turn the crank clockwise.
REAR SLIDING WINDOW
(if so equipped)
Squeeze the handles of the lever, then slide
the window open.
TILTING THE SUNROOF
Pull the handle down, then push the handle
up to the fully tilted position.
WARNING
cIn an accident you could be thrown
from the vehicle through an open
sunroof. Always use seat belts and
child restraints.
AIC0648AIC0745IC0197
SUNROOF
(if so equipped)
Instruments and controls2-25
ZX
Page 87 of 290

3 Pre-driving checks and adjustments
Key .........................................................................3-2
Doors ......................................................................3-2
Locking with key ................................................3-2
Locking with inside lock knob............................3-3
Locking with power door lock switch.................3-3
Child safety rear door lock
(Crew Cab models only)....................................3-4
Multi-remote control system (if so equipped).........3-4
How to use multi-remote control system...........3-4
Battery replacement ..........................................3-7
Hood .......................................................................3-8
Roof rack (if so equipped)......................................3-9
Step rail (if so equipped) ......................................3-11
Fuel filler lid ..........................................................3-11Fuel filler cap ...................................................3-11
Steering wheel .....................................................3-12
Tilt operation (if so equipped) .........................3-12
Sun visors.............................................................3-13
Vanity mirror (if so equipped) ..........................3-13
Mirrors ..................................................................3-13
Inside mirror.....................................................3-13
Outside mirrors ................................................3-13
Outside mirror remote control
(if so equipped)................................................3-14
Truck box..............................................................3-15
Tailgate ............................................................3-15
Tie down hooks ...............................................3-17
ZX
Page 88 of 290
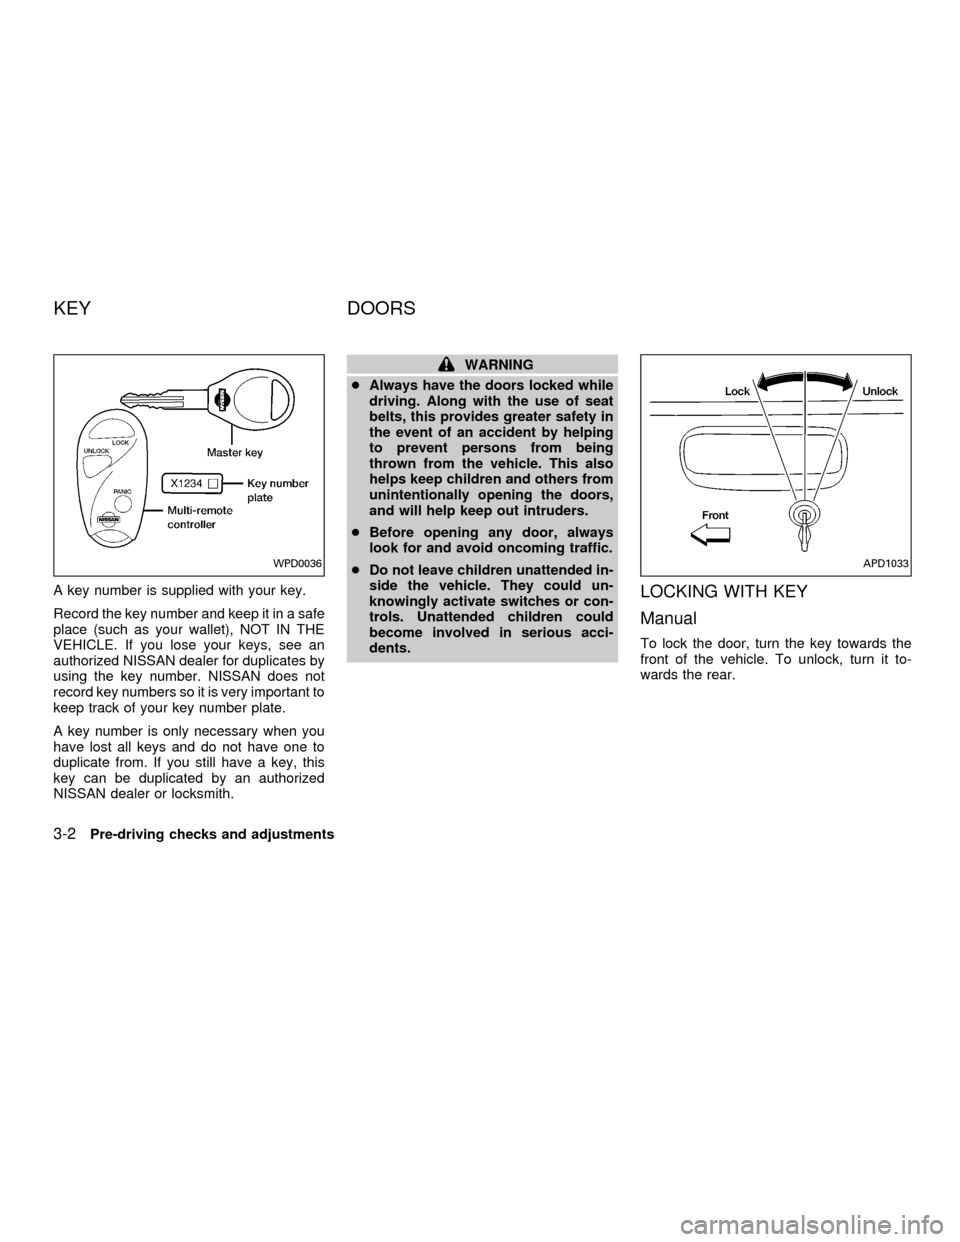
A key number is supplied with your key.
Record the key number and keep it in a safe
place (such as your wallet), NOT IN THE
VEHICLE. If you lose your keys, see an
authorized NISSAN dealer for duplicates by
using the key number. NISSAN does not
record key numbers so it is very important to
keep track of your key number plate.
A key number is only necessary when you
have lost all keys and do not have one to
duplicate from. If you still have a key, this
key can be duplicated by an authorized
NISSAN dealer or locksmith.
WARNING
cAlways have the doors locked while
driving. Along with the use of seat
belts, this provides greater safety in
the event of an accident by helping
to prevent persons from being
thrown from the vehicle. This also
helps keep children and others from
unintentionally opening the doors,
and will help keep out intruders.
cBefore opening any door, always
look for and avoid oncoming traffic.
cDo not leave children unattended in-
side the vehicle. They could un-
knowingly activate switches or con-
trols. Unattended children could
become involved in serious acci-
dents.
LOCKING WITH KEY
Manual
To lock the door, turn the key towards the
front of the vehicle. To unlock, turn it to-
wards the rear.
WPD0036APD1033
KEY DOORS
3-2Pre-driving checks and adjustments
ZX
Page 89 of 290

Power (if so equipped)
For vehicles equipped with the theft warning
system, the power door lock system allows
you to lock or unlock all doors simulta-
neously.
Turning the key to the front of the vehicle
locks all doors.
Turning the key one time to the rear of the
vehicle unlocks that door. From that posi-
tion, returning the key to neutral (where the
key can only be removed and inserted) and
turning it to the rear again within 5 seconds
unlocks all doors.
LOCKING WITH INSIDE LOCK
KNOB
To lock the door without the key, push the
inside lock knob to the lock position, then
close the door.
When locking the door this way, be certain
not to leave the key inside the vehicle.
LOCKING WITH POWER DOOR
LOCK SWITCH
To lock the doors without a key, push the
power door lock switch (driver or passenger
side), then close the door. When locking the
doors this way, be certain not to leave the
key inside the vehicle.
If the key is left in the ignition, all doors will
unlock automatically.
APD1041AIC1012APD1049
Pre-driving checks and adjustments3-3
ZX
Page 90 of 290
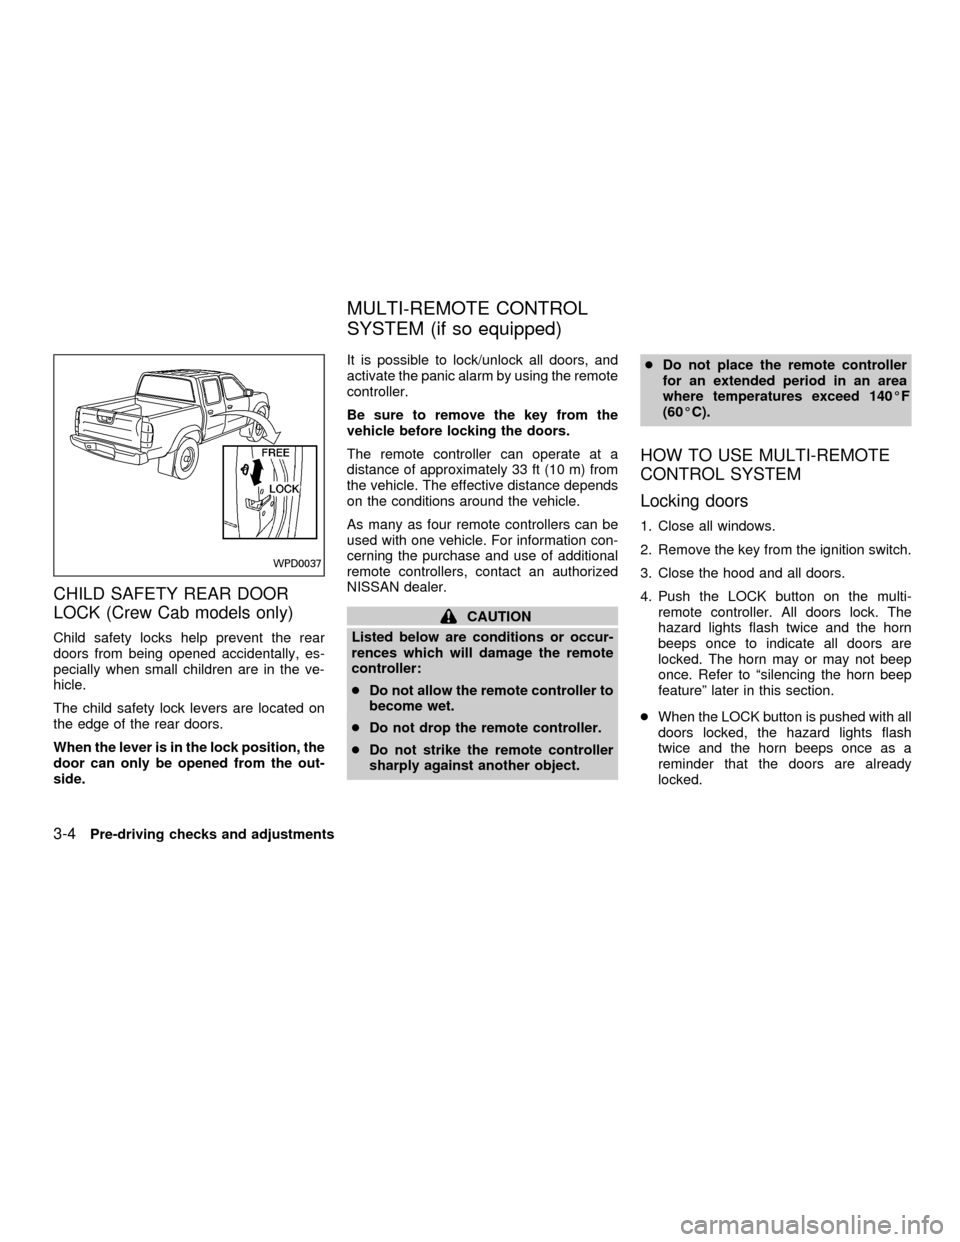
CHILD SAFETY REAR DOOR
LOCK (Crew Cab models only)
Child safety locks help prevent the rear
doors from being opened accidentally, es-
pecially when small children are in the ve-
hicle.
The child safety lock levers are located on
the edge of the rear doors.
When the lever is in the lock position, the
door can only be opened from the out-
side.It is possible to lock/unlock all doors, and
activate the panic alarm by using the remote
controller.
Be sure to remove the key from the
vehicle before locking the doors.
The remote controller can operate at a
distance of approximately 33 ft (10 m) from
the vehicle. The effective distance depends
on the conditions around the vehicle.
As many as four remote controllers can be
used with one vehicle. For information con-
cerning the purchase and use of additional
remote controllers, contact an authorized
NISSAN dealer.
CAUTION
Listed below are conditions or occur-
rences which will damage the remote
controller:
cDo not allow the remote controller to
become wet.
cDo not drop the remote controller.
cDo not strike the remote controller
sharply against another object.cDo not place the remote controller
for an extended period in an area
where temperatures exceed 140ÉF
(60ÉC).
HOW TO USE MULTI-REMOTE
CONTROL SYSTEM
Locking doors
1. Close all windows.
2. Remove the key from the ignition switch.
3. Close the hood and all doors.
4. Push the LOCK button on the multi-
remote controller. All doors lock. The
hazard lights flash twice and the horn
beeps once to indicate all doors are
locked. The horn may or may not beep
once. Refer to ªsilencing the horn beep
featureº later in this section.
cWhen the LOCK button is pushed with all
doors locked, the hazard lights flash
twice and the horn beeps once as a
reminder that the doors are already
locked.
WPD0037
MULTI-REMOTE CONTROL
SYSTEM (if so equipped)
3-4Pre-driving checks and adjustments
ZX