seat adjustment NISSAN FRONTIER 2001 D22 / 1.G Owners Manual
[x] Cancel search | Manufacturer: NISSAN, Model Year: 2001, Model line: FRONTIER, Model: NISSAN FRONTIER 2001 D22 / 1.GPages: 290, PDF Size: 3.14 MB
Page 6 of 290
Table of
ContentsSeats, restraints and supplemental air bag systems
Instruments and controls
Pre-driving checks and adjustments
Heater, air conditioner and audio systems
Starting and driving
In case of emergency
Appearance and care
Do-it-yourself
Maintenance
Technical and consumer information
Index
1
2
3
4
5
6
7
8
9
10
11
Page 8 of 290

1 Seats, restraints and supplemental air
bag systems
Front bucket seats..................................................1-2
Seat adjustment ................................................1-2
Tilting front bucket seat (if so equipped)...........1-3
Front 60/40 bench seats ........................................1-4
Seat adjustment ................................................1-4
Tilting front 60/40 bench seat (King Cab
models only) ......................................................1-5
Front bench seat ....................................................1-6
Seat adjustment ................................................1-6
Tilting front bench seat ......................................1-7
Tilting rear bench seat (Crew Cab
models only) ......................................................1-7
Jump seats .............................................................1-8
Head restraint adjustment ......................................1-9
Supplemental restraint system .............................1-10
Precautions on supplemental restraint
system .............................................................1-10
Passenger supplemental air bag on/off
switch and light (except Crew Cab
models) ............................................................1-17
Supplemental air bag warning labels ..............1-20
Supplemental air bag warning light .................1-20Seat belts .............................................................1-22
Precautions on seat belt usage ......................1-22
Child safety ......................................................1-23
Pregnant women .............................................1-25
Injured persons ................................................1-25
Three-point type seat belt with retractor .........1-25
Two-point type seat belt without
retractor (center of 60/40 bench seat) ............1-28
Two-point type seat belt without
retractor (jump seat and center of
bench seat) ......................................................1-29
Seat belt extenders .........................................1-31
Seat belt maintenance ....................................1-31
Child restraints .....................................................1-32
Precautions on child restraints ........................1-32
Installation on rear bench seat center
position (Crew Cab models only) ....................1-34
Installation on rear bench seat outboard
positions (Crew Cab models only) ..................1-36
Top tether strap child restraint ........................1-41
Installation on front passenger seat ................1-42
ZX
Page 9 of 290
WARNING
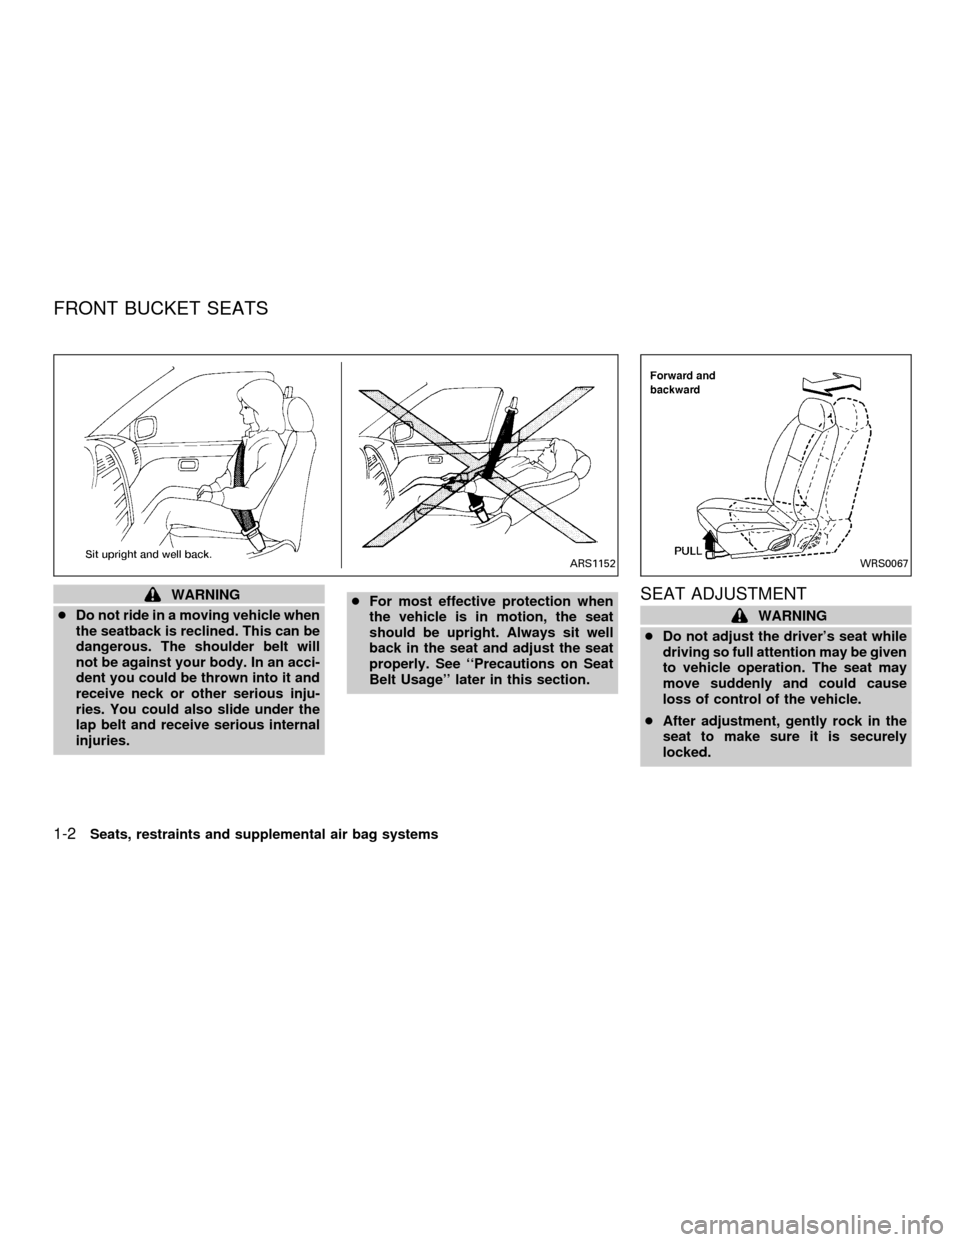
cDo not ride in a moving vehicle when
the seatback is reclined. This can be
dangerous. The shoulder belt will
not be against your body. In an acci-
dent you could be thrown into it and
receive neck or other serious inju-
ries. You could also slide under the
lap belt and receive serious internal
injuries.cFor most effective protection when
the vehicle is in motion, the seat
should be upright. Always sit well
back in the seat and adjust the seat
properly. See ``Precautions on Seat
Belt Usage'' later in this section.SEAT ADJUSTMENT
WARNING
cDo not adjust the driver's seat while
driving so full attention may be given
to vehicle operation. The seat may
move suddenly and could cause
loss of control of the vehicle.
cAfter adjustment, gently rock in the
seat to make sure it is securely
locked.
ARS1152WRS0067
FRONT BUCKET SEATS
1-2Seats, restraints and supplemental air bag systems
ZX
Page 11 of 290
WARNING
After adjustment, gently rock in the
seat to make sure it is securely locked.
SEAT ADJUSTMENT
WARNING
cDo not adjust the driver's seat while
driving so full attention may be given
to vehicle operation. The seat may
move suddenly and could cause
loss of control of the vehicle.
cAfter adjustment, gently rock in the
seat to make sure it is securely
locked.
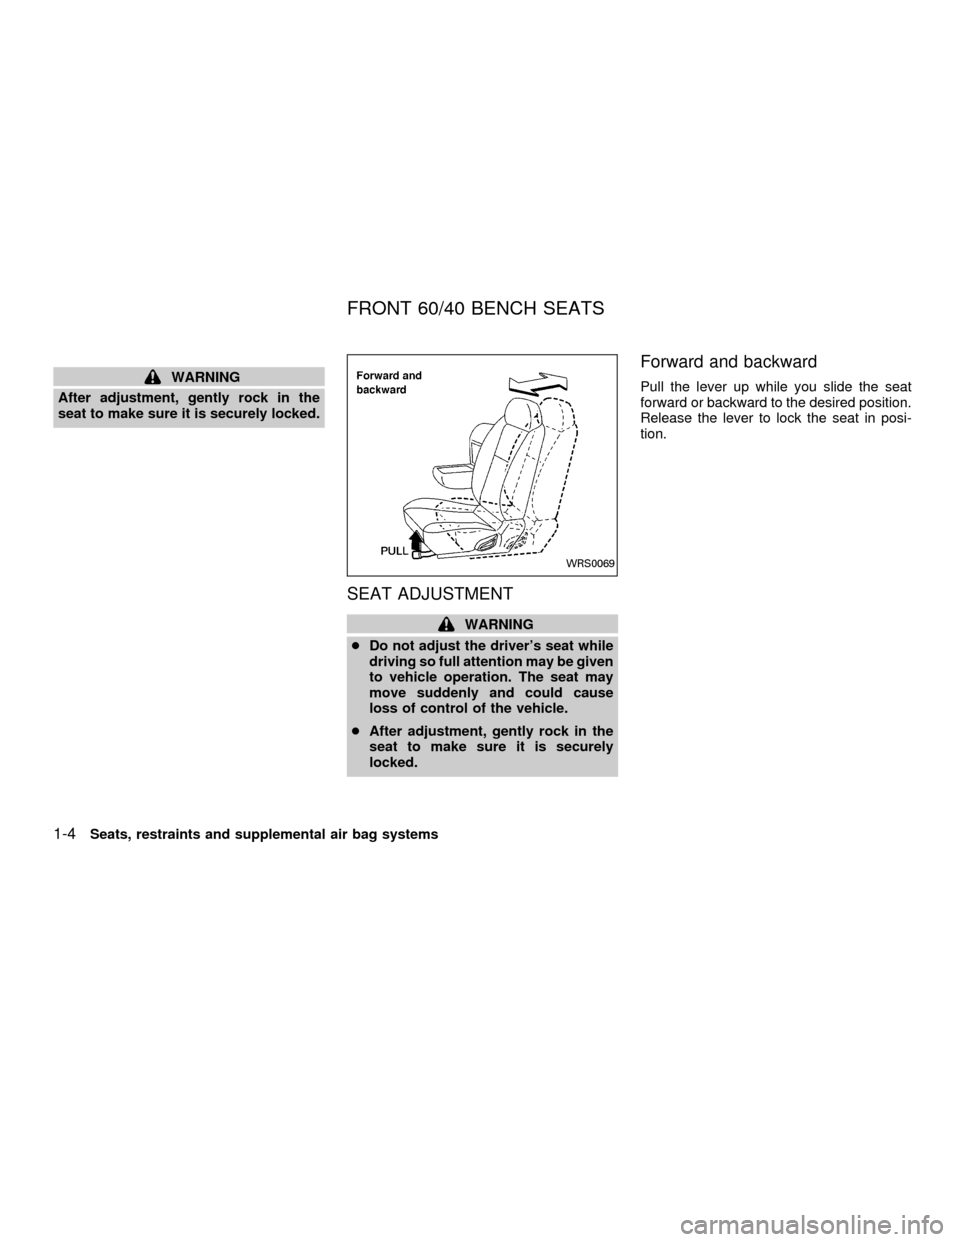
Forward and backward
Pull the lever up while you slide the seat
forward or backward to the desired position.
Release the lever to lock the seat in posi-
tion.
WRS0069
FRONT 60/40 BENCH SEATS
1-4Seats, restraints and supplemental air bag systems
ZX
Page 12 of 290
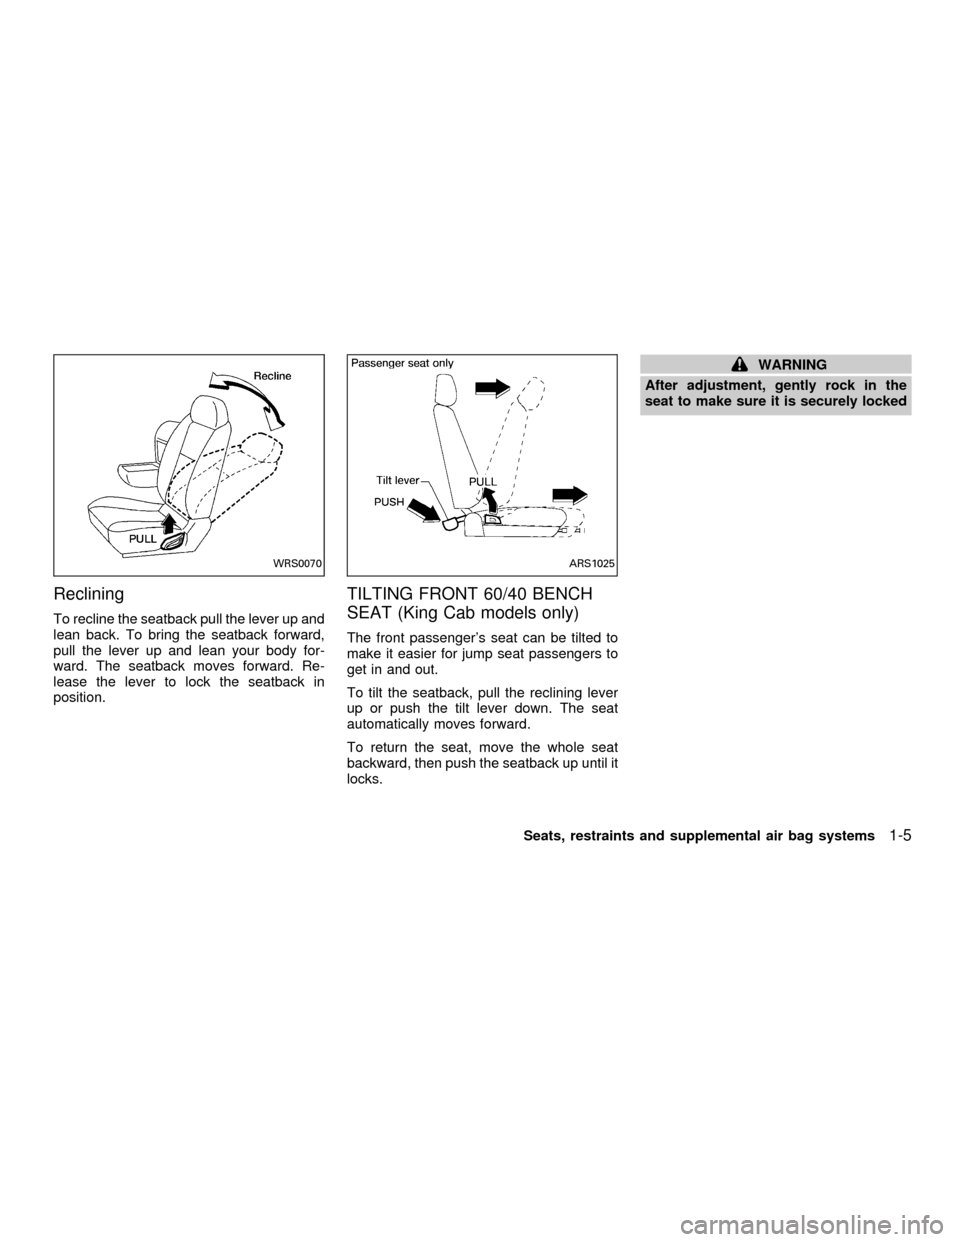
Reclining
To recline the seatback pull the lever up and
lean back. To bring the seatback forward,
pull the lever up and lean your body for-
ward. The seatback moves forward. Re-
lease the lever to lock the seatback in
position.
TILTING FRONT 60/40 BENCH
SEAT (King Cab models only)
The front passenger's seat can be tilted to
make it easier for jump seat passengers to
get in and out.
To tilt the seatback, pull the reclining lever
up or push the tilt lever down. The seat
automatically moves forward.
To return the seat, move the whole seat
backward, then push the seatback up until it
locks.
WARNING
After adjustment, gently rock in the
seat to make sure it is securely locked
WRS0070ARS1025
Seats, restraints and supplemental air bag systems1-5
ZX
Page 13 of 290
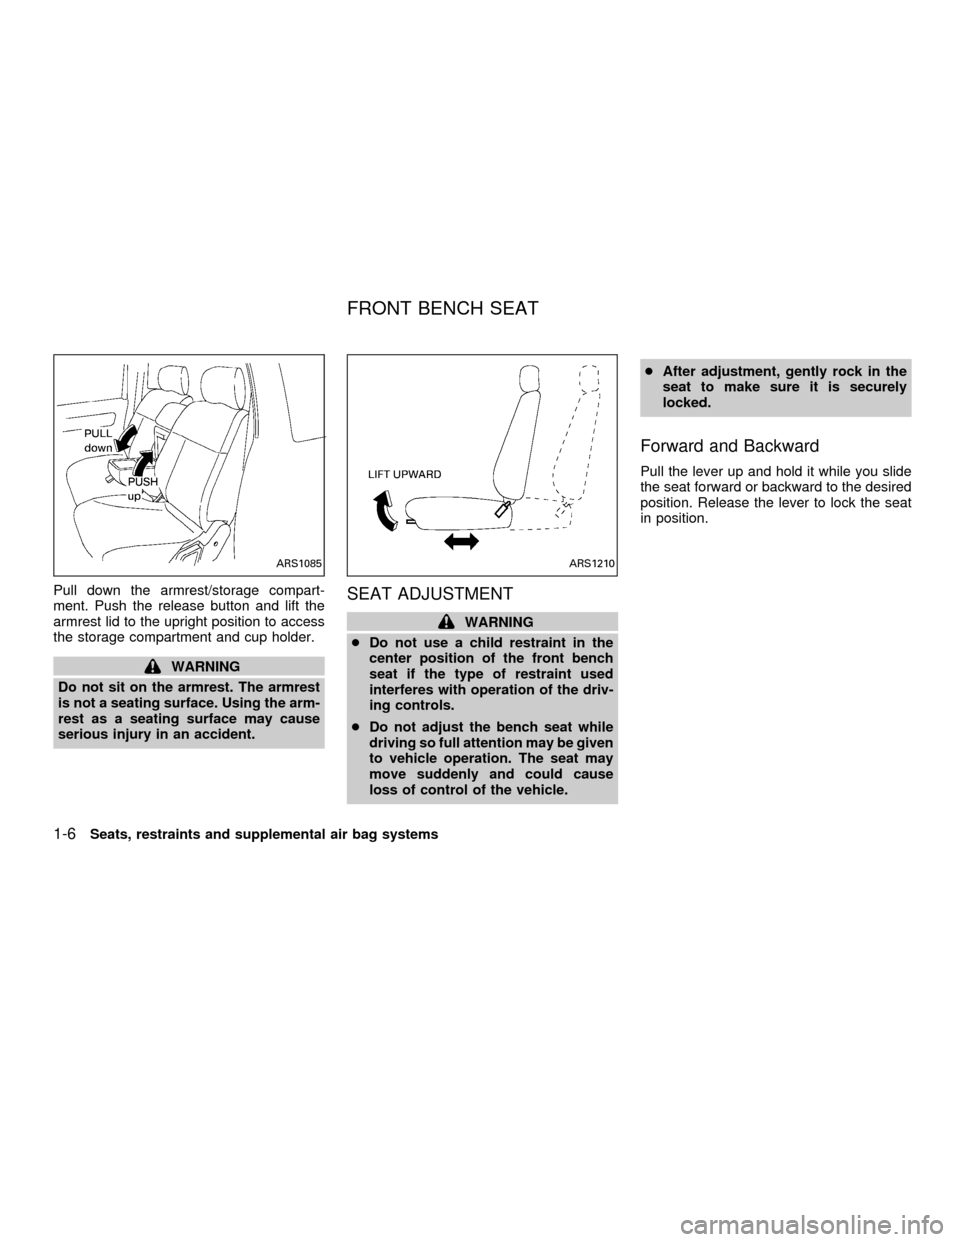
Pull down the armrest/storage compart-
ment. Push the release button and lift the
armrest lid to the upright position to access
the storage compartment and cup holder.
WARNING
Do not sit on the armrest. The armrest
is not a seating surface. Using the arm-
rest as a seating surface may cause
serious injury in an accident.
SEAT ADJUSTMENT
WARNING
cDo not use a child restraint in the
center position of the front bench
seat if the type of restraint used
interferes with operation of the driv-
ing controls.
cDo not adjust the bench seat while
driving so full attention may be given
to vehicle operation. The seat may
move suddenly and could cause
loss of control of the vehicle.cAfter adjustment, gently rock in the
seat to make sure it is securely
locked.
Forward and Backward
Pull the lever up and hold it while you slide
the seat forward or backward to the desired
position. Release the lever to lock the seat
in position.
ARS1085ARS1210
FRONT BENCH SEAT
1-6Seats, restraints and supplemental air bag systems
ZX
Page 14 of 290
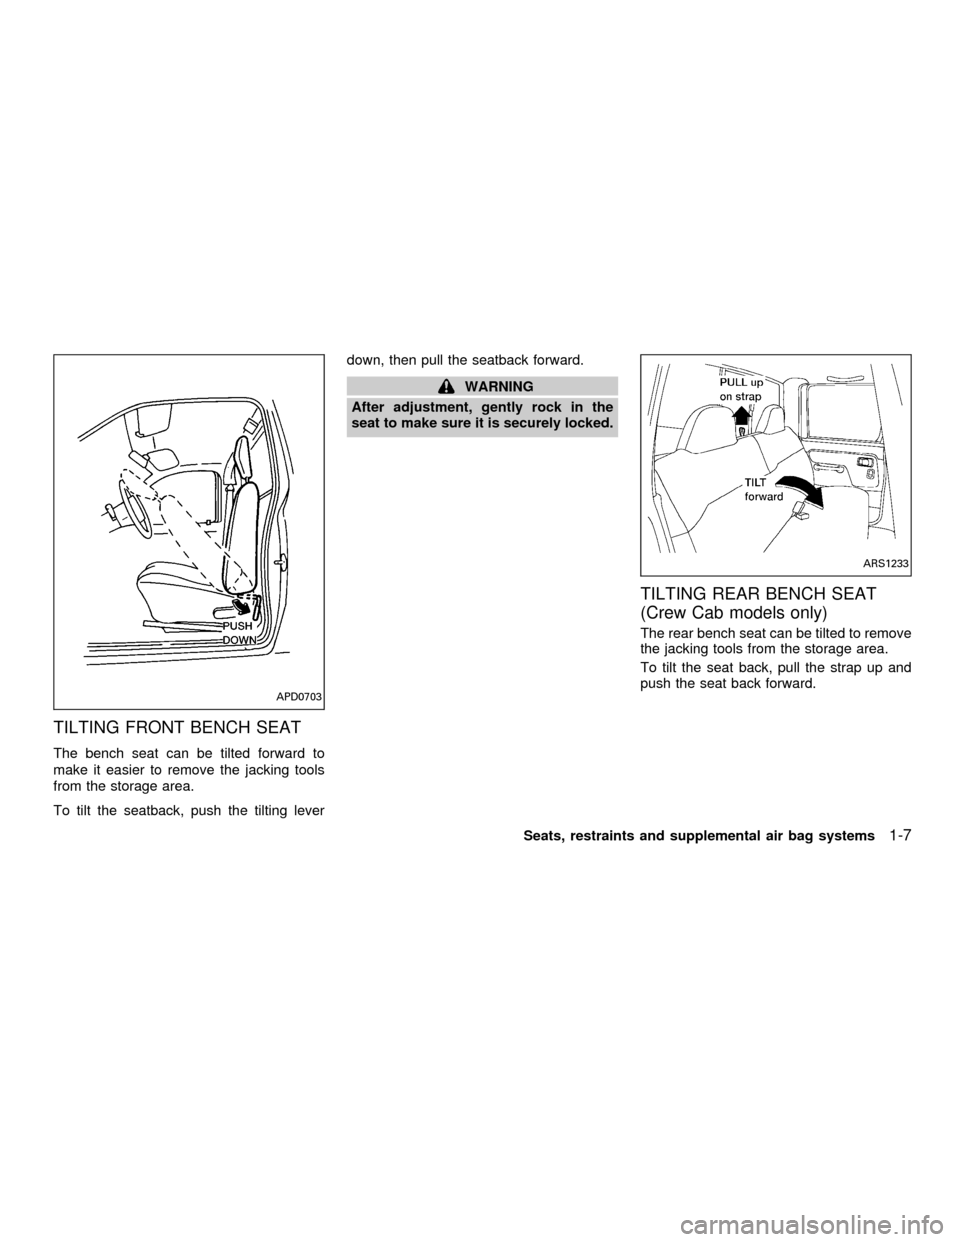
TILTING FRONT BENCH SEAT
The bench seat can be tilted forward to
make it easier to remove the jacking tools
from the storage area.
To tilt the seatback, push the tilting leverdown, then pull the seatback forward.
WARNING
After adjustment, gently rock in the
seat to make sure it is securely locked.
TILTING REAR BENCH SEAT
(Crew Cab models only)
The rear bench seat can be tilted to remove
the jacking tools from the storage area.
To tilt the seat back, pull the strap up and
push the seat back forward.
APD0703
ARS1233
Seats, restraints and supplemental air bag systems1-7
ZX
Page 16 of 290
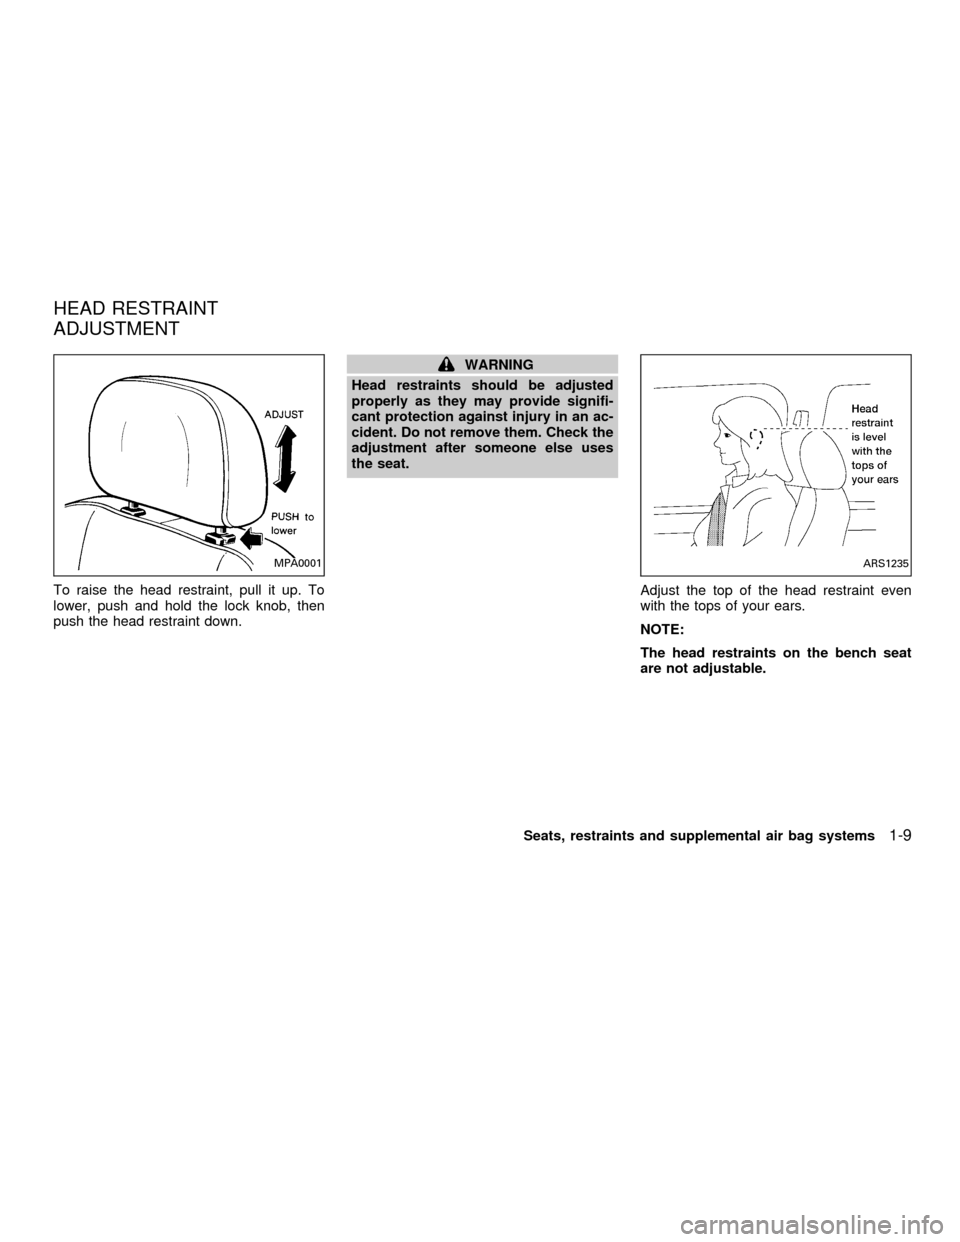
To raise the head restraint, pull it up. To
lower, push and hold the lock knob, then
push the head restraint down.
WARNING
Head restraints should be adjusted
properly as they may provide signifi-
cant protection against injury in an ac-
cident. Do not remove them. Check the
adjustment after someone else uses
the seat.
Adjust the top of the head restraint even
with the tops of your ears.
NOTE:
The head restraints on the bench seat
are not adjustable.
MPA0001ARS1235
HEAD RESTRAINT
ADJUSTMENT
Seats, restraints and supplemental air bag systems1-9
ZX
Page 34 of 290

belts, check the operation as follows.
cGrasp the shoulder belt and pull quickly
forward. The retractor should lock and
restrict further belt movement.
If the retractor does not lock during this
check, or if you have any questions about
seat belt operation, see an authorized
NISSAN dealer.
Shoulder belt height adjustment
(For front seats)
The shoulder belt anchor height should be
adjusted to the position best for you. (See
``Precautions on seat belt usage'' earlier in
this section.) To adjust, pull out or squeeze
the adjustment button and move the shoul-
der belt anchor to the desired position, so
the belt passes over the center of the shoul-
der. The belt should be away from your face
and neck, but not falling off of your shoulder.
Release the adjustment button to lock the
shoulder belt anchor into position.
WRS0083WRS0084
Seats, restraints and supplemental air bag systems1-27
ZX
Page 35 of 290
WARNING
cAfter adjustment, release the adjust-
ment button and try to move the
shoulder belt anchor up and down to
make sure it is securely fixed in
position.
cThe shoulder belt anchor height
should be adjusted to the position
best for you. Failure to do so may
reduce the effectiveness of the en-
tire restraint system and increase
the chance or severity of injury in an
accident.
TWO-POINT TYPE SEAT BELT
WITHOUT RETRACTOR (Center
of 60/40 bench seat)
WARNING
cDo not install a child restraint in the
center position of the front seat if the
type of restraint used interferes with
operation of the driving controls.cDo not sit on the armrest. The arm-
rest is not a seating surface. Using
the armrest as a seating surface may
cause serious injury in an accident.
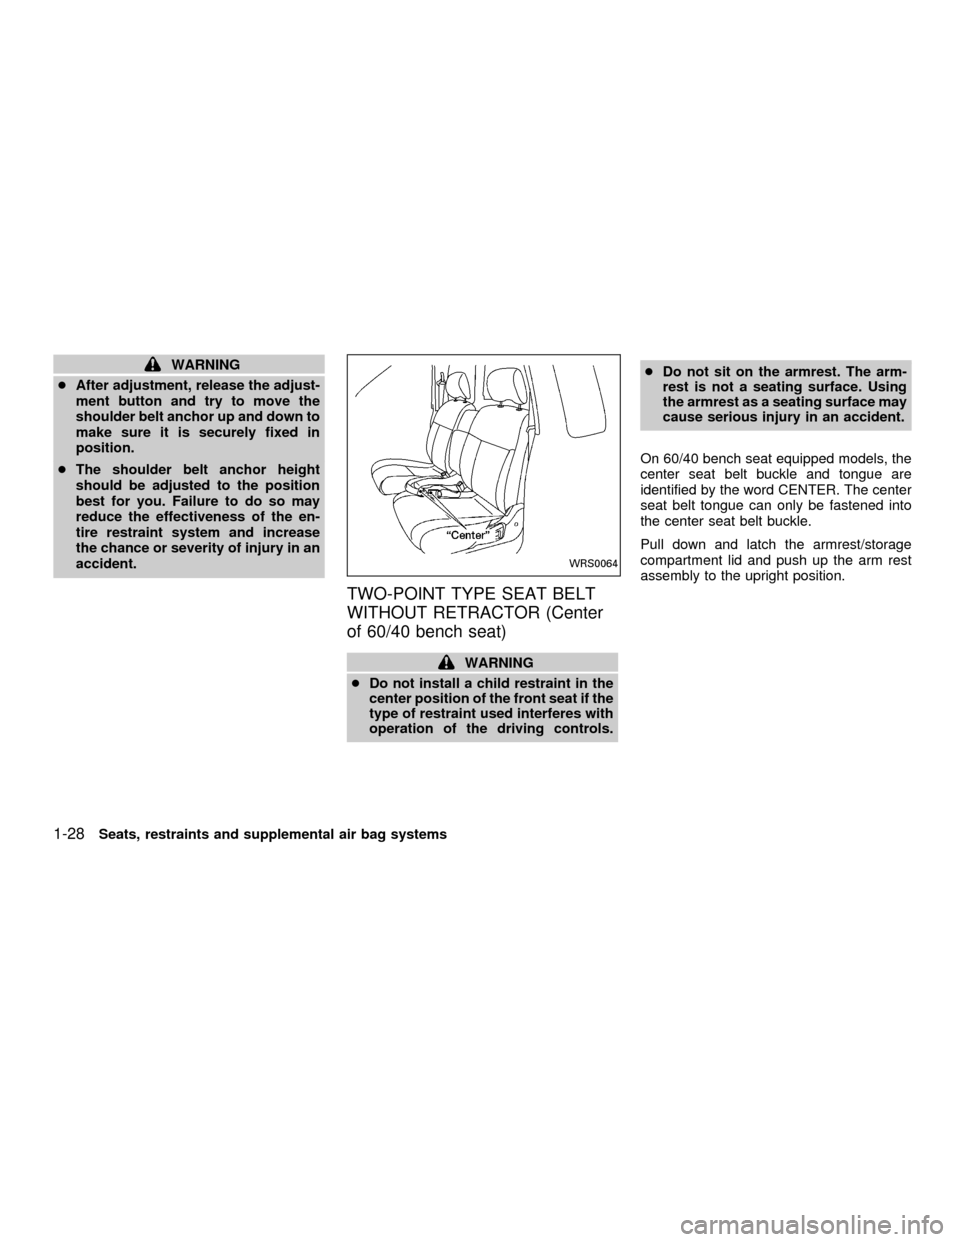
On 60/40 bench seat equipped models, the
center seat belt buckle and tongue are
identified by the word CENTER. The center
seat belt tongue can only be fastened into
the center seat belt buckle.
Pull down and latch the armrest/storage
compartment lid and push up the arm rest
assembly to the upright position.
WRS0064
1-28Seats, restraints and supplemental air bag systems
ZX