torque NISSAN FRONTIER 2009 Owner´s Manual
[x] Cancel search | Manufacturer: NISSAN, Model Year: 2009, Model line: FRONTIER, Model: NISSAN FRONTIER 2009Pages: 366, PDF Size: 6.43 MB
Page 260 of 366

5. Remove the wheel nuts and then remove the
tire.
Installing the spare tire
The spare tire is designed for emergency
use. See specific instructions under the
heading “Wheels and tires” in the “Mainte-
nance and do-it-yourself” section of this
manual.
1. Clean any mud or dirt from the surface be-
tween the wheel and hub.
2. Carefully put the spare tire on and tighten
the wheel nuts finger tight.
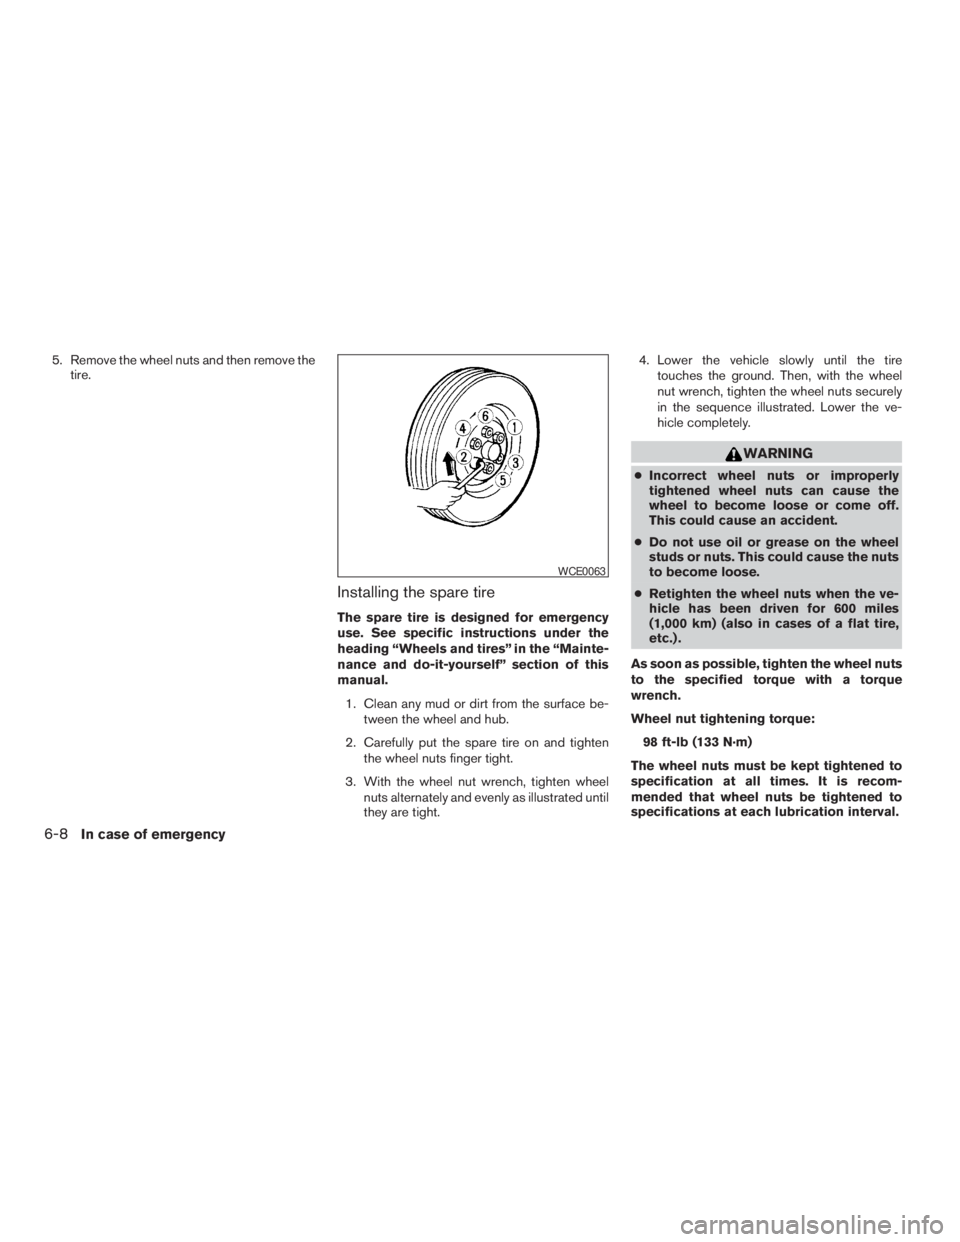
3. With the wheel nut wrench, tighten wheel
nuts alternately and evenly as illustrated until
they are tight.4. Lower the vehicle slowly until the tire
touches the ground. Then, with the wheel
nut wrench, tighten the wheel nuts securely
in the sequence illustrated. Lower the ve-
hicle completely.
WARNING
cIncorrect wheel nuts or improperly
tightened wheel nuts can cause the
wheel to become loose or come off.
This could cause an accident.
cDo not use oil or grease on the wheel
studs or nuts. This could cause the nuts
to become loose.
cRetighten the wheel nuts when the ve-
hicle has been driven for 600 miles
(1,000 km) (also in cases of a flat tire,
etc.) .
As soon as possible, tighten the wheel nuts
to the specified torque with a torque
wrench.
Wheel nut tightening torque:
98 ft-lb (133 N·m)
The wheel nuts must be kept tightened to
specification at all times. It is recom-
mended that wheel nuts be tightened to
specifications at each lubrication interval.
WCE0063
6-8In case of emergency
ZREVIEW COPYÐ2009 08+ Truck/Frontier(fro)
Owners ManualÐUSA_English(nna)
05/27/08Ðdebbie
X
Page 285 of 366

CHANGING ENGINE OIL
1. Park the vehicle on a level surface and apply
the parking brake.
2. Start the engine and let it idle until it reaches
operating temperature, then turn it off.
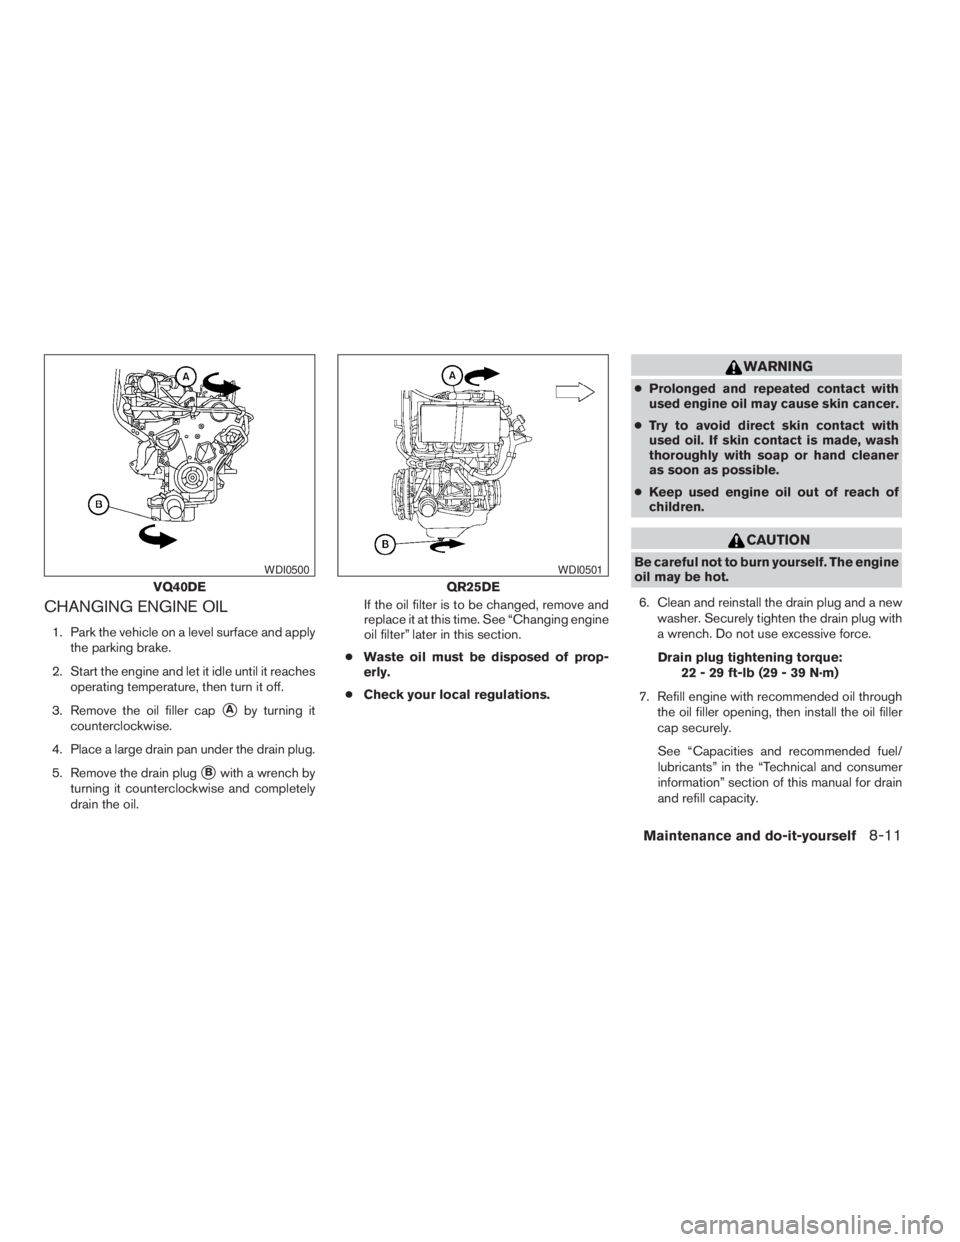
3. Remove the oil filler cap
sAby turning it
counterclockwise.
4. Place a large drain pan under the drain plug.
5. Remove the drain plug
sBwith a wrench by
turning it counterclockwise and completely
drain the oil.If the oil filter is to be changed, remove and
replace it at this time. See “Changing engine
oil filter” later in this section.
cWaste oil must be disposed of prop-
erly.
cCheck your local regulations.
WARNING
cProlonged and repeated contact with
used engine oil may cause skin cancer.
cTry to avoid direct skin contact with
used oil. If skin contact is made, wash
thoroughly with soap or hand cleaner
as soon as possible.
cKeep used engine oil out of reach of
children.
CAUTION
Be careful not to burn yourself. The engine
oil may be hot.
6. Clean and reinstall the drain plug and a new
washer. Securely tighten the drain plug with
a wrench. Do not use excessive force.
Drain plug tightening torque:
22 - 29 ft-lb (29 - 39 N·m)
7. Refill engine with recommended oil through
the oil filler opening, then install the oil filler
cap securely.
See “Capacities and recommended fuel/
lubricants” in the “Technical and consumer
information” section of this manual for drain
and refill capacity.
VQ40DE
WDI0500
QR25DE
WDI0501
Maintenance and do-it-yourself8-11
ZREVIEW COPYÐ2009 08+ Truck/Frontier(fro)
Owners ManualÐUSA_English(nna)
05/27/08Ðdebbie
X
Page 315 of 366

CHANGING WHEELS AND TIRES
Tire rotation
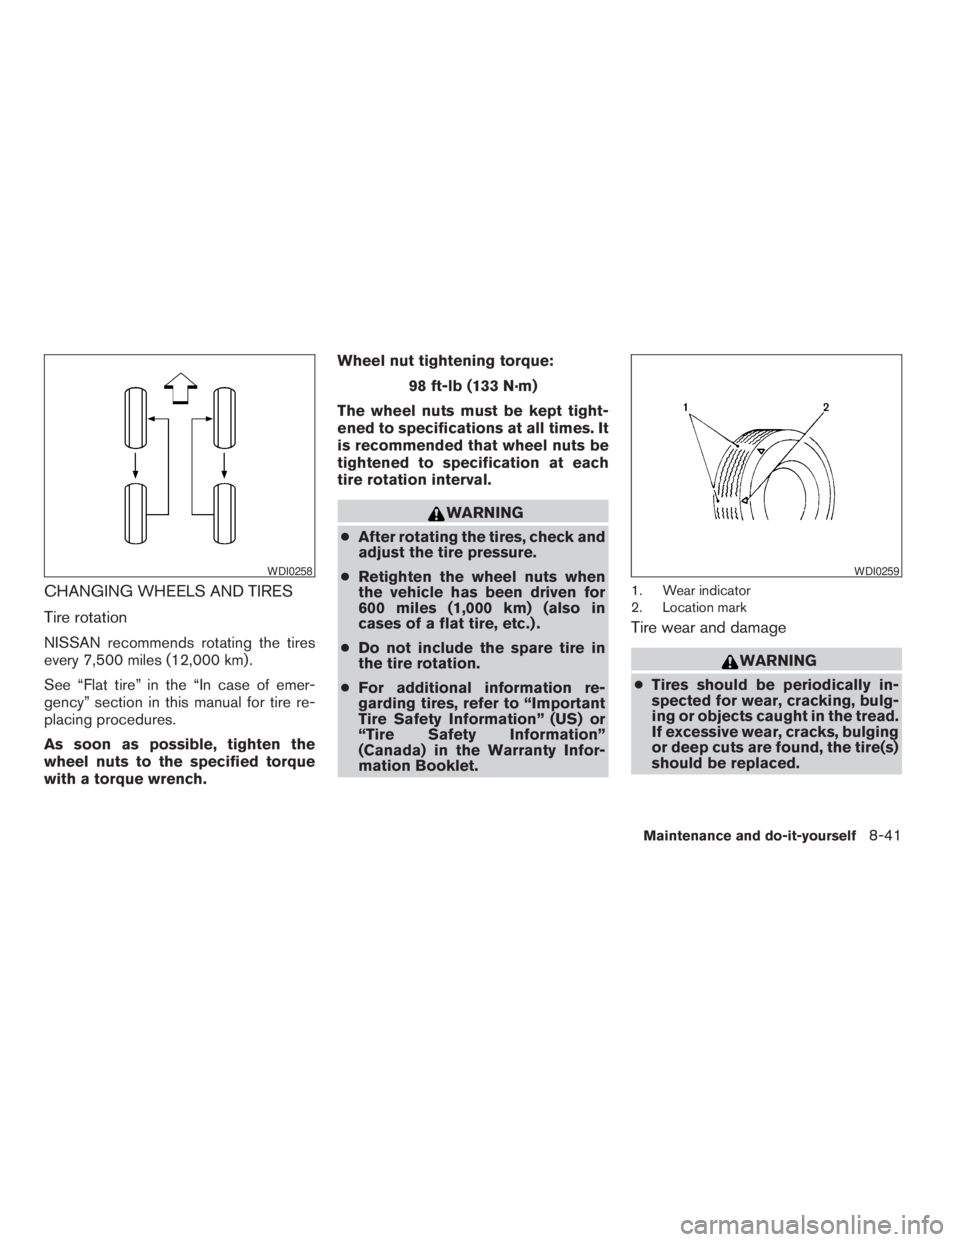
NISSAN recommends rotating the tires
every 7,500 miles (12,000 km) .
See “Flat tire” in the “In case of emer-
gency” section in this manual for tire re-
placing procedures.
As soon as possible, tighten the
wheel nuts to the specified torque
with a torque wrench.Wheel nut tightening torque:
98 ft-lb (133 N·m)
The wheel nuts must be kept tight-
ened to specifications at all times. It
is recommended that wheel nuts be
tightened to specification at each
tire rotation interval.
WARNING
cAfter rotating the tires, check and
adjust the tire pressure.
cRetighten the wheel nuts when
the vehicle has been driven for
600 miles (1,000 km) (also in
cases of a flat tire, etc.) .
cDo not include the spare tire in
the tire rotation.
cFor additional information re-
garding tires, refer to “Important
Tire Safety Information” (US) or
“Tire Safety Information”
(Canada) in the Warranty Infor-
mation Booklet.
1. Wear indicator
2. Location mark
Tire wear and damage
WARNING
cTires should be periodically in-
spected for wear, cracking, bulg-
ing or objects caught in the tread.
If excessive wear, cracks, bulging
or deep cuts are found, the tire(s)
should be replaced.
WDI0258WDI0259
Maintenance and do-it-yourself8-41
ZREVIEW COPYÐ2009 08+ Truck/Frontier(fro)
Owners ManualÐUSA_English(nna)
05/27/08Ðdebbie
X
Page 331 of 366

INSTALLING FRONT LICENSE
PLATE WITH GROMMETS
Use the following steps to mount the front license
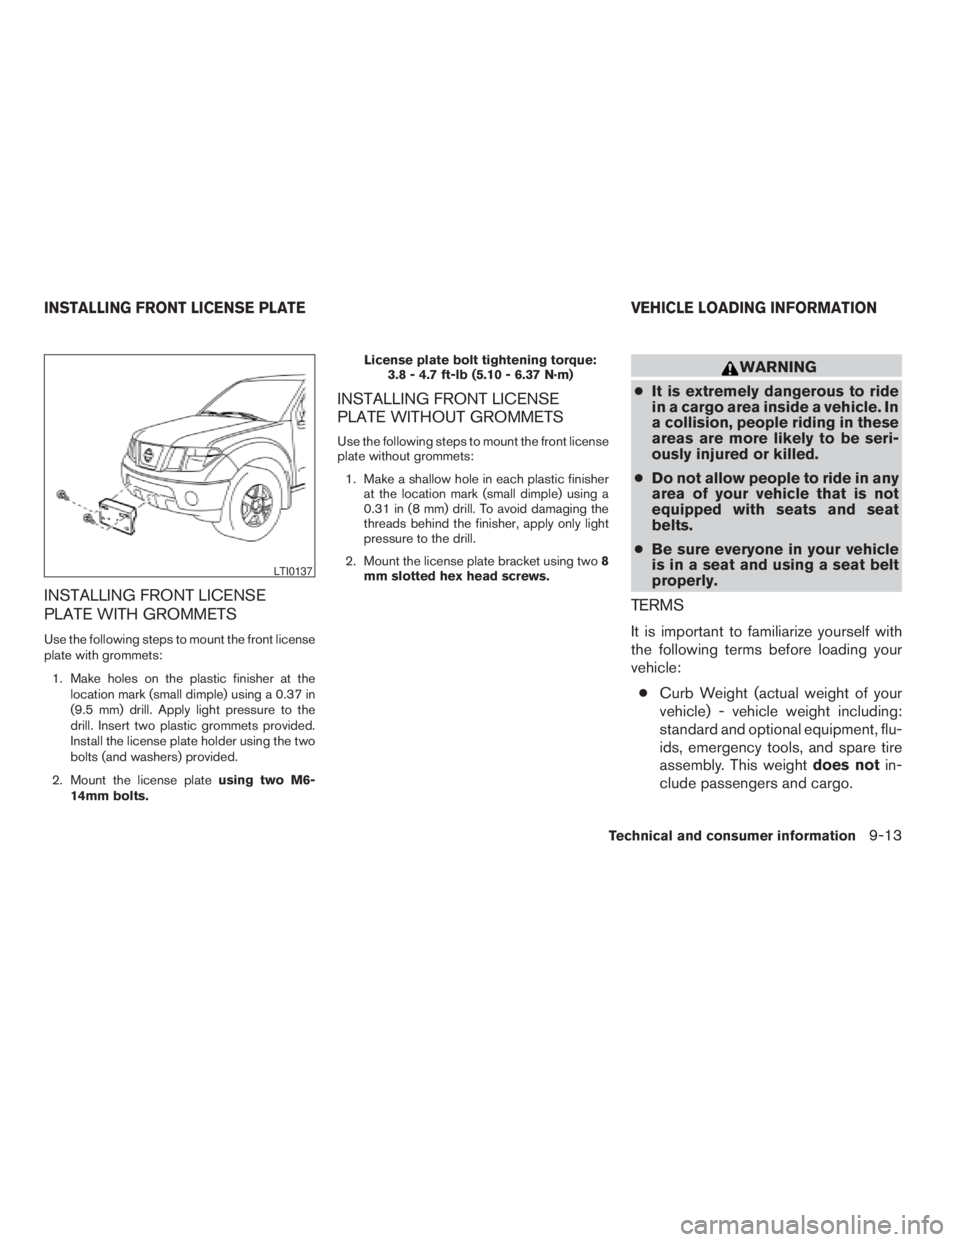
plate with grommets:
1. Make holes on the plastic finisher at the
location mark (small dimple) using a 0.37 in
(9.5 mm) drill. Apply light pressure to the
drill. Insert two plastic grommets provided.
Install the license plate holder using the two
bolts (and washers) provided.
2. Mount the license plateusing two M6-
14mm bolts.License plate bolt tightening torque:
3.8 - 4.7 ft-lb (5.10 - 6.37 N·m)
INSTALLING FRONT LICENSE
PLATE WITHOUT GROMMETS
Use the following steps to mount the front license
plate without grommets:
1. Make a shallow hole in each plastic finisher
at the location mark (small dimple) using a
0.31 in (8 mm) drill. To avoid damaging the
threads behind the finisher, apply only light
pressure to the drill.
2. Mount the license plate bracket using two8
mm slotted hex head screws.
WARNING
cIt is extremely dangerous to ride
in a cargo area inside a vehicle. In
a collision, people riding in these
areas are more likely to be seri-
ously injured or killed.
cDo not allow people to ride in any
area of your vehicle that is not
equipped with seats and seat
belts.
cBe sure everyone in your vehicle
is in a seat and using a seat belt
properly.
TERMS
It is important to familiarize yourself with
the following terms before loading your
vehicle:
cCurb Weight (actual weight of your
vehicle) - vehicle weight including:
standard and optional equipment, flu-
ids, emergency tools, and spare tire
assembly. This weightdoes notin-
clude passengers and cargo.
LTI0137
INSTALLING FRONT LICENSE PLATE VEHICLE LOADING INFORMATION
Technical and consumer information9-13
ZREVIEW COPYÐ2009 08+ Truck/Frontier(fro)
Owners ManualÐUSA_English(nna)
06/13/08Ðdebbie
X