ECO mode NISSAN GT-R 2013 R35 Multi Function Display User Guide
[x] Cancel search | Manufacturer: NISSAN, Model Year: 2013, Model line: GT-R, Model: NISSAN GT-R 2013 R35Pages: 315, PDF Size: 6.96 MB
Page 151 of 315
DISC·AUX button:
When
off and the Bluetooth
®audio device connected,
the system will turn on. If another audio source is
playing and the Bluetooth
®audio device is
connected, push
the display changes to the Bluetooth
®audio
mode.
Next/Previous Track and Fast Forward/
Rewind:
When <
>or <>is pushed for more than
1.5 seconds while a Bluetooth®audio file is
being played, the Bluetooth®audio device will
play while forwarding or rewinding. When the
button is released, the Bluetooth
®audio device
will return to normal play speed.
When <
>or <>is pushed for less than
1.5 seconds while a Bluetooth®audio file is
being played, the next track or the beginning of
the current track on the Bluetooth
®audio device
will be played. The center dial can also be used
to select tracks when the Bluetooth
®audio play
mode screen is shown on the display. (“Blue-
tooth
®audio” will be indicated on the header of
the screen.)
REPEAT (RPT) , RANDOM (RDM):
To change the play mode, push
repeatedly and the mode changes as follows.
Normal ?Shuffle All Tracks ?Shuffle Group
? Repeat 1 Track ?Repeat All Tracks ?
Repeat Group ?Normal
Operation keys:
To operate a Bluetooth
®audio device, select a
key displayed on the operation screen using the
center dial.
Play
Select [
]to start playing when pausing.
Select this key again to pause the audio play.
Pause
Select [
]to pause the Bluetooth®audio
device. Select this key again to resume playing.
Play Mode:
The play mode setting display will appear when
[Menu] is selected.
Choose the preferred play mode from the
following items. .
Shuffle
Choose “Shuffle OFF”, “Shuffle All Tracks”
and “Shuffle Group”.
. Repeat
Choose from “Repeat OFF”, “Repeat 1
Track”, “Repeat All Tracks” and “Repeat
Group”.
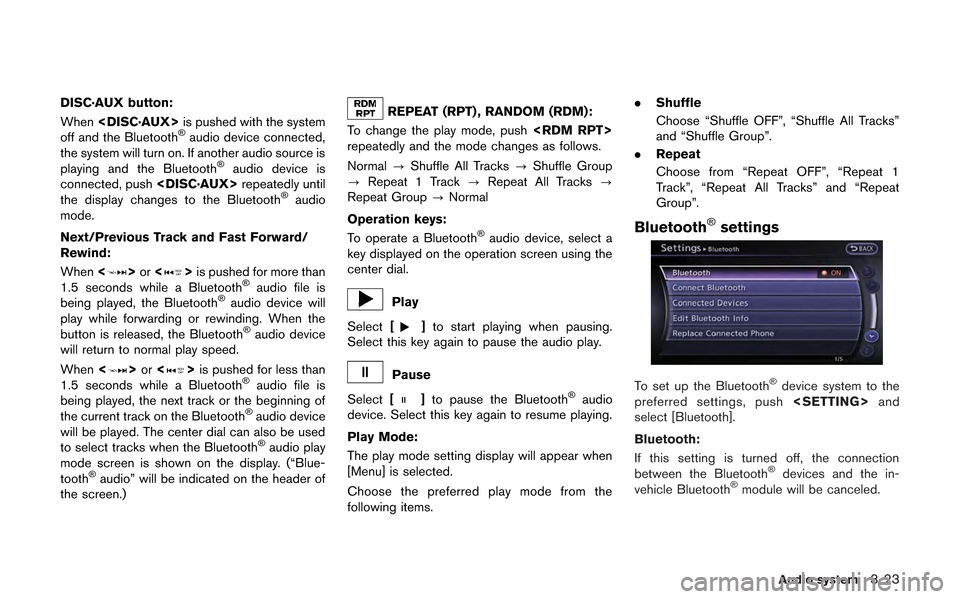
Bluetooth®settings
To set up the Bluetooth®device system to the
preferred settings, push
select [Bluetooth].
Bluetooth:
If this setting is turned off, the connection
between the Bluetooth
®devices and the in-
vehicle Bluetooth®module will be canceled.
Audio system3-23
Page 152 of 315
3-24Audio system
Connect Bluetooth:
Connects to the Bluetooth®device. Up to 5
devices can be registered.
“Connecting procedure” (page 3-22)
Connected Devices:
Registered devices are shown on the list. Select
a Bluetooth
®device from the list, the following
options will be available.
. Select
Select [Select] to connect the selected
device to the vehicle. If there is a different
device currently connected, the selected
device will replace the current device.
. Edit
Rename the selected Bluetooth
®device
using the keypad displayed on the screen.
“How to input letters and numbers”
(page 1-16)
. Delete
Delete the selected Bluetooth
®device.
Edit Bluetooth Info:
Change the name broadcasted by this system
over Bluetooth
®. Change the PIN code that is
entered when connecting a hands free device to
this system. Replace Connected Phone:
Replace the Bluetooth
®connection with a
connected Bluetooth®cellular phone.“4. Bluetooth®Hands-Free Phone Sys-
tem”
iPod®PLAYER OPERATION
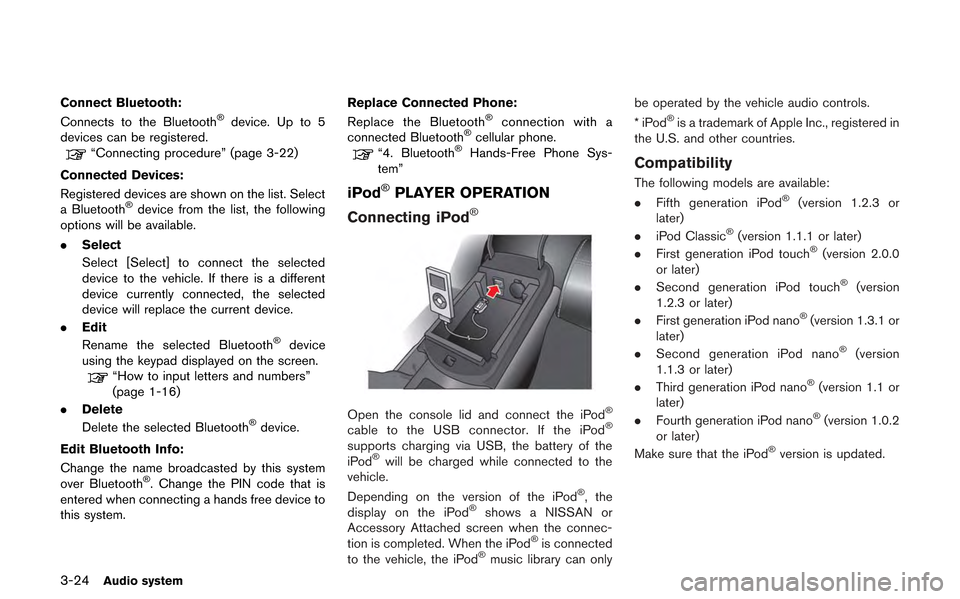
Connecting iPod
®
Open the console lid and connect the iPod®
cable to the USB connector. If the iPod®
supports charging via USB, the battery of the
iPod®will be charged while connected to the
vehicle.
Depending on the version of the iPod
®, the
display on the iPod®shows a NISSAN or
Accessory Attached screen when the connec-
tion is completed. When the iPod
®is connected
to the vehicle, the iPod®music library can only be operated by the vehicle audio controls.
*iPod
®is a trademark of Apple Inc., registered in
the U.S. and other countries.
Compatibility
The following models are available:
. Fifth generation iPod®(version 1.2.3 or
later)
. iPod Classic
®(version 1.1.1 or later)
. First generation iPod touch®(version 2.0.0
or later)
. Second generation iPod touch
®(version
1.2.3 or later)
. First generation iPod nano
®(version 1.3.1 or
later)
. Second generation iPod nano
®(version
1.1.3 or later)
. Third generation iPod nano
®(version 1.1 or
later)
. Fourth generation iPod nano
®(version 1.0.2
or later)
Make sure that the iPod
®version is updated.
Page 153 of 315
Audio main operation
Push the ignition switch to the ACC or ON
position. Then, push
to switch to the iPod
®mode.
If the system has been turned off while the iPod®
was playing, pushing the ON·OFF button will
start the iPod®.
PLAY:
When
off and the iPod
®connected, the system will turn
on. If another audio source is playing and the
iPod
®is connected, push
peatedly until the center display changes to the
iPod
®mode.
Interface:
The interface for iPod
®operation shown on the
vehicle center display is similar to the iPod®
interface. Use the center dial and
settings.
The following items can be chosen from the
menu list screen. For further information about
each item, see the iPod
®Owner’s Manual.
. Now Playing
. Playlists .
Artists
. Albums
. Songs
. Podcasts
. Genres
. Composers
. Audiobooks
. Shuffle Songs
The following touch-panel buttons shown on the
screen are also available:
.
: returns to the previous screen.
.
: plays/pauses the music selected.
Next/Previous Track and Fast Forward/
Rewind:
When <
>or <>is pushed for more than
1.5 seconds while the iPod®is playing, the
iPod®will play while fast forwarding or rewind-
ing. When the button is released, the iPod®will
return to the normal play speed.
When <
>or <>is pushed for less than
1.5 seconds while the iPod®is playing, the next
track or the beginning of the current track on the
iPod
®will be played.
The center dial can also be used to select tracks
when the iPod
®is playing.
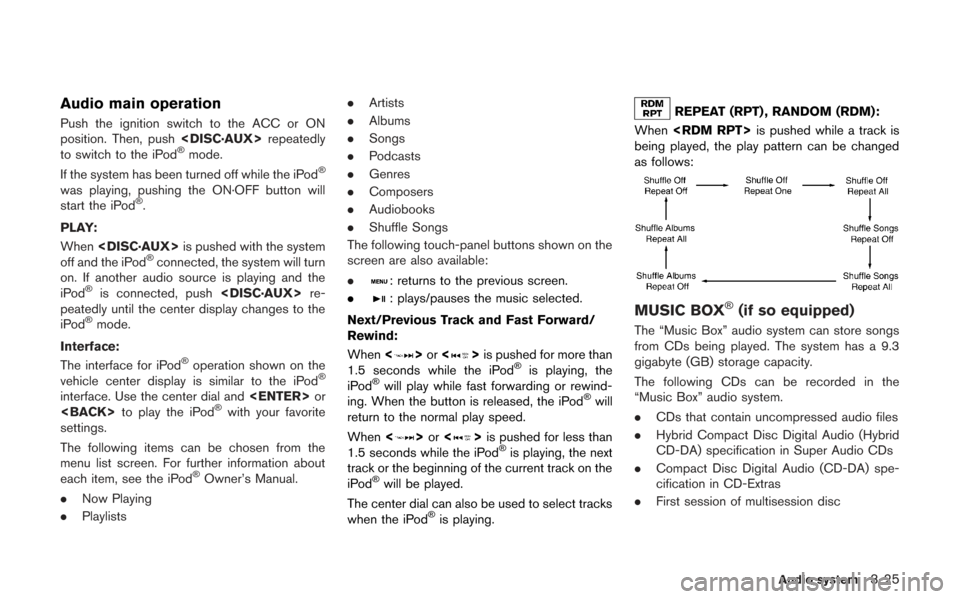
REPEAT (RPT) , RANDOM (RDM):
When
being played, the play pattern can be changed
as follows:
MUSIC BOX®(if so equipped)
The “Music Box” audio system can store songs
from CDs being played. The system has a 9.3
gigabyte (GB) storage capacity.
The following CDs can be recorded in the
“Music Box” audio system.
. CDs that contain uncompressed audio files
. Hybrid Compact Disc Digital Audio (Hybrid
CD-DA) specification in Super Audio CDs
. Compact Disc Digital Audio (CD-DA) spe-
cification in CD-Extras
. First session of multisession disc
Audio system3-25
Page 155 of 315
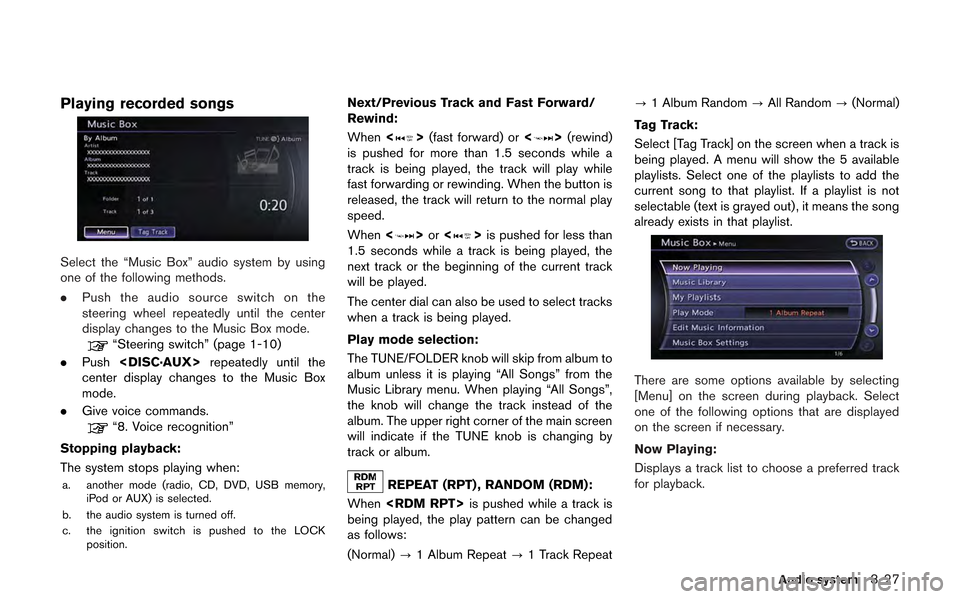
Playing recorded songs
Select the “Music Box” audio system by using
one of the following methods.
.Push the audio source switch on the
steering wheel repeatedly until the center
display changes to the Music Box mode.
“Steering switch” (page 1-10)
. Push
center display changes to the Music Box
mode.
. Give voice commands.
“8. Voice recognition”
Stopping playback:
The system stops playing when:
a. another mode (radio, CD, DVD, USB memory, iPod or AUX) is selected.
b. the audio system is turned off.
c. the ignition switch is pushed to the LOCK position.
Next/Previous Track and Fast Forward/
Rewind:
When <
>(fast forward) or <>(rewind)
is pushed for more than 1.5 seconds while a
track is being played, the track will play while
fast forwarding or rewinding. When the button is
released, the track will return to the normal play
speed.
When <
>or <>is pushed for less than
1.5 seconds while a track is being played, the
next track or the beginning of the current track
will be played.
The center dial can also be used to select tracks
when a track is being played.
Play mode selection:
The TUNE/FOLDER knob will skip from album to
album unless it is playing “All Songs” from the
Music Library menu. When playing “All Songs”,
the knob will change the track instead of the
album. The upper right corner of the main screen
will indicate if the TUNE knob is changing by
track or album.
REPEAT (RPT) , RANDOM (RDM):
When
being played, the play pattern can be changed
as follows:
(Normal) ?1 Album Repeat ?1 Track Repeat ?
1 Album Random ?All Random ?(Normal)
Tag Track:
Select [Tag Track] on the screen when a track is
being played. A menu will show the 5 available
playlists. Select one of the playlists to add the
current song to that playlist. If a playlist is not
selectable (text is grayed out), it means the song
already exists in that playlist.
There are some options available by selecting
[Menu] on the screen during playback. Select
one of the following options that are displayed
on the screen if necessary.
Now Playing:
Displays a track list to choose a preferred track
for playback.
Audio system3-27
Page 156 of 315
3-28Audio system
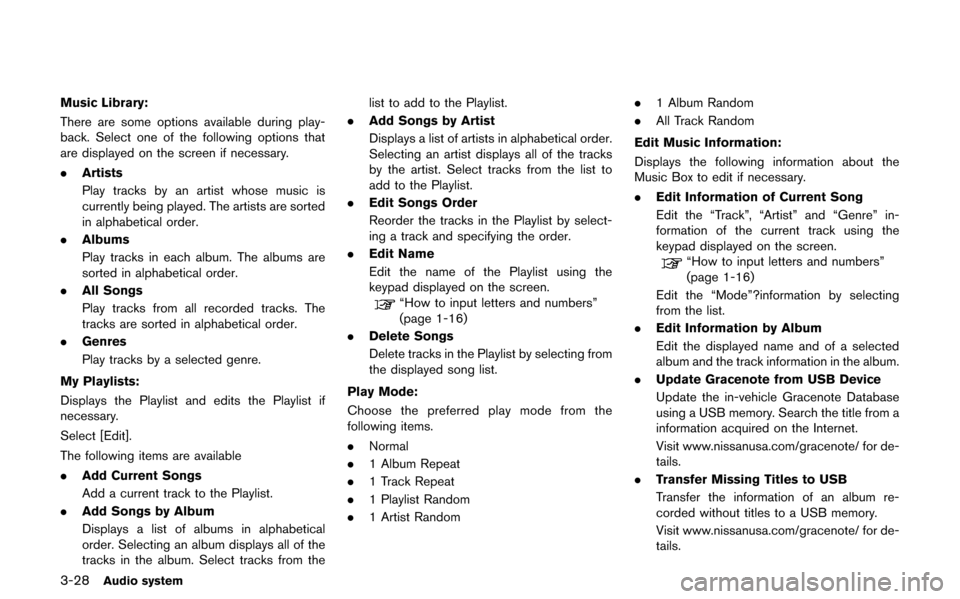
Music Library:
There are some options available during play-
back. Select one of the following options that
are displayed on the screen if necessary.
.Artists
Play tracks by an artist whose music is
currently being played. The artists are sorted
in alphabetical order.
. Albums
Play tracks in each album. The albums are
sorted in alphabetical order.
. All Songs
Play tracks from all recorded tracks. The
tracks are sorted in alphabetical order.
. Genres
Play tracks by a selected genre.
My Playlists:
Displays the Playlist and edits the Playlist if
necessary.
Select [Edit].
The following items are available
. Add Current Songs
Add a current track to the Playlist.
. Add Songs by Album
Displays a list of albums in alphabetical
order. Selecting an album displays all of the
tracks in the album. Select tracks from the list to add to the Playlist.
. Add Songs by Artist
Displays a list of artists in alphabetical order.
Selecting an artist displays all of the tracks
by the artist. Select tracks from the list to
add to the Playlist.
. Edit Songs Order
Reorder the tracks in the Playlist by select-
ing a track and specifying the order.
. Edit Name
Edit the name of the Playlist using the
keypad displayed on the screen.
“How to input letters and numbers”
(page 1-16)
. Delete Songs
Delete tracks in the Playlist by selecting from
the displayed song list.
Play Mode:
Choose the preferred play mode from the
following items.
. Normal
. 1 Album Repeat
. 1 Track Repeat
. 1 Playlist Random
. 1 Artist Random .
1 Album Random
. All Track Random
Edit Music Information:
Displays the following information about the
Music Box to edit if necessary.
. Edit Information of Current Song
Edit the “Track”, “Artist” and “Genre” in-
formation of the current track using the
keypad displayed on the screen.
“How to input letters and numbers”
(page 1-16)
Edit the “Mode”?information by selecting
from the list.
. Edit Information by Album
Edit the displayed name and of a selected
album and the track information in the album.
. Update Gracenote from USB Device
Update the in-vehicle Gracenote Database
using a USB memory. Search the title from a
information acquired on the Internet.
Visit www.nissanusa.com/gracenote/ for de-
tails.
. Transfer Missing Titles to USB
Transfer the information of an album re-
corded without titles to a USB memory.
Visit www.nissanusa.com/gracenote/ for de-
tails.
Page 159 of 315
.Handle a CD/DVD by its edges. Never touch
the surface of the disc. Do not bend the
disc.
. Always place the discs in the storage case
when they are not being used.
. To clean a disc, wipe the surface from the
center to the outer edge using a clean, soft
cloth. Do not wipe the disc using a circular
motion.
Do not use a conventional record cleaner or
alcohol intended for industrial use.
. A new disc may be rough on the inner and
outer edges. Remove the rough edges by
rubbing the inner and outer edges with the
side of a pen or pencil as illustrated.
USB memory
.Never touch the terminal portion of the USB
memory.
. Do not place heavy objects on the USB
memory.
. Do not store the USB memory in highly
humid locations.
. Do not expose the USB memory to direct
sunlight.
. Do not spill any liquids on the USB memory.
Refer to the USB memory Owner’s Manual for
the details.
When installing a car phone or a CB radio in
your vehicle, be sure to observe the following
cautions, otherwise the new equipment may
adversely affect the electronic control modules
and electronic control system harness.
WARNING
. A cellular phone should not be used
for any purpose while driving so full
attention may be given to vehicle
operation. Some jurisdictions prohi-
bit the use of cellular phones while
driving.
. If you must make a call while your
vehicle is in motion, the hands-free
cellular phone operational mode (if
so equipped) is highly recom-
mended. Exercise extreme caution
at all times so full attention may be
given to vehicle operation.
. If you are unable to devote full
attention to vehicle operation while
talking on the phone, pull off the
road to a safe location and stop
your vehicle.
CAUTION
. Keep the antenna as far away as
possible from the electronic control
modules.
. Keep the antenna wire more than 8
in (20 cm) away from the electronic
control system harness. Do not
route the antenna wire next to any
harness.
. Adjust the antenna standing-wave
ratio as recommended by the man-
ufacturer.
. Connect the ground wire from the
CB radio chassis to the body.
. For details, consult your NISSAN
dealer or GT-R certified NISSAN
dealer.
Audio system3-31
CAR PHONE or CB RADIO
Page 166 of 315
![NISSAN GT-R 2013 R35 Multi Function Display User Guide 4-6Bluetooth®Hands-Free Phone System
The following editing items are available:
.[Entry #]:
Changes the displayed number of the
selected entry.
. [Name]:
Edit the name of the entry using the keypad
d NISSAN GT-R 2013 R35 Multi Function Display User Guide 4-6Bluetooth®Hands-Free Phone System
The following editing items are available:
.[Entry #]:
Changes the displayed number of the
selected entry.
. [Name]:
Edit the name of the entry using the keypad
d](/img/5/316/w960_316-165.png)
4-6Bluetooth®Hands-Free Phone System
The following editing items are available:
.[Entry #]:
Changes the displayed number of the
selected entry.
. [Name]:
Edit the name of the entry using the keypad
displayed on the screen.
. [Number]:
Edit the phone number using the keypad
displayed on the screen.
. [Type]:
Select an icon from the icon list.
. [Voicetag]:
Confirm and store the voicetag. Voicetags
allow easy dialing using the NISSAN Voice
Recognition system.
“8. Voice recognition”
To delete an entry, select [Delete] at step 3.
MAKING A CALL
To make a call, follow this procedure.
1. Push
>. The “PHONE”
screen will appear on the display.
2. Select [Handset Phonebook] on the “PHONE” menu.
3. Select the desired entry from the list.
4. Confirm the correct entry by selecting for the correct number from the list.
5. Select [Call] to start dialing the number.
There are different methods to make a call.
Select one of the following options instead of
[Handset Phonebook] in step 2 above.
.[Vehicle Phonebook]:
Select an entry stored in the Vehicle’s
Phonebook.
. [Call History]:
Select an outgoing, incoming or missed call
downloaded from your cell phone (depend-
ing on your phone’s compatibility) .
. [Dial Number]:
Input the phone number manually using the
keypad displayed on the screen.
“How to input letters and numbers”
(page 1-16)
RECEIVING A CALL
When you hear a phone ring, the display will
change to the incoming call mode. To receive a
Page 172 of 315
5-2Heater and air conditioner
WARNING
.The air conditioner cooling function
operates only when the engine is
running.
. Do not leave children or adults who
would normally require the support
of others alone in your vehicle. Pets
should not be left alone either. On
hot, sunny days, temperatures in a
closed vehicle could quickly become
high enough to cause severe or
possibly fatal injuries to people or
animals.
. Do not use the recirculation mode
for long periods as it may cause the
interior air to become stale and the
windows to fog up.
Start the engine and operate the heater and air
conditioner system.
You can individually set the driver and front
passenger side temperature using each tem-
perature control button.
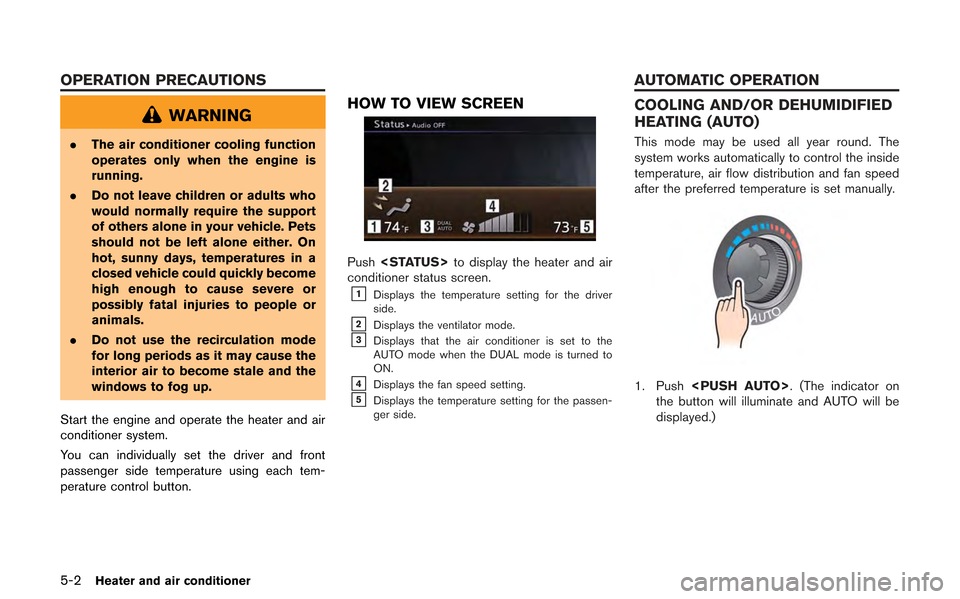
HOW TO VIEW SCREEN
Push
conditioner status screen.
&1Displays the temperature setting for the driver
side.
&2Displays the ventilator mode.&3Displays that the air conditioner is set to the
AUTO mode when the DUAL mode is turned to
ON.
&4Displays the fan speed setting.&5Displays the temperature setting for the passen-
ger side.
COOLING AND/OR DEHUMIDIFIED
HEATING (AUTO)
This mode may be used all year round. The
system works automatically to control the inside
temperature, air flow distribution and fan speed
after the preferred temperature is set manually.
1. Push
the button will illuminate and AUTO will be
displayed.)
OPERATION PRECAUTIONS AUTOMATIC OPERATION
Page 174 of 315
5-4Heater and air conditioner
.Do not set the temperature lower than the
outside air temperature. Otherwise the
system may not work properly.
. Not recommended if windows fog up.
DEHUMIDIFIED DEFROSTING or
DEFOGGING
1. Push the front defroster button <>. The
indicator light on the button will come on.
2. Operate the temperature control dial to set the desired temperature.
. To quickly remove ice from the outside of the
windows, turn the fan speed control dial
<
>and set it to the maximum position.
. As soon as possible after the windshield is
clean, push
the auto mode. .
When the front defroster button <
>is
pushed, the air conditioner will automatically
be turned on at outside temperatures above
238F( −58C) to defog the windshield, and
the air recirculate mode will automatically be
turned off.
Outside air is drawn into the passenger
compartment to improve the defogging
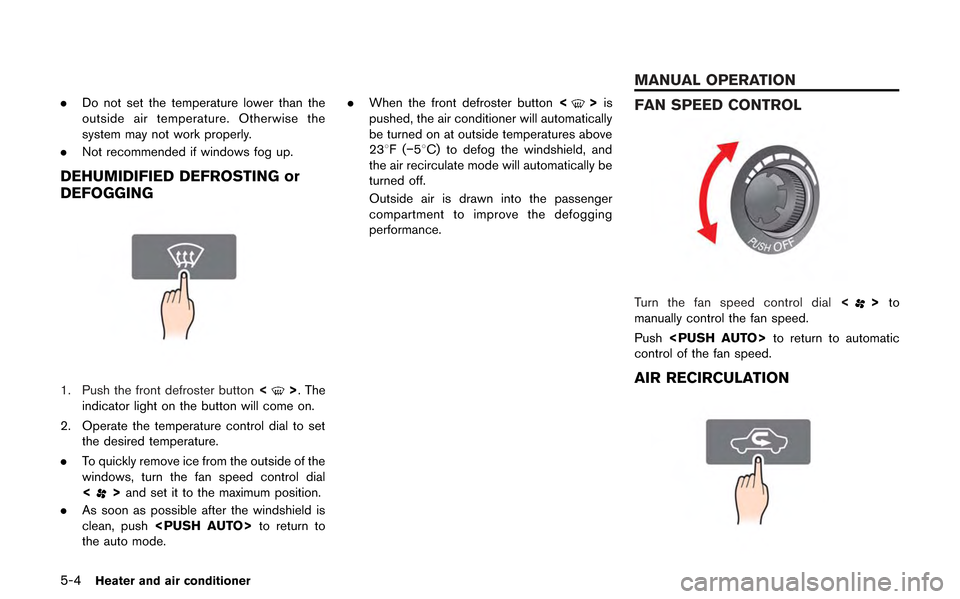
performance.FAN SPEED CONTROL
Turn the fan speed control dial <>to
manually control the fan speed.
Push
control of the fan speed.
AIR RECIRCULATION
MANUAL OPERATION
Page 175 of 315
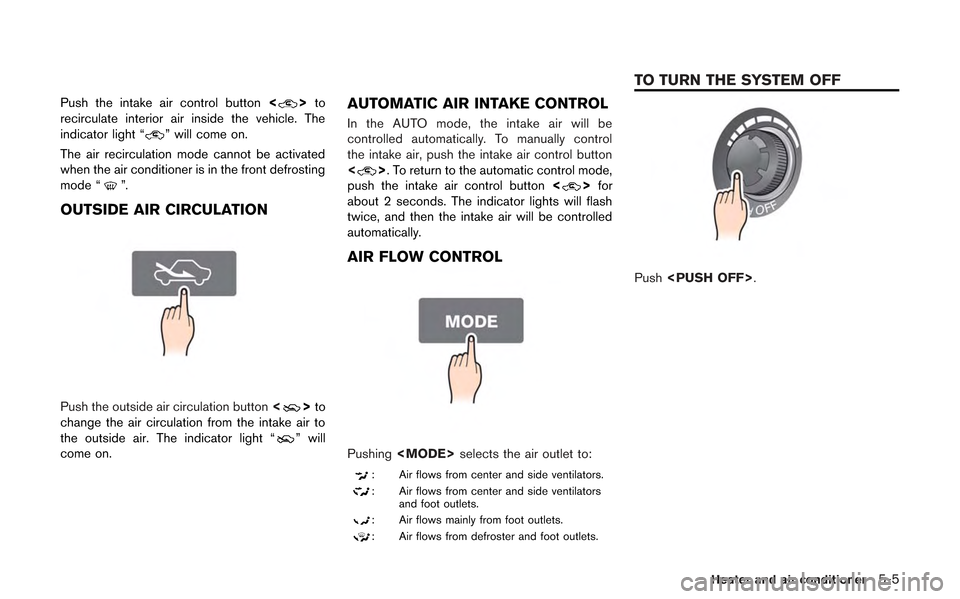
Push the intake air control button<>to
recirculate interior air inside the vehicle. The
indicator light “
” will come on.
The air recirculation mode cannot be activated
when the air conditioner is in the front defrosting
mode “
”.
OUTSIDE AIR CIRCULATION
Push the outside air circulation button <>to
change the air circulation from the intake air to
the outside air. The indicator light “
” will
come on.
AUTOMATIC AIR INTAKE CONTROL
In the AUTO mode, the intake air will be
controlled automatically. To manually control
the intake air, push the intake air control button
<
>. To return to the automatic control mode,
push the intake air control button <>for
about 2 seconds. The indicator lights will flash
twice, and then the intake air will be controlled
automatically.
AIR FLOW CONTROL
Pushing
: Air flows from center and side ventilators.
: Air flows from center and side ventilators
and foot outlets.
: Air flows mainly from foot outlets.
: Air flows from defroster and foot outlets.
Push
Heater and air conditioner5-5
TO TURN THE SYSTEM OFF