battery NISSAN GT-R 2013 R35 Multi Function Display Owners Manual
[x] Cancel search | Manufacturer: NISSAN, Model Year: 2013, Model line: GT-R, Model: NISSAN GT-R 2013 R35Pages: 315, PDF Size: 6.96 MB
Page 7 of 315
.If you notice any foreign objects in
the system hardware, spill liquid on
the system or notice smoke or a
smell coming from it, stop using the
system immediately and contact a
GT-R certified NISSAN dealer. Ignor-
ing such conditions may lead to
accidents, fire or electrical shock.
CAUTION
.Do not use this system if you notice
any malfunctions such as a frozen
screen or the lack of sound. Con-
tinued use of the system may result
in accidents, fire or electrical shock.
. Some states/provinces may have
laws limiting the use of video
screens while driving. Use this sys-
tem only where it is legal to do so.
. Extreme temperature conditions
[below −48F( −208 C) and above
1588F (708C)] could affect the per-
formance of the system.
NOTICE
Do not keep the navigation system
running with the engine stopped. Doing
so may discharge the vehicle battery.
When you use the navigation system,
always keep the engine running.
Introduction0-3
Page 131 of 315
AM radio reception:
AM signals, because of their low frequency, can
bend around objects and skip along the ground.
In addition, the signals can be bounced off the
ionosphere and bent back to earth. Because of
these characteristics. AM signals are also
subject to interference as they travel from
transmitter to receiver.
Fading: Occurs while the vehicle is passing
through freeway underpasses or in areas with
many tall buildings. It can also occur for several
seconds during ionospheric turbulence even in
areas where no obstacles exist.
Static: Caused by thunderstorms, electrical
power lines, electric signs and even traffic lights.
Satellite radio reception:
When the satellite radio is used for the first time
or the battery has been replaced, the satellite
radio may not work properly. This is not a
malfunction. Wait more than 10 minutes with the
satellite radio ON and the vehicle outside of any
metal or large building for the satellite radio to
receive all of the necessary data.
The satellite radio mode requires an active XM
®
Satellite Radio subscription. The satellite radio is
not available in Alaska, Hawaii and Guam.
The satellite radio performance may be affected
if cargo carried on the roof blocks the satelliteradio signal.
If possible, do not put cargo near the satellite
antenna.
A build up of ice on the satellite radio antenna
can affect satellite radio performance. Remove
the ice to restore satellite radio reception.
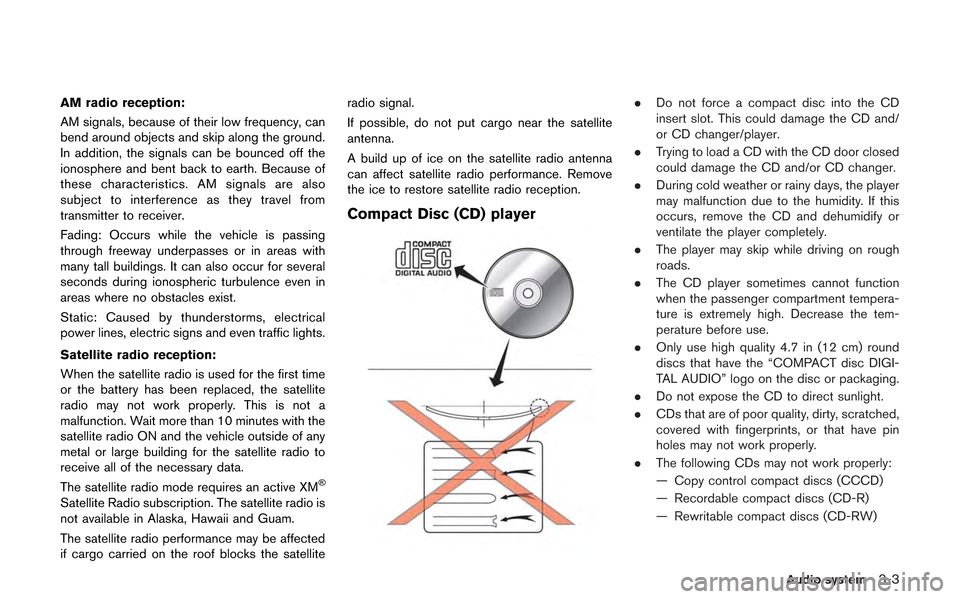
Compact Disc (CD) player
.
Do not force a compact disc into the CD
insert slot. This could damage the CD and/
or CD changer/player.
. Trying to load a CD with the CD door closed
could damage the CD and/or CD changer.
. During cold weather or rainy days, the player
may malfunction due to the humidity. If this
occurs, remove the CD and dehumidify or
ventilate the player completely.
. The player may skip while driving on rough
roads.
. The CD player sometimes cannot function
when the passenger compartment tempera-
ture is extremely high. Decrease the tem-
perature before use.
. Only use high quality 4.7 in (12 cm) round
discs that have the “COMPACT disc DIGI-
TAL AUDIO” logo on the disc or packaging.
. Do not expose the CD to direct sunlight.
. CDs that are of poor quality, dirty, scratched,
covered with fingerprints, or that have pin
holes may not work properly.
. The following CDs may not work properly:
— Copy control compact discs (CCCD)
— Recordable compact discs (CD-R)
— Rewritable compact discs (CD-RW)
Audio system3-3
Page 141 of 315
TUNE (Tuning):
.For AM and FM radio
Turn the radio TUNE knob for manual tuning.
. For XM Satellite Radio
Turn the radio TUNE knob to seek channels
from all of the categories when any category
is not selected.
SEEK tuning/CATEGORY (CAT):
. For AM and FM radio
Push <
>or <>to tune from low to
high or high to low frequencies and to stop
at the next broadcasting station.
. For XM Satellite Radio
Push <
>or <>to tune to the first
channel of the next or previous category.
During satellite radio reception, the following
notices will be displayed under certain condi-
tions.
. NO SIGNAL (No signal is received while the
SAT tuner is connected.)
. OFF AIR (Broadcasting signed off)
. CHECK ANTENNA (Antenna connection
error)
. LOADING (When the initial setting is
performed) .
UPDATING (When the satellite radio sub-
scription is not active)
SCAN tuning:
Push
frequencies and stop at each broadcasting
station/channel for 5 seconds. Pushing the
button again during this 5 seconds period will
stop SCAN tuning and the radio will remain
tuned to that station/channel.
If
SCAN tuning moves to the next station/channel.
*1to*6Station memory operations:
12 stations/channels can be set for the FM band
(6 each for FM1 and FM2), 18 for XM radio (6
each for XM1, XM2 and XM3) and 6 stations
can be set for the AM band.
1. Choose the radio band using the radio band select button.
2. Tune to the desired station/channel using <
>, <>,
TUNE knob.
3. Push and hold the desired station preset button
*1to*6until the radio mutes.
4. The station indicator will then come on and the sound will resume. Memorizing is now
complete. 5. Other buttons can be set in the same
manner.
If the battery cable is disconnected, or if the fuse
opens, the radio memory will be erased. In that
case, reset the desired stations/channels.
List (AM and FM radio):
When [List] on the display is selected while the
FM or AM radio is being played, the preset
station list will be displayed.
If one of the 6 preset stations listed is touched
and held, the current station will be stored as the
new preset.
Menu (XM Satellite Radio):
When [Menu] on the display is selected while
the XM Satellite Radio is being played, the menu
list will be displayed.
The following items are available.
. Preset List
Displays the preset channel list. If one of the
6 preset stations listed is touched and held,
the current station will be stored as the new
preset.
. Customize Channel List
Selects specific channels to skip while using
the TUNE, SEEK/CATEGORY or Menu-
Categories feature.
Audio system3-13
Page 144 of 315
3-16Audio system
CAUTION
.Only operate the DVD while the
vehicle engine is running. Operating
the DVD for extended periods of
time with the engine OFF can dis-
charge the vehicle battery.
. Do not allow the system to get wet.
Excessive moisture such as spilled
liquids may cause the system to
malfunction.
. While playing VIDEO-CD media, this
DVD player does not guarantee
complete functionality of all VI-
DEO-CD formats.
Display settings
To adjust the front display mode, push
select [Others] and then select [Display].
To adjust the display ON/OFF, brightness, tint,
color and contrast, select [Display Adjustment]
and then select each key.
Then you can adjust each item using the center
dial. After changes have been made push
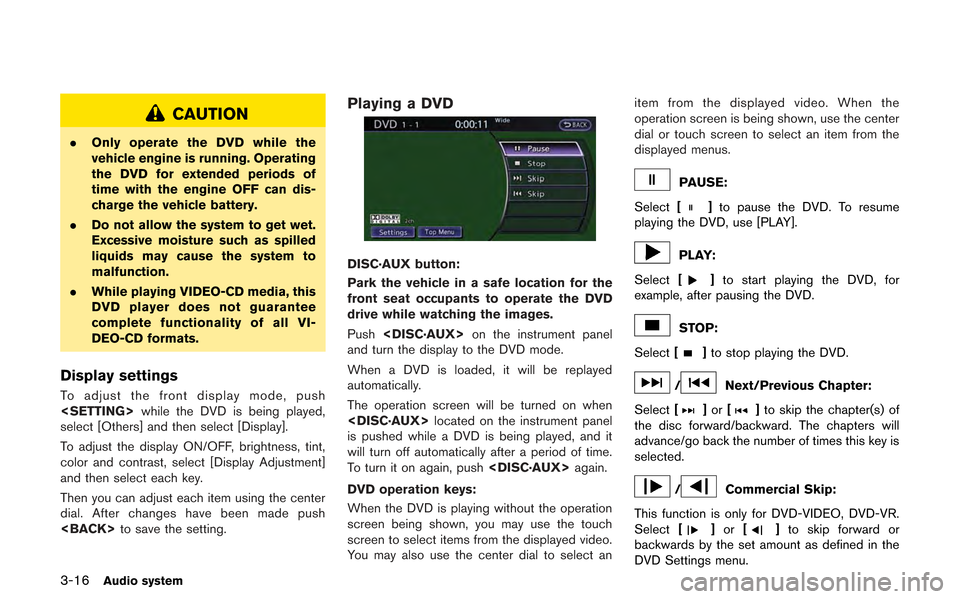
Playing a DVD
DISC·AUX button:
Park the vehicle in a safe location for the
front seat occupants to operate the DVD
drive while watching the images.
Push
and turn the display to the DVD mode.
When a DVD is loaded, it will be replayed
automatically.
The operation screen will be turned on when
is pushed while a DVD is being played, and it
will turn off automatically after a period of time.
To turn it on again, push
DVD operation keys:
When the DVD is playing without the operation
screen being shown, you may use the touch
screen to select items from the displayed video.
You may also use the center dial to select an item from the displayed video. When the
operation screen is being shown, use the center
dial or touch screen to select an item from the
displayed menus.
PAUSE:
Select [
]to pause the DVD. To resume
playing the DVD, use [PLAY].
PLAY:
Select [
]to start playing the DVD, for
example, after pausing the DVD.
STOP:
Select [
]to stop playing the DVD.
/Next/Previous Chapter:
Select [
]or []to skip the chapter(s) of
the disc forward/backward. The chapters will
advance/go back the number of times this key is
selected.
/Commercial Skip:
This function is only for DVD-VIDEO, DVD-VR.
Select [
]or []to skip forward or
backwards by the set amount as defined in the
DVD Settings menu.
Page 152 of 315
3-24Audio system
Connect Bluetooth:
Connects to the Bluetooth®device. Up to 5
devices can be registered.
“Connecting procedure” (page 3-22)
Connected Devices:
Registered devices are shown on the list. Select
a Bluetooth
®device from the list, the following
options will be available.
. Select
Select [Select] to connect the selected
device to the vehicle. If there is a different
device currently connected, the selected
device will replace the current device.
. Edit
Rename the selected Bluetooth
®device
using the keypad displayed on the screen.
“How to input letters and numbers”
(page 1-16)
. Delete
Delete the selected Bluetooth
®device.
Edit Bluetooth Info:
Change the name broadcasted by this system
over Bluetooth
®. Change the PIN code that is
entered when connecting a hands free device to
this system. Replace Connected Phone:
Replace the Bluetooth
®connection with a
connected Bluetooth®cellular phone.“4. Bluetooth®Hands-Free Phone Sys-
tem”
iPod®PLAYER OPERATION
Connecting iPod
®
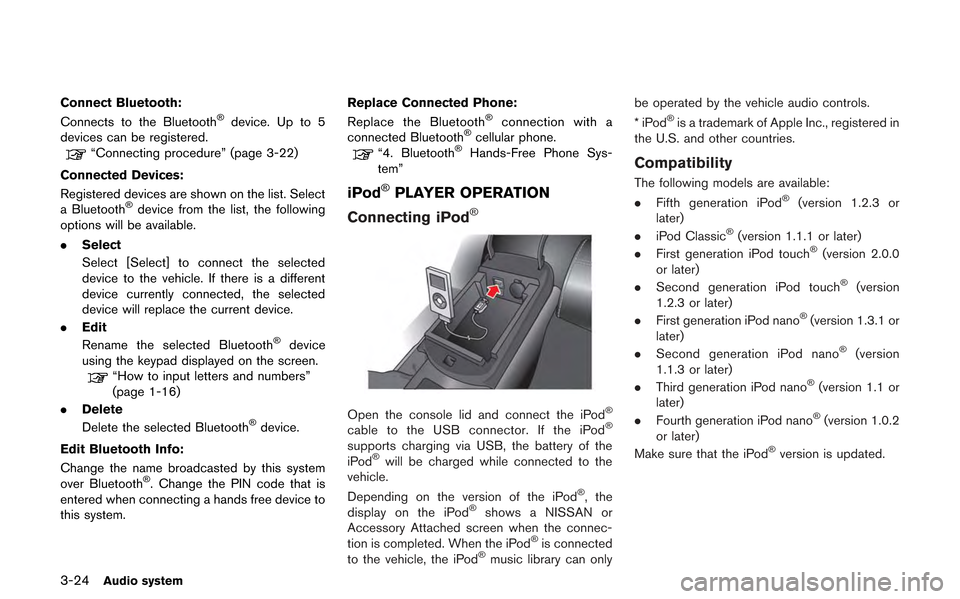
Open the console lid and connect the iPod®
cable to the USB connector. If the iPod®
supports charging via USB, the battery of the
iPod®will be charged while connected to the
vehicle.
Depending on the version of the iPod
®, the
display on the iPod®shows a NISSAN or
Accessory Attached screen when the connec-
tion is completed. When the iPod
®is connected
to the vehicle, the iPod®music library can only be operated by the vehicle audio controls.
*iPod
®is a trademark of Apple Inc., registered in
the U.S. and other countries.
Compatibility
The following models are available:
. Fifth generation iPod®(version 1.2.3 or
later)
. iPod Classic
®(version 1.1.1 or later)
. First generation iPod touch®(version 2.0.0
or later)
. Second generation iPod touch
®(version
1.2.3 or later)
. First generation iPod nano
®(version 1.3.1 or
later)
. Second generation iPod nano
®(version
1.1.3 or later)
. Third generation iPod nano
®(version 1.1 or
later)
. Fourth generation iPod nano
®(version 1.0.2
or later)
Make sure that the iPod
®version is updated.
Page 162 of 315
4-2Bluetooth®Hands-Free Phone System
WARNING
.Use a phone after stopping your
vehicle in a safe location. If you
have to use a phone while driving,
exercise extreme caution at all
times so full attention may be given
to vehicle operation.
. If you are unable to devote full
attention to vehicle operation while
talking on the phone, pull off the
road to a safe location and stop
your vehicle.
CAUTION
To avoid draining the vehicle battery,
use a phone after starting the engine.
Your vehicle is equipped with Bluetooth
®
Hands-Free Phone System. If you are an owner
of a compatible Bluetooth®enabled cellular
phone, you can set up the wireless connection
between your cellular phone and the in-vehicle
phone module. With Bluetooth
®wireless tech-
nology, you can make or receive a telephone call
with your cellular phone in your pocket. Once a cellular phone is connected to the in-
vehicle phone module, no phone connecting
procedure is required anymore. Your phone is
automatically connected with the in-vehicle
phone module when the ignition switch is
pushed to the ON position with the registered
cellular phone turned on and carried in the
vehicle.
You can register up to 5 different Bluetooth
®
cellular phones in the in-vehicle phone module.
However, you can talk on only one cellular phone
at a time.
The NISSAN Voice Recognition system sup-
ports the phone commands, so dialing a phone
number using your voice is possible.
“8. Voice recognition”
Before using the Bluetooth®Hands-Free Phone
System, refer to the following notes.
. Set up the wireless connection between a
compatible cellular phone and the in-vehicle
phone module before using the Bluetooth
®
Hands-Free Phone System.
. Some Bluetooth®enabled cellular phones
may not be recognized by the in-vehicle
phone module. Please visit
www.nissanusa.com/bluetooth for a recom-
mended phone list. .
You will not be able to use a hands-free
phone under the following conditions:
— Your vehicle is outside of the telephone
service area.
— Your vehicle is in an area where it is difficult to receive radio waves; such as in
a tunnel, in an underground parking
garage, behind a tall building or in a
mountainous area.
— Your cellular phone is locked in order not to be dialed.
. When the radio wave condition is not ideal
or ambient sound is too loud, it may be
difficult to hear the other person’s voice
during a call.
. Immediately after the ignition switch is
pushed to the ON position, it may be
impossible to receive a call for a short
period of time.
. Do not place the cellular phone in an area
surrounded by metal or far away from the in-
vehicle phone module to prevent tone quality
degradation and wireless connection dis-
ruption.
. While a cellular phone is connected through
the Bluetooth
®wireless connection, the
battery power of the cellular phone may
discharge quicker than usual.
BLUETOOTH®HANDS-FREE PHONE
SYSTEM
Page 163 of 315
.If the Bluetooth®Hands-Free Phone System
seems to be malfunctioning, please visit
www.nissanusa.com/bluetooth for trouble-
shooting help.
. Some cellular phones or other devices may
cause interference or a buzzing noise to
come from the audio system speakers.
Storing the device in a different location
may reduce or eliminate the noise.
. Refer to the cellular phone Owner’s Manual
regarding the telephone pairing procedure
specific to your phone, battery charging,
cellular phone antenna, etc.
. The antenna display on the monitor will not
coincide with the antenna display of some
cellular phones.
. Keep the interior of the vehicle as quiet as
possible to hear the caller’s voice clearly as
well as to minimize its echoes.
. If reception between callers is unclear,
adjusting the incoming or outgoing call
volume may improve the clarity.REGULATORY INFORMATION
FCC Regulatory information
.CAUTION: To maintain compliance with
FCC’s RF exposure guidelines, use only
the supplied antenna. Unauthorized antenna,
modification, or attachments could damage
the transmitter and may violate FCC regula-
tions.
. Operation is subject to the following two
conditions:
1. this device may not cause interference and
2. this device must accept any interference, including interference that may cause un-
desired operation of the device
IC Regulatory information
.Operation is subject to the following two
conditions: (1) this device may not cause
interference, and (2) this device must accept
any interference, including interference that
may cause undesired operation of the
device.
. This Class B digital apparatus meets all
requirements of the Canadian Interference-
Causing Equipment Regulations. Bluetooth trademark:
BLUETOOTH®is a trademark
owned by Bluetooth SIG, Inc.,
VOICE COMMANDS
You can use voice commands to operate various
Bluetooth®Hands-Free Phone System features
using the NISSAN Voice Recognition system.
“8. Voice recognition”
Bluetooth®Hands-Free Phone System4-3
Page 243 of 315
the object projects over the actual backing up
course.WARNING
.Always turn and check that it is safe
to park your car before backing up.
Always back up slowly.
. Use the displayed lines as a refer-
ence. The lines are highly affected
by the number of occupants, fuel
level, vehicle position, road condi-
tion and road grade.
. If the tires are replaced with differ-
ent sized tires, the predicted course
line may not be displayed correctly.
. On a snow-covered or slippery road,
there may be a difference between
the predicted course line and the
actual course line.
. If the battery is disconnected or
becomes discharged, the predicted
course lines may be displayed in-
correctly. If this occurs, drive the
vehicle on a straight road for more
than 5 minutes.
. When the steering wheel is turned
with the ignition switch in the ACC
position, the predicted course lines
may be displayed incorrectly. .
The displayed line will appear
slightly off to the right because the
rear view camera is not installed in
the rear center of the vehicle.
. The distance guide line and the
vehicle width guide line should be
used as a reference only when the
vehicle is on a level paved surface.
The distance viewed on the monitor
is for reference only and may be
different than the actual distance
between the vehicle and displayed
objects.
. When backing up the vehicle up a
hill, objects viewed in the monitor
are further than they appear. When
backing up the vehicle down a hill,
objects viewed in the monitor are
closer than they appear. Use the
inside mirror or glance over your
shoulder to properly judge dis-
tances to other objects.
The vehicle width and predicted course
lines are wider than the actual width and
course.
Monitor system9-5
HOW TO PARK WITH PREDICTED
COURSE LINES