Tire NISSAN GT-R 2013 R35 Owner's Manual
[x] Cancel search | Manufacturer: NISSAN, Model Year: 2013, Model line: GT-R, Model: NISSAN GT-R 2013 R35Pages: 346, PDF Size: 4.19 MB
Page 56 of 346
WARNING
.Every person who drives or rides in
this vehicle should use a seat belt at
all times. Children should be prop-
erly restrained in the rear seat and,
if appropriate, in a child restraint.
. The seat belt should be properly
adjusted to a snug fit. Failure to do
so may reduce the effectiveness of
the entire restraint system and in-
crease the chance or severity of
injury in an accident. Serious injury
or death can occur if the seat belt is
not worn properly.
. Always route the shoulder belt over
your shoulder and across your
chest. Never put the belt behind
your back, under your arm or across
your neck. The belt should be away
from your face and neck, but not
falling off your shoulder.
. Position the lap belt as low and
snug as possible AROUND THE
HIPS, NOT THE WAIST. A lap belt
worn too high could increase the
risk of internal injuries in an acci-
dent. .
Be sure the seat belt tongue is
securely fastened to the proper
buckle.
. Do not wear the seat belt inside out
or twisted. Doing so may reduce its
effectiveness.
. Do not allow more than one person
to use the same seat belt.
. Never carry more people in the
vehicle than there are seat belts.
. If the seat belt warning light glows
continuously while the ignition is
turned ON with all doors closed and
all seat belts fastened, it may in-
dicate a malfunction in the system.
Have the system checked by a GT-R
certified NISSAN dealer.
. No changes should be made to the
seat belt system. For example, do
not modify the seat belt, add mate-
rial, or install devices that may
change the seat belt routing or
tension. Doing so may affect the
operation of the seat belt system.
Modifying or tampering with the
seat belt system may result in
serious personal injury. .
Once a seat belt pretensioner has
activated, it cannot be reused and
must be replaced together with the
retractor. See a GT-R certified
NISSAN dealer.
. Removal and installation of the
pretensioner system components
should be done by a GT-R certified
NISSAN dealer.
. All seat belt assemblies, including
retractors and attaching hardware,
should be inspected after any colli-
sion by a GT-R certified NISSAN
dealer. NISSAN recommends that
all seat belt assemblies in use
during a collision be replaced un-
less the collision was minor and the
belts show no damage and continue
to operate properly.
Seat belt assemblies not in use
during a collision should also be
inspected and replaced if either
damage or improper operation is
noted.
. All child restraints and attaching
hardware should be inspected after
any collision. Always follow the
restraint manufacturer’s inspection
Safety — Seats, seat belts and supplemental restraint system1-7
Page 61 of 346
1-12Safety — Seats, seat belts and supplemental restraint system
SEAT BELT EXTENDERS
If, because of body size or driving position, it is
not possible to properly fit the lap-shoulder belt
and fasten it, an extender that is compatible with
the installed seat belts is available that can be
purchased. The extender adds approximately 8
in (200 mm) of length and may be used for either
the driver or front passenger seating position.
See a GT-R certified NISSAN dealer for
assistance with purchasing an extender if an
extender is required.
WARNING
.Only NISSAN seat belt extenders,
made by the same company which
made the original equipment seat
belts, should be used with the
NISSAN seat belts.
. Adults and children who can use the
standard seat belt should not use an
extender. Such unnecessary use
could result in serious personal
injury in the event of an accident.
. Never use seat belt extenders to
install child restraints. If the child
restraint is not secured properly, the
child could be seriously injured in a collision or a sudden stop.
SEAT BELT MAINTENANCE
.
To clean the seat belt webbing, apply a
mild soap solution or any solution recom-
mended for cleaning upholstery or carpets.
Then, wipe with a cloth and allow the seat
belts to dry in the shade. Do not allow the
seat belts to retract until they are completely
dry.
. If dirt builds up in the shoulder belt
guide of the seat belt anchors, the seat
belts may retract slowly. Wipe the shoulder
belt guide with a clean, dry cloth.
. Periodically check to see that the seat
belt and the metal components such as
buckles, tongues, retractors, flexible wires
and anchors work properly. If loose parts,
deterioration, cuts or other damage on the
webbing is found, the entire seat belt
assembly should be replaced.
WARNING
Do not allow children to play with the
seat belts. Most seating positions are
equipped with Automatic Locking Re-
tractor (ALR) mode seat belts. If the
seat belt becomes wrapped around a
child’s neck with the ALR mode acti-
vated, the child can be seriously injured
or killed if the seat belt retracts and
becomes tight. This can occur even if
the vehicle is parked. Unbuckle the seat
belt to release the child. If the seat belt
can not be unbuckled or is already
unbuckled, release the child by cutting
the seat belt with a suitable tool (such
as a knife or scissors) to release the
seat belt.
Children need adults to help protect them.
They need to be properly restrained.
In addition to the general information in this
manual, child safety information is available from
many other sources, including doctors, teachers,
government traffic safety offices, and community
organizations. Every child is different, so be sure
to learn the best way to transport your child.
There are three basic types of child restraint
CHILD SAFETY
Page 96 of 346
2 Instruments and controls
Cockpit ........................................................................\
............... 2-3
Instrument panel ....................................................................... 2-4
Meters and gauges .................................................................. 2-5Speedometer ....................................................................... 2-6
Odometer/twin trip odometer ......................................... 2-6
Tachometer ........................................................................\
.. 2-7
Engine coolant temperature gauge ............................... 2-7
Fuel gauge ........................................................................\
... 2-8
Transmission position indicator ...................................... 2-8
Upshift indicator ................................................................. 2-9
Instrument brightness control ...................................... 2-11
Vehicle information display ................................................. 2-11 Engine oil level display ................................................... 2-12
Transmission system check display ............................ 2-13
Drive computer ...................................................................... 2-14 Current fuel consumption ............................................. 2-15
Vehicle speed ................................................................... 2-15
Cruise control ................................................................... 2-15
Average fuel consumption and speed ....................... 2-16
Elapsed time and trip odometer .................................. 2-16
Distance to empty ........................................................... 2-17
Outside air temperature ................................................ 2-17
Setting (drive computer) ............................................... 2-18
Warning (drive computer) ............................................. 2-23 Warning/indicator lights and audible reminders .......... 2-24
Checking bulbs ............................................................. 2-24
Warning lights ................................................................ 2-24
Indicator lights ............................................................... 2-61
Audible reminders ......................................................... 2-31
Warning display .................................................................... 2-32
Engine oil low pressure warning ............................... 2-33
Engine system warning ............................................... 2-33
Shift lever position warning ........................................ 2-34
Transmission system warning .................................... 2-34
Transmission oil high temperature warning ............ 2-34
Transmission clutch high temperature warning ..... 2-35Parking brake release warning .................................. 2-35
Low brake fluid warning .............................................. 2-35
Anti-lock Braking System (ABS) warning .............. 2-36
Vehicle Dynamic Control (VDC)
system warning .............................................................. 2-36
AWD clutch high temperature warning ................... 2-36
Front/rear tire size discrepancy warning ................. 2-37
AWD system warning .................................................. 2-37
Low tire pressure warning .......................................... 2-38
Run-flat tire warning ..................................................... 2-38Tire Pressure Monitoring System
(TPMS) warning ............................................................ 2-38
Page 117 of 346
2-22Instruments and controls
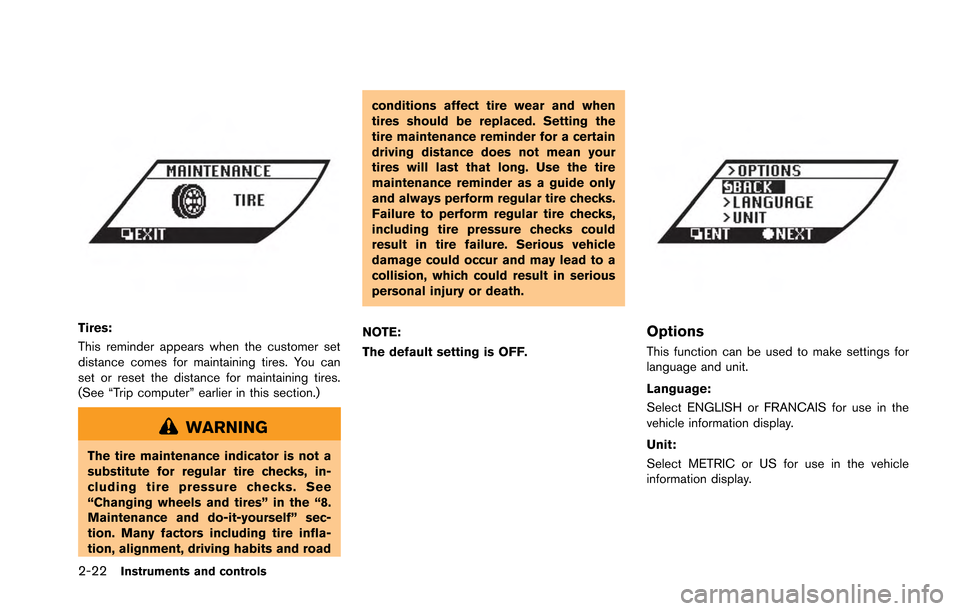
Tires:
This reminder appears when the customer set
distance comes for maintaining tires. You can
set or reset the distance for maintaining tires.
(See “Trip computer” earlier in this section.)
WARNING
The tire maintenance indicator is not a
substitute for regular tire checks, in-
cluding tire pressure checks. See
“Changing wheels and tires” in the “8.
Maintenance and do-it-yourself” sec-
tion. Many factors including tire infla-
tion, alignment, driving habits and roadconditions affect tire wear and when
tires should be replaced. Setting the
tire maintenance reminder for a certain
driving distance does not mean your
tires will last that long. Use the tire
maintenance reminder as a guide only
and always perform regular tire checks.
Failure to perform regular tire checks,
including tire pressure checks could
result in tire failure. Serious vehicle
damage could occur and may lead to a
collision, which could result in serious
personal injury or death.
NOTE:
The default setting is OFF.
Options
This function can be used to make settings for
language and unit.
Language:
Select ENGLISH or FRANCAIS for use in the
vehicle information display.
Unit:
Select METRIC or US for use in the vehicle
information display.
Page 119 of 346
2-24Instruments and controls
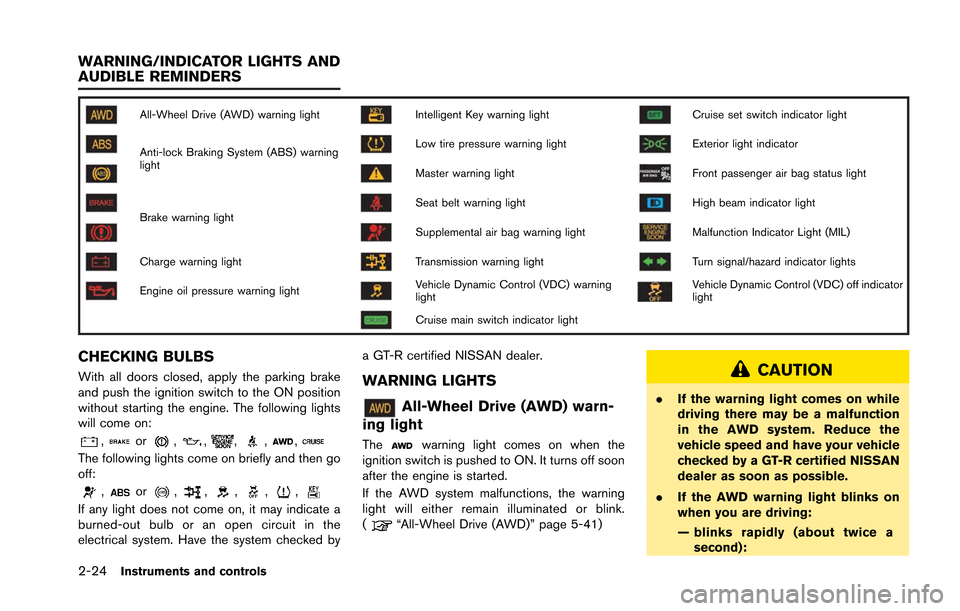
All-Wheel Drive (AWD) warning lightIntelligent Key warning lightCruise set switch indicator light
Anti-lock Braking System (ABS) warning
lightLow tire pressure warning lightExterior light indicator
Master warning lightFront passenger air bag status light
Brake warning lightSeat belt warning lightHigh beam indicator light
Supplemental air bag warning lightMalfunction Indicator Light (MIL)
Charge warning lightTransmission warning lightTurn signal/hazard indicator lights
Engine oil pressure warning lightVehicle Dynamic Control (VDC) warning
lightVehicle Dynamic Control (VDC) off indicator
light
Cruise main switch indicator light
CHECKING BULBS
With all doors closed, apply the parking brake
and push the ignition switch to the ON position
without starting the engine. The following lights
will come on:
,or,,,,,
The following lights come on briefly and then go
off:
,or,,,,,
If any light does not come on, it may indicate a
burned-out bulb or an open circuit in the
electrical system. Have the system checked bya GT-R certified NISSAN dealer.
WARNING LIGHTS
All-Wheel Drive (AWD) warn-
ing light
Thewarning light comes on when the
ignition switch is pushed to ON. It turns off soon
after the engine is started.
If the AWD system malfunctions, the warning
light will either remain illuminated or blink.
(
“All-Wheel Drive (AWD)” page 5-41)
CAUTION
. If the warning light comes on while
driving there may be a malfunction
in the AWD system. Reduce the
vehicle speed and have your vehicle
checked by a GT-R certified NISSAN
dealer as soon as possible.
. If the AWD warning light blinks on
when you are driving:
— blinks rapidly (about twice a
second):
WARNING/INDICATOR LIGHTS AND
AUDIBLE REMINDERS
Page 120 of 346
Pull off the road in a safe area,
and idle the engine. The driving
mode will change to RWD to
prevent the AWD system from
malfunctioning. If the warning
light turns off, you can drive
again. This does not indicate
that there is a malfunction.
— blinks slowly (about once every 2 seconds):
Pull off the road in a safe area,
and idle the engine. Check that
all tire sizes are the same as
that specified on the Tire and
Loading Information label lo-
cated in the driver’s door open-
ing, tire pressure is correct and
tires are not worn. (
“Tire
and loading information label”
page 9-13)
If the tire pressure is insuffi-
cient, fill with nitrogen gas.
Contact a GT-R certified NISSAN
dealer about filling with nitro-
gen gas. If nitrogen gas is not
available, compressed air may
be safely used under normal
driving conditions. However,
NISSAN recommends refilling with nitrogen gas for maximum
tire performance.
. If the warning light is still on after
the above operations, have your
vehicle checked by a GT-R certified
NISSAN dealer as soon as possible.
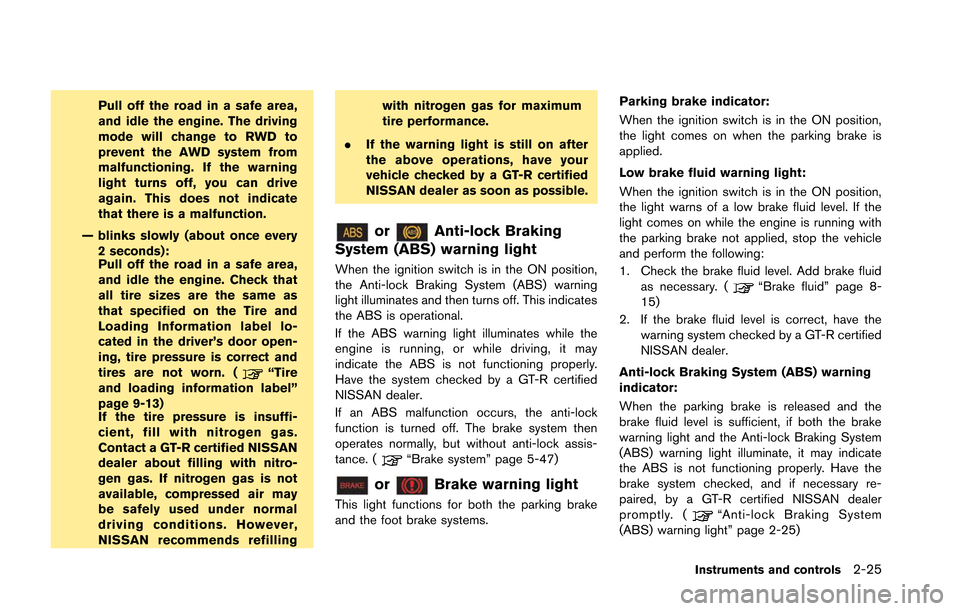
orAnti-lock Braking
System (ABS) warning light
When the ignition switch is in the ON position,
the Anti-lock Braking System (ABS) warning
light illuminates and then turns off. This indicates
the ABS is operational.
If the ABS warning light illuminates while the
engine is running, or while driving, it may
indicate the ABS is not functioning properly.
Have the system checked by a GT-R certified
NISSAN dealer.
If an ABS malfunction occurs, the anti-lock
function is turned off. The brake system then
operates normally, but without anti-lock assis-
tance. (
“Brake system” page 5-47)
orBrake warning light
This light functions for both the parking brake
and the foot brake systems. Parking brake indicator:
When the ignition switch is in the ON position,
the light comes on when the parking brake is
applied.
Low brake fluid warning light:
When the ignition switch is in the ON position,
the light warns of a low brake fluid level. If the
light comes on while the engine is running with
the parking brake not applied, stop the vehicle
and perform the following:
1. Check the brake fluid level. Add brake fluid
as necessary. (
“Brake fluid” page 8-
15)
2. If the brake fluid level is correct, have the warning system checked by a GT-R certified
NISSAN dealer.
Anti-lock Braking System (ABS) warning
indicator:
When the parking brake is released and the
brake fluid level is sufficient, if both the brake
warning light and the Anti-lock Braking System
(ABS) warning light illuminate, it may indicate
the ABS is not functioning properly. Have the
brake system checked, and if necessary re-
paired, by a GT-R certified NISSAN dealer
promptly. (
“Anti-lock Braking System
(ABS) warning light” page 2-25)
Instruments and controls2-25
Page 121 of 346
2-26Instruments and controls
WARNING
.Your brake system may not be
working properly if the warning light
is on. Driving could be dangerous. If
you judge it to be safe, drive care-
fully to the nearest service station
for repairs. Otherwise, have your
vehicle towed because driving it
could be dangerous.
. Pressing the brake pedal with the
engine stopped and/or low brake
fluid level may increase your stop-
ping distance and braking will re-
quire greater pedal effort as well as
pedal travel.
. If the brake fluid level is below the
minimum or MIN mark on the brake
fluid reservoir, do not drive until the
brake system has been checked at a
GT-R certified NISSAN dealer.
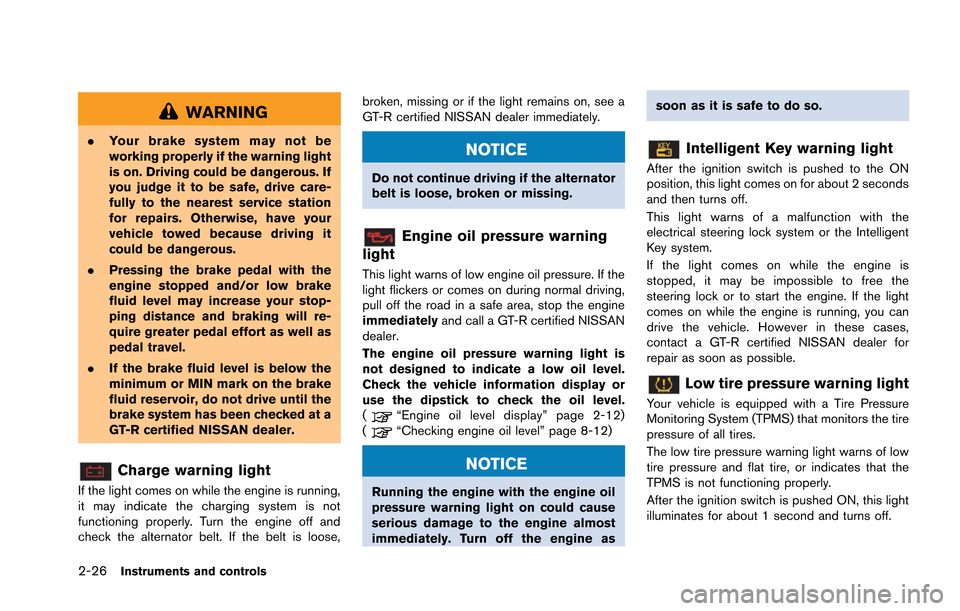
Charge warning light
If the light comes on while the engine is running,
it may indicate the charging system is not
functioning properly. Turn the engine off and
check the alternator belt. If the belt is loose, broken, missing or if the light remains on, see a
GT-R certified NISSAN dealer immediately.
NOTICE
Do not continue driving if the alternator
belt is loose, broken or missing.
Engine oil pressure warning
light
This light warns of low engine oil pressure. If the
light flickers or comes on during normal driving,
pull off the road in a safe area, stop the engine
immediately and call a GT-R certified NISSAN
dealer.
The engine oil pressure warning light is
not designed to indicate a low oil level.
Check the vehicle information display or
use the dipstick to check the oil level.
(
“Engine oil level display” page 2-12)
(“Checking engine oil level” page 8-12)
NOTICE
Running the engine with the engine oil
pressure warning light on could cause
serious damage to the engine almost
immediately. Turn off the engine as soon as it is safe to do so.
Intelligent Key warning light
After the ignition switch is pushed to the ON
position, this light comes on for about 2 seconds
and then turns off.
This light warns of a malfunction with the
electrical steering lock system or the Intelligent
Key system.
If the light comes on while the engine is
stopped, it may be impossible to free the
steering lock or to start the engine. If the light
comes on while the engine is running, you can
drive the vehicle. However in these cases,
contact a GT-R certified NISSAN dealer for
repair as soon as possible.
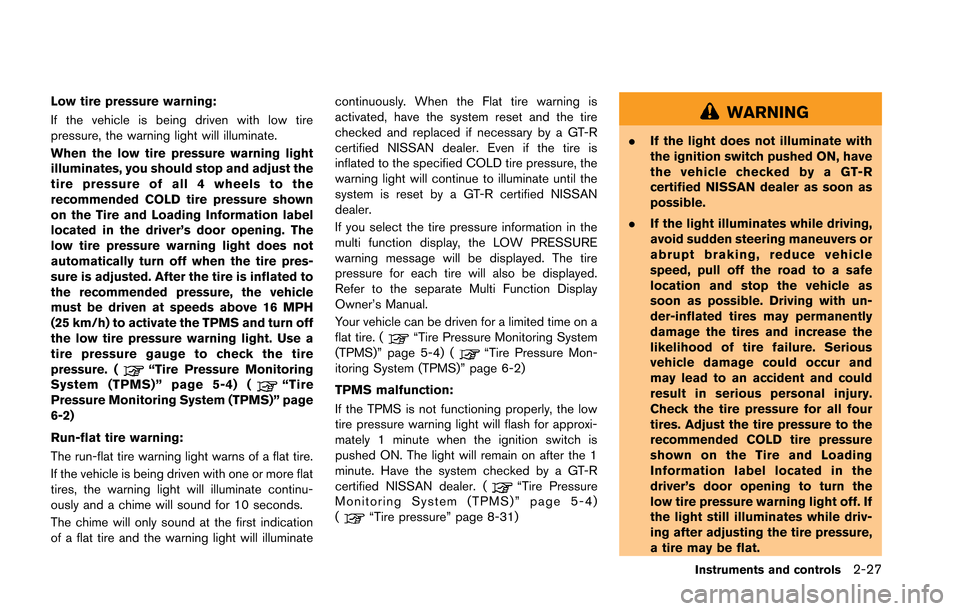
Low tire pressure warning light
Your vehicle is equipped with a Tire Pressure
Monitoring System (TPMS) that monitors the tire
pressure of all tires.
The low tire pressure warning light warns of low
tire pressure and flat tire, or indicates that the
TPMS is not functioning properly.
After the ignition switch is pushed ON, this light
illuminates for about 1 second and turns off.
Page 122 of 346
Low tire pressure warning:
If the vehicle is being driven with low tire
pressure, the warning light will illuminate.
When the low tire pressure warning light
illuminates, you should stop and adjust the
tire pressure of all 4 wheels to the
recommended COLD tire pressure shown
on the Tire and Loading Information label
located in the driver’s door opening. The
low tire pressure warning light does not
automatically turn off when the tire pres-
sure is adjusted. After the tire is inflated to
the recommended pressure, the vehicle
must be driven at speeds above 16 MPH
(25 km/h) to activate the TPMS and turn off
the low tire pressure warning light. Use a
tire pressure gauge to check the tire
pressure. (
“Tire Pressure Monitoring
System (TPMS)” page 5-4) (“Tire
Pressure Monitoring System (TPMS)” page
6-2)
Run-flat tire warning:
The run-flat tire warning light warns of a flat tire.
If the vehicle is being driven with one or more flat
tires, the warning light will illuminate continu-
ously and a chime will sound for 10 seconds.
The chime will only sound at the first indication
of a flat tire and the warning light will illuminate continuously. When the Flat tire warning is
activated, have the system reset and the tire
checked and replaced if necessary by a GT-R
certified NISSAN dealer. Even if the tire is
inflated to the specified COLD tire pressure, the
warning light will continue to illuminate until the
system is reset by a GT-R certified NISSAN
dealer.
If you select the tire pressure information in the
multi function display, the LOW PRESSURE
warning message will be displayed. The tire
pressure for each tire will also be displayed.
Refer to the separate Multi Function Display
Owner’s Manual.
Your vehicle can be driven for a limited time on a
flat tire. (
“Tire Pressure Monitoring System
(TPMS)” page 5-4) (“Tire Pressure Mon-
itoring System (TPMS)” page 6-2)
TPMS malfunction:
If the TPMS is not functioning properly, the low
tire pressure warning light will flash for approxi-
mately 1 minute when the ignition switch is
pushed ON. The light will remain on after the 1
minute. Have the system checked by a GT-R
certified NISSAN dealer. (
“Tire Pressure
Monitoring System (TPMS)” page 5-4)
(
“Tire pressure” page 8-31)
WARNING
. If the light does not illuminate with
the ignition switch pushed ON, have
the vehicle checked by a GT-R
certified NISSAN dealer as soon as
possible.
. If the light illuminates while driving,
avoid sudden steering maneuvers or
abrupt braking, reduce vehicle
speed, pull off the road to a safe
location and stop the vehicle as
soon as possible. Driving with un-
der-inflated tires may permanently
damage the tires and increase the
likelihood of tire failure. Serious
vehicle damage could occur and
may lead to an accident and could
result in serious personal injury.
Check the tire pressure for all four
tires. Adjust the tire pressure to the
recommended COLD tire pressure
shown on the Tire and Loading
Information label located in the
driver’s door opening to turn the
low tire pressure warning light off. If
the light still illuminates while driv-
ing after adjusting the tire pressure,
a tire may be flat.
Instruments and controls2-27
Page 123 of 346
2-28Instruments and controls
.Although you can continue driving
with a punctured run-flat tire, re-
member that vehicle handling sta-
bility is reduced, which could lead to
an accident and personal injury.
Also, driving a long distance at high
speeds may damage the tires.
. Do not drive at speeds above 50
MPH (80 km/h) and do not drive
more than 50 miles (80 km) with a
punctured run-flat tire. The actual
distance the vehicle can be driven
on a flat tire depends on outside
temperature, vehicle load, road con-
ditions and other factors.
. When a wheel is replaced, the TPMS
will not function and the low tire
pressure warning light will flash for
approximately 1 minute. The light
will remain on after the 1 minute.
Contact a GT-R certified NISSAN
dealer as soon as possible for tire
replacement and/or system reset-
ting.
. Replacing tires with those not ori-
ginally specified by NISSAN could
affect the proper operation of the
TPMS.CAUTION
.The TPMS is not a substitute for the
regular tire pressure check. Be sure
to check the tire pressure regularly.
. Be sure to install the specified size
of tires on the four wheels.
NOTE:
. If the vehicle is being driven at speeds
of less than 16 MPH (25 km/h) , the
TPMS may not operate correctly.
. The tires of this vehicle are filled with
nitrogen gas. When the tire pressure is
low, fill the tires with nitrogen gas.
Contact a GT-R certified NISSAN dealer
for information on filling the tires with
nitrogen gas.
Master warning light
When the ignition switch is in the ON position,
the master warning light illuminates if any of the
warning displays appear on the vehicle informa-
tion display. (
“Warning display” page 2-
32)
Seat belt warning light and
chime
The light and chime remind you to fasten seat
belts. The light illuminates whenever the ignition
switch is pushed to the ON position, and will
remain illuminated until the driver’s seat belt is
fastened. At the same time, the chime will sound
for about 6 seconds unless the driver’s seat belt
is securely fastened.
The seat belt warning light for the front
passenger will illuminate if the seat belt is not
fastened when the front passenger’s seat is
occupied. For approximately 5 seconds after the
ignition switch is in the ON position, the system
does not activate the warning light for the front
passenger. (
“Seat belts” page 1-6)
Supplemental air bag warning
light
After pushing the ignition switch to the ON
position, the supplemental air bag warning light
will illuminate for about 7 seconds and then turn
off. This means the system is operational.
If any of the following conditions occur, the front
air bag, side air bag, curtain air bag and
pretensioner systems need servicing and your
vehicle must be taken to a GT-R certified
NISSAN dealer.
Page 132 of 346
damage to the AWD system.
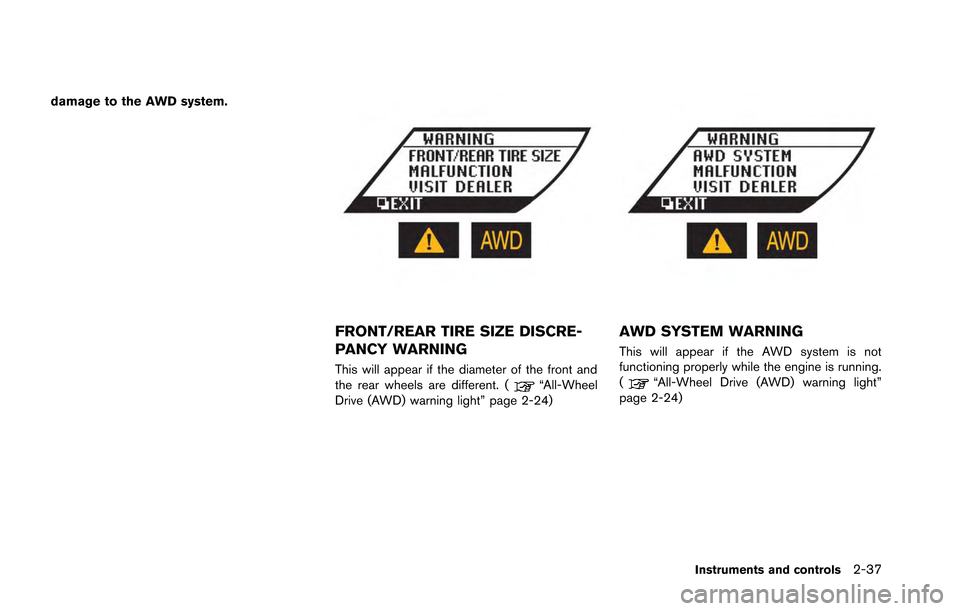
FRONT/REAR TIRE SIZE DISCRE-
PANCY WARNING
This will appear if the diameter of the front and
the rear wheels are different. (“All-Wheel
Drive (AWD) warning light” page 2-24)
AWD SYSTEM WARNING
This will appear if the AWD system is not
functioning properly while the engine is running.
(
“All-Wheel Drive (AWD) warning light”
page 2-24)
Instruments and controls2-37