engine NISSAN GT-R 2015 R35 Multi Function Display Owners Manual
[x] Cancel search | Manufacturer: NISSAN, Model Year: 2015, Model line: GT-R, Model: NISSAN GT-R 2015 R35Pages: 298, PDF Size: 11.39 MB
Page 6 of 298
.If you notice any foreign objects in
the system hardware, spill liquid on
the system or notice smoke or a
smell coming from it, stop using the
system immediately and contact a
GT-R certified NISSAN dealer. Ignor-
ing such conditions may lead to
accidents, fire or electrical shock.
CAUTION
.Do not use this system if you notice
any malfunctions such as a frozen
screen or the lack of sound. Con-
tinued use of the system may result
in accidents, fire or electrical shock.
. Some jurisdictions may have laws
limiting the use of video screens
while driving. Use this system only
where it is legal to do so.
. Extreme temperature conditions
[below −48F( −208 C) and above
1588F (708C)] could affect the per-
formance of the system.
NOTICE
Do not keep the navigation system
running with the engine stopped. Doing
so may discharge the vehicle battery.
When you use the navigation system,
always keep the engine running.
Introduction0-3
Page 12 of 298
Performance and vehicle informa-
tion
Drivers can customize the panel by choosing up
to six information gauges for the information they
would like displayed.
“Custom view screen” (page 10-6)
Custom view screen (three panels)
Custom view screen (six panels)
Vehicle information items:
.Engine coolant temperature
. Engine oil temperature
. Engine oil pressure
. Transmission oil pressure
. Transmission oil temperature
. Boost
. etc.
Trip calculator
This allows you to record your driving time and
waypoints. It also displays the history for both
functions.
Stopwatch screenAvailable items:
.Stopwatch screen
— Time log — Speed
— Elapsed time
“Stopwatch screen” (page 10-22)
About Multi function display system1-3
Page 18 of 298
1. The navigation system starts when theignition switch is pushed to the ACC or
ON position.
INFO:
. After the engine is started, the operation
instructions will only be displayed the first
time the screen is displayed.
.The operations instruction screen will dis-
appear automatically after a few seconds or
when you start to operate the screen. .
The system saves the screen displayed at
the time the engine is turned off.
. “Clarion” logo is a registered trademark of
Clarion Co., Ltd. and the “POLYPHONY
DIGITAL” logo is a registered trademark of
Polyphony Digital Corporation.
About Multi function display system1-9
START-UP SCREEN
Page 123 of 298
3-2Audio system
AUDIO OPERATION PRECAUTIONS
Radio
Push the ignition switch to the ACC or ON
position and push the radio band select button
to turn on the radio. If you listen to the radio with
the engine not running, the ignition switch
should be pushed to the ACC position.
Radio reception is affected by station signal
strength, distance from radio transmitter, build-
ings, bridges, mountains and other external
influences. Intermittent changes in reception
quality normally are caused by these external
influences.
Using a cellular phone in or near the
vehicle may influence radio reception
quality.
Radio reception:
Your NISSAN radio system is equipped with
state-of-the-art electronic circuits to enhance
radio reception. These circuits are designed to
extend reception range, and to enhance the
quality of that reception.
However there are some general characteristics
of both FM and AM radio signals that can affect
radio reception quality in a moving vehicle, even
when the finest equipment is used. These
characteristics are completely normal in a givenreception area, and do not indicate any mal-
function in your NISSAN radio system.
Reception conditions will constantly change
because of vehicle movement. Buildings, terrain,
signal distance and interference from other
vehicles can work against ideal reception.
Described below are some of the factors that
can affect your radio reception.
Some cellular phones or other devices may
cause interference or a buzzing noise to come
from the audio system speakers. Storing the
device in a different location may reduce or
eliminate the noise.
FM radio reception:
Range: FM range is normally limited to 25 to 30
miles (40 to 48 km) , with monaural (single
channel) FM having slightly more range than
stereo FM. External influences may sometimes
interfere with FM station reception even if the
FM station is within 25 miles (40 km). The
strength of the FM signal is directly related to the
distance between the transmitter and receiver.
FM signals follow a line-of-sight path, exhibiting
many of the same characteristics as light. For
example they will reflect off objects.
Fade and drift: As your vehicle moves away from
a station transmitter, the signals will tend to fade
and/or drift.
Static and flutter: During signal interference from
buildings, large hills or due to antenna position,
usually in conjunction with increased distance
from the station transmitter, static or flutter can
be heard. This can be reduced by lowering the
treble setting to reduce the treble response.
Multipath reception: Because of the reflective
characteristics of FM signals, direct and re-
flected signals reach the receiver at the same
time. The signals may cancel each other,
resulting in momentary flutter or loss of sound.
AUDIO SYSTEM
Page 136 of 298
DVD (Digital Versatile Disc) PLAYER
OPERATION
Precautions
Start the engine when using the DVD entertain-
ment system.
Movies will not be shown on the front display
while the vehicle is in any drive position to
reduce driver distraction. Audio is available
when a movie is played. To view movies in the
front display, stop the vehicle in a safe location,
move the shift lever to the P (Park) position and
apply the parking brake.
WARNING
.The driver must not attempt to
operate the DVD system or wear
the headphones while the vehicle is
in motion so that full attention may
be given to vehicle operation.
. Do not attempt to modify the system
to display a movie on the front
screen while the vehicle is being
driven. Doing so may distract the
driver and may cause a collision and
serious personal injury or death.
CAUTION
.Only operate the DVD while the
vehicle engine is running. Operating
the DVD for extended periods of
time with the engine OFF can dis-
charge the vehicle battery.
. Do not allow the system to get wet.
Excessive moisture such as spilled
liquids may cause the system to
malfunction.
. While playing VIDEO-CD media, this
DVD player does not guarantee
complete functionality of all VI-
DEO-CD formats.
Display settings
To adjust the front display mode, push
select [Others] and then select [Display].
To adjust the display ON/OFF, brightness, tint,
color and contrast, select [Display Adjustment]
and then select each key.
Then you can adjust each item using the center
dial. After changes have been made push
Playing a DVD
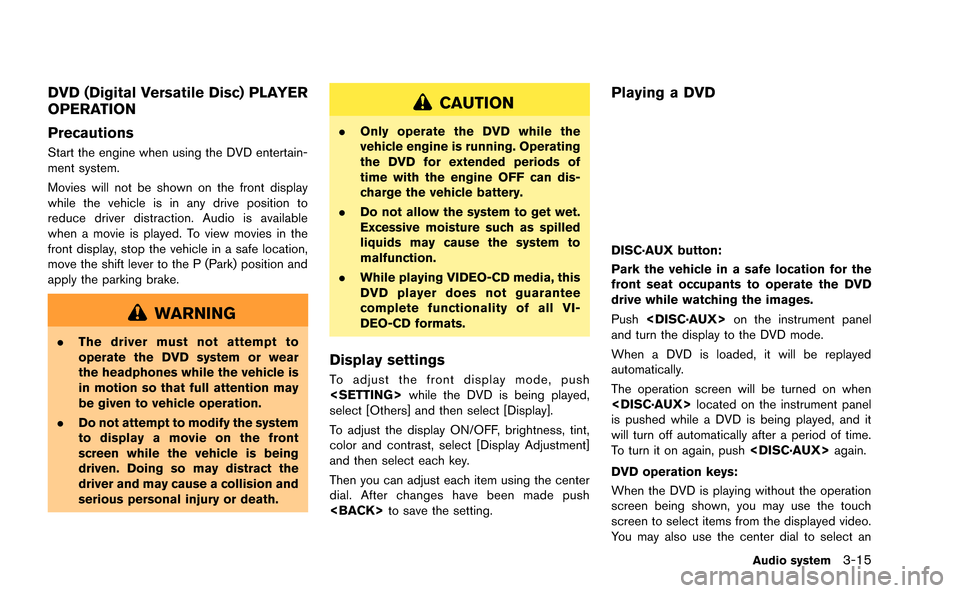
DISC·AUX button:
Park the vehicle in a safe location for the
front seat occupants to operate the DVD
drive while watching the images.
Push
and turn the display to the DVD mode.
When a DVD is loaded, it will be replayed
automatically.
The operation screen will be turned on when
is pushed while a DVD is being played, and it
will turn off automatically after a period of time.
To turn it on again, push
DVD operation keys:
When the DVD is playing without the operation
screen being shown, you may use the touch
screen to select items from the displayed video.
You may also use the center dial to select an
Audio system3-15
Page 149 of 298
4-2Bluetooth®Hands-Free Phone System
WARNING
.Use a phone after stopping your
vehicle in a safe location. If you
have to use a phone while driving,
exercise extreme caution at all
times so full attention may be given
to vehicle operation.
. If you are unable to devote full
attention to vehicle operation while
talking on the phone, pull off the
road to a safe location and stop
your vehicle.
CAUTION
To avoid draining the vehicle battery,
use a phone after starting the engine.
Your vehicle is equipped with Bluetooth
®
Hands-Free Phone System. If you are an owner
of a compatible Bluetooth®enabled cellular
phone, you can set up the wireless connection
between your cellular phone and the in-vehicle
phone module. With Bluetooth
®wireless tech-
nology, you can make or receive a telephone call
with your cellular phone in your pocket. Once a cellular phone is connected to the in-
vehicle phone module, no phone connecting
procedure is required anymore. Your phone is
automatically connected with the in-vehicle
phone module when the ignition switch is
pushed to the ON position with the registered
cellular phone turned on and carried in the
vehicle.
You can register up to 5 different Bluetooth
®
cellular phones in the in-vehicle phone module.
However, you can talk on only one cellular phone
at a time.
The NISSAN Voice Recognition system sup-
ports the phone commands, so dialing a phone
number using your voice is possible.
“8. Voice recognition”
Before using the Bluetooth®Hands-Free Phone
System, refer to the following notes.
. Set up the wireless connection between a
compatible cellular phone and the in-vehicle
phone module before using the Bluetooth
®
Hands-Free Phone System.
. Some Bluetooth®enabled cellular phones
may not be recognized by the in-vehicle
phone module. Please visit
www.nissanusa.com/bluetooth for a recom-
mended phone list. .
You will not be able to use a hands-free
phone under the following conditions:
— Your vehicle is outside of the telephone
service area.
— Your vehicle is in an area where it is difficult to receive radio waves; such as in
a tunnel, in an underground parking
garage, behind a tall building or in a
mountainous area.
— Your cellular phone is locked in order not to be dialed.
. When the radio wave condition is not ideal
or ambient sound is too loud, it may be
difficult to hear the other person’s voice
during a call.
. Immediately after the ignition switch is
pushed to the ON position, it may be
impossible to receive a call for a short
period of time.
. Do not place the cellular phone in an area
surrounded by metal or far away from the in-
vehicle phone module to prevent tone quality
degradation and wireless connection dis-
ruption.
. While a cellular phone is connected through
the Bluetooth
®wireless connection, the
battery power of the cellular phone may
discharge quicker than usual.
BLUETOOTH®HANDS-FREE PHONE
SYSTEM
Page 157 of 298
5-2Heater and air conditioner
WARNING
.The air conditioner cooling function
operates only when the engine is
running.
. Do not leave children or adults who
would normally require the support
of others alone in your vehicle. Pets
should not be left alone either. On
hot, sunny days, temperatures in a
closed vehicle could quickly become
high enough to cause severe or
possibly fatal injuries to people or
animals.
. Do not use the recirculation mode
for long periods as it may cause the
interior air to become stale and the
windows to fog up.
Start the engine and operate the heater and air
conditioner system.
You can individually set the driver and front
passenger side temperature using each tem-
perature control switch.
INFO:
. Odors from inside and outside the vehicle
can build up in the air conditioner unit. Odor
can enter the passenger compartment
through the vents.
. When parking, set the heater and air
conditioner controls to turn off air recircula-
tion to allow fresh air into the passenger
compartment. This should help reduce
odors inside the vehicle.
HOW TO VIEW SCREEN
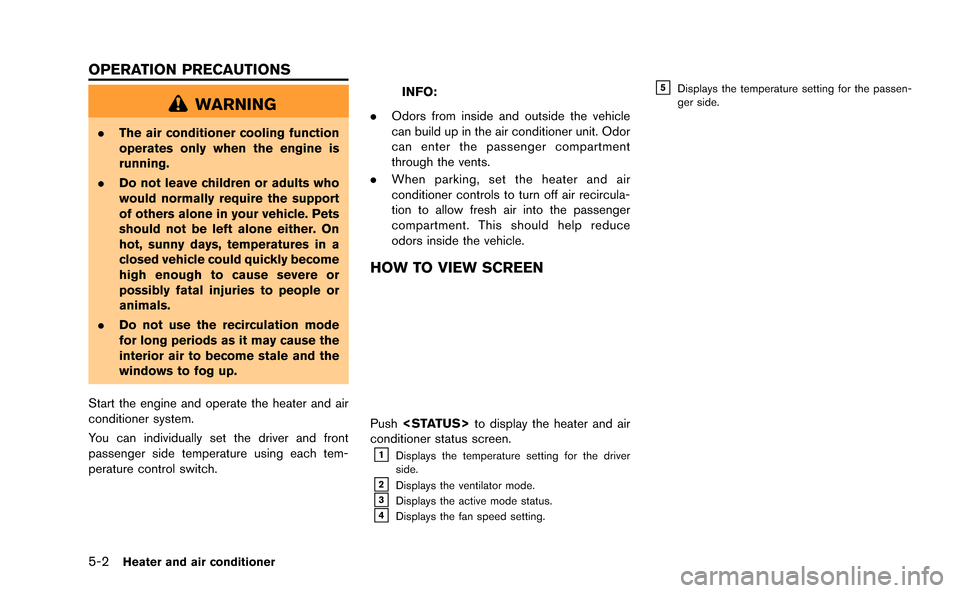
Push
conditioner status screen.
&1Displays the temperature setting for the driver
side.
&2Displays the ventilator mode.&3Displays the active mode status.&4Displays the fan speed setting.
&5Displays the temperature setting for the passen-
ger side.
OPERATION PRECAUTIONS
Page 169 of 298
6-6Viewing technical information
MAINTENANCE INFORMATION
The maintenance intervals can be displayed for
your desired maintenance items.
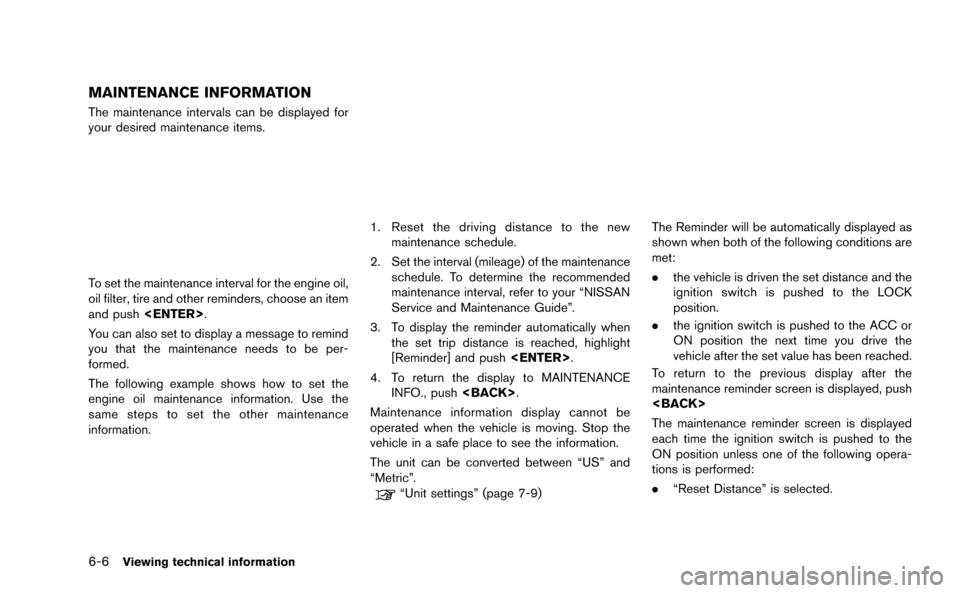
To set the maintenance interval for the engine oil,
oil filter, tire and other reminders, choose an item
and push
You can also set to display a message to remind
you that the maintenance needs to be per-
formed.
The following example shows how to set the
engine oil maintenance information. Use the
same steps to set the other maintenance
information.
1. Reset the driving distance to the new maintenance schedule.
2. Set the interval (mileage) of the maintenance schedule. To determine the recommended
maintenance interval, refer to your “NISSAN
Service and Maintenance Guide”.
3. To display the reminder automatically when the set trip distance is reached, highlight
[Reminder] and push
4. To return the display to MAINTENANCE INFO., push
Maintenance information display cannot be
operated when the vehicle is moving. Stop the
vehicle in a safe place to see the information.
The unit can be converted between “US” and
“Metric”.
“Unit settings” (page 7-9)
The Reminder will be automatically displayed as
shown when both of the following conditions are
met:
. the vehicle is driven the set distance and the
ignition switch is pushed to the LOCK
position.
. the ignition switch is pushed to the ACC or
ON position the next time you drive the
vehicle after the set value has been reached.
To return to the previous display after the
maintenance reminder screen is displayed, push
The maintenance reminder screen is displayed
each time the ignition switch is pushed to the
ON position unless one of the following opera-
tions is performed:
. “Reset Distance” is selected.
Page 242 of 298
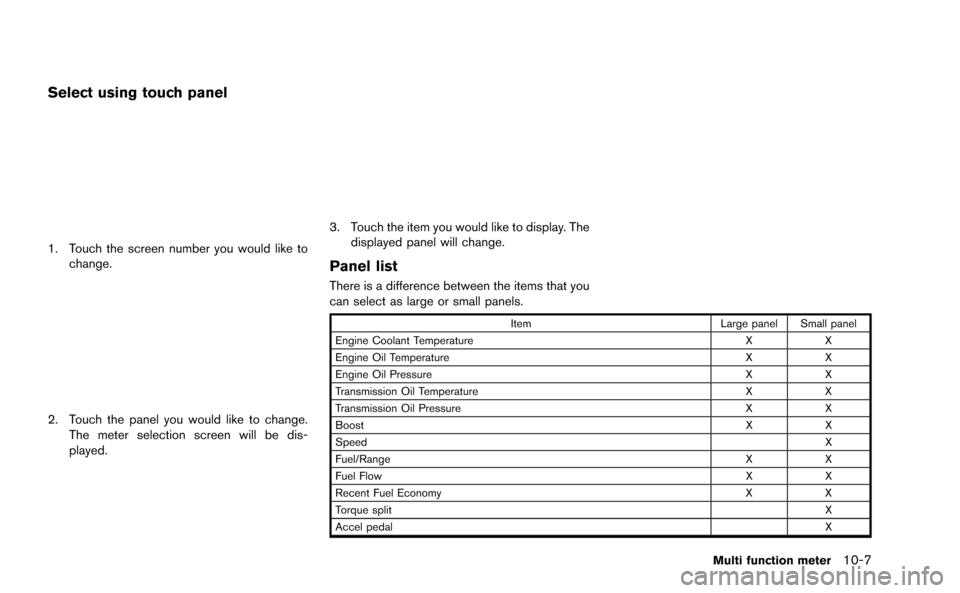
Select using touch panel
1. Touch the screen number you would like tochange.
2. Touch the panel you would like to change.The meter selection screen will be dis-
played.
3. Touch the item you would like to display. Thedisplayed panel will change.
Panel list
There is a difference between the items that you
can select as large or small panels.
Item Large panel Small panel
Engine Coolant Temperature XX
Engine Oil Temperature XX
Engine Oil Pressure XX
Transmission Oil Temperature XX
Transmission Oil Pressure XX
Boost XX
Speed X
Fuel/Range XX
Fuel Flow XX
Recent Fuel Economy XX
Torque split X
Accel pedal X
Multi function meter10-7
Page 243 of 298
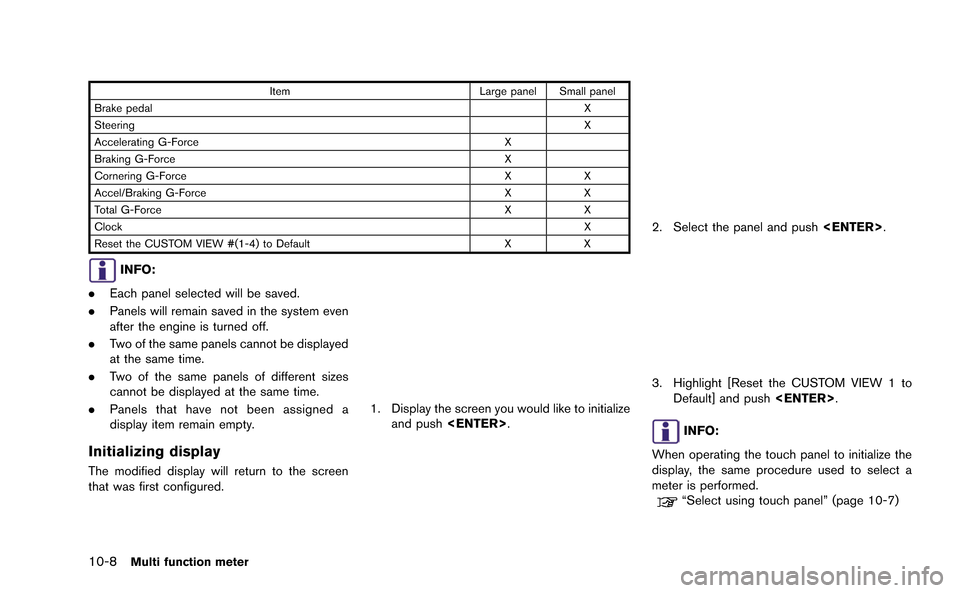
10-8Multi function meter
ItemLarge panel Small panel
Brake pedal X
Steering X
Accelerating G-Force X
Braking G-Force X
Cornering G-Force XX
Accel/Braking G-Force XX
Total G-Force XX
Clock X
Reset the CUSTOM VIEW #(1-4) to Default XX
INFO:
. Each panel selected will be saved.
. Panels will remain saved in the system even
after the engine is turned off.
. Two of the same panels cannot be displayed
at the same time.
. Two of the same panels of different sizes
cannot be displayed at the same time.
. Panels that have not been assigned a
display item remain empty.
Initializing display
The modified display will return to the screen
that was first configured.
1. Display the screen you would like to initialize
and push
2. Select the panel and push
3. Highlight [Reset the CUSTOM VIEW 1 to
Default] and push
INFO:
When operating the touch panel to initialize the
display, the same procedure used to select a
meter is performed.
“Select using touch panel” (page 10-7)