key NISSAN GT-R 2015 R35 Quick Reference Guide
[x] Cancel search | Manufacturer: NISSAN, Model Year: 2015, Model line: GT-R, Model: NISSAN GT-R 2015 R35Pages: 23, PDF Size: 1.23 MB
Page 3 of 23

TAB LE OF CONTE NTS
Additional information about your vehicle is also available in your Owne\
r’s Manual, Multi Function Display
Owner’s Manual and at www.nissanusa.com.
NEW SYSTEM FEATURES
RearView Monitor ........................................................................\
...........................................................2
USB (Universal Serial Bus) Connection Port/iPod® Interface .................................................... 2
NavTraffic and NavWeather
........................................................................\
......................................... 2
ESSENTIAL INFORMATION
Tire Pressure Monitoring System (TPMS) ........................................................................\
...............3
Fuel-filler Door/Cap ........................................................................\
....................................................... 4
Unique Noises
........................................................................\
................................................................ 4
Vehicle Modifications
........................................................................\
.................................................... 4
Vehicle Dynamic Control (VDC)
........................................................................\
................................. 4
Matte Paint Care (if so equipped)
........................................................................\
.............................. 5
Carbon-based Parts (if so equipped)
........................................................................\
....................... 5
Clock Set/Adjustment
........................................................................\
................................................... 5
FIRST DRIVE FEATURES
NISSAN Intelligent Key® System ........................................................................\
...............................6
Trunk Lid Release
........................................................................\
........................................................... 7
Seat Adjustments
........................................................................\
........................................................... 7
Outside Mirror Control Switch
........................................................................\
.................................... 8
Starting/Stopping the Engine
........................................................................\
..................................... 8
Headlight Control Switch
........................................................................\
............................................. 8
Windshield Wiper and Washer Switch
........................................................................\
..................... 9
Automatic Climate Controls
........................................................................\
...................................... 10
AM/FM/SiriusXM
® Satellite Radio with CD Player ..................................................................... 11
Cruise Control
........................................................................\
.............................................................. 12
SYSTEM GUIDE
Drive Computer ........................................................................\
............................................................13
Bluetooth® Hands-free Phone System ........................................................................\
................... 14
• System Operating Tips
............................................................................................................... 14
Navigation System
........................................................................\
....................................................... 16
HomeLink
® Universal Transceiver ........................................................................\
............................ 18
Please see your Owner’s Manual for impor tant safety information and system operation limitations.
•
A c
ellular telephone should not be used for any purpose while driving so full attention may be
given to vehicle operation.
•
A
lways wear your seat belt.
•
S
upplemental air bags do not replace proper seat belt usage.
•
C
hildren 12 and under should always ride in the rear seat properly secured in child restraints
or seat belts according to their age and weight.
•
D
o not drink and drive.
For more information, refer to the “ Bluetooth
® Hands-Free Phone System (section 4) ” of the Multi Function
Display Owner’s Manual, the “ Safety — Seats, seat belts and supplemental restraint system (section 1) ” and
the “ Starting and driving (section 5) ” of your Owner’s Manual.
1655184_15b_GTR_QRGText-Insert_062414.indd 16/24/14 9:06 AM
Page 7 of 23

5
CARBON-BASED PARTS (if so equipped)
Do not wax carbon parts suc h as the rear diffuser or the optional dry carbon fiber
rear spoiler
Waxing speeds up deterioration by allowing water under the carbon layer.
For more information, refer to the “GT-R Overview (section GTR)” and the “Appearance and care (section 7)” of
your Owner’s Manual.
MATTE PAINT CARE (if so equipped)
Your vehicle is equipped with Matte paint and special care is necessary to maintain the appearance.
For more information on special care instructions, refer to the “Appearance and care (section 7)” of your
Owner’s Manual.
CLOCK SET/ADJUSTMENT
Press the SETTING button 1, select the “Clock”
key using the control knob
2 and press the ENTER
button to access the following clock settings:
On-screen Cloc
k – When this feature is turned to
ON, a clock is always displayed in the upper right
corner of the Multi Function Display screen. The
clock is automatically adjusted by the GPS system.
Clock Format – Choose either the 12-hour clock display or the 24-hour clock display.
Offset (hour) – T he time can be adjusted by increasing or decreasing per hour.
Offset (min) – The time can be adjusted by increasing or decreasing per minute.
Daylight Savings Time – Turn this item to ON for daylight savings time application.
Time Zone – Choose the time zone.
For more information, refer to the “Other settings (section 7)” of your Multi Function Display Owner’s Manual.
12
1655184_15b_GTR_QRGText-Insert_062414.indd 56/24/14 9:06 AM
To view detailed instructional videos regarding these and other features, please go to www.nissanownersinfo.mobi.
Page 8 of 23

6
NISSAN INTELLIGENT KEY® SYSTE M
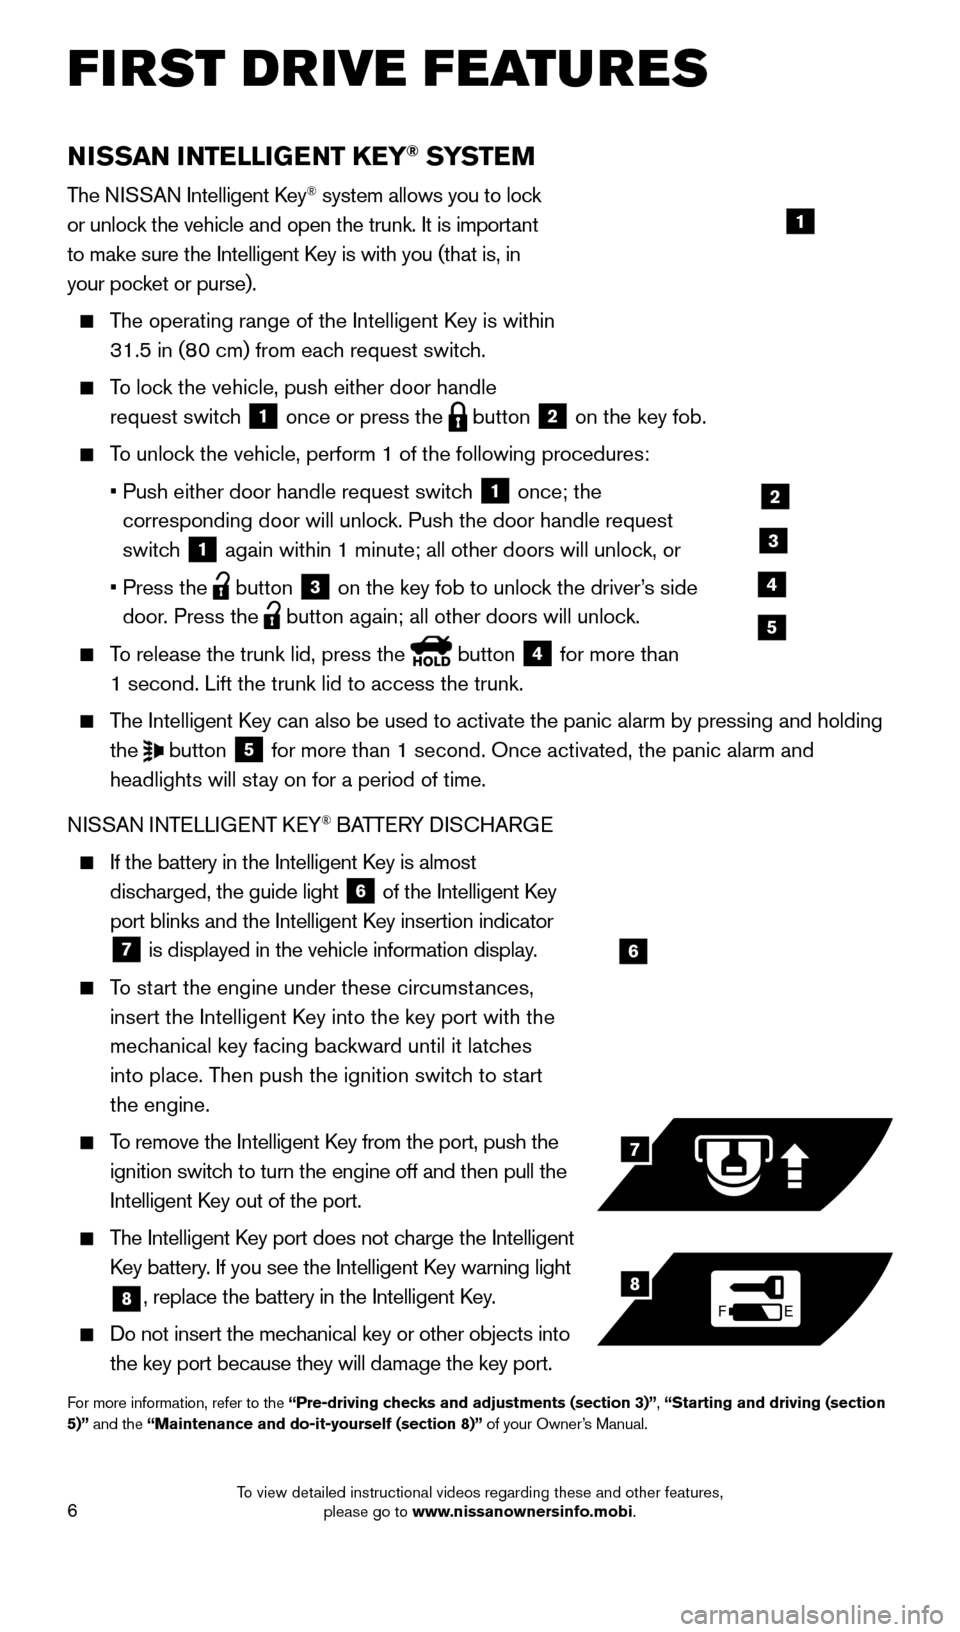
The NISSAN Intelligent Key® system allows you to lock
or unlock the vehicle and open the trunk. It is important
to make sure the Intelligent Key is with you (that is, in
your pocket or purse).
The operating range of the Intelligent Key is within
31.5 in (80 cm) from each request switch.
To lock the vehicle, push either door handle request switch
1 once or press the
button
2 on the key fob.
To unlock the vehicle, perform 1 of the following procedures:
•
Push either door handle request switc
h
1 once; the
corresponding door will unlock. Push the door handle request
switch
1 again within 1 minute; all other doors will unlock, or
•
Press the button
3 on the key fob to unlock the driver’s side
door. Press the button again; all other doors will unlock.
To release the trunk lid, press the button
4 for more than
1 second. Lift the trunk lid to access the trunk.
The Intelligent Key can also be used to activate the panic alarm by pressing and holding the
button
5 for more than 1 second. Once activated, the panic alarm and
headlights will stay on for a period of time.
NISSAN INTELLIGENT KEY
® BATTERY DISCHARGE
If the battery in the Intelligent K ey is almost
discharged, the guide light
6 of the Intelligent Key
port blinks and the Intelligent Key insertion indicator
7 is displayed in the vehicle information display.
To start the engine under these circumstances,
insert the Intelligent Key into the key port with the
mechanical key facing backward until it latches
into place. Then push the ignition switch to start
the engine.
To remove the Intelligent Key from the port, push the
ignition switch to turn the engine off and then pull the
Intelligent Key out of the port.
The Intelligent Key port does not charge the Intelligent
Key battery. If you see the Intelligent Key warning light
8, replace the battery in the Intelligent Key.
Do not insert the mechanical key or other objects into
the key port because they will damage the key port.
For more information, refer to the “Pre-driving checks and adjustments (section 3)”, “Starting and driving (section
5)” and the “Maintenance and do-it-yourself (section 8)” of your Owner’s Manual.
6
FE
7
8
FIRST DRIVE FEATURES
1
2
3
4
5
1655184_15b_GTR_QRGText-Insert_062414.indd 66/24/14 9:06 AM
To view detailed instructional videos regarding these and other features, please go to www.nissanownersinfo.mobi.
Page 9 of 23

7
TRUNK LID RELEASE
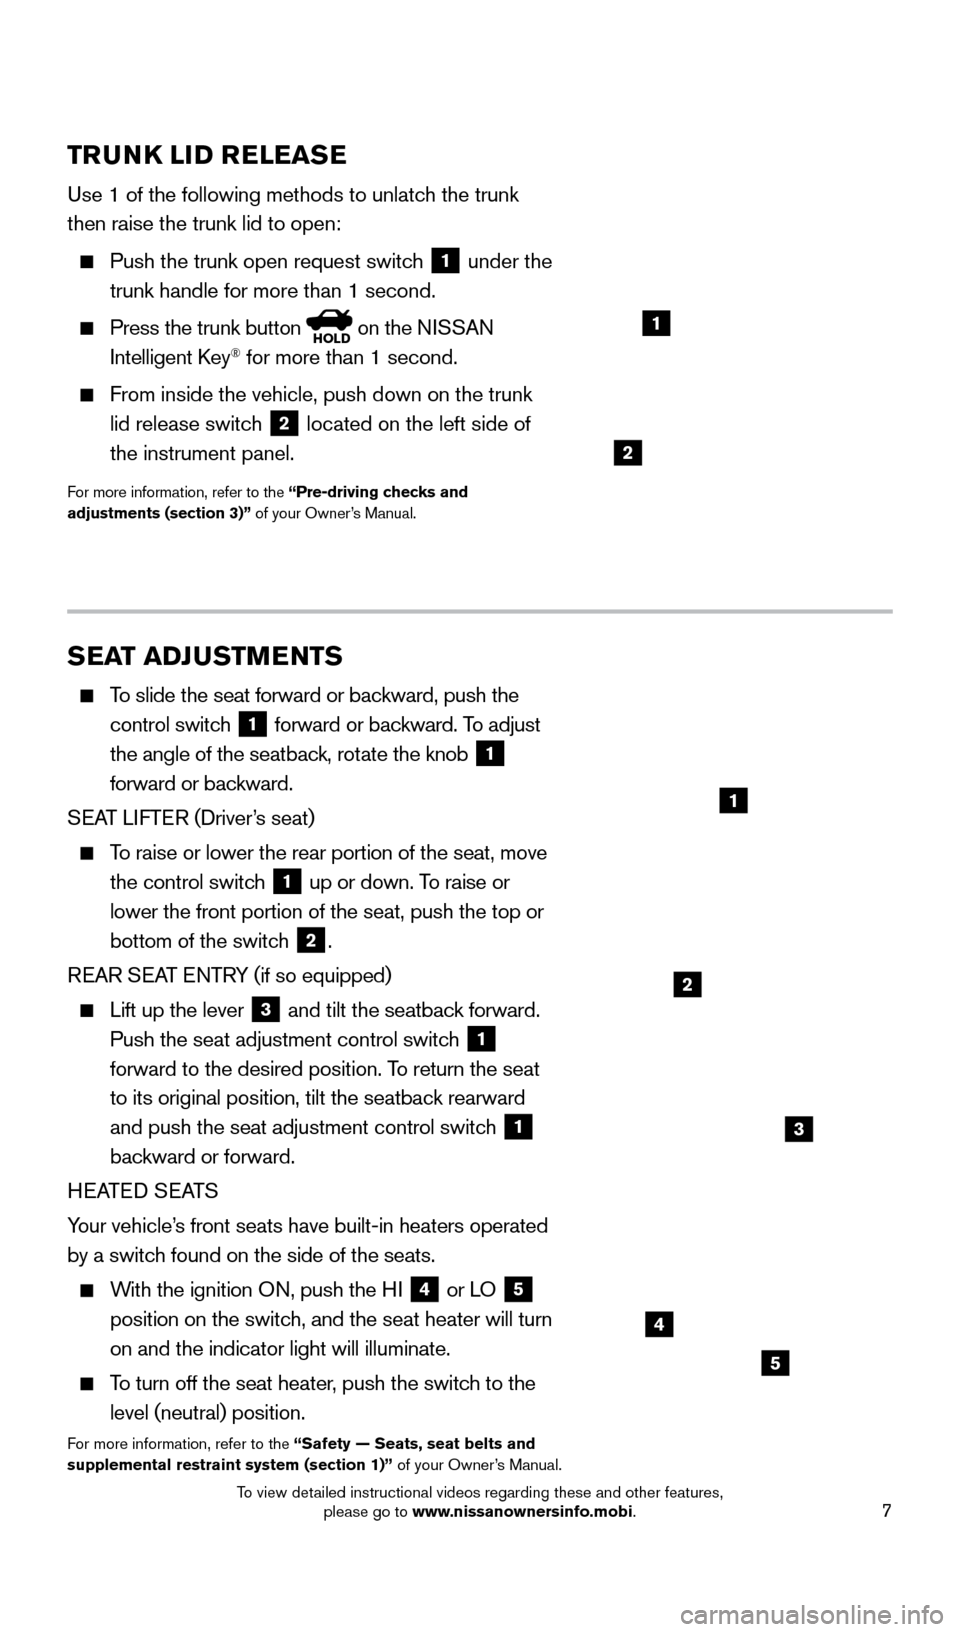
Use 1 of the following methods to unlatch the trunk
then raise the trunk lid to open:
Push the trunk open request switc h
1 under the
trunk handle for more than 1 second.
Press the trunk button HOLD on the NISSAN
Intelligent Key® for more than 1 second.
From inside the vehicle, push down on the trunk
lid release switch
2 located on the left side of
the instrument panel.
For more information, refer to the “Pre-driving checks and
adjustments (section 3)” of your Owner’s Manual.
1
SEAT ADJUSTMENTS
To slide the seat forward or backward, push the control switch
1 forward or backward. To adjust
the angle of the seatback, rotate the knob 1
forward or backward.
SEAT LIFTER (Driver’s seat)
To raise or lower the rear portion of the seat, move the control switch
1 up or down. To raise or
lower the front portion of the seat, push the top or
bottom of the switch
2.
REAR SEAT ENTRY (if so equipped)
Lift up the lever 3 and tilt the seatback forward.
Push the seat adjustment control switch 1
forward to the desired position. To return the seat
to its original position, tilt the seatback rearward
and push the seat adjustment control switch
1
backward or forward.
HEATED SEATS
Your vehicle’s front seats have built-in heaters operated
by a switch found on the side of the seats.
With the ignition ON, push the HI 4 or LO 5
position on the switch, and the seat heater will turn
on and the indicator light will illuminate.
To turn off the seat heater, push the switch to the level (neutral) position.
For more information, refer to the “Safety — Seats, seat belts and
supplemental restraint system (section 1)” of your Owner’s Manual.
3
2
4
5
2
1
1655184_15b_GTR_QRGText-Insert_062414.indd 76/24/14 9:06 AM
To view detailed instructional videos regarding these and other features, please go to www.nissanownersinfo.mobi.
Page 10 of 23

8
OUTSIDE MIRROR CONTROL SWITCH
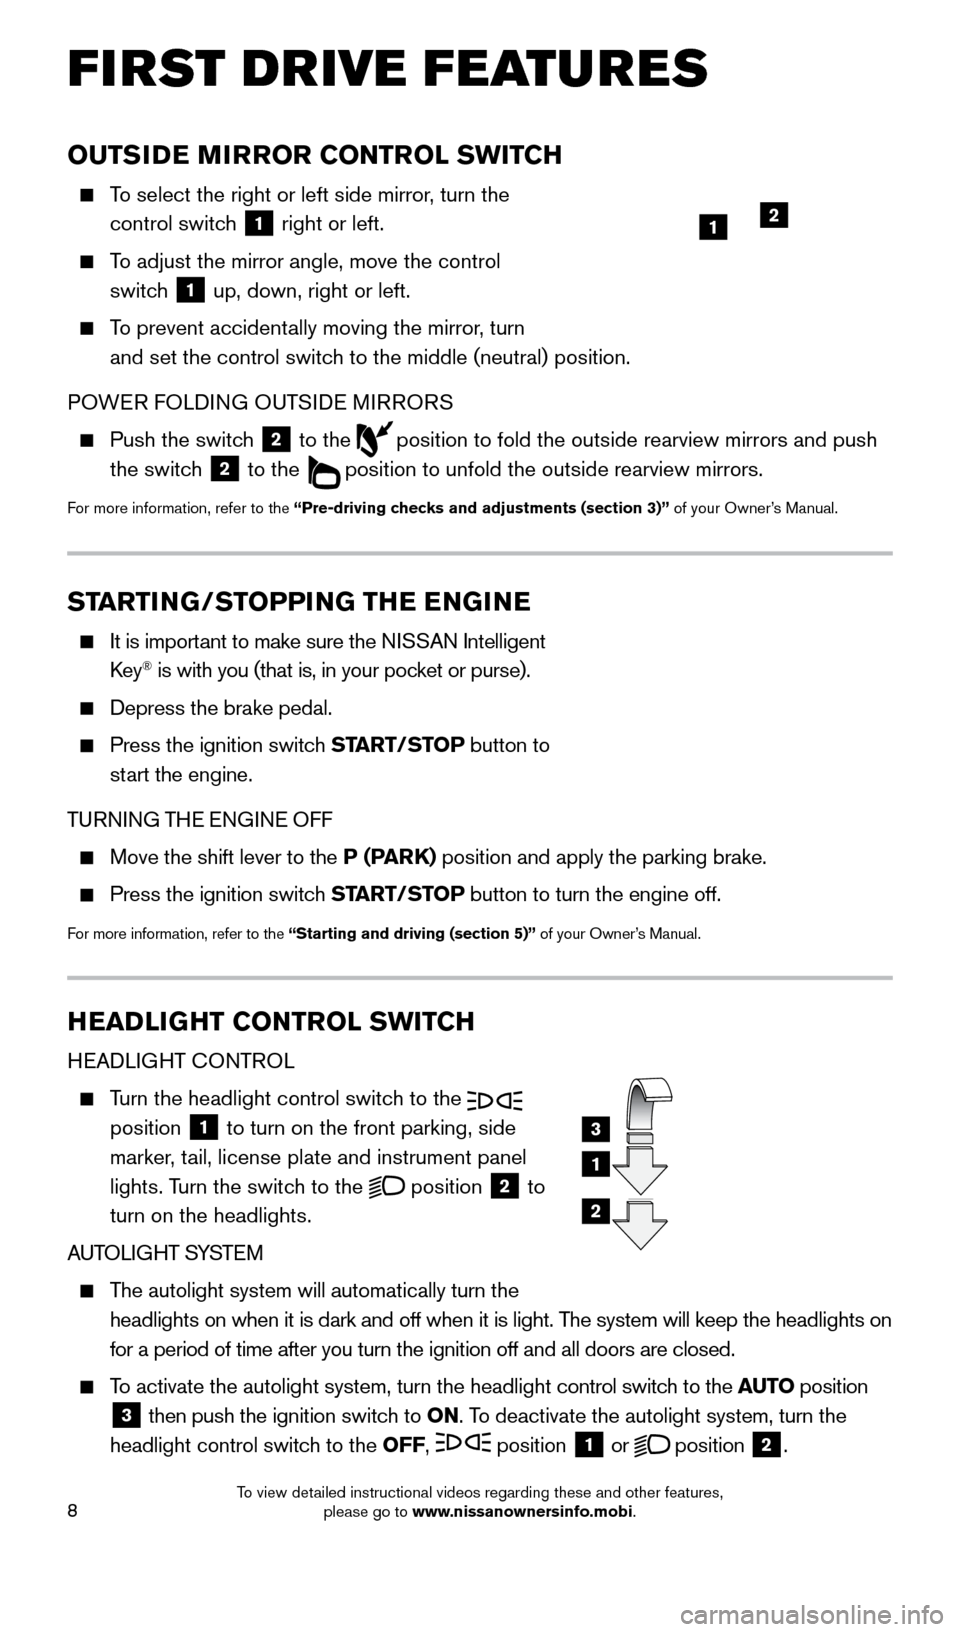
To select the right or left side mirror, turn the control switch
1 right or left.
To adjust the mirror angle, move the control
switch
1 up, down, right or left.
To prevent accidentally moving the mirror, turn
and set the control switch to the middle (neutral) position.
POWER FOLDING OUTSIDE MIRRORS
Push the switc h
2 to the
position to fold the outside rearview mirrors and push
the switch
2 to the
position to unfold the outside rearview mirrors.
For more information, refer to the “Pre-driving checks and adjustments (section 3)” of your Owner’s Manual.
HEADLIGHT CONTROL SWITCH
HEADLIGHT CONTROL
Turn the headlight control switch to the
position 1 to turn on the front parking, side
marker, tail, license plate and instrument panel
lights. Turn the switch to the
position
2 to
turn on the headlights.
AUTOLIGHT SYSTEM
The autolight system will automatically turn the
headlights on when it is dark and off when it is light. The system will keep the headlights on
for a period of time after you turn the ignition off and all doors are c\
losed.
To activate the autolight system, turn the headlight control switch to the AUTO position
3 then push the ignition switch to
ON. To deactivate the autolight system, turn the
headlight control switch to the OFF, position 1 or
position
2.
3
1
2
FIRST DRIVE FEATURES
1
STARTING/STOPPING THE ENGINE
It is import ant to make sure the NISSAN Intelligent
Key® is with you (that is, in your pocket or purse).
Depress the brake pedal.
Press the ignition switc h START/STOP button to
start the engine.
TURNING THE ENGINE OFF
Move the shift lever to the P (PARK) position and apply the parking brake.
Press the ignition switch START/STOP button to turn the engine off.
For more information, refer to the “Starting and driving (section 5)” of your Owner’s Manual.
2
1655184_15b_GTR_QRGText-Insert_062414.indd 86/24/14 9:06 AM
To view detailed instructional videos regarding these and other features, please go to www.nissanownersinfo.mobi.
Page 16 of 23

14
BLUETOOTH® HANDS-FREE PHONE SYSTEM
A cellular telephone should not be used
while driving so full attention may be given to
vehicle operation.*
Before using the hands-free feature, you need to
setup or connect the system to recognize your
compatible cellular phone(s). Five Bluetooth
®-
enabled phones can be connected. After set-up,
the system automatically connects with a
connected phone when the ignition is in the ACC
or ON position as long as the phone is on and in the vehicle.
Bluetooth® Streaming Audio allows you to use a compatible Bluetooth® phone to play
audio files on your device. Your compatible cellular phone can be connected to the
vehicle’s audio system, allowing audio files to play through the vehicle’s speakers.
SYSTEM OPERATING TIPS
Press the button to interrupt the voice prompts at any time and speak a command \
after the tone.
The “Help” command can be used to hear a list of available commands\
at any time.
Reduce bac kground noise as much as possible by closing windows and pointing
HVAC vents away from the ceiling.
Speak naturally without long pauses and without raising your voice.
When speaking Phonebook names, please be aware some phones require the la\
st name to be spoken before the first name. For example, “Michael Smith” may be
spoken as “Smith Michael”.
To cancel a Voice Recognition session, simply wait 5 seconds, say “Cancel” or “Quit”, or press and hold the
button for 5 seconds.
If the Voice Recognition system does not recognize your voice commands, train the system using the Voice Adaptation Mode. See your Owner’s Manual for
detailed information.
For more detailed information and instructions, refer to your cellular phone’s Owner’s Manual and visit www.nissanusa.com/bluetooth.
CONNECTING PROCEDURE
The vehicle must be stationary when connecting the phone.
1.
Press the PHONE button on the control panel
1 or press the
button on the steering wheel
and touch the “Connect Phone” key. 1
SYSTEM GUIDE
*Some jurisdictions prohibit the use of cellular telephones while drivin\
g.
1655184_15b_GTR_QRGText-Insert_062414.indd 146/24/14 9:06 AM
To view detailed instructional videos regarding these and other features, please go to www.nissanownersinfo.mobi.
Page 17 of 23

15
2. Initiate connecting from the phone.
•
T
he connecting procedure varies
according to each cellular phone model.
For detailed connecting instructions and
a list of compatible phones, please visit
www.nissanusa.com/bluetooth.
•
W
hen prompted for a PIN code, enter “1234”
from the handset. (The PIN code is assigned by
NISSAN and cannot be changed.)
3.
W
hen the connecting is complete, the screen will
return to the Phone menu display.
PHONEBOOK SETUP
Depending on your cellular phone, the system
may automatically download your cellular
phone’s entire phonebook to the vehicle’s Bluetooth
® system.
If the phonebook does not download automatically, up to 40 entries can be manually downloaded.
To manually download entries:
1. P
ress the
button and select the “Quick
Dial” key.
2
.
S
elect the “Add New” key at the top of
the display. There are different methods
to input a phone number. Select 1 of the
following options:
•
“
Copy from Call History”- to save a number
from the Outgoing, Incoming or Missed
Calls lists.
•
“
Copy from the Phonebook”- to save a
number that has been downloaded from your
handset to the vehicle.
•
“
Enter Number by Keypad”- to input the number and name manually.
MAKING A CALL
To make a call, follow this procedure:
1
.
Press the
button on the steering wheel.
The Phone menu will appear on the control
panel display.
2
.
S
elect the “Quick Dial”, “Call History”,
“Phonebook” or “Dial Number” key.
3
.
S
elect the desired entry from the list.
4
.
S
elect “Call” to start dialing the number.
1655184_15b_GTR_QRGText-Insert_062414.indd 156/24/14 9:06 AM
To view detailed instructional videos regarding these and other features, please go to www.nissanownersinfo.mobi.
Page 18 of 23

16
NAVIGATION SYSTEM
The Navigation System starts when the ignition switch is placed in the ACC or ON
position. To help ensure safe driving, some functions are grayed out or muted while driving.
Park the vehicle in a safe location and then operate the Navigation System.
STORING YOUR HOME IN YOUR ADDRESS BOOK
Press the DEST button.
Touch the “Home (Add New)” key. If you have
already stored your home, this key may not appear.
When you touch the “Home (Add New)” key,
a confirmation message is displayed.
Touch the “Yes” key.
RECEIVING/ENDING A CALL
To accept the call, press the button on the
steering wheel or touch the “Answer” key.
To reject the call, touch the “Reject Call” key.
To hang-up, press the
button or touch the
“Hang Up” key.
For more information, refer to the “Bluetooth® Hands-Free Phone
System (section 4)” of your Multi Function Display Owner’s Manual or
please visit www.nissanusa.com/bluetooth.
SYSTEM GUIDE
1655184_15b_GTR_QRGText-Insert_062414.indd 166/24/14 9:06 AM
To view detailed instructional videos regarding these and other features, please go to www.nissanownersinfo.mobi.
Page 19 of 23

17
Make sure the correct region is selected. To change the region, touch the “Change Region”
key and select the appropriate region.
Touch the “Street Address” key. A character input
screen is displayed.
Enter the street number of your home then touc h
the “OK” key.
Enter your street name then touc h the “OK” key.
The map screen is displayed.
Press the directional buttons to adjust your home
location if necessary. After adjusting the location,
touch the “ENTER” key.
Your home is displayed at the center of the map.
A confirmation message is displayed, and the
system sets your home as the destination.
Press the MAP button to return to the current
location map screen. The home icon is displayed
on the screen.
SETTING A STREET ADDRESS AS A DESTINATION
Press the DEST button.
Touch the “Street Address” key. A character input
screen is displayed.
Enter the house number; when finished, touc h the
“OK” key. If you do not know the house number,
touch the “No House #” key.
1655184_15b_GTR_QRGText-Insert_062414.indd 176/24/14 9:06 AM
To view detailed instructional videos regarding these and other features, please go to www.nissanownersinfo.mobi.
Page 20 of 23

18
Enter the name of the street. After finishing the
entry, touch the “List” key. A list of possible street
names is displayed.
Touch the correct name of the destination
from the list. You might need to touch the “UP”
or “DOWN” key to find the preferred street name.
The selected destination is displayed at the center
of the map. Touch the “Start” key after confirming
the location of the displayed destination. The
system sets the destination to the selected
location and starts calculating a route.
For more information, refer to the “Navigation (section 2)” of your Multi
Function Display Owner’s Manual.
SYSTEM GUIDE
HOMELINK® UNIVERSAL TRANSCEIVER
The HomeLink® Universal Transceiver can learn and consolidate the functions of up
to 3 different hand-held transmitters, operating items such as garage doors, property
gates, outdoor and indoor lights or alarm systems.
To program the HomeLink® Universal Transceiver:
•
P
osition the handheld transceiver 1-3 in (26-76 mm) away from the HomeLink surface,
keeping the HomeLink indicator light in view.
•
Press and hold the desired HomeLink button and the handheld transmitter \
button
simultaneously until the HomeLink indicator light flashes slowly and then ra\
pidly.
•
B
oth buttons may be released when the indicator light flashes rapidly.
HOMELINK
1655184_15b_GTR_QRGText-Insert_062414.indd 186/24/14 9:06 AM
To view detailed instructional videos regarding these and other features, please go to www.nissanownersinfo.mobi.