ECU NISSAN JUKE 2021 Owners Manual
[x] Cancel search | Manufacturer: NISSAN, Model Year: 2021, Model line: JUKE, Model: NISSAN JUKE 2021Pages: 1672, PDF Size: 2.45 MB
Page 68 of 1672
SSS0643
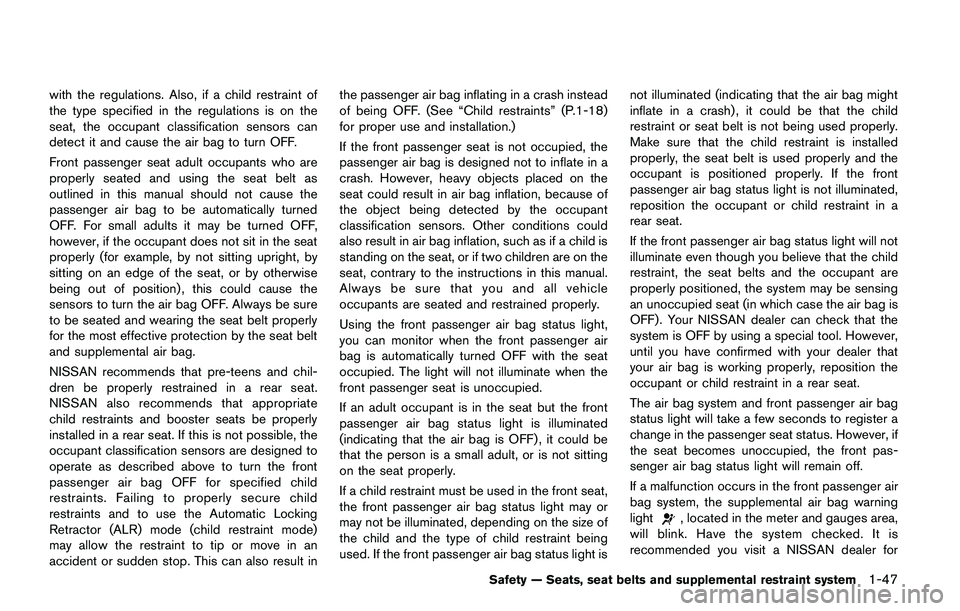
LATCH webbing-mounted attachment
Installing child restraint LATCH lower
anchor attachments
LATCH compatible child restraints include two
rigid or webbing-mounted attachments that can
be connected to two anchors located at certain
seating positions in your vehicle. With this
system, you do not have to use a vehicle seat
belt to secure the child restraint. Check your
child restraint for a label stating that it is
compatible with LATCH. This information may
also be in the instructions provided by the child
restraint manufacturer.
Page 71 of 1672
SSS0650
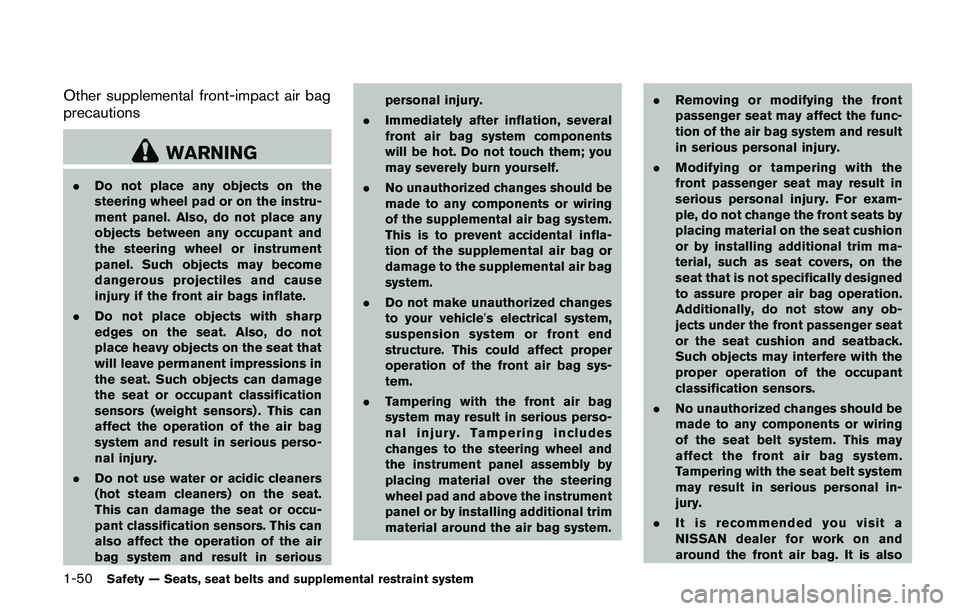
Rear-facing — step 4
4. After attaching the child restraint, test itbefore you place the child in it. Push it from
side to side while holding the child restraint
near the LATCH attachment path. The child
restraint should not move more than 1 inch
(25 mm) , from side to side. Try to tug it
forward and check to see if the LATCH
attachment holds the restraint in place. If the
restraint is not secure, tighten the LATCH
attachment as necessary, or put the restraint
in another seat and test it again. You may
need to try a different child restraint or try
installing by using the vehicle seat belt (if
applicable) . Not all child restraints fit in all
types of vehicles. 5. Check to make sure the child restraint is
properly secured prior to each use. If the
child restraint is loose, repeat steps 1
through 4.
REAR-FACING CHILD RESTRAINT IN-
STALLATION USING THE SEAT BELTS
Page 176 of 1672
JVP0338X
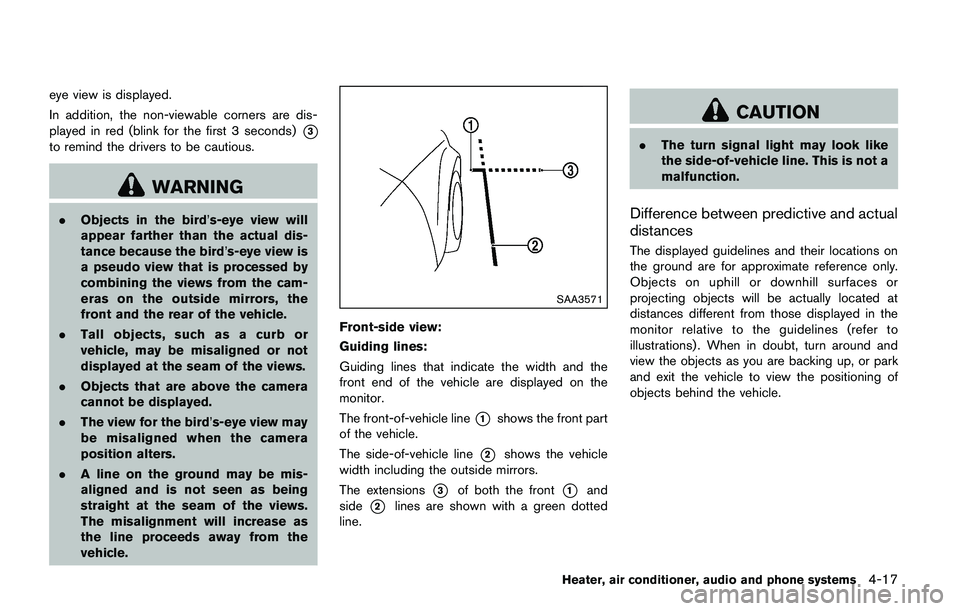
When opening the hood:
1. Pull the hood release handle
*1located
below the instrument panel; the hood will
then spring up slightly.
2. Locate the lever
*2in between the hood
and grille, and pull the lever up with your
fingertips.
3. Raise the hood
*3.
4. Remove the support rod
*4and insert it
into the slot
*5.
Hold the coated part
*Awhen removing or
resetting the support rod. Avoid direct
contact with the metal parts, as they may
be hot immediately after the engine has been stopped.
When closing the hood:
1. While supporting the hood, return the
support rod to its original position.
2. Slowly lower the hood to about 8 to 12 in (20 to 30 cm) above the hood lock, then let
it drop.
3. Make sure it is securely latched.
Page 178 of 1672
SPA2336
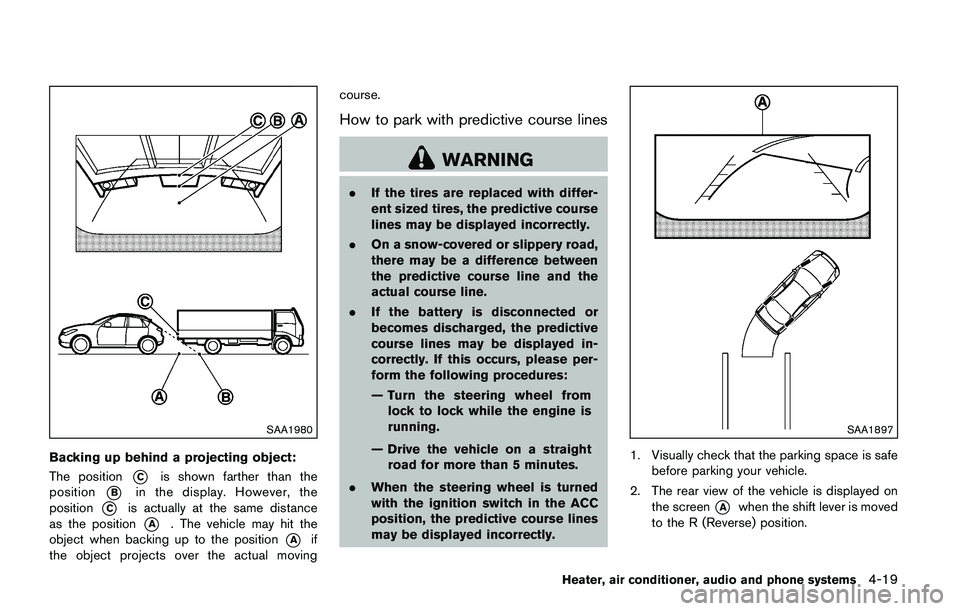
OPENING THE FUEL-FILLER DOOR
To open the fuel-filler door, pull the release
handle located below the instrument panel. To
lock, close the fuel-filler door securely.
Page 288 of 1672
WARNING
.Do not leave children or adults who
would normally require the support
of others alone in your vehicle. Pets
should not be left alone either. They
could accidentally injure themselves
or others through inadvertent op-
eration of the vehicle. Also, on hot,
sunny days, temperatures in a
closed vehicle could quickly become
high enough to cause severe or
possibly fatal injuries to people or
animals.
. Properly secure all cargo with ropes
or straps to help prevent it from
sliding or shifting. Do not place
cargo higher than the seatbacks. In
a sudden stop or collision, unse-
cured cargo could cause personal
injury.
EXHAUST GAS (carbon monoxide)
Page 294 of 1672
.Do not drive across steep slopes.
Instead drive either straight up or
straight down the slopes. Off-road
vehicles can tip over sideways much
more easily than they can forward or
backward.
. Many hills are too steep for any
vehicle. If you drive up them, you
may stall. If you drive down them,
you may not be able to control your
speed. If you drive across them, you
may roll over.
. Do not shift ranges while driving on
downhill grades as this could cause
loss of control of the vehicle.
. Stay alert when driving to the top of
a hill. At the top there could be a
drop-off or other hazard that could
cause an accident.
. If your engine stalls or you cannot
make it to the top of a steep hill,
never attempt to turn around. Your
vehicle could tip or roll over. Always
back straight down in R (Reverse)
range. Never back down in N (Neu-
tral) , using only the brake, as this
could cause loss of control. .
Heavy braking going down a hill
could cause your brakes to overheat
and fade, resulting in loss of control
and an accident. Apply brakes
lightly and use a low range to
control your speed.
. Unsecured cargo can be thrown
around when driving over rough
terrain. Properly secure all cargo
so it will not be thrown forward
and cause injury to you or your
passengers.
. To avoid raising the center of gravity
excessively, do not exceed the rated
capacity of the roof rack (if so
equipped) and evenly distribute the
load. Secure heavy loads in the
cargo area as far forward and as
low as possible. Do not equip the
vehicle with tires larger than speci-
fied in this manual. This could cause
your vehicle to roll over.
. Do not grip the inside or spokes of
the steering wheel when driving off-
road. The steering wheel could
move suddenly and injure your
hands. Instead drive with your fin-
gers and thumbs on the outside of
the rim. .
Before operating the vehicle, ensure
that the driver and all passengers
have their seat belts fastened.
. Always drive with the floor mats in
place as the floor may became hot.
. Lower your speed when encounter-
ing strong crosswinds. With a higher
center of gravity, your vehicle is
more affected by strong side winds.
Slower speeds ensure better vehicle
control.
. Do not drive beyond the perfor-
mance capability of the tires, even
with AWD engaged.
. For AWD equipped vehicles, do not
attempt to raise two wheels off the
ground and shift the transmission to
any drive or reverse position with
the engine running. Doing so may
result in drivetrain damage or un-
expected vehicle movement which
could result in serious vehicle da-
mage or personal injury.
. Do not attempt to test an AWD
equipped vehicle on a 2-wheel dy-
namometer (such as the dynam-
ometers used by some states for
emissions testing) , or similar equip-
Page 329 of 1672
To shut off the engine in an emergency situation
while driving, perform the following procedure:
.Rapidly push the push-button ignition switch
3 consecutive times in less than 1.5
seconds, or
. Push and hold the push-button ignition
switch for more than 2 seconds.TIRE PRESSURE MONITORING SYS-
TEM (TPMS)
This vehicle is equipped with the Tire Pressure
Monitoring System (TPMS) . It monitors tire
pressure of all tires except the spare. When
the low tire pressure warning light is lit, and the
CHECK TIRE PRES (pressure) warning mes-
sage is displayed in the vehicle information
display, one or more of your tires is significantly
under-inflated. If the vehicle is being driven with
low tire pressure, the TPMS will activate and
warn you of it by the low tire pressure warning
light. This system will activate only when the
vehicle is driven at speeds above 16 MPH (25
km/h) . For more details, see “Warning lights,
indicator lights and audible reminders” (P.2-15)
and “Tire Pressure Monitoring System (TPMS)”
(P.5-3) .
Page 334 of 1672
4. Lower the vehicle slowly until the tiretouches the ground. Then, with the wheel
nut wrench, tighten the wheel nuts securely
in the sequence illustrated. Lower the
vehicle completely.
Page 355 of 1672
SDI2641
CHECKING ENGINE COOLANT LEVEL
Check the coolant levelin the reservoir when
the engine is cold. If the coolant level is below
the MIN level
*2, open the reservoir cap and
add coolant up to the MAX level
*1. If the
reservoir is empty, check the coolant level in the
radiator when the engine is cold. If there is
insufficient coolant in the radiator, fill the radiator
with coolant up to the filler opening and also add
it to the reservoir up to the MAX level
*1.
Tighten the cap securely after adding engine
coolant.
If the cooling system frequently requires
coolant, have it checked. It is recom-
mended you visit a NISSAN dealer for this service.
CHANGING ENGINE COOLANT
It is recommended that major cooling system
repairs be performed by a NISSAN dealer. The
service procedures can be found in the appro-
priate NISSAN Service Manual.
Improper servicing can result in reduced
heater performance and engine overheat-
ing.
Page 387 of 1672
Warranty Information Booklet.
All season tires
NISSAN specifies all season tires on some
models to provide good performance all year,
including snowy and icy road conditions. All
Season tires are identified by ALL SEASON
and/or M&S (Mud and Snow) on the tire
sidewall. Snow tires have better snow traction
than All Season tires and may be more appro-
priate in some areas.
Summer tires
NISSAN specifies summer tires on some
models to provide superior performance on dry
roads. Summer tire performance is substantially
reduced in snow and ice. Summer tires do not
have the tire traction rating M&S on the tire
sidewall.
If you plan to operate your vehicle in snowy or
icy conditions, NISSAN recommends the use of
SNOW tires or ALL SEASON tires on all four
wheels.
Snow tires
If snow tires are needed, it is necessary to select
tires equivalent in size and load rating to the
original equipment tires. If you do not, it can
adversely affect the safety and handling of your
vehicle.
Generally, snow tires will have lower speed
ratings than factory equipped tires and may not
match the potential maximum vehicle speed.
Never exceed the maximum speed rating of the
tire.
If you install snow tires, they must be the same
size, brand, construction and tread pattern on all
four wheels.
For additional traction on icy roads, studded
tires may be used. However, some U.S. states
and Canadian provinces prohibit their use.
Check local, state and provincial laws before
installing studded tires. Skid and traction cap-
abilities of studded snow tires, on wet or dry
surfaces, may be poorer than that of non-
studded snow tires.
TIRE CHAINS
Use of tire chains may be prohibited according
to location. Check the local laws before instal-
ling tire chains. When installing tire chains, make
sure they are the proper size for the tires on your
vehicle and are installed according to the chainmanufacturer’s suggestions.
Use only SAE
Class S chains. Class “S” chains are used on
vehicles with restricted tire to vehicle clearance.
Vehicles that can use Class “S” chains are
designed to meet the SAE standard minimum
clearances between the tire and the closest
vehicle suspension or body component required
to accommodate the use of a winter traction
device (tire chains or cables) . The minimum
clearances are determined using the factory
equipped tire size. Other types may damage
your vehicle. Use chain tensioners when re-
commended by the tire chain manufacturer to
ensure a tight fit. Loose end links of the tire
chain must be secured or removed to prevent
the possibility of whipping action damage to the
fenders or underbody. If possible, avoid fully
loading your vehicle when using tire chains. In
addition, drive at a reduced speed. Otherwise,
your vehicle may be damaged and/or vehicle
handling and performance may be adversely
affected.
Tire chains must be installed only on the
front wheels and not on the rear wheels.
Never install tire chains on a TEMPORARY USE
ONLY spare tire.
Do not use tire chains on dry roads. Driving with
tire chains in such conditions can cause damage
to the various mechanisms of the vehicle due to
Do-it-yourself8-37