ECU NISSAN LEAF 2012 User Guide
[x] Cancel search | Manufacturer: NISSAN, Model Year: 2012, Model line: LEAF, Model: NISSAN LEAF 2012Pages: 1062, PDF Size: 3.63 MB
Page 169 of 1062
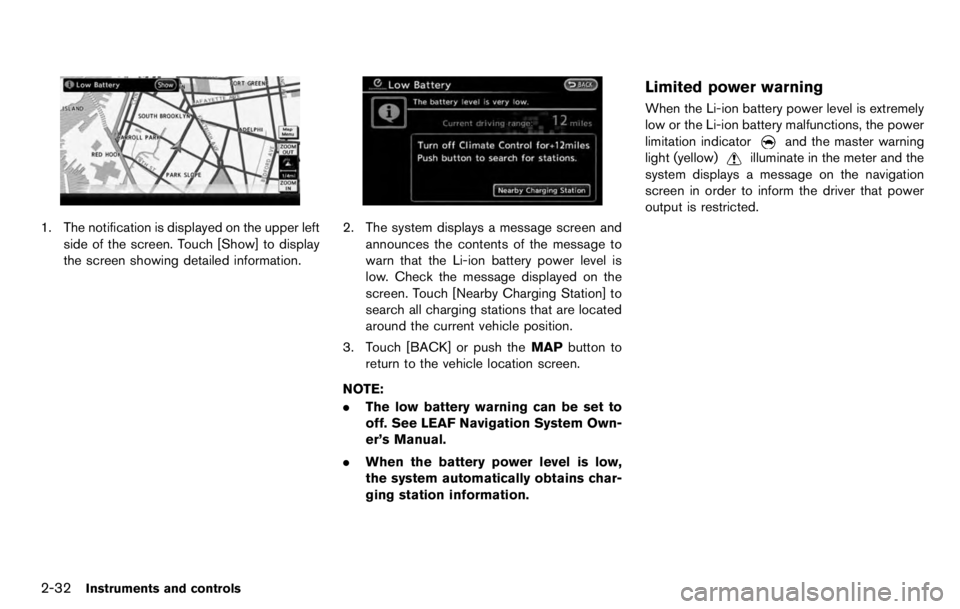
9 Technical and consumer information
Capacities and recommended lubricants .......................... 9-2Air conditioning system refrigerant and
lubricant recommendations .............................................. 9-3
Specifications ............................................................................ 9-4 Charging system ................................................................ 9-4
Motor ..................................................................................... 9-5
Wheels and tires ................................................................ 9-5
Dimensions and weights .................................................. 9-5
When traveling or registering your vehicle in
another country ......................................................................... 9-6
Vehicle identification ................................................................ 9-6 Vehicle Identification Number (VIN) plate .................... 9-6
Vehicle identification number (chassis number) ........ 9-6
Traction motor serial number .......................................... 9-7
F.M.V.S.S./C.M.V.S.S certification label ....................... 9-7
Emission control information label ................................. 9-7
Tire and Loading Information label ................................ 9-8
Air conditioner specification label .................................. 9-8 Installing front license plate .................................................. 9-9
Vehicle loading information ................................................ 9-10 Terms ................................................................................ 9-10
Vehicle load capacity ................................................... 9-11
Securing the load ......................................................... 9-12
Loading tips .................................................................... 9-13
Measurement of weights ............................................. 9-13
Towing a trailer ...................................................................... 9-13
Flat towing .............................................................................. 9-14
Uniform tire quality grading ................................................ 9-14
Treadwear ....................................................................... 9-14
Traction AA, A, B and C ............................................. 9-14
Temperature A, B and C ............................................. 9-14
Reporting safety defects .................................................... 9-15
Telematics overview ............................................................. 9-16
Event Data Recorder (EDR) .............................................. 9-18
Owner’s Manual/Service Manual order information .... 9-19
Page 179 of 1062

Front-facing — step 6
6. After attaching the child restraint, test itbefore you place the child in it. Push it from
side to side while holding the child restraint
near the LATCH attachment path. The child
restraint should not move more than 1 inch
(25 mm), from side to side. Try to tug it
forward and check to see if the LATCH
attachment holds the restraint in place. If the
restraint is not secure, tighten the LATCH
attachment as necessary, or put the restraint
in another seat and test it again. You may
need to try a different child restraint. Not all
child restraints fit in all types of vehicles. 7. Check to make sure the child restraint is
properly secured prior to each use. If the
child restraint is loose, repeat steps 1
through 6.
FORWARD-FACING CHILD RE-
STRAINT INSTALLATION USING THE
SEAT BELTS
Page 183 of 1062
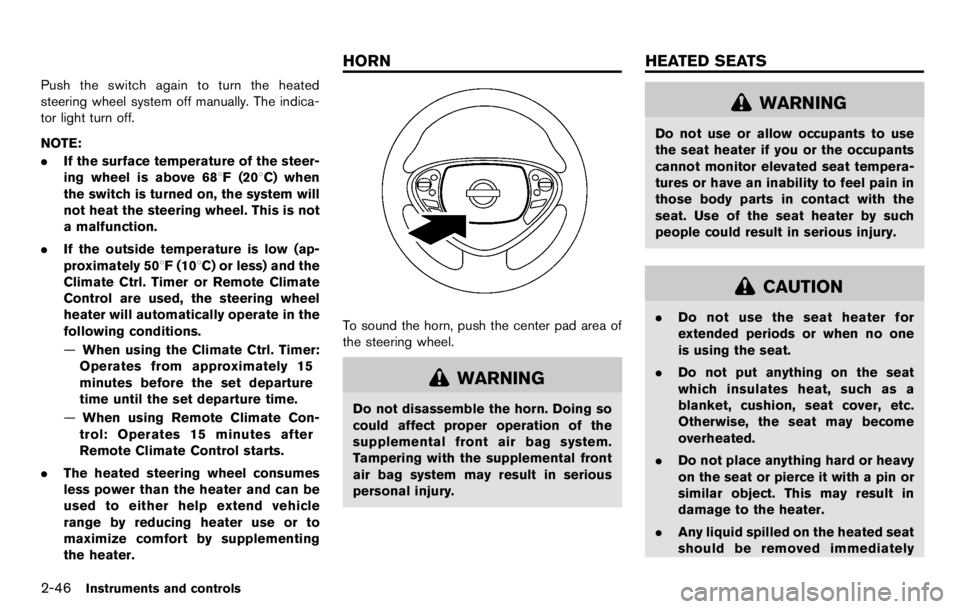
See “Adjustable headrests” earlier in this
section for headrest adjustment, removal
and installation information.
Position the top tether strap over the top of
the seatback.
3. Secure the tether strap to the tether anchor point on the seatback.
4. Refer to the appropriate child restraint installation procedure steps in this section
before tightening the tether strap.
If you have any questions when installing a
top tether strap, consult your NISSAN
certified LEAF dealer for details.
Page 187 of 1062
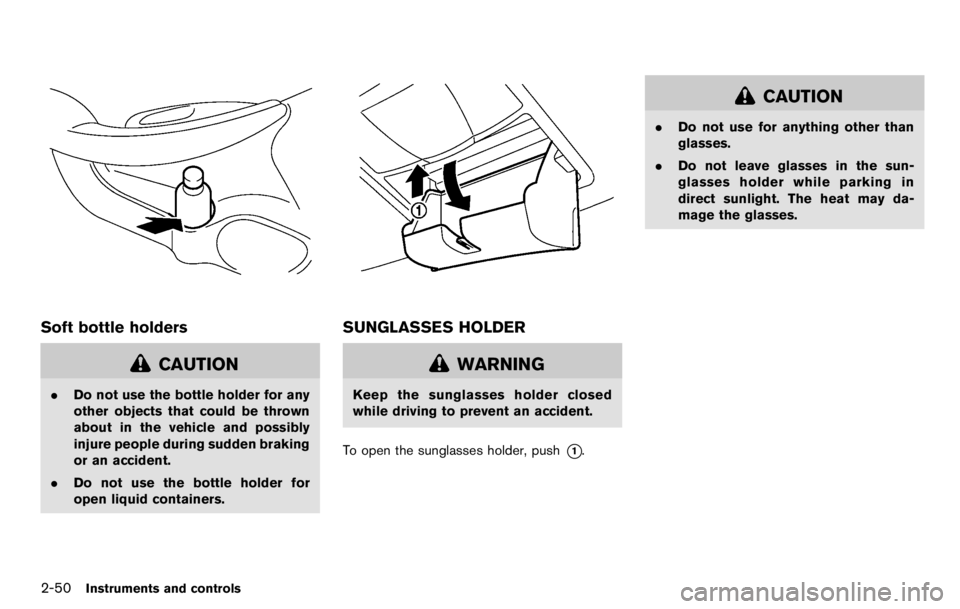
Removal
Use the following procedure to remove the
adjustable head restraints.
1. Pull the head restraint up to the highestposition.
2. Push and hold the lock knob.
3. Remove the head restraint from the seat.
4. Store the head restraint properly in a secure place so it is not loose in the vehicle.
5. Reinstall and properly adjust the head restraint before an occupant uses the
seating position.
Page 191 of 1062

WARNING
.Every person who drives or rides in
this vehicle should use a seat belt at
all times. Children should be prop-
erly restrained in the rear seat and,
if appropriate, in a child restraint.
. The seat belt should be properly
adjusted to a snug fit. Failure to do
so may reduce the effectiveness of
the entire restraint system and in-
crease the chance or severity of
injury in an accident. Serious injury
or death can occur if the seat belt is
not worn properly.
. Always route the shoulder belt over
your shoulder and across your
chest. Never put the belt behind
your back, under your arm or across
your neck. The belt should be away
from your face and neck, but not
falling off your shoulder.
. Position the lap belt as low and
snug as possible AROUND THE
HIPS, NOT THE WAIST. A lap belt
worn too high could increase the
risk of internal injuries in an acci-
dent. .
Be sure the seat belt tongue is
securely fastened to the proper
buckle.
. Do not wear the seat belt inside out
or twisted. Doing so may reduce its
effectiveness.
. Do not allow more than one person
to use the same seat belt.
. Never carry more people in the
vehicle than there are seat belts.
. If the seat belt warning light glows
continuously while the power switch
is turned ON with all doors closed
and all seat belts fastened, it may
indicate a malfunction in the sys-
tem. Have the system checked by a
NISSAN certified LEAF dealer.
. No changes should be made to the
seat belt system. For example, do
not modify the seat belt, add mate-
rial, or install devices that may
change the seat belt routing or
tension. Doing so may affect the
operation of the seat belt system.
Modifying or tampering with the
seat belt system may result in
serious personal injury.
Safety—Seats, seat belts and supplemental restraint system1-11
Page 203 of 1062
2 Instruments and controls
Cockpit ....................................................................................... 2-3
Instrument panel ....................................................................... 2-4
Meters and gauges .................................................................. 2-5Speedometer and odometer ........................................... 2-6
Li-ion battery temperature gauge ................................... 2-7
Power meter ........................................................................ 2-7
Driving range ....................................................................... 2-8
Li-ion battery available charge gauge ........................... 2-9
Li-ion battery capacity level gauge ............................. 2-10
Outside air temperature ................................................ 2-10
ECO indicator .................................................................. 2-10
Clock .................................................................................. 2-11
Warning/indicator lights and audible reminders ........... 2-12
Checking bulbs ................................................................ 2-13
Warning lights .................................................................. 2-13
Indicator lights .................................................................. 2-19
Audible reminders ........................................................... 2-21
Dot matrix liquid crystal display ......................................... 2-22 Indicators for operation .................................................. 2-23
Trip computer ................................................................... 2-27
Warning information displays ....................................... 2-31
Indicators for maintenance ........................................... 2-33
Indicator for timer ............................................................ 2-34
Security systems ................................................................... 2-35 Vehicle security system ................................................. 2-35 NISSAN Vehicle Immobilizer System ....................... 2-36
Windshield wiper and washer switch ............................. 2-38 Washer operation ......................................................... 2-39
Rear window wiper and washer switch ........................ 2-39
Rear window and outside mirror defroster switch ...... 2-40
Instrument brightness control ............................................ 2-41
Headlight and turn signal switch ...................................... 2-41 Headlight switch ........................................................... 2-41
Turn signal switch ......................................................... 2-44
Fog light switch (if so equipped) ..................................... 2-44
Hazard warning flasher switch .......................................... 2-45
Heated steering wheel ........................................................ 2-45
Horn ......................................................................................... 2-46
Heated seats ......................................................................... 2-46
Vehicle Dynamic Control (VDC) OFF switch ................ 2-48
Power outlet ........................................................................... 2-48
Storage ................................................................................... 2-49 Cup holders .................................................................... 2-49
Sunglasses holder ........................................................ 2-50
Glove box ........................................................................ 2-51
Console box ................................................................... 2-51
Cargo cover (if so equipped) .................................... 2-51
Stowing golf bags ........................................................ 2-53
Luggage side hook ....................................................... 2-53
Page 261 of 1062
.Pass the lower side belt of the EVSE
(Electric Vehicle Supply Equipment)
case securely through the fastener
on the bottom of the luggage board.
If the case suddenly becomes loose,
it may cause serious injury or death.
CAUTION
.To prevent damage to the charging
equipment:
— Do not close the charge port lid
without closing the cap. — Do not subject the charging
equipment to impact.
— Do not pull or twist the charge cable.
— Do not drag the charge cable.
— Do not store and use charging equipment in locations where
the temperature is over 1858F
(858C) .
— Do not place the charging equip- ment close to a heater or other
heat source.
. Make sure the cap is closed on the
charge port when charging is fin-
ished. If the charge port lid is closed
when the cap is open, water or
foreign materials may enter the
charge port.
. Do not charge when a vehicle body
cover is in use. This may cause
damage to the charge connector.
. Do not attempt to perform a jump
start on the 12-volt battery at the
same time that the Li-ion battery is
being charged. Doing so may da-
mage the vehicle or charging equip- ment and could cause an injury. See
“Jump starting” in the “6. In case of
emergency” section.
. Trickle charging is performed using
the EVSE (Electric Vehicle Supply
Equipment) provided with the vehi-
cle. NISSAN recommends using an
AC 110 - 120 volt, 15A, dedicated
electrical circuit and outlet. The
dedicated circuit is used to help
prevent circuit damage or the circuit
breaker from tripping due to the
high draw of charging the Li-ion
battery. If the dedicated circuit is
not used, the circuit may cause
adverse interference on MCB
(Moulded Circuit Board) and house-
hold electrical appliances such as
televisions and audio systems. If the
circuit is shared, and another elec-
trical device is being used at the
same time the vehicle is charging,
the breaker may trip. A licensed
professional electrician should in-
stall a dedicated circuit if one is not
already available.
ChargingCH-3
Page 294 of 1062
REAR SEATS
Folding
Before folding the rear seats:
.Secure the seat belts on the seat belt hooks
located on the side wall. See “Seat belt
hooks ” later in this section.
To fold down the seatback, pull the release
knob.
To return the seatback to the seating position, lift
up each seatback and push it to the upright
position until it is latched.
Page 297 of 1062
Removal
Use the following procedure to remove the
adjustable head restraints.
1. Pull the head restraint up to the highestposition.
2. Push and hold the lock knob.
3. Remove the head restraint from the seat.
4. Store the head restraint properly in a secure place so it is not loose in the vehicle.
5. Reinstall and properly adjust the head restraint before an occupant uses the
seating position.
Page 301 of 1062
WARNING
.Every person who drives or rides in
this vehicle should use a seat belt at
all times. Children should be prop-
erly restrained in the rear seat and,
if appropriate, in a child restraint.
. The seat belt should be properly
adjusted to a snug fit. Failure to do
so may reduce the effectiveness of
the entire restraint system and in-
crease the chance or severity of
injury in an accident. Serious injury
or death can occur if the seat belt is
not worn properly.
. Always route the shoulder belt over
your shoulder and across your
chest. Never put the belt behind
your back, under your arm or across
your neck. The belt should be away
from your face and neck, but not
falling off your shoulder.
. Position the lap belt as low and
snug as possible AROUND THE
HIPS, NOT THE WAIST. A lap belt
worn too high could increase the
risk of internal injuries in an acci-
dent. .
Be sure the seat belt tongue is
securely fastened to the proper
buckle.
. Do not wear the seat belt inside out
or twisted. Doing so may reduce its
effectiveness.
. Do not allow more than one person
to use the same seat belt.
. Never carry more people in the
vehicle than there are seat belts.
. If the seat belt warning light glows
continuously while the power switch
is turned ON with all doors closed
and all seat belts fastened, it may
indicate a malfunction in the sys-
tem. Have the system checked by a
NISSAN certified LEAF dealer.
. No changes should be made to the
seat belt system. For example, do
not modify the seat belt, add mate-
rial, or install devices that may
change the seat belt routing or
tension. Doing so may affect the
operation of the seat belt system.
Modifying or tampering with the
seat belt system may result in
serious personal injury.
Safety—Seats, seat belts and supplemental restraint system1-11