change time NISSAN LEAF 2022 Owner´s Manual
[x] Cancel search | Manufacturer: NISSAN, Model Year: 2022, Model line: LEAF, Model: NISSAN LEAF 2022Pages: 618, PDF Size: 4.3 MB
Page 320 of 618
• Timer setting can also be changed whileClimate Ctrl. Timer is operated. When the
power position is switched to OFF, the air
conditioner starts or enters waiting
mode depending on the new timer
settings.
• When the difference in temperature be- tween the air conditioner setting tem-
perature and the temperature outside
the vehicle is large, the temperature in-
side the vehicle may not be maintained
at the setting temperature.
• The charging status indicator lights illu- minate in a specific pattern when the Li-
ion battery warmer operates. The charg-
ing status indicator lights use the same
pattern to indicate 12–volt battery charg-
ing, Climate Ctrl. Timer operation or Re-
mote Climate Control operation. The
charging status indicator lights do not
change if the Li-ion battery warmer oper-
ates at the same time as the above
features.
• The temperature in the passenger com- partment may not be comfortable if en-
tering the vehicle too soon before or too
long af ter the scheduled time of
departure. • Air conditioning is limited to the capacity
of the electric power when the charge
connector is connected. Therefore, the
temperature may not reach the set tem-
perature due to limitations in air condi-
tioning performance, if ambient tem-
perature is excessively high or low, or if
the charge connector is connected to a
120–volt plug outlet.
• The Climate Ctrl. Timer operates the cli- mate control function so that a comfort-
able temperature is provided in the pas-
senger compartment at the scheduled
time of departure. The climate control is
set to stop at the scheduled time of
departure.
• Depending on the facilities of charging station, there may be time when it is not
available for charging. Confirm the avail-
ability of the charging facility before set-
ting the Climate Ctrl. Timer. Be sure that
the power switch of the charger is turned
on when setting the Climate Ctrl. Timer.
• When the power switch is turned OFF af- ter changing the setting, the new setting
will be applied.
*models with Navigation SystemRemote climate control
This vehicle incorporates a communica-
tion device that is called a TCU (Telematics
Control Unit). The communication connec-
tion between this unit and Nissan Data
Center allows for various remote function
services.
Even when away from the vehicle, climate
control can be started by accessing the
Web Owner Portal using a cellular phone or
a personal computer.
When operation is started, or at the set
start time, the Nissan Data Center ac-
cesses the vehicle. When the vehicle re-
ceives a command for remote operation,
the climate control immediately turns ON
and operates for the specified period of
time. Confirmation of the ON/OFF of the
climate control operation can be checked
by accessing the Web Owner Portal, or by
e-mail.
Completing registration for the
NissanConnect® EV Services is necessary
before using the service. For additional in-
formation, refer to the NissanConnect®
Manual.
Monitor, climate, audio, phone and voice recognition systems4-41
Page 334 of 618
4. Gradually steer the vehicle to a safe lo-cation off the road and away from traffic
if possible.
5. Lightly apply the brake pedal to gradu- ally stop the vehicle.
6. Turn on the hazard warning flashers and contact a roadside emergency service
to change the tire. For additional infor-
mation, see “Flat tire” (P. 6-3).
DRINKING ALCOHOL/DRUGS AND
DRIVING
WARNING
Never drive under the influence of alco-
hol or drugs. Alcohol in the blood-
stream reduces coordination, delays
reaction time and impairs judgement.
Driving af ter drinking alcohol increases
the likelihood of being involved in an
accident injuring yourself and others.
Additionally, if you are injured in an ac-
cident, alcohol can increase the sever-
ity of the injury. NISSAN is committed to safe driving. How-
ever, you must choose not to drive under
the influence of alcohol. Every year thou-
sands of people are injured or killed in
alcohol-related accidents. Although the lo-
cal laws vary on what is considered to be
legally intoxicated, the fact is that alcohol
affects all people differently and most
people underestimate the effects of
alcohol.
Remember, drinking and driving don’t mix!
That is true for drugs, too (over-the-
counter, prescription, and illegal drugs). Do
not drive if your ability to operate your ve-
hicle is impaired by alcohol, drugs, or some
other physical condition.
WARNING
• Do not operate the power switch
while driving the vehicle except in an
emergency. (The EV system shuts
down when the power switch is
pushed three consecutive times or
the power switch is pushed and held
for more than 2 seconds.) If the EV
system stops while the vehicle is be-
ing driven, this could lead to a crash
and serious injury.
• When turning off the power switch,
make sure to shif t the shif t lever to
the P (Park) position even if the ve-
hicle is maintaining a stop and hold
using the e-pedal. This will prevent
the vehicle from moving or rolling
unexpectedly, which could result in
serious personal injury or property
damage.
Before operating the power switch, make
sure the vehicle is in the P (Park) position.
PUSH-BUTTON POWER SWITCH
Starting and driving5-9
Page 336 of 618
POWER SWITCH OPERATION
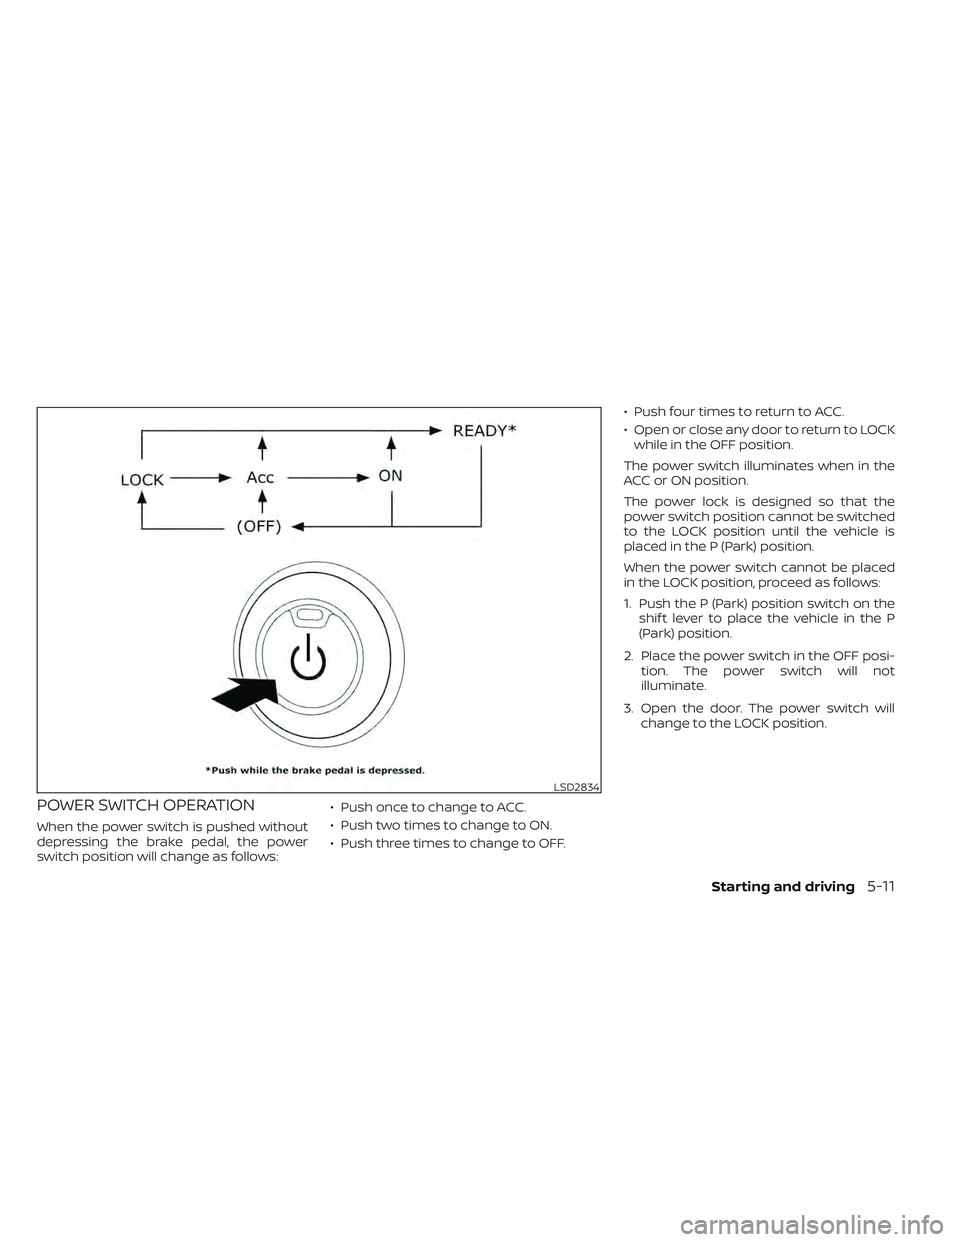
When the power switch is pushed without
depressing the brake pedal, the power
switch position will change as follows:• Push once to change to ACC.
• Push two times to change to ON.
• Push three times to change to OFF.• Push four times to return to ACC.
• Open or close any door to return to LOCK
while in the OFF position.
The power switch illuminates when in the
ACC or ON position.
The power lock is designed so that the
power switch position cannot be switched
to the LOCK position until the vehicle is
placed in the P (Park) position.
When the power switch cannot be placed
in the LOCK position, proceed as follows:
1. Push the P (Park) position switch on the shif t lever to place the vehicle in the P
(Park) position.
2. Place the power switch in the OFF posi- tion. The power switch will not
illuminate.
3. Open the door. The power switch will change to the LOCK position.
LSD2834
Starting and driving5-11
Page 347 of 618
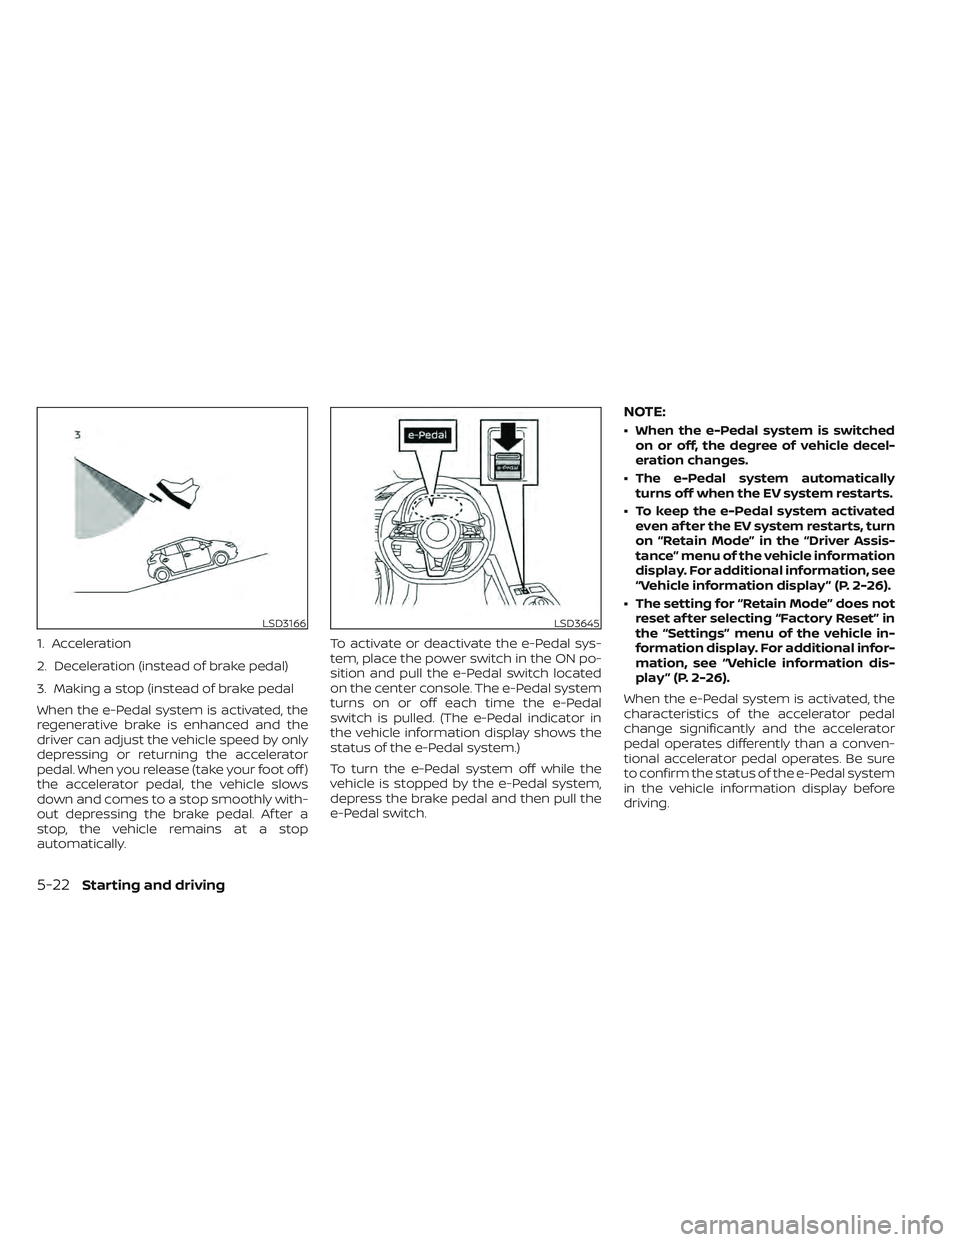
1. Acceleration
2. Deceleration (instead of brake pedal)
3. Making a stop (instead of brake pedal
When the e-Pedal system is activated, the
regenerative brake is enhanced and the
driver can adjust the vehicle speed by only
depressing or returning the accelerator
pedal. When you release (take your foot off )
the accelerator pedal, the vehicle slows
down and comes to a stop smoothly with-
out depressing the brake pedal. Af ter a
stop, the vehicle remains at a stop
automatically.To activate or deactivate the e-Pedal sys-
tem, place the power switch in the ON po-
sition and pull the e-Pedal switch located
on the center console. The e-Pedal system
turns on or off each time the e-Pedal
switch is pulled. (The e-Pedal indicator in
the vehicle information display shows the
status of the e-Pedal system.)
To turn the e-Pedal system off while the
vehicle is stopped by the e-Pedal system,
depress the brake pedal and then pull the
e-Pedal switch.
NOTE:
• When the e-Pedal system is switched
on or off, the degree of vehicle decel-
eration changes.
• The e-Pedal system automatically turns off when the EV system restarts.
• To keep the e-Pedal system activated even af ter the EV system restarts, turn
on “Retain Mode” in the “Driver Assis-
tance” menu of the vehicle information
display. For additional information, see
“Vehicle information display ” (P. 2-26).
• The setting for “Retain Mode” does not reset af ter selecting “Factory Reset” in
the “Settings” menu of the vehicle in-
formation display. For additional infor-
mation, see “Vehicle information dis-
play ” (P. 2-26).
When the e-Pedal system is activated, the
characteristics of the accelerator pedal
change significantly and the accelerator
pedal operates differently than a conven-
tional accelerator pedal operates. Be sure
to confirm the status of the e-Pedal system
in the vehicle information display before
driving.
LSD3166LSD3645
5-22Starting and driving
Page 348 of 618
The e-Pedal system provides the following
driving features:
When driving and stopping the vehicle:
• Depressing or returning the acceleratorpedal changes the degree of accelera-
tion and deceleration accordingly.
• Returning the accelerator pedal gener- ates more deceleration than normal. (The
maximum deceleration changes accord-
ing to the vehicle speed.)
• Releasing (taking your foot off ) the accel- erator pedal reduces the vehicle speed
until the vehicle comes to a stop.
• The vehicle’s brake lights illuminate when the deceleration level reaches an ordi-
nary braking operation.
If the deceleration is not sufficient when the
accelerator pedal is returned or released,
depress the brake pedal. The brake pedal
can be operated to reduce the vehicle
speed in the same way as normal even
when the e-Pedal system is activated.
When restarting the vehicle:
• Af ter the vehicle comes to a stop by the e-Pedal system function, the vehicle re-
mains at a stop as long as the accelerator
pedal is released. • The vehicle’s brake lights remain illumi-
nated when the vehicle is stopped by the
e-Pedal system.
• Depress the accelerator pedal to start the vehicle again from a stop.
When the vehicle needs to be stopped for a
certain period of time, place the vehicle in
the P (Park) position and apply the parking
brake.
CAUTION
When the e-Pedal system is turned off,
remember to depress the brake pedal
firmly to prevent the vehicle from mov-
ing with the shif t lever in any position
other than P (Park).
When backing up the vehicle:
• With the shif t lever in the R (Reverse) po- sition, operating the accelerator pedal
adjusts the vehicle speed (acceleration,
deceleration, or stopping) in the same
way as the D (Drive) position. Other driving tips for the e-Pedal
system:
• For smooth deceleration when the
e-Pedal system is activated, it is recom-
mended that you adjust the accelerator
pedal by either depressing or returning,
not releasing, the pedal.
• Moving the shif t lever from D (Drive) to B mode or from B mode to D (Drive) does
not affect the e-Pedal system feature.
• The e-Pedal system does not function under the following conditions:– When the vehicle is placed in the P (Park) or N (Neutral) position
– When cruise control (if so equipped), ProPILOT Assist (if so equipped), or
Automatic Emergency Braking with
Pedestrian Detection operates
Starting and driving5-23
Page 358 of 618
I-LI SYSTEM LIMITATIONS
WARNING
Listed below are the system limitations
for the I-LI system. Failure to follow the
warnings and instructions for proper
use of the I-LI system could result in
serious injury or death.
• The I-LI system may activate if you
change lanes without first activating
your turn signal or, for example, if a
construction zone directs traffic to
cross an existing lane marker. If this
occurs you may need to apply correc-
tive steering to complete your lane
change.
• Because the I-LI may not activate un-
der the road, weather, and lane
marker conditions described in this
section, it may not activate every
time your vehicle begins to leave its
lane and you will need to apply cor-
rective steering.
• When the I-LI system is operating,
avoid excessive or sudden steering
maneuvers. Otherwise, you could
lose control of the vehicle. •
The I-LI system will not operate at
speeds below approximately 37 mph
(60 km/h) or if it cannot detect lane
markers.
• Do not use the I-LI system under the
following conditions as it may not
function properly:
– During bad weather (rain, fog,
snow, etc.).
– When driving on slippery roads,
such as on ice or snow.
– When driving on winding or un-
even roads.
– When there is a lane closure due to
road repairs.
– When driving in a makeshif t or
temporary lane.
– When driving on roads where the
lane width is too narrow.
– When driving without normal tire
conditions (for example, tire wear,
low tire pressure, installation of
spare tire, tire chains, nonstan-
dard wheels).
– When the vehicle is equipped with
nonoriginal brake parts or sus-
pension parts. –
On roads where there are multiple
parallel lane markers; lane mark-
ers that are faded or not painted
clearly; yellow painted lane mark-
ers; non-standard lane markers;
or lane markers covered with wa-
ter, dirt, snow, etc.
– On roads where discontinued lane
markers are still detectable.
– On roads where there are sharp
curves.
– On roads where there are sharply
contrasting objects, such as shad-
ows, snow, water, wheel ruts,
seams or lines remaining af ter
road repairs. (The I-LI system
could detect these items as lane
markers.)
– On roads where the traveling lane
merges or separates.
– When the vehicle’s traveling direc-
tion does not align with the lane
marker.
– When traveling close to the ve-
hicle in front of you, which ob-
structs the lane camera unit de-
tection range.
Starting and driving5-33
Page 401 of 618
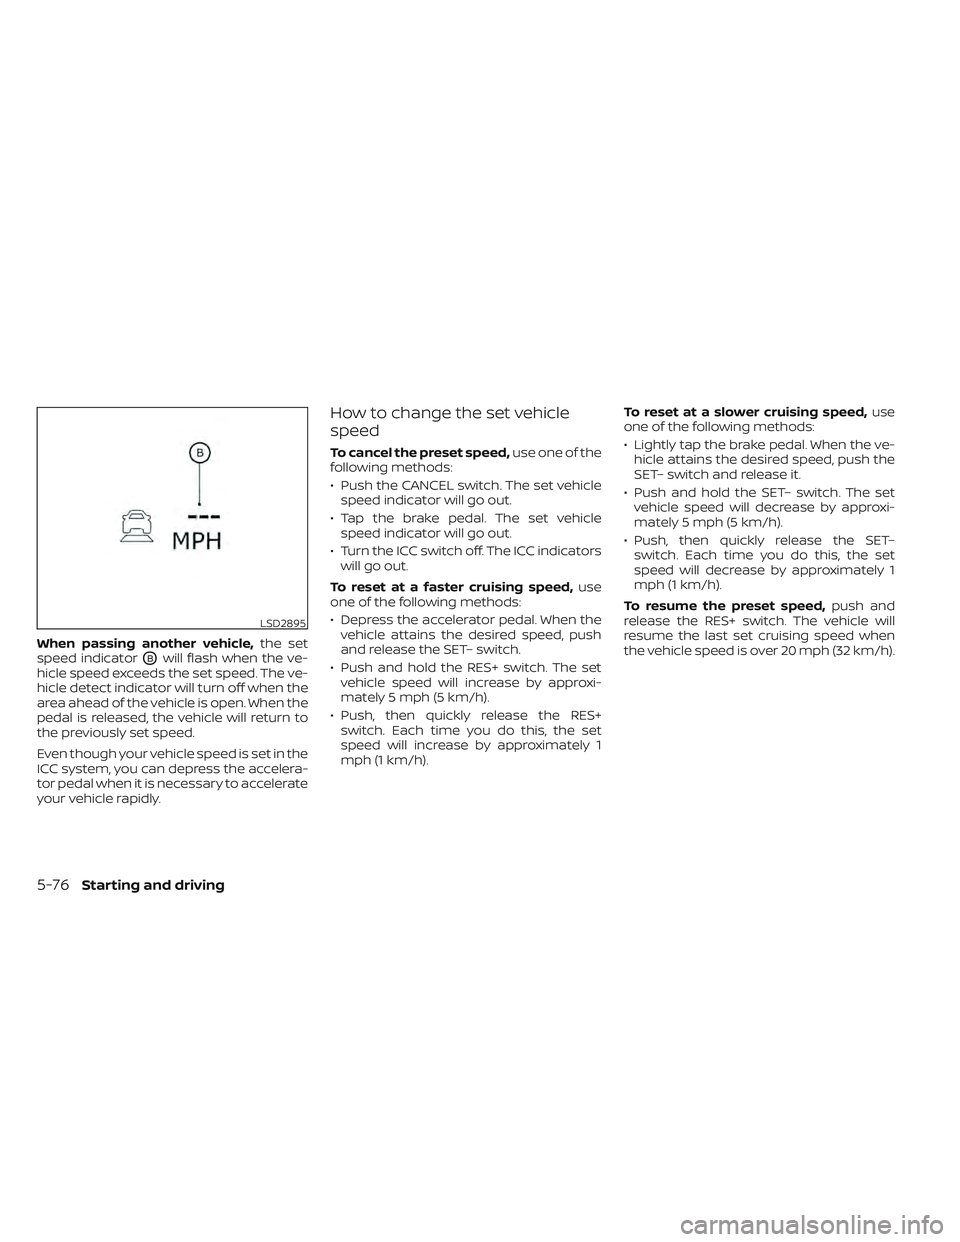
When passing another vehicle,the set
speed indicator
OBwill flash when the ve-
hicle speed exceeds the set speed. The ve-
hicle detect indicator will turn off when the
area ahead of the vehicle is open. When the
pedal is released, the vehicle will return to
the previously set speed.
Even though your vehicle speed is set in the
ICC system, you can depress the accelera-
tor pedal when it is necessary to accelerate
your vehicle rapidly.
How to change the set vehicle
speed
To cancel the preset speed, use one of the
following methods:
• Push the CANCEL switch. The set vehicle speed indicator will go out.
• Tap the brake pedal. The set vehicle speed indicator will go out.
• Turn the ICC switch off. The ICC indicators will go out.
To reset at a faster cruising speed, use
one of the following methods:
• Depress the accelerator pedal. When the vehicle attains the desired speed, push
and release the SET– switch.
• Push and hold the RES+ switch. The set vehicle speed will increase by approxi-
mately 5 mph (5 km/h).
• Push, then quickly release the RES+ switch. Each time you do this, the set
speed will increase by approximately 1
mph (1 km/h). To reset at a slower cruising speed,
use
one of the following methods:
• Lightly tap the brake pedal. When the ve- hicle attains the desired speed, push the
SET– switch and release it.
• Push and hold the SET– switch. The set vehicle speed will decrease by approxi-
mately 5 mph (5 km/h).
• Push, then quickly release the SET– switch. Each time you do this, the set
speed will decrease by approximately 1
mph (1 km/h).
To resume the preset speed, push and
release the RES+ switch. The vehicle will
resume the last set cruising speed when
the vehicle speed is over 20 mph (32 km/h).
LSD2895
5-76Starting and driving
Page 402 of 618
How to change the set distance
to the vehicle ahead
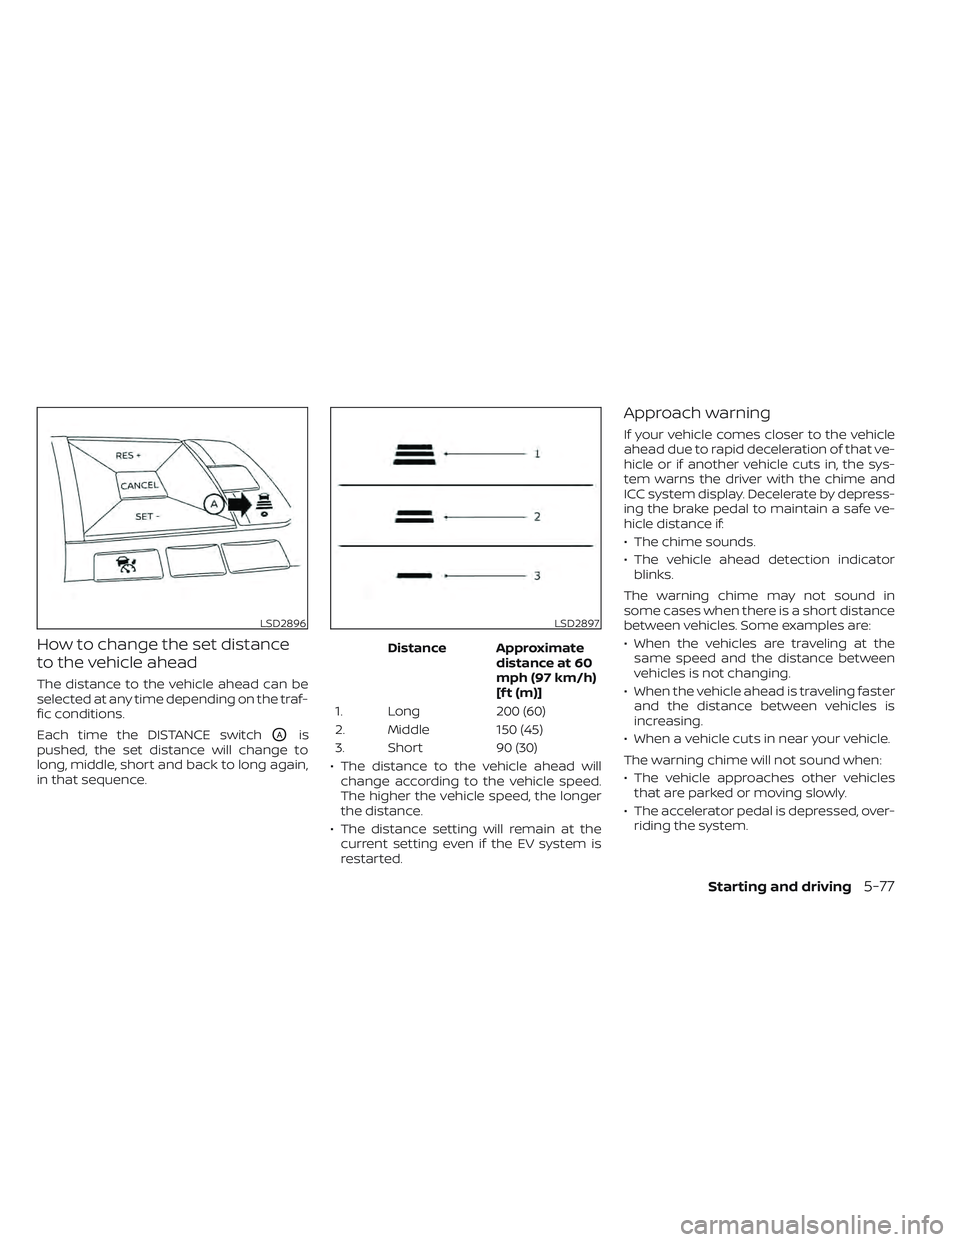
The distance to the vehicle ahead can be
selected at any time depending on the traf-
fic conditions.
Each time the DISTANCE switch
OAis
pushed, the set distance will change to
long, middle, short and back to long again,
in that sequence. Distance Approximate
distance at 60
mph (97 km/h)
[f t (m)]
1. Long 200 (60)
2. Middle 150 (45)
3. Short 90 (30)
• The distance to the vehicle ahead will change according to the vehicle speed.
The higher the vehicle speed, the longer
the distance.
• The distance setting will remain at the current setting even if the EV system is
restarted.
Approach warning
If your vehicle comes closer to the vehicle
ahead due to rapid deceleration of that ve-
hicle or if another vehicle cuts in, the sys-
tem warns the driver with the chime and
ICC system display. Decelerate by depress-
ing the brake pedal to maintain a safe ve-
hicle distance if:
• The chime sounds.
• The vehicle ahead detection indicatorblinks.
The warning chime may not sound in
some cases when there is a short distance
between vehicles. Some examples are:
• When the vehicles are traveling at the same speed and the distance between
vehicles is not changing.
• When the vehicle ahead is traveling faster and the distance between vehicles is
increasing.
• When a vehicle cuts in near your vehicle.
The warning chime will not sound when:
• The vehicle approaches other vehicles that are parked or moving slowly.
• The accelerator pedal is depressed, over- riding the system.
LSD2896LSD2897
Starting and driving5-77
Page 403 of 618
NOTE:
The approach warning chime may sound
and the system display may blink when
the ICC sensor detects objects on the
side of the vehicle or on the side of the
road. This may cause the ICC system to
decelerate or accelerate the vehicle. The
ICC sensor may detect these objects
when the vehicle is driven on winding
roads, narrow roads, hilly roads, or when
entering or exiting a curve. In these
cases you will have to manually control
the proper distance ahead of your
vehicle.
Also, the sensor sensitivity can be af-
fected by vehicle operation (steering
maneuver or driving position in the lane)
or traffic or vehicle condition (for ex-
ample, if a vehicle is being driven with
some damage).
Acceleration when passing
When the ICC system is engaged above 43
mph and following a slower vehicle (below
ICC set speed), and the turn signal is acti-
vated to the lef t, the ICC system will auto-
matically start to accelerate the vehicle to
help initiate passing on the lef t and will
begin to reduce the distance to the vehicle
directly ahead. Only the lef t side turn signaloperates this feature. As the driver steers
the vehicle and moves into the passing
lane, if no vehicle is detected ahead the ICC
system will continue to accelerate to the
ICC system set speed. If another vehicle is
detected ahead, then the vehicle will accel-
erate up to the following speed of that ve-
hicle. If the vehicle is not steered into the
lef t lane to pass, the acceleration will stop
af ter a short time and regain the set follow-
ing distance. Acceleration can be stopped
at any point by depressing the brake pedal
or the CANCEL switch on the steering
wheel.
WARNING
In order to reduce the risk of a collision
that may result in serious injury or
death, please be aware of the following:
• This function is only activated with
the lef t turn signal and will briefly ac-
celerate the vehicle even if a lane
change is not initiated. This can in-
clude non-passing situations such as
lef t side exits.
• Ensure that when passing another
vehicle, the adjacent lane is clear be-
fore initiating the pass. Sudden
changes in traffic may occur while
passing. –
Always manually steer or brake as
needed
– Never solely rely on the system
Automatic cancellation
A chime sounds under the following condi-
tions and the control is automatically
canceled:
• When the vehicle ahead is not detected
and your vehicle is traveling below the
speed of 15 mph (24 km/h)
• When the system judges the vehicle is at a standstill
• When the shif t lever is not in the D (Drive) position or B mode
• When the parking brake system is applied
• When the VDC system is turned off
• When VDC operates
• When distance measurement becomes impaired due to adhesion of dirt or ob-
struction to the sensor
• When a wheel slips
• When the radar signal is temporarily interrupted
5-78Starting and driving
Page 424 of 618
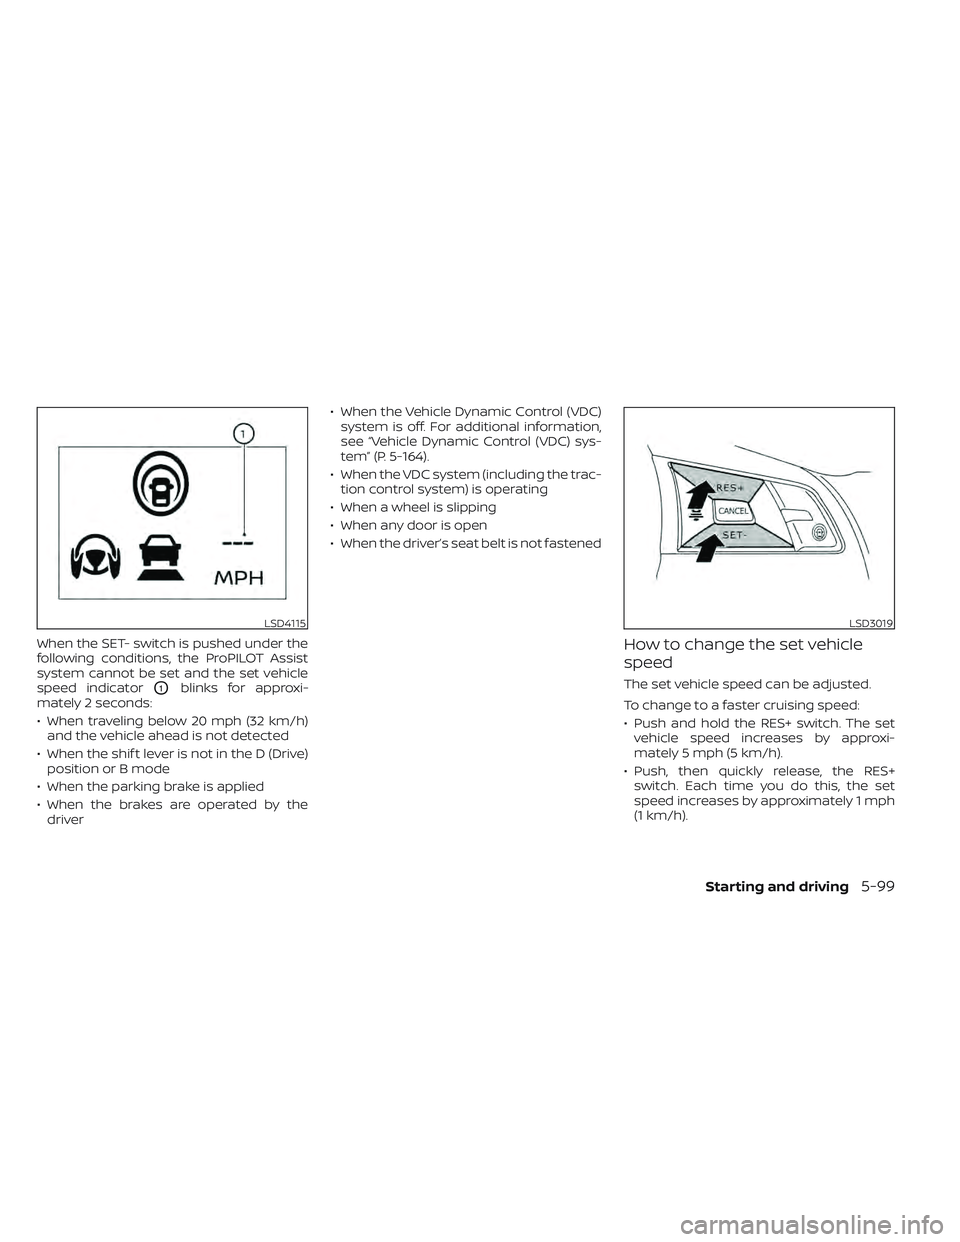
When the SET- switch is pushed under the
following conditions, the ProPILOT Assist
system cannot be set and the set vehicle
speed indicator
O1blinks for approxi-
mately 2 seconds:
• When traveling below 20 mph (32 km/h) and the vehicle ahead is not detected
• When the shif t lever is not in the D (Drive) position or B mode
• When the parking brake is applied
• When the brakes are operated by the driver • When the Vehicle Dynamic Control (VDC)
system is off. For additional information,
see “Vehicle Dynamic Control (VDC) sys-
tem” (P. 5-164).
• When the VDC system (including the trac- tion control system) is operating
• When a wheel is slipping
• When any door is open
• When the driver’s seat belt is not fastened
How to change the set vehicle
speed
The set vehicle speed can be adjusted.
To change to a faster cruising speed:
• Push and hold the RES+ switch. The set vehicle speed increases by approxi-
mately 5 mph (5 km/h).
• Push, then quickly release, the RES+ switch. Each time you do this, the set
speed increases by approximately 1 mph
(1 km/h).
LSD4115LSD3019
Starting and driving5-99