warning NISSAN MAXIMA 2003 A33 / 5.G Workshop Manual
[x] Cancel search | Manufacturer: NISSAN, Model Year: 2003, Model line: MAXIMA, Model: NISSAN MAXIMA 2003 A33 / 5.GPages: 247, PDF Size: 2.74 MB
Page 76 of 247
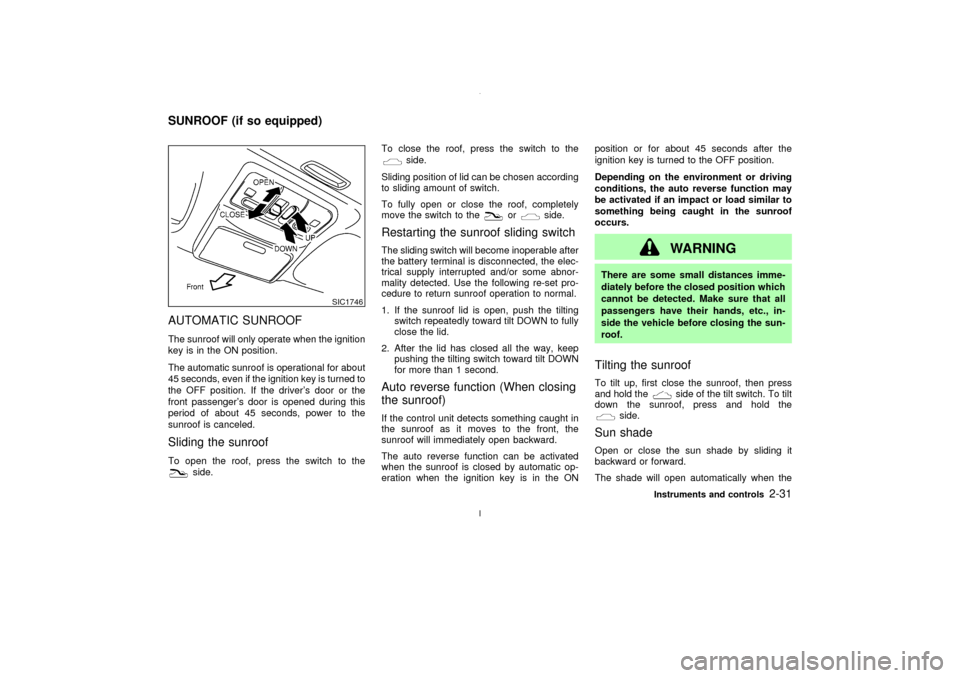
AUTOMATIC SUNROOFThe sunroof will only operate when the ignition
key is in the ON position.
The automatic sunroof is operational for about
45 seconds, even if the ignition key is turned to
the OFF position. If the driver's door or the
front passenger's door is opened during this
period of about 45 seconds, power to the
sunroof is canceled.Sliding the sunroofTo open the roof, press the switch to the
side.To close the roof, press the switch to the
side.
Sliding position of lid can be chosen according
to sliding amount of switch.
To fully open or close the roof, completely
move the switch to the
or
side.
Restarting the sunroof sliding switchThe sliding switch will become inoperable after
the battery terminal is disconnected, the elec-
trical supply interrupted and/or some abnor-
mality detected. Use the following re-set pro-
cedure to return sunroof operation to normal.
1. If the sunroof lid is open, push the tilting
switch repeatedly toward tilt DOWN to fully
close the lid.
2. After the lid has closed all the way, keep
pushing the tilting switch toward tilt DOWN
for more than 1 second.Auto reverse function (When closing
the sunroof)If the control unit detects something caught in
the sunroof as it moves to the front, the
sunroof will immediately open backward.
The auto reverse function can be activated
when the sunroof is closed by automatic op-
eration when the ignition key is in the ONposition or for about 45 seconds after the
ignition key is turned to the OFF position.
Depending on the environment or driving
conditions, the auto reverse function may
be activated if an impact or load similar to
something being caught in the sunroof
occurs.
WARNING
There are some small distances imme-
diately before the closed position which
cannot be detected. Make sure that all
passengers have their hands, etc., in-
side the vehicle before closing the sun-
roof.Tilting the sunroofTo tilt up, first close the sunroof, then press
and hold the
side of the tilt switch. To tilt
down the sunroof, press and hold the
side.
Sun shadeOpen or close the sun shade by sliding it
backward or forward.
The shade will open automatically when the
SIC1746
SUNROOF (if so equipped)
Instruments and controls
2-31
Z
02.7.12/A33-D/V5.0
X
Page 77 of 247
sunroof is opened. However, it must be closed
manually.
WARNING
IIn an accident you could be thrown
from the vehicle through an open
sunroof. Always use seat belts and
child restraints.
IDo not allow anyone to stand up or
extend any portion of their body out
of the opening while the vehicle is in
motion or while the sunroof is clos-
ing.
CAUTION
IRemove water drops, snow, ice or
sand from the sunroof before open-
ing.
IDo not place any heavy object on the
sunroof or surrounding area.If the sunroof does not closeHave your NISSAN dealer check and repair
the sunroof.The digital clock displays time when the igni-
tion key is in ACC or ON.
If the power supply is disconnected, the clock
will not indicate the correct time. Readjust the
time.
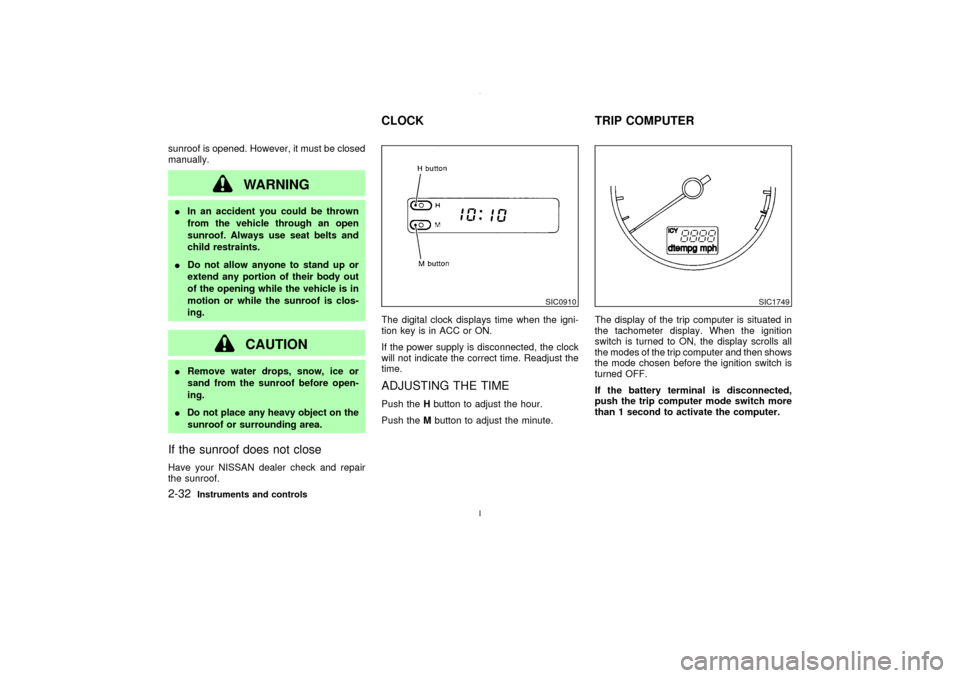
ADJUSTING THE TIMEPush theHbutton to adjust the hour.
Push theMbutton to adjust the minute.The display of the trip computer is situated in
the tachometer display. When the ignition
switch is turned to ON, the display scrolls all
the modes of the trip computer and then shows
the mode chosen before the ignition switch is
turned OFF.
If the battery terminal is disconnected,
push the trip computer mode switch more
than 1 second to activate the computer.
SIC0910
SIC1749
CLOCK TRIP COMPUTER
2-32
Instruments and controls
Z
02.7.12/A33-D/V5.0
X
Page 78 of 247

When the ignition switch is turned to ON,
modes of the trip computer can be selected by
pushing once on the trip mode switch. The
following modes can be selected:Outside air temperature (ICY Ð ÉF
or ÉC)The outside air temperature is displayed in ÉF
or ÉC.
The outside air temperature mode includes a
low temperature warning feature: below 37ÉF
(3ÉC), the outside air temperature mode is
automatically selected and ICY indicator will
illuminate in order to draw the driver's atten-tion. Press the mode switch if you wish to
return to the mode that was selected before
the warning occurred. The ICY indicator will
continue blinking as long as the temperature
remains below 39ÉF (4ÉC).
Distance to empty (dte Ð mile or
km)The distance to empty (dte) mode provides
you with an estimation of the distance that can
be driven before refueling. The dte is con-
stantly being calculated, based on the amount
of fuel in the fuel tank and the actual fuel
consumption.
The display is updated every 30 seconds.
The dte mode includes a low range warning
feature: when the fuel level is low, the dte
mode is automatically selected and the digits
blink in order to draw the driver's attention.
Press the mode switch if you wish to return to
the mode that was selected before the warning
occurred. The dte mark (dte) will remain blink-
ing until the vehicle is refuelled.
When the fuel level drops even lower, the dte
display will change to (
).
NOTE:
IIf the amount of fuel added while the
ignition switch is OFF is small, the dis-play just before the ignition switch is
turned OFF may continue to be dis-
played.
IWhen driving uphill or rounding curves,
the fuel in the tank shifts, which may
momentarily change the display.
Average fuel consumption
(
or
)
The Average fuel consumption mode shows
the average fuel consumption since the last
reset. Resetting is done by pressing the mode
switch for more than approximately 1 second.
The display is updated every 30 seconds. At
about the first 1/3 miles (500 m) after a reset,
the display shows (
).
Average speed (
or
)
The average speed mode shows the average
vehicle speed since last reset. Resetting is
done by pressing the mode switch for more
than approximately 1 second. The display is
updated every 30 seconds. The first 30 sec-
onds after a reset, the display shows (
).
Journey timeThe journey time mode shows the time since
the last reset. The displayed time can be reset
by pressing the mode switch for more than
approximately 1 second.
SIC1750
Instruments and controls
2-33
Z
02.7.12/A33-D/V5.0
X
Page 79 of 247

NOTE:
If a low temperature warning and low range
warning occur simultaneously, other dis-
play modes switch automatically to the
outside temperature display.
When the mode switch is pushed, the dis-
play switches to the mode chosen before
the warning display, and the ICY indicator
will blink.
CEILINGThe ceiling light has a three-position switch.
When the switch is in the centerqposition, the
light will illuminate when a door is opened.
The light will stay on for about 30 seconds
when:
IThe doors are unlocked by the keyfob, a
key or the lock-unlock switch while all doors
are closed.
IThe driver's door is opened and then closed
while the key is removed from the ignition
switch.IThe key is removed from the ignition switch
while all doors are closed.
The ceiling light will turn off while the 30
second timer is activated, when:
IThe driver's door is locked either with the
keyfob, a key, or the lock-unlock switch.
IThe ignition switch is turned ON.
When the interior light switch or personal
light switch is in the ON position, the inte-
rior, personal, and vanity mirror lights will
automatically turn off 30 minutes after the
ignition switch has been turned to the OFF
position. To turn on the light again, insert
the key into the ignition switch and move it
to the ON position.
After the above procedure, the interior, per-
sonal, and vanity mirror lights will automati-
cally turn off 30 minutes after the latest opera-
tion of the following with the ignition switch in
the ACC or OFF position:
IOpening or closing any door
ILocking or unlocking with the keyfob, a key
or the lock-unlock switch.
IInserting or removing a key from the ignition
switch
These lights will turn on again when any of the
IC1226
INTERIOR LIGHT
2-34
Instruments and controls
Z
02.7.12/A33-D/V5.0
X
Page 82 of 247
The HomeLink
Universal Transceiver pro-
vides a convenient way to consolidate the
functions of up to three individual hand-held
transmitters into one built-in device.
The HomeLinkUniversal Transceiver power
will automatically turn off 30 minutes after the
ignition switch has been turned to the off
position.
HomeLink
Universal Transceiver:
IWill operate most Radio Frequency (RF)
devices such as garage doors, gates, home
and office lighting, entry door locks and
security systems.
IIs powered by your vehicle's battery. No
separate batteries are required. If the vehi-
cle's battery is discharged or is discon-
nected, HomeLink
will retain all program-
ming.
Once the HomeLinkUniversal Transceiver
is programmed, retain the original trans-
mitter for future programming procedures
(i.e., new vehicle purchases). Upon sale of
the vehicle, the programmed HomeLink
Universal Transceiver buttons should be
erased for security purposes. For addi-
tional information, refer to ªProgramming
HomeLink
º later in this section.
WARNING
IDo not use the HomeLink
Universal
Transceiver with any garage door
opener that lacks safety stop and
reverse features as required by fed-
eral safety standards. (These stan-
dards became effective for opener
models manufactured after April 1,
1982). A garage door opener which
cannot detect an object in the path of
a closing garage door and then auto-
matically stop and reverse, does not
meet current federal safety stan-
dards. Using a garage door opener
without these features increases the
risk of serious injury or death.
IDuring programming, your garage
door or gate may open or close. Make
sure that people and objects are clear
of the garage door or gate that you
are programming.
IYour vehicle's engine should be
turned off while programming theHomeLink
Universal Transceiver.
PROGRAMMING HomeLinkTo program your HomeLink Transceiver to
operate a garage door, gate, or entry door
opener, home or office lighting, you need to be
at the same location as the device. Note:
Garage door openers (manufactured after
1996) have ªrolling code protectionº. To pro-
gram a garage door opener equipped with
ªrolling code protectionº; you will need to use a
ladder to get up to the garage door opener
motor to be able to access the ªsmart or learnº
program button.
HomeLink
UNIVERSAL
TRANSCEIVER (if so equipped)
Instruments and controls
2-37
Z
02.7.12/A33-D/V5.0
X
Page 87 of 247
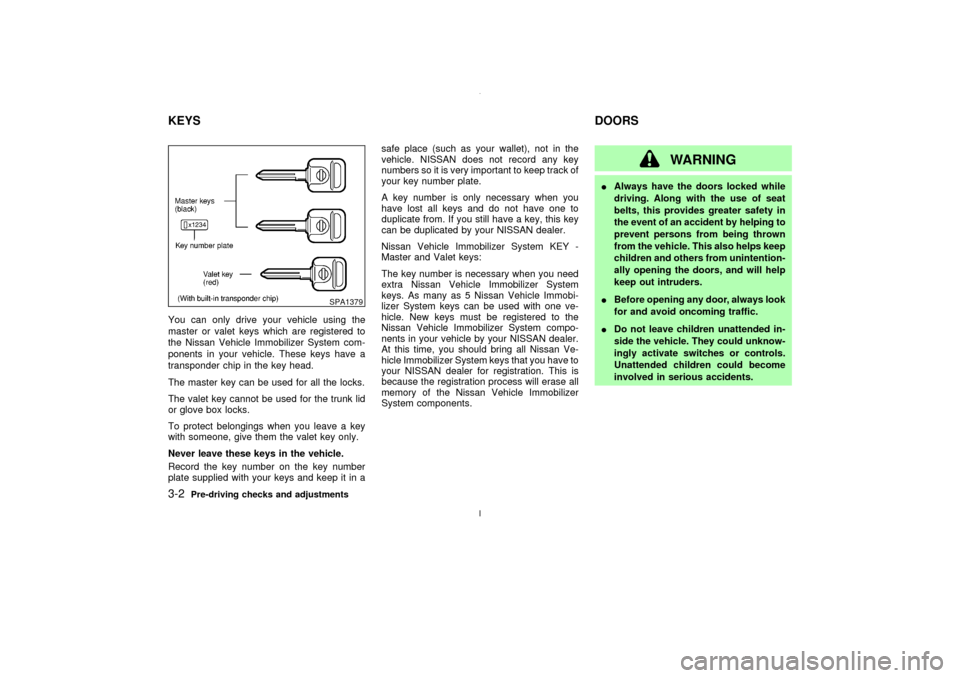
You can only drive your vehicle using the
master or valet keys which are registered to
the Nissan Vehicle Immobilizer System com-
ponents in your vehicle. These keys have a
transponder chip in the key head.
The master key can be used for all the locks.
The valet key cannot be used for the trunk lid
or glove box locks.
To protect belongings when you leave a key
with someone, give them the valet key only.
Never leave these keys in the vehicle.
Record the key number on the key number
plate supplied with your keys and keep it in asafe place (such as your wallet), not in the
vehicle. NISSAN does not record any key
numbers so it is very important to keep track of
your key number plate.
A key number is only necessary when you
have lost all keys and do not have one to
duplicate from. If you still have a key, this key
can be duplicated by your NISSAN dealer.
Nissan Vehicle Immobilizer System KEY -
Master and Valet keys:
The key number is necessary when you need
extra Nissan Vehicle Immobilizer System
keys. As many as 5 Nissan Vehicle Immobi-
lizer System keys can be used with one ve-
hicle. New keys must be registered to the
Nissan Vehicle Immobilizer System compo-
nents in your vehicle by your NISSAN dealer.
At this time, you should bring all Nissan Ve-
hicle Immobilizer System keys that you have to
your NISSAN dealer for registration. This is
because the registration process will erase all
memory of the Nissan Vehicle Immobilizer
System components.
WARNING
IAlways have the doors locked while
driving. Along with the use of seat
belts, this provides greater safety in
the event of an accident by helping to
prevent persons from being thrown
from the vehicle. This also helps keep
children and others from unintention-
ally opening the doors, and will help
keep out intruders.
IBefore opening any door, always look
for and avoid oncoming traffic.
IDo not leave children unattended in-
side the vehicle. They could unknow-
ingly activate switches or controls.
Unattended children could become
involved in serious accidents.
SPA1379
KEYSDOORS3-2
Pre-driving checks and adjustments
Z
02.7.12/A33-D/V5.0
X
Page 93 of 247

To stop lowering the windows, release the
UNLOCK button.
To start lowering the windows, press the UN-
LOCK button again for 3 more seconds.
This function will operate after the ignition
switch is off and 45 seconds passed or either
the front door is opened.Releasing the trunk lid1. Push the TRUNK button on the keyfob for
longer than 0.5 seconds with the key re-
moved from the ignition key cylinder.
2. The trunk lid opens.
The trunk lid will not open when the trunk lid
cancel lever is in the CANCEL position.
It can be opened only with the key.
See ªTrunk lidº later in this section for cancel
lever.Using the panic alarmIf you are near your vehicle and feel threat-
ened, you may activate the alarm to call atten-
tion as follows:
1. Push the PANIC button on the keyfob for
longer than 0.5 secondswith the key
removed from the ignition key cylinder.
2. The theft warning alarm and headlights willstay on for 30 seconds.
3. The panic alarm stops when:
IIt has run for 30 seconds, or
IThe LOCK or the UNLOCK button is
pressed, or
IThe panic button or the trunk lid release
button is pushed on the keyfob for longer
than 0.5 seconds.
BATTERY REPLACEMENTReplace the battery as follows:
1. Open the lid using a suitable tool.
2. Replace the battery with a new one.
SPA1374
3-8
Pre-driving checks and adjustments
Z
02.7.12/A33-D/V5.0
X
Page 95 of 247
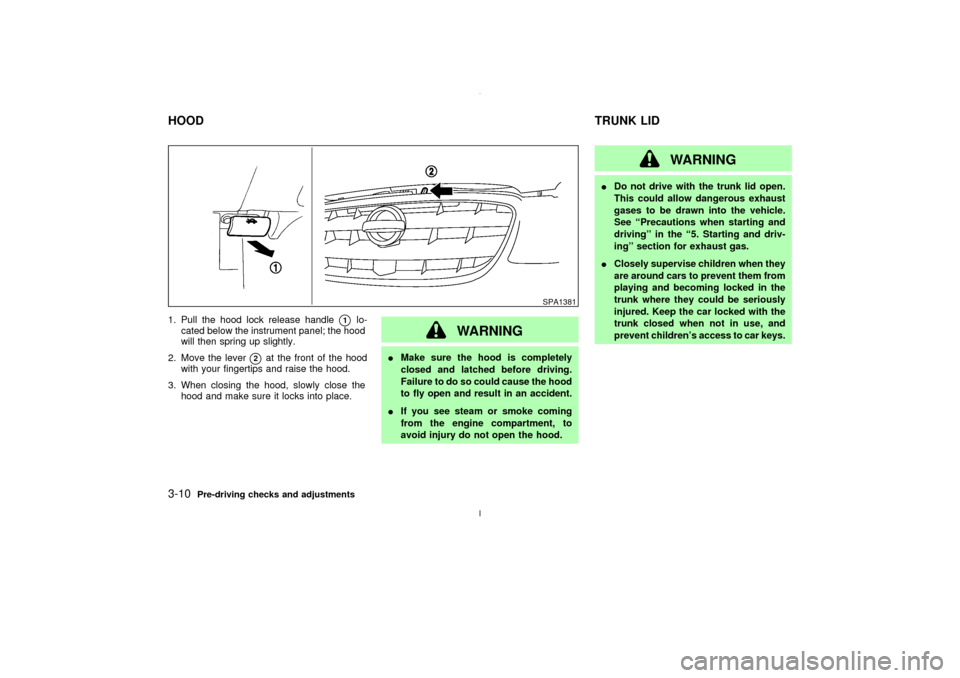
1. Pull the hood lock release handle
q1
lo-
cated below the instrument panel; the hood
will then spring up slightly.
2. Move the lever
q2
at the front of the hood
with your fingertips and raise the hood.
3. When closing the hood, slowly close the
hood and make sure it locks into place.
WARNING
IMake sure the hood is completely
closed and latched before driving.
Failure to do so could cause the hood
to fly open and result in an accident.
IIf you see steam or smoke coming
from the engine compartment, to
avoid injury do not open the hood.
WARNING
IDo not drive with the trunk lid open.
This could allow dangerous exhaust
gases to be drawn into the vehicle.
See ªPrecautions when starting and
drivingº in the ª5. Starting and driv-
ingº section for exhaust gas.
IClosely supervise children when they
are around cars to prevent them from
playing and becoming locked in the
trunk where they could be seriously
injured. Keep the car locked with the
trunk closed when not in use, and
prevent children's access to car keys.
SPA1381
HOODTRUNK LID3-10
Pre-driving checks and adjustments
Z
02.7.12/A33-D/V5.0
X
Page 97 of 247
INTERIOR TRUNK LID RELEASE
WARNING
Closely supervise children when they
are around cars to prevent them from
playing and becoming locked in the
trunk where they could be seriously in-
jured. Keep the car locked, with the
trunk closed, when not in use, and pre-
vent children's access to car keys.
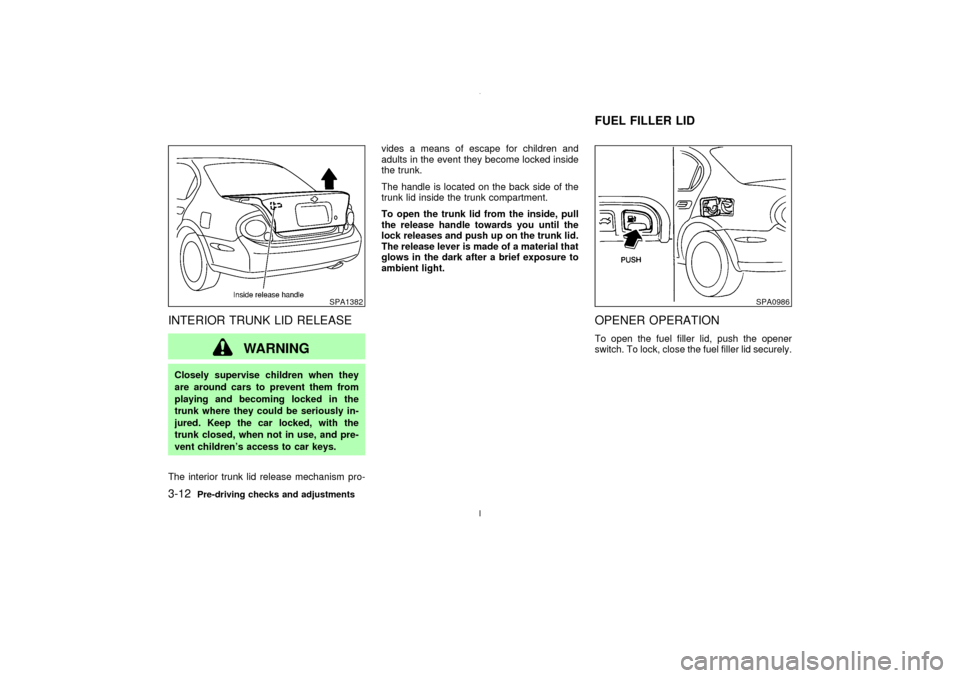
The interior trunk lid release mechanism pro-vides a means of escape for children and
adults in the event they become locked inside
the trunk.
The handle is located on the back side of the
trunk lid inside the trunk compartment.
To open the trunk lid from the inside, pull
the release handle towards you until the
lock releases and push up on the trunk lid.
The release lever is made of a material that
glows in the dark after a brief exposure to
ambient light.
OPENER OPERATIONTo open the fuel filler lid, push the opener
switch. To lock, close the fuel filler lid securely.
SPA1382
SPA0986
FUEL FILLER LID
3-12
Pre-driving checks and adjustments
Z
02.7.12/A33-D/V5.0
X
Page 98 of 247
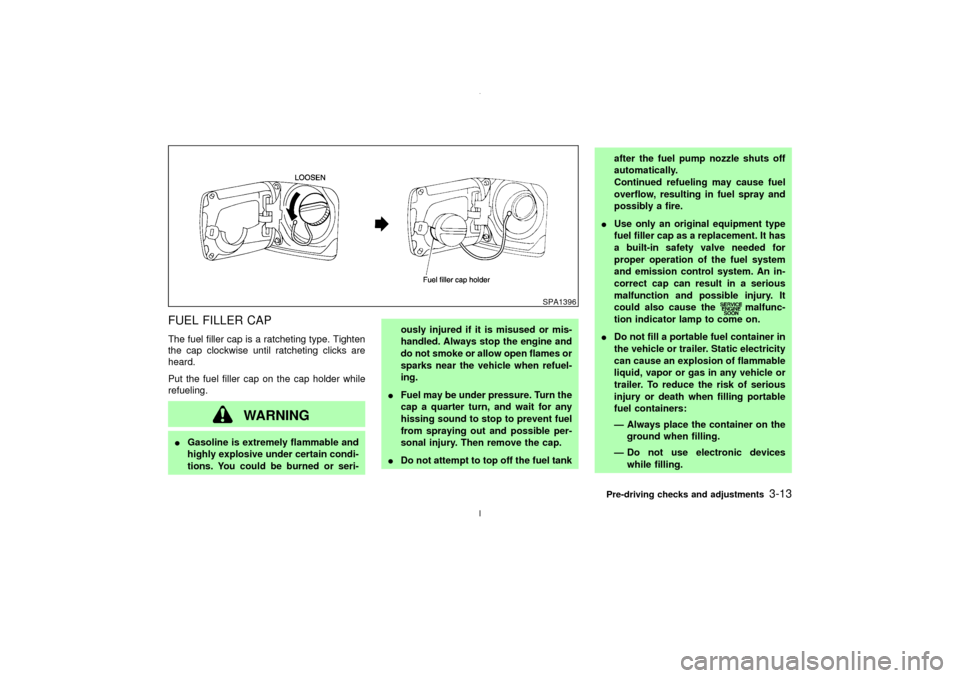
FUEL FILLER CAPThe fuel filler cap is a ratcheting type. Tighten
the cap clockwise until ratcheting clicks are
heard.
Put the fuel filler cap on the cap holder while
refueling.
WARNING
IGasoline is extremely flammable and
highly explosive under certain condi-
tions. You could be burned or seri-ously injured if it is misused or mis-
handled. Always stop the engine and
do not smoke or allow open flames or
sparks near the vehicle when refuel-
ing.
IFuel may be under pressure. Turn the
cap a quarter turn, and wait for any
hissing sound to stop to prevent fuel
from spraying out and possible per-
sonal injury. Then remove the cap.
IDo not attempt to top off the fuel tankafter the fuel pump nozzle shuts off
automatically.
Continued refueling may cause fuel
overflow, resulting in fuel spray and
possibly a fire.
IUse only an original equipment type
fuel filler cap as a replacement. It has
a built-in safety valve needed for
proper operation of the fuel system
and emission control system. An in-
correct cap can result in a serious
malfunction and possible injury. It
could also cause the
malfunc-
tion indicator lamp to come on.
IDo not fill a portable fuel container in
the vehicle or trailer. Static electricity
can cause an explosion of flammable
liquid, vapor or gas in any vehicle or
trailer. To reduce the risk of serious
injury or death when filling portable
fuel containers:
Ð Always place the container on the
ground when filling.
Ð Do not use electronic devices
while filling.
SPA1396
Pre-driving checks and adjustments
3-13
Z
02.7.12/A33-D/V5.0
X