remove seats NISSAN MAXIMA 2004 A34 / 6.G Owners Manual
[x] Cancel search | Manufacturer: NISSAN, Model Year: 2004, Model line: MAXIMA, Model: NISSAN MAXIMA 2004 A34 / 6.GPages: 280, PDF Size: 3.99 MB
Page 24 of 280
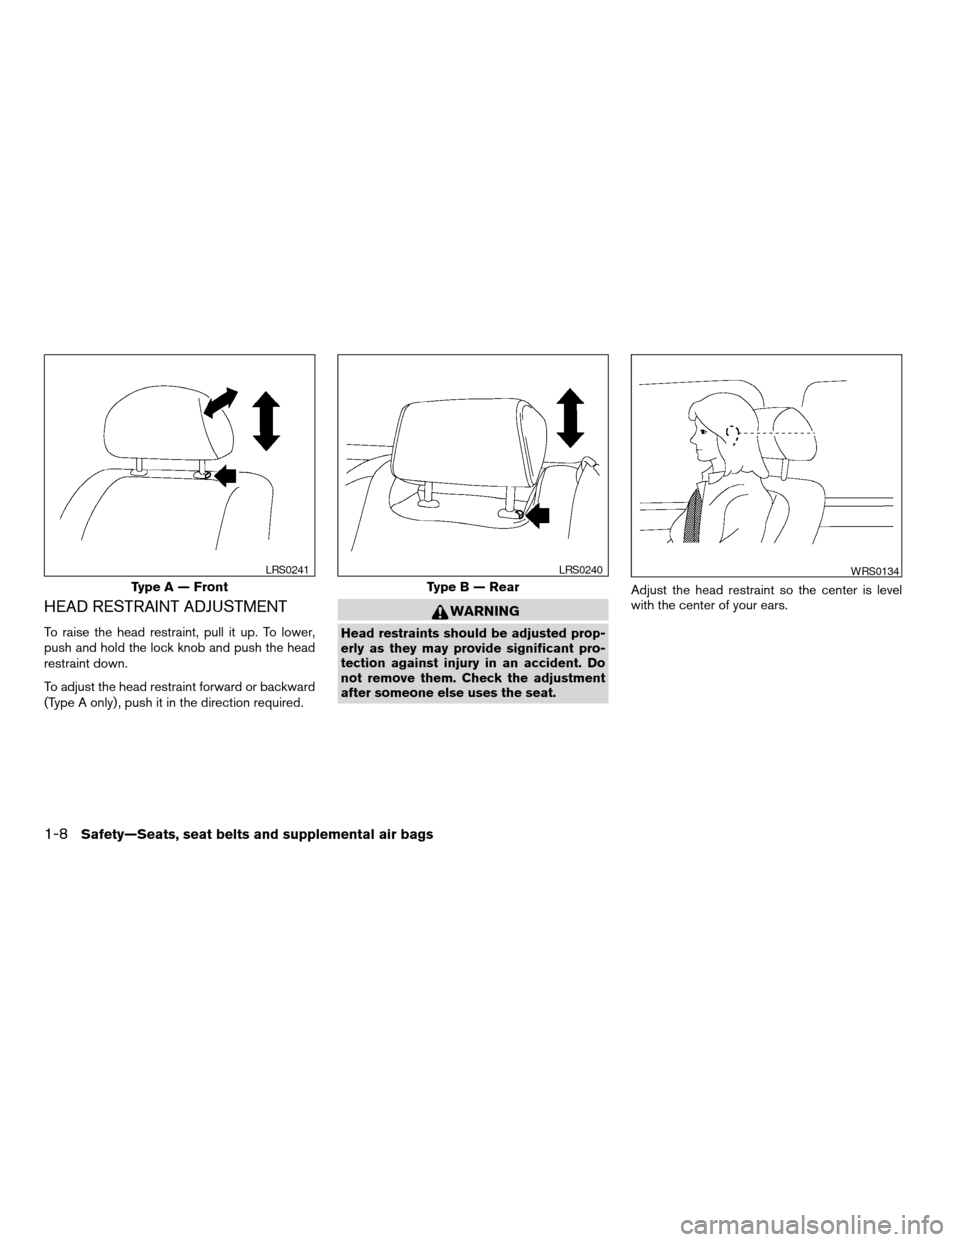
HEAD RESTRAINT ADJUSTMENT
To raise the head restraint, pull it up. To lower,
push and hold the lock knob and push the head
restraint down.
To adjust the head restraint forward or backward
(Type A only) , push it in the direction required.
WARNING
Head restraints should be adjusted prop-
erly as they may provide significant pro-
tection against injury in an accident. Do
not remove them. Check the adjustment
after someone else uses the seat.Adjust the head restraint so the center is level
with the center of your ears.
Type A — Front
LRS0241
Type B — Rear
LRS0240WRS0134
1-8Safety—Seats, seat belts and supplemental air bags
ZREVIEW COPY:Ð2004 Maxima(max)
Owners Manual(owners)ÐUSA English(nna)
10/07/03Ðtbrooks
X
Page 50 of 280

2. Route the seat belt tongue through the child
restraint and insert it into the buckle until you
hear and feel the latch engage.
Be sure to follow the child restraint manu-
facturer’s instructions for belt routing.3. Pull on the shoulder belt until all of the belt is
fully extended. At this time, the seat belt
retractor is in the automatic locking mode
(child restraint mode) . It reverts back to
emergency locking mode when the seat belt
is fully retracted.4. Allow the seat belt to retract. Pull up on the
shoulder belt to remove any slack in the belt.
Front Facing — step 2
WRS0250
Front Facing — step 3
WRS0251
Front Facing — step 4
WRS0146
1-34Safety—Seats, seat belts and supplemental air bags
ZREVIEW COPY:Ð2004 Maxima(max)
Owners Manual(owners)ÐUSA English(nna)
10/07/03Ðtbrooks
X
Page 51 of 280
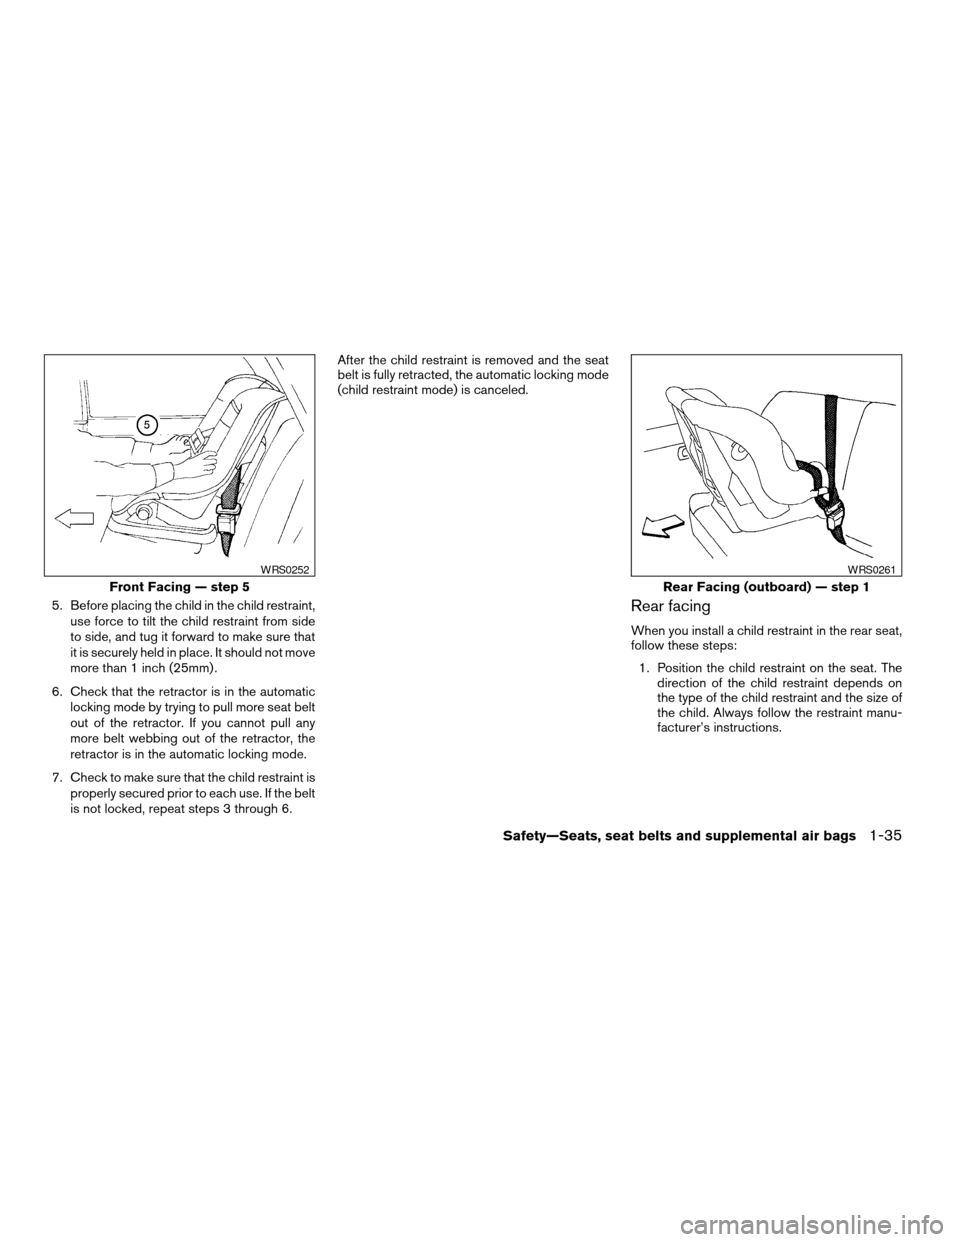
5. Before placing the child in the child restraint,
use force to tilt the child restraint from side
to side, and tug it forward to make sure that
it is securely held in place. It should not move
more than 1 inch (25mm) .
6. Check that the retractor is in the automatic
locking mode by trying to pull more seat belt
out of the retractor. If you cannot pull any
more belt webbing out of the retractor, the
retractor is in the automatic locking mode.
7. Check to make sure that the child restraint is
properly secured prior to each use. If the belt
is not locked, repeat steps 3 through 6.After the child restraint is removed and the seat
belt is fully retracted, the automatic locking mode
(child restraint mode) is canceled.Rear facing
When you install a child restraint in the rear seat,
follow these steps:
1. Position the child restraint on the seat. The
direction of the child restraint depends on
the type of the child restraint and the size of
the child. Always follow the restraint manu-
facturer’s instructions.
Front Facing — step 5
WRS0252
Rear Facing (outboard) — step 1
WRS0261
Safety—Seats, seat belts and supplemental air bags1-35
ZREVIEW COPY:Ð2004 Maxima(max)
Owners Manual(owners)ÐUSA English(nna)
10/07/03Ðtbrooks
X
Page 53 of 280
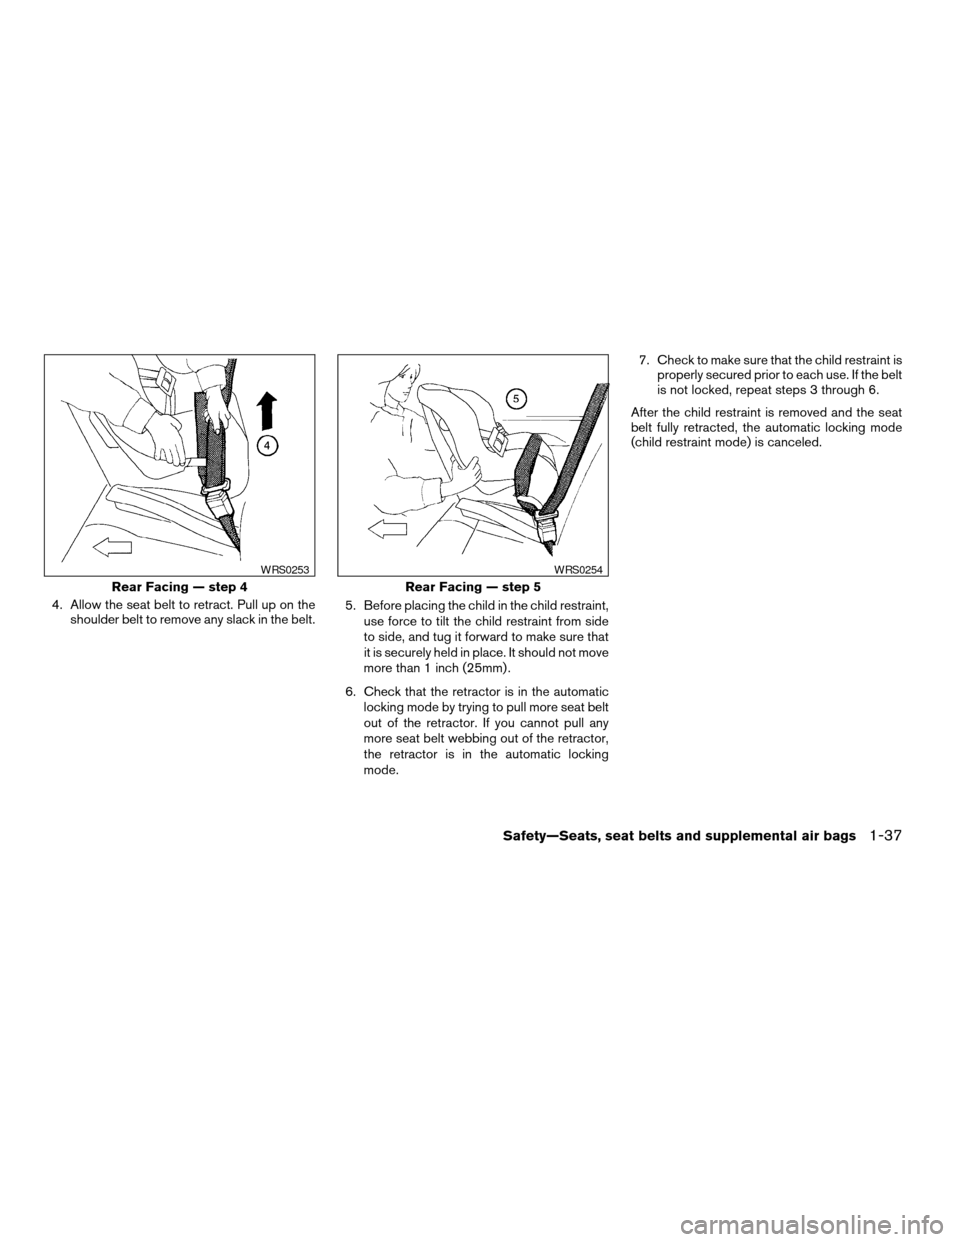
4. Allow the seat belt to retract. Pull up on the
shoulder belt to remove any slack in the belt.5. Before placing the child in the child restraint,
use force to tilt the child restraint from side
to side, and tug it forward to make sure that
it is securely held in place. It should not move
more than 1 inch (25mm) .
6. Check that the retractor is in the automatic
locking mode by trying to pull more seat belt
out of the retractor. If you cannot pull any
more seat belt webbing out of the retractor,
the retractor is in the automatic locking
mode.7. Check to make sure that the child restraint is
properly secured prior to each use. If the belt
is not locked, repeat steps 3 through 6.
After the child restraint is removed and the seat
belt fully retracted, the automatic locking mode
(child restraint mode) is canceled.
Rear Facing — step 4
WRS0253
Rear Facing — step 5
WRS0254
Safety—Seats, seat belts and supplemental air bags1-37
ZREVIEW COPY:Ð2004 Maxima(max)
Owners Manual(owners)ÐUSA English(nna)
10/07/03Ðtbrooks
X
Page 56 of 280
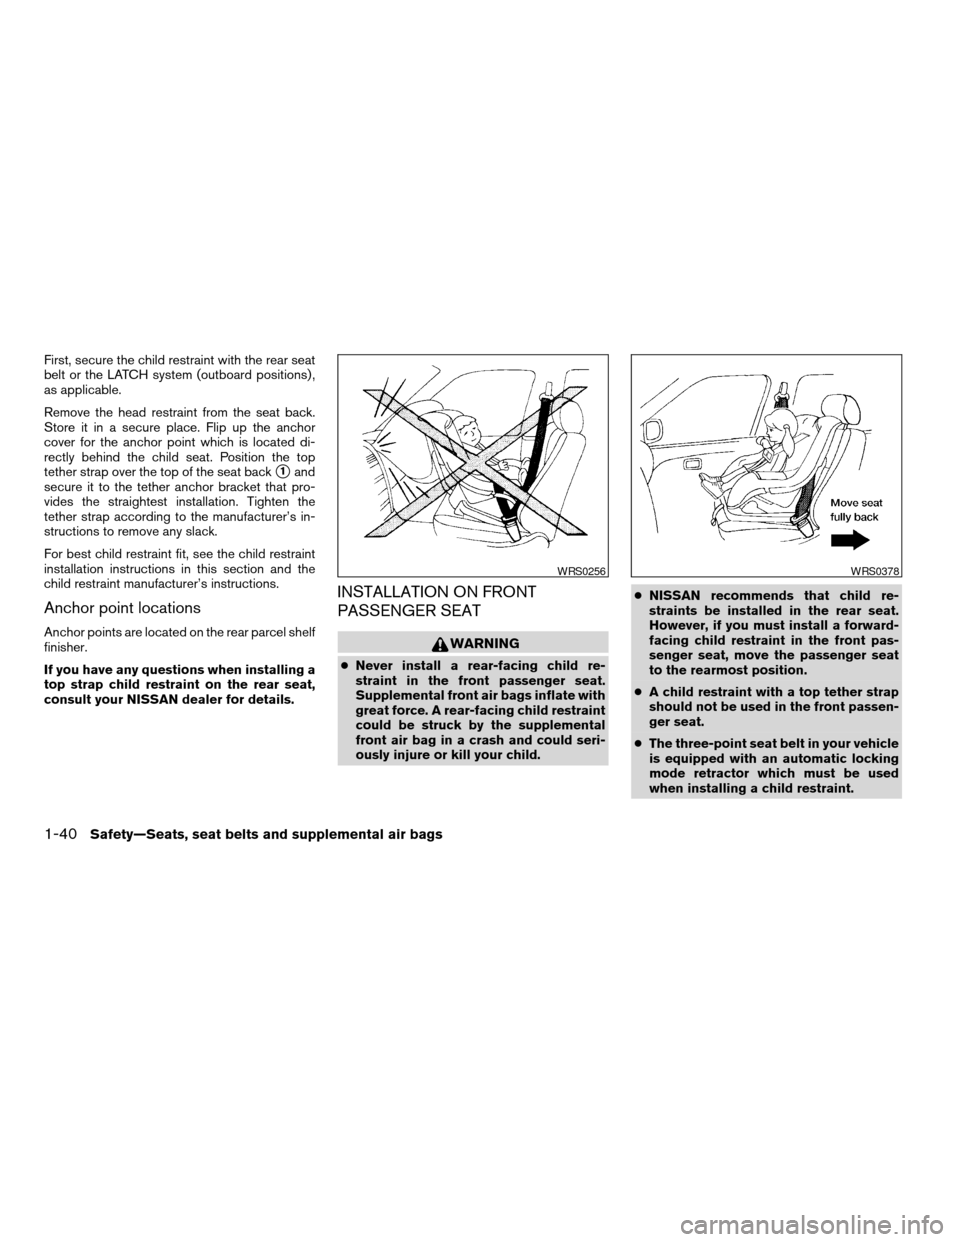
First, secure the child restraint with the rear seat
belt or the LATCH system (outboard positions) ,
as applicable.
Remove the head restraint from the seat back.
Store it in a secure place. Flip up the anchor
cover for the anchor point which is located di-
rectly behind the child seat. Position the top
tether strap over the top of the seat back
s1and
secure it to the tether anchor bracket that pro-
vides the straightest installation. Tighten the
tether strap according to the manufacturer’s in-
structions to remove any slack.
For best child restraint fit, see the child restraint
installation instructions in this section and the
child restraint manufacturer’s instructions.
Anchor point locations
Anchor points are located on the rear parcel shelf
finisher.
If you have any questions when installing a
top strap child restraint on the rear seat,
consult your NISSAN dealer for details.
INSTALLATION ON FRONT
PASSENGER SEAT
WARNING
cNever install a rear-facing child re-
straint in the front passenger seat.
Supplemental front air bags inflate with
great force. A rear-facing child restraint
could be struck by the supplemental
front air bag in a crash and could seri-
ously injure or kill your child.cNISSAN recommends that child re-
straints be installed in the rear seat.
However, if you must install a forward-
facing child restraint in the front pas-
senger seat, move the passenger seat
to the rearmost position.
cA child restraint with a top tether strap
should not be used in the front passen-
ger seat.
cThe three-point seat belt in your vehicle
is equipped with an automatic locking
mode retractor which must be used
when installing a child restraint.
WRS0256WRS0378
1-40Safety—Seats, seat belts and supplemental air bags
ZREVIEW COPY:Ð2004 Maxima(max)
Owners Manual(owners)ÐUSA English(nna)
10/07/03Ðtbrooks
X
Page 58 of 280
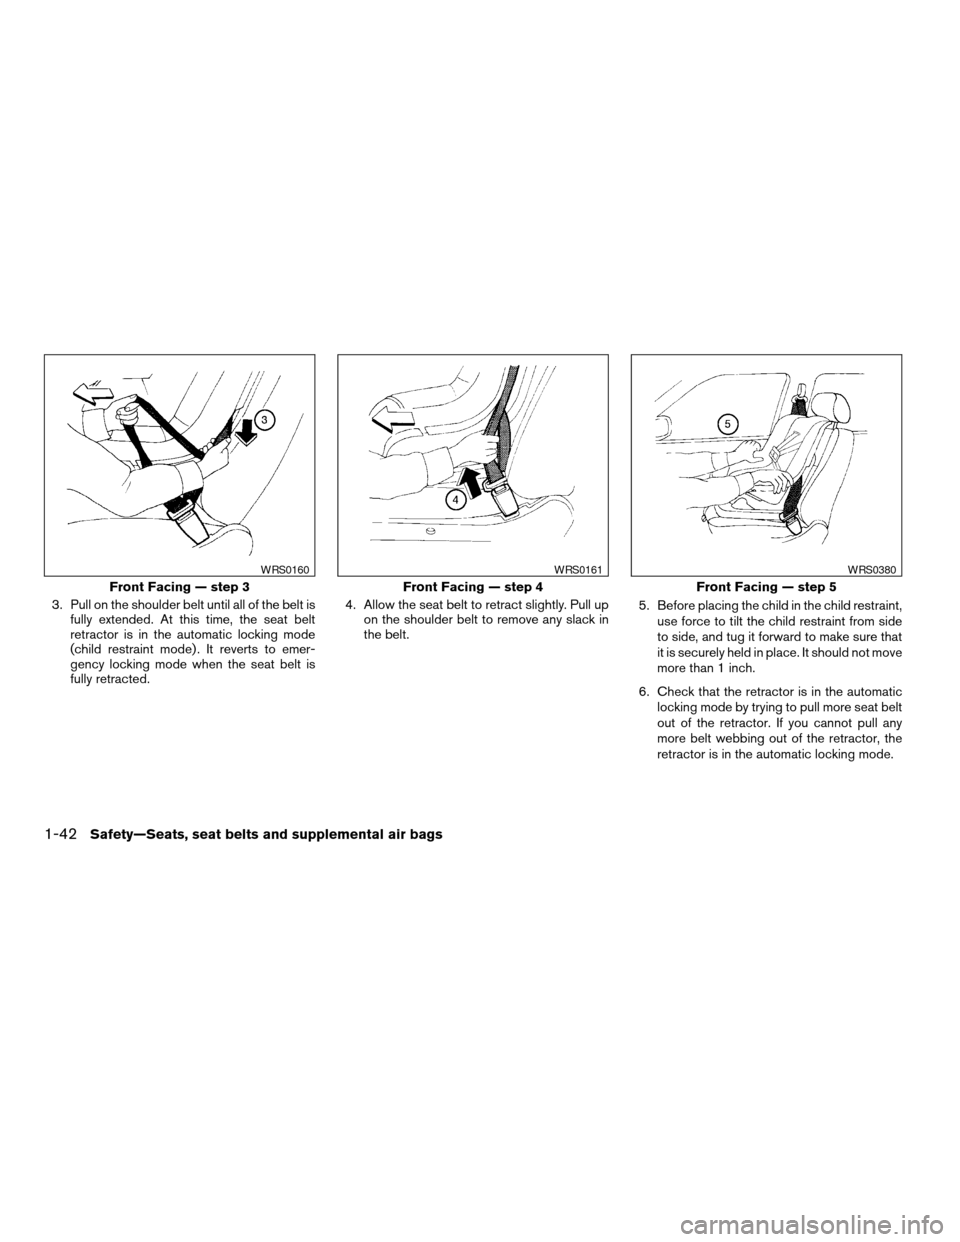
3. Pull on the shoulder belt until all of the belt is
fully extended. At this time, the seat belt
retractor is in the automatic locking mode
(child restraint mode) . It reverts to emer-
gency locking mode when the seat belt is
fully retracted.4. Allow the seat belt to retract slightly. Pull up
on the shoulder belt to remove any slack in
the belt.5. Before placing the child in the child restraint,
use force to tilt the child restraint from side
to side, and tug it forward to make sure that
it is securely held in place. It should not move
more than 1 inch.
6. Check that the retractor is in the automatic
locking mode by trying to pull more seat belt
out of the retractor. If you cannot pull any
more belt webbing out of the retractor, the
retractor is in the automatic locking mode.
Front Facing — step 3
WRS0160
Front Facing — step 4
WRS0161
Front Facing — step 5
WRS0380
1-42Safety—Seats, seat belts and supplemental air bags
ZREVIEW COPY:Ð2004 Maxima(max)
Owners Manual(owners)ÐUSA English(nna)
10/07/03Ðtbrooks
X
Page 59 of 280
7. Check to make sure the child restraint is
properly secured prior to each use. If the
seat belt is not locked, repeat steps 3
through 6.
After the child restraint is removed and the seat
belt is fully retracted, the automatic locking mode
(child restraint mode) is canceled.
Safety—Seats, seat belts and supplemental air bags1-43
ZREVIEW COPY:Ð2004 Maxima(max)
Owners Manual(owners)ÐUSA English(nna)
10/07/03Ðtbrooks
X
Page 126 of 280

3. Adjust the driver’s seat, steering column and
outside mirrors to the desired positions by
manually operating each adjusting switch.
For additional information, see “Seats” in the
“Safety—Seats, seat belts and supplemen-
tal air bags” section and “Steering wheel”
and “Outside mirrors” earlier in this section.
During this step, do not turn the ignition to
any positions other than ON.
4. Push the SET switch and, within 5 seconds,
push the memory switch (1 or 2) fully for at
least 1 second.
The indicator light for the pushed memory
switch will come on and stay on for approxi-
mately 5 seconds after pushing the switch.
After the indicator light goes off, the se-
lected positions are stored in the selected
memory (1 or 2) .
If memory is stored in the same memory switch,
the previous memory will be deleted.
Linking a keyfob to a stored memory
position
A keyfob can be linked to a stored memory posi-
tion with the following procedure.
1. Follow the steps for storing a memory posi-
tion.2. While the indicator light for the memory
switch being set is illuminated for 5 sec-
onds, press the
button on the keyfob.
The indicator light will blink. After the indica-
tor light goes off, the keyfob is linked to that
memory setting.
With the key removed from the ignition switch,
press the
button on the keyfob. The driv-
er’s seat and outside mirrors will move to the
memorized position.
Confirming memory storage
cTurn the ignition ON and push the SET
switch. If the main memory has not been
stored, the indicator light will come on for
approximately 0.5 seconds. When the
memory has stored the position, the indica-
tor light will stay on for approximately 5 sec-
onds.
cIf the battery cable is disconnected, or if the
fuse blows, the memory will be canceled. In
such a case, reset the desired positions
using the following procedures.
1. Open and close the driver’s door more than
two times with the ignition key in the LOCK
position.
2. Reset the desired position using the previ-
ous procedure.
Selecting the memorized position
1. Set the automatic transmission selector le-
ver to the P (Park) position.
2. Turn the ignition ON.
3. Push the memory switch (1 or 2) fully for at
least 1 second.
The driver’s seat, steering column and out-
side mirrors will move to the memorized po-
sition with the indicator light flashing, and
then the light will stay on for approximately 5
seconds.
ENTRY/EXIT FUNCTION (for
automatic transmission model)
This system is designed so that the driver’s seat
and steering column will automatically move
when the automatic transmission selector lever is
in the P (Park) position. This allows the driver to
get into and out of the driver’s seat more easily.
(This feature is not available on manual transmis-
sion model.)
The driver’s seat will slide backward and the
steering wheel will move up:
cWhen the key is removed from the ignition
switch.
cWhen the driver’s door is opened with the
key turned to LOCK.
3-20Pre-driving checks and adjustments
ZREVIEW COPY:Ð2004 Maxima(max)
Owners Manual(owners)ÐUSA English(nna)
10/20/03Ðarosenma
X
Page 202 of 280
Occasionally remove loose dust from the interior
trim, plastic parts and seats using a vacuum
cleaner or soft brush. Wipe the vinyl and leather
surfaces with a clean, soft cloth dampened in
mild soap solution, then wipe clean with a dry,
soft cloth. Before using any fabric protector, read
the manufacturer’s recommendations. Some fab-
ric protectors contain chemicals that may stain or
bleach the seat material.
Use a cloth dampened only with water to clean
the meter and gauge lens.
CAUTION
cNever use benzine, thinner or any simi-
lar material.
cSmall dirt particles can be abrasive and
damaging to leather surfaces and
should be removed promptly. Do not
use saddle soap, polishes, oils, clean-
ing fluids, solvents, detergents or
ammonia-based cleaners as they may
damage the leather’s natural finish.
cNever use fabric protectors unless rec-
ommended by the manufacturer.
cDo not use glass or plastic cleaner on
meter or gauge lens covers. It may dam-
age the lens cover.
FLOOR MATS
The use of genuine NISSAN floor mats can ex-
tend the life of your vehicle carpet and make it
easier to clean the interior.No matter what
mats are used, be sure they are fitted for
your vehicle and are properly positioned in
the footwell to prevent interference with
pedal operation.Mats should be maintained
with regular cleaning and replaced if they be-
come excessively worn.
Floor mat positioning aid (driver’s side
only)
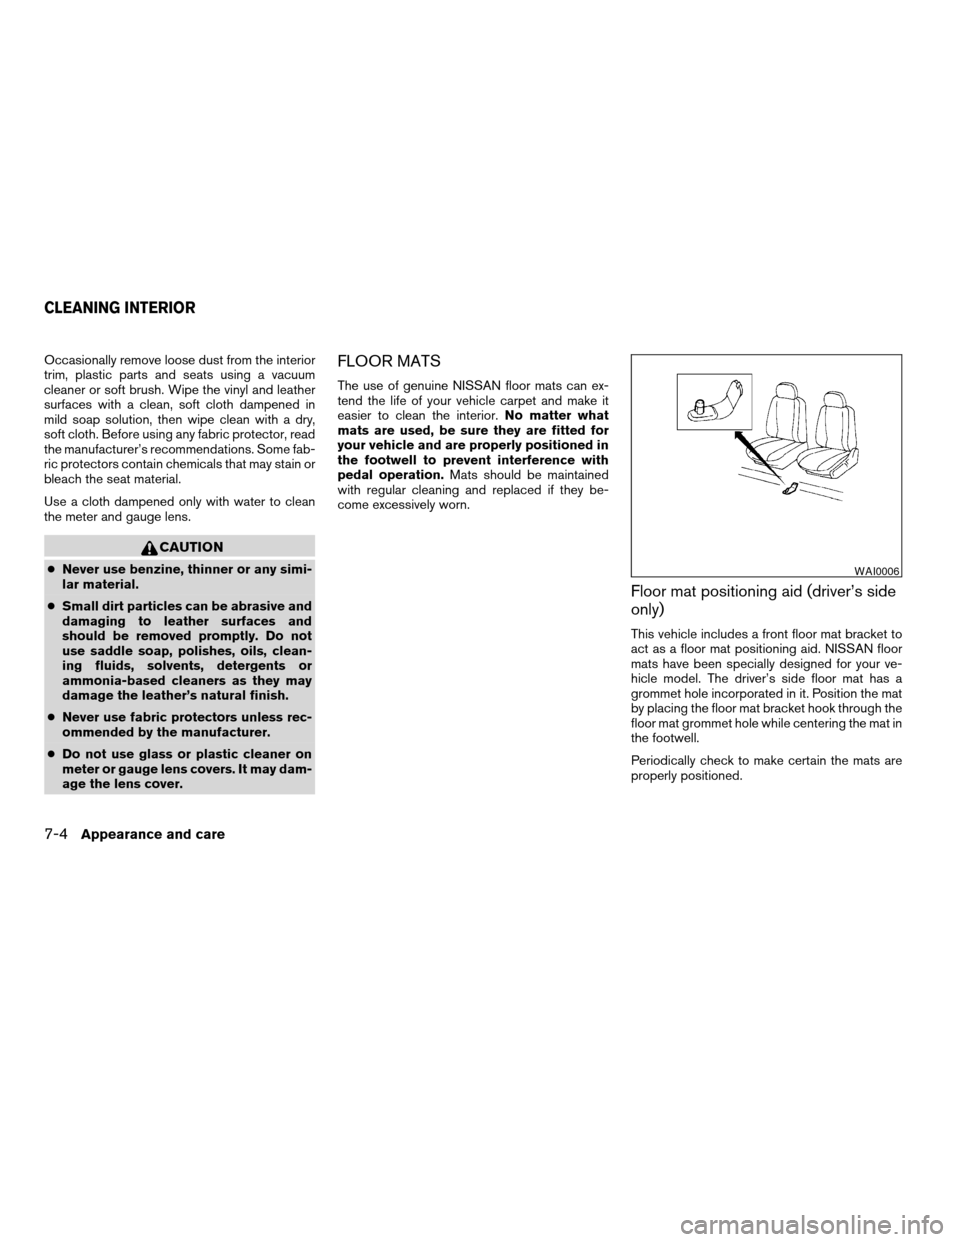
This vehicle includes a front floor mat bracket to
act as a floor mat positioning aid. NISSAN floor
mats have been specially designed for your ve-
hicle model. The driver’s side floor mat has a
grommet hole incorporated in it. Position the mat
by placing the floor mat bracket hook through the
floor mat grommet hole while centering the mat in
the footwell.
Periodically check to make certain the mats are
properly positioned.
WAI0006
CLEANING INTERIOR
7-4Appearance and care
ZREVIEW COPY:Ð2004 Maxima(max)
Owners Manual(owners)ÐUSA English(nna)
10/07/03Ðtbrooks
X
Page 203 of 280
SEAT BELTS
The seat belts can be cleaned by wiping them
with a sponge dampened in a mild soap solution.
Allow the belts to dry completely in the shade
before using them. See “Seat belt maintenance”
in the “Safety – Seats, seat belts and supplemen-
tal air bags” section of this manual.
WARNING
Do not allow wet seat belts to roll up in the
retractor. NEVER use bleach, dye or
chemical solvents to clean the seat belts,
since these materials may severely
weaken the seat belt webbing.
MOST COMMON FACTORS
CONTRIBUTING TO VEHICLE
CORROSION
1. The accumulation of moisture-retaining dirt
and debris in body panel sections, cavities,
and other areas.
2. Damage to paint and other protective coat-
ings caused by gravel and stone chips or
minor traffic accidents.
ENVIRONMENTAL FACTORS
INFLUENCE THE RATE OF
CORROSION
Moisture
Accumulation of sand, dirt and water on the ve-
hicle body underside can accelerate corrosion.
Wet floor coverings will not dry completely inside
the vehicle, and should be removed for drying to
avoid floor panel corrosion.
Relative humidity
Corrosion will be accelerated:
cin areas of high relative humidity.
cin areas where the temperatures stay above
freezing.
cwhere atmospheric pollution exists.cwhere road salt is used.
Temperature
High temperatures accelerate the rate of corro-
sion to those parts which are not well ventilated.
Air pollution
Industrial pollution, the presence of salt in the air
in coastal areas, or heavy road salt use acceler-
ates the corrosion process. Road salt also accel-
erates the disintegration of paint surfaces.
TO PROTECT YOUR VEHICLE
FROM CORROSION
cWash and wax your vehicle often to keep the
vehicle clean.
cAlways check for minor damage to the paint
and repair it as soon as possible.
cKeep drain holes at the bottom of the doors
open to avoid water accumulation.
cCheck the underbody for accumulation of
sand, dirt or salt. If present, wash with water
as soon as possible.
CORROSION PROTECTION
Appearance and care7-5
ZREVIEW COPY:Ð2004 Maxima(max)
Owners Manual(owners)ÐUSA English(nna)
10/20/03Ðarosenma
X