mirror NISSAN MAXIMA 2007 A34 / 6.G Quick Reference Guide
[x] Cancel search | Manufacturer: NISSAN, Model Year: 2007, Model line: MAXIMA, Model: NISSAN MAXIMA 2007 A34 / 6.GPages: 14, PDF Size: 0.92 MB
Page 2 of 14

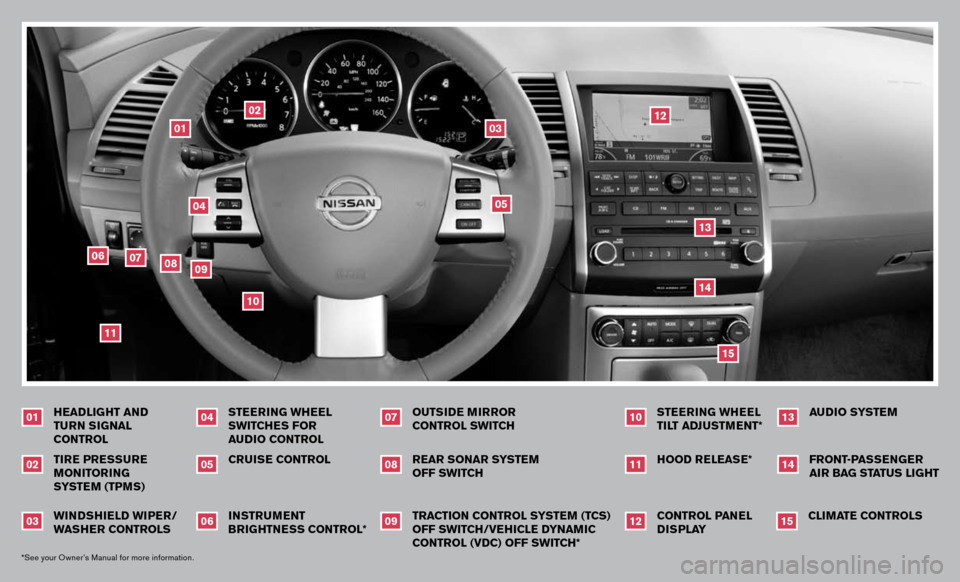
WINDSHIELD WIPER/WASHER CONTROLSTIRE PRESSURE MONITORING SYSTEM (TPMS)HEADLIGHT AND TURN SIGNAL CONTROL
010203*See your Owner’s Manual for more information.
INSTRUMENT BRIGHTNESS CONTROL*CRUISE CONTROLSTEERING WHEEL SWITCHES FOR AUDIO CONTROL
040506
TRACTION CONTROL SYSTEM (TCS) OFF SWITCH/VEHICLE DYNAMIC CONTROL (VDC) OFF SWITCH*REAR SONAR SYSTEM OFF SWITCHOUTSIDE MIRROR CONTROL SWITCH
070809
CONTROL PANEL DISPLAYHOOD RELEASE*STEERING WHEEL TILT ADJUSTMENT*
101112
03
04
01
02
05
06
14
08
07
11
12
09
10
13
FRONT-PASSENGER
AIR BAG STATUS LIGHTAUDIO SYSTEM
1314
CLIMATE CONTROLS
15
15
Page 5 of 14

AUTOMATIC DRIVER POSITIONER
(if so equipped)
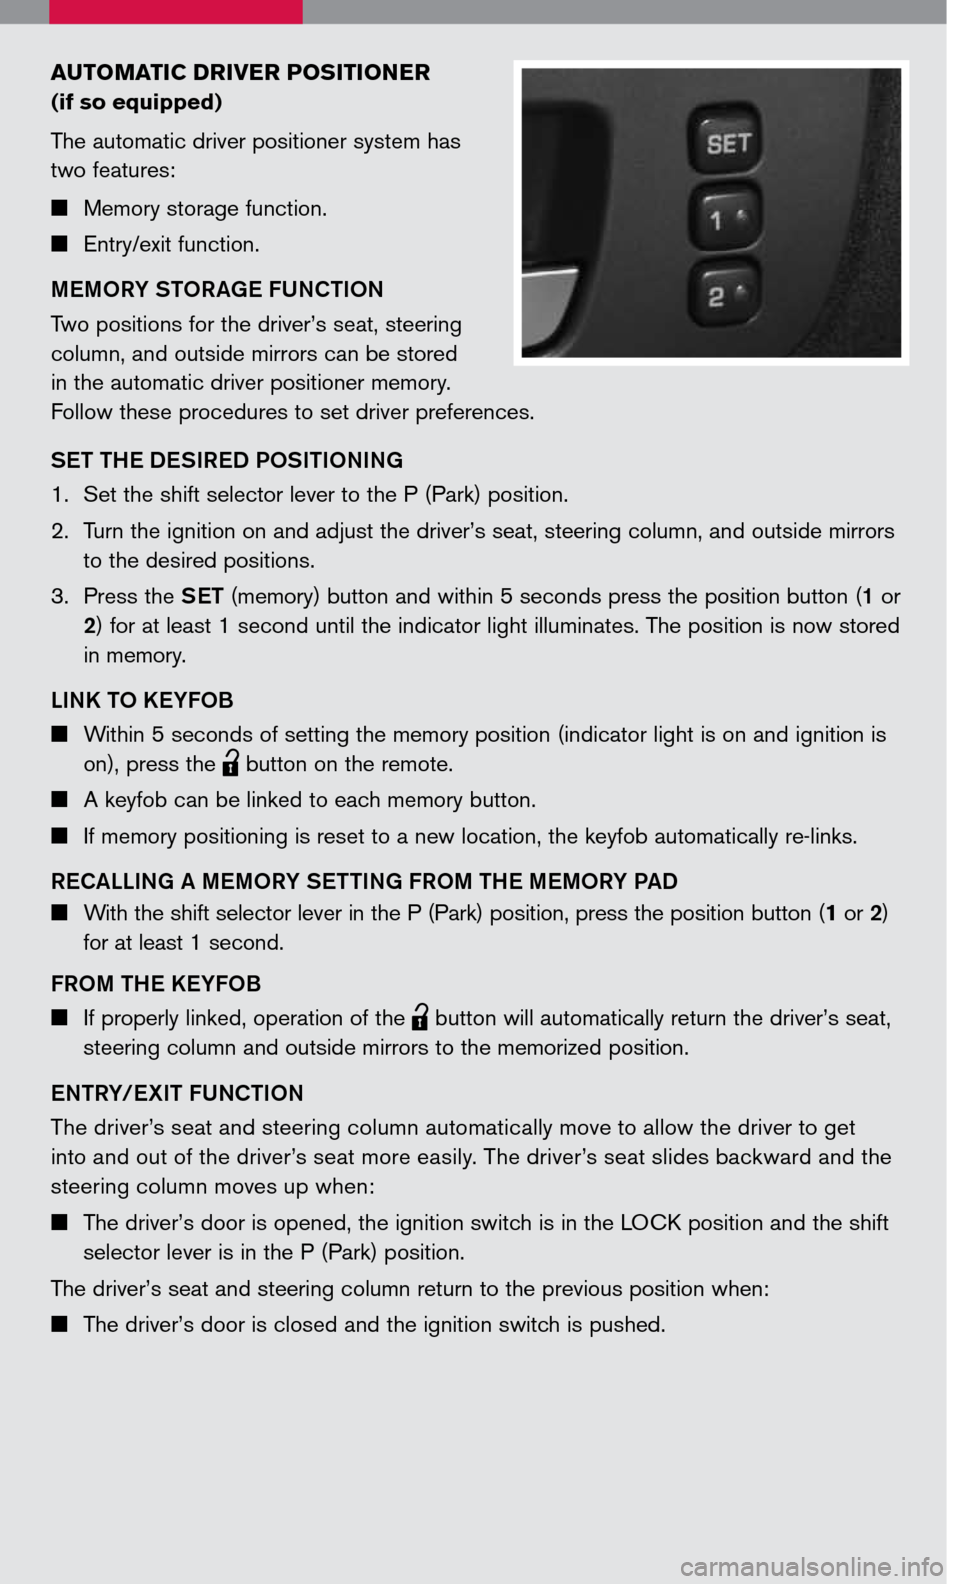
The automatic driver positioner system has
two features:
Memory storage function.
Entry/exit function.
MEMORY STORAGE FUNCTION
Two positions for the driver’s seat, steering
column, and outside mirrors can be stored
in the automatic driver positioner memory.
Follow these procedures to set driver preferences.
SET THE DESIRED POSITIONING
1. Set the shift selector lever to the P (Park) position.
2. Turn the ignition on and adjust the driver’s seat, steering column, and outside mirrors
to the desired positions.
3. Press the
SET (memory) button and within 5 seconds press the position button (1 or
2) for at least 1 second until the indicator light illuminates. The position is now stored
in memory.
LINK TO KEYFOB
Within 5 seconds of setting the memory position (indicator light is on and ignition is
on), press the
lpd0151
button on the remote.
A keyfob can be linked to each memory button.
If memory positioning is reset to a new location, the keyfob automatically re-links.
RECALLING A MEMORY SETTING FROM THE MEMORY PAD
With the shift selector lever in the P (Park) position, press the position button (1 or 2)
for at least 1 second.
FROM THE KEYFOB
If properly linked, operation of the
lpd0151
button will automatically return the driver’s seat,
steering column and outside mirrors to the memorized position.
ENTRY/EXIT FUNCTION
The driver’s seat and steering column automatically move to allow the driver to get
into and out of the driver’s seat more easily. The driver’s seat slides backward and the
steering column moves up when:
The driver’s door is opened, the ignition switch is in the LOCK position and the shift
selector lever is in the P (Park) position.
The driver’s seat and steering column return to the previous position when:
The driver’s door is closed and the ignition switch is pushed.
Page 7 of 14

AUTOMATIC CLIMATE CONTROL
AUTO BUTTON
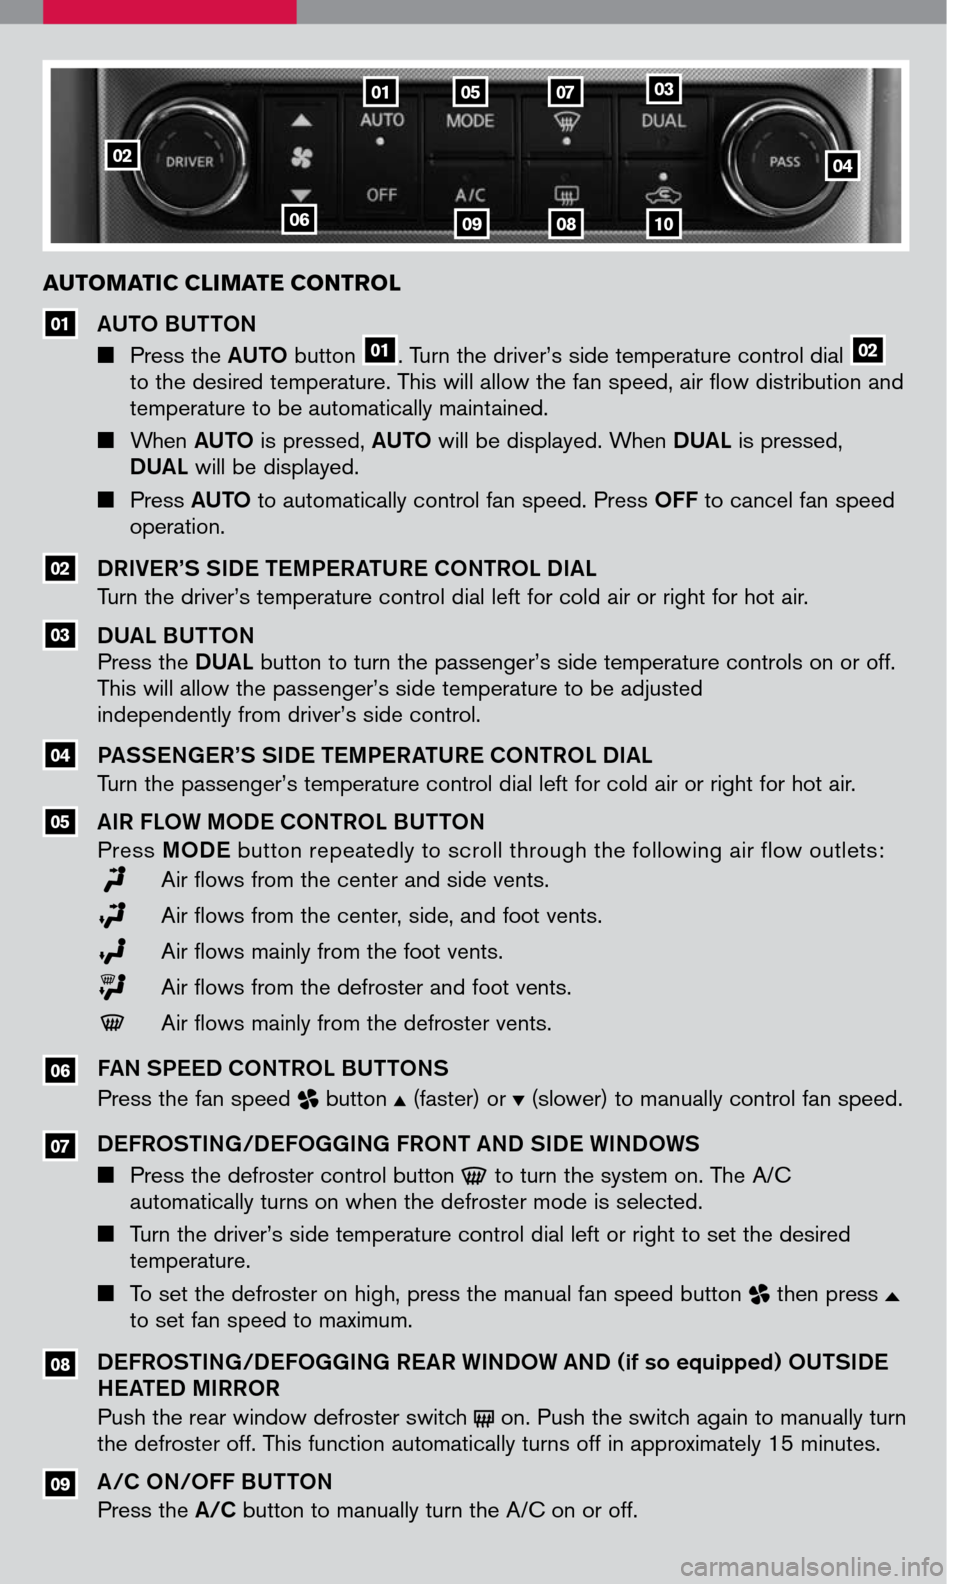
Press the AUTO button 01. Turn the driver’s side temperature control dial 02 to the desired temperature. This will allow the fan speed, air flow distribution and temperature to be automatically maintained.
When AUTO is pressed, AUTO will be displayed. When DUAL is pressed, DUAL will be displayed.
Press AUTO to automatically control fan speed. Press OFF to cancel fan speed operation.
DRIVER’S SIDE TEMPERATURE CONTROL DIAL
Turn the driver’s temperature control dial left for cold air or right for hot air.
DUAL BUTTON Press the DUAL button to turn the passenger’s side temperature controls on or off. This will allow the passenger’s side temperature to be adjusted independently from driver’s side control.
PASSENGER’S SIDE TEMPERATURE CONTROL DIAL
Turn the passenger’s temperature control dial left for cold air or right for hot air.
AIR FLOW MODE CONTROL BUTTON
Press MODE button repeatedly to scroll through the following air flow outlets:
Air flows from the center and side vents.
Air flows from the center, side, and foot vents.
Air flows mainly from the foot vents.
Air flows from the defroster and foot vents.
Air flows mainly from the defroster vents.
FAN SPEED CONTROL BUTTONS
Press the fan speed button (faster) or (slower) to manually control fan speed.
DEFROSTING/DEFOGGING FRONT AND SIDE WINDOWS
Press the defroster control button to turn the system on. The A/C automatically turns on when the defroster mode is selected.
Turn the driver’s side temperature control dial left or right to set the desired temperature.
To set the defroster on high, press the manual fan speed button then press to set fan speed to maximum.
DEFROSTING/DEFOGGING REAR WINDOW AND (if so equipped) OUTSIDE HEATED MIRROR
Push the rear window defroster switch on. Push the switch again to manually turn the defroster off. This function automatically turns off in approximately 15 minutes.
A/C ON/OFF BUTTON
Press the A/C button to manually turn the A/C on or off.
05
04
08
07
06
03
02
01
02
06
01050703
090810
04
09
Page 13 of 14

SUNROOF CONTROLS (if so equipped)
TILTING THE SUNROOF
To tilt the sunroof up, push the tilt switch to the UP 01 position. If the roof is open, it will automatically
close and then tilt up.
To tilt the sunroof down, push the tilt switch to the
DOWN 02 position.
SLIDING THE SUNROOF
To open the roof, slide the switch to the OPEN 03 position. If the roof is tilted up, it
will automatically tilt down and then open.
To close the roof, slide the switch to the CLOSE 04 position.
The position of the sliding roof lid can be chosen by the position of the sliding switch.
To fully open or close the roof, move the switch completely to the OPEN or
CLOSE position.
OUTSIDE MIRROR CONTROL SWITCH
POWER FOLDING MIRRORS (if so equipped)
Move the switch 01 to select the left or right mirror.
Adjust each mirror to the desired position using the
switch 02.
Push the switch 03 to fold both mirrors in or out.
REVERSE TILT-DOWN FEATURE (if so equipped)
The reverse tilt-down feature will turn the selected outside mirror surface downward to
provide better rear visibility close to the vehicle.
Turn the outside mirror control switch to the left or right position 01 when the
ignition switch is in the ON position.
Move the shift selector lever to R (Reverse). The selected mirror will turn downward.
The selected mirror surface will return to its original position when any of the following
have occurred:
The shift selector lever is moved to any position other than R (Reverse).
The outside mirror control switch is set to the neutral position.
The ignition switch is turned to the OFF position.
02
03
01
REAR SONAR SYSTEM OFF SWITCH (if so equipped)
When backing up, this system will beep to alert you to obstacles within
6 ft. (1.8 m) of the rear bumper. The system beeps faster as the vehicle
gets closer to the obstacle. A continuous tone sounds when an obstacle
is less than 10 inches (25 cm) away from the bumper. Turn the system
off by pushing the rear sonar system OFF switch. The system will
automatically reset the next time the ignition switch is turned on.
04
01
02
03