trailer NISSAN MAXIMA 2012 A35 / 7.G Owners Manual
[x] Cancel search | Manufacturer: NISSAN, Model Year: 2012, Model line: MAXIMA, Model: NISSAN MAXIMA 2012 A35 / 7.GPages: 450, PDF Size: 3.07 MB
Page 150 of 450
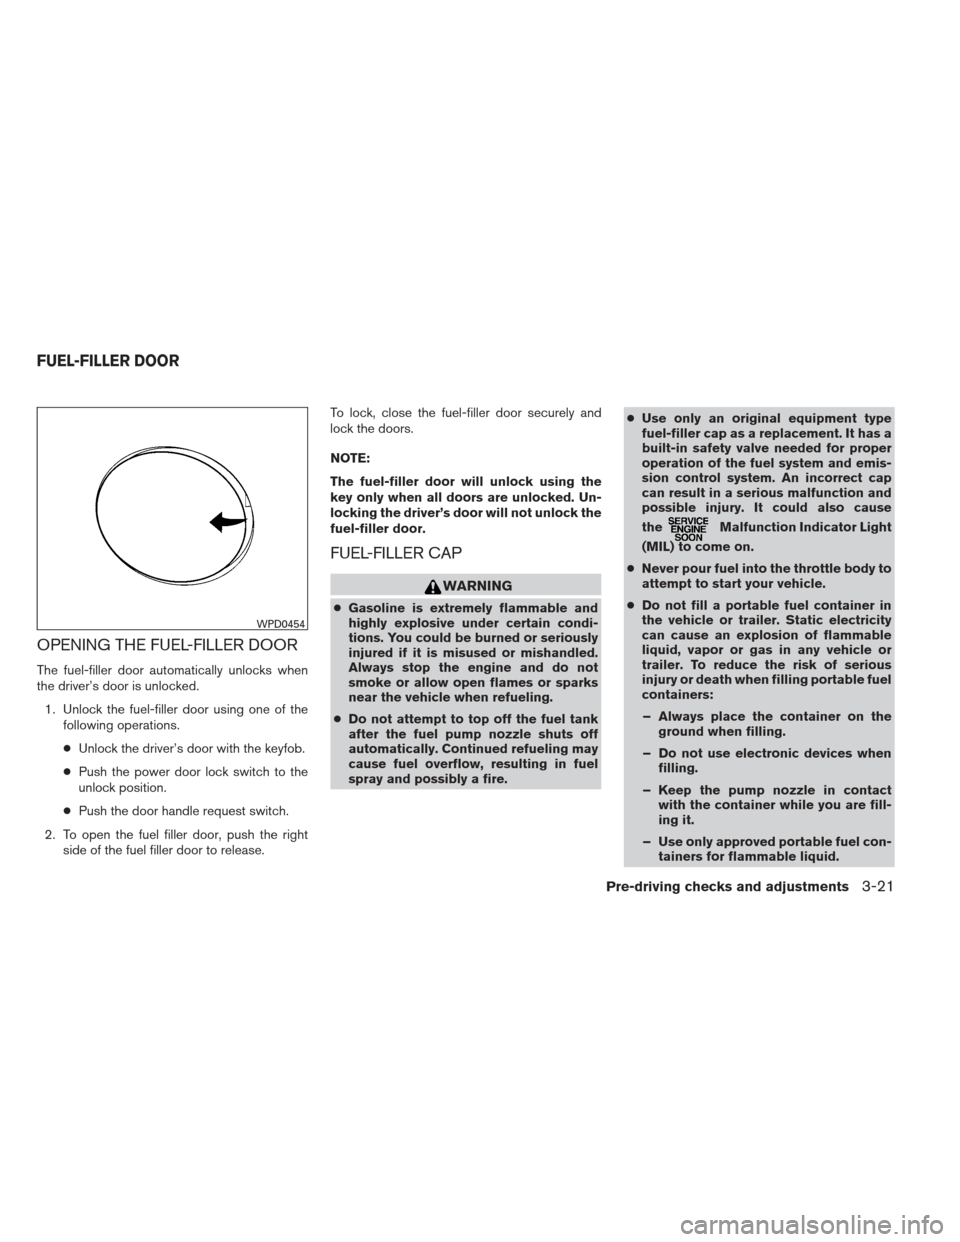
OPENING THE FUEL-FILLER DOOR
The fuel-filler door automatically unlocks when
the driver’s door is unlocked.1. Unlock the fuel-filler door using one of the following operations.
● Unlock the driver’s door with the keyfob.
● Push the power door lock switch to the
unlock position.
● Push the door handle request switch.
2. To open the fuel filler door, push the right side of the fuel filler door to release. To lock, close the fuel-filler door securely and
lock the doors.
NOTE:
The fuel-filler door will unlock using the
key only when all doors are unlocked. Un-
locking the driver’s door will not unlock the
fuel-filler door.
FUEL-FILLER CAP
WARNING
●
Gasoline is extremely flammable and
highly explosive under certain condi-
tions. You could be burned or seriously
injured if it is misused or mishandled.
Always stop the engine and do not
smoke or allow open flames or sparks
near the vehicle when refueling.
● Do not attempt to top off the fuel tank
after the fuel pump nozzle shuts off
automatically. Continued refueling may
cause fuel overflow, resulting in fuel
spray and possibly a fire. ●
Use only an original equipment type
fuel-filler cap as a replacement. It has a
built-in safety valve needed for proper
operation of the fuel system and emis-
sion control system. An incorrect cap
can result in a serious malfunction and
possible injury. It could also cause
the
Malfunction Indicator Light
(MIL) to come on.
● Never pour fuel into the throttle body to
attempt to start your vehicle.
● Do not fill a portable fuel container in
the vehicle or trailer. Static electricity
can cause an explosion of flammable
liquid, vapor or gas in any vehicle or
trailer. To reduce the risk of serious
injury or death when filling portable fuel
containers:
– Always place the container on the ground when filling.
– Do not use electronic devices when filling.
– Keep the pump nozzle in contact with the container while you are fill-
ing it.
– Use only approved portable fuel con- tainers for flammable liquid.
WPD0454
FUEL-FILLER DOOR
Pre-driving checks and adjustments3-21
Page 325 of 450
WARNING
●Do not leave children or adults who
would normally require the assistance
of others alone in your vehicle. Pets
should also not be left alone. They
could accidentally injure themselves or
others through inadvertent operation of
the vehicle. Also, on hot, sunny days,
temperatures in a closed vehicle could
quickly become high enough to cause
severe or possibly fatal injuries to
people or animals.
● Closely supervise children when they
are around cars to prevent them from
playing and becoming locked in the
trunk where they could be seriously in-
jured. Keep the car locked, with the rear
seatback and trunk lid securely latched
when not in use, and prevent children’s
access to car keys.
EXHAUST GAS (carbon monoxide)
WARNING
● Do not breathe exhaust gases; they
contain colorless and odorless carbon
monoxide. Carbon monoxide is danger-
ous. It can cause unconsciousness or
death. ●
If you suspect that exhaust fumes are
entering the vehicle, drive with all win-
dows fully open, and have the vehicle
inspected immediately.
● Do not run the engine in closed spaces
such as a garage.
● Do not park the vehicle with the engine
running for any extended length of time.
● Keep the rear vent windows, lift gates,
doors and trunk lids (if so equipped)
closed while driving, otherwise exhaust
gases could be drawn into the passen-
ger compartment. If you must drive with
one of these open, follow these
precautions:
1. Open all the windows.
2. Set the
air recirculation but-
ton to off and the fan control dial to
high to circulate the air.
● If electrical wiring or other cable con-
nections must pass to a trailer through
the seal on the trunk lid or the body,
follow the manufacturer’s recommen-
dation to prevent carbon monoxide en-
try into the vehicle. ●
The exhaust system and body should be
inspected by a qualified mechanic
whenever:
a. The vehicle is raised for service.
b. You suspect that exhaust fumes are entering into the passenger
compartment.
c. You notice a change in the sound of the exhaust system.
d. You have had an accident involving damage to the exhaust system, un-
derbody, or rear of the vehicle.
THREE-WAY CATALYST
The three-way catalyst is an emission control
device installed in the exhaust system. Exhaust
gases in the three-way catalyst are burned at
high temperatures to help reduce pollutants.
WARNING
●The exhaust gas and the exhaust sys-
tem are very hot. Keep people, animals
or flammable materials away from the
exhaust system components.
● Do not stop or park the vehicle over
flammable materials such as dry grass,
waste paper or rags. They may ignite
and cause a fire.
PRECAUTIONS WHEN STARTING
AND DRIVING
5-2Starting and driving
Page 340 of 450
Accelerator downshift
— in D (Drive) position and manual
shift mode
For passing or hill climbing, depress the accel-
erator pedal to the floor. This shifts the transmis-
sion down into lower range, depending on the
vehicle speed.
High fluid temperature protection
mode
This transmission has a high fluid temperature
protection mode. If the fluid temperature be-
comes too high (for example, when climbing
steep grades in high temperature with heavy
loads, such as when towing a trailer) , engine
power and, under some conditions, vehicle
speed will be decreased automatically to reduce
the chance of transmission damage. Vehicle
speed can be controlled with the accelerator
pedal, but the engine and vehicle speed may be
limited.
Fail-safe
If the vehicle is driven under extreme con-
ditions, such as excessive wheel spinning
and subsequent hard braking, the fail-safe
system may be activated. The MIL may
come on to indicate the fail-safe mode is
activated, see “Malfunction Indicator Light(MIL)” in the “Instrument and controls” sec-
tion. This will occur even if all electrical
circuits are functioning properly. In this
case, place the ignition switch in the OFF
position and wait for 10 seconds. Then
push the switch back to the ON position.
The vehicle should return to its normal op-
erating condition. If it does not return to its
normal operating condition, have a
NISSAN dealer check the transmission and
repair if necessary.
WARNING
When the high fluid temperature protec-
tion mode or fail-safe operation occurs,
vehicle speed may be gradually reduced.
The reduced speed may be lower than
other traffic, which could increase the
chance of a collision. Be especially care-
ful when driving. If necessary, pull to the
side of the road at a safe place and allow
the transmission to return to normal op-
eration, or have it repaired if necessary.
WARNING
●
Be sure the parking brake is fully re-
leased before driving. Failure to do so
can cause brake failure and lead to an
accident.
● Do not release the parking brake from
outside the vehicle.
● Do not use the shift selector in place of
the parking brake. When parking, be
sure the parking brake is fully engaged.
● Do not leave children unattended in a
vehicle. They could release the parking
brake and cause an accident.
PARKING BRAKE
Starting and driving5-17
Page 342 of 450
To set cruising speed,accelerate the vehicle to
the desired speed, push the COAST/SET switch
and release it. Take your foot off the accelerator
pedal. Your vehicle maintains the set speed.
● To pass another vehicle, depress the ac-
celerator pedal. When you release the
pedal, the vehicle returns to the previously
set speed.
● The vehicle may not maintain the set speed
when going up or down steep hills. If this
happens, drive without the cruise control.
To cancel the preset speed, use one of the
following three methods.
● Push the CANCEL button.
● Tap the brake pedal.
● Push the ON·OFF switch off. The CRUISE
indicator light in the instrument panel goes
out.
The cruise control is automatically canceled if: ● you depress the brake pedal while pushing
the ACCEL/RES or SET/COAST switch.
The preset speed is deleted from memory.
● the vehicle slows down more than 8 MPH
(13 km/h) below the set speed.
● you move the shift selector to N (Neutral) . To reset at a faster cruising speed,
use one
of the following three methods.
● Depress the accelerator pedal. When the
vehicle attains the desired speed, push and
release the COAST/SET switch.
● Push and hold the ACCEL/RES switch.
When the vehicle attains the speed you de-
sire, release the switch.
● Push and release the ACCEL/RES switch.
Each time you do this, the set speed in-
creases by about 1 MPH (1.6 km/h) .
To reset at a slower cruising speed, use one
of the following three methods.
● Lightly tap the brake pedal. When the ve-
hicle attains the desired speed, push the
COAST/SET switch and release it.
● Push and hold the COAST/SET switch. Re-
lease the switch when the vehicle slows to
the desired speed.
● Push and release the COAST/SET switch.
Each time you do this, the set speed de-
creases by about 1 MPH (1.6 km/h) .
To resume the preset speed, push and re-
lease the ACCEL/RES switch. The vehicle re-
turns to the last set cruising speed when the
vehicle speed is over 25 MPH (40 km/h) .CAUTION
During the first 1,200 miles (2,000 km) ,
follow these recommendations to obtain
maximum engine performance and en-
sure the future reliability and economy of
your new vehicle. Failure to follow these
recommendations may result in short-
ened engine life and reduced engine
performance.
● Avoid driving for long periods at constant
speed, either fast or slow, and do not run the
engine over 4,000 rpm.
● Do not accelerate at full throttle in any gear.
● Avoid quick starts.
● Avoid hard braking as much as possible.
● Do not tow a trailer for the first 500 miles
(800 km) . Your engine, axle or other parts
could be damaged.
BREAK-IN SCHEDULE
Starting and driving5-19
Page 415 of 450
Care of wheels
●Wash the wheels when washing the vehicle
to maintain their appearance.
● Clean the inner side of the wheels when the
wheel is changed or the underside of the
vehicle is washed.
● Do not use abrasive cleaners when washing
the wheels.
● Inspect wheel rims regularly for dents or
corrosion. Such damage may cause loss of
pressure or poor seal at the tire bead.
● NISSAN recommends waxing the road
wheels to protect against road salt in areas
where it is used during winter.
Spare tire (TEMPORARY USE ONLY
spare tire)
Observe the following precautions if the TEM-
PORARY USE ONLY spare tire must be used.
Otherwise, your vehicle could be damaged or
involved in an accident:
WARNING
● The spare tire should be used for emer-
gency use only. It should be replaced
with the standard tire at the first oppor-
tunity to avoid possible tire or differen-
tial damage.
● Drive carefully while the TEMPORARY
USE ONLY spare tire is installed. Avoid
sharp turns and abrupt braking while
driving.
● Periodically check spare tire inflation
pressure. Always keep the pressure of
the TEMPORARY USE ONLY spare tire
at 60 psi (420 kPa, 4.2 bar) .
● With the TEMPORARY USE ONLY spare
tire installed do not drive the vehicle at
speeds faster than 50 MPH (80 km/h) .
● When driving on roads covered with
snow or ice, the TEMPORARY USE
ONLY spare tire should be used on the
rear wheels and the original tire used
on the front wheels (drive wheels) . Use
tire chains only on the front (original)
tires. ●
Tire tread of the TEMPORARY USE
ONLY spare tire will wear at a faster rate
than the standard tire. Replace the
spare tire as soon as the tread wear
indicators appear.
● Do not use the spare tire on other
vehicles.
● Do not use more than one spare tire at
the same time.
● Do not tow a trailer when the TEMPO-
RARY USE ONLY spare tire is installed.
CAUTION
● Do not use tire chains on a TEMPO-
RARY USE ONLY spare tire. Tire chains
will not fit properly and may cause dam-
age to the vehicle.
● Because the TEMPORARY USE ONLY
spare tire is smaller than the original
tire, ground clearance is reduced. To
avoid damage to the vehicle, do not
drive over obstacles. Also, do not drive
the vehicle through an automatic car
wash since it may get caught.
8-42Maintenance and do-it-yourself
Page 416 of 450
9 Technical and consumer information
Capacities and recommended fuel/lubricants.........9-2
Fuel recommendation ...........................9-3
Engine oil and oil filter recommendations ..........9-5
Air conditioner system refrigerant and oil
recommendations ..............................9-6
Specifications .....................................9-7
Engine ........................................9-7
Wheels and tires ...............................9-8
Dimensions and weights ........................9-8
When traveling or registering your vehicle in
another country ...................................9-9
Vehicle identification ...............................9-9
Vehicle identification number (VIN) plate ..........9-9
Vehicle identification number
(chassis number) ...............................9-9
Engine serial number ........................... 9-10
F.M.V.S.S./C.M.V.S.S. certification label ..........9-10
Emission control information label ...............9-10
Tire and loading information label ................9-11Air conditioner specification label
................9-11
Installing front license plate ........................9-11
Vehicle loading information ........................9-12
Terms ........................................ 9-12
Vehicle load capacity .......................... 9-12
Loading tips . . . ............................... 9-13
Measurement of weights .......................9-14
Towing a trailer ................................... 9-15
Maximum load limits ........................... 9-15
Towing load/specification .......................9-18
Towing safety ................................. 9-18
Flat towing .................................... 9-22
Uniform tire quality grading ........................9-23
Emission control system warranty ..................9-24
Reporting safety defects .......................... 9-24
Readiness for inspection/maintenance (I/M) test .....9-25
Event Data Recorders (EDR) .......................9-25
Owner’s Manual/Service Manual order information . . . 9-26
Page 421 of 450
Your engine was filled with a high-quality engine
oil when it was built. You do not have to change
the oil before the first recommended change
interval. Oil and filter change intervals depend
upon how you use your vehicle.
Operation under the following conditions may
require more frequent oil and filter changes:● repeated short distance driving at cold out-
side temperatures
● driving in dusty conditions
● extensive idling
● towing a trailer
● stop and go commuting
Refer to the “NISSAN Service and Maintenance
Guide” for the maintenance schedule.
AIR CONDITIONER SYSTEM
REFRIGERANT AND OIL
RECOMMENDATIONS
The air conditioner system in your NISSAN
vehicle must be charged with the refriger-
ant HFC-134a (R-134a) and NISSAN A/C
system oil Type S or the exact equivalents.
CAUTION
The use of any other refrigerant or oil will
cause severe damage to the air condition-
ing system and will require the replace-
ment of all air conditioner system
components.
The refrigerant HFC-134a (R-134a) in your
NISSAN vehicle does not harm the earth’s ozone
layer. Although this refrigerant does not affect the
earth’s atmosphere, certain government regula-
tions require the recovery and recycling of any
refrigerant during automotive air conditioner sys-
tem service. A NISSAN dealer has the trained
technicians and equipment needed to recover
and recycle your air conditioner system refriger-
ant.
Contact a NISSAN dealer when servicing your air
conditioner system.
9-6Technical and consumer information
Page 427 of 450
WARNING
● It is extremely dangerous to ride
in a cargo area inside a vehicle. In
a collision, people riding in these
areas are more likely to be seri-
ously injured or killed.
●
Do not allow people to ride in any
area of your vehicle that is not
equipped with seats and seat belts.
● Be sure everyone in your vehicle
is in a seat and using a seat belt
properly.
TERMS
It is important to familiarize yourself with
the following terms before loading your
vehicle:
● Curb Weight (actual weight of your
vehicle) - vehicle weight including:
standard and optional equipment, flu-
ids, emergency tools, and spare tire
assembly. This weight does notin-
clude passengers and cargo.
● GVW (Gross Vehicle Weight) - curb
weight plus the combined weight of
passengers and cargo. ●
GVWR (Gross Vehicle Weight Rat-
ing) - maximum total combined
weight of the unloaded vehicle, pas-
sengers, luggage, hitch, trailer
tongue load and any other optional
equipment. This information is lo-
cated on the F.M.V.S.S./C.M.V.S.S.
certification label.
● GAWR (Gross Axle Weight Rating) -
maximum weight (load) limit specified
for the front or rear axle. This informa-
tion is located on the
F.M.V.S.S./C.M.V.S.S. certification
label.
● GCWR (Gross Combined Weight
rating) - The maximum total weight
rating of the vehicle, passengers,
cargo, and trailer.
● Vehicle Capacity Weight, Load limit,
Total load capacity - maximum total
weight limit specified of the load
(passengers and cargo) for the ve-
hicle. This is the maximum combined
weight of occupants and cargo that
can be loaded into the vehicle. If the vehicle is used to tow a trailer, the
trailer tongue weight must be in-
cluded as part of the cargo load. This
information is located on the Tire and
Loading Information label.
● Cargo capacity - permissible weight
of cargo, the subtracted weight of
occupants from the load limit.
VEHICLE LOAD CAPACITY
Do not exceed the load limit of your ve-
hicle shown as “The combined weight of
occupants and cargo” on the Tire and
Loading Information label. Do not exceed
the number of occupants shown as
“Seating Capacity” on the Tire and Load-
ing Information label.
To get “the combined weight of occu-
pants and cargo”, add the weight of all
occupants, then add the total luggage
weight. Examples are shown in the follow-
ing illustration.
VEHICLE LOADING INFORMATION
9-12Technical and consumer information
Page 428 of 450
Steps for determining correct load
limit
1. Locate the statement “The combinedweight of occupants and cargo
should never exceed XXX lbs or XXX
kg” on your vehicle’s placard.
2. Determine the combined weight of the driver and passengers that will be
riding in your vehicle.
3. Subtract the combined weight of the driver and passengers from XXX lbs
or XXX kg.
4. The resulting figure equals the avail- able amount of cargo and luggage
load capacity. For example, if the
XXX amount equals 1,400 lbs. and
there will be five 150 lb. passengers
in your vehicle, the amount of avail-
able cargo and luggage load capac-
ity is 650 lbs. (1,400-750 (5 X 150)
= 650 lbs) or (640-340 (5 X 70) =
300 kg.)
5. Determine the combined weight of luggage and cargo being loaded on
the vehicle. That weight may not safely exceed the available cargo and
luggage load capacity calculated in
Step 4.
6. If your vehicle will be towing a trailer, load from your trailer will be trans-
ferred to your vehicle. Consult this
manual to determine how this re-
duces the available cargo and lug-
gage load capacity of your vehicle.
Before driving a loaded vehicle, confirm
that you do not exceed the Gross Vehicle
Weight Rating (GVWR) or the Gross Axle
Weight Rating (GAWR) for your vehicle.
See “Measurement of weights” later in
this section.
Also check tires for proper inflation pres-
sures. See the Tire and Loading Informa-
tion label.
LOADING TIPS
● The GVW must not exceed GVWR
or GAWR as specified on the
F.M.V.S.S./C.M.V.S.S. certification
label. ●
Do not load the front and rear axle to
the GAWR. Doing so will exceed the
GVWR.
WARNING
● Properly secure all cargo with
ropes or straps to help prevent it
from sliding or shifting. Do not
place cargo higher than the seat-
backs. In a sudden stop or colli-
sion, unsecured cargo could
cause personal injury.
● Do not load your vehicle any
heavier than the GVWR or the
maximum front and rear GAWRs.
If you do, parts of your vehicle
can break, tire damage could oc-
cur, or it can change the way your
vehicle handles. This could result
in loss of control and cause per-
sonal injury.
Technical and consumer information9-13
Page 430 of 450
WARNING
Overloading or improper loading of a
trailer and its cargo can adversely affect
vehicle handling, braking and perfor-
mance and may lead to accidents.
CAUTION
●Do not tow a trailer or haul a heavy load
for the first 500 miles (800 km) . Your
engine, axle or other parts could be
damaged.
● For the first 500 miles (800 km) that you
tow a trailer, do not drive over 50 mph
(80 km/h) and do not make starts at full
throttle. This helps the engine and other
parts of your vehicle wear in at the
heavier loads.
Your new vehicle was designed to be used pri-
marily to carry passengers and cargo. Remember
that towing a trailer places additional loads on
your vehicle’s engine, drive train, steering, brak-
ing and other systems.
A NISSAN Towing Guide (U.S. only) is available
on the website at www.nissanusa.com. This
guide includes information on trailer towing ca-
pability and the special equipment required for
proper towing.
MAXIMUM LOAD LIMITS
Maximum trailer loads
Never allow the total trailer load to exceed the
value specified in the “Towing
Load/Specification” chart found later in this sec-
tion. The total trailer load equals trailer weight
plus its cargo weight. ● When towing a trailer load of 1,000 lbs.
(454 kg) or more, trailers with a brake
system must be used.
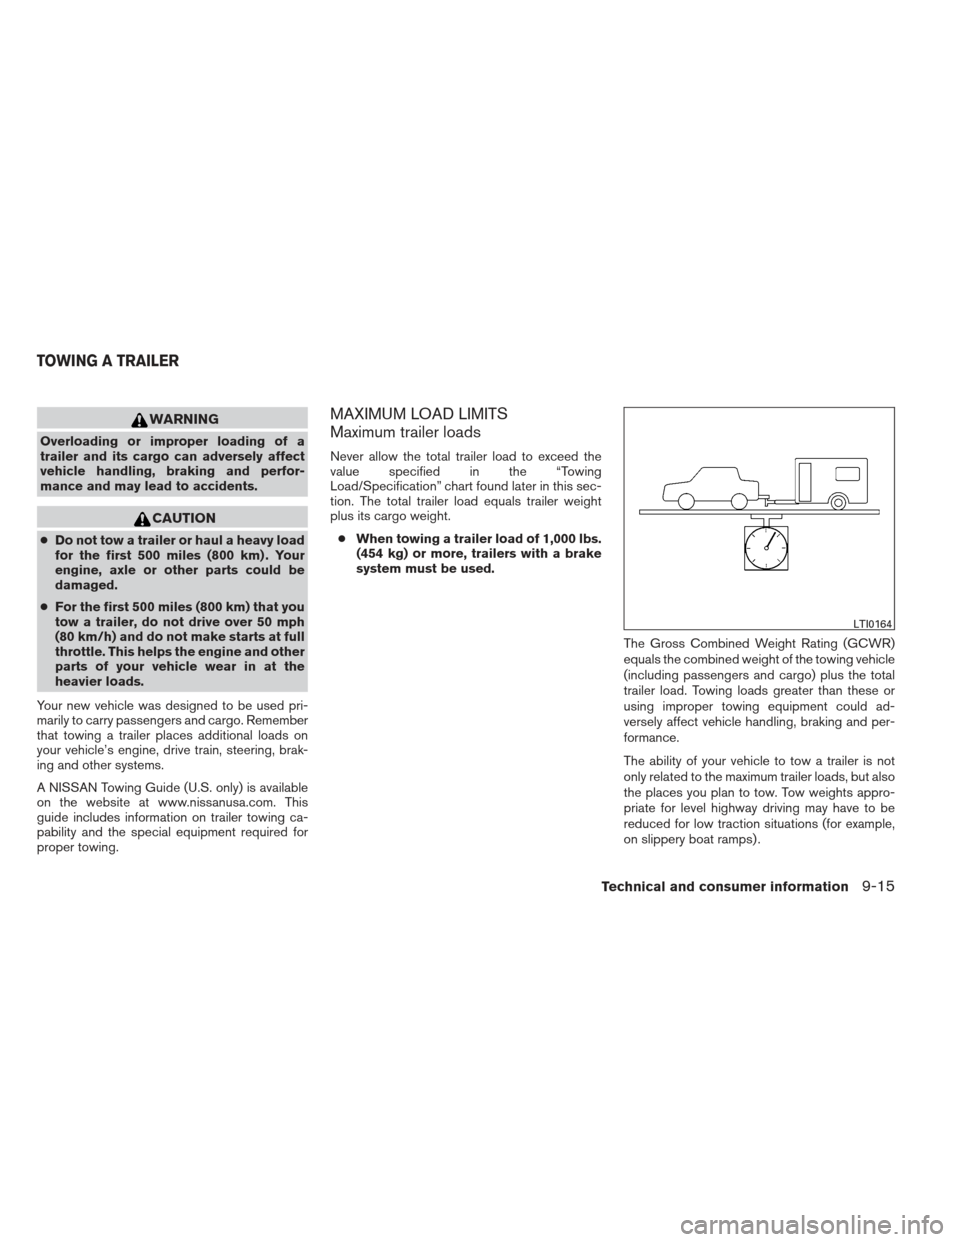
The Gross Combined Weight Rating (GCWR)
equals the combined weight of the towing vehicle
(including passengers and cargo) plus the total
trailer load. Towing loads greater than these or
using improper towing equipment could ad-
versely affect vehicle handling, braking and per-
formance.
The ability of your vehicle to tow a trailer is not
only related to the maximum trailer loads, but also
the places you plan to tow. Tow weights appro-
priate for level highway driving may have to be
reduced for low traction situations (for example,
on slippery boat ramps) .
LTI0164
TOWING A TRAILER
Technical and consumer information9-15