warning NISSAN MAXIMA 2021 Owner´s Manual
[x] Cancel search | Manufacturer: NISSAN, Model Year: 2021, Model line: MAXIMA, Model: NISSAN MAXIMA 2021Pages: 476, PDF Size: 3.32 MB
Page 186 of 476
To open the trunk from the inside, pull the
illuminated release handle until the lock re-
leases and push up on the trunk lid. The
release handle is made of a material that
glows in the dark af ter a brief exposure to
ambient light.
The handle is located inside the trunk com-
partment on the interior of the trunk lid.
INTERIOR TRUNK ACCESS
The trunk can be accessed from the pas-
senger side of the rear seat.
1. Move the front passenger seat to themost forward position.
2. Open the access cover on the rear par- cel shelf.
3. Push down on the button on the rear parcel shelf.
4. Fold down the passenger’s side seatback.
For additional information, see “Seats”
(P. 1-2).
WARNING
• Never allow anyone to ride in the
cargo area or on the rear seat when it
is in the fold-down position. Use of
these areas by passengers without
proper restraints could result in seri-
ous injury or death in an accident or
sudden stop.
• Properly secure all cargo with ropes
or straps to help prevent it from slid-
ing or shif ting. Do not place cargo
higher than the seatbacks. In a sud-
den stop or collision, unsecured
cargo could cause personal injury.
• When returning the seatbacks to the
upright position, be certain they are
completely secured in the latched
position. If they are not completely
secured, passengers may be injured
in an accident or sudden stop.
• Closely supervise children when they
are around cars to prevent them
from playing and becoming locked in
the trunk where they could be seri-
ously injured. Keep the car locked,
with the rear seatback and trunk lid
securely latched when not in use, and
prevent children's access to car keys.
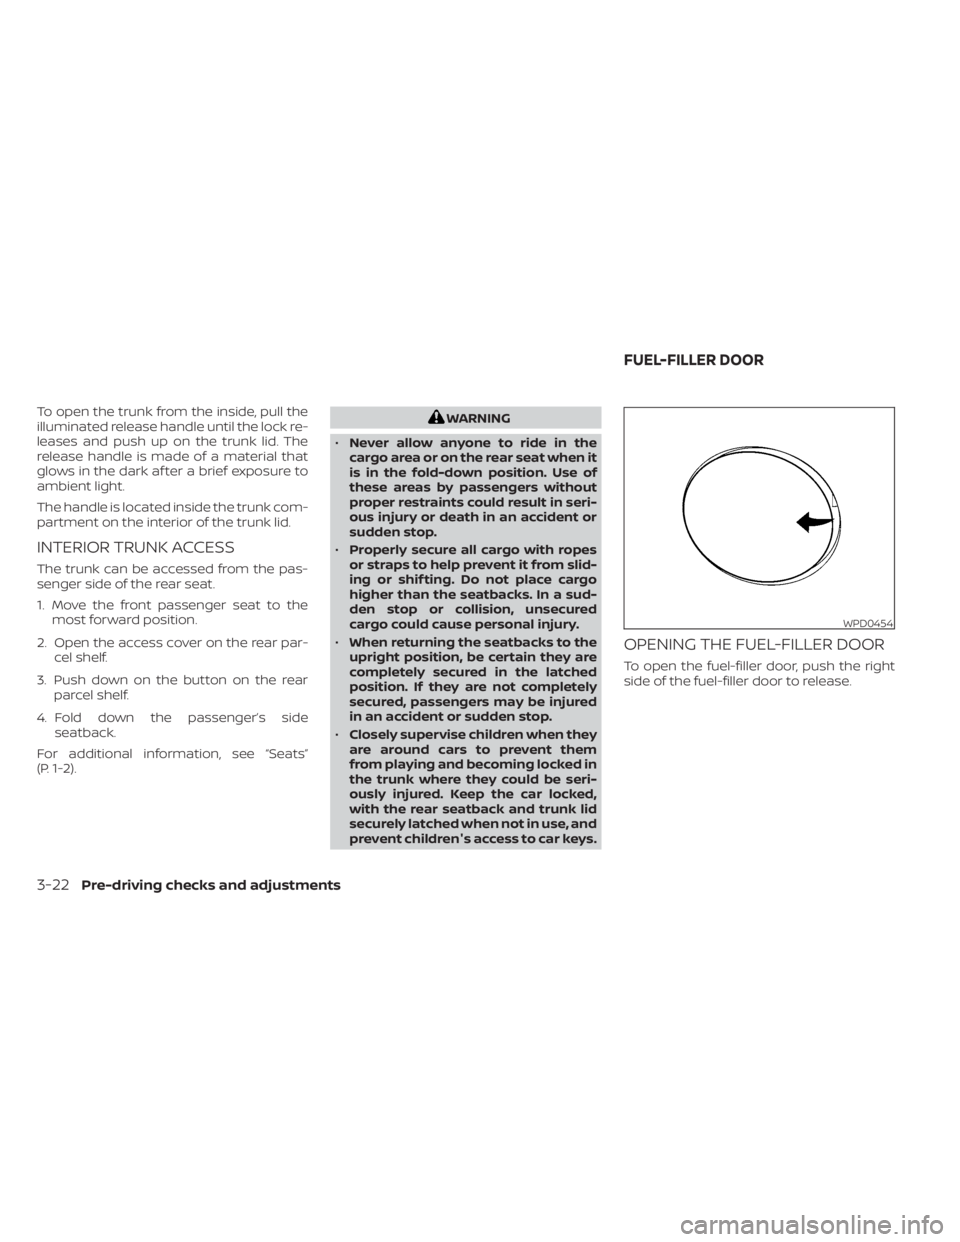
OPENING THE FUEL-FILLER DOOR
To open the fuel-filler door, push the right
side of the fuel-filler door to release.
WPD0454
FUEL-FILLER DOOR
3-22Pre-driving checks and adjustments
Page 187 of 476

FUEL-FILLER CAP
WARNING
• Gasoline is extremely flammable and
highly explosive under certain condi-
tions. You could be burned or seri-
ously injured if it is misused or mis-
handled. Always stop the engine and
do not smoke or allow open flames or
sparks near the vehicle when
refueling.
• Do not attempt to top off the fuel
tank af ter the fuel pump nozzle
shuts off automatically. Continued
refueling may cause fuel overflow,
resulting in fuel spray and possibly a
fire.
• Use only an original equipment type
fuel-filler cap as a replacement. It has
a built-in safety valve needed for
proper operation of the fuel system
and emission control system. An in-
correct cap can result in a serious
malfunction and possible injury. It
could also cause the
Malfunc-
tion Indicator Light (MIL) to come on.
• Never pour fuel into the throttle body
to attempt to start your vehicle. •
Do not fill a portable fuel container in
the vehicle or trailer. Static electricity
can cause an explosion of flammable
liquid, vapor or gas in any vehicle or
trailer. To reduce the risk of serious
injury or death when filling portable
fuel containers:
– Always place the container on the
ground when filling.
– Do not use electronic devices
when filling.
– Keep the pump nozzle in contact
with the container while you are
filling it.
– Use only approved portable fuel
containers for flammable liquid.
CAUTION
• Do not use a fuel containing more
than 15% ethanol in your vehicle. For
additional information, see “Fuel rec-
ommendation” (P. 10-3). •
The Loose Fuel Cap warning will ap-
pear if the fuel-filler cap is not prop-
erly tightened. It may take a few driv-
ing trips for the message to be
displayed. Failure to tighten the fuel-
filler cap properly af ter the Loose
Fuel Cap warning appears may cause
the
Malfunction Indicator Light
(MIL) to illuminate.
• Failure to tighten the fuel-filler cap
properly may cause the
Mal-
function Indicator Light (MIL) to illu-
minate. If the
light illuminates
because the fuel-filler cap is loose or
missing, tighten or install the cap and
continue to drive the vehicle. The
light should turn off af ter a few
driving trips. If thelight does not
turn off af ter a few driving trips, have
the vehicle inspected. It is recom-
mended that you visit a NISSAN
dealer for this service.
• For additional information, see “Mal-
function Indicator Light (MIL)”
(P. 2-13).
• If fuel is spilled on the vehicle body,
flush it away with water to avoid
paint damage.
Pre-driving checks and adjustments3-23
Page 188 of 476

To remove the fuel-filler cap:
1. Turn the fuel-filler cap counterclockwiseto remove.
2. Put the fuel-filler cap on the cap holder
O1while refueling.
To install the fuel-filler cap:
1. Insert the fuel-filler cap straight into the fuel-filler tube.
2. Turn the fuel-filler cap clockwise until a single click is heard.
Loose Fuel Cap warning
The Loose Fuel Cap warning appears in the
vehicle information display when the fuel-
filler cap is not tightened correctly af ter the
vehicle has been refueled. It may take a few
driving trips for the message to be dis-
played. To turn off the warning, perform the
following:
1. Remove and install the fuel-filler cap assoon as possible. For additional informa-
tion, see “Fuel-filler cap” (P. 3-23).
2. Tighten the fuel-filler cap until it a single click is heard.
WARNING
• Do not adjust the steering wheel
while driving. You could lose control
of your vehicle and cause an
accident.
• Do not adjust the steering wheel any
closer to you than is necessary for
proper steering operation and com-
fort. The driver's air bag inflates with
great force. If you are unrestrained,
leaning forward, sitting sideways or
out of position in any way, you are at
greater risk of injury or death in a
crash. You may also receive serious
or fatal injuries from the air bag if you
are up against it when it inflates. Al-
ways sit back against the seatback
and as far away as practical from the
steering wheel. Always use the seat
belts.
LPD0482LPD2985
STEERING WHEEL
3-24Pre-driving checks and adjustments
Page 193 of 476

WARNING
• Objects viewed in the outside mirror
on the passenger side are closer than
they appear. Be careful when moving
to the right. Using only this mirror
could cause an accident. Use the in-
side mirror or glance over your
shoulder to properly judge distances
to other objects.
• Do not adjust the mirrors while driv-
ing. You could lose control of your ve-
hicle and cause an accident.
Foldable outside mirrors
Pull the outside mirror toward the door to
fold it.
Automatic anti-glare outside
mirror (Driver's side only) (if so
equipped)
The outside mirror will automatically dim
during nighttime conditions to reduce the
glare from the headlights of trailing ve-
hicles. The automatic anti-glare feature
operates only when the ignition switch is
placed in the ON position. The automatic anti-glare feature will be on
when starting the vehicle. The indicator
light on the automatic anti-glare rearview
mirror will illuminate when the automatic
anti-glare feature is operating.
To turn off the anti-glare feature, press the
O button on the inside rearview mirror. The
indicator light will turn off.
To turn on the anti-glare feature again,
press the I button on the inside rearview
mirror. The indicator light will turn on.
For additional information, see “Automatic
anti-glare rearview mirror” (P. 3-27).
Heated mirrors
The electric control type outside mirrors
can be heated to defrost, defog, or de-ice
for improved visibility. Push the rear win-
dow defroster switch to activate the heat-
ing function. Push the switch again to de-
activate, or the heating function will
automatically turn off af ter approximately
15 minutes.
LPD2112
Pre-driving checks and adjustments3-29
Page 199 of 476
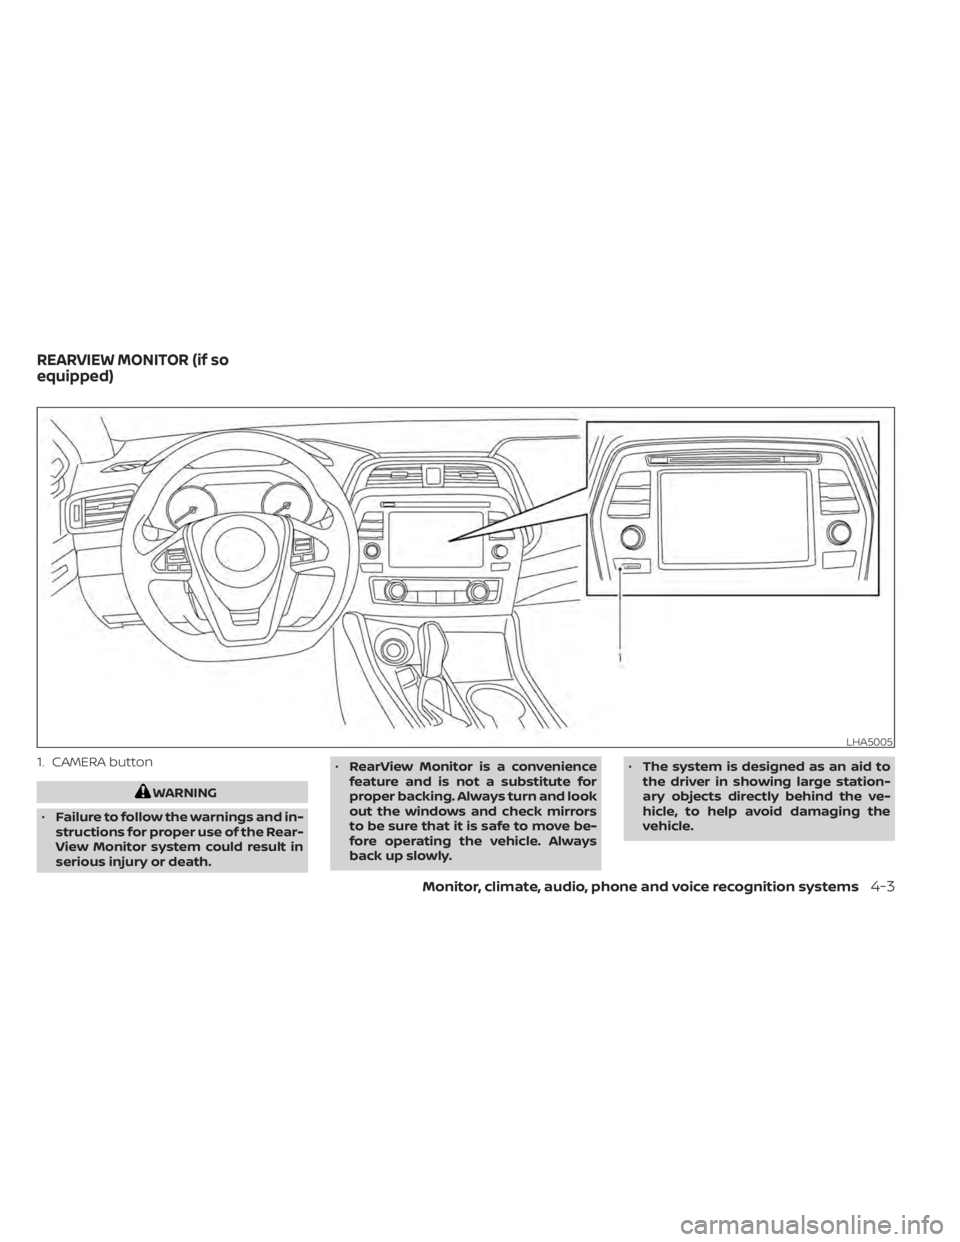
1. CAMERA button
WARNING
• Failure to follow the warnings and in-
structions for proper use of the Rear-
View Monitor system could result in
serious injury or death. •
RearView Monitor is a convenience
feature and is not a substitute for
proper backing. Always turn and look
out the windows and check mirrors
to be sure that it is safe to move be-
fore operating the vehicle. Always
back up slowly. •
The system is designed as an aid to
the driver in showing large station-
ary objects directly behind the ve-
hicle, to help avoid damaging the
vehicle.
LHA5005
REARVIEW MONITOR (if so
equipped)
Monitor, climate, audio, phone and voice recognition systems4-3
Page 202 of 476
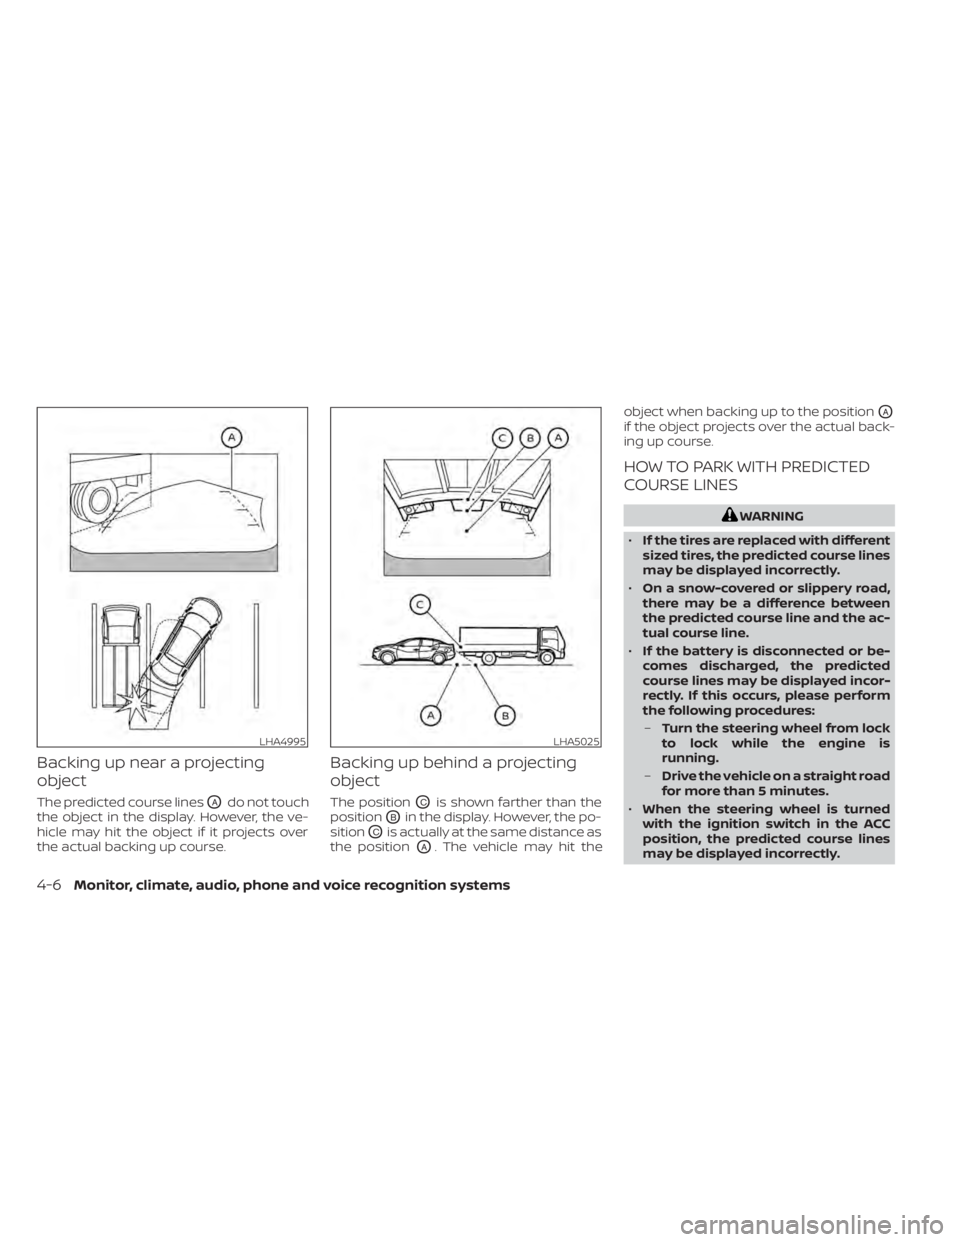
Backing up near a projecting
object
The predicted course linesOAdo not touch
the object in the display. However, the ve-
hicle may hit the object if it projects over
the actual backing up course.
Backing up behind a projecting
object
The positionOCis shown farther than the
position
OBin the display. However, the po-
sition
OCis actually at the same distance as
the position
OA. The vehicle may hit the object when backing up to the position
OA
if the object projects over the actual back-
ing up course.
HOW TO PARK WITH PREDICTED
COURSE LINES
WARNING
• If the tires are replaced with different
sized tires, the predicted course lines
may be displayed incorrectly.
• On a snow-covered or slippery road,
there may be a difference between
the predicted course line and the ac-
tual course line.
• If the battery is disconnected or be-
comes discharged, the predicted
course lines may be displayed incor-
rectly. If this occurs, please perform
the following procedures:
– Turn the steering wheel from lock
to lock while the engine is
running.
– Drive the vehicle on a straight road
for more than 5 minutes.
• When the steering wheel is turned
with the ignition switch in the ACC
position, the predicted course lines
may be displayed incorrectly.
LHA4995LHA5025
4-6Monitor, climate, audio, phone and voice recognition systems
Page 204 of 476
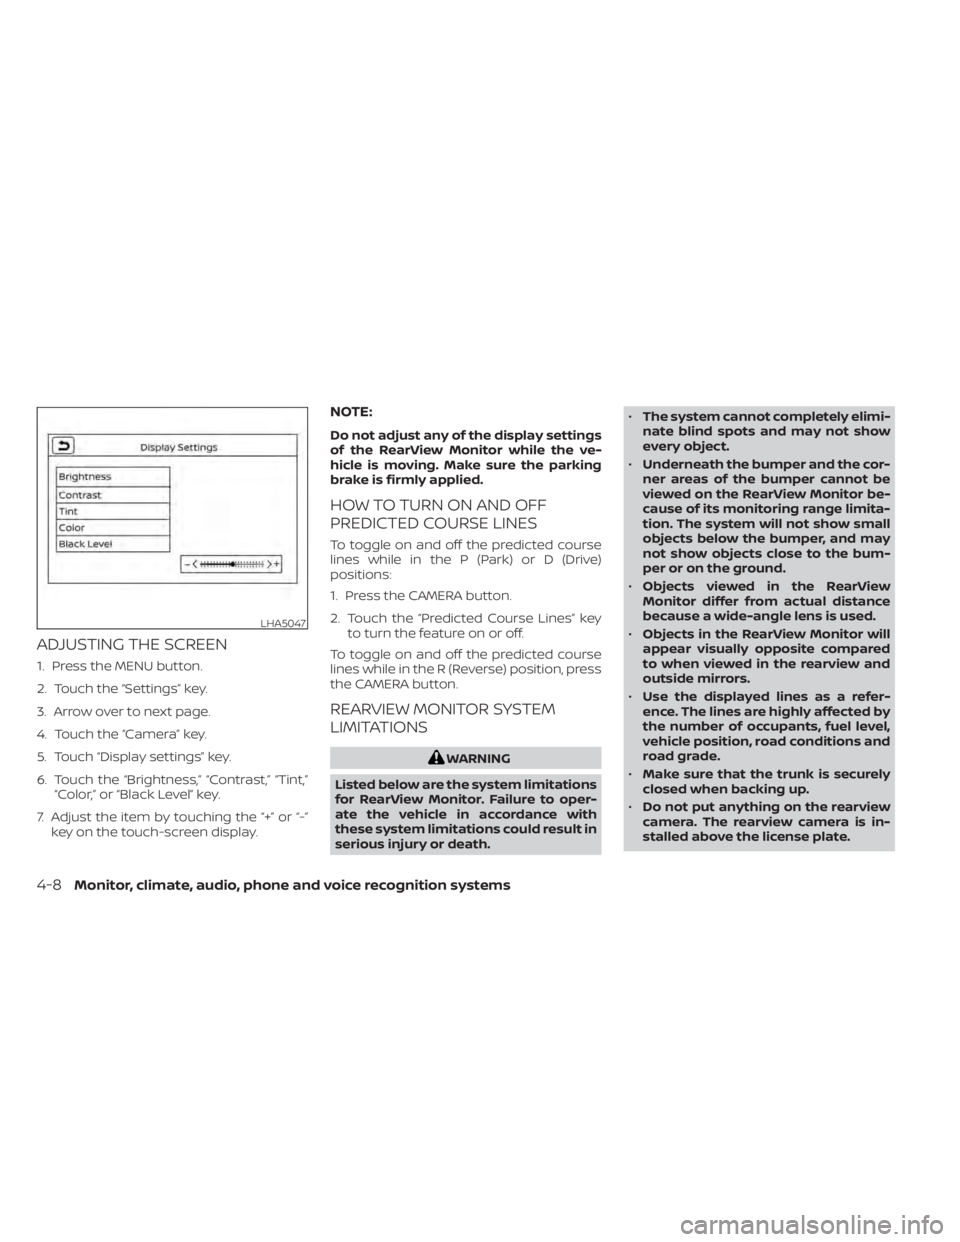
ADJUSTING THE SCREEN
1. Press the MENU button.
2. Touch the “Settings” key.
3. Arrow over to next page.
4. Touch the “Camera” key.
5. Touch “Display settings” key.
6. Touch the “Brightness,” “Contrast,” “Tint,”“Color,” or “Black Level” key.
7. Adjust the item by touching the “+” or “-” key on the touch-screen display.
NOTE:
Do not adjust any of the display settings
of the RearView Monitor while the ve-
hicle is moving. Make sure the parking
brake is firmly applied.
HOW TO TURN ON AND OFF
PREDICTED COURSE LINES
To toggle on and off the predicted course
lines while in the P (Park) or D (Drive)
positions:
1. Press the CAMERA button.
2. Touch the “Predicted Course Lines” key to turn the feature on or off.
To toggle on and off the predicted course
lines while in the R (Reverse) position, press
the CAMERA button.
REARVIEW MONITOR SYSTEM
LIMITATIONS
WARNING
Listed below are the system limitations
for RearView Monitor. Failure to oper-
ate the vehicle in accordance with
these system limitations could result in
serious injury or death. •
The system cannot completely elimi-
nate blind spots and may not show
every object.
• Underneath the bumper and the cor-
ner areas of the bumper cannot be
viewed on the RearView Monitor be-
cause of its monitoring range limita-
tion. The system will not show small
objects below the bumper, and may
not show objects close to the bum-
per or on the ground.
• Objects viewed in the RearView
Monitor differ from actual distance
because a wide-angle lens is used.
• Objects in the RearView Monitor will
appear visually opposite compared
to when viewed in the rearview and
outside mirrors.
• Use the displayed lines as a refer-
ence. The lines are highly affected by
the number of occupants, fuel level,
vehicle position, road conditions and
road grade.
• Make sure that the trunk is securely
closed when backing up.
• Do not put anything on the rearview
camera. The rearview camera is in-
stalled above the license plate.
LHA5047
4-8Monitor, climate, audio, phone and voice recognition systems
Page 207 of 476
WARNING
• Failure to follow the warnings and in-
structions for the proper use of the
Intelligent Around View Monitor sys-
tem could result in serious injury or
death.
• The Intelligent Around View Monitor
is a convenience feature and is not a
substitute for proper vehicle opera-
tion because it has areas where ob-
jects cannot be viewed. The four cor-
ners of the vehicle in particular, are
areas where objects do not always
appear in the bird’s-eye, front, or rear
views. Always check your surround-
ings to be sure that it is safe to move
before operating the vehicle. Always
operate the vehicle slowly.
• The driver is always responsible for
safety during parking and other
maneuvers.
CAUTION
Do not scratch the camera lens when
cleaning dirt or snow from the front of
the camera. The Intelligent Around View Monitor sys-
tem is designed as an aid to the driver in
situations such as slot parking or parallel
parking.
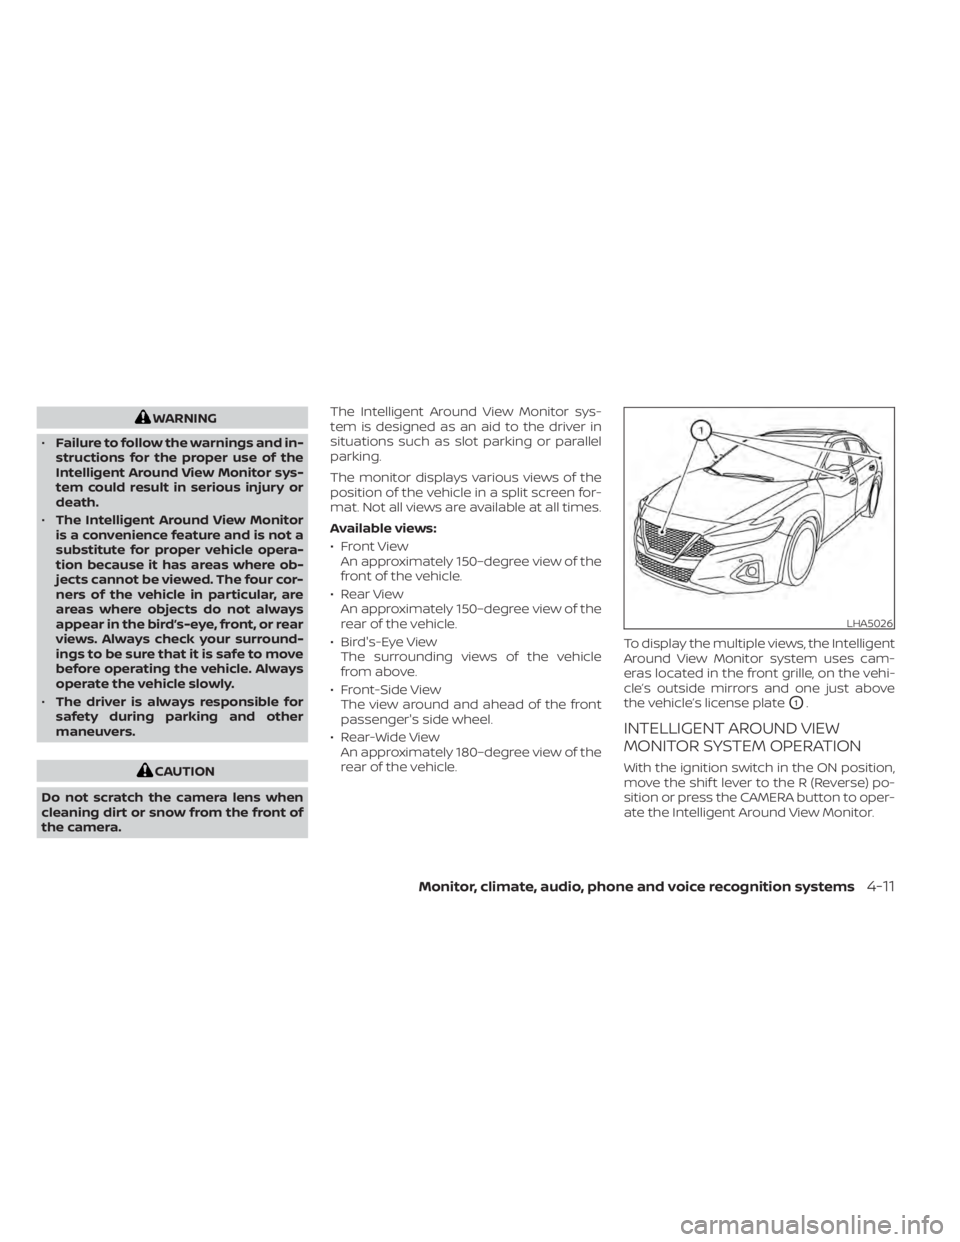
The monitor displays various views of the
position of the vehicle in a split screen for-
mat. Not all views are available at all times.
Available views:
• Front View
An approximately 150–degree view of the
front of the vehicle.
• Rear View An approximately 150–degree view of the
rear of the vehicle.
• Bird's-Eye View The surrounding views of the vehicle
from above.
• Front-Side View The view around and ahead of the front
passenger's side wheel.
• Rear-Wide View An approximately 180–degree view of the
rear of the vehicle. To display the multiple views, the Intelligent
Around View Monitor system uses cam-
eras located in the front grille, on the vehi-
cle’s outside mirrors and one just above
the vehicle’s license plate
O1.
INTELLIGENT AROUND VIEW
MONITOR SYSTEM OPERATION
With the ignition switch in the ON position,
move the shif t lever to the R (Reverse) po-
sition or press the CAMERA button to oper-
ate the Intelligent Around View Monitor.
LHA5026
Monitor, climate, audio, phone and voice recognition systems4-11
Page 208 of 476
When the camera is first activated with the
bird’s-eye view in the display, a red icon (if so
equipped) will flash on the screen. This in-
dicates that the sonar system (if so
equipped) is activated. For additional infor-
mation on the front and rear sonar system
(if so equipped), see “Front and rear sonar
system” (P. 5-116).
The screen displayed on the Intelligent
Around View Monitor will automatically re-
turn to the previous screen 3 minutes af ter
the CAMERA button has been pressed with
the shif t lever in a position other than the R
(Reverse) position.
Available views
WARNING
• The distance guide lines and the ve-
hicle width lines should be used as a
reference only when the vehicle is on
a paved, level surface. The apparent
distance viewed on the monitor may
be different than the actual distance
between the vehicle and displayed
objects. •
Use the displayed lines and the
bird’s-eye view as a reference. The
lines and the bird’s-eye view are
greatly affected by the number of oc-
cupants, cargo, fuel level, vehicle po-
sition, road condition and road
grade.
• If the tires are replaced with different
sized tires, the predicted course lines
and the bird's-eye view may be dis-
played incorrectly.
• When driving the vehicle up a hill, ob-
jects viewed in the monitor are fur-
ther than they appear. When driving
the vehicle down a hill, objects
viewed in the monitor are closer than
they appear.
• Objects in the rear view will appear
visually opposite compared to when
viewed in the monitor and outside
mirrors.
• Use the mirrors or actually look to
properly judge distances to other
objects.
• On a snow-covered or slippery road,
there may be a difference between
the predicted course lines and the
actual course line. •
The vehicle width and predicted
course lines are wider than the actual
width and course.
• The displayed lines will appear
slightly off to the right, because the
rearview camera is not installed in
the rear center of the vehicle.
4-12Monitor, climate, audio, phone and voice recognition systems
Page 210 of 476
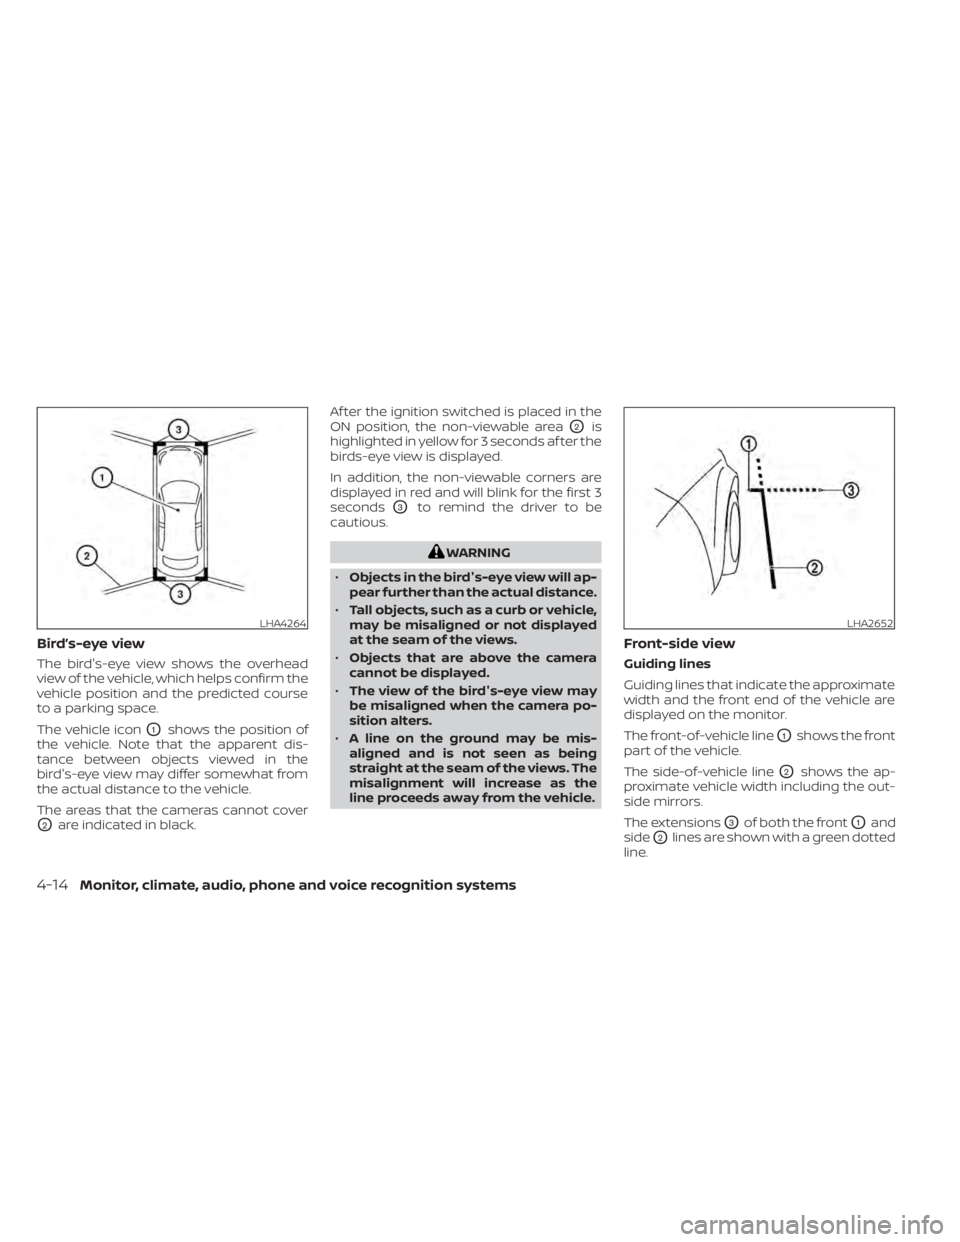
Bird’s-eye view
The bird's-eye view shows the overhead
view of the vehicle, which helps confirm the
vehicle position and the predicted course
to a parking space.
The vehicle icon
O1shows the position of
the vehicle. Note that the apparent dis-
tance between objects viewed in the
bird's-eye view may differ somewhat from
the actual distance to the vehicle.
The areas that the cameras cannot cover
O2are indicated in black. Af ter the ignition switched is placed in the
ON position, the non-viewable area
O2is
highlighted in yellow for 3 seconds af ter the
birds-eye view is displayed.
In addition, the non-viewable corners are
displayed in red and will blink for the first 3
seconds
O3to remind the driver to be
cautious.
WARNING
• Objects in the bird's-eye view will ap-
pear further than the actual distance.
• Tall objects, such as a curb or vehicle,
may be misaligned or not displayed
at the seam of the views.
• Objects that are above the camera
cannot be displayed.
• The view of the bird's-eye view may
be misaligned when the camera po-
sition alters.
• A line on the ground may be mis-
aligned and is not seen as being
straight at the seam of the views. The
misalignment will increase as the
line proceeds away from the vehicle.
Front-side view
Guiding lines
Guiding lines that indicate the approximate
width and the front end of the vehicle are
displayed on the monitor.
The front-of-vehicle line
O1shows the front
part of the vehicle.
The side-of-vehicle line
O2shows the ap-
proximate vehicle width including the out-
side mirrors.
The extensions
O3of both the frontO1and
side
O2lines are shown with a green dotted
line.
LHA4264LHA2652
4-14Monitor, climate, audio, phone and voice recognition systems