maintenance schedule NISSAN MAXIMA 2021 Owner´s Manual
[x] Cancel search | Manufacturer: NISSAN, Model Year: 2021, Model line: MAXIMA, Model: NISSAN MAXIMA 2021Pages: 476, PDF Size: 3.32 MB
Page 3 of 476
This manual was prepared to help you un-
derstand the operation and maintenance
of your vehicle so that you may enjoy many
miles (kilometers) of driving pleasure.
Please read through this manual before
operating your vehicle.
A separate Warranty Information Book-
let explains details about the warranties
covering your vehicle. The “Maintenance
and schedules” section of this manual
explains details about maintaining and
servicing your vehicle. You will also re-
ceive a separate Customer Care/Lemon
Law Booklet (U.S. only) that will explain
how to resolve any concerns you may
have with your vehicle, and clarif y your
rights under your state's lemon law. Ad-
ditionally, you may receive a separate
NissanConnect
®Owner’s Manual that
will explain the various features and
functions your system may have.
A NISSAN dealership knows your vehicle
best. When you require any service or have
any questions, they will be glad to assist
you with the extensive resources available
to them. In addition to factory-installed options,
your vehicle may also be equipped with
additional accessories installed by NISSAN
or by a NISSAN dealer prior to delivery. It is
recommended that you visit a NISSAN
dealer for details concerning the particular
accessories with which your vehicle is
equipped. It is important that you familiar-
ize yourself with all disclosures, warnings,
cautions and instructions concerning
proper use of such accessories prior to op-
erating the vehicle and/or accessory. It is
recommended that you visit a NISSAN
dealer for details concerning the particular
accessories with which your vehicle is
equipped.
Before driving your vehicle, please read this
Owner's Manual carefully. This will ensure
familiarity with controls and maintenance
requirements assisting you in the safe op-
eration of your vehicle.
WARNING
IMPORTANT SAFETY INFORMATION
REMINDERS!
Follow these important driving rules to
help ensure a safe and comfortable trip
for you and your passengers!
• NEVER drive under the influence of
alcohol or drugs.
•
ALWAYS observe posted speed limits
and never drive too fast for conditions.
• ALWAYS give your full attention to
driving and avoid using vehicle fea-
tures or taking other actions that
could distract you.
• ALWAYS use your seat belts and ap-
propriate child restraint systems.
Preteen children should be seated in
the rear seat.
• ALWAYS provide information about
the proper use of vehicle safety fea-
tures to all occupants of the vehicle.
• ALWAYS review this Owner’s Manual
for important safety information.
FOREWORD READ FIRST—THEN DRIVE SAFELY
Page 7 of 476
Table of
contentsIllustrated table of contents
Safety-Seats, seat belts and supplemental restraint system
Instruments and controls
Pre-driving checks and adjustments
Monitor, climate, audio, phone and voice recognition systems
Starting and driving
In case of emergency
Appearance and care
Do-it-yourself
Maintenance and schedules
Technical and consumer information
Index
0
1
2
3
4
5
6
7
8
9
10
11
Page 114 of 476
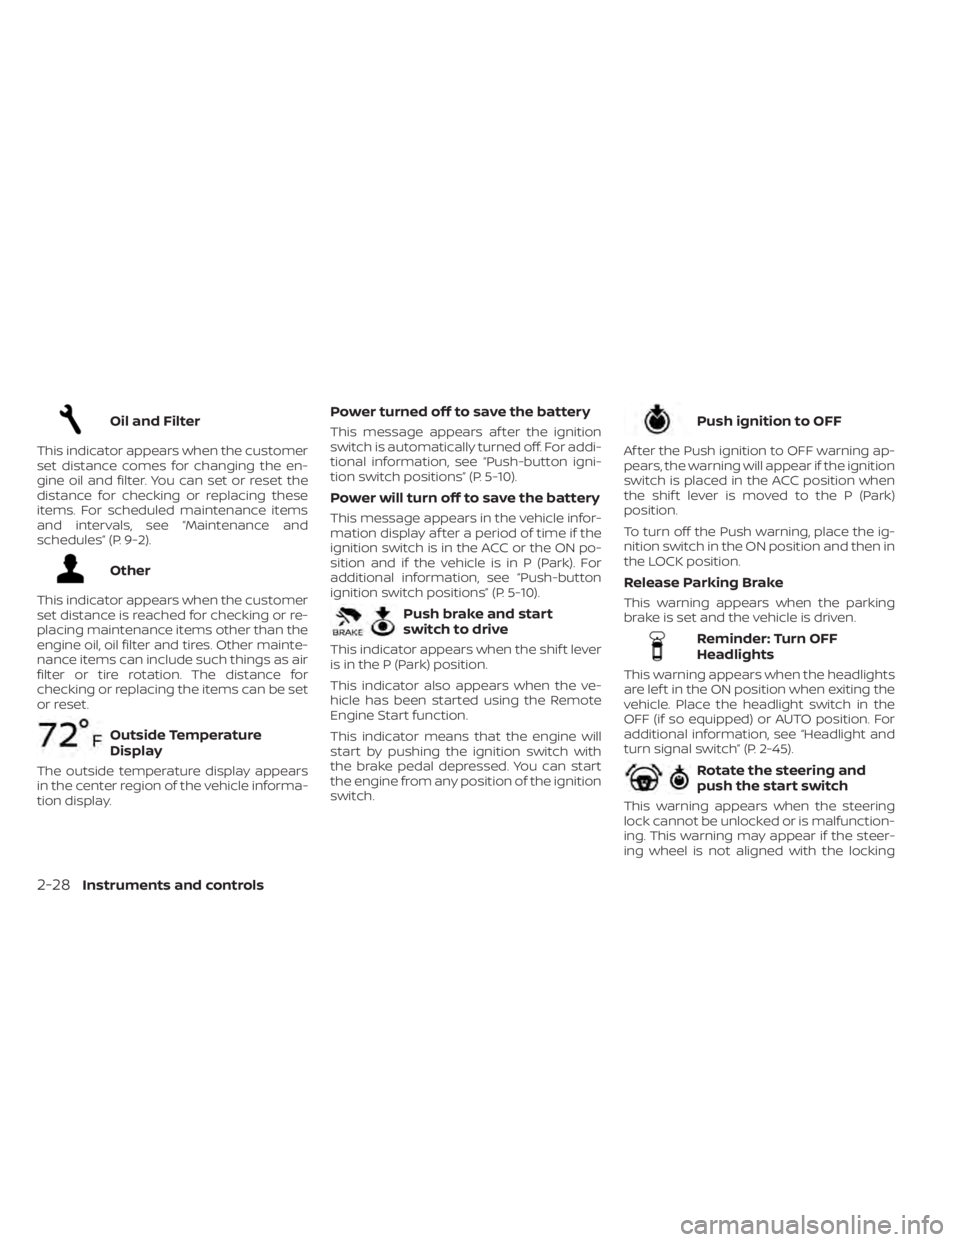
Oil and Filter
This indicator appears when the customer
set distance comes for changing the en-
gine oil and filter. You can set or reset the
distance for checking or replacing these
items. For scheduled maintenance items
and intervals, see “Maintenance and
schedules” (P. 9-2).
Other
This indicator appears when the customer
set distance is reached for checking or re-
placing maintenance items other than the
engine oil, oil filter and tires. Other mainte-
nance items can include such things as air
filter or tire rotation. The distance for
checking or replacing the items can be set
or reset.
Outside Temperature
Display
The outside temperature display appears
in the center region of the vehicle informa-
tion display.
Power turned off to save the battery
This message appears af ter the ignition
switch is automatically turned off. For addi-
tional information, see “Push-button igni-
tion switch positions” (P. 5-10).
Power will turn off to save the battery
This message appears in the vehicle infor-
mation display af ter a period of time if the
ignition switch is in the ACC or the ON po-
sition and if the vehicle is in P (Park). For
additional information, see “Push-button
ignition switch positions” (P. 5-10).
Push brake and start
switch to drive
This indicator appears when the shif t lever
is in the P (Park) position.
This indicator also appears when the ve-
hicle has been started using the Remote
Engine Start function.
This indicator means that the engine will
start by pushing the ignition switch with
the brake pedal depressed. You can start
the engine from any position of the ignition
switch.
Push ignition to OFF
Af ter the Push ignition to OFF warning ap-
pears, the warning will appear if the ignition
switch is placed in the ACC position when
the shif t lever is moved to the P (Park)
position.
To turn off the Push warning, place the ig-
nition switch in the ON position and then in
the LOCK position.
Release Parking Brake
This warning appears when the parking
brake is set and the vehicle is driven.
Reminder: Turn OFF
Headlights
This warning appears when the headlights
are lef t in the ON position when exiting the
vehicle. Place the headlight switch in the
OFF (if so equipped) or AUTO position. For
additional information, see “Headlight and
turn signal switch” (P. 2-45).
Rotate the steering and
push the start switch
This warning appears when the steering
lock cannot be unlocked or is malfunction-
ing. This warning may appear if the steer-
ing wheel is not aligned with the locking
2-28Instruments and controls
Page 233 of 476
System maintenance......................5-105
Intelligent Driver Alertness (I-DA) ...............5-106
Intelligent Driver Alertness system
operation .................................. 5-106
How to enable/disable the Intelligent
Driver Alertness (I-DA) system ..............5-107
Intelligent Driver Alertness (I-DA)
system limitations ......................... 5-107
Break-in schedule ............................. 5-109
Fuel efficient driving tips .......................5-109
Increasing fuel economy ......................5-110
Parking/parking on hills ........................5-111
Power steering ................................ 5-112
Vehicle Dynamic Control (VDC) system ........5-113
Brake force distribution ....................5-114
Integrated Dynamics-control Module ..........5-115
Intelligent Trace Control (I-TC) ..............5-115
Intelligent Engine Brake (I-EB) ...............5-115Active Ride Control (ARC)
...................5-116
Front and rear sonar system (if so equipped) . . 5-116 System operation ........................... 5-117
How to enable/disable the front and
rear sonar system .......................... 5-119
Cold weather driving .......................... 5-120
Freeing a frozen door lock ..................5-120
Antifreeze .................................. 5-120
Battery..................................... 5-120
Draining of coolant water ..................5-120
Tire equipment ............................. 5-120
Special winter equipment ..................5-120
Driving on snow or ice ......................5-120
Active noise cancellation/Active sound
control (if so equipped) ........................ 5-121
Active noise cancellation ...................5-121
Active sound control ....................... 5-121
Page 340 of 476
7.Avoid Idling
• Shutting off your engine when safe for stops exceeding 30–60 seconds saves
fuel and reduces emissions.
8. Buy an Automated Pass for Toll Roads
• Automated passes permit drivers to use special lanes to maintain cruising
speed through the toll and avoid stop-
ping and starting.
9. Winter Warm Up
• Limit idling time to minimize impact to fuel economy.
• Vehicles typically need no more than 30 seconds of idling at start-up to ef-
fectively circulate the engine oil before
driving.
• Your vehicle will reach its ideal operat- ing temperature more quickly while
driving versus idling.
10. Keeping your Vehicle Cool
• Park your vehicle in a covered parking area or in the shade whenever
possible.
• When entering a hot vehicle, opening the windows will help to reduce the
inside temperature faster, resulting in
reduced demand on your A/C system. • Keep your engine tuned up.
• Follow the recommended scheduled
maintenance.
• Keep the tires inflated to the correct pres- sure. Low tire pressure increases tire
wear and lowers fuel economy.
• Keep the wheels in correct alignment. Im- proper alignment increases tire wear and
lowers fuel economy.
• Use the recommended viscosity engine oil. For additional information, see “Rec-
ommended fluids/lubricants and capaci-
ties” (P. 10-2).
INCREASING FUEL ECONOMY
5-110Starting and driving
Page 380 of 476
The engine cooling system is filled at the
factory with a pre-diluted mixture of 50%
Genuine NISSAN Long Life Antifreeze/
Coolant (blue) and 50% water to provide
year-round antifreeze and coolant protec-
tion. The antifreeze solution contains rust
and corrosion inhibitors. Additional engine
cooling system additives are not
necessary.
WARNING
• Never remove the radiator or coolant
reservoir cap when the engine is hot.
Wait until the engine and radiator
cool down. Serious burns could be
caused by high pressure fluid escap-
ing from the radiator. For additional
information, see “If your vehicle over-
heats” (P. 6-11).
• The radiator is equipped with a pres-
sure type radiator cap. To prevent en-
gine damage, use only a Genuine
NISSAN radiator cap.
CAUTION
• Never use any cooling system addi-
tives such as radiator sealer. Addi-
tives may clog the cooling system
and cause damage to the engine,
transmission and/or cooling system.
• When adding or replacing coolant, be
sure to use only Genuine NISSAN
Long Life Antifreeze/Coolant (blue)
or equivalent. Genuine NISSAN Long
Life Antifreeze/Coolant (blue) is pre-
diluted to provide antifreeze protec-
tion to -34° F (-37° C). If additional
freeze protection is needed due to
weather where you operate your ve-
hicle, add Genuine NISSAN Long Life
Antifreeze/Coolant (blue) concen-
trate following the directions on the
container. If an equivalent coolant
other than Genuine NISSAN Long Life
Antifreeze/Coolant (blue) is used, fol-
low the coolant manufacturer’s in-
structions to maintain minimum an-
tifreeze protection to -34° F (-37° C).
The use of other types of coolant so-
lutions other than Genuine NISSAN
Long Life Antifreeze/Coolant (blue)
or equivalent may damage the en-
gine cooling system. •
The life expectancy of the factory-fill
coolant is 105,000 miles (168,000 km)
or 7 years. Mixing any other type of
coolant other than Genuine NISSAN
Long Life Antifreeze/Coolant (blue)
(or equivalent coolant), including
Genuine NISSAN Long Life
Antifreeze/Coolant (green), or the
use of non-distilled water may re-
duce the life expectancy of the
factory-fill coolant. For additional in-
formation, see the “Maintenance and
schedules” section of this manual.
ENGINE COOLING SYSTEM
8-4Do-it-yourself
Page 381 of 476
CHECKING ENGINE COOLANT
LEVEL
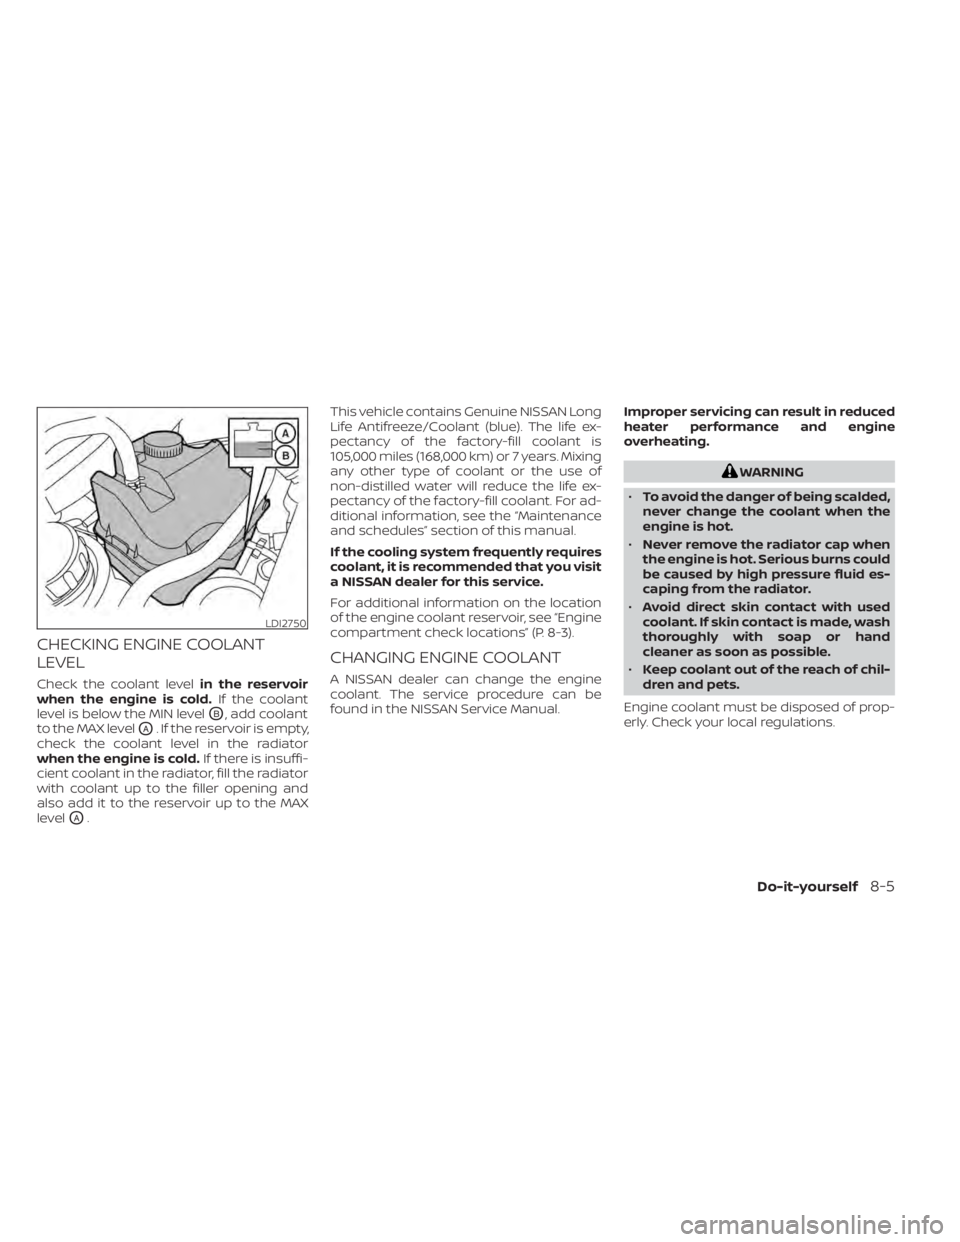
Check the coolant levelin the reservoir
when the engine is cold. If the coolant
level is below the MIN level
OB, add coolant
to the MAX level
OA. If the reservoir is empty,
check the coolant level in the radiator
when the engine is cold. If there is insuffi-
cient coolant in the radiator, fill the radiator
with coolant up to the filler opening and
also add it to the reservoir up to the MAX
level
OA. This vehicle contains Genuine NISSAN Long
Life Antifreeze/Coolant (blue). The life ex-
pectancy of the factory-fill coolant is
105,000 miles (168,000 km) or 7 years. Mixing
any other type of coolant or the use of
non-distilled water will reduce the life ex-
pectancy of the factory-fill coolant. For ad-
ditional information, see the “Maintenance
and schedules” section of this manual.
If the cooling system frequently requires
coolant, it is recommended that you visit
a NISSAN dealer for this service.
For additional information on the location
of the engine coolant reservoir, see “Engine
compartment check locations” (P. 8-3).
CHANGING ENGINE COOLANT
A NISSAN dealer can change the engine
coolant. The service procedure can be
found in the NISSAN Service Manual.
Improper servicing can result in reduced
heater performance and engine
overheating.
WARNING
• To avoid the danger of being scalded,
never change the coolant when the
engine is hot.
• Never remove the radiator cap when
the engine is hot. Serious burns could
be caused by high pressure fluid es-
caping from the radiator.
• Avoid direct skin contact with used
coolant. If skin contact is made, wash
thoroughly with soap or hand
cleaner as soon as possible.
• Keep coolant out of the reach of chil-
dren and pets.
Engine coolant must be disposed of prop-
erly. Check your local regulations.
LDI2750
Do-it-yourself8-5
Page 391 of 476
NOTE:
Do not try to open the top of the battery.
This battery is not equipped with remov-
able vent caps.
JUMP STARTING
If jump starting is necessary, see “Jump
starting” (P. 6-9). If the engine does not start
by jump starting, the battery may have to
be replaced. It is recommended that you
visit a NISSAN dealer for this service.
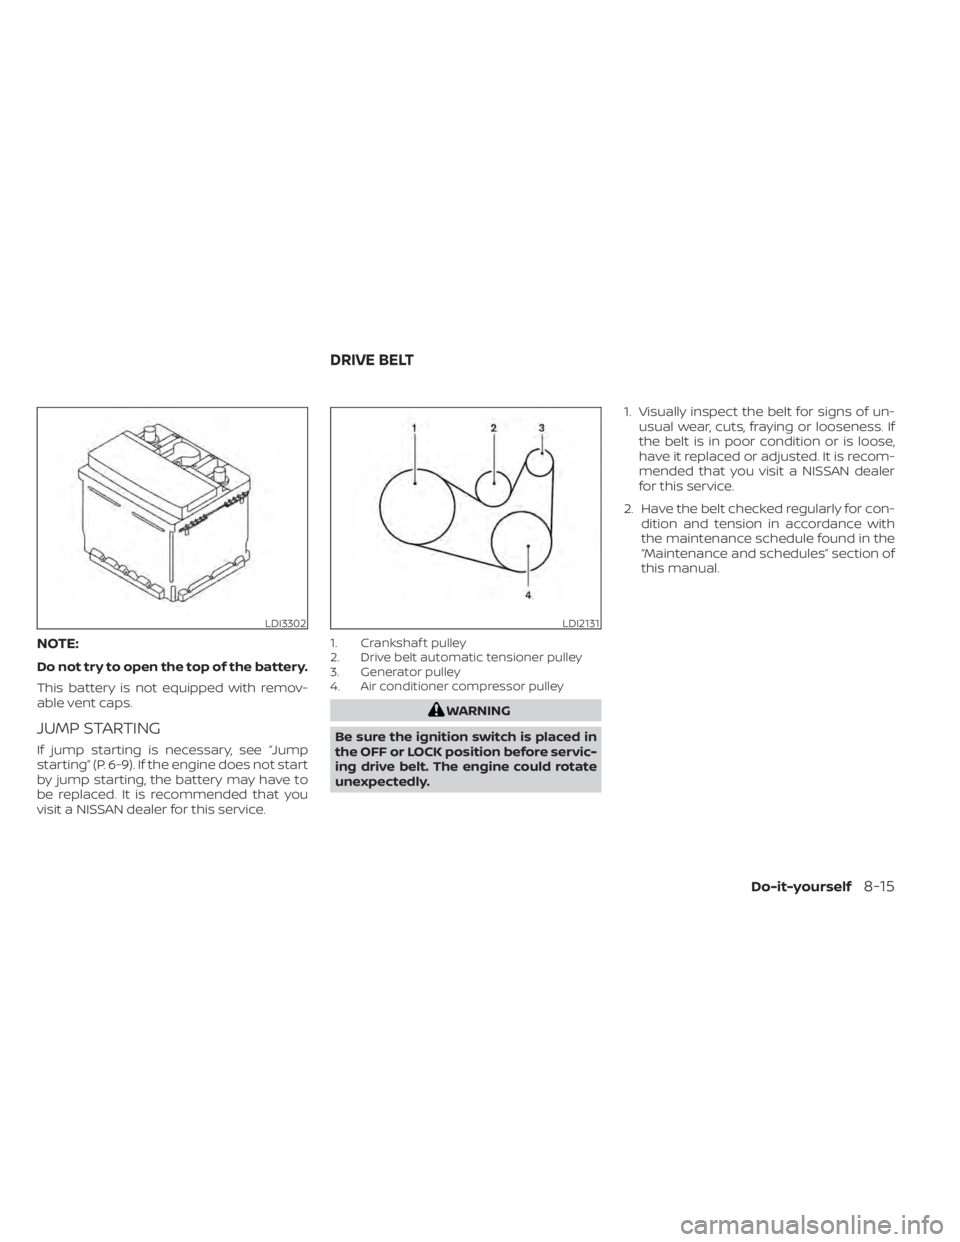
1. Crankshaf t pulley
2. Drive belt automatic tensioner pulley
3. Generator pulley
4. Air conditioner compressor pulley
WARNING
Be sure the ignition switch is placed in
the OFF or LOCK position before servic-
ing drive belt. The engine could rotate
unexpectedly. 1. Visually inspect the belt for signs of un-
usual wear, cuts, fraying or looseness. If
the belt is in poor condition or is loose,
have it replaced or adjusted. It is recom-
mended that you visit a NISSAN dealer
for this service.
2. Have the belt checked regularly for con- dition and tension in accordance with
the maintenance schedule found in the
“Maintenance and schedules” section of
this manual.
LDI3302LDI2131
DRIVE BELT
Do-it-yourself8-15
Page 392 of 476
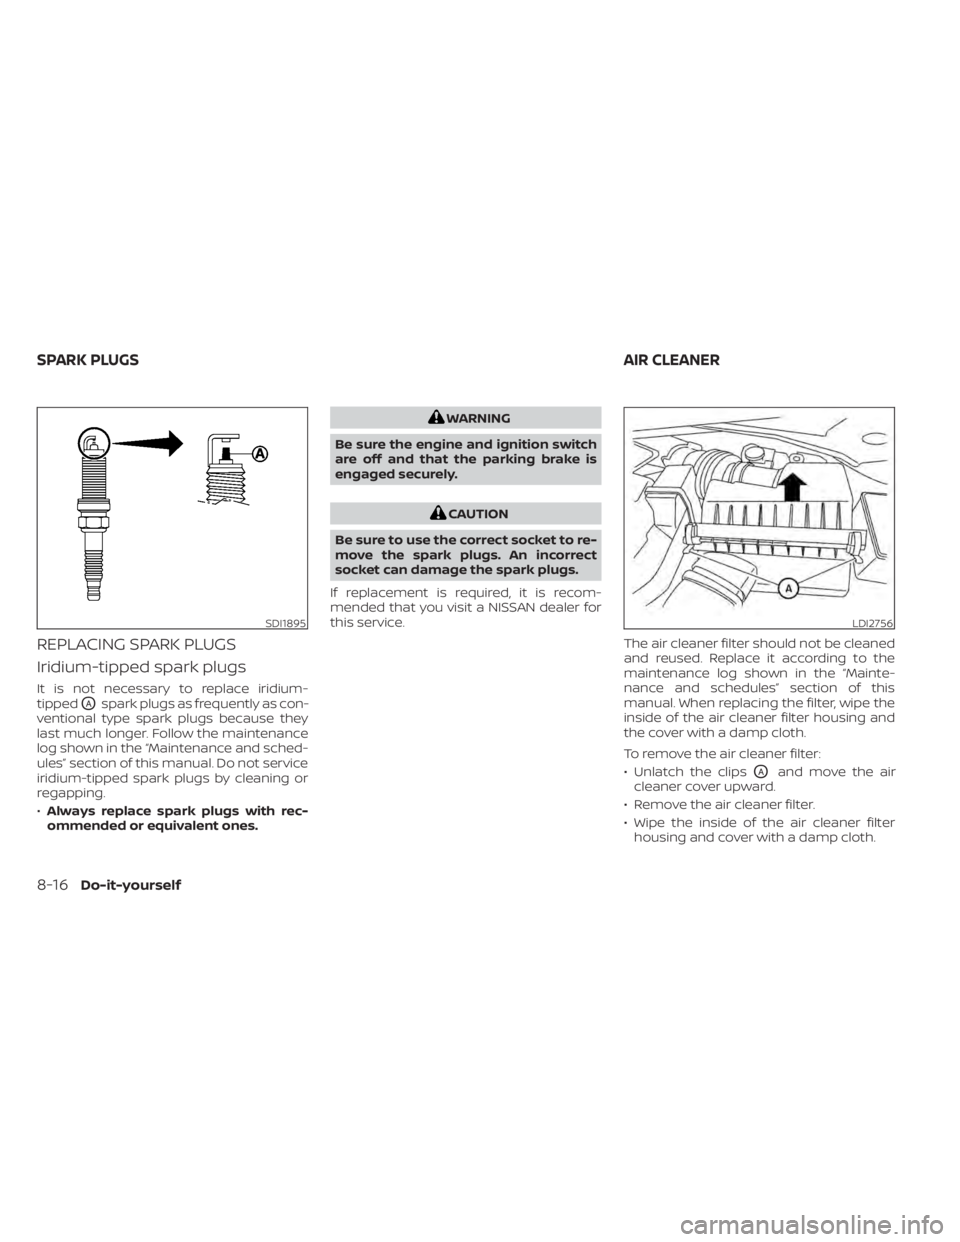
REPLACING SPARK PLUGS
Iridium-tipped spark plugs
It is not necessary to replace iridium-
tipped
OAspark plugs as frequently as con-
ventional type spark plugs because they
last much longer. Follow the maintenance
log shown in the “Maintenance and sched-
ules” section of this manual. Do not service
iridium-tipped spark plugs by cleaning or
regapping.
• Always replace spark plugs with rec-
ommended or equivalent ones.
WARNING
Be sure the engine and ignition switch
are off and that the parking brake is
engaged securely.
CAUTION
Be sure to use the correct socket to re-
move the spark plugs. An incorrect
socket can damage the spark plugs.
If replacement is required, it is recom-
mended that you visit a NISSAN dealer for
this service. The air cleaner filter should not be cleaned
and reused. Replace it according to the
maintenance log shown in the “Mainte-
nance and schedules” section of this
manual. When replacing the filter, wipe the
inside of the air cleaner filter housing and
the cover with a damp cloth.
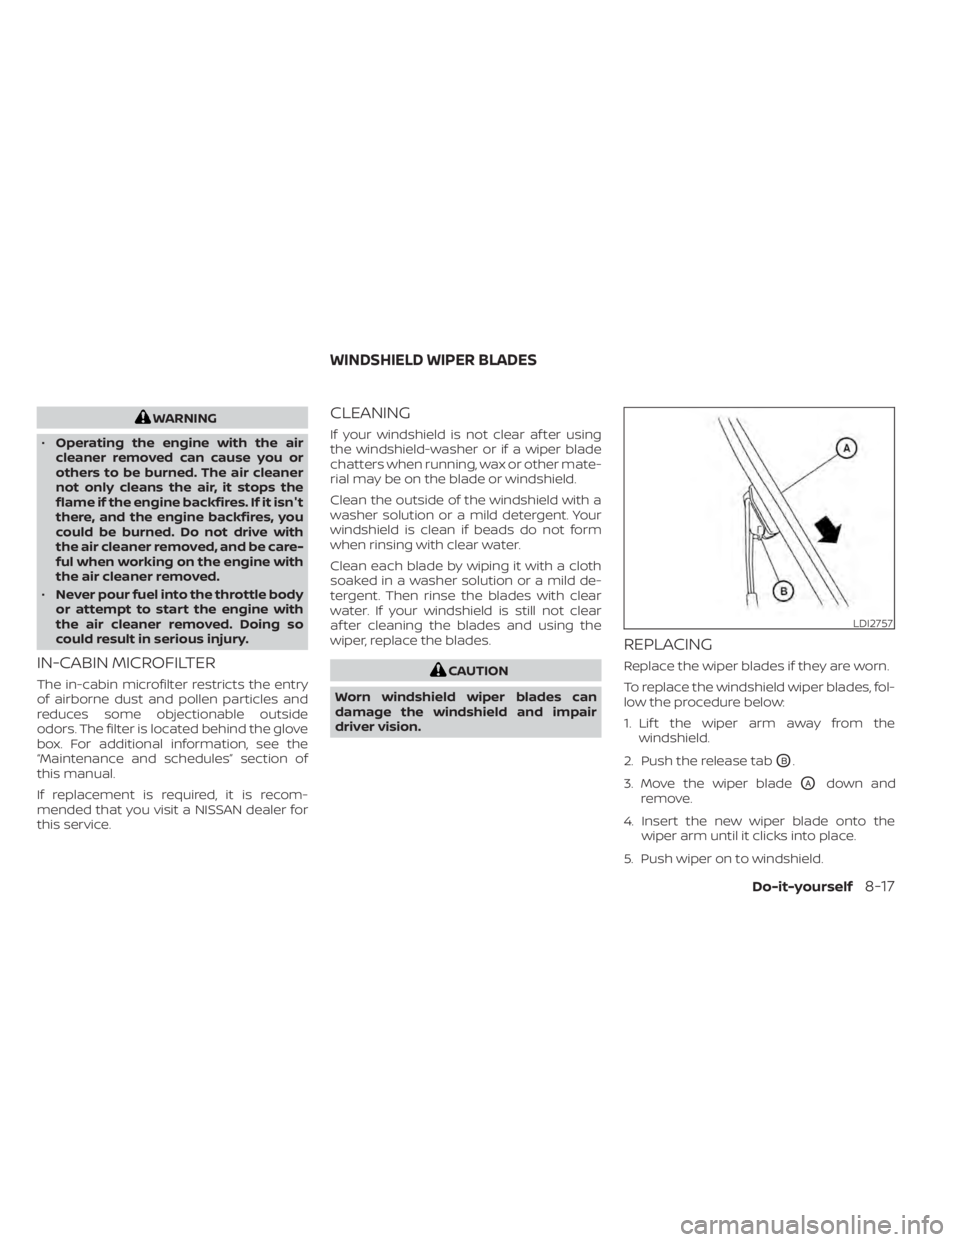
To remove the air cleaner filter:
• Unlatch the clips
OAand move the air
cleaner cover upward.
• Remove the air cleaner filter.
• Wipe the inside of the air cleaner filter housing and cover with a damp cloth.
SDI1895LDI2756
SPARK PLUGS AIR CLEANER
8-16Do-it-yourself
Page 393 of 476
WARNING
• Operating the engine with the air
cleaner removed can cause you or
others to be burned. The air cleaner
not only cleans the air, it stops the
flame if the engine backfires. If it isn't
there, and the engine backfires, you
could be burned. Do not drive with
the air cleaner removed, and be care-
ful when working on the engine with
the air cleaner removed.
• Never pour fuel into the throttle body
or attempt to start the engine with
the air cleaner removed. Doing so
could result in serious injury.
IN-CABIN MICROFILTER
The in-cabin microfilter restricts the entry
of airborne dust and pollen particles and
reduces some objectionable outside
odors. The filter is located behind the glove
box. For additional information, see the
“Maintenance and schedules” section of
this manual.
If replacement is required, it is recom-
mended that you visit a NISSAN dealer for
this service.
CLEANING
If your windshield is not clear af ter using
the windshield-washer or if a wiper blade
chatters when running, wax or other mate-
rial may be on the blade or windshield.
Clean the outside of the windshield with a
washer solution or a mild detergent. Your
windshield is clean if beads do not form
when rinsing with clear water.
Clean each blade by wiping it with a cloth
soaked in a washer solution or a mild de-
tergent. Then rinse the blades with clear
water. If your windshield is still not clear
af ter cleaning the blades and using the
wiper, replace the blades.
CAUTION
Worn windshield wiper blades can
damage the windshield and impair
driver vision.
REPLACING
Replace the wiper blades if they are worn.
To replace the windshield wiper blades, fol-
low the procedure below:
1. Lif t the wiper arm away from the windshield.
2. Push the release tab
OB.
3. Move the wiper blade
OAdown and
remove.
4. Insert the new wiper blade onto the wiper arm until it clicks into place.
5. Push wiper on to windshield.
LDI2757
WINDSHIELD WIPER BLADES
Do-it-yourself8-17