light NISSAN MAXIMA 2021 Owner´s Manual
[x] Cancel search | Manufacturer: NISSAN, Model Year: 2021, Model line: MAXIMA, Model: NISSAN MAXIMA 2021Pages: 476, PDF Size: 3.32 MB
Page 368 of 476
In order to maintain the appearance of
your vehicle, it is important to take proper
care of it.
To protect the paint surfaces, wash your
vehicle as soon as you can:
• Af ter a rainfall to prevent possible dam-age from acid rain.
• Af ter driving on coastal roads.
• When contaminants such as soot, bird droppings, tree sap, metal particles or
bugs get on the paint surface.
• When dust or mud builds up on the surface.
Whenever possible, store or park your ve-
hicle inside a garage or in a covered area.
When it is necessary to park outside, park in
a shady area or protect the vehicle with a
body cover.
Be careful not to scratch the paint sur-
face when putting on or removing the
body cover.
WASHING
Wash dirt off with a wet sponge and plenty
of water. Clean the vehicle thoroughly us-
ing a mild soap, a special vehicle soap or
general purpose dishwashing liquid mixed
with clean, lukewarm (never hot) water.
CAUTION
• Do not concentrate water spray di-
rectly on the sonar sensors (if so
equipped) on the bumper as this will
result in damage to the sensors. Do
not use pressure washers capable of
spraying water over 1,200 psi (8,274
kPa) to wash your vehicle. Use of
high-pressure washers over 1,200 psi
(8,274 kPa) can result in damage to or
removal of paint or graphics. Avoid
using a high-pressure washer closer
than 12 inches (30 cm) to the vehicle.
Always use a wide-angle nozzle only,
keep the nozzle moving and do not
concentrate the water spray on any
one area.
• Do not use car washes that use acid
in the detergent. Some car washes,
especially brushless ones, use some
acid for cleaning. The acid may react
with some plastic vehicle compo-
nents, causing them to crack. This
could affect their appearance, and
also could cause them not to func-
tion properly. Always check with your
car wash to confirm that acid is not
used. •
Do not wash the vehicle with strong
household soap, strong chemical de-
tergents, gasoline or solvents.
• Do not wash the vehicle in direct sun-
light or while the vehicle body is hot,
as the surface may become
water-spotted.
• Avoid using tight-napped or rough
cloths, such as washing mitts. Care
must be taken when removing
caked-on dirt or other foreign sub-
stances so the paint surface is not
scratched or damaged.
Rinse the vehicle thoroughly with plenty of
clean water.
Inside edges, seams and folds on the
doors, hatches and hood are particularly
vulnerable to the effects of road salt. There-
fore, these areas must be cleaned regularly.
Take care that the drain holes in the lower
edge of the door are open. Spray water
under the body and in the wheel wells to
loosen the dirt and wash away road salt.
A damp chamois can be used to dry the
vehicle to avoid water spots.
CLEANING EXTERIOR
7-2Appearance and care
Page 369 of 476
WAXING
Regular waxing protects the paint surface
and helps retain new vehicle appearance.
Polishing is recommended to remove
built-up wax residue and to avoid a weath-
ered appearance before re-applying wax.
A NISSAN dealer can assist you in choosing
the proper product.
• Wax your vehicle only af ter a thoroughwashing. Follow the instructions supplied
with the wax.
• Do not use a wax containing any abra- sives, cutting compounds or cleaners
that may damage the vehicle finish.
Machine compounding or aggressive pol-
ishing on a base coat/clear coat paint fin-
ish may dull the finish or leave swirl marks.
REMOVING SPOTS
Remove tar and oil spots, industrial dust,
insects, and tree sap as quickly as possible
from the surface of the paint to avoid last-
ing damage or staining. Special cleaning
products are available at a NISSAN dealer
or any automotive accessory store. It is
recommended that you visit a NISSAN
dealer for these products.
UNDERBODY
In areas where road salt is used in winter, it
is necessary to clean the underbody regu-
larly in order to prevent dirt and salt from
building up and causing the acceleration of
corrosion on the underbody and suspen-
sion. Before the winter period and again in
the spring, the underseal must be checked
and, if necessary, re-treated.
GLASS
When cleaning the rear window, it may be
easier to clean if the high-mounted stop
light (if so equipped) is removed first.
Be careful when removing the high-
mounted stop light (if so equipped) to re-
duce the risk of damaging the high-
mounted stop light wires.
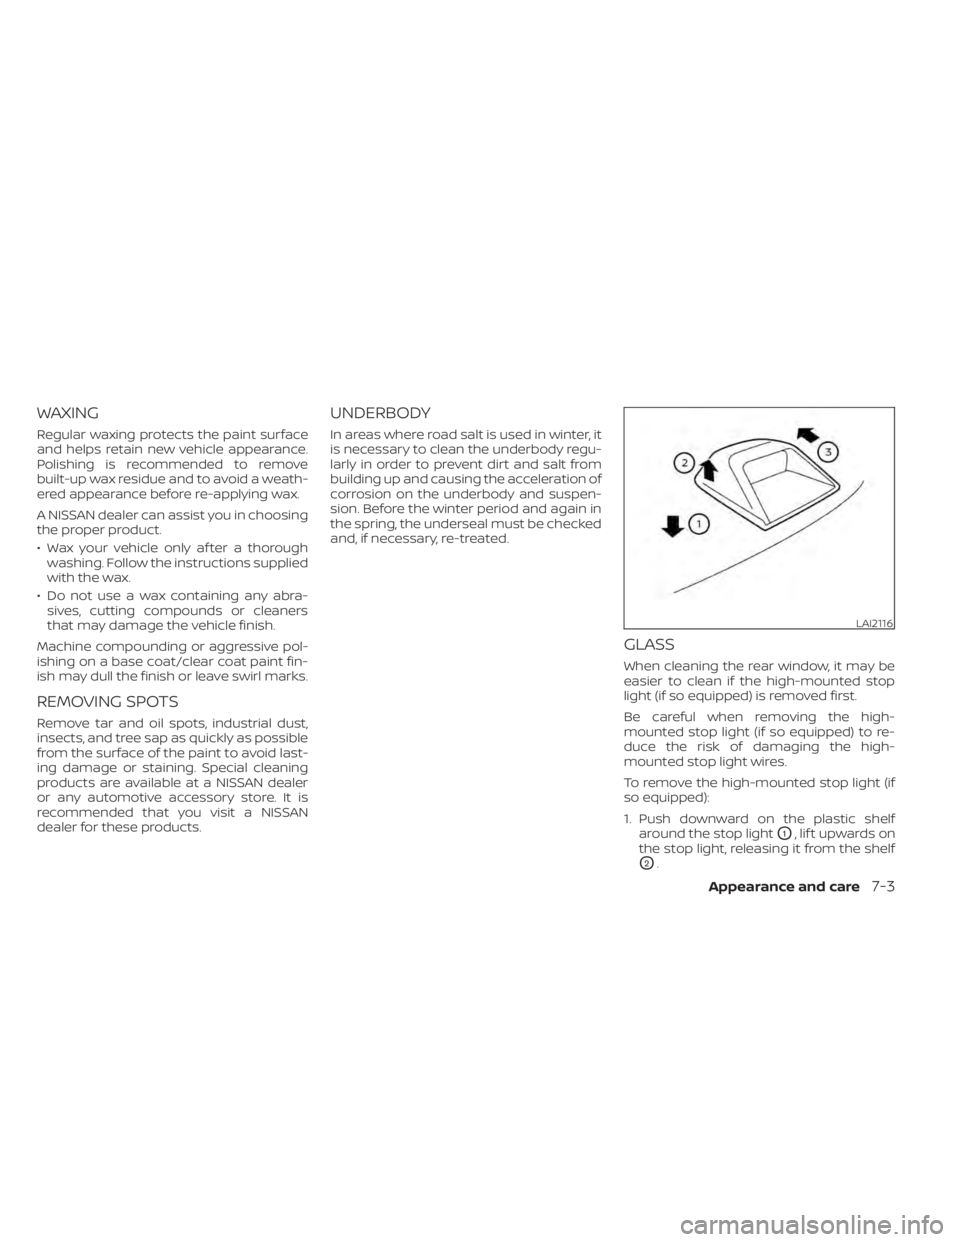
To remove the high-mounted stop light (if
so equipped):
1. Push downward on the plastic shelf around the stop light
O1,liftupwardson
the stop light, releasing it from the shelf
O2.
LAI2116
Appearance and care7-3
Page 370 of 476
2. Once it is released from the shelf, gentlypull the stop light towards the rear seat-
back
O3.
The high-mounted stop light must be
properly reinstalled before driving your
vehicle.
Use glass cleaner to remove smoke and
dust film from the glass surfaces. It is nor-
mal for glass to become coated with a film
af ter the vehicle is parked in the hot sun.
Glass cleaner and a sof t cloth will easily
remove this film.
To reinstall the high-mounted stop light,
reverse steps
O3, thenO2.
CAUTION
When cleaning the inside of the win-
dows, do not use sharp-edged tools,
abrasive cleaners or chlorine-based
disinfectant cleaners. They could dam-
age the electrical conductors, radio an-
tenna elements or rear window defog-
ger elements.
ALUMINUM ALLOY WHEELS
Wash the wheels regularly with a sponge
dampened in a mild soap solution, espe-
cially during winter months in areas where
road salt is used. If not removed, road salt
can discolor the wheels.
CAUTION
Follow the directions below to avoid
staining or discoloring the wheels:
• Do not use a cleaner that uses strong
acid or alkali contents to clean the
wheels.
• Do not apply wheel cleaners to the
wheels when they are hot. The wheel
temperature should be the same as
ambient temperature.
• Rinse the wheel to completely re-
move the cleaner within 15 minutes
af ter the cleaner is applied.
CHROME PARTS
Clean all chrome parts regularly with a
non-abrasive chrome polish to maintain
the finish.
TIRE DRESSINGS
NISSAN does not recommend the use of
tire dressings. Tire manufacturers apply a
coating to the tires to help reduce discolor-
ation of the rubber. If a tire dressing is ap-
plied to the tires, it may react with the coat-
ing and form a compound. This compound
may come off the tire while driving and
stain the vehicle paint.
If you choose to use a tire dressing, take the
following precautions:
• Use a water-based tire dressing. The coating on the tire dissolves more easily
than with an oil-based tire dressing.
• Apply a light coat of tire dressing to help prevent it from entering the tire tread/
grooves (where it would be difficult to
remove).
• Wipe off excess tire dressing using a dry towel. Make sure the tire dressing is com-
pletely removed from the tire
tread/grooves.
• Allow the tire dressing to dry as recom- mended by the tire dressing
manufacturer.
7-4Appearance and care
Page 377 of 476

8 Do-it-yourself
Maintenance precautions.......................8-2
Engine compartment check locations ...........8-3
Engine cooling system ..........................8-4
Checking engine coolant level ................8-5
Changing engine coolant ....................8-5
Engine oil .......................................8-6
Checking engine oil level .....................8-6
Changing engine oil and oil filter ..............8-6
Continuously Variable Transmission (CVT)
fluid ............................................ 8-10
Power Steering Fluid (PSF) .......................8-11
Brake fluid ....................................... 8-11
Windshield-washer fluid ........................8-12
Windshield-washer fluid reservoir ...........8-12
Battery......................................... 8-13
Jump starting ............................... 8-15
Drive belt ....................................... 8-15
Spark plugs .................................... 8-16
Replacing spark plugs .......................8-16
Air cleaner ..................................... 8-16
In-cabin microfilter .......................... 8-17Windshield wiper blades
........................8-17
Cleaning .................................... 8-17
Replacing ................................... 8-17
Brakes ......................................... 8-18
Fuses .......................................... 8-19
Engine compartment ....................... 8-19
Passenger compartment ...................8-20
Battery replacement ........................... 8-21
NISSAN Intelligent Key® ......................8-22
Lights .......................................... 8-23
Headlights .................................. 8-23
Front park/turn signal/side marker
light ......................................... 8-23
Fog lights (if so equipped) ...................8-23
Exterior and interior lights ...................8-24
Wheels and tires ............................... 8-26
Tire pressure ................................ 8-26
Tire labeling .................................
8-30
T
ypes of tires ................................ 8-33
Tire chains .................................. 8-34
Changing wheels and tires ..................8-34
Page 385 of 476
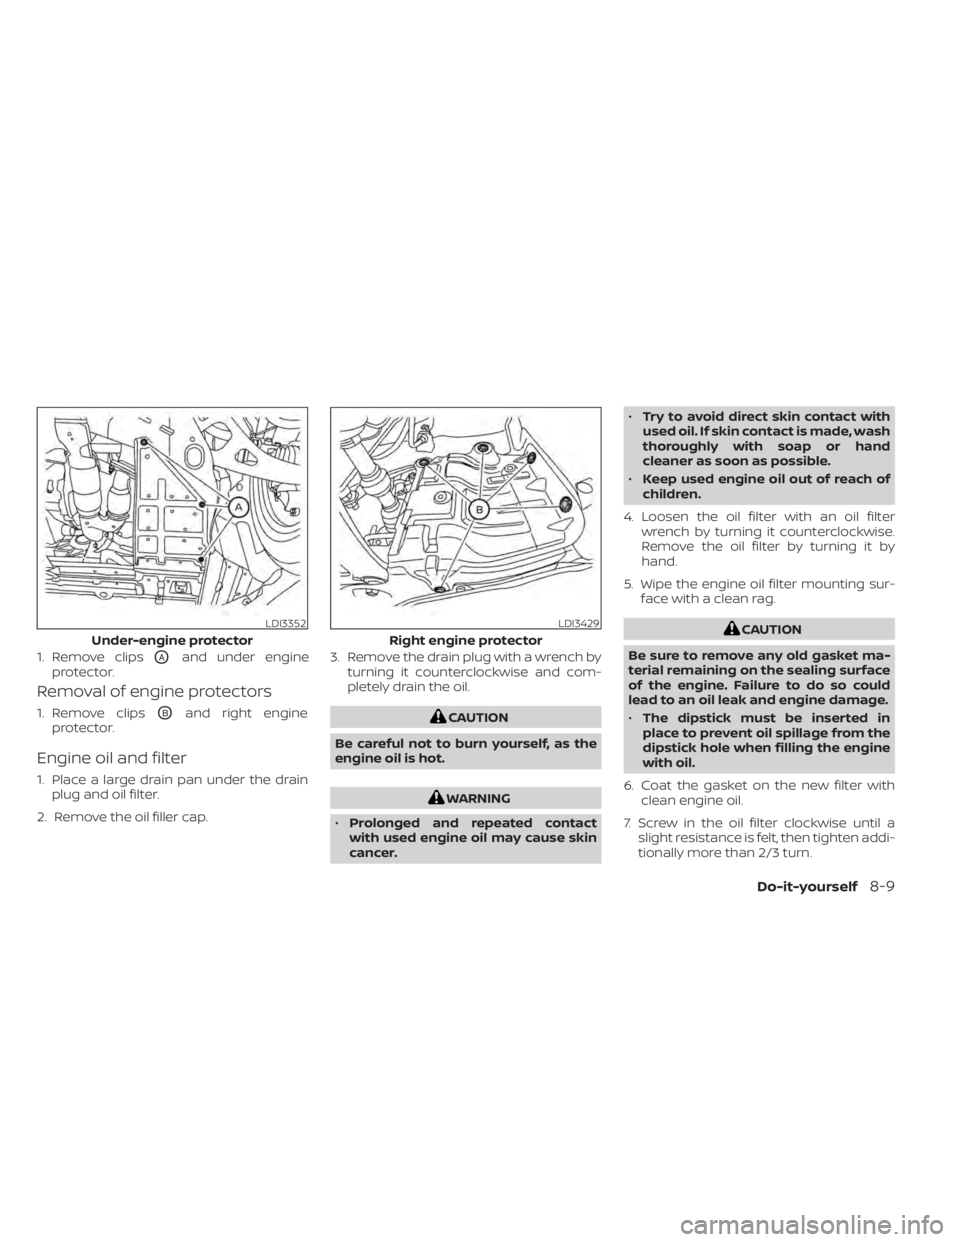
Removal of engine protectors
1. Remove clipsOBand right engine
protector.
Engine oil and filter
1. Place a large drain pan under the drain plug and oil filter.
2. Remove the oil filler cap. 3. Remove the drain plug with a wrench by
turning it counterclockwise and com-
pletely drain the oil.
CAUTION
Be careful not to burn yourself, as the
engine oil is hot.
WARNING
• Prolonged and repeated contact
with used engine oil may cause skin
cancer. •
Try to avoid direct skin contact with
used oil. If skin contact is made, wash
thoroughly with soap or hand
cleaner as soon as possible.
• Keep used engine oil out of reach of
children.
4. Loosen the oil filter with an oil filter wrench by turning it counterclockwise.
Remove the oil filter by turning it by
hand.
5. Wipe the engine oil filter mounting sur- face with a clean rag.
CAUTION
Be sure to remove any old gasket ma-
terial remaining on the sealing surface
of the engine. Failure to do so could
lead to an oil leak and engine damage.
• The dipstick must be inserted in
place to prevent oil spillage from the
dipstick hole when filling the engine
with oil.
6. Coat the gasket on the new filter with clean engine oil.
7. Screw in the oil filter clockwise until a slight resistance is felt, then tighten addi-
tionally more than 2/3 turn.LDI3352
Under-engine protector
1. Remove clips
OAand under engine
protector.
LDI3429
Right engine protector
Do-it-yourself8-9
Page 388 of 476

•Brake fluid is poisonous and should
be stored carefully in marked con-
tainers out of reach of children.
CAUTION
Do not spill the fluid on any painted sur-
faces. This will damage the paint. If fluid
is spilled, immediately wash the sur-
face with water.
Check the fluid level in the reservoir. If the
brake fluid is below the MIN line
OB, the
brake warning light will illuminate. Add
brake fluid up to the MAX line
OA. For addi-
tional information on recommended type
of brake fluid, see “Recommended fluids/
lubricants and capacities" (P. 10-2).
If the brake fluid must be added frequently,
the brake system should be thoroughly
checked. It is recommended that you visit a
NISSAN dealer for this service.
WINDSHIELD-WASHER FLUID
RESERVOIR
Fill the windshield-washer fluid reservoir
periodically. Add windshield-washer fluid
when the “Low Washer Fluid” warning mes-
sage shows on the vehicle information
display.
To fill the windshield-washer fluid reservoir,
lif t the cap off the reservoir and pour the
windshield-washer fluid into the reservoir
opening.
Add a washer solvent to the washer for
better cleaning. In the winter season, add a windshield-washer antifreeze. Follow the
manufacturer's instructions for the mix-
ture ratio.
Refill the reservoir more frequently when
driving conditions require an increased
amount of windshield-washer fluid.
Recommended fluid is Genuine NISSAN
Windshield Washer Concentrate Cleaner &
Anti-freeze or equivalent.
CAUTION
• Do not substitute engine antifreeze
coolant for windshield-washer fluid.
This may result in damage to the
paint.
• Do not fill the windshield-washer
fluid reservoir with washer fluid con-
centrates at full strength. Some
methyl alcohol based washer fluid
concentrates may permanently stain
the grille if spilled while filling the
windshield-washer fluid reservoir.
•
Pre-mix washer fluid concentrates
with water to the manufacturer's rec-
ommended levels before pouring the
fluid into the windshield-washer fluid
reservoir. Do not use the windshield-
washer fluid reservoir to mix the
washer fluid concentrate and water.
LDI2754
WINDSHIELD-WASHER FLUID
8-12Do-it-yourself
Page 395 of 476
Under some driving or climate conditions,
occasional brake squeak, squeal or other
noise may be heard. Occasional brake
noise during light to moderate stops is nor-
mal and does not affect the function or
performance of the brake system.
Proper brake inspection intervals should
be followed.For additional information re-
garding brake inspections, see to the ap-
propriate maintenance schedule informa-
tion in the “Maintenance and schedules”
section of this manual.
If any electrical equipment does not oper-
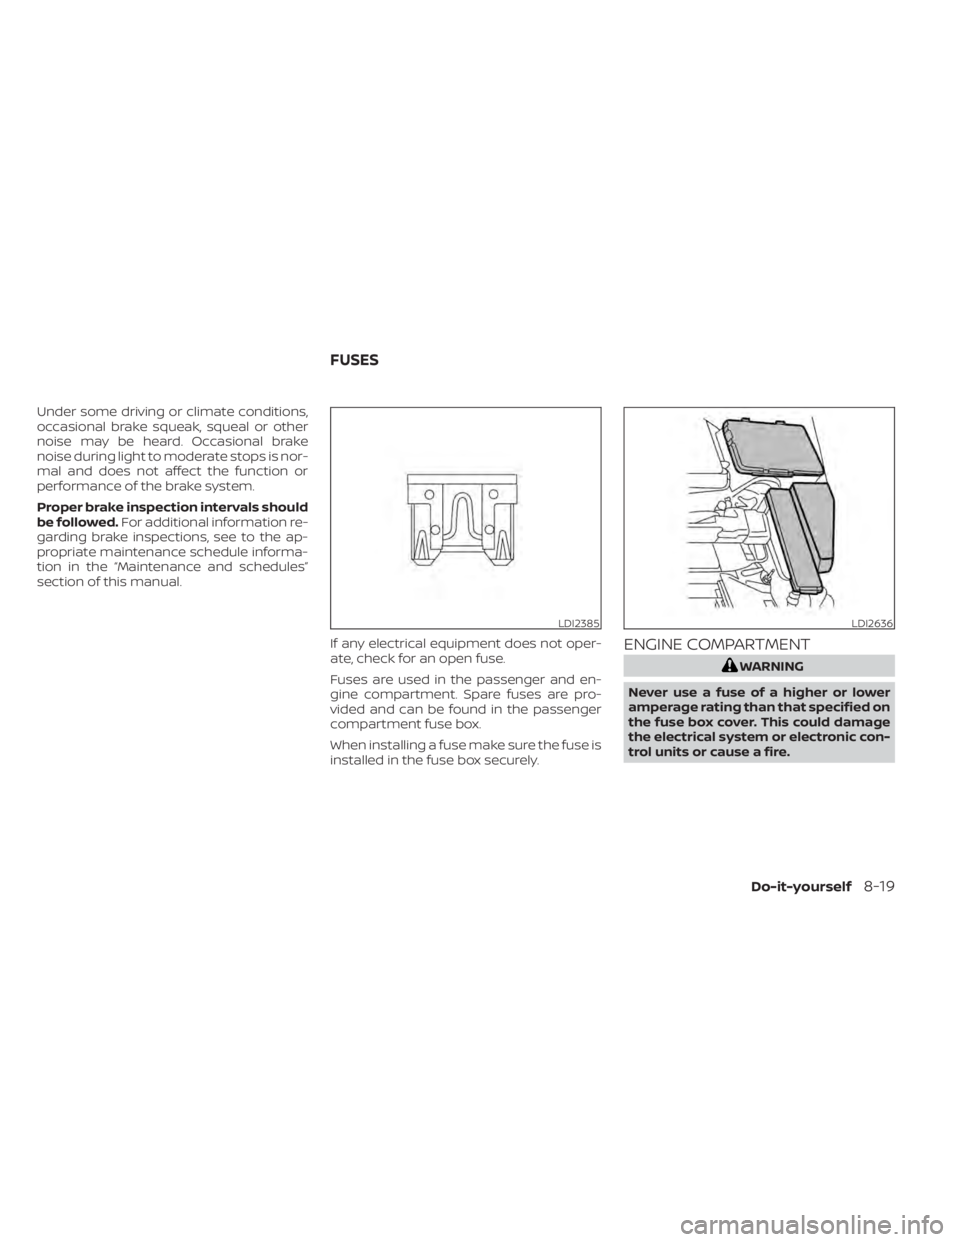
ate, check for an open fuse.
Fuses are used in the passenger and en-
gine compartment. Spare fuses are pro-
vided and can be found in the passenger
compartment fuse box.
When installing a fuse make sure the fuse is
installed in the fuse box securely.
ENGINE COMPARTMENT
WARNING
Never use a fuse of a higher or lower
amperage rating than that specified on
the fuse box cover. This could damage
the electrical system or electronic con-
trol units or cause a fire.
LDI2385LDI2636
FUSES
Do-it-yourself8-19
Page 396 of 476
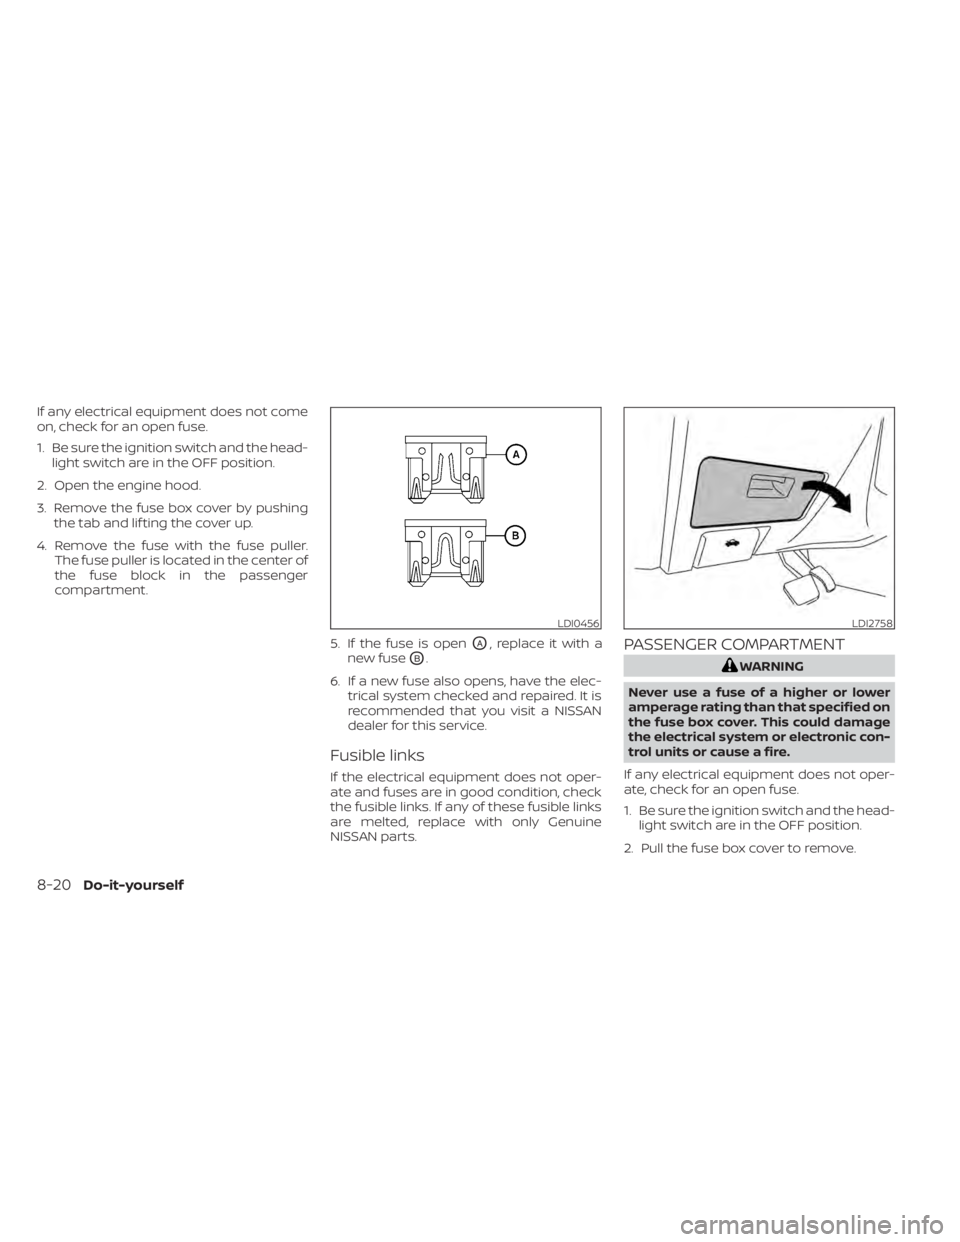
If any electrical equipment does not come
on, check for an open fuse.
1. Be sure the ignition switch and the head-light switch are in the OFF position.
2. Open the engine hood.
3. Remove the fuse box cover by pushing the tab and lif ting the cover up.
4. Remove the fuse with the fuse puller. The fuse puller is located in the center of
the fuse block in the passenger
compartment.
5. If the fuse is open
OA, replace it with a
new fuse
OB.
6. If a new fuse also opens, have the elec- trical system checked and repaired. It is
recommended that you visit a NISSAN
dealer for this service.
Fusible links
If the electrical equipment does not oper-
ate and fuses are in good condition, check
the fusible links. If any of these fusible links
are melted, replace with only Genuine
NISSAN parts.
PASSENGER COMPARTMENT
WARNING
Never use a fuse of a higher or lower
amperage rating than that specified on
the fuse box cover. This could damage
the electrical system or electronic con-
trol units or cause a fire.
If any electrical equipment does not oper-
ate, check for an open fuse.
1. Be sure the ignition switch and the head- light switch are in the OFF position.
2. Pull the fuse box cover to remove.
LDI0456LDI2758
8-20Do-it-yourself
Page 399 of 476

3. Replace the battery with a new one.Recommended battery: CR2032 or
equivalent.• Do not touch the internal circuit and electric terminals as doing so could
cause a malfunction.
• Hold the battery by the edges. Holding the battery across the contact points
will seriously deplete the storage
capacity.
• Make sure that the + side faces the bottom of the lower part.
4. Close the lid securely as illustrated with
OCandOD.
5. Operate the buttons to check the operation.
It is recommended that you visit a NISSAN
dealer if you need assistance for
replacement. FCC Notice:
For USA:
This device complies with Part 15 of the
FCC Rules. Operation is subject to the fol-
lowing two conditions: (1) This device
may not cause harmful interference, and
(2) this device must accept any interfer-
ence received, including interference
that may cause undesired operation.
Note:
Changes or modifications not expressly
approved by the party responsible for
compliance could void the user’s author-
ity to operate the equipment.
For Canada:
This device complies with Industry
Canada licence-exempt RSS standard(s).
Operation is subject to the following two
conditions: (1) this device may not cause
interference, and (2) this device must ac-
cept any interference, including interfer-
ence that may cause undesired opera-
tion of the device.
HEADLIGHTS
For additional information on headlight
bulb replacement, refer to the instructions
outlined in this section.
Replacing the LED headlight bulb
If LED headlight bulb replacement is re-
quired, it is recommended that you visit a
NISSAN dealer for this service.
FRONT PARK/TURN SIGNAL/SIDE
MARKER LIGHT
If park, turn signal or side marker light bulb
replacement is required, it is recom-
mended that you visit a NISSAN dealer for
this service.
FOG LIGHTS (if so equipped)
For additional information on fog light bulb
replacement, refer to the instructions out-
lined in this section.
Replacing the LED fog light bulb
If LED fog light bulb replacement is re-
quired, it is recommended that you visit a
NISSAN dealer for this service.
LIGHTS
Do-it-yourself8-23
Page 400 of 476

EXTERIOR AND INTERIOR LIGHTS
ItemWattage (W)Bulb No.
Headlight assembly* High ——
Low ——
Daytime running/Park ——
Turn ——
Side marker ——
Front fog light (if so equipped)* ——
Door mirror turn signal light (if so equipped)* ——
Map light* ——
Glove box light* 1—
Vanity mirror light 1.8—
Footwell light 3.4158
Step light 3.8194
Personal light* ——
Trunk light 3.4158
High-mounted stop light* Inside (if so equipped) ——
Spoiler (if so equipped) ——
Rear combination light* Stop ——
Turn signal ——
Ta i l ——
Side marker ——
Backup (reversing) assembly* Backup 16W16W
Ta i l ——
License plate light* 5W5W
* It is recommended that you visit a NISSAN dealer for assistance.
Always check with the Parts Department at a NISSAN dealer for the latest parts
information.LDI3338
8-24Do-it-yourself