fuel cap NISSAN MAXIMA 2021 Owner´s Manual
[x] Cancel search | Manufacturer: NISSAN, Model Year: 2021, Model line: MAXIMA, Model: NISSAN MAXIMA 2021Pages: 476, PDF Size: 3.32 MB
Page 99 of 476

•If the light illuminates while driving,
avoid sudden steering maneuvers or
abrupt braking, reduce vehicle
speed, pull off the road to a safe loca-
tion and stop the vehicle as soon as
possible. Driving with under-inflated
tires may permanently damage the
tires and increase the likelihood of
tire failure. Serious vehicle damage
could occur and may lead to an acci-
dent and could result in serious per-
sonal injury or death. Check the tire
pressure for all four tires. Adjust the
tire pressure to the recommended
COLD tire pressure show on the Tire
and Loading Information label lo-
cated in the driver’s door opening to
turn the low tire pressure warning
light off. If the light still illuminates
while driving af ter adjusting the tire
pressure, a tire may be flat or the
TPMS may be malfunctioning. If you
have a flat tire, replace it with a spare
tire as soon as possible. If no tire is
flat and all tires are properly inflated,
have the vehicle checked. It is recom-
mended that you visit a NISSAN
dealer for this service. •
When using a wheel without the
TPMS such as the spare tire, the TPMS
will not function and the low tire
pressure warning light will flash for
approximately 1 minute. The light will
remain on af ter 1 minute. Have your
tires replaced and/or TPMS system
reset as soon as possible. It is recom-
mended that you visit a NISSAN
dealer for these services.
• Replacing tires with those not origi-
nally specified by NISSAN could af-
fect the proper operation of the
TPMS.
CAUTION
• The TPMS is not a substitute for the
regular tire pressure check. Be sure
to check the tire pressure regularly.
• If the vehicle is being driven at
speeds of less than 16 mph (25 km/h),
the TPMS may not operate correctly.
• Be sure to install the specified size of
tires to the four wheels correctly.
Malfunction Indicator Light
(MIL)
If this indicator light comes on steady or
blinks while the engine is running, it may
indicate a potential emission control
malfunction.
The MIL may also come on steady if the
fuel-filler cap is loose or missing, or if the
vehicle runs out of fuel. Check to make sure
the fuel-filler cap is installed and closed
tightly, and that the vehicle has at least 3
gallons (11.4 liters) of fuel in the fuel tank.
Af ter a few driving trips, the
light
should turn off if no other potential emis-
sion control system malfunction exists.
If this indicator light comes on steady for 20
seconds and then blinks for 10 seconds
when the engine is not running, it indicates
that the vehicle is not ready for an emission
control system inspection/maintenance
test. For additional information, see “Readi-
ness for Inspection/Maintenance (I/M) test”
(P. 10-21).
Instruments and controls2-13
Page 100 of 476
Operation
The MIL will come on in one of two ways:
• MIL on steady — An emission control sys-tem malfunction has been detected.
Check the fuel-filler cap if the Loose Fuel
Cap warning appears in the vehicle infor-
mation display. If the fuel-filler cap is loose
or missing, tighten or install the cap and
continue to drive the vehicle. The
light should turn off af ter a few driving
trips. If thelight does not turn off
af ter a few driving trips, have the vehicle
inspected. It is recommended that you
visit a NISSAN dealer for this service. You
do not need to have your vehicle towed
to the dealer.
• MIL blinking — An engine misfire has been detected which may damage the emis-
sion control system. To reduce or avoid
emission control system damage:– do not drive at speeds above 45 mph (72 km/h).
– avoid hard acceleration or deceleration.
– avoid steep uphill grades.
– if possible, reduce the amount of cargo being hauled or towed. The MIL may stop blinking and come on
steady. Have the vehicle inspected. It is rec-
ommended that you visit a NISSAN dealer
for this service. You do not need to have
your vehicle towed to the dealer.
CAUTION
Continued vehicle operation without
having the emission control system
checked and repaired as necessary
could lead to poor driveability, reduced
fuel economy, and possible damage to
the emission control system.
Master warning light
The master warning light illuminates
whenever there is an active warning that
can be reviewed in the “warnings review”
content page in the meter, or if there is a
red-level warning being displayed (which
cannot be dismissed). The master warning
light will illuminate red if a red-level warning
is being displayed, or yellow otherwise.
• Push Engine Start Lock Warning
• No Key Detected
• Incorrect Key
• Door/Trunk Open (vehicle stationary)
• Trunk Open (vehicle moving) • Low Washer Fluid
• I-Key System Fault
• Low Tire Pressure
• CVT Warning
• Sonar Parking Sensor Error
• Chassis Control warning (if so equipped)
• Loose Fuel Cap warning
• Traffic Sign Recognition system fault (see
owner’s manual) (if so equipped)
• Driver Attention Alert system fault (if so equipped)
For additional information, see “Vehicle in-
formation display” (P. 2-17).Power steering warning
light
WARNING
• If the engine is not running or is
turned off while driving, the power
assist for the steering will not work.
Steering will be harder to operate.
2-14Instruments and controls
Page 113 of 476

• Using the steering wheel switch, a drivercan select “Dismiss Message” to clear the
display for a period of time. If no selection
is made, this message automatically
turns off af ter a period of time.
• Using the steering wheel switch, a driver can select “Disable Alert” to disable the
selected alert for the remainder of the
current trip.
WARNING
Selecting “Dismiss Message” during a
stop within a trip temporarily dis-
misses the message for that stop with-
out turning the system off. Alerts can
be provided for other stops during the
trip. Selecting “Disable Alert” turns off
the Rear Door Alert system for the re-
mainder of a trip and no audible alert
will be provided.
NOTE:
This system is disabled until a driver en-
ables it using the vehicle information
display. For additional information, see
“How to use the vehicle information dis-
play ” (P. 2-18).
For additional information, see “Rear Door
Alert” (P. 2-58).
Check Rear Seat For All Articles
When the system is enabled, this message
appears when the vehicle comes to a com-
plete stop, the vehicle is transitioned from
the D (Drive) position to P (Park) position,
and the driver exits the vehicle. This mes-
sage alerts the driver, af ter a period of time,
to check for items in the rear seat af ter the
audible alert has been provided.
NOTE:
This system is disabled until a driver en-
ables it using the vehicle information
display. For additional information, see
“How to use the vehicle information dis-
play ” (P. 2-18).
For additional information, see “Rear Door
Alert” (P. 2-58).
Door/Trunk Open
This warning appears when a door or the
trunk has been opened.
Headlight System Error: See Owner’s
Manual
This warning appears when there is an er-
ror with the system. For additional informa-
tion, see “Headlight and turn signal switch”
(P. 2-45).
Loose Fuel Cap
This warning appears when the fuel-filler
cap is not tightened correctly af ter the ve-
hicle has been refueled. For additional in-
formation, see “Fuel-filler cap” (P. 3-22).
Low Fuel
This warning appears when the fuel level in
the fuel tank is getting low. Refuel as soon
as it is convenient, preferably before the
fuel gauge reaches 0 (Empty). There will be
a small reserve of fuel in the tank when
the fuel gauge needle reaches 0 (Empty).
Low Outside Temperature
This warning appears if the outside tem-
perature is below 37°F (3°C). The tempera-
ture can be changed to display in Celsius or
Fahrenheit. For additional information, see
“Settings” (P. 2-19).
Low Washer Fluid
This warning appears when the
windshield-washer fluid is at a low level.
Add windshield-washer fluid as necessary.
For additional information, see
“Windshield-washer fluid” (P. 8-12).
Instruments and controls2-27
Page 165 of 476

3 Pre-driving checks and adjustments
Keys.............................................3-2NISSAN Intelligent Key® .......................3-2
NISSAN Vehicle Immobilizer System
keys..........................................3-4
Doors ...........................................3-4
Locking with key .............................3-5
Locking with power door lock switch .........3-6
Automatic door locks ........................3-6
Child safety rear door lock ....................3-6
NISSAN Intelligent Key® .......................... 3-7
Operating range .............................3-8
Door locks/unlocks precaution ...............3-8
NISSAN Intelligent Key® Operation ............3-9
How to use the remote keyless entry
function ..................................... 3-13
Warning signals ............................. 3-15
Troubleshooting guide ......................3-16
Remote Engine Start ........................... 3-18
Remote Engine Start operating range .......3-18
Remote starting the vehicle .................3-18
Extending engine run time ..................3-19
Canceling a Remote Engine Start ...........3-19
Conditions the Remote Engine Start will
notwork .................................... 3-19Hood
........................................... 3-20
Trunk lid ........................................ 3-21
Opener operation ........................... 3-21
Interior trunk lid release .....................3-21
Interior trunk access ........................ 3-22
Fuel-filler door .................................. 3-22
Opening the fuel-filler door ..................3-22
Fuel-filler cap ................................ 3-23
Steering wheel ................................. 3-24
Manual operation (if so equipped) ...........3-25
Automatic operation (if so equipped) ........3-25
Sun visors ...................................... 3-26
Vanity mirrors ............................... 3-27
Mirrors ......................................... 3-27
Automatic anti-glare rearview mirror ........3-27
Outside mirrors ............................. 3-28
Memory seat (if so equipped) ...................3-30
Memory storage function (key-link) ..........
3-30
Memor
y storage function (switch) ...........3-31
Entry/exit function .......................... 3-32
System operation ........................... 3-32
Page 187 of 476

FUEL-FILLER CAP
WARNING
• Gasoline is extremely flammable and
highly explosive under certain condi-
tions. You could be burned or seri-
ously injured if it is misused or mis-
handled. Always stop the engine and
do not smoke or allow open flames or
sparks near the vehicle when
refueling.
• Do not attempt to top off the fuel
tank af ter the fuel pump nozzle
shuts off automatically. Continued
refueling may cause fuel overflow,
resulting in fuel spray and possibly a
fire.
• Use only an original equipment type
fuel-filler cap as a replacement. It has
a built-in safety valve needed for
proper operation of the fuel system
and emission control system. An in-
correct cap can result in a serious
malfunction and possible injury. It
could also cause the
Malfunc-
tion Indicator Light (MIL) to come on.
• Never pour fuel into the throttle body
to attempt to start your vehicle. •
Do not fill a portable fuel container in
the vehicle or trailer. Static electricity
can cause an explosion of flammable
liquid, vapor or gas in any vehicle or
trailer. To reduce the risk of serious
injury or death when filling portable
fuel containers:
– Always place the container on the
ground when filling.
– Do not use electronic devices
when filling.
– Keep the pump nozzle in contact
with the container while you are
filling it.
– Use only approved portable fuel
containers for flammable liquid.
CAUTION
• Do not use a fuel containing more
than 15% ethanol in your vehicle. For
additional information, see “Fuel rec-
ommendation” (P. 10-3). •
The Loose Fuel Cap warning will ap-
pear if the fuel-filler cap is not prop-
erly tightened. It may take a few driv-
ing trips for the message to be
displayed. Failure to tighten the fuel-
filler cap properly af ter the Loose
Fuel Cap warning appears may cause
the
Malfunction Indicator Light
(MIL) to illuminate.
• Failure to tighten the fuel-filler cap
properly may cause the
Mal-
function Indicator Light (MIL) to illu-
minate. If the
light illuminates
because the fuel-filler cap is loose or
missing, tighten or install the cap and
continue to drive the vehicle. The
light should turn off af ter a few
driving trips. If thelight does not
turn off af ter a few driving trips, have
the vehicle inspected. It is recom-
mended that you visit a NISSAN
dealer for this service.
• For additional information, see “Mal-
function Indicator Light (MIL)”
(P. 2-13).
• If fuel is spilled on the vehicle body,
flush it away with water to avoid
paint damage.
Pre-driving checks and adjustments3-23
Page 188 of 476

To remove the fuel-filler cap:
1. Turn the fuel-filler cap counterclockwiseto remove.
2. Put the fuel-filler cap on the cap holder
O1while refueling.
To install the fuel-filler cap:
1. Insert the fuel-filler cap straight into the fuel-filler tube.
2. Turn the fuel-filler cap clockwise until a single click is heard.
Loose Fuel Cap warning
The Loose Fuel Cap warning appears in the
vehicle information display when the fuel-
filler cap is not tightened correctly af ter the
vehicle has been refueled. It may take a few
driving trips for the message to be dis-
played. To turn off the warning, perform the
following:
1. Remove and install the fuel-filler cap assoon as possible. For additional informa-
tion, see “Fuel-filler cap” (P. 3-23).
2. Tighten the fuel-filler cap until it a single click is heard.
WARNING
• Do not adjust the steering wheel
while driving. You could lose control
of your vehicle and cause an
accident.
• Do not adjust the steering wheel any
closer to you than is necessary for
proper steering operation and com-
fort. The driver's air bag inflates with
great force. If you are unrestrained,
leaning forward, sitting sideways or
out of position in any way, you are at
greater risk of injury or death in a
crash. You may also receive serious
or fatal injuries from the air bag if you
are up against it when it inflates. Al-
ways sit back against the seatback
and as far away as practical from the
steering wheel. Always use the seat
belts.
LPD0482LPD2985
STEERING WHEEL
3-24Pre-driving checks and adjustments
Page 252 of 476
NORMAL MODE
NORMAL mode is recommended for nor-
mal driving and is the default drive mode. If
SPORT mode is selected, then NORMAL
mode is canceled. Press the SPORT mode
button again to return to NORMAL mode.
The SPORT mode indicator in the vehicle
information display, and the indicator light
on the Drive Mode Selector switch will turn
off.
SPORT MODE
The SPORT mode adjusts the engine,
transmission, and steering to enhance
performance. Press the SPORT mode but-
ton to select this driving mode. The SPORT
mode indicator will appear in the vehicle
information display, and the indicator light
on the Drive Mode Selector switch will turn
on.
NOTE:
In the SPORT mode, fuel economy may
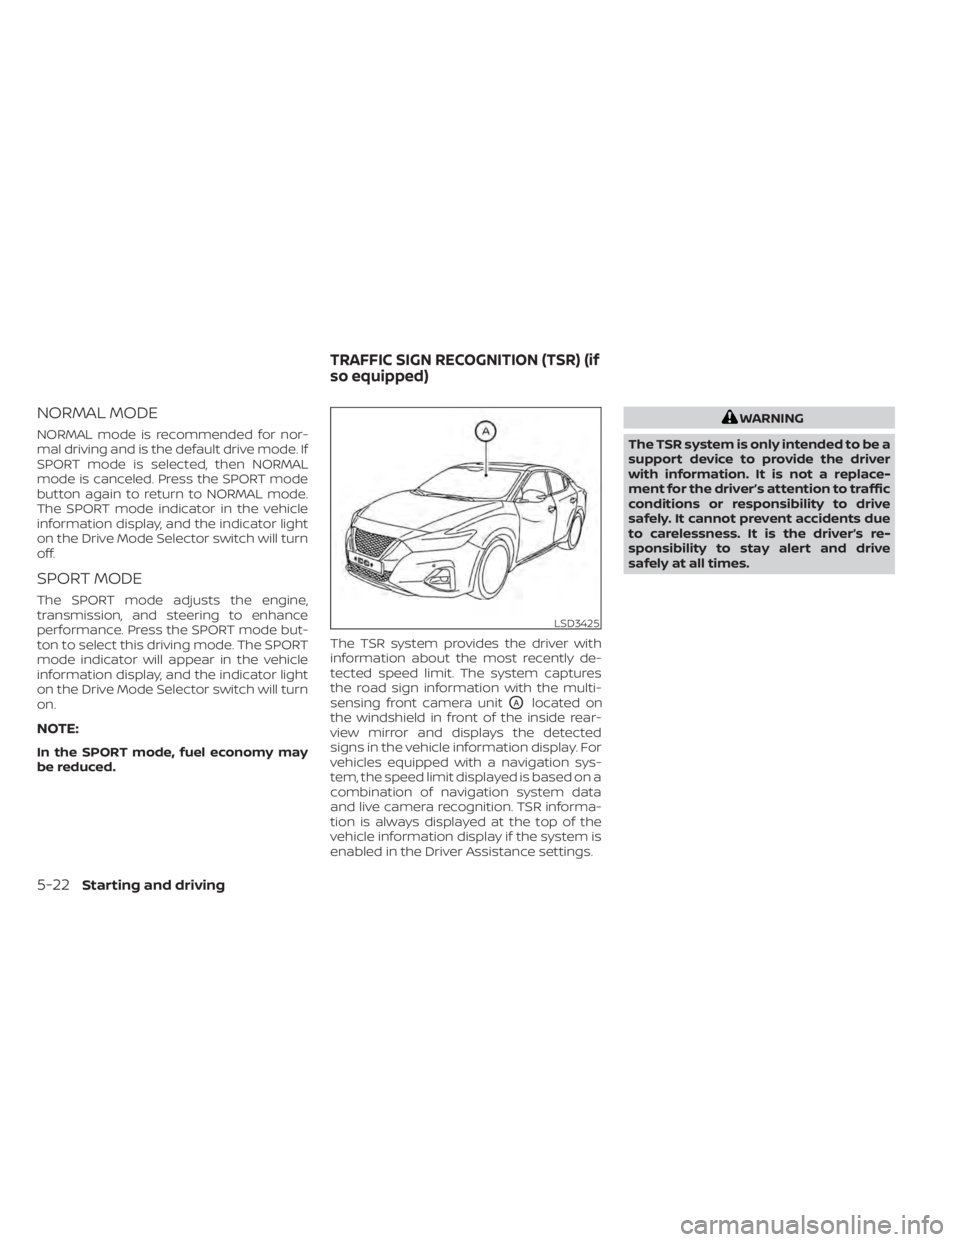
be reduced.The TSR system provides the driver with
information about the most recently de-
tected speed limit. The system captures
the road sign information with the multi-
sensing front camera unit
OAlocated on
the windshield in front of the inside rear-
view mirror and displays the detected
signs in the vehicle information display. For
vehicles equipped with a navigation sys-
tem, the speed limit displayed is based on a
combination of navigation system data
and live camera recognition. TSR informa-
tion is always displayed at the top of the
vehicle information display if the system is
enabled in the Driver Assistance settings.
WARNING
The TSR system is only intended to be a
support device to provide the driver
with information. It is not a replace-
ment for the driver’s attention to traffic
conditions or responsibility to drive
safely. It cannot prevent accidents due
to carelessness. It is the driver’s re-
sponsibility to stay alert and drive
safely at all times.
LSD3425
TRAFFIC SIGN RECOGNITION (TSR) (if
so equipped)
5-22Starting and driving
Page 340 of 476
7.Avoid Idling
• Shutting off your engine when safe for stops exceeding 30–60 seconds saves
fuel and reduces emissions.
8. Buy an Automated Pass for Toll Roads
• Automated passes permit drivers to use special lanes to maintain cruising
speed through the toll and avoid stop-
ping and starting.
9. Winter Warm Up
• Limit idling time to minimize impact to fuel economy.
• Vehicles typically need no more than 30 seconds of idling at start-up to ef-
fectively circulate the engine oil before
driving.
• Your vehicle will reach its ideal operat- ing temperature more quickly while
driving versus idling.
10. Keeping your Vehicle Cool
• Park your vehicle in a covered parking area or in the shade whenever
possible.
• When entering a hot vehicle, opening the windows will help to reduce the
inside temperature faster, resulting in
reduced demand on your A/C system. • Keep your engine tuned up.
• Follow the recommended scheduled
maintenance.
• Keep the tires inflated to the correct pres- sure. Low tire pressure increases tire
wear and lowers fuel economy.
• Keep the wheels in correct alignment. Im- proper alignment increases tire wear and
lowers fuel economy.
• Use the recommended viscosity engine oil. For additional information, see “Rec-
ommended fluids/lubricants and capaci-
ties” (P. 10-2).
INCREASING FUEL ECONOMY
5-110Starting and driving
Page 378 of 476
When performing any inspection or main-
tenance work on your vehicle, always take
care to prevent serious accidental injury to
yourself or damage to the vehicle. The fol-
lowing are general precautions which
should be closely observed.
WARNING
• Park the vehicle on a level surface,
apply the parking brake securely and
block the wheels to prevent the ve-
hicle from moving. Move the shif t le-
ver to P (Park).
• Be sure the ignition switch is in the
OFF or LOCK position when perform-
ing any parts replacement or repairs.
• If you must work with the engine run-
ning, keep your hands, clothing, hair
and tools away from moving fans,
belts and any other moving parts.
• It is advisable to secure or remove
any loose clothing and remove any
jewelry, such as rings, watches, etc.
before working on your vehicle.
• Always wear eye protection when-
ever you work on your vehicle. •
Your vehicle is equipped with an au-
tomatic engine cooling fan. It may
come on at any time without warn-
ing, even if the ignition switch is in
the OFF position and the engine is
not running. To avoid injury, always
disconnect the negative battery
cable before working near the fan.
• If you must run the engine in an en-
closed space such as a garage, be
sure there is proper ventilation for
exhaust gases to escape.
• Never get under the vehicle while it is
supported only by a jack. If it is nec-
essary to work under the vehicle,
support it with safety stands.
• Keep smoking materials, flame and
sparks away from the fuel tank and
battery.
• On gasoline engine models, the fuel
filter or fuel lines should be serviced.
It is recommended that you visit a
NISSAN dealer for this service be-
cause the fuel lines are under high
pressure even when the engine is off.
CAUTION
• Do not work under the hood while
the engine is hot. Turn the engine off
and wait until it cools down. •
Avoid contact with used engine oil
and coolant. Improperly disposed
engine oil, engine coolant and/or
other vehicle fluids can damage the
environment. Always conform to lo-
cal regulations for disposal of vehicle
fluid.
• Never leave the engine or the trans-
mission related component harness
connector disconnected while the ig-
nition switch is in the ON position.
• Never connect or disconnect the bat-
tery or any transistorized compo-
nent while the ignition switch is in
the ON position.
This “Do-it-yourself ” section gives instruc-
tions regarding only those items which are
relatively easy for an owner to perform.
A Genuine NISSAN service manual is also
available. For additional information, see
“Owner's Manual/Service Manual order in-
formation” (P. 10-22).
You should be aware that incomplete or
improper servicing may result in operating
difficulties or excessive emissions, and
could affect warranty coverage. If in doubt
about any servicing, it is recommended
that you have it done by a NISSAN dealer.
MAINTENANCE PRECAUTIONS
8-2Do-it-yourself
Page 420 of 476
NOTE:
NISSAN does not advocate the use of
non-OEM approved af termarket flush-
ing systems and strongly advises
against performing these services on a
NISSAN product. Many of the af termar-
ket flushing systems use non-OEM ap-
proved chemicals or solvents, the use of
which has not been validated by NISSAN.
For recommended fuel, lubricants, fluids,
grease, and refrigerant, see “Recom-
mended fluids/lubricants and capaci-
ties” (P. 10-2).
EMISSION CONTROL SYSTEM
MAINTENANCE:
Drive belts*:Check engine drive belts for
wear, fraying or cracking and for proper
tension. Replace any damaged drive belts.
Engine air filter: Replace at specified inter-
vals. When driving for prolonged periods in
dusty conditions, check/replace the filter
more frequently.
Engine coolant*: Replace coolant at the
specified interval. When adding or replac-
ing coolant, be sure to use only Genuine
NISSAN Long Life Antifreeze/Coolant (blue)
or equivalent with the proper mixture. (For additional information on the proper mix-
ture for your area, see “Engine cooling sys-
tem” (P. 8-5.)
NOTE: Mixing any other type of coolant or
the use of non-distilled water may reduce
the recommended service interval of the
coolant.
Engine oil and oil filter:
Replace engine oil
and oil filter at the specified intervals. For
recommended oil grade and viscosity, see
“Recommended fluids/lubricants and ca-
pacities” (P. 10-2).
Fuel lines*: Check the fuel hoses, piping
and connections for leaks, looseness, or
deterioration. Tighten connections or re-
place parts as necessary.
Spark plugs: Replace at specified intervals.
Install new plugs of the same type as origi-
nally equipped.
CHASSIS AND BODY
MAINTENANCE:
Brake lines and cables: Visually inspect for
proper installation. Check for chafing,
cracks, deterioration, and signs of leaking.
Replace any deteriorated or damaged
parts immediately. Brake pads and rotors:
Check for wear, de-
terioration and fluid leaks. Replace any dete-
riorated or damaged parts immediately.
Exhaust system: Visually inspect the ex-
haust pipes, muffler and hangers for leaks,
cracks, deterioration, and damage. Tighten
connections or replace parts as necessary.
In-cabin microfilter: Replace at specified
intervals. When driving for prolonged peri-
ods in dusty conditions, replace the filter
more frequently.
Steering gear and linkage, axle and sus-
pension parts, drive shaf t boots: Check
for damage, looseness, and leakage of oil
or grease. Under severe driving conditions,
inspect more frequently.
Tire rotation: Rotate tires at the specified
interval shown in the maintenance sched-
ule. When rotating tires, check for damage
and uneven wear. Replace if necessary.
Transmission fluid/oil: Visually inspect for
signs of leakage at specified intervals.
If using a car-top carrier, or driving on rough
or muddy roads, replace the CVT fluid every
60,000 miles (96,000 km) or request the
dealer to inspect the fluid deterioration data
using a CONSULT. If the deterioration data is
more than 210000, replace the CVT fluid.
9-6Maintenance and schedules