MIL NISSAN MICRA 2011 Owners Manual
[x] Cancel search | Manufacturer: NISSAN, Model Year: 2011, Model line: MICRA, Model: NISSAN MICRA 2011Pages: 293, PDF Size: 2.98 MB
Page 2 of 293
Welcome to the growing family of new NISSAN
owners. This vehicle is delivered to you with
confidence. It was produced using the latest
techniques and strict quality control.
This manual was prepared to help you under-
stand the operation and maintenance of your
vehicle so that you may enjoy many kilometers
(miles) of driving pleasure. Please read through
this manual before operating your vehicle.
A separate Warranty Information Booklet
explains details about the warranties cov-
ering your vehicle. The “NISSAN Service
and Maintenance Guide” explains details
about maintaining and servicing your ve-
hicle.
Your NISSAN dealership knows your vehicle
best. When you require any service or have any
questions, they will be glad to assist you with the
extensive resources available to them.
In addition to factory-installed options, your ve-
hicle may also be equipped with additional ac-
cessories installed by NISSAN or by your
NISSAN dealer prior to delivery. It is important
that you familiarize yourself with all disclosures,
warnings, cautions and instructions concerning
proper use of such accessories prior to operating
the vehicle and/or accessory. See a NISSAN
dealer for details concerning the particular ac-
cessories with which your vehicle is equipped.Before driving your vehicle, please read this
Owner’s Manual carefully. This will ensure famil-
iarity with controls and maintenance require-
ments assisting you in the safe operation of your
vehicle.
Page 33 of 293
WARNING
●Only NISSAN seat belt extenders, made
by the same company which made the
original equipment seat belts, should
be used with NISSAN seat belts.
● Adults and children who can use the
standard seat belt should not use an
extender. Such unnecessary use could
result in serious personal injury in the
event of an accident.
● Never use seat belt extenders to install
child restraints. If the child restraint is
not secured properly, the child could be
seriously injured in a collision or a sud-
den stop.
SEAT BELT MAINTENANCE
● To clean the seat belt webbing, apply a
mild soap solution or any solution recom-
mended for cleaning upholstery or carpet.
Then wipe with a cloth and allow the seat
belts to dry in the shade. Do not allow the
seat belts to retract until they are completely
dry.
● If dirt builds up in the shoulder belt
guide of the seat belt anchors, the seat
belts may retract slowly. Wipe the shoulder
belt guide with a clean, dry cloth. ●
Periodically check to see that the seat
belt and the metal components, such as
buckles, tongues, retractors, flexible wires
and anchors, work properly. If loose parts,
deterioration, cuts or other damage on the
webbing is found, the entire seat belt as-
sembly should be replaced.
Page 64 of 293
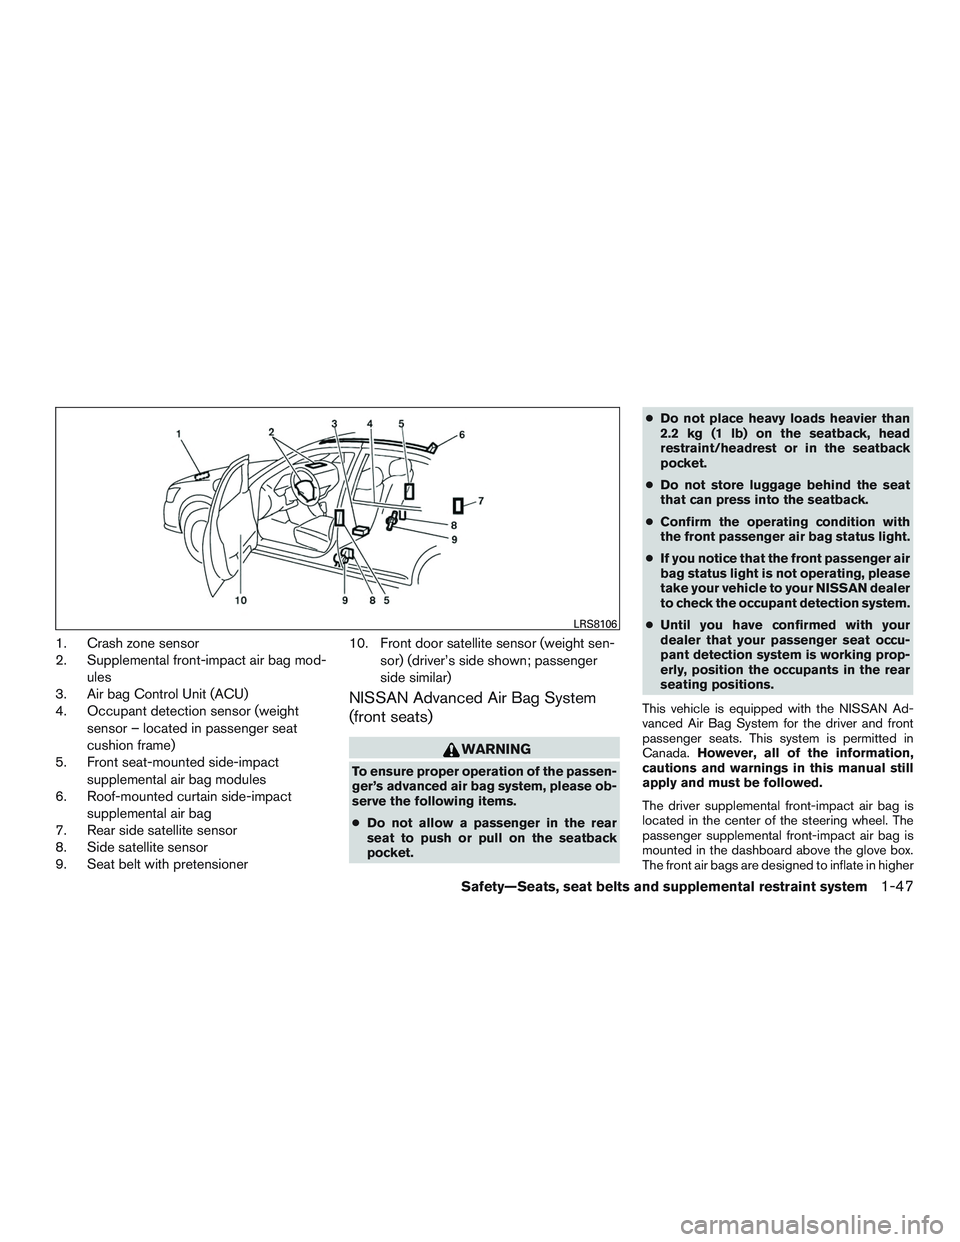
1. Crash zone sensor
2. Supplemental front-impact air bag mod-ules
3. Air bag Control Unit (ACU)
4. Occupant detection sensor (weight
sensor – located in passenger seat
cushion frame)
5. Front seat-mounted side-impact
supplemental air bag modules
6. Roof-mounted curtain side-impact
supplemental air bag
7. Rear side satellite sensor
8. Side satellite sensor
9. Seat belt with pretensioner 10. Front door satellite sensor (weight sen-
sor) (driver’s side shown; passenger
side similar)
NISSAN Advanced Air Bag System
(front seats)
Page 69 of 293
●Work on and around the front air bag
system should be done by a NISSAN
dealer. Installation of electrical equip-
ment should also be done by a NISSAN
dealer. The Supplemental Restraint
System (SRS) wiring harnesses* should
not be modified or disconnected. Unau-
thorized electrical test equipment and
probing devices should not be used on
the air bag system.
● A cracked windshield should be re-
placed immediately by a qualified repair
facility. A cracked windshield could af-
fect the function of the supplemental air
bag system.
*The SRS wiring harness connectors are
yellow and orange for easy identification.
When selling your vehicle, we request that you
inform the buyer about the front air bag system
and guide the buyer to the appropriate sections
in this Owner’s Manual.
FRONT SEAT-MOUNTED SIDE-
IMPACT SUPPLEMENTAL AIR BAG
AND ROOF-MOUNTED CURTAIN
SIDE-IMPACT SUPPLEMENTAL AIR
BAG SYSTEMS
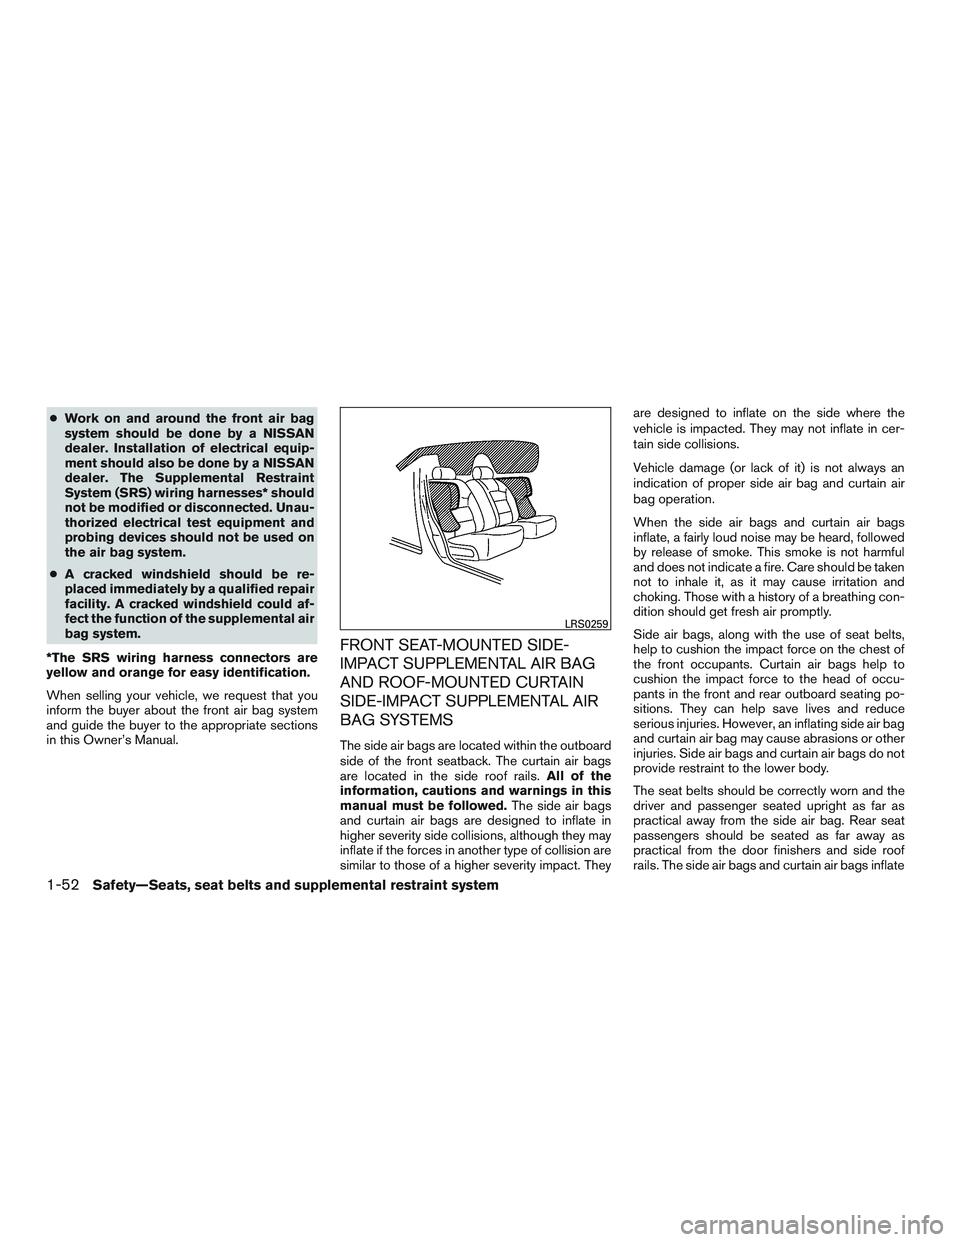
The side air bags are located within the outboard
side of the front seatback. The curtain air bags
are located in the side roof rails. All of the
information, cautions and warnings in this
manual must be followed. The side air bags
and curtain air bags are designed to inflate in
higher severity side collisions, although they may
inflate if the forces in another type of collision are
similar to those of a higher severity impact. They are designed to inflate on the side where the
vehicle is impacted. They may not inflate in cer-
tain side collisions.
Vehicle damage (or lack of it) is not always an
indication of proper side air bag and curtain air
bag operation.
When the side air bags and curtain air bags
inflate, a fairly loud noise may be heard, followed
by release of smoke. This smoke is not harmful
and does not indicate a fire. Care should be taken
not to inhale it, as it may cause irritation and
choking. Those with a history of a breathing con-
dition should get fresh air promptly.
Side air bags, along with the use of seat belts,
help to cushion the impact force on the chest of
the front occupants. Curtain air bags help to
cushion the impact force to the head of occu-
pants in the front and rear outboard seating po-
sitions. They can help save lives and reduce
serious injuries. However, an inflating side air bag
and curtain air bag may cause abrasions or other
injuries. Side air bags and curtain air bags do not
provide restraint to the lower body.
The seat belts should be correctly worn and the
driver and passenger seated upright as far as
practical away from the side air bag. Rear seat
passengers should be seated as far away as
practical from the door finishers and side roof
rails. The side air bags and curtain air bags inflate
Page 192 of 293
WARNING
●If the engine is not running or is turned
off while driving, the power assist for
the steering will not work. Steering will
be harder to operate.
● When the power steering warning light
illuminates with the engine running,
there will be no power assist for the
steering. You will still have control of
the vehicle but the steering will be
harder to operate. Have the power
steering system checked by a NISSAN
dealer.
The power steering system is designed to pro-
vide power assist while driving to operate the
steering wheel with light force.
When the steering wheel is operated repeatedly
or continuously while parking or driving at a very
low speed, the power assist for the steering
wheel will be reduced. This is to prevent over-
heating of the power steering system and protect
it from getting damaged. While the power assist
is reduced, steering wheel operation will become
heavy. When the temperature of the power steer-
ing system goes down, the power assist level will
return to normal. Avoid repeating such steering
wheel operations that could cause the power
steering system to overheat. You may hear a sound when the steering wheel is
operated quickly. However, this is not a malfunc-
tion.
If the electric power steering warning light
PS
illuminates while the engine is running, it may
indicate the power steering system is not func-
tioning properly and may need servicing. Have
the power steering system checked by a
NISSAN dealer.
When the electric power steering warning light
illuminates with the engine running, there will be
no power assist for the steering but you will still
have control of the vehicle. At this time, greater
steering effort is required to operate the steering
wheel, especially in sharp turns and at low
speeds.
For additional information, refer to “Power steer-
ing warning light” in the “Instruments and con-
trols” section. The brake system has two separate hydraulic
circuits. If one circuit malfunctions, you will still
have braking at two wheels.
BRAKE PRECAUTIONS
Vacuum assisted brakes
The brake booster aids braking by using engine
vacuum. If the engine stops, you can stop the
vehicle by depressing the brake pedal. However,
greater foot pressure on the brake pedal will be
required to stop the vehicle and stopping dis-
tance will be longer.
Using the brakes
Avoid resting your foot on the brake pedal while
driving. This will overheat the brakes, wear out the
brake pads faster, and reduce gas mileage.
To help reduce brake wear and to prevent the
brakes from overheating, reduce speed and
downshift to a lower gear before going down a
slope or long grade. Overheated brakes may
reduce braking performance and could result in
loss of vehicle control.
POWER STEERING
BRAKE SYSTEM
Starting and driving5-19
Page 194 of 293
WARNING
Do not pump the brake pedal. Doing so
may result in increased stopping
distances.
Self-test feature
The ABS includes electronic sensors, electric
pumps, hydraulic solenoids and a computer. The
computer has a built-in diagnostic feature that
tests the system each time you start the engine
and move the vehicle at a low speed in forward or
reverse. When the self-test occurs, you may hear
a “clunk” noise and/or feel a pulsation in the brake
pedal. This is normal and does not indicate a
malfunction. If the computer senses a malfunc-
tion, it switches the ABS off and illuminates the
ABS warning light on the instrument panel. The
brake system then operates normally but without
anti-lock assistance.
If the ABS warning light illuminates during the
self-test or while driving, have the vehicle
checked by a NISSAN dealer.
Normal operation
The ABS operates at speeds above5-10km/h
(3 - 6 MPH) . The speed varies according to road
conditions.
When the ABS senses that one or more wheels
are close to locking up, the actuator rapidly ap-
plies and releases hydraulic pressure. This action
is similar to pumping the brakes very quickly. You
may feel a pulsation in the brake pedal and hear a
noise from under the hood or feel a vibration from
the actuator when it is operating. This is normal
and indicates that the ABS is operating properly.
However, the pulsation may indicate that road
conditions are hazardous and extra care is re-
quired while driving. The Vehicle Dynamic Control (VDC) system uses
various sensors to monitor driver inputs and ve-
hicle motion. Under certain driving conditions,
the VDC System helps to perform the following
functions:
● Controls brake pressure to reduce wheel
slip on one slipping drive wheel so power is
transferred to a non slipping drive wheel on
the same axle.
● Controls brake pressure and engine output
to reduce drive wheel slip based on vehicle
speed (traction control function) .
● Controls brake pressure at individual wheels
and engine output to help the driver maintain
control of the vehicle in the following condi-
tions:
– understeer (vehicle tends to not follow the steered path despite increased steer-
ing input)
– oversteer (vehicle tends to spin due to certain road or driving conditions)
The VDC system can help the driver to maintain
control of the vehicle, but it cannot prevent loss of
vehicle control in all driving situations.
VEHICLE DYNAMIC CONTROL (VDC)
SYSTEM
Starting and driving5-21
Page 206 of 293
WARNING
●Incorrect wheel nuts or improperly
tightened wheel nuts can cause the
wheel to become loose or come off.
This could cause an accident.
● Do not use oil or grease on the wheel
studs or nuts. This could cause the nuts
to become loose.
● Retighten the wheel nuts when the ve-
hicle has been driven for 1,000 km
(600 miles) (also in cases of a flat tire,
etc.) .
As soon as possible, tighten the wheel nuts
to the specified torque with a torque
wrench.
Wheel nut tightening torque: 113 N·m (83 ft-lb)
The wheel nuts must be kept tightened to
specification at all times. It is recom-
mended that wheel nuts be tightened to
specification at each lubrication interval.
Adjust tire pressure to the COLD pressure.
COLD pressure: After the vehicle has been
parked for 3 hours or more or driven less
than 1.6 km (1 mile) . COLD tire pressures are shown on the Tire
Placard.
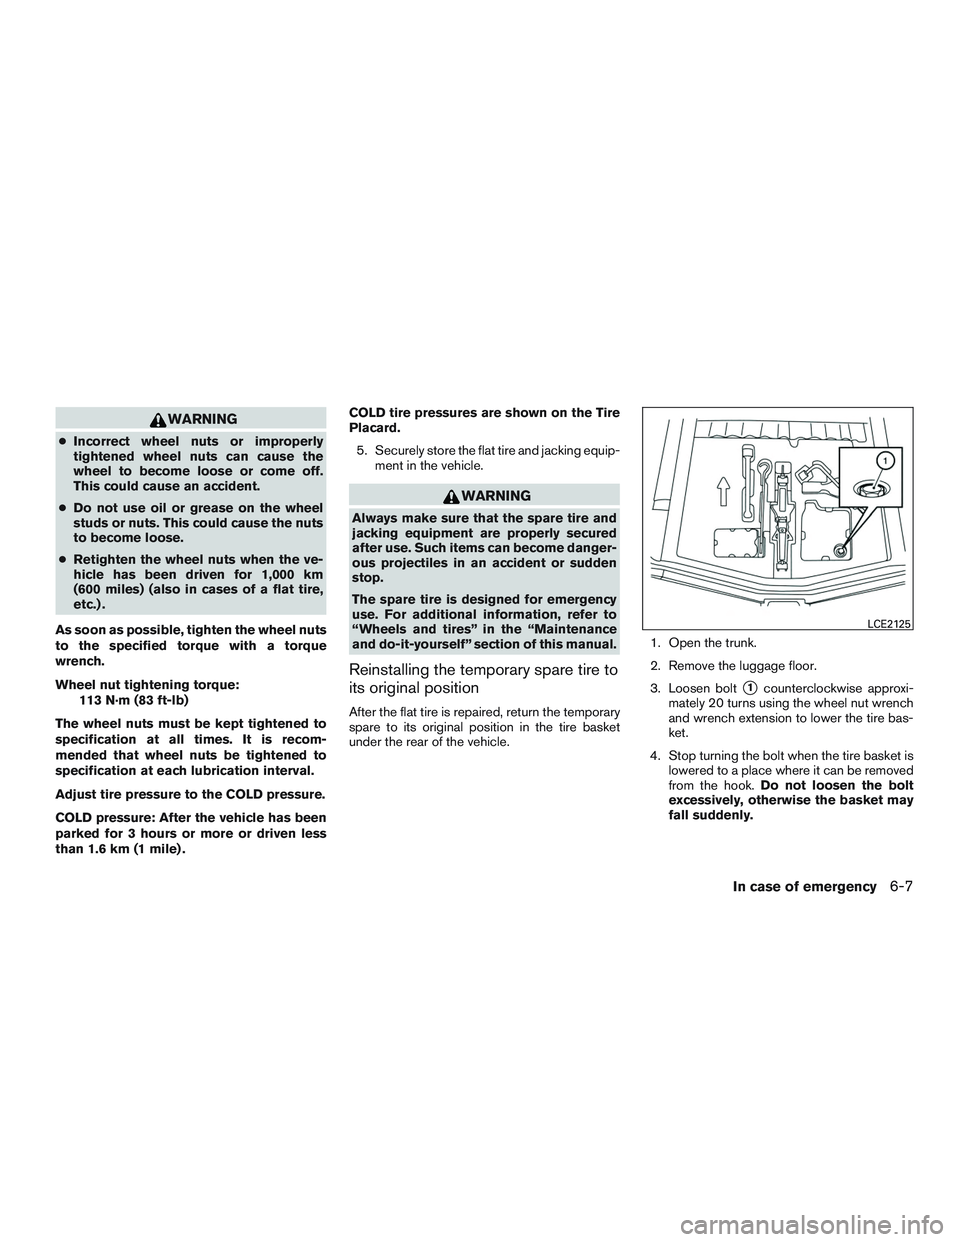
5. Securely store the flat tire and jacking equip- ment in the vehicle.
Page 214 of 293
CAUTION
●Never tow automatic transmission
models with the front wheels on the
ground or four wheels on the ground
(forward or backward) , as this may
cause serious and expensive damage to
the transmission. If it is necessary to
tow the vehicle with the rear wheels
raised always use towing dollies under
the front wheels.
● When towing automatic transmission
models with the front wheels on towing
dollies, or when towing manual trans-
mission models with the front wheels
on the ground:
– Place the ignition switch to the OFF position, and secure the steering
wheel in a straight-ahead position
with a rope or similar device. Never
secure the steering wheel by placing
the ignition switch in the LOCK posi-
tion. This may damage the steering
lock mechanism.
– Place the shift lever in the N (Neutral) position. ●
When towing automatic or manual
transmission models with the rear
wheels on the ground (if you do not use
towing dollies): Always release the
parking brake.
● Observe the following restricted towing
speeds and distances for manual trans-
missions (M/T) only:
– Speed: Below 80 km/h (50 MPH)
– Distance: Less than 80 km (50 miles)
VEHICLE RECOVERY (freeing a stuck
vehicle)
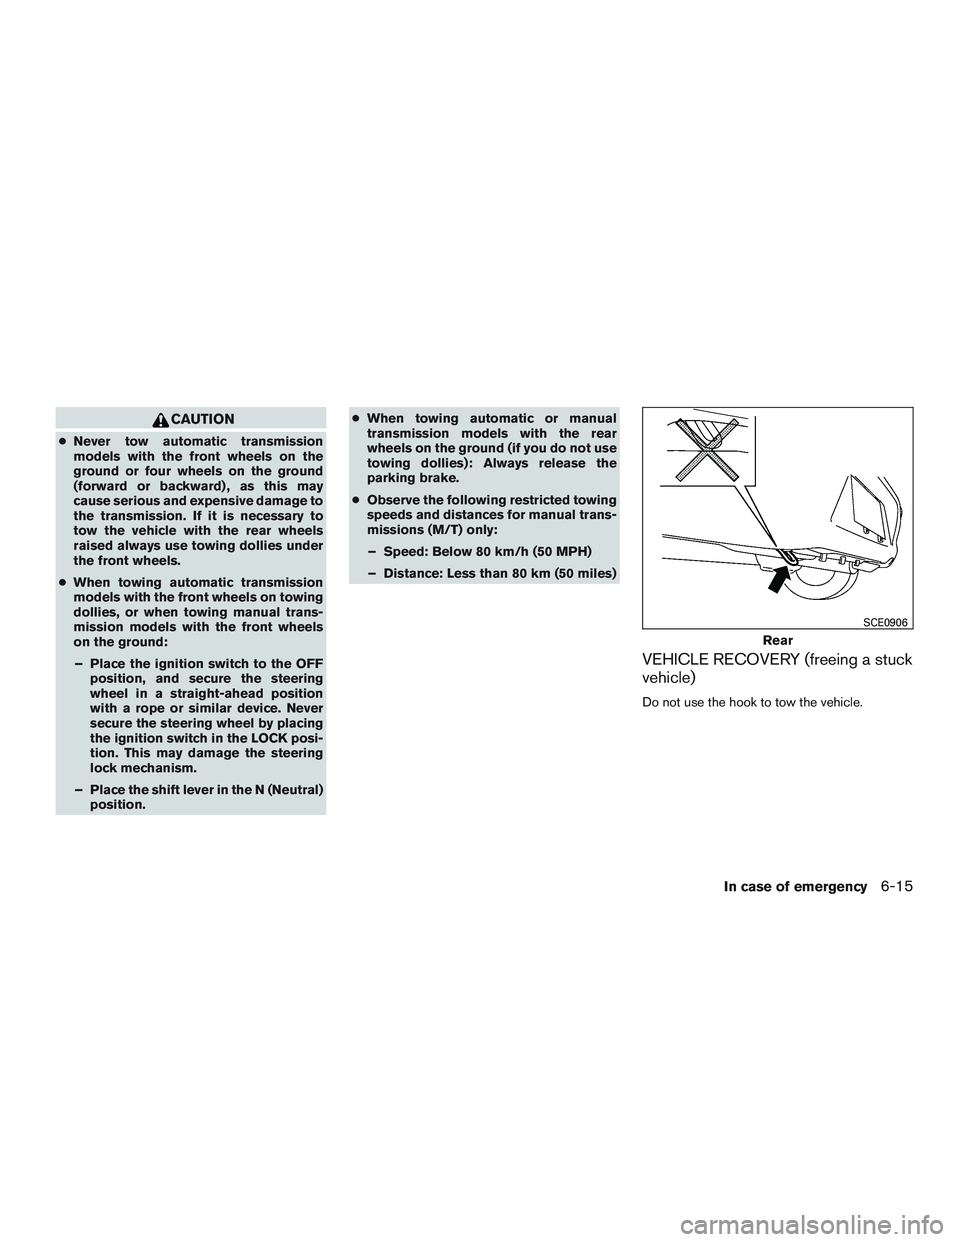
Do not use the hook to tow the vehicle.
Page 217 of 293
In order to maintain the appearance of your ve-
hicle, it is important to take proper care of it.
To protect the paint surfaces, please wash your
vehicle as soon as you can:● after a rainfall to prevent possible damage
from acid rain
● after driving on coastal roads
● when contaminants such as soot, bird drop-
pings, tree sap, metal particles or bugs get
on the paint surface
● when dust or mud builds up on the surface
Whenever possible, store or park your vehicle
inside a garage or in a covered area.
When it is necessary to park outside, park in a
shady area or protect the vehicle with a body
cover.
Be careful not to scratch the paint surface
when putting on or removing the body
cover.
WASHING
Wash dirt off with a wet sponge and plenty of
water. Clean the vehicle thoroughly using a mild
soap, a special vehicle soap or general purpose
dishwashing liquid mixed with clean, lukewarm
(never hot) water.
Page 219 of 293
Occasionally remove loose dust from the interior
trim, plastic parts and seats using a vacuum
cleaner or soft bristled brush. Wipe the vinyl and
leather surfaces with a clean, soft cloth damp-
ened in mild soap solution, then wipe clean with a
dry, soft cloth.
Regular care and cleaning is required in order to
maintain the appearance of the leather.
Before using any fabric protector, read the manu-
facturer’s recommendations. Some fabric pro-
tectors contain chemicals that may stain or
bleach the seat material.
Use a cloth dampened only with water to clean
the meter and gauge lens.