center console NISSAN NV PASSENGER VAN 2018 Owners Manual
[x] Cancel search | Manufacturer: NISSAN, Model Year: 2018, Model line: NV PASSENGER VAN, Model: NISSAN NV PASSENGER VAN 2018Pages: 426, PDF Size: 4.52 MB
Page 128 of 426
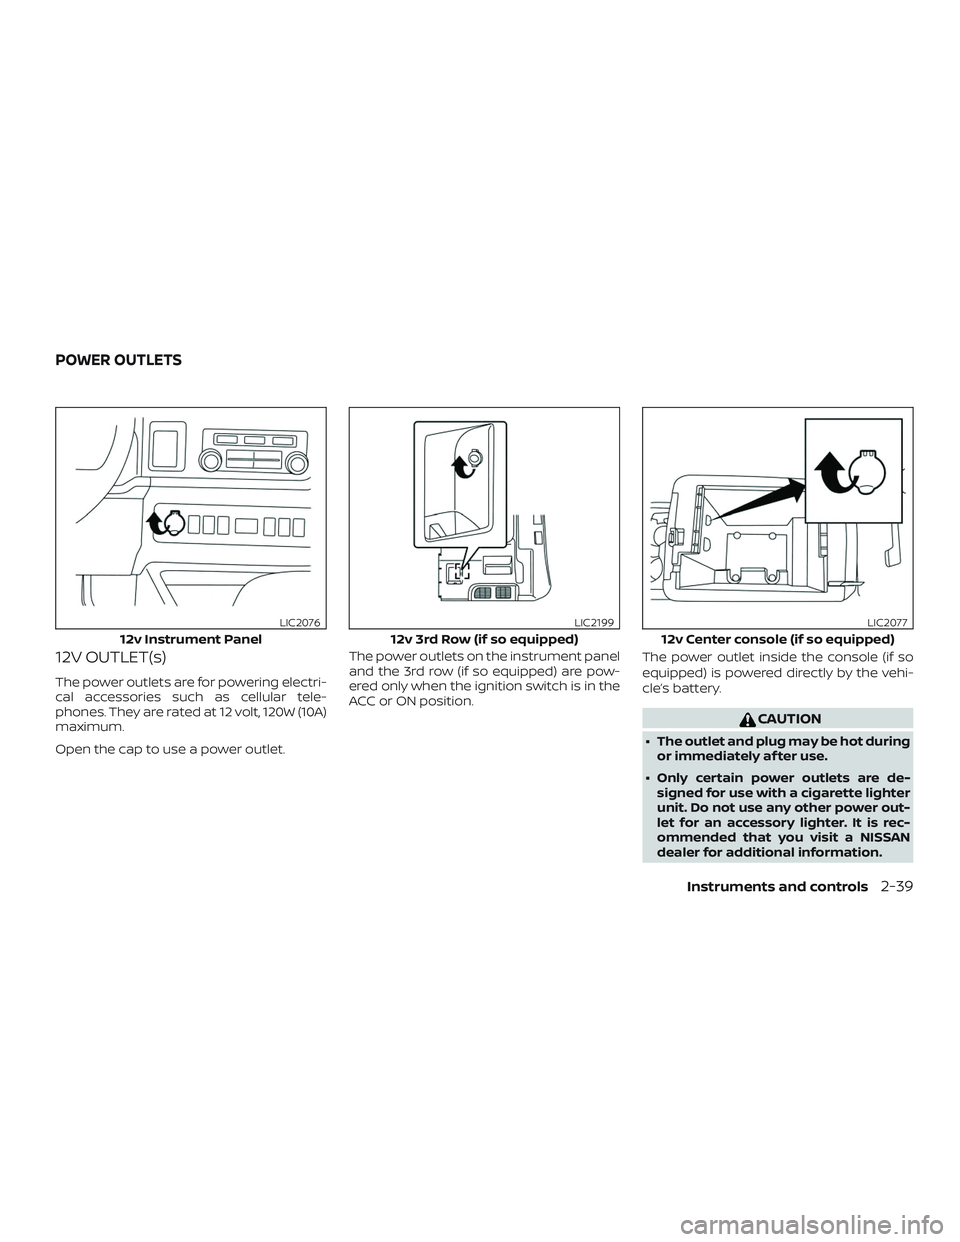
12V OUTLET(s)
The power outlets are for powering electri-
cal accessories such as cellular tele-
phones. They are rated at 12 volt, 120W (10A)
maximum.
Open the cap to use a power outlet.The power outlets on the instrument panel
and the 3rd row (if so equipped) are pow-
ered only when the ignition switch is in the
ACC or ON position.
The power outlet inside the console (if so
equipped) is powered directly by the vehi-
cle’s battery.
CAUTION
∙ The outlet and plug may be hot during
or immediately af ter use.
∙ Only certain power outlets are de- signed for use with a cigarette lighter
unit. Do not use any other power out-
let for an accessory lighter. It is rec-
ommended that you visit a NISSAN
dealer for additional information.
12v Instrument Panel
LIC2076
12v 3rd Row (if so equipped)
LIC2199
12v Center console (if so equipped)
LIC2077
POWER OUTLETS
Instruments and controls2-39
Page 129 of 426
∙ Do not use with accessories that ex-ceed a 12 volt, 120W (10A) power draw.
∙ Do not use double adapters or more than one electrical accessory.
∙ Use power outlets with the engine running to avoid discharging the ve-
hicle battery.
∙ Avoid using power outlets when the air conditioner, headlights or rear win-
dow defroster is on.
∙ Before inserting or disconnecting a plug, be sure the electrical accessory
being used is turned off.
∙ Push the plug in as far as it will go. If good contact is not made, the plug
may overheat or the internal tem-
perature fuse may open.
∙ When not in use, be sure to close the cap. Do not allow water or any other
liquid to contact the outlet.
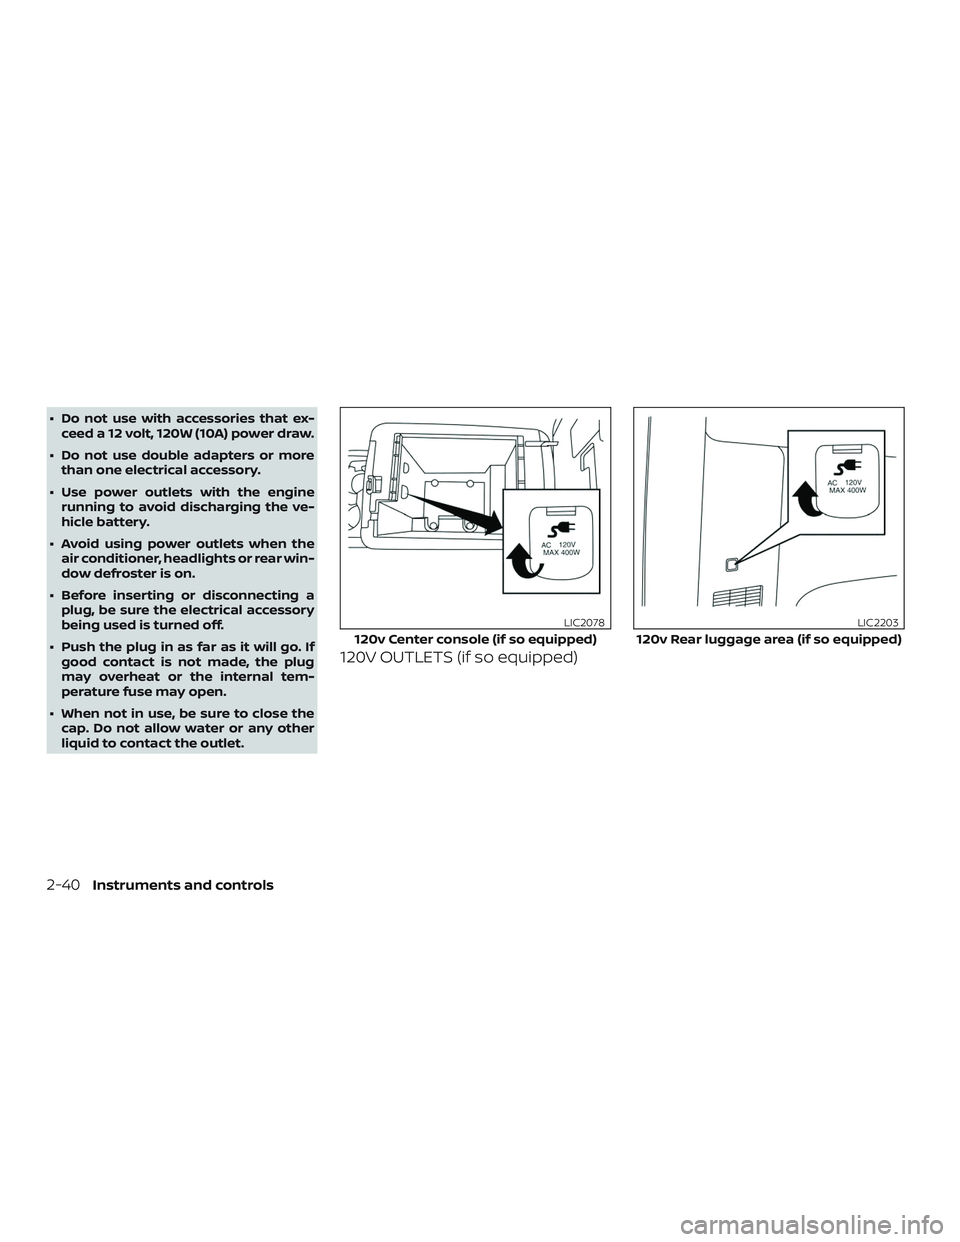
120V OUTLETS (if so equipped)
120v Center console (if so equipped)
LIC2078
120v Rear luggage area (if so equipped)
LIC2203
2-40Instruments and controls
Page 132 of 426
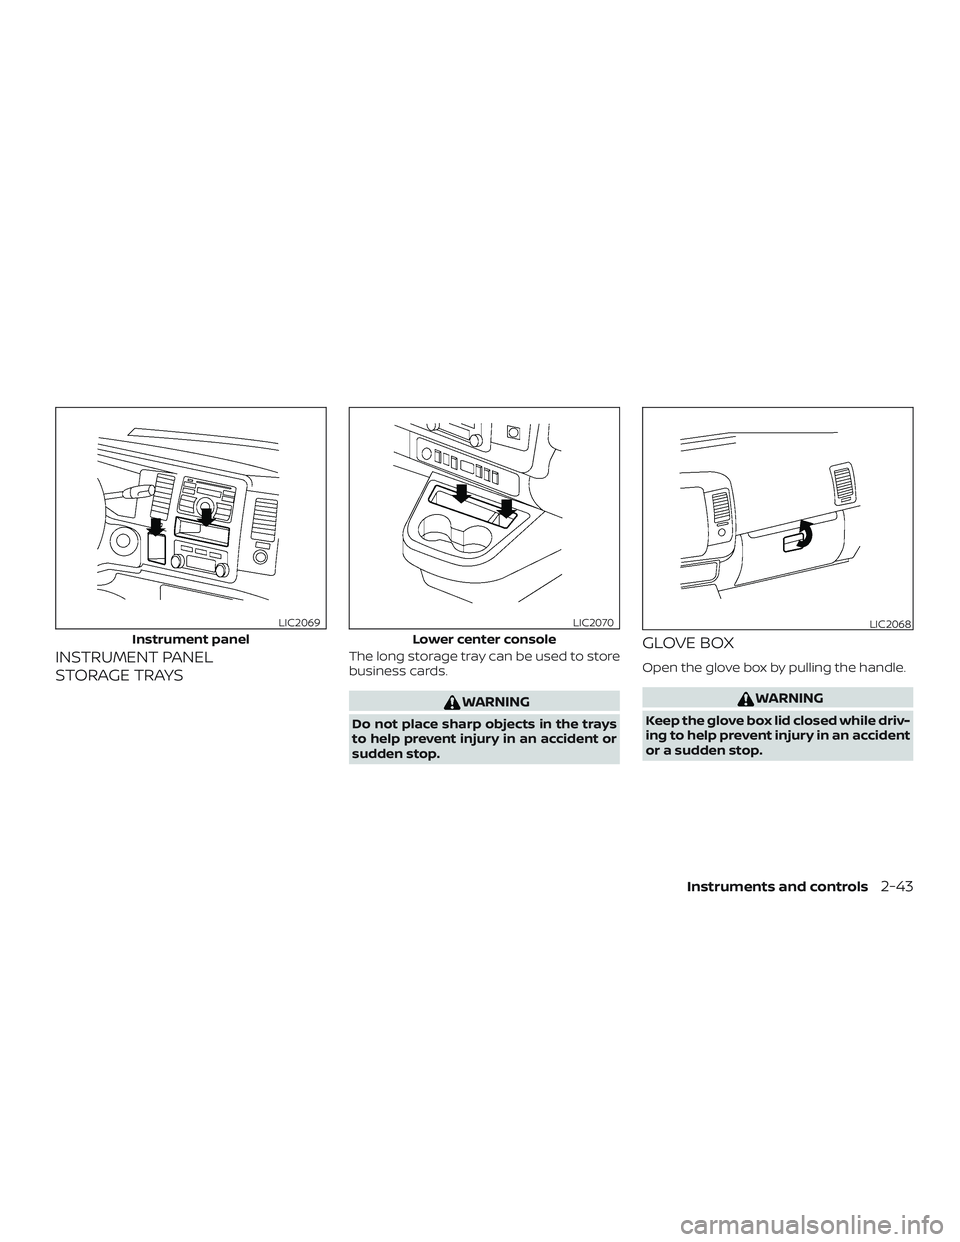
INSTRUMENT PANEL
STORAGE TRAYSThe long storage tray can be used to store
business cards.
WARNING
Do not place sharp objects in the trays
to help prevent injury in an accident or
sudden stop.
GLOVE BOX
Open the glove box by pulling the handle.
WARNING
Keep the glove box lid closed while driv-
ing to help prevent injury in an accident
or a sudden stop.
Instrument panel
LIC2069
Lower center console
LIC2070LIC2068
Instruments and controls2-43
Page 134 of 426
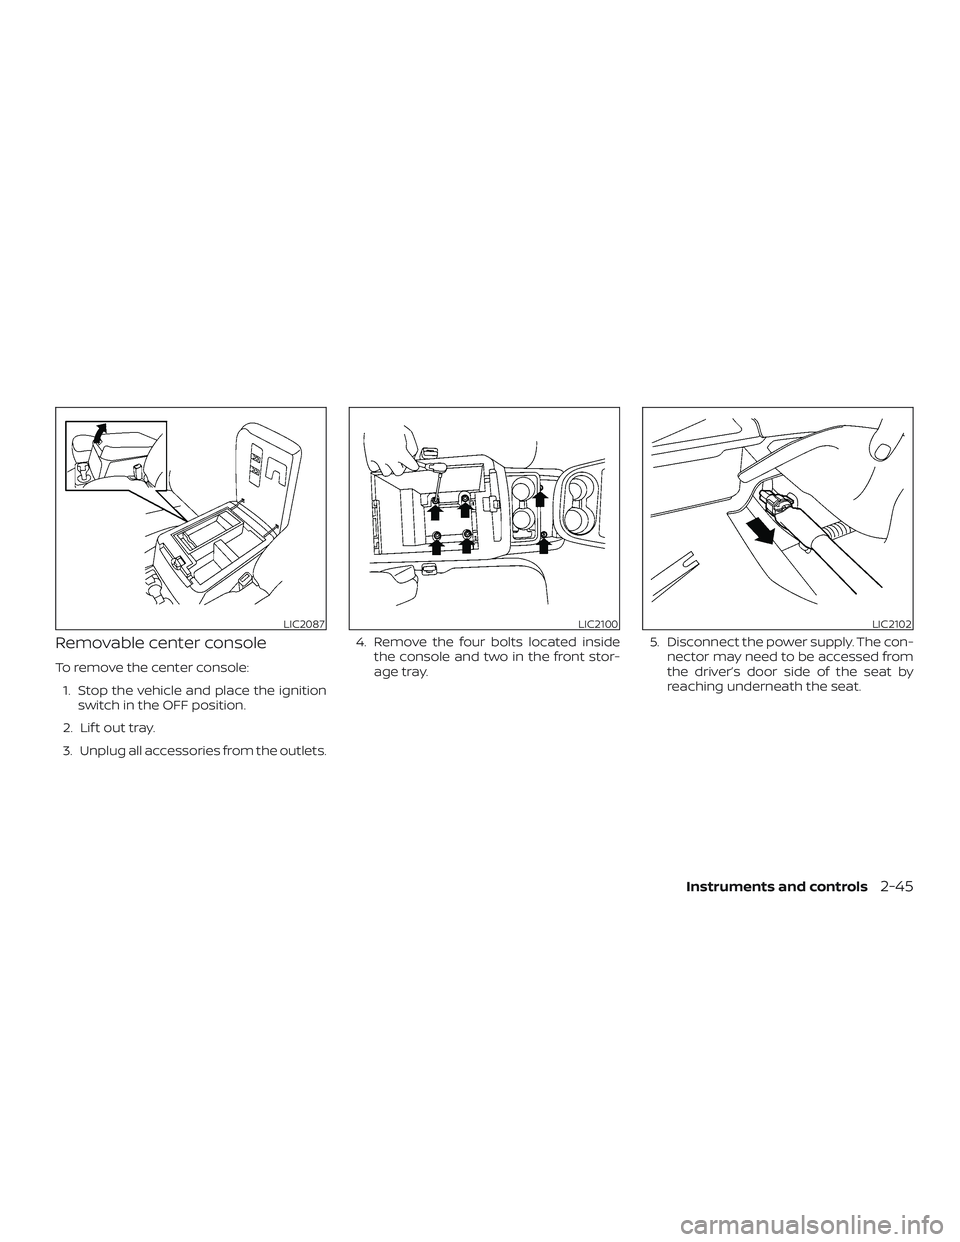
Removable center console
To remove the center console:1. Stop the vehicle and place the ignition switch in the OFF position.
2. Lif t out tray.
3. Unplug all accessories from the outlets. 4. Remove the four bolts located inside
the console and two in the front stor-
age tray. 5. Disconnect the power supply. The con-
nector may need to be accessed from
the driver’s door side of the seat by
reaching underneath the seat.
LIC2087LIC2100LIC2102
Instruments and controls2-45
Page 135 of 426
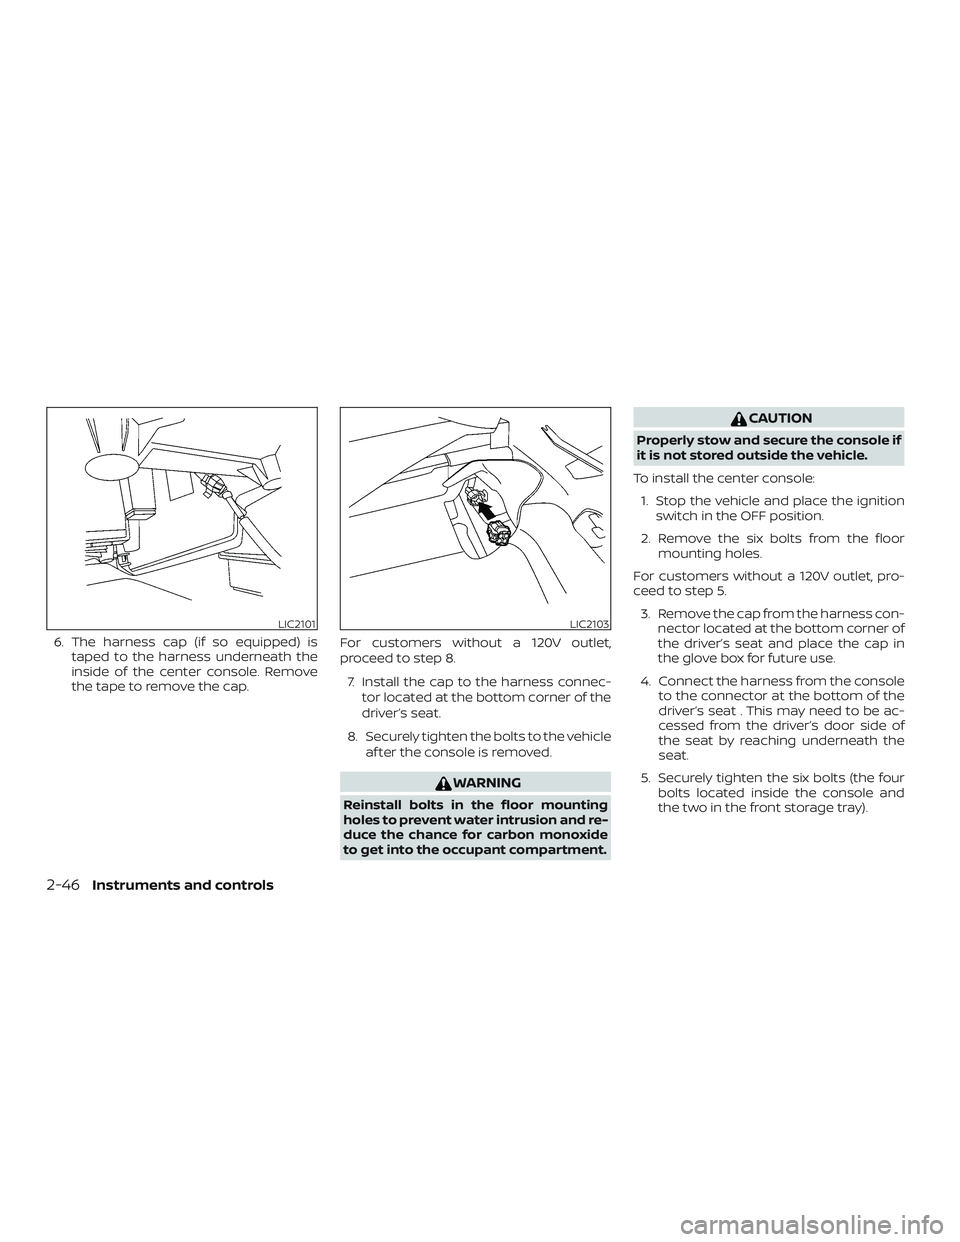
6. The harness cap (if so equipped) istaped to the harness underneath the
inside of the center console. Remove
the tape to remove the cap. For customers without a 120V outlet,
proceed to step 8.
7. Install the cap to the harness connec- tor located at the bottom corner of the
driver’s seat.
8. Securely tighten the bolts to the vehicle af ter the console is removed.
WARNING
Reinstall bolts in the floor mounting
holes to prevent water intrusion and re-
duce the chance for carbon monoxide
to get into the occupant compartment.
CAUTION
Properly stow and secure the console if
it is not stored outside the vehicle.
To install the center console: 1. Stop the vehicle and place the ignition switch in the OFF position.
2. Remove the six bolts from the floor mounting holes.
For customers without a 120V outlet, pro-
ceed to step 5. 3. Remove the cap from the harness con- nector located at the bottom corner of
the driver’s seat and place the cap in
the glove box for future use.
4. Connect the harness from the console to the connector at the bottom of the
driver’s seat . This may need to be ac-
cessed from the driver’s door side of
the seat by reaching underneath the
seat.
5. Securely tighten the six bolts (the four bolts located inside the console and
the two in the front storage tray).
LIC2101LIC2103
2-46Instruments and controls
Page 137 of 426
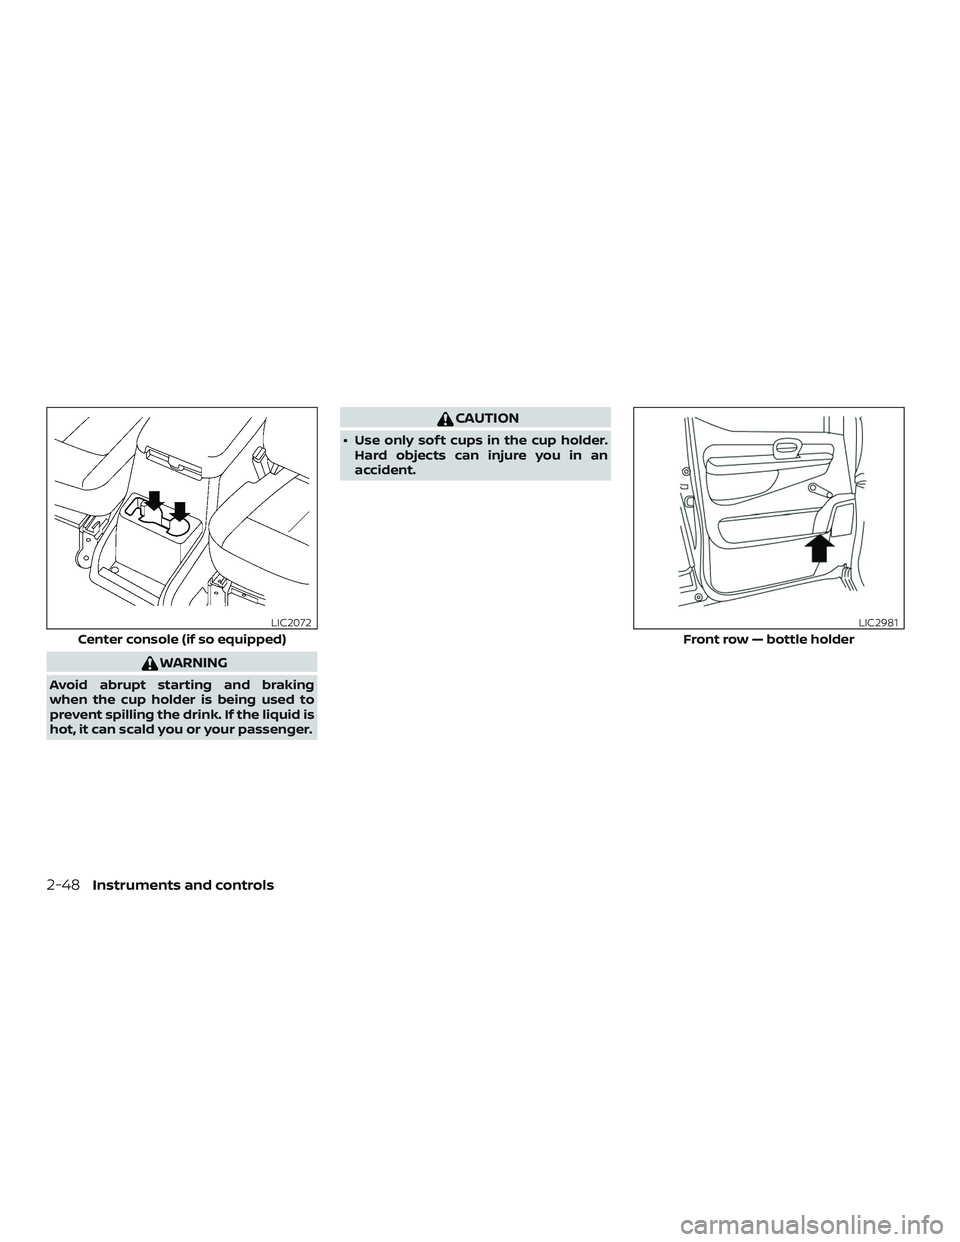
WARNING
Avoid abrupt starting and braking
when the cup holder is being used to
prevent spilling the drink. If the liquid is
hot, it can scald you or your passenger.
CAUTION
∙ Use only sof t cups in the cup holder.Hard objects can injure you in an
accident.
Center console (if so equipped)
LIC2072
Front row — bottle holder
LIC2981
2-48Instruments and controls
Page 203 of 426
∙ If an iPod® automatically selects largevideo files while in the shuffle mode, the
vehicle center display may momen-
tarily black out, but will soon recover.
iPod®* player
∙ Some characters used in other lan-guages (Chinese, Japanese, etc.) are not
displayed properly on the vehicle center
screen. We recommend using English
language characters with an iPod®.
∙ Large video podcast files cause slow responses in the iPod®. The vehicle cen-
ter display may momentarily black out,
but it will soon recover.
∙ If the iPod® automatically selects large video podcast files while in the shuffle
mode, the vehicle center display may
momentarily black out, but it will soon
recover.
∙ Improperly plugging in the iPod® may cause a checkmark to be displayed on
and off (flickering). Always make sure
that the iPod® is connected properly.
∙ The iPod® nano (2nd Generation) will continue to fast forward or rewind if it is
disconnected during a seek operation. ∙ An incorrect song title may appear
when the Play Mode is changed while
using the iPod® nano (2nd Generation).
∙ Audiobooks may not play in the same order as they appear on the iPod®.
∙ The iPod® nano (1st Generation) may remain in fast forward or rewind mode if
it is connected during a seek operation.
In this case, please manually reset the
iPod®.
∙ If you are using an iPod® (3rd Generation with Dock connector), do not use very
long names for the song title, album
name or artist name to prevent the
iPod® from resetting itself.
∙ Be careful not to do the following, or the cable could be damaged and a loss of
function may occur:
∙ Bend the cable excessively (1.6 in (40 mm) radius maximum).
∙ Twist the cable excessively (more than 180 degrees).
∙ Pull or drop the cable.
∙ Do not force the iPod® cable connec- tor into the device port. ∙ Close the center console lid on the
cable or connectors.
∙ Store objects with sharp edges in the storage where the cable is stored.
∙ Spill liquids on the cable and connec- tors.
∙ Do not connect the cable to the iPod® if the cable and/or connectors are wet. It
may damage the iPod®.
∙ If the cable and connectors are ex- posed to water, allow the cable and/or
connectors to dry completely before
connecting the cable to the iPod® (wait
24 hours for it to dry).
∙ If the connector is exposed to fluids other than water, evaporative residue
may cause a short between the con-
nector pins. In this case, replace the
cable, otherwise damage to the iPod®
and a loss of function may occur.
∙ If the cable is damaged (insulation cut, connectors cracked, contamination
such as liquids, dust, dirt, etc. in the con-
nectors), do not use the cable and con-
tact a NISSAN dealer to replace the
cable with a new one.
4-40Monitor, climate, audio, phone and voice recognition systems