window NISSAN NV200 2021 Owners Manual
[x] Cancel search | Manufacturer: NISSAN, Model Year: 2021, Model line: NV200, Model: NISSAN NV200 2021Pages: 300, PDF Size: 1.9 MB
Page 54 of 300
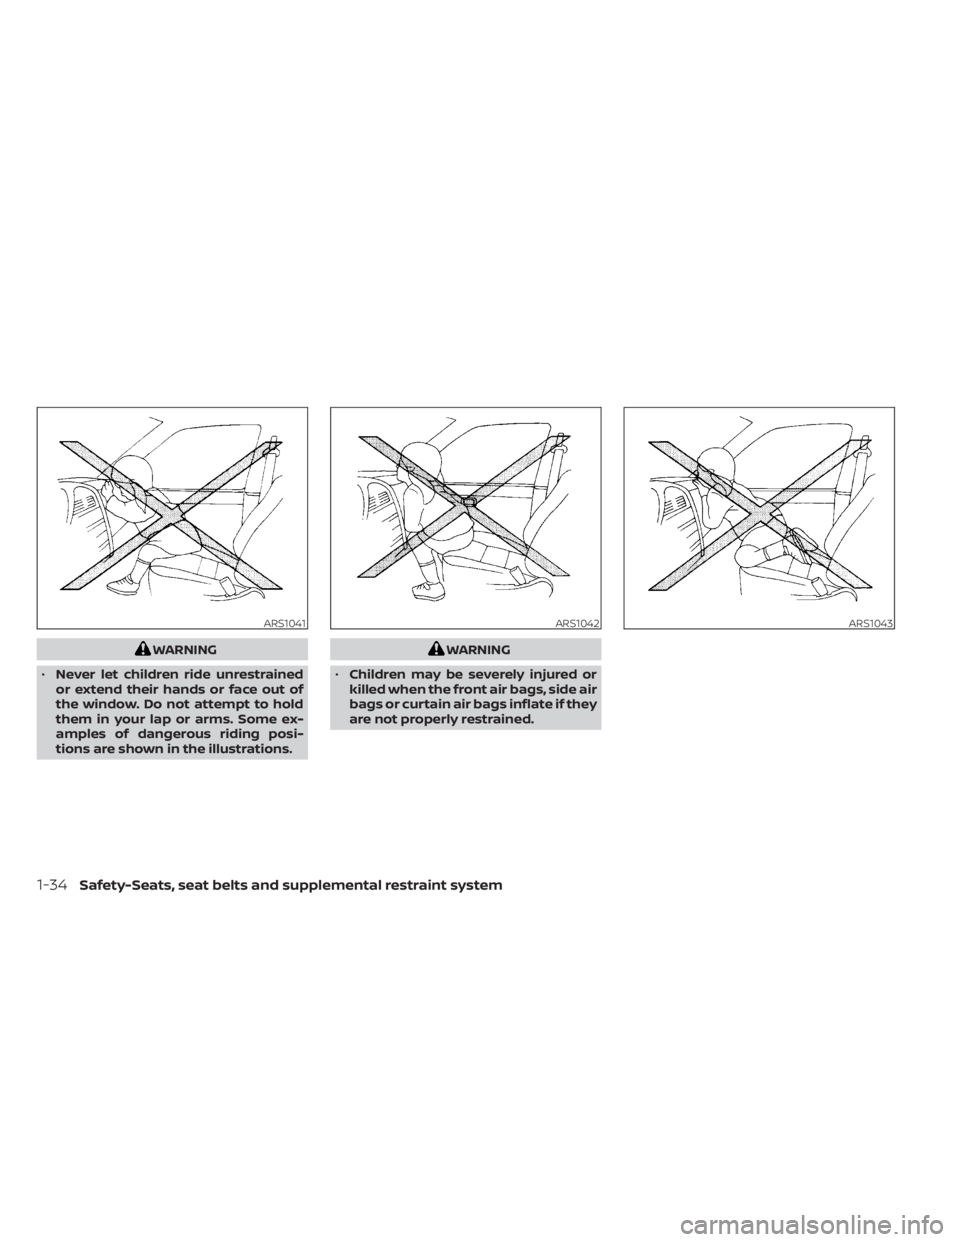
WARNING
• Never let children ride unrestrained
or extend their hands or face out of
the window. Do not attempt to hold
them in your lap or arms. Some ex-
amples of dangerous riding posi-
tions are shown in the illustrations.WARNING
• Children may be severely injured or
killed when the front air bags, side air
bags or curtain air bags inflate if they
are not properly restrained.
ARS1042ARS1043
1-34Safety-Seats, seat belts and supplemental restraint system
Page 99 of 300
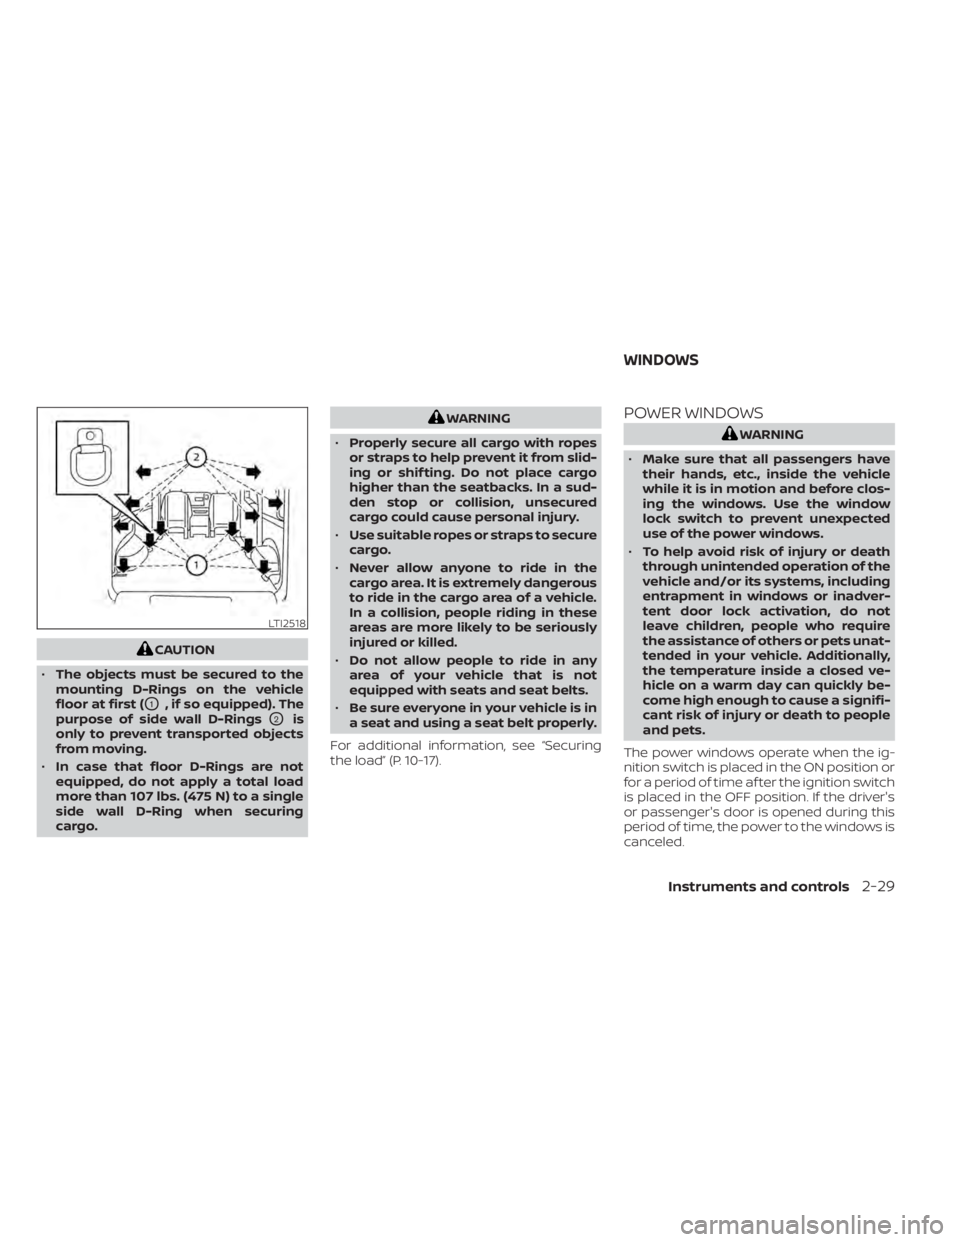
CAUTION
• The objects must be secured to the
mounting D-Rings on the vehicle
floor at first (
O1, if so equipped). The
purpose of side wall D-Rings
O2is
only to prevent transported objects
from moving.
• In case that floor D-Rings are not
equipped, do not apply a total load
more than 107 lbs. (475 N) to a single
side wall D-Ring when securing
cargo.
WARNING
• Properly secure all cargo with ropes
or straps to help prevent it from slid-
ing or shif ting. Do not place cargo
higher than the seatbacks. In a sud-
den stop or collision, unsecured
cargo could cause personal injury.
• Use suitable ropes or straps to secure
cargo.
• Never allow anyone to ride in the
cargo area. It is extremely dangerous
to ride in the cargo area of a vehicle.
In a collision, people riding in these
areas are more likely to be seriously
injured or killed.
• Do not allow people to ride in any
area of your vehicle that is not
equipped with seats and seat belts.
• Be sure everyone in your vehicle is in
a seat and using a seat belt properly.
For additional information, see “Securing
the load” (P. 10-17).POWER WINDOWS
LTI2518
WINDOWS
Instruments and controls2-29
Page 100 of 300
LIC2373
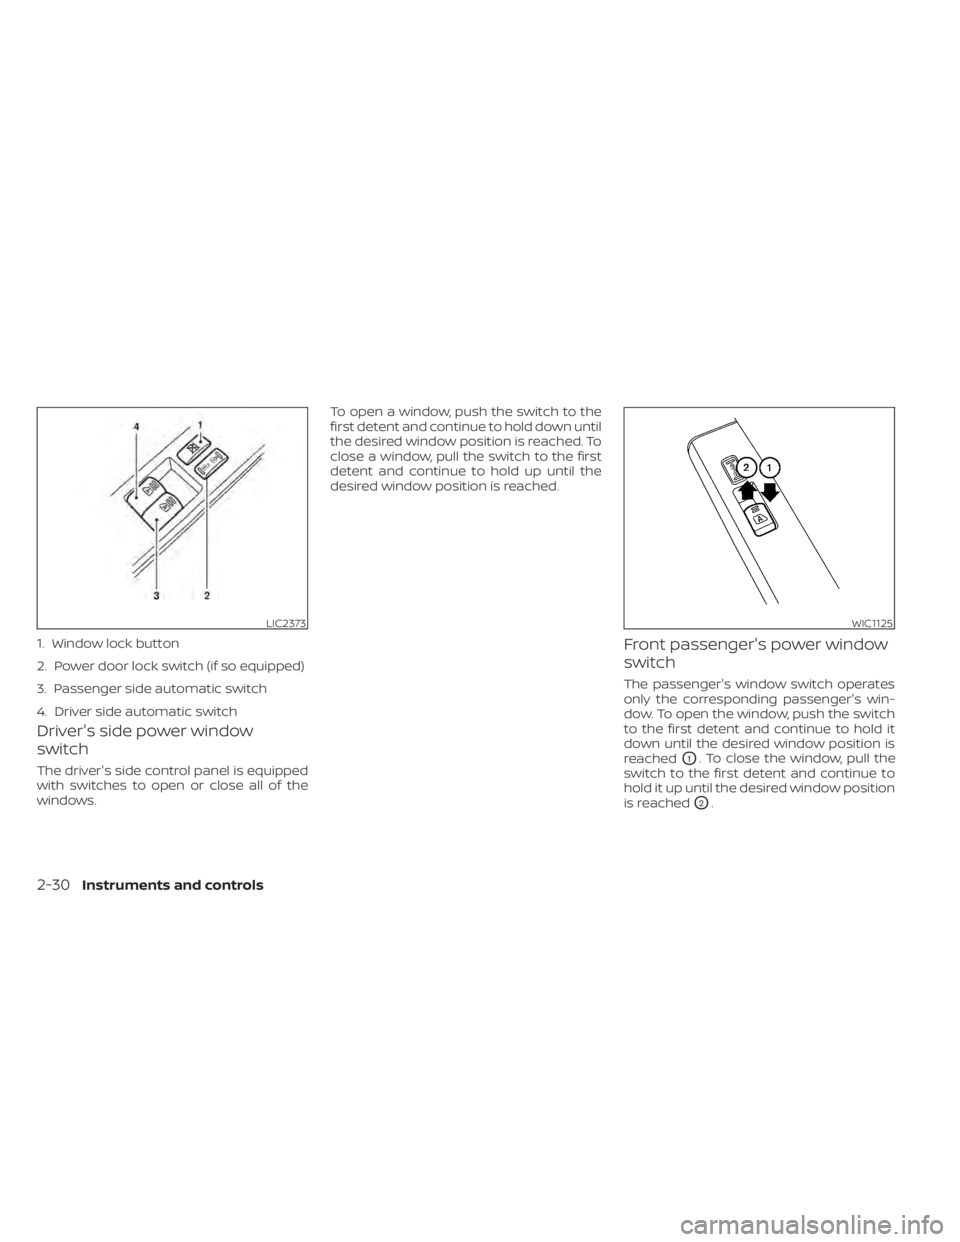
1. Window lock button
2. Power door lock switch (if so equipped)
3. Passenger side automatic switch
4. Driver side automatic switch
WIC1125
2-30Instruments and controls
Page 101 of 300
Locking passengers' windows
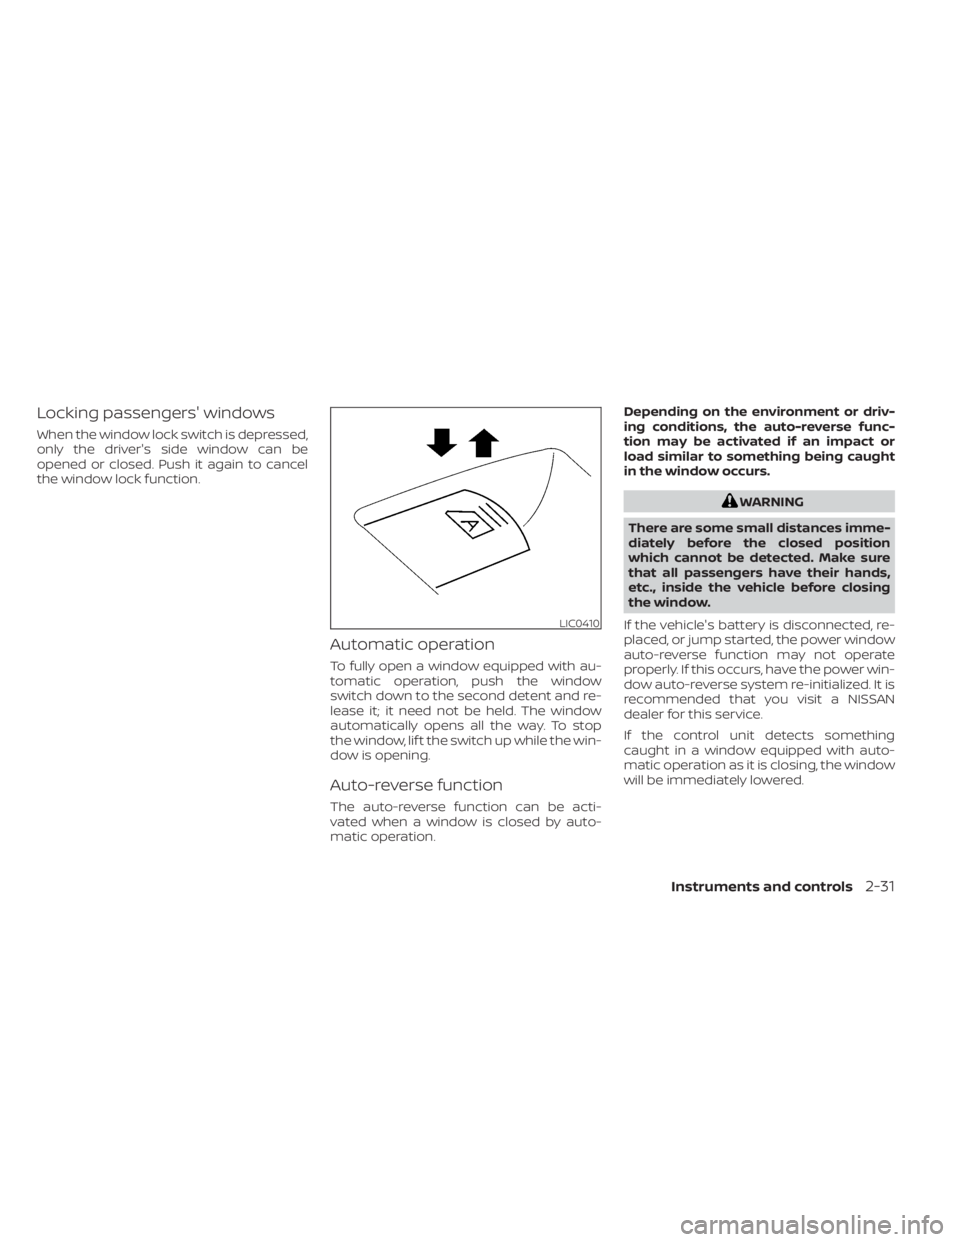
When the window lock switch is depressed,
only the driver's side window can be
opened or closed. Push it again to cancel
the window lock function.
Automatic operation
To fully open a window equipped with au-
tomatic operation, push the window
switch down to the second detent and re-
lease it; it need not be held. The window
automatically opens all the way. To stop
the window, lif t the switch up while the win-
dow is opening.
Auto-reverse function
The auto-reverse function can be acti-
vated when a window is closed by auto-
matic operation.Depending on the environment or driv-
ing conditions, the auto-reverse func-
tion may be activated if an impact or
load similar to something being caught
in the window occurs.
WARNING
There are some small distances imme-
diately before the closed position
which cannot be detected. Make sure
that all passengers have their hands,
etc., inside the vehicle before closing
the window.
If the vehicle's battery is disconnected, re-
placed, or jump started, the power window
auto-reverse function may not operate
properly. If this occurs, have the power win-
dow auto-reverse system re-initialized. It is
recommended that you visit a NISSAN
dealer for this service.
If the control unit detects something
caught in a window equipped with auto-
matic operation as it is closing, the window
will be immediately lowered.
LIC0410
Page 115 of 300
•Do not place the key fob for an ex-
tended period in an area where tem-
peratures exceed 140°F (60°C).
• Do not attach the key fob with a key
holder that contains a magnet.
• Do not place the key fob near equip-
ment that produces a magnetic field,
such as a TV, audio equipment and
personal computers.
If a key fob is lost or stolen, NISSAN rec-
ommends erasing the ID code of that
key fob. This will prevent the key fob
from unauthorized use to unlock the
vehicle. For information regarding the
erasing procedure, it is recommended
that you visit a NISSAN dealer.
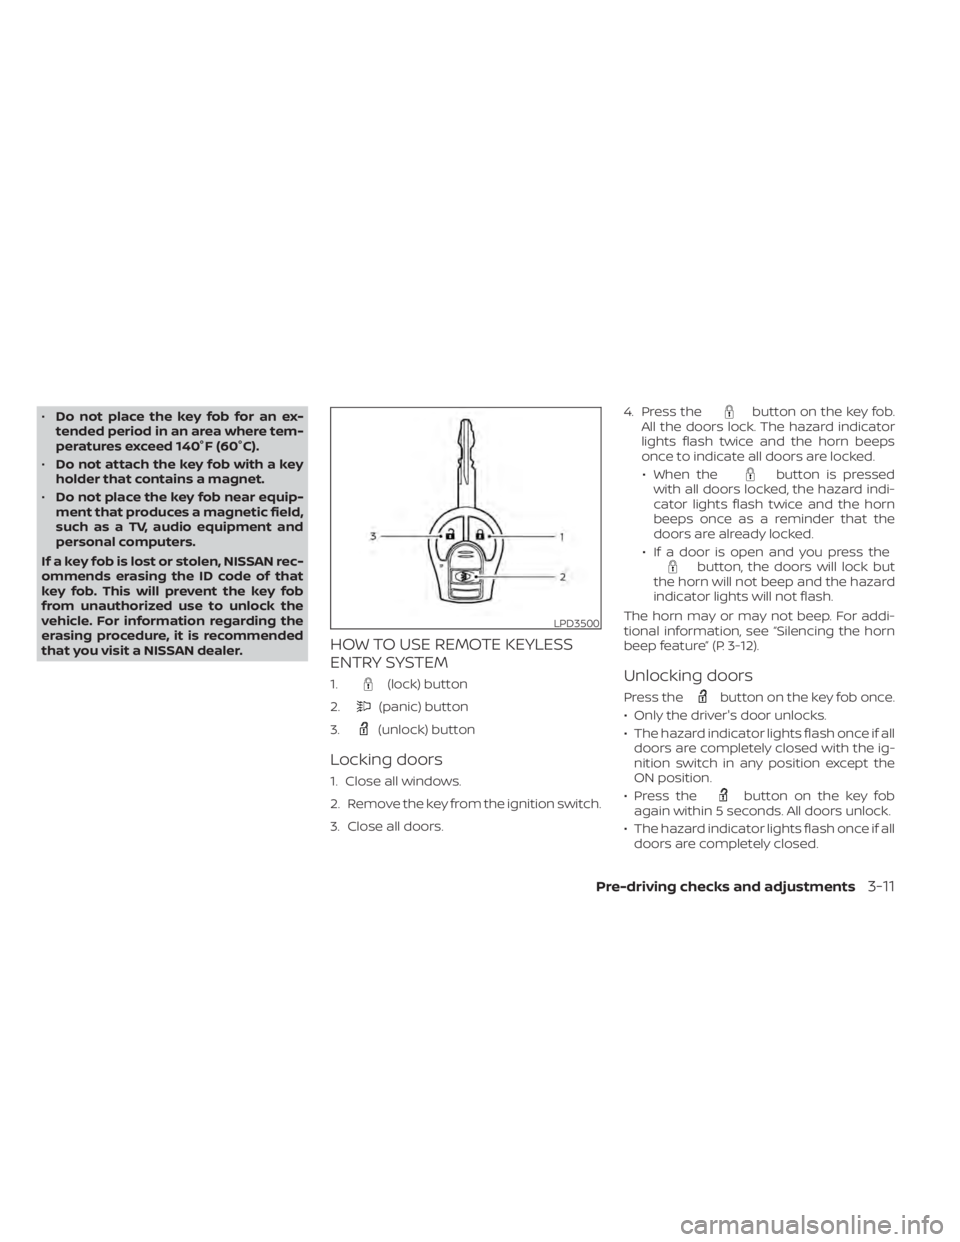
HOW TO USE REMOTE KEYLESS
ENTRY SYSTEM
1.(lock) button
2.
(panic) button
3.
(unlock) button
Locking doors
1. Close all windows.
2. Remove the key from the ignition switch.
3. Close all doors. 4. Press the
button on the key fob.
All the doors lock. The hazard indicator
lights flash twice and the horn beeps
once to indicate all doors are locked.
• When the
button is pressed
with all doors locked, the hazard indi-
cator lights flash twice and the horn
beeps once as a reminder that the
doors are already locked.
• If a door is open and you press the
button, the doors will lock but
the horn will not beep and the hazard
indicator lights will not flash.
The horn may or may not beep. For addi-
tional information, see “Silencing the horn
beep feature” (P. 3-12).
Unlocking doors
Press thebutton on the key fob once.
• Only the driver's door unlocks.
• The hazard indicator lights flash once if all doors are completely closed with the ig-
nition switch in any position except the
ON position.
• Press the
button on the key fob
again within 5 seconds. All doors unlock.
• The hazard indicator lights flash once if all doors are completely closed.
LPD3500
Page 125 of 300
WARNING
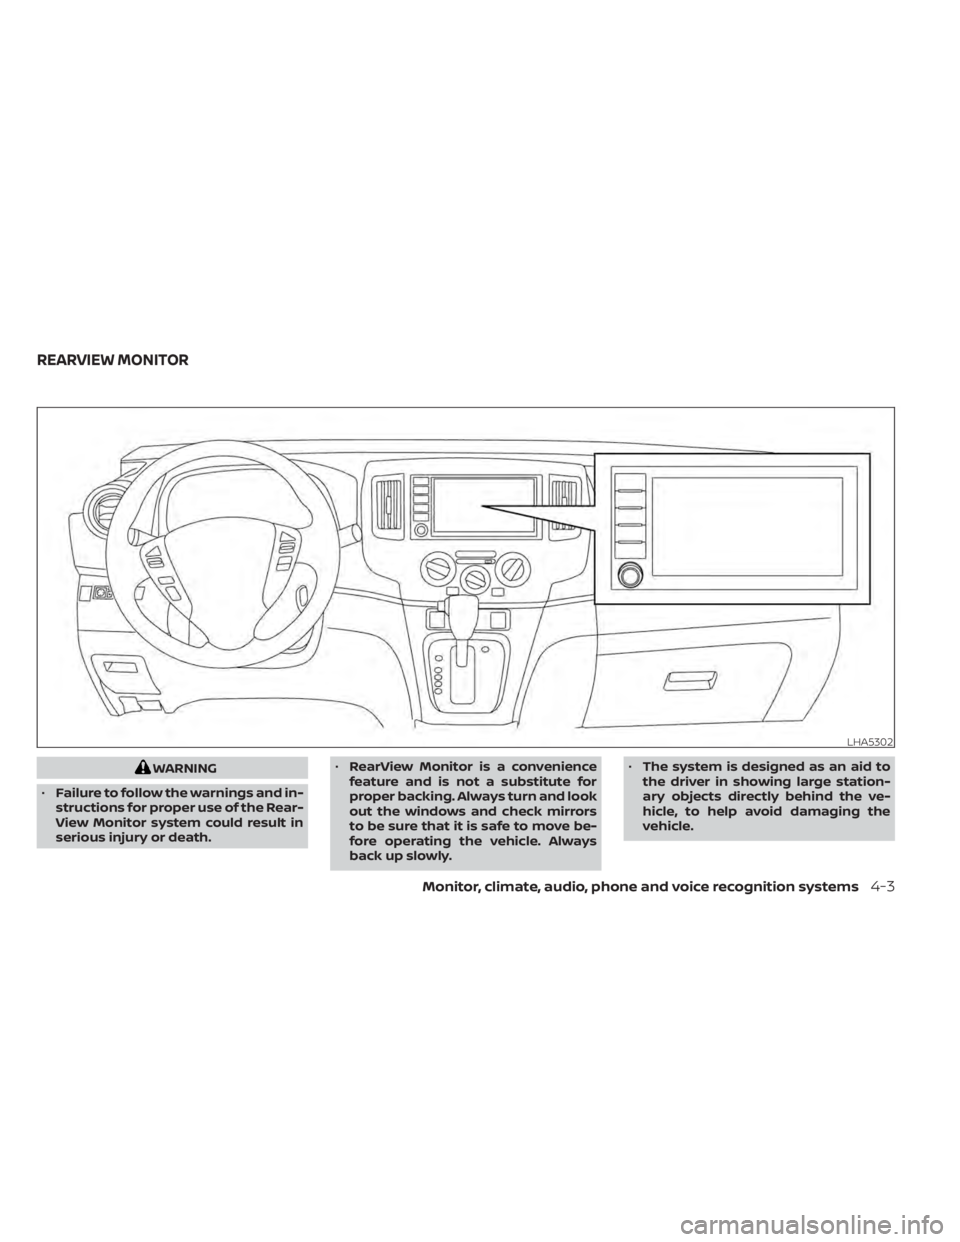
• Failure to follow the warnings and in-
structions for proper use of the Rear-
View Monitor system could result in
serious injury or death. •
RearView Monitor is a convenience
feature and is not a substitute for
proper backing. Always turn and look
out the windows and check mirrors
to be sure that it is safe to move be-
fore operating the vehicle. Always
back up slowly. •
The system is designed as an aid to
the driver in showing large station-
ary objects directly behind the ve-
hicle, to help avoid damaging the
vehicle.
Monitor, climate, audio, phone and voice recognition systems4-3
Page 133 of 300
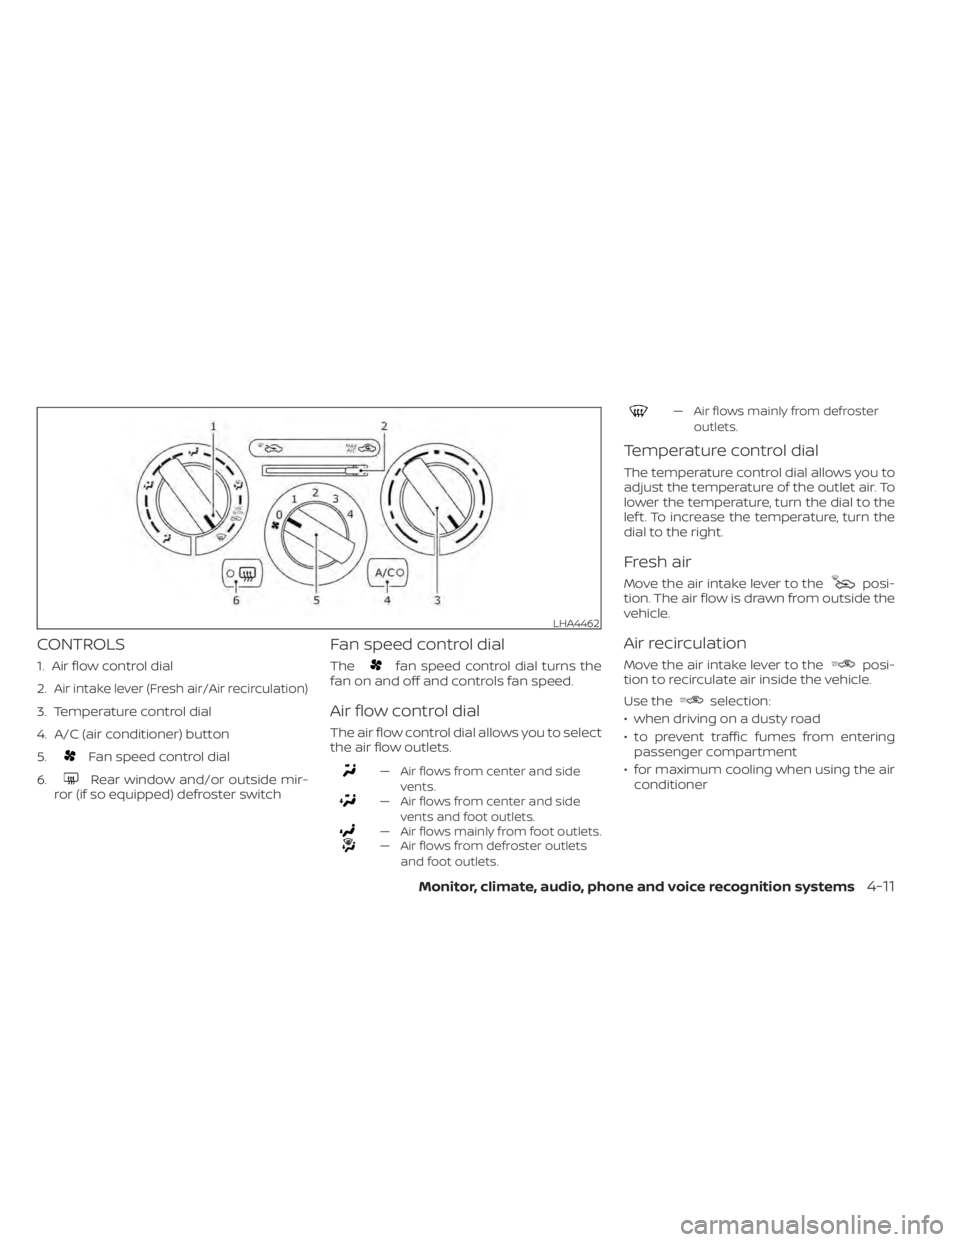
Fan speed control dial
6.
Rear window and/or outside mir-
ror (if so equipped) defroster switch
Fan speed control dial
Thefan speed control dial turns the
fan on and off and controls fan speed.
Air flow control dial
The air flow control dial allows you to select
the air flow outlets.
„ Air flows from center and side
vents.
„ Air flows from center and sidevents and foot outlets.
„ Air flows mainly from foot outlets.„ Air flows from defroster outletsand foot outlets.
„ Air flows mainly from defrosteroutlets.
Temperature control dial
The temperature control dial allows you to
adjust the temperature of the outlet air. To
lower the temperature, turn the dial to the
lef t. To increase the temperature, turn the
dial to the right.
Fresh air
Move the air intake lever to theposi-
tion. The air flow is drawn from outside the
vehicle.
Air recirculation
Move the air intake lever to theposi-
tion to recirculate air inside the vehicle.
Use the
selection:
€ when driving on a dusty road
€ to prevent traffic fumes from entering passenger compartment
€ for maximum cooling when using the air conditioner
LHA4462
Page 134 of 300
fan speed
control dial to the desired position and
press the
button to turn on the air
conditioner. To turn off the air conditioner,
press the
button again.
The air conditioner cooling function op-
erates only when the engine is running.
Rear window and/or outside
mirror defroster switch (if so
equipped)
For additional information, see “Rear win-
dow and/or outside mirror defroster
switch (if so equipped)” (P. 2-21).
HEATER OPERATION
Heating
This mode is used to direct heated air to
the foot outlets. Some air also flows from
the defrost outlets.
1. Move the air intake lever to the
position for normal heating.
2. Turn the air flow control dial to the
position. 3. Turn the
fan speed control dial to
the desired position.
4. Turn the temperature control dial to the desired position between the middle
and the hot position.
Ventilation
This mode directs outside air to the side
and center vents.
1. Move the air intake lever to the
position.
2. Turn the air flow control dial to the
position.
3. Turn the
fan speed control dial to
the desired position.
4. Turn the temperature control dial to the desired position.
Defrosting or defogging
This mode directs the air to the defrost
outlets to defrost/defog the windows.
1. Move the air intake lever to the
position.
2. Turn the air flow control dial to the
position. 3. Turn the
fan speed control dial to
the desired position.
4. Turn the temperature control dial to the desired position between the middle
and the hot position.
• To quickly remove ice or fog from the win- dows, turn the
fan speed control dial
to the maximum position and the tem-
perature control dial to the full hot
position.
When the
orposition is se-
lected, the air conditioner automatically
turns on (however, the indicator light will
not illuminate). In this position, the air con-
ditioner cannot be turned off. When the air
flow control is turned to any position other
than
or(the air conditioner will
continue operating). and can be turned off
using the air conditioner button. This dehu-
midifies the air, which helps defog the
windshield.
Bi-level heating
This mode directs cooler air from the side
and center vents and warmer air from the
floor outlets. When the temperature con-
trol dial is moved to the full hot or full cool
position, the air between the vents and the
floor outlets is the same temperature.
4-12Monitor, climate, audio, phone and voice recognition systems
Page 136 of 300
position.
2. Turn the air flow control dial to the
position.
3. Turn the
fan speed control dial to
the desired position. When theorposition is selected, the air condi-
tioner automatically turns on (however,
the indicator light will not illuminate). In
this position, the air conditioner cannot
be turned off. When the air flow control is
turned to any position other than
or(the air conditioner will continue
operating). and can be turned off using
the air conditioner button. This dehu-
midifies the air, which helps defog the
windshield.
4. Turn the temperature control dial to the desired position.
Operating tips
€ Keep the windows closed while the airconditioner is in operation.
€ Af ter parking in the sun, drive for 2 or 3 minutes with the windows open to vent
hot air from the passenger compart-
ment before closing the windows. This
allows the air conditioner to cool the inte-
rior more quickly.
€ The air conditioning system should be
operated for approximately 10 minutes
at least once a month. This helps pre-
vent damage to the system due to lack
of lubrication.
• A visible mist may be seen coming from the ventilators in hot, humid conditions
as the air is cooled rapidly. This does not
indicate a malfunction.
• If the high temperature warning light
illuminates in red indicating en-
gine coolant temperature is over the
normal range, turn the air conditioner
off. For additional information, see “If
your vehicle overheats” (P. 6-12).
AIR FLOW CHARTS
The following charts show the button and
dial positions for MAXIMUM AND QUICK
heating, cooling or defrosting. The air in-
take lever should always be in the
position for heating and defrosting.
4-14Monitor, climate, audio, phone and voice recognition systems
Page 161 of 300
CAUTION
During the first 1,200 miles (2,000 km),
follow these recommendations to ob-
tain maximum engine performance
and ensure the future reliability and
economy of your new vehicle. Failure to
follow these recommendations may
result in shortened engine life and re-
duced engine performance.
• Avoid driving for long periods at constant speed, either fast or slow, and do not run
the engine over 4,000 rpm.
• Do not accelerate at full throttle in any gear.
• Avoid quick starts.
• Avoid hard braking as much as possible. Follow these easy-to-use Fuel Efficient
Driving Tips to help you achieve the most
fuel economy from your vehicle.
1.
Use Smooth Accelerator and Brake
Pedal Application
• Avoid rapid starts and stops.
• Use smooth, gentle accelerator and brake application whenever possible.
• Maintain constant speed while com- muting and coast whenever possible.
2. Maintain Constant Speed
• Look ahead to try and anticipate and minimize stops.
• Synchronizing your speed with traffic lights allows you to reduce your num-
ber of stops.
• Maintaining a steady speed can mini- mize red light stops and improve fuel
efficiency.
3. Use Air Conditioning (A/C) at Higher
Vehicle Speeds
• Below 40 mph (64 km/h), it is more efficient to open windows to cool the
vehicle due to reduced engine load.
• Above 40 mph (64 km/h), it is more efficient to use A/C to cool the vehicle
due to increased aerodynamic drag. • Recirculating the cool air in the cabin
when the A/C is on reduces cooling
load.
4. Drive at Economical Speeds and
Distances
• Observing the speed limit and not ex- ceeding 60 mph (97 km/h) (where le-
gally allowed) can improve fuel effi-
ciency due to reduced aerodynamic
drag.
• Maintaining a safe following distance behind other vehicles reduces unnec-
essary braking.
• Safely monitoring traffic to anticipate changes in speed permits reduced
braking and smooth acceleration
changes.
• Select a gear range suitable to road conditions.
5. Use Cruise Control
• Using cruise control during highway driving helps maintain a steady speed.
• Cruise control is particularly effective in providing fuel savings when driving
on flat terrains.
6. Plan for the Shortest Route
• Utilize a map or navigation system to determine the best route to save time.
BREAK-IN SCHEDULE FUEL EFFICIENT DRIVING TIPS
Starting and driving5-19