lock NISSAN PATHFINDER 1999 R50 / 2.G Owners Manual
[x] Cancel search | Manufacturer: NISSAN, Model Year: 1999, Model line: PATHFINDER, Model: NISSAN PATHFINDER 1999 R50 / 2.GPages: 274, PDF Size: 2.34 MB
Page 9 of 274
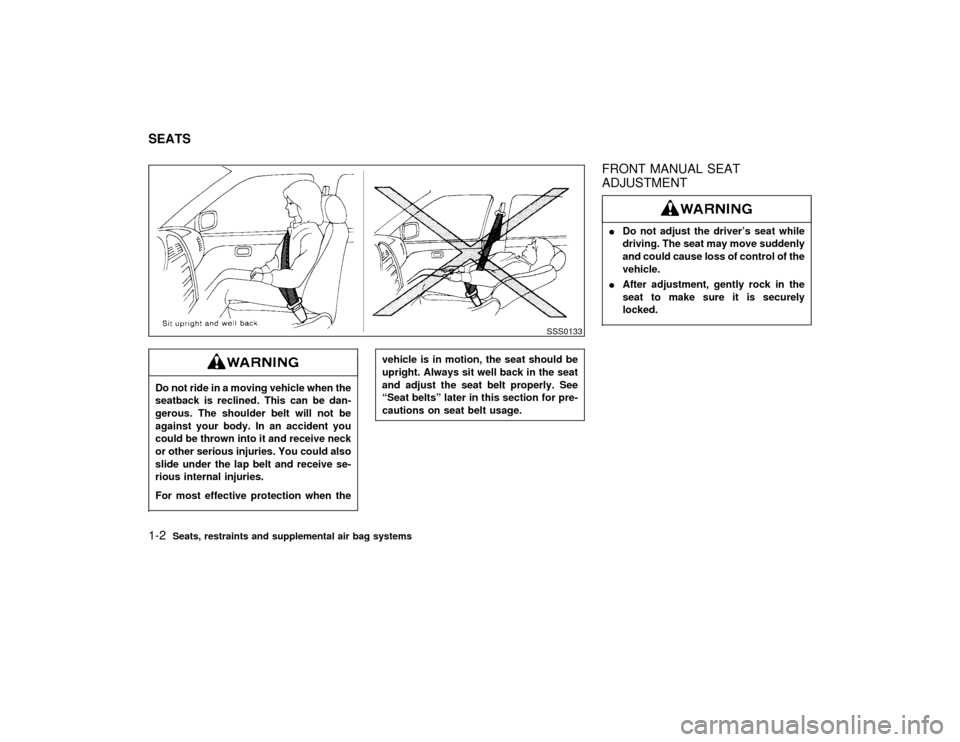
Do not ride in a moving vehicle when the
seatback is reclined. This can be dan-
gerous. The shoulder belt will not be
against your body. In an accident you
could be thrown into it and receive neck
or other serious injuries. You could also
slide under the lap belt and receive se-
rious internal injuries.
For most effective protection when the
vehicle is in motion, the seat should be
upright. Always sit well back in the seat
and adjust the seat belt properly. See
ªSeat beltsº later in this section for pre-
cautions on seat belt usage.
FRONT MANUAL SEAT
ADJUSTMENTIDo not adjust the driver's seat while
driving. The seat may move suddenly
and could cause loss of control of the
vehicle.
IAfter adjustment, gently rock in the
seat to make sure it is securely
locked.
SSS0133
SEATS1-2
Seats, restraints and supplemental air bag systems
Z
01.1.22/R50-D/V5
X
Page 10 of 274
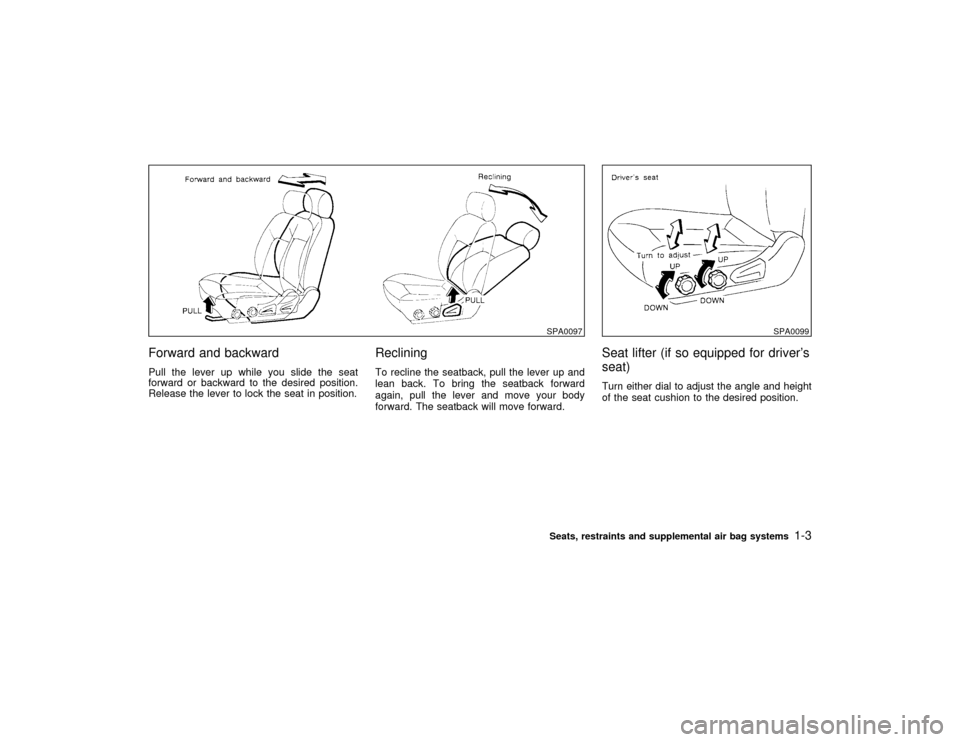
Forward and backwardPull the lever up while you slide the seat
forward or backward to the desired position.
Release the lever to lock the seat in position.
RecliningTo recline the seatback, pull the lever up and
lean back. To bring the seatback forward
again, pull the lever and move your body
forward. The seatback will move forward.
Seat lifter (if so equipped for driver's
seat)Turn either dial to adjust the angle and height
of the seat cushion to the desired position.
SPA0097
SPA0099
Seats, restraints and supplemental air bag systems
1-3
Z
01.1.22/R50-D/V5
X
Page 15 of 274
upright position, be certain they are
completely secured in the latched
position.
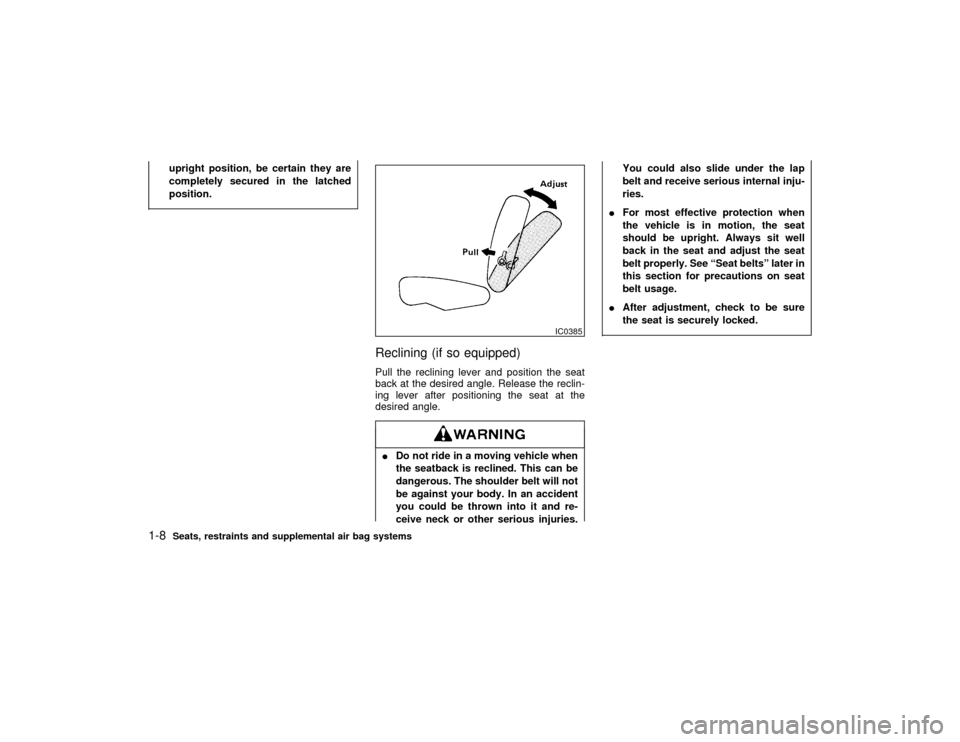
Reclining (if so equipped)Pull the reclining lever and position the seat
back at the desired angle. Release the reclin-
ing lever after positioning the seat at the
desired angle.IDo not ride in a moving vehicle when
the seatback is reclined. This can be
dangerous. The shoulder belt will not
be against your body. In an accident
you could be thrown into it and re-
ceive neck or other serious injuries.You could also slide under the lap
belt and receive serious internal inju-
ries.
IFor most effective protection when
the vehicle is in motion, the seat
should be upright. Always sit well
back in the seat and adjust the seat
belt properly. See ªSeat beltsº later in
this section for precautions on seat
belt usage.
IAfter adjustment, check to be sure
the seat is securely locked.
IC0385
1-8
Seats, restraints and supplemental air bag systems
Z
01.1.22/R50-D/V5
X
Page 16 of 274
HEAD RESTRAINT ADJUSTMENTHead restraints should be adjusted
properly as they may provide significant
protection against injury in an accident.
Do not remove them. Check the adjust-
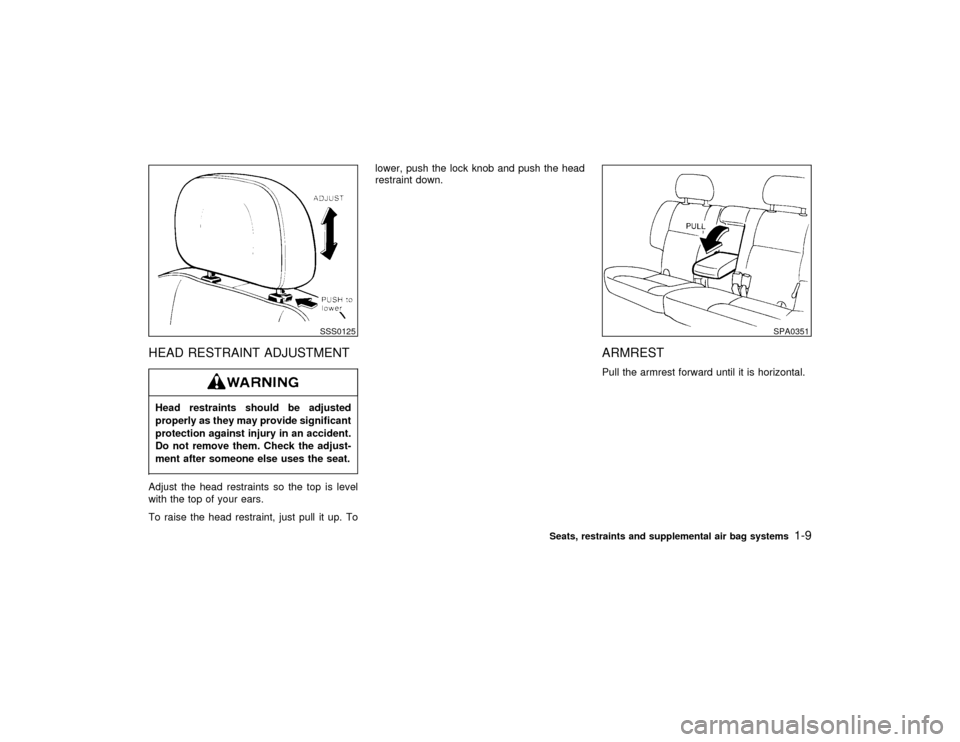
ment after someone else uses the seat.Adjust the head restraints so the top is level
with the top of your ears.
To raise the head restraint, just pull it up. Tolower, push the lock knob and push the head
restraint down.
ARMRESTPull the armrest forward until it is horizontal.
SSS0125
SPA0351
Seats, restraints and supplemental air bag systems
1-9
Z
01.1.22/R50-D/V5
X
Page 28 of 274

after about 7 seconds if the systems are
operational.
If any of the following conditions occurs, the
supplemental air bag and supplemental side
air bag systems need servicing:
IThe supplemental air bag warning light
does not come on and remain on for 7
seconds and then go off as described
above.
IThe supplemental air bag warning light
flashes intermittently or remains on (after 7
seconds).
IThe supplemental air bag warning light
does not come on at all.
Under these conditions, the supplemental air
bags or supplemental side air bags may not
operate properly. It must be checked and
repaired. Take your vehicle to the nearest
authorized NISSAN dealer.If the supplemental air bag warning light
is on, it could mean that the supplemen-
tal air bag system or supplemental side
air bag system will not operate in an
accident.
Repair and replacement procedureThe supplemental air bags and supplemental
side air bags are designed to inflate on a
one-time-only basis. As a reminder, unless
they are damaged, the supplemental air bag
warning light will remain illuminated after infla-
tion has occurred. Repair and replacement of
the supplemental systems should be done
only by authorized NISSAN dealers.
To ensure long-term functioning, the sys-
tems must be inspected 10 years after the
date of manufacture noted on the certifica-
tion label located on the driver side center
pillar.
When maintenance work is required on the
vehicle, the supplemental systems and related
parts should be pointed out to the person
conducting the maintenance. The ignition key
should always be in the LOCK position when
working under the hood or inside the vehicle.IOnce the supplemental air bags or
supplemental side air bags have in-
flated, these supplemental modules
will not function again and must be
replaced. The supplemental air bagmodules or supplemental side air bag
modules should be replaced by an
authorized NISSAN dealer. These
supplemental modules cannot be re-
paired.
IThe supplemental air bag and supple-
mental side air bag systems should
be inspected by an authorized
NISSAN dealer if there is any damage
to the front end portion of the vehicle.
IIf you need to dispose of these
supplemental systems or scrap the
vehicle, contact an authorized
NISSAN dealer. Correct disposal pro-
cedures are set forth in the appropri-
ate NISSAN Service Manual. Incorrect
disposal procedures could cause
personal injury.
Seats, restraints and supplemental air bag systems
1-21
Z
01.1.22/R50-D/V5
X
Page 33 of 274
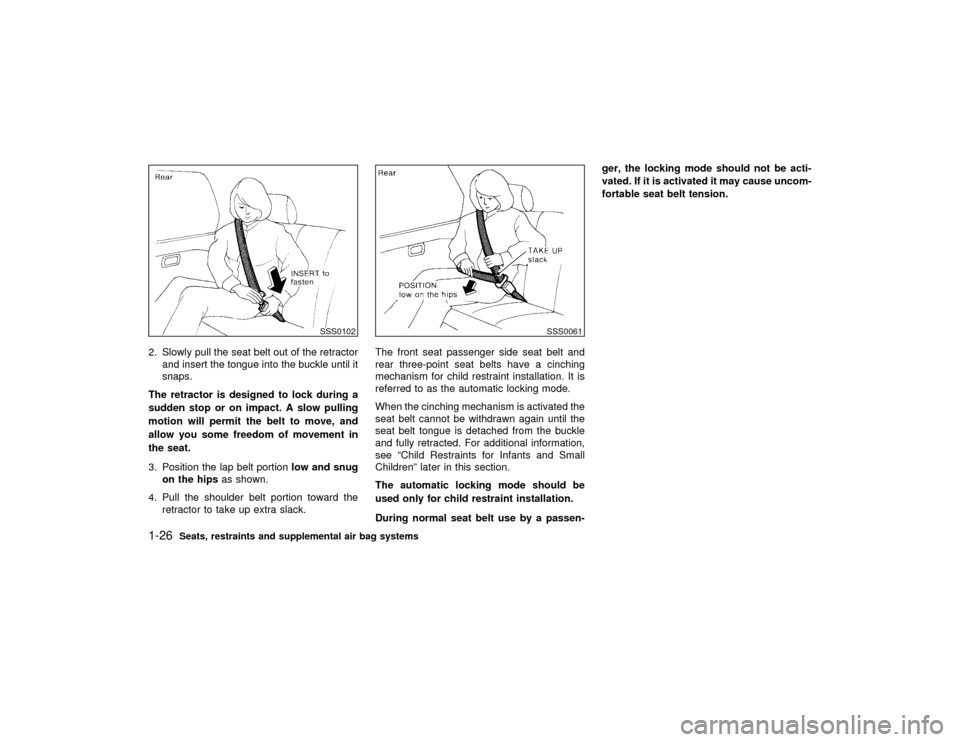
2. Slowly pull the seat belt out of the retractor
and insert the tongue into the buckle until it
snaps.
The retractor is designed to lock during a
sudden stop or on impact. A slow pulling
motion will permit the belt to move, and
allow you some freedom of movement in
the seat.
3. Position the lap belt portionlow and snug
on the hipsas shown.
4. Pull the shoulder belt portion toward the
retractor to take up extra slack.The front seat passenger side seat belt and
rear three-point seat belts have a cinching
mechanism for child restraint installation. It is
referred to as the automatic locking mode.
When the cinching mechanism is activated the
seat belt cannot be withdrawn again until the
seat belt tongue is detached from the buckle
and fully retracted. For additional information,
see ªChild Restraints for Infants and Small
Childrenº later in this section.
The automatic locking mode should be
used only for child restraint installation.
During normal seat belt use by a passen-ger, the locking mode should not be acti-
vated. If it is activated it may cause uncom-
fortable seat belt tension.
SSS0102
SSS0061
1-26
Seats, restraints and supplemental air bag systems
Z
01.1.22/R50-D/V5
X
Page 34 of 274
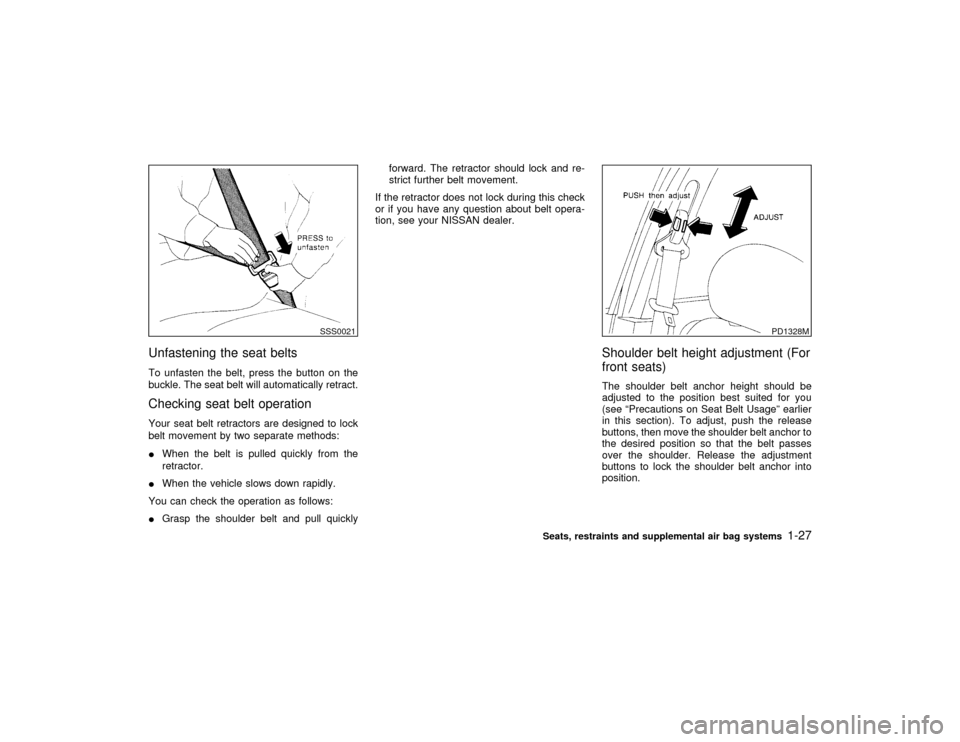
Unfastening the seat beltsTo unfasten the belt, press the button on the
buckle. The seat belt will automatically retract.Checking seat belt operationYour seat belt retractors are designed to lock
belt movement by two separate methods:
IWhen the belt is pulled quickly from the
retractor.
IWhen the vehicle slows down rapidly.
You can check the operation as follows:
IGrasp the shoulder belt and pull quicklyforward. The retractor should lock and re-
strict further belt movement.
If the retractor does not lock during this check
or if you have any question about belt opera-
tion, see your NISSAN dealer.
Shoulder belt height adjustment (For
front seats)The shoulder belt anchor height should be
adjusted to the position best suited for you
(see ªPrecautions on Seat Belt Usageº earlier
in this section). To adjust, push the release
buttons, then move the shoulder belt anchor to
the desired position so that the belt passes
over the shoulder. Release the adjustment
buttons to lock the shoulder belt anchor into
position.
SSS0021
PD1328M
Seats, restraints and supplemental air bag systems
1-27
Z
01.1.22/R50-D/V5
X
Page 42 of 274
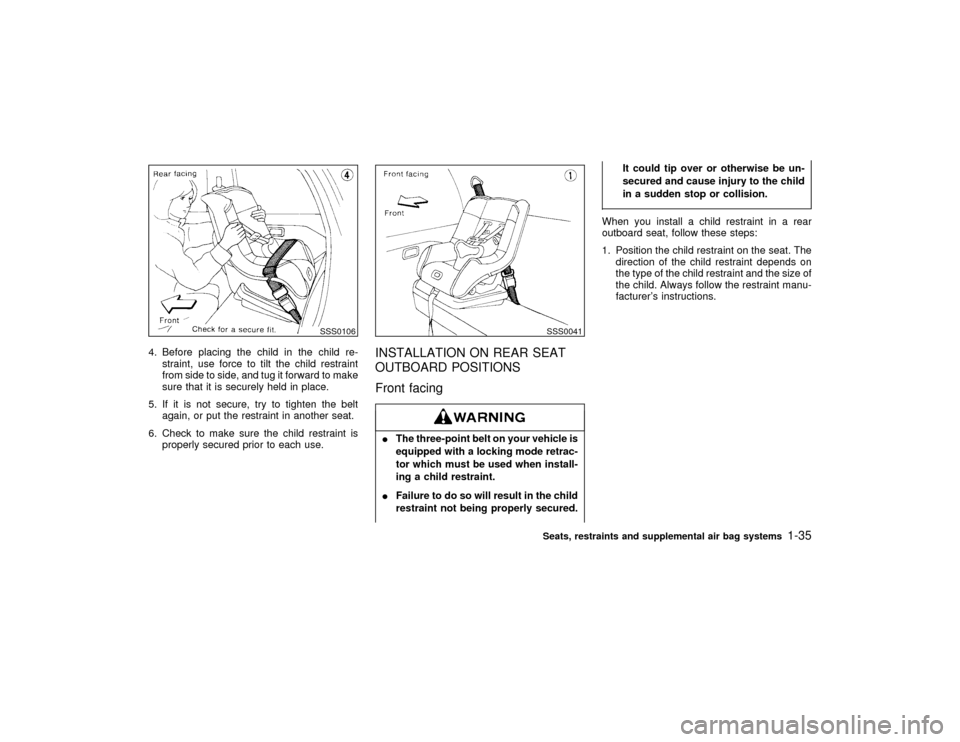
4. Before placing the child in the child re-
straint, use force to tilt the child restraint
from side to side, and tug it forward to make
sure that it is securely held in place.
5. If it is not secure, try to tighten the belt
again, or put the restraint in another seat.
6. Check to make sure the child restraint is
properly secured prior to each use.
INSTALLATION ON REAR SEAT
OUTBOARD POSITIONS
Front facingIThe three-point belt on your vehicle is
equipped with a locking mode retrac-
tor which must be used when install-
ing a child restraint.
IFailure to do so will result in the child
restraint not being properly secured.It could tip over or otherwise be un-
secured and cause injury to the child
in a sudden stop or collision.
When you install a child restraint in a rear
outboard seat, follow these steps:
1. Position the child restraint on the seat. The
direction of the child restraint depends on
the type of the child restraint and the size of
the child. Always follow the restraint manu-
facturer's instructions.
SSS0106
SSS0041Seats, restraints and supplemental air bag systems
1-35
Z
01.1.22/R50-D/V5
X
Page 43 of 274
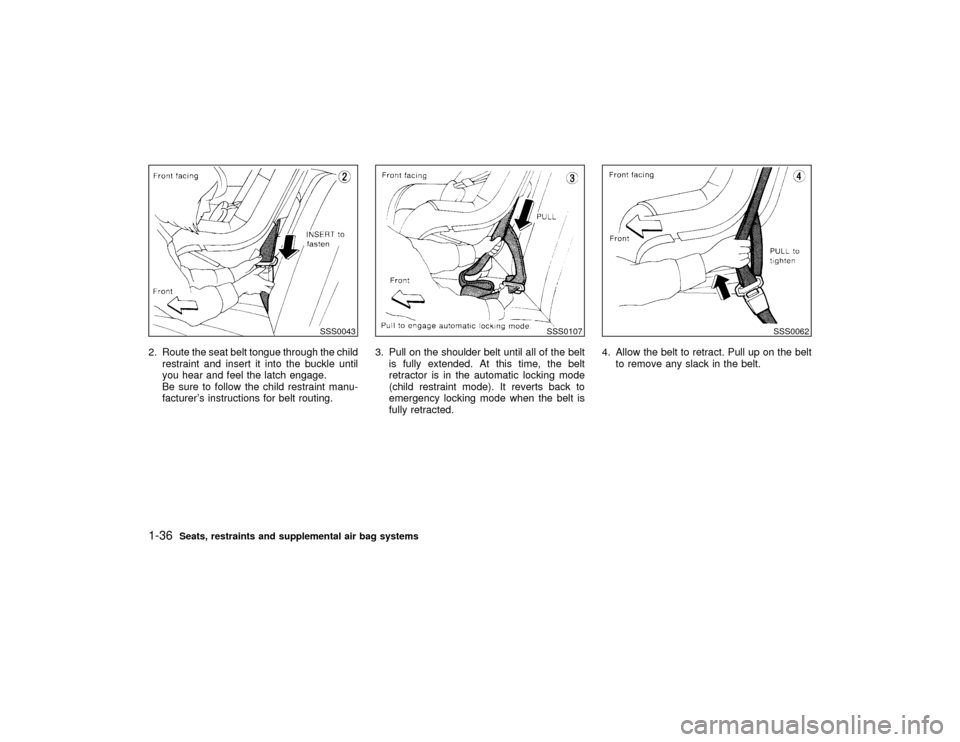
2. Route the seat belt tongue through the child
restraint and insert it into the buckle until
you hear and feel the latch engage.
Be sure to follow the child restraint manu-
facturer's instructions for belt routing.3. Pull on the shoulder belt until all of the belt
is fully extended. At this time, the belt
retractor is in the automatic locking mode
(child restraint mode). It reverts back to
emergency locking mode when the belt is
fully retracted.4. Allow the belt to retract. Pull up on the belt
to remove any slack in the belt.
SSS0043
SSS0107
SSS0062
1-36
Seats, restraints and supplemental air bag systems
Z
01.1.22/R50-D/V5
X
Page 44 of 274
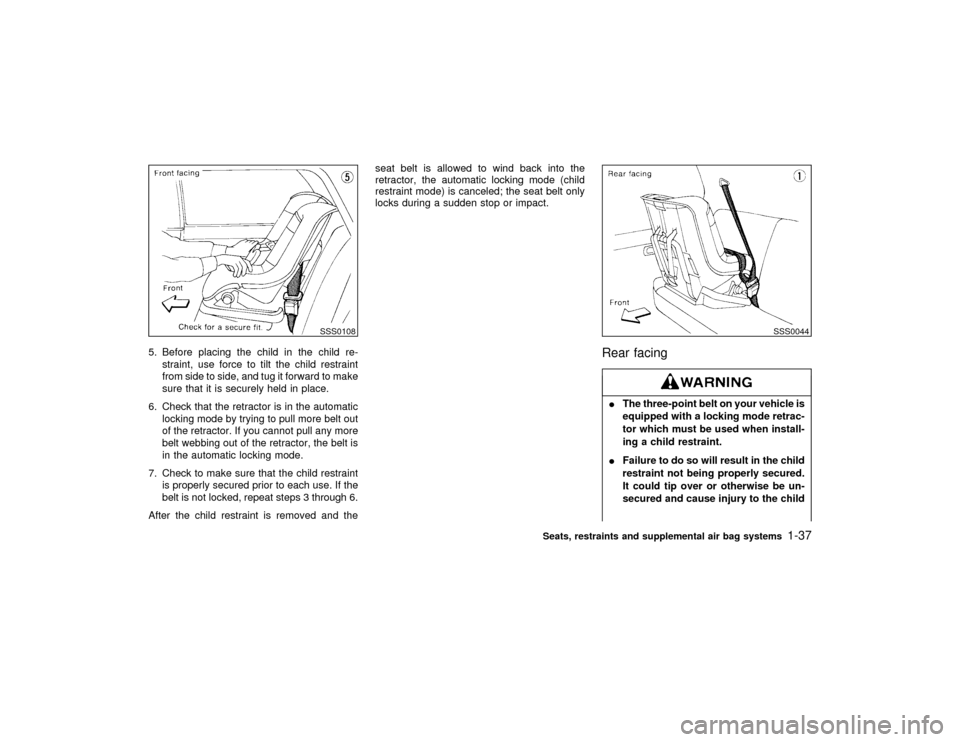
5. Before placing the child in the child re-
straint, use force to tilt the child restraint
from side to side, and tug it forward to make
sure that it is securely held in place.
6. Check that the retractor is in the automatic
locking mode by trying to pull more belt out
of the retractor. If you cannot pull any more
belt webbing out of the retractor, the belt is
in the automatic locking mode.
7. Check to make sure that the child restraint
is properly secured prior to each use. If the
belt is not locked, repeat steps 3 through 6.
After the child restraint is removed and theseat belt is allowed to wind back into the
retractor, the automatic locking mode (child
restraint mode) is canceled; the seat belt only
locks during a sudden stop or impact.
Rear facingIThe three-point belt on your vehicle is
equipped with a locking mode retrac-
tor which must be used when install-
ing a child restraint.
IFailure to do so will result in the child
restraint not being properly secured.
It could tip over or otherwise be un-
secured and cause injury to the child
SSS0108
SSS0044
Seats, restraints and supplemental air bag systems
1-37
Z
01.1.22/R50-D/V5
X