instrument panel NISSAN PATHFINDER 2002 R50 / 2.G Owners Manual
[x] Cancel search | Manufacturer: NISSAN, Model Year: 2002, Model line: PATHFINDER, Model: NISSAN PATHFINDER 2002 R50 / 2.GPages: 288, PDF Size: 2.49 MB
Page 17 of 288

PRECAUTIONS ON
SUPPLEMENTAL RESTRAINT
SYSTEMThis Supplemental Restraint System (SRS)
section contains important information con-
cerning the driver and passenger supplemen-
tal front air bags, supplemental side air bags
and pre-tensioner seat belts.
Supplemental front air bag system:This
system can help cushion the impact force to
the face and chest of the driver and front
passenger in certain frontal collisions.
Supplemental side air bag system (if so
equipped):This system can help cushion the
impact force to the head and chest area of the
driver and front passenger in certain side
impact collisions. The supplemental side air
bags are designed to inflate on the side where
the vehicle is impacted.
These supplemental restraint systems are de-
signed tosupplementthe crash protection
provided by the driver and front passenger
seat belts and arenot a substitutefor them.
Seat belts should always be correctly worn
and the driver and front passenger seated a
suitable distance away from the steering
wheel, instrument panel and front door finish-
ers. (See ªSeat beltsº later in this section forinstructions and precautions on seat belt us-
age.)
After turning the ignition key to the ON
position, the supplemental air bag warning
light illuminates. The supplemental air bag
warning light will turn off after about 7
seconds if the systems are operational.SUPPLEMENTAL RESTRAINT
SYSTEM1-10
Seats, restraints and supplemental air bag systems
Z
01.9.21/R50-D/V5
X
Page 18 of 288
WARNING
IThe supplemental front air bags ordi-
narily will not inflate in the event of a
side impact, rear impact, roll over, or
lower severity frontal collision. Al-
ways wear your seat belts to help
reduce the risk or severity of injury in
various kinds of accidents.
IThe seat belts and the supplemental
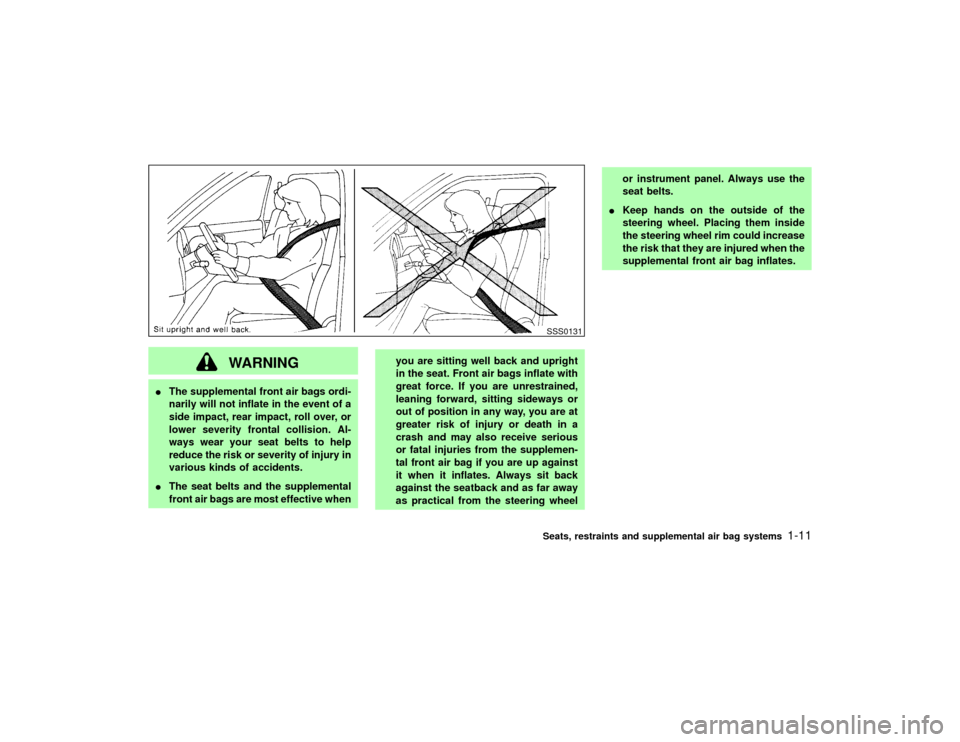
front air bags are most effective whenyou are sitting well back and upright
in the seat. Front air bags inflate with
great force. If you are unrestrained,
leaning forward, sitting sideways or
out of position in any way, you are at
greater risk of injury or death in a
crash and may also receive serious
or fatal injuries from the supplemen-
tal front air bag if you are up against
it when it inflates. Always sit back
against the seatback and as far away
as practical from the steering wheelor instrument panel. Always use the
seat belts.
IKeep hands on the outside of the
steering wheel. Placing them inside
the steering wheel rim could increase
the risk that they are injured when the
supplemental front air bag inflates.
SSS0131Seats, restraints and supplemental air bag systems
1-11
Z
01.9.21/R50-D/V5
X
Page 24 of 288
WARNING
IDo not place any objects on the steer-
ing wheel pad or on the instrument
panel. Also, do not place any objects
between any occupant and the steer-
ing wheel or instrument panel. Such
objects may become dangerous pro-
jectiles and may cause injury if the
supplemental air bag inflates.
IRight after inflation, several air bag
system components will be hot. Do
not touch them; you may severely
burn yourself.
INo unauthorized changes should be
made to any components or wiring of
the supplemental air bag system.
This is to prevent accidental inflation
of the supplemental front air bags or
damage to the supplemental air bag
system.
IDo not make unauthorized changes
to your vehicle's electrical system,
suspension system or front end
structure. This could affect properoperation of the supplemental front
air bag system.
ITampering with the supplemental
front air bag system may result in
serious personal injury. Tampering
includes changes to the steering
wheel and the instrument panel as-
sembly by placing material over the
steering wheel pad and above the
instrument panel, or by installing ad-
ditional trim material around the air
bag system.
IWork around and on the supplemen-
tal front air bag system should be
done by an authorized NISSAN
dealer. Installation of electrical equip-
ment should also be done by an au-
thorized NISSAN dealer. The yellow
Supplemental Restraint System
(SRS) wiring harnesses* should not
be modified or disconnected. Unau-
thorized electrical test equipment and
probing devices should not be used
on the air bag system.
IA cracked windshield should be re-placed immediately by a qualified re-
pair facility. A cracked windshield
could affect inflation of the supple-
mental air bag system.
* The SRS wiring harnesses are cov-
ered with yellow insulation either just
before the harness connectors or
over the complete harness for easy
identification.
When selling your vehicle, we request that you
inform the buyer about the supplemental air
bag system and guide the buyer to the appro-
priate sections in this Owner's Manual.
Seats, restraints and supplemental air bag systems
1-17
Z
01.9.21/R50-D/V5
X
Page 28 of 288
SUPPLEMENTAL AIR BAG
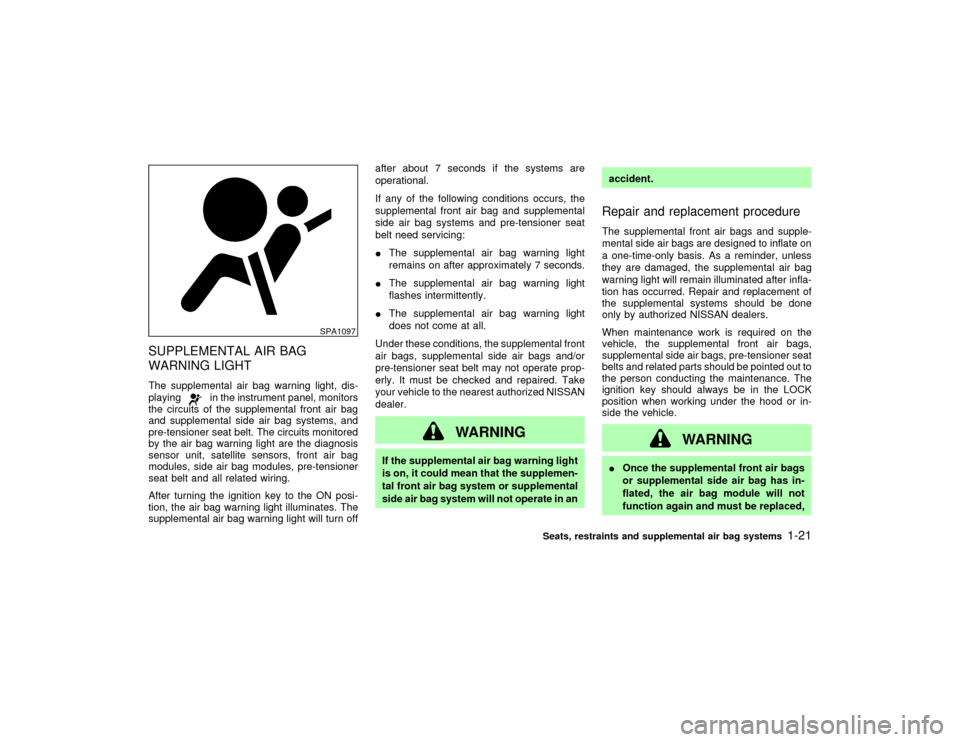
WARNING LIGHTThe supplemental air bag warning light, dis-
playing
in the instrument panel, monitors
the circuits of the supplemental front air bag
and supplemental side air bag systems, and
pre-tensioner seat belt. The circuits monitored
by the air bag warning light are the diagnosis
sensor unit, satellite sensors, front air bag
modules, side air bag modules, pre-tensioner
seat belt and all related wiring.
After turning the ignition key to the ON posi-
tion, the air bag warning light illuminates. The
supplemental air bag warning light will turn offafter about 7 seconds if the systems are
operational.
If any of the following conditions occurs, the
supplemental front air bag and supplemental
side air bag systems and pre-tensioner seat
belt need servicing:
IThe supplemental air bag warning light
remains on after approximately 7 seconds.
IThe supplemental air bag warning light
flashes intermittently.
IThe supplemental air bag warning light
does not come at all.
Under these conditions, the supplemental front
air bags, supplemental side air bags and/or
pre-tensioner seat belt may not operate prop-
erly. It must be checked and repaired. Take
your vehicle to the nearest authorized NISSAN
dealer.
WARNING
If the supplemental air bag warning light
is on, it could mean that the supplemen-
tal front air bag system or supplemental
side air bag system will not operate in anaccident.
Repair and replacement procedureThe supplemental front air bags and supple-
mental side air bags are designed to inflate on
a one-time-only basis. As a reminder, unless
they are damaged, the supplemental air bag
warning light will remain illuminated after infla-
tion has occurred. Repair and replacement of
the supplemental systems should be done
only by authorized NISSAN dealers.
When maintenance work is required on the
vehicle, the supplemental front air bags,
supplemental side air bags, pre-tensioner seat
belts and related parts should be pointed out to
the person conducting the maintenance. The
ignition key should always be in the LOCK
position when working under the hood or in-
side the vehicle.
WARNING
IOnce the supplemental front air bags
or supplemental side air bag has in-
flated, the air bag module will not
function again and must be replaced,
SPA1097
Seats, restraints and supplemental air bag systems
1-21
Z
01.9.21/R50-D/V5
X
Page 53 of 288

2 Instruments and controlsInstrument panel ....................................................... 2-2
Meters and gauges ................................................... 2-3
Speedometer and odometer ................................ 2-3
Tachometer .......................................................... 2-4
Engine coolant temperature gauge ...................... 2-4
Fuel gauge ........................................................... 2-5
Compass and outside temperature display (if so
equipped) .................................................................. 2-6
Outside temperature display ................................ 2-6
Compass display .................................................. 2-7
Warning/indicator lights and audible reminders ........ 2-9
Checking bulbs ..................................................... 2-9
Warning lights....................................................... 2-9
Indicator lights .................................................... 2-13
Audible reminders .............................................. 2-15
Security systems ..................................................... 2-15
Vehicle security system ...................................... 2-15
Nissan vehicle immobilizer system .................... 2-17
Windshield wiper and washer switch ...................... 2-18
Rear window wiper and washer switch................... 2-18
Glass hatch and outside mirror (if so equipped)
defogger switch ...................................................... 2-19
Headlight and turn signal switch ............................. 2-19
Headlight switch ................................................. 2-20Turn signal switch .............................................. 2-22
Fog light switch (if so equipped) ............................. 2-23
Front fog light switch .......................................... 2-23
Hazard warning flasher switch ................................ 2-23
Horn......................................................................... 2-24
Heated seats (if so equipped) ................................. 2-24
Clock ....................................................................... 2-25
Adjusting the time............................................... 2-25
Power outlet (if so equipped) .................................. 2-25
Cigarette lighter and ashtray (if so equipped) ........ 2-26
Storage .................................................................... 2-27
Tray .................................................................... 2-27
Coin box (if so equipped) ................................... 2-27
Glasses case ...................................................... 2-28
Cup holders ........................................................ 2-28
Glove box ........................................................... 2-29
Console box ....................................................... 2-30
Luggage hooks ................................................... 2-32
Cargo net............................................................ 2-33
Tonneau cover (if so equipped) ......................... 2-33
Luggage rack (if so equipped) ........................... 2-34
Windows .................................................................. 2-35
Power windows .................................................. 2-35
Sunroof (if so equipped) ......................................... 2-36
Z
01.9.21/R50-D/V5
X
Page 55 of 288

Driver's supplemental air bag (P.1-10)Cruise control
switch (P.5-17)
Outside mirror remote control
(P.3-15) Headlight/dimmer/turn signal switch (P.2-19)
Front fog light switch (P.2-23)
Steering switch for audio control
(P.4-30)Meters/gauges (P.2-3)Windshield
and rear
window wiper/
washer
switch
(P.2-18)
Hazard warning
flasher switch
(P.2-23)Center ventilator (P.4-2)
Heater/air conditioner control (P.4-2)Compass/outside air temperature display (P.2-6)
Passenger supplemental air bag (P.1-10)
Side ventilator (P.4-2)
Glove box (P.2-29)
Power outlet (P.2-25) or Cigarette lighter (P.2-26)
Radio (P.4-11)/CD player (P.4-13) or Navigation system* Glass hatch/
outside mirror
defogger switch
(P.2-19) Ignition switch/steering
lock (P.5-6)
Heated seat switch (P.2-24)
or 4WD shift switch (P.5-24) Tilting steering wheel
adjust lever (P.3-14) Fuse box cover (P.8-28)/
Tray (P.2-27)Clock (P.2-25)
Instrument brightness control
(P.2-21)
SIC1438
See the page indicated in parentheses for operating details.
*: Refer to the separate Navigation System Owner's Manual.
Security indicator
light (P.2-15)
Hood release handle (P.3-9)Heated seat switch (P.2-24) (4WD shift switch equipped models)
INSTRUMENT PANEL2-2
Instruments and controls
Z
01.9.21/R50-D/V5
X
Page 73 of 288
HEADLIGHT SWITCH
LightingTurn the switch to the AUTO position:
When the ignition key is in the ON position, the
tail light, headlight, instrument light and other
lights turn on automatically, depending on the
brightness of the surroundings. The headlight
will automatically turn off 5 minutes after the
ignition switch is turned to the OFF position
and the driver's or front passenger's door is
opened.
The headlight will also automatically turn off 45
seconds after a front door is opened and
closed.
When the light switch is turned to the
position, the headlight low or high beam
will turn off.
Turn the switch to the
position:
The side combination, tail, license plate and
instrument lights will come on.
Turn the switch to theposition:
Headlights will come on and all the other lights
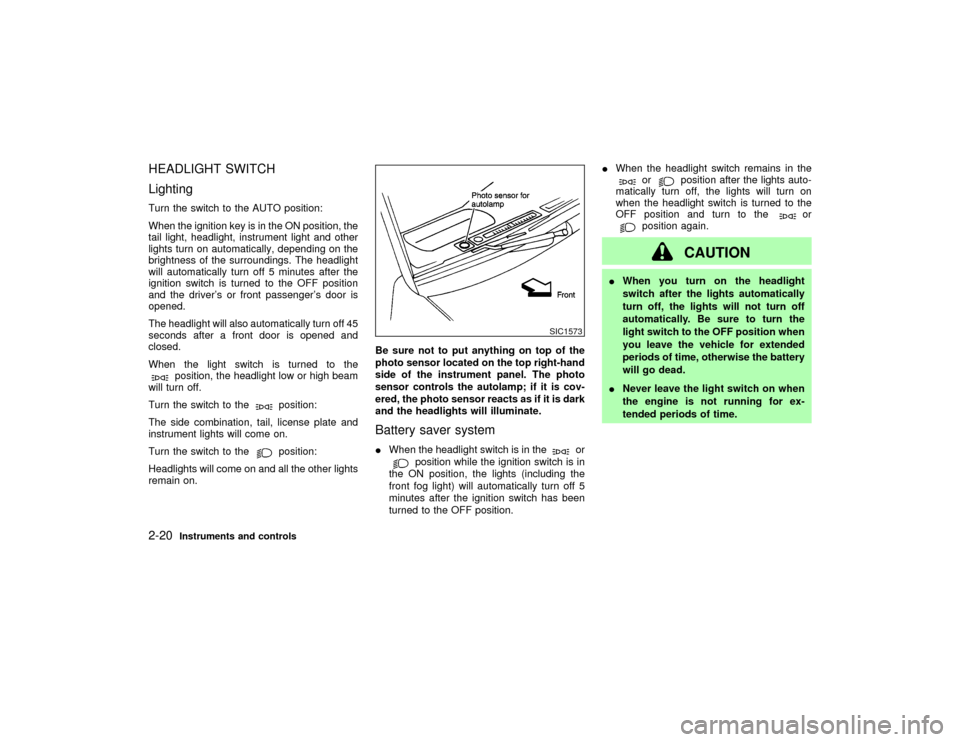
remain on.Be sure not to put anything on top of the
photo sensor located on the top right-hand
side of the instrument panel. The photo
sensor controls the autolamp; if it is cov-
ered, the photo sensor reacts as if it is dark
and the headlights will illuminate.
Battery saver systemIWhen the headlight switch is in the
or
position while the ignition switch is in
the ON position, the lights (including the
front fog light) will automatically turn off 5
minutes after the ignition switch has been
turned to the OFF position.IWhen the headlight switch remains in the
or
position after the lights auto-
matically turn off, the lights will turn on
when the headlight switch is turned to the
OFF position and turn to the
or
position again.
CAUTION
IWhen you turn on the headlight
switch after the lights automatically
turn off, the lights will not turn off
automatically. Be sure to turn the
light switch to the OFF position when
you leave the vehicle for extended
periods of time, otherwise the battery
will go dead.
INever leave the light switch on when
the engine is not running for ex-
tended periods of time.
SIC1573
2-20
Instruments and controls
Z
01.9.21/R50-D/V5
X
Page 74 of 288

Instrument brightness controlThe instrument brightness control operates
when the light switch is in the
or
position.
Turn the control to adjust the brightness of
instrument panel lights and power window
switch lights.
When the control is turned upward until a click
sound is heard, the light intensity will be at
maximum. When the control is turned down-
ward until a click sound is heard or felt, the
light will be turned off.
Headlight beam selectTo select the high beam, push the lever for-
ward. Pull it back to select the low beam.Passing signalPulling the lever toward you will turn on the
passing signal even when the headlight switch
is off.Daytime running light system
(Canada only)The headlights automatically illuminate at a
reduced intensity when the engine is started
with the parking brake released. The daytime
running lights operate with the headlight switch
in the off position or in the
position. Turn
the headlight switch to theposition for
full illumination when driving at night.
If the parking brake is applied before the
engine is started, the daytime running lights do
not illuminate. The daytime running lights illu-
minate once the parking brake is released.
The daytime running lights will remain on until
the ignition switch is turned off.
SIC0922
SIC1445
Instruments and controls
2-21
Z
01.9.21/R50-D/V5
X
Page 77 of 288
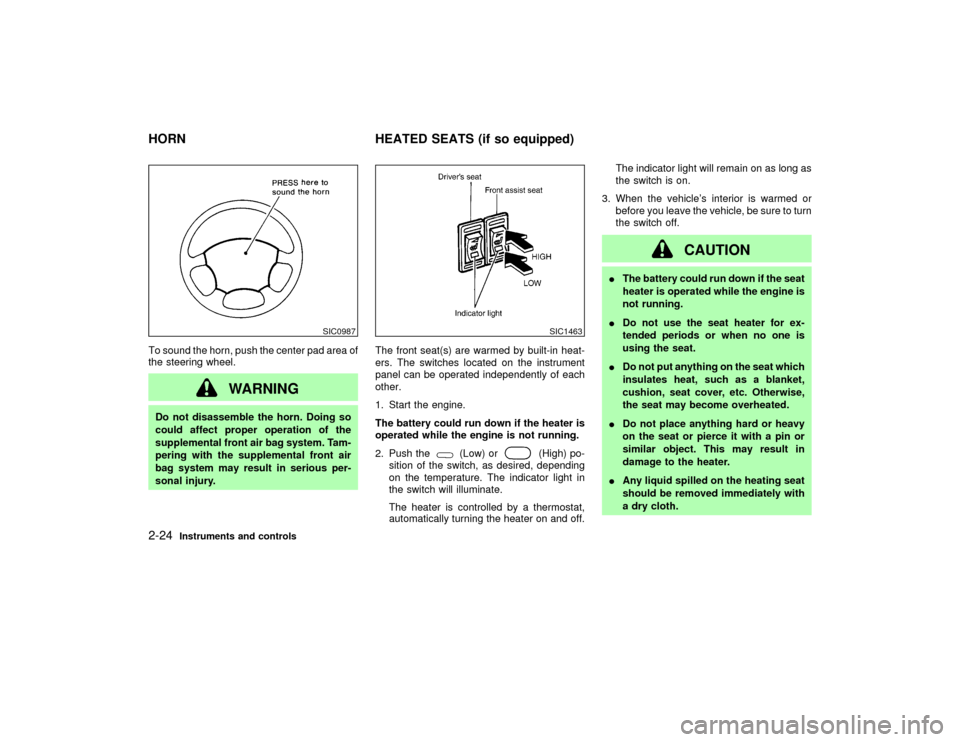
To sound the horn, push the center pad area of
the steering wheel.
WARNING
Do not disassemble the horn. Doing so
could affect proper operation of the
supplemental front air bag system. Tam-
pering with the supplemental front air
bag system may result in serious per-
sonal injury.The front seat(s) are warmed by built-in heat-
ers. The switches located on the instrument
panel can be operated independently of each
other.
1. Start the engine.
The battery could run down if the heater is
operated while the engine is not running.
2. Push the
(Low) or
(High) po-
sition of the switch, as desired, depending
on the temperature. The indicator light in
the switch will illuminate.
The heater is controlled by a thermostat,
automatically turning the heater on and off.The indicator light will remain on as long as
the switch is on.
3. When the vehicle's interior is warmed or
before you leave the vehicle, be sure to turn
the switch off.
CAUTION
IThe battery could run down if the seat
heater is operated while the engine is
not running.
IDo not use the seat heater for ex-
tended periods or when no one is
using the seat.
IDo not put anything on the seat which
insulates heat, such as a blanket,
cushion, seat cover, etc. Otherwise,
the seat may become overheated.
IDo not place anything hard or heavy
on the seat or pierce it with a pin or
similar object. This may result in
damage to the heater.
IAny liquid spilled on the heating seat
should be removed immediately with
a dry cloth.
SIC0987
SIC1463
HORN HEATED SEATS (if so equipped)2-24
Instruments and controls
Z
01.9.21/R50-D/V5
X
Page 108 of 288
could void the user's authority to operate
the equipment.
This device complies with Part 15 of the
FCC Rules and RSS-210 of Industry
Canada.
Operation is subject to the following two
conditions: (1) This device may not cause
harmful interference, and (2) this device
must accept any interference received, in-
cluding interference that may cause undes-
ired operation of the device.
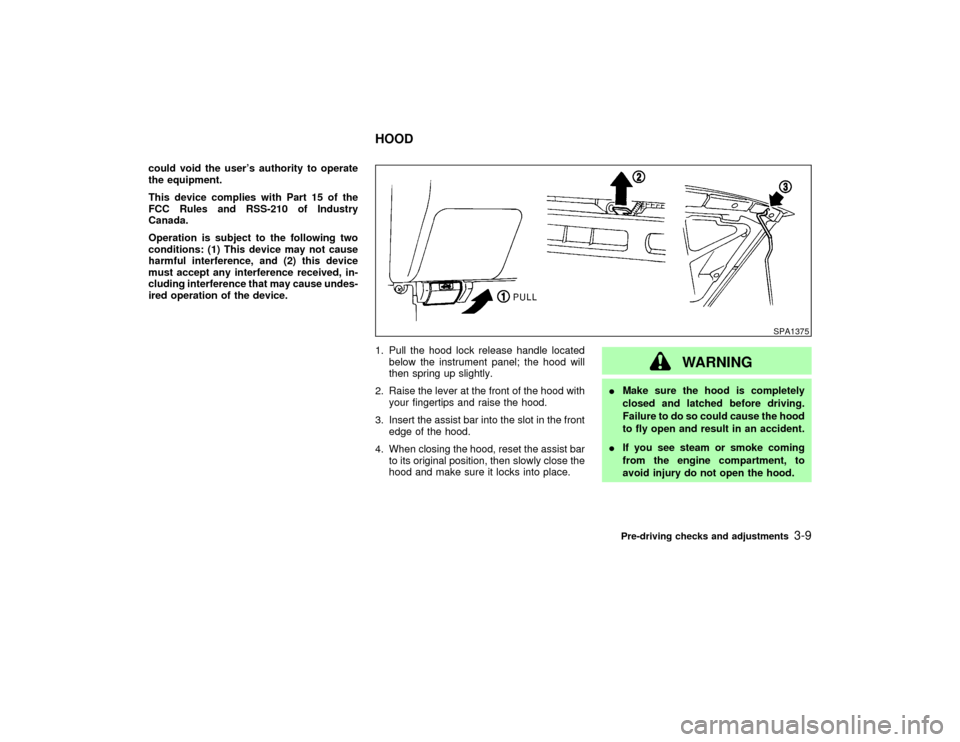
1. Pull the hood lock release handle located
below the instrument panel; the hood will
then spring up slightly.
2. Raise the lever at the front of the hood with
your fingertips and raise the hood.
3. Insert the assist bar into the slot in the front
edge of the hood.
4. When closing the hood, reset the assist bar
to its original position, then slowly close the
hood and make sure it locks into place.
WARNING
IMake sure the hood is completely
closed and latched before driving.
Failure to do so could cause the hood
to fly open and result in an accident.
IIf you see steam or smoke coming
from the engine compartment, to
avoid injury do not open the hood.
SPA1375
HOOD
Pre-driving checks and adjustments
3-9
Z
01.9.21/R50-D/V5
X