tow NISSAN PATHFINDER 2008 R51 / 3.G Quick Reference Guide
[x] Cancel search | Manufacturer: NISSAN, Model Year: 2008, Model line: PATHFINDER, Model: NISSAN PATHFINDER 2008 R51 / 3.GPages: 36, PDF Size: 3.11 MB
Page 5 of 36

tURN iN g the eN gi Ne OFF
Shift the transmission into P (Park).
Turn the ignition knob to the LOCK position.
An audible warning chime will sound when exiting the vehicle if the ignition knob is
not completely turned to the OFF position.
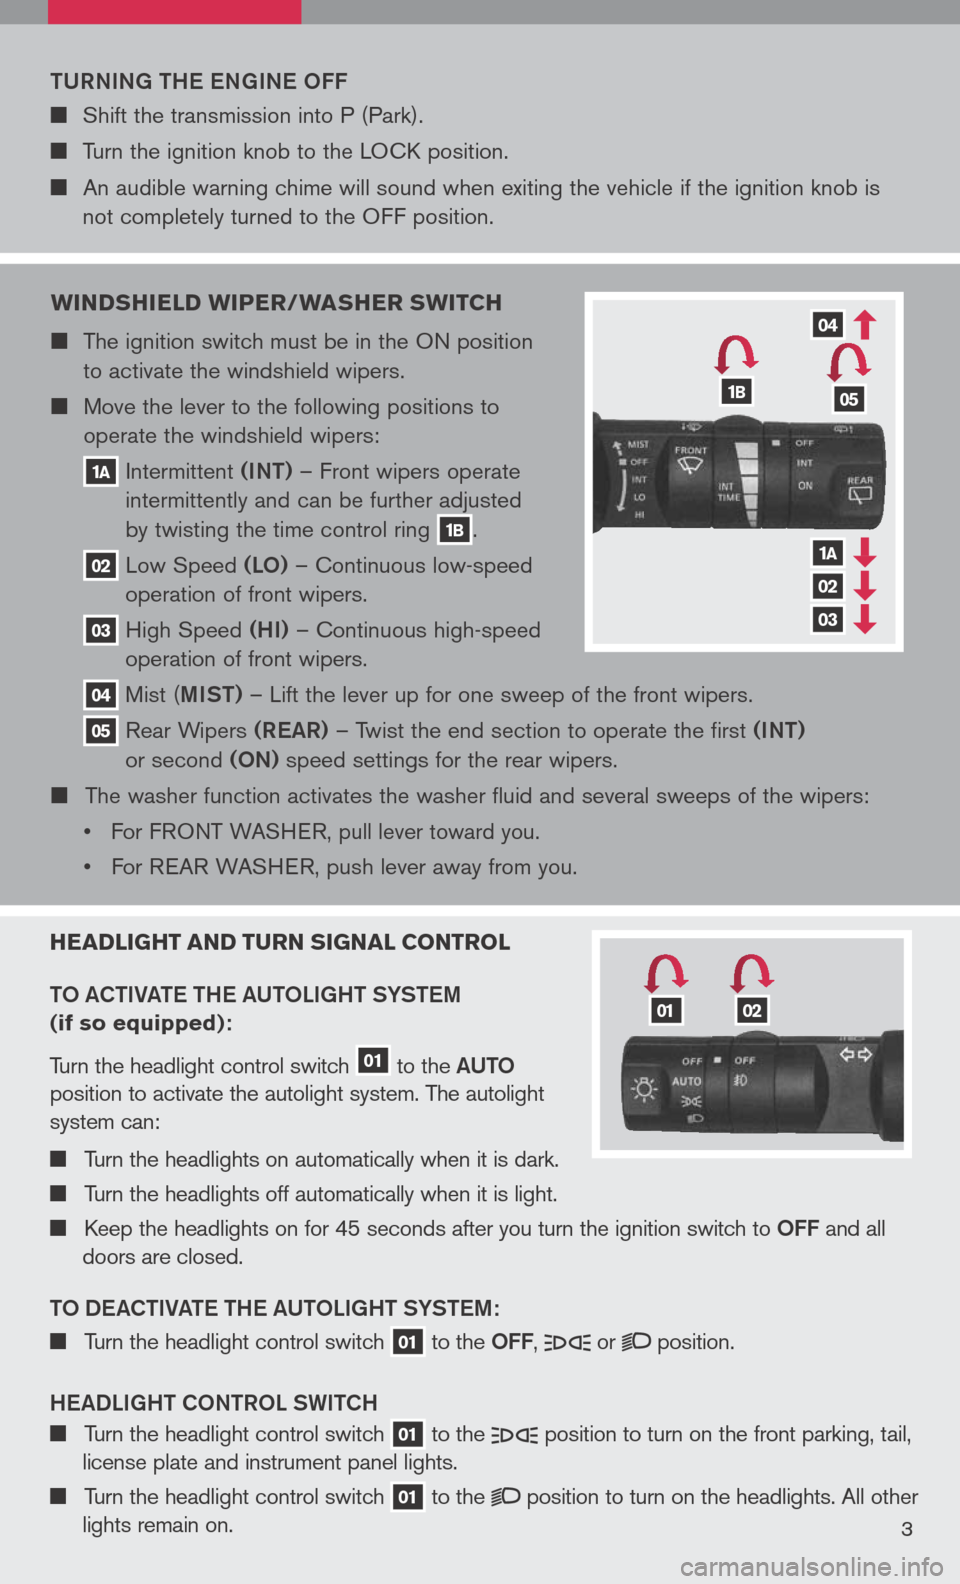
W indshield W iper/Washer sW itch
The ignition switch must be in the ON position
to activate the windshield wipers.
Move the lever to the following positions to
operate the windshield wipers:
1a Intermittent (iNt) – Front wipers operate
intermittently and can be further adjusted
by twisting the time control ring 1b.
02 Low Speed (LO) – Continuous low-speed
operation of front wipers.
03 High Speed (hi) – Continuous high-speed
operation of front wipers.
04 Mist ( miSt) – Lift the lever up for one sweep of the front wipers.
05 Rear Wipers (ReaR) – Twist the end section to operate the first (iNt)
or second (ON) speed settings for the rear wipers.
The washer function activates the washer fluid and several sweeps of the wipers:
• For F
RONT WASHER, pull lever toward you.
• For REAR WASHER, push lever away from you.
headlight and turn signal control
t O aC ti Vate the a U tOL ight SYStem
(if so equipped):
Turn the headlight control switch 01 to the aU tO
position to activate the autolight system. The autolight
system can:
Turn the headlights on automatically when it is dark.
Turn the headlights off automatically when it is light.
Keep the headlights on for 45 seconds after you turn the ignition switch to OFF and all
doors are closed.
t O D eaCti Vate the a U tOL ight SYStem:
Turn the headlight control switch 01 to the OFF, or position.
hea DLight CON tROL SW itCh
Turn the headlight control switch 01 to the position to turn on the front parking, tail,
license plate and instrument panel lights.
Turn the headlight control switch 01 to the position to turn on the headlights. All other
lights remain on.3
1b05
04
03
02
1a
0102
Page 17 of 36

vehicle dyna Mic control ( vdc) s yste M oFF sWitch
(if so equipped)
The vehicle dynamic control (VDC) system is designed to help improve
driving stability. VDC detects wheel spin and controls braking and
engine output. VDC may need to be temporarily shut off if you are trying
to free a vehicle stuck in snow or mud.
Push the vehicle dynamic control (VDC) off switch to deactivate the VDC system.
The light will illuminate in the instrument panel gauge area.
Push the vehicle dynamic control (VDC) off switch again to activate the VDC system.
The light in the instrument panel gauge area will turn off.
Vehicle dynamic control system is active while the vehicle is running until the
switch is pressed to turn it off.
Refer to your Owner’s Manual for detailed information regarding Vehicle Dynamic
Control (VDC) OFF Switch usage.
15
02
01
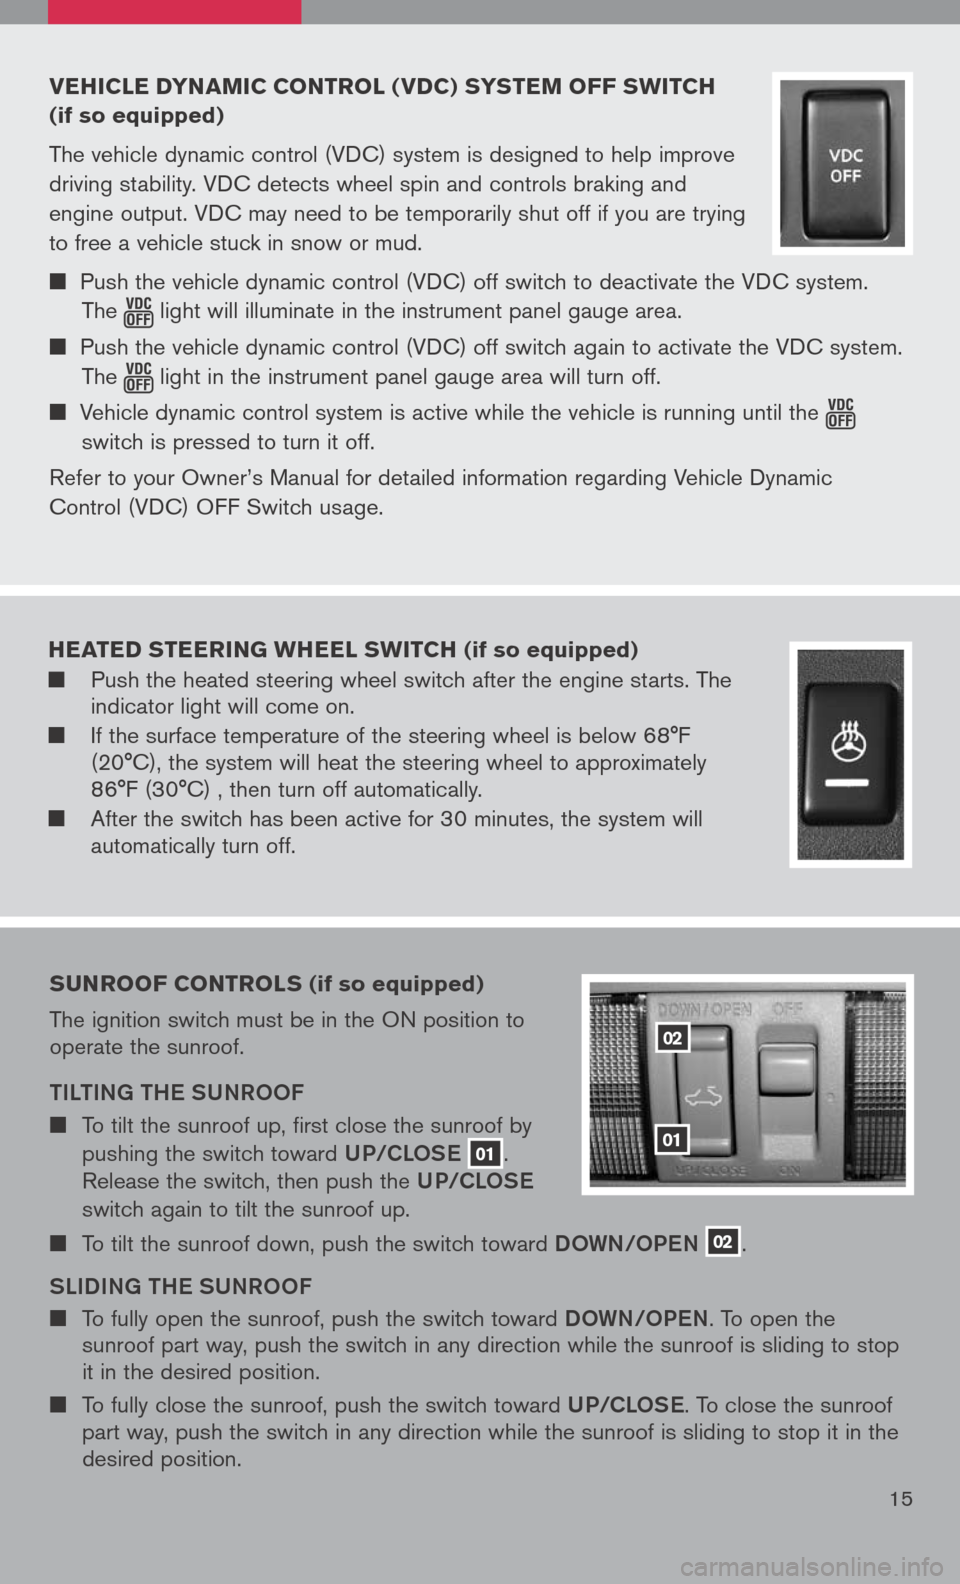
sunroo F controls (if so equipped)
The ignition switch must be in the ON position to operate the sunroof.
tiLti Ng the SUNROOF
To tilt the sunroof up, first close the sunroof by
pushing the switch toward UP/CLOSe 01.
Release the switch, then push the UP/CLOSe
switch again to tilt the sunroof up.
To tilt the sunroof down, push the switch toward DOWN/OPeN 02.
SL iD iN g the SUNROOF
To fully open the sunroof, push the switch toward DOWN/OPeN. To open the sunroof part way, push the switch in any direction while the sunroof is sliding to stop it in the desired position.
To fully close the sunroof, push the switch toward UP/CLOSe. To close the sunroof part way, push the switch in any direction while the sunroof is sliding to stop it in the desired position.
heated steering Wheel sWitch (if so equipped)
Push the heated steering wheel switch after the engine starts. The indicator light will come on.
If the surface temperature of the steering wheel is below 68°F (20°C), the system will heat the steering wheel to approximately 86°F (30°C) , then turn off automatically.
After the switch has been active for 30 minutes, the system will automatically turn off.
Page 18 of 36

Front seat ad Just Ments
With manual seats (passenger’s side, if so equipped):
Pull up on the lever under the front of the seat and slide backward or forward; release.
Lift the lever on the side of the seat to adjust your seatback backward or forward; release when you have found a comfortable angle and the seat belt fits properly.
With power seats (if so equipped):
Move the control 01 forward or backward to adjust the seat cushion forward or backward.
Pull up 01 to raise the seat cushion; press down to lower the cushion.
Push the switch 02 forward to move the seatback forward; push it back to move the seatback backward.
LU mBaR SUPPOR t (if so equipped)
Your driver’s seat has a lumbar support; adjust it by moving the lever 03 up or down.
0102
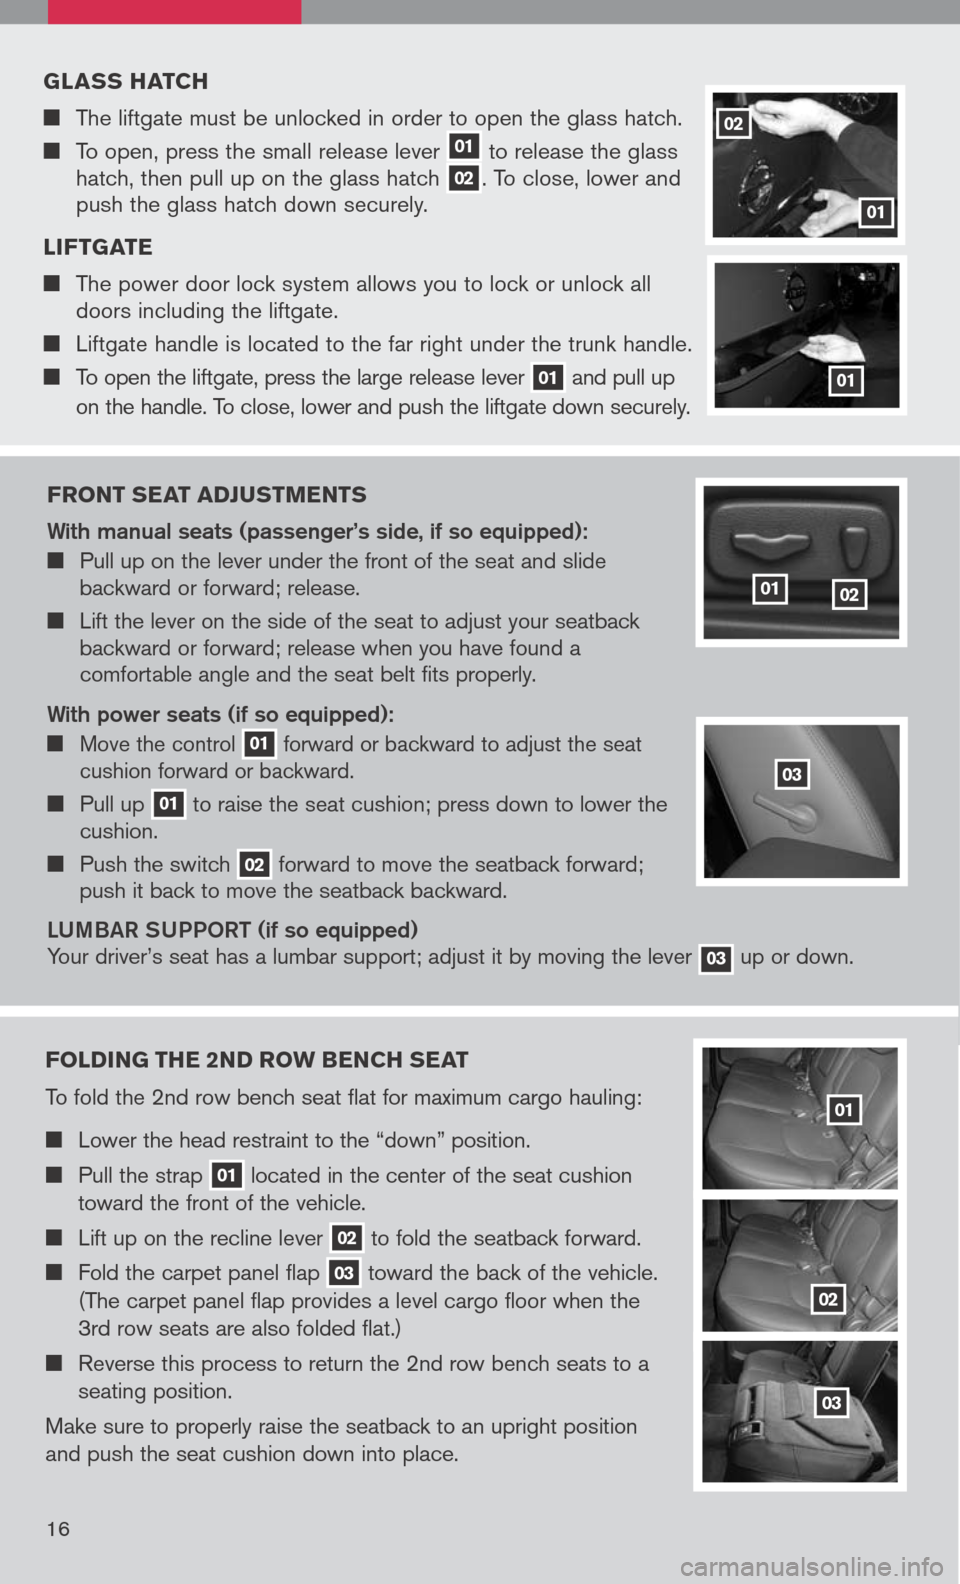
g lass hatch
The liftgate must be unlocked in order to open the glass hatch.
To open, press the small release lever 01 to release the glass hatch, then pull up on the glass hatch 02. To close, lower and push the glass hatch down securely.
l iF tgate
The power door lock system allows you to lock or unlock all doors including the liftgate.
Liftgate handle is located to the far right under the trunk handle.
To open the liftgate, press the large release lever 01 and pull up
on the handle. To close, lower and push the liftgate down securely.
01
02
01
Folding the 2nd ro W bench seat
To fold the 2nd row bench seat flat for maximum cargo hauling:
Lower the head restraint to the “down” position.
Pull the strap 01 located in the center of the seat cushion
toward the front of the vehicle.
Lift up on the recline lever 02 to fold the seatback forward.
Fold the carpet panel flap 03 toward the back of the vehicle.
(The carpet panel flap provides a level cargo floor when the
3rd row seats are also folded flat.)
Reverse this process to return the 2nd row bench seats to a
seating position.
Make sure to properly raise the seatback to an upright position
and push the seat cushion down into place.
01
02
03
03
16