buttons NISSAN PATHFINDER 2012 R52 / 4.G 06IT Navigation Manual
[x] Cancel search | Manufacturer: NISSAN, Model Year: 2012, Model line: PATHFINDER, Model: NISSAN PATHFINDER 2012 R52 / 4.GPages: 235, PDF Size: 5.14 MB
Page 101 of 235
![NISSAN PATHFINDER 2012 R52 / 4.G 06IT Navigation Manual 1. Push<ROUTE> .
2. Highlight [Edit] and push <ENTER>.
3. Highlight a destination or waypoint that is already set and push <ENTER>.
4. Highlight [Move Dest.] to modify the location
and push <ENTER> .
NISSAN PATHFINDER 2012 R52 / 4.G 06IT Navigation Manual 1. Push<ROUTE> .
2. Highlight [Edit] and push <ENTER>.
3. Highlight a destination or waypoint that is already set and push <ENTER>.
4. Highlight [Move Dest.] to modify the location
and push <ENTER> .](/img/5/280/w960_280-100.png)
1. Push
2. Highlight [Edit] and push
3. Highlight a destination or waypoint that is already set and push
4. Highlight [Move Dest.] to modify the location
and push
“ADJUSTING THE LOCATION OF
THE DESTINATION” (page 4-25)
5. Highlight [Delete] and push
delete the location.
6. A confirmation message is displayed. Con- firm the contents of the message, highlight
[Yes] and push
or waypoint is deleted from the route.
INFO:
. If the destination is deleted, the final
waypoint of the route becomes the destina-
tion. .
Even if you touch the map screen or operate
the directional buttons other than the up or
down button, the same map screen as when
[Move Dest.] is selected is displayed.
Changing route calculation conditions
Each section of the route between waypoints
can have different route calculation conditions.
After setting these conditions, you can recalcu-
late the entire route.
1. Push
2. Highlight [Edit] and push
3. Highlight the preferred section of the route to the destination or waypoint and push
Route guidance5-9
Page 103 of 235
Available items:. Turn List:
Displays the details of the suggested route.
“Using turn list” (page 5-11)
. Preview:
Allows you to confirm the suggested route
by scrolling the map.
“Using route preview” (page 5-11)
. Simulation:
Allows you to simulate the suggested route.
This function provides a detailed image of
the route with voice guidance.
“Confirming by simulation” (page 5-
12)
. Store Route:
A calculated route can be stored. A max-
imum of 5 routes can be stored. Stored
routes can be easily retrieved and set as the
suggested route.
“STORING A ROUTE” (page 6-4)
. Map Scroll:
Displays a map screen where you can
confirm the location of the destination.
Even if you touch the map screen or operate
the directional buttons other than the up or
down button, the same map screen as when
[Map Scroll] is selected is displayed.
Voice command
1. Push
switch.
2. After the tone sounds, speak a command.
To display the route information:
“Route Information” (Alternate command mode)
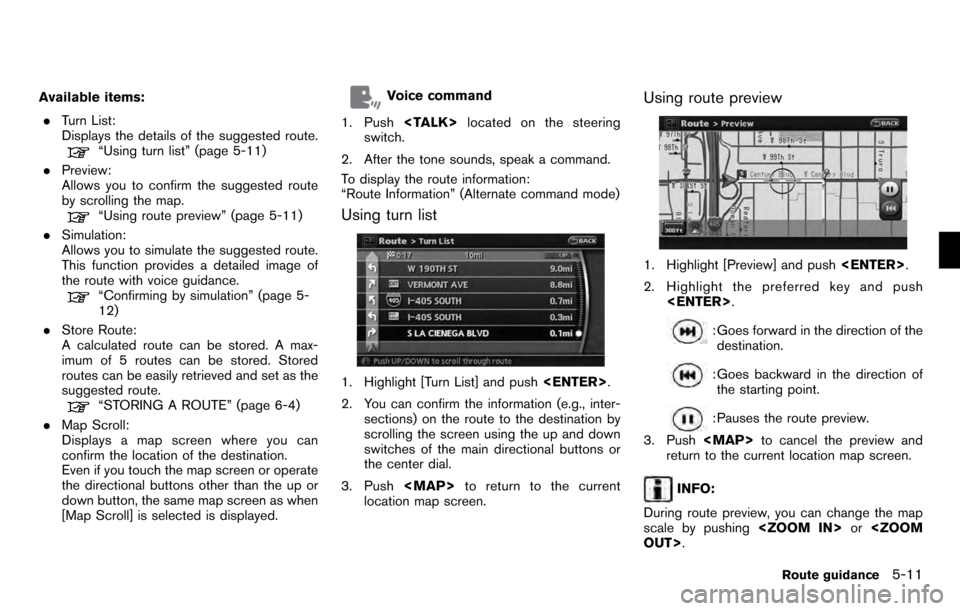
Using turn list
1. Highlight [Turn List] and push
2. You can confirm the information (e.g., inter- sections) on the route to the destination by
scrolling the screen using the up and down
switches of the main directional buttons or
the center dial.
3. Push
Page 111 of 235
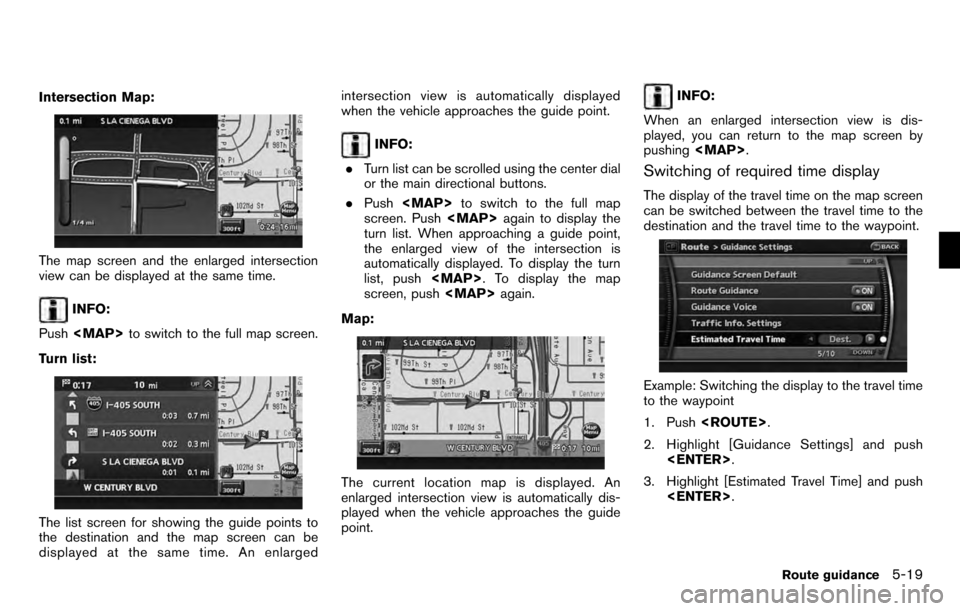
Intersection Map:
The map screen and the enlarged intersection
view can be displayed at the same time.
INFO:
Push
Turn list:
The list screen for showing the guide points to
the destination and the map screen can be
displayed at the same time. An enlarged intersection view is automatically displayed
when the vehicle approaches the guide point.
INFO:
. Turn list can be scrolled using the center dial
or the main directional buttons.
. Push
screen. Push
turn list. When approaching a guide point,
the enlarged view of the intersection is
automatically displayed. To display the turn
list, push
screen, push
Map:
The current location map is displayed. An
enlarged intersection view is automatically dis-
played when the vehicle approaches the guide
point.
INFO:
When an enlarged intersection view is dis-
played, you can return to the map screen by
pushing
Switching of required time display
The display of the travel time on the map screen
can be switched between the travel time to the
destination and the travel time to the waypoint.
Example: Switching the display to the travel time
to the waypoint
1. Push
2. Highlight [Guidance Settings] and push
3. Highlight [Estimated Travel Time] and push
Route guidance5-19
Page 112 of 235
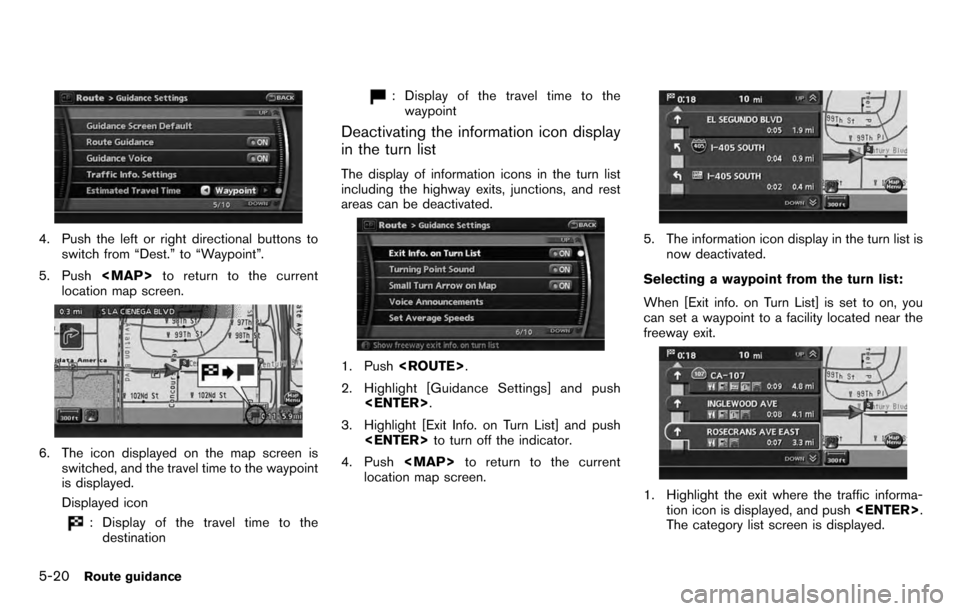
4. Push the left or right directional buttons toswitch from “Dest.” to “Waypoint”.
5. Push
location map screen.
6. The icon displayed on the map screen is switched, and the travel time to the waypoint
is displayed.
Displayed icon
: Display of the travel time to thedestination
: Display of the travel time to the
waypoint
Deactivating the information icon display
in the turn list
The display of information icons in the turn list
including the highway exits, junctions, and rest
areas can be deactivated.
1. Push
2. Highlight [Guidance Settings] and push
3. Highlight [Exit Info. on Turn List] and push
4. Push
location map screen.
5. The information icon display in the turn list is
now deactivated.
Selecting a waypoint from the turn list:
When [Exit info. on Turn List] is set to on, you
can set a waypoint to a facility located near the
freeway exit.
1. Highlight the exit where the traffic informa- tion icon is displayed, and push
The category list screen is displayed.
5-20Route guidance
Page 114 of 235
![NISSAN PATHFINDER 2012 R52 / 4.G 06IT Navigation Manual Set average speeds
You can calculate the required time to the
destination based on the set vehicle speeds.
Basic operation:
1. Push<ROUTE> .
2. Highlight [Guidance Settings] and push <ENTER> .
3. High NISSAN PATHFINDER 2012 R52 / 4.G 06IT Navigation Manual Set average speeds
You can calculate the required time to the
destination based on the set vehicle speeds.
Basic operation:
1. Push<ROUTE> .
2. Highlight [Guidance Settings] and push <ENTER> .
3. High](/img/5/280/w960_280-113.png)
Set average speeds
You can calculate the required time to the
destination based on the set vehicle speeds.
Basic operation:
1. Push
2. Highlight [Guidance Settings] and push
3. Highlight [Set Average Speeds] and push
4. Highlight the preferred item and push
5. Use the main directional buttons or the center dial to make an adjustment. The
speed can be increased/decreased by 5
MPH (5 km/h) .
6. After finishing the setting, push
or
screen. Push
current location map screen.
Available setting items: . Auto:
If set to ON, the system automatically
calculates the required time to the destina-
tion, the indicator illuminates and the speed
settings cannot be changed.
. Freeway:
Allows you to adjust the average vehicle
speed on a freeway by moving the main
directional buttons or the center dial in the
direction of [+] or [− ].
. Main Road:
Allows you to adjust the average vehicle
speed on a main road by moving the main
directional buttons or the center dial in the
direction of [+] or [− ].
. Town Road:
Allows you to adjust the average vehicle
speed on a town road by moving the main
directional buttons or the center dial in the
direction of [+] or [− ].
. Residential:
Allows you to adjust the average vehicle
speed in a residential area by moving the
main directional buttons or the center dial in
the direction of [+] or [− ]..
Reset:
Sets the average vehicle speeds to the
default values.
5-22Route guidance
Page 129 of 235
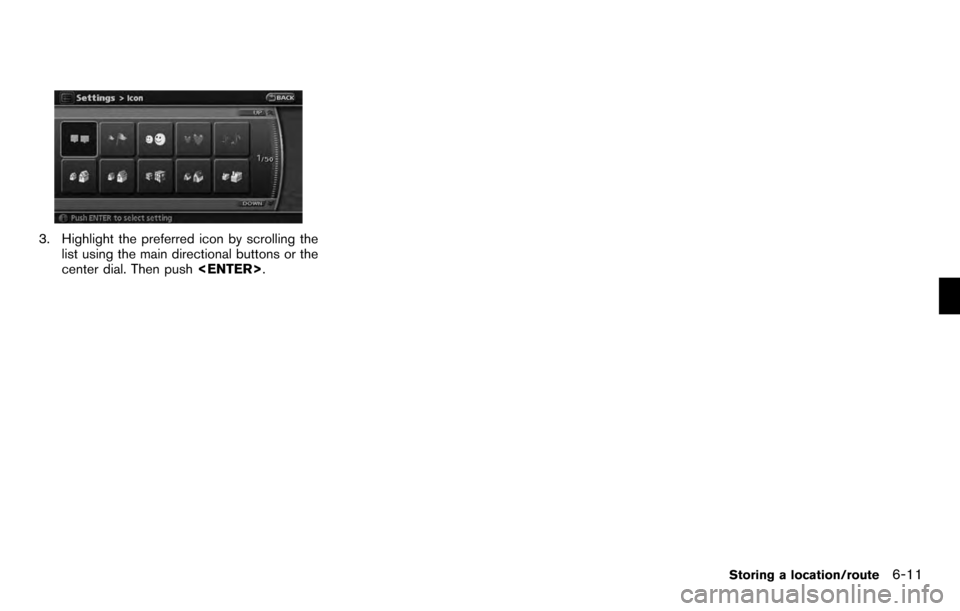
3. Highlight the preferred icon by scrolling thelist using the main directional buttons or the
center dial. Then push
Storing a location/route6-11
Page 131 of 235
![NISSAN PATHFINDER 2012 R52 / 4.G 06IT Navigation Manual Sound
Sets the tone of the arrival alarm that sounds
when the vehicle approaches the home or a
stored location.
1. Highlight [Edit] and push<ENTER>.
2. Highlight [Sound] and push <ENTER>.
A sound list NISSAN PATHFINDER 2012 R52 / 4.G 06IT Navigation Manual Sound
Sets the tone of the arrival alarm that sounds
when the vehicle approaches the home or a
stored location.
1. Highlight [Edit] and push<ENTER>.
2. Highlight [Sound] and push <ENTER>.
A sound list](/img/5/280/w960_280-130.png)
Sound
Sets the tone of the arrival alarm that sounds
when the vehicle approaches the home or a
stored location.
1. Highlight [Edit] and push
2. Highlight [Sound] and push
A sound list is displayed.
3. Highlight the preferred alarm tone by scrol- ling the list using the main directional
buttons or the center dial. Then push
. The indicator of the selected
alarm tone illuminates.
Sound list:
None
Chime
Melody
Sound
Dog
Cat
Wave
Church bell
Music box 1
Music box 2
Marimba
Trumpet
Horn
Scratch
Direction
Sets the alarm to sound when approaching from
a specific direction.
1. Highlight [Edit] and push
2. Highlight [Direction] and push
The home or stored location is displayed at
the center of the map.
3. Set the direction that sounds the alarm using the center dial or the left or right
button of the main directional buttons. Then
push
set.
Storing a location/route6-13
Page 134 of 235
![NISSAN PATHFINDER 2012 R52 / 4.G 06IT Navigation Manual EDITING THE STORED ROUTE
1. Highlight [Stored Routes] and push<ENTER> .
2. Highlight the preferred stored route and push <ENTER> .
3. Push the right button of the main directional
buttons to select th NISSAN PATHFINDER 2012 R52 / 4.G 06IT Navigation Manual EDITING THE STORED ROUTE
1. Highlight [Stored Routes] and push<ENTER> .
2. Highlight the preferred stored route and push <ENTER> .
3. Push the right button of the main directional
buttons to select th](/img/5/280/w960_280-133.png)
EDITING THE STORED ROUTE
1. Highlight [Stored Routes] and push
2. Highlight the preferred stored route and push
3. Push the right button of the main directional
buttons to select the Edit screen. The
setting items are highlighted.
4. Highlight the preferred item and push
push
INFO:
If you select [None (Add New)], the system
stores the current route.
Available setting items: . Rename:
Changes the name.
“CHARACTER (letter and number)
INPUT SCREEN” (page 2-21)
. Replace:
Overwrites the stored route to the current
route.
. Delete:
Deletes the stored route.
. OK:
Applies the settings.
EDITING THE STORED TRACKING
1. Highlight [Stored Tracking] and push
2. Highlight the preferred stored tracked route and push
indicator is not illuminated, push
The indicator illuminates, and the Edit
screen is displayed.
If you push
indicator is illuminated, the indicator is
turned off.
6-16Storing a location/route
Page 137 of 235
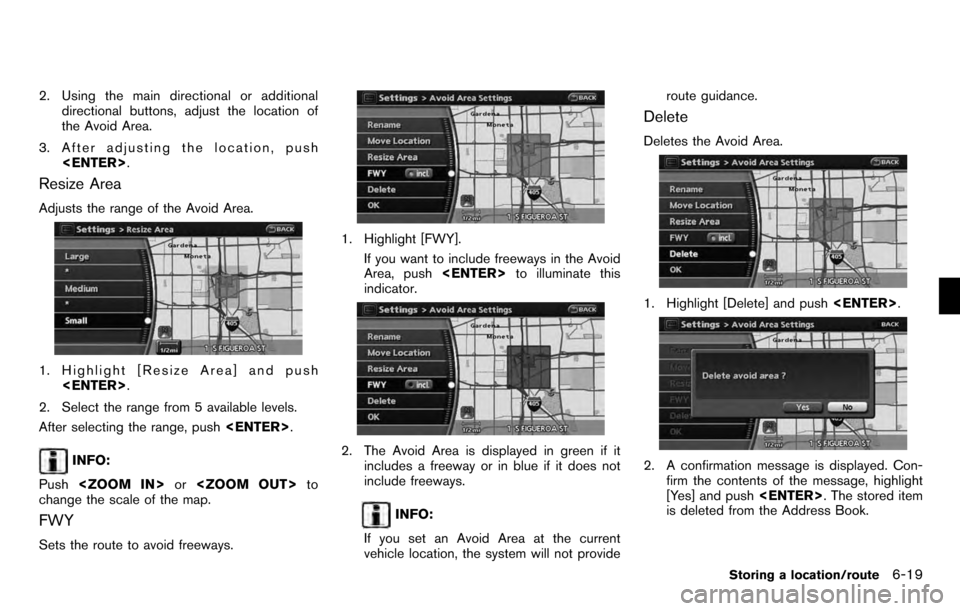
2. Using the main directional or additionaldirectional buttons, adjust the location of
the Avoid Area.
3. After adjusting the location, push
Resize Area
Adjusts the range of the Avoid Area.
1. Highlight [Resize Area] and push
2. Select the range from 5 available levels.
After selecting the range, push
INFO:
Push
change the scale of the map.
FWY
Sets the route to avoid freeways.
1. Highlight [FWY].
If you want to include freeways in the Avoid
Area, push
indicator.
2. The Avoid Area is displayed in green if it includes a freeway or in blue if it does not
include freeways.
INFO:
If you set an Avoid Area at the current
vehicle location, the system will not provide route guidance.
Delete
Deletes the Avoid Area.
1. Highlight [Delete] and push
2. A confirmation message is displayed. Con-
firm the contents of the message, highlight
[Yes] and push
is deleted from the Address Book.
Storing a location/route6-19
Page 154 of 235
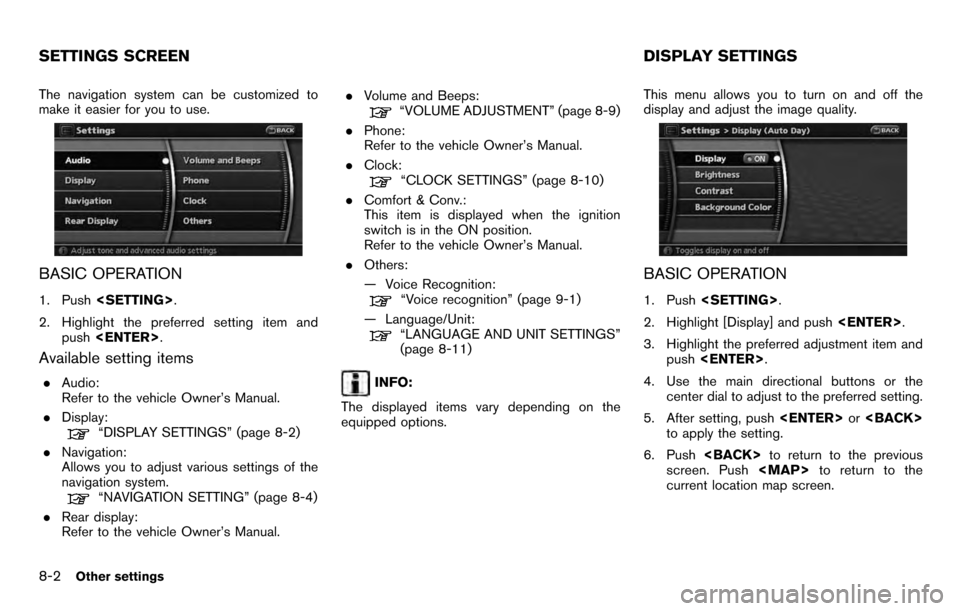
The navigation system can be customized to
make it easier for you to use.
BASIC OPERATION
1. Push
2. Highlight the preferred setting item and push
Available setting items
.Audio:
Refer to the vehicle Owner’s Manual.
. Display:
“DISPLAY SETTINGS” (page 8-2)
. Navigation:
Allows you to adjust various settings of the
navigation system.
“NAVIGATION SETTING” (page 8-4)
. Rear display:
Refer to the vehicle Owner’s Manual. .
Volume and Beeps:
“VOLUME ADJUSTMENT” (page 8-9)
. Phone:
Refer to the vehicle Owner’s Manual.
. Clock:
“CLOCK SETTINGS” (page 8-10)
. Comfort & Conv.:
This item is displayed when the ignition
switch is in the ON position.
Refer to the vehicle Owner’s Manual.
. Others:
— Voice Recognition:
“Voice recognition” (page 9-1)
— Language/Unit:
“LANGUAGE AND UNIT SETTINGS”
(page 8-11)
INFO:
The displayed items vary depending on the
equipped options. This menu allows you to turn on and off the
display and adjust the image quality.
BASIC OPERATION
1. Push
2. Highlight [Display] and push
3. Highlight the preferred adjustment item and push
4. Use the main directional buttons or the center dial to adjust to the preferred setting.
5. After setting, push
to apply the setting.
6. Push
screen. Push
current location map screen.
SETTINGS SCREEN DISPLAY SETTINGS
8-2Other settings